

Page 1
MODELOS / MODELS:
• FQC153MBHW
• FQC153MBHS
• FQL153MBHW
• FQL153MBHS
Lea todas las instrucciones antes de utilizar
el aparato y guardelas para futuras referencias.
Read all instructions prior to using
appliance and keep this manual for future reference.
B00(4,5)FM_BILING_100224P
MANUAL DE INSTRUCCIONES /
INSTRUCTIONS MANUAL
DISPENSADOR DE AGUA CALIENTE , NORMAL Y FRIA /
HOT, NORMAL AND COLD WATER DISPENSER
Page 2
Gracias por elegir Frigidaire como marca para su dispensador de agua
caliente, normal y fria.
Los dispensadores de agua caliente, normal y fria Frigidaire han sido
concebidas bajo altísimos estándares técnicos. Poseen características
especiales desarrolladas para ofrecer aun más comodidad al usuario.
Para que usted pueda disfrutar todos los recursos que su nuevo dispensador
de agua caliente, normal y fria ofrece, Frigidaire creó este manual. Con
orientaciones simples y prácticas usted conocerá sus funciones y aprenderá
la manera de operar este aparato de modo adecuado y seguro.
Lea toda las instrucciones antes de utilizar su dispensador de agua caliente,
normal y fria y guárdelas en un lugar seguro para futuras consultas.
Frigidaire una vez más fabrica lo mejor en lo que se refiere a
electrodomésticos.
Índice
Bienvenido al mundo del
manejo simple y sin preocupaciones
1
2
Consejos ambientales
El material del embalaje es reciclable.
Procure separar plásticos, espuma flex,
papel y cartón y enviarlos a las
compañias de reciclaje.
De acuerdo con la directriz de la RAEE
(Residuos de Aparatos Eléctricos y
Electrónicos), en inglés WEEE (Waste of
Electrical and Electronic Equipment), se
debe colectar y disponer de los
residuos de aparatos eléctricos y
electrónicos separadamente. Si
futuramente usted necesita desechar
este electrodoméstico, NO lo haga
echándolo con el resto de la basura
doméstica. Sírvase enviar el aparato a
los puntos de colecta de RAEE donde
los haya disponibles.
Introducción al funcionamento .................................................. 03
Seguridad ................................................................................... 04
Descripción ................................................................................. 07
Instalación ................................................................................... 08
Cómo usar ................................................................................... 09
Cuidado y limpieza .................................................................. 11
Guía de soluciones ...................................................................... 14
Diagrama eléctrico .................................................................... 29
Informaciones técnicas ............................................................. 30
Lea todas las instrucciones antes de usar este aparato.
Conserve estas instrucciones para futuras consultas.
No intente instalar o hacer funcionar su aparato sin haber leído las
precauciones de seguridad indicadas en este manual.
ESP
ESP
Atención
Page 3
3
4
Introducción al funcionamento
Este aparato puede utilizarse con botellones de 10 a 20 litros. No use agua
dura insalubre.
Este aparato debe funcionar a una temperatura ambiente de entre 10ºC y
38ºC, con una humedad relativa no mayor que 90%
Este dispensador puede utilizarse para preparar té, café y bebidas frías. Sirve
tanto para uso doméstico como público.
Con la adopción de la tecnología de aislamiento térmico diferenciado, este
aparato puede minimizar en intercambio térmico entre el agua fría y el agua
caliente.
Los modelos FQL153MBHW / FQL153MBHS posee un refrigerador para
almacenar alimentos y frutas.
En los modelos FQC153MBHW / FQC153MBHS el gabinete de
almacenamiento es hermético y no debe ponerse comida ni frutas.
Seguridad
Para los niños
Evite accidentes. Después de
desembalar el aparato, mantenga el
material de embalaje fuera del alcance
de los niños.
No permita que el aparato sea
manipulado por niños aunque el
mismo se encuentre desconectado.
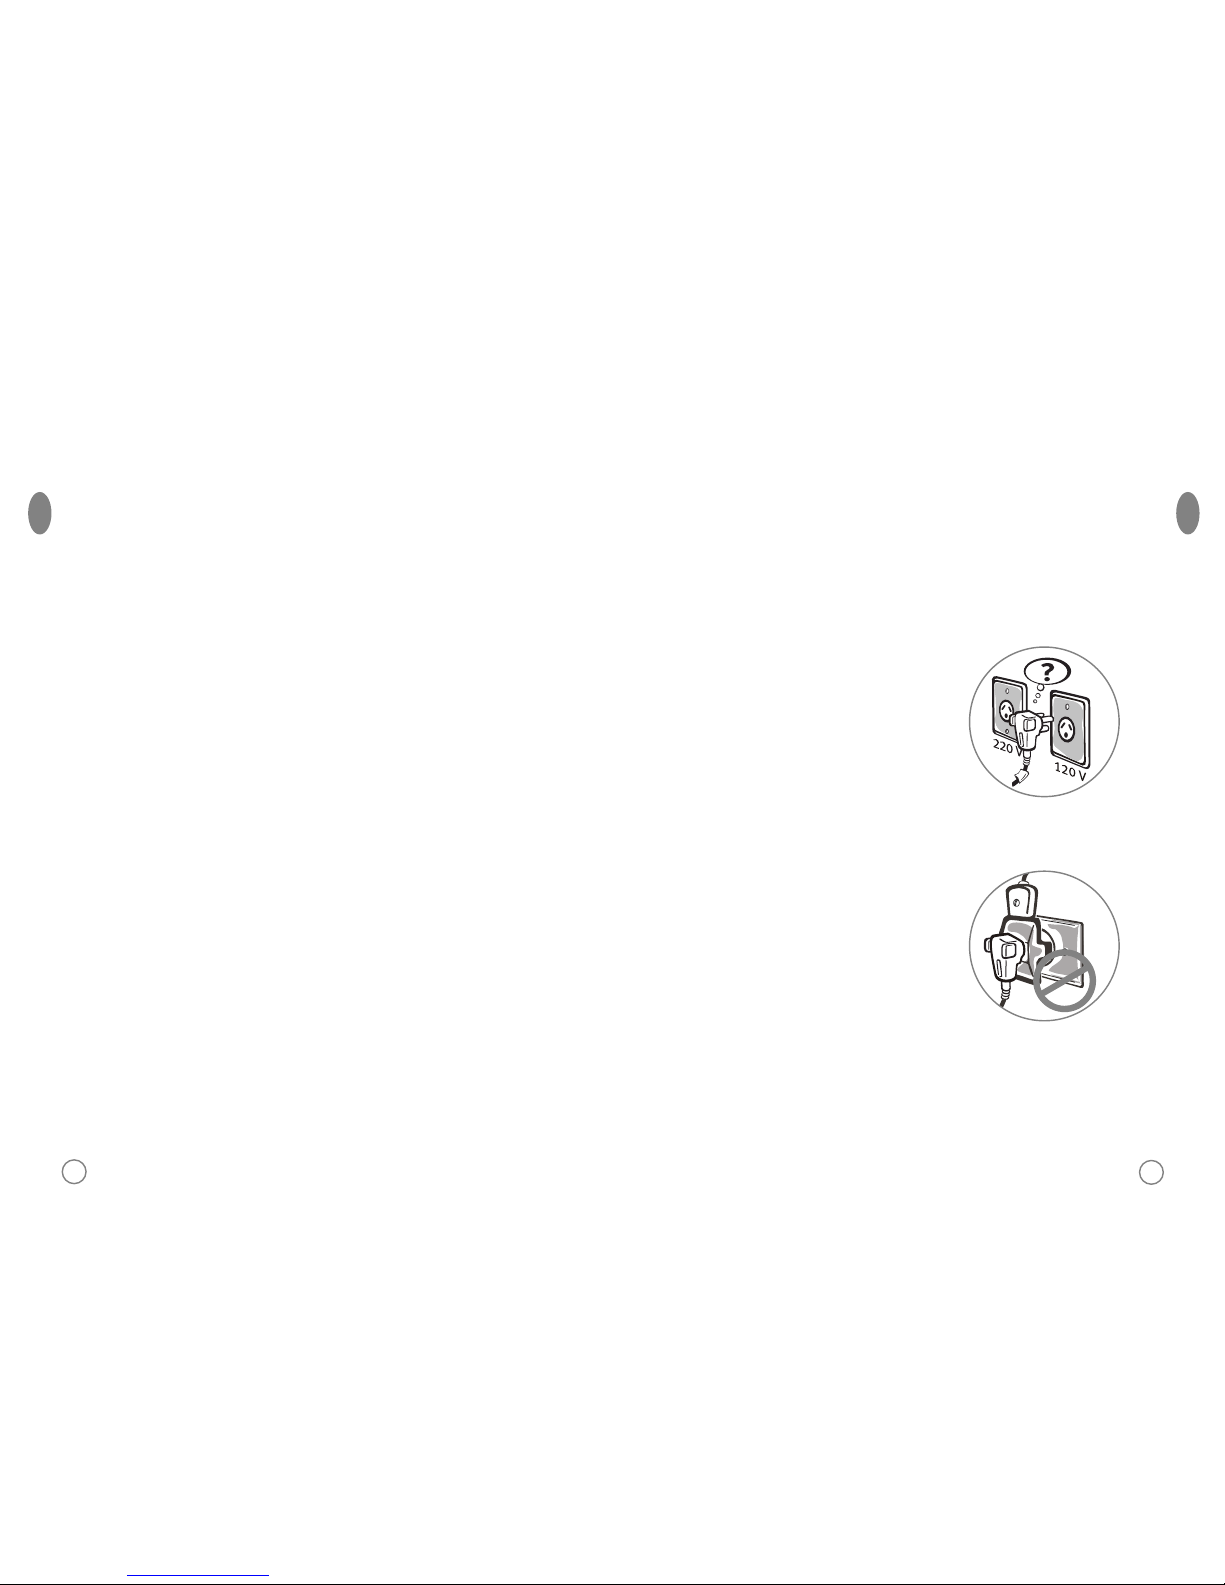
Para el usuario y instalador
Solamente enchufe el aparato
directamente en la corriente AC, que
esté correctamente aterrada y con el
voltaje cierto.
Se suministra un cable de
alimentación corto para reducir los
riesgos de enredos o tropiezos que
resultarian de la utilización de un
cable largo.
Conecte firmemente el enchufe.
Si el aparato está conectado a una
extensión o un enchufe portátil, tanto
la extensión como el enchufe portátil
deben posicionarse de manera que no
estén sujetos a salpicaje. Por motivos
de seguridad, no aconsejamos el uso
de adaptadores, extensiones y placas
de energía.
El electrodoméstico debe ubicarse de
tal manera que se pueda alcanzar el
enchufe con facilidad.
Cuide que su dispensador de agua
caliente, normal y fria no se apoye
sobre el cable eléctrico.
ESP
ESP
Page 4
5
6
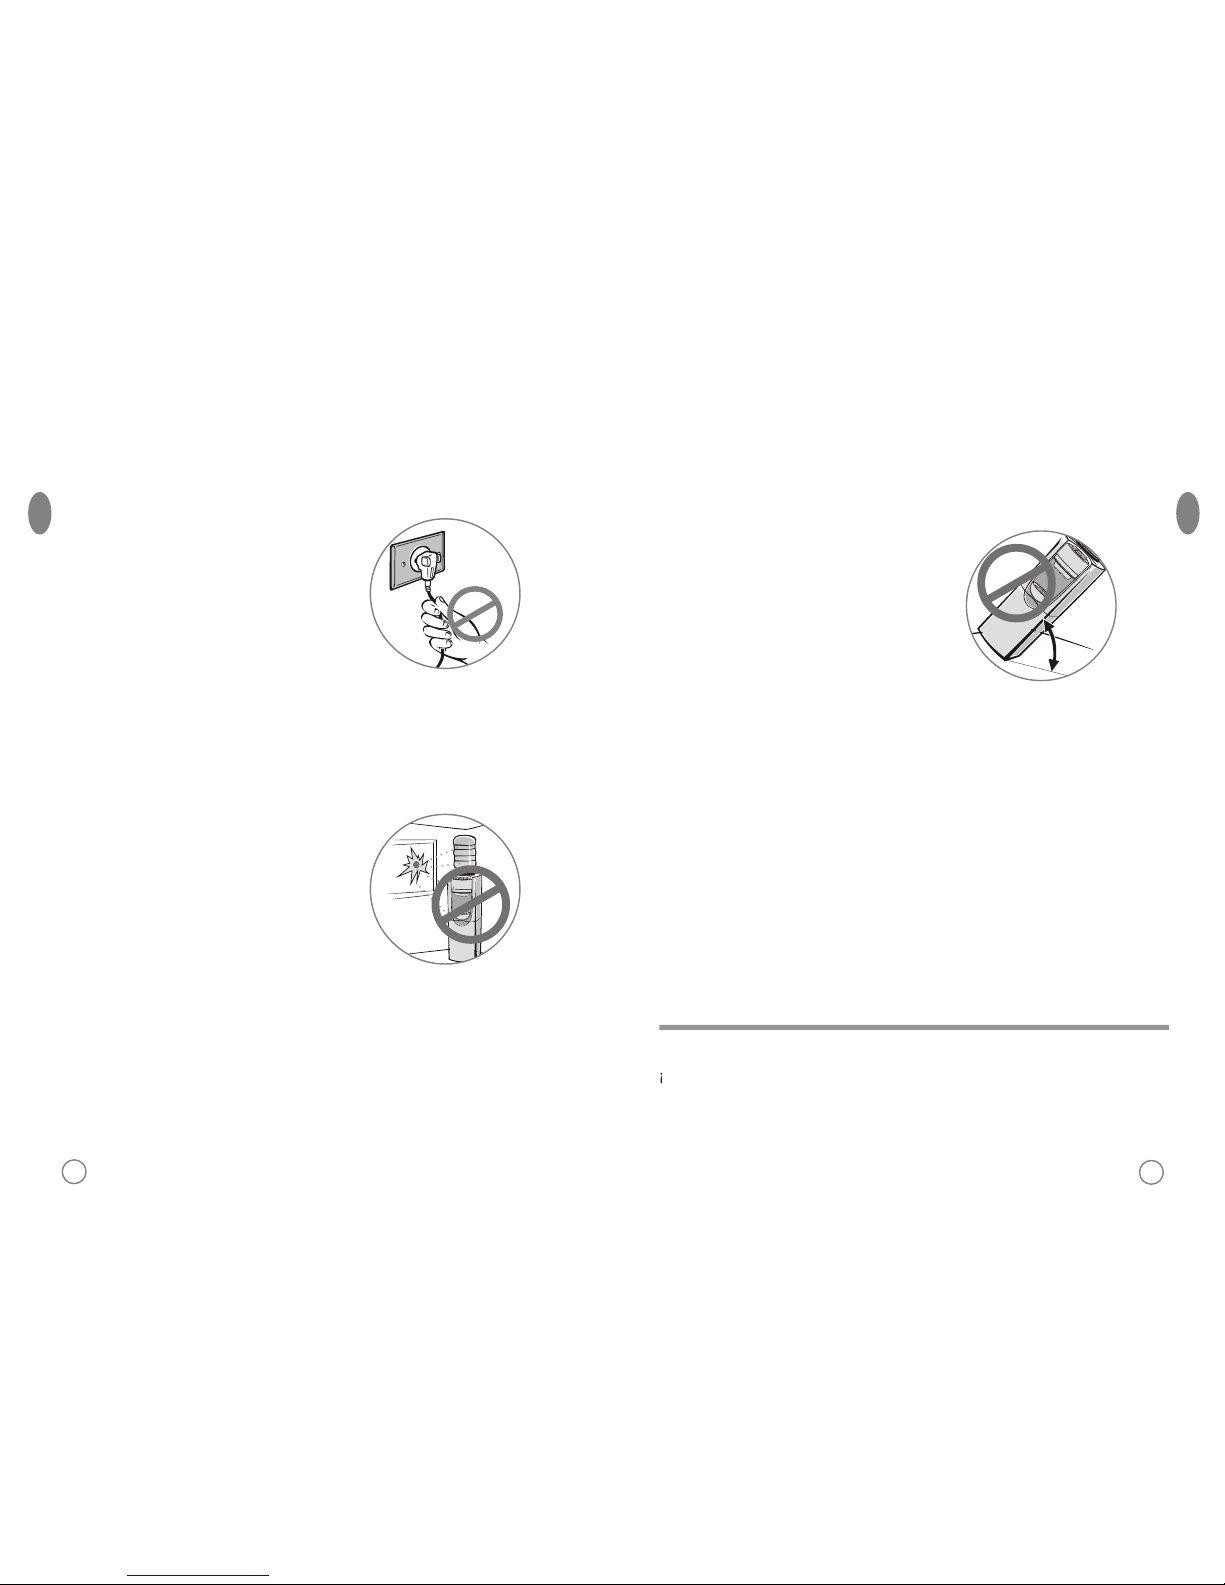
No conecte o desconecte el enchufe
con las manos mojadas para evitar
descargas eléctricas.
Nunca encienda ni apague el aparato
enchufando o desenchufando el cable
de alimentación eléctrica. Nunca
añada extensiones al cable de
alimentación eléctrica para evitar
incendios.
No apriete, no doble ni ate el cable
eléctrico. No intente repararlo. El
propietario no está autorizado a
sustituir el cable de la máquina. Si su
cordón de alimentación se daña, este
deberá ser reemplazado por un
técnico especialista, ya sea del
fabricante o del distribuidor.
Mantenga este aparato en un lugar
seco y evite la exposición directa a los
rayos de sol. La parte posterior del
aparato debe estar a una distancia
mínima de 25 cm de la pared. Nunca
ponga el aparato sobre papel o
espuma de poliuretano ya que esto
puede dejarlo en una condición
inestable. Nunca ponga nada
inflamable al lado de este aparato.
Para evitar daños al aparato, no
enchufe el cable de alimentación
eléctrica ni presione el interruptor de
calentamiento hasta que el agua salga
por el grifo de agua caliente.
En caso de que no se vaya a utilizar
este aparato durante un período
prolongado, apague los interruptores,
desenchufe el cable de alimentación
eléctrica y drene el agua remanente a
través de la salida de drenaje.
Nunca ponga el aparato boca abajo ni
lo incline a más de 45°.
Nunca use líquido orgánico para
limpiar el aparato. Está estrictamente
prohibido salpicar agua a la unidad.
Si el cable de alimentación eléctrica
está dañado, debe reemplazarlo
mediante un cable o un conjunto
especial disponible a través del
fabricante o su agente autorizado.
El termostato ha sido ajustado. Usted
no necesita ajustarlo.
45º
Agua caliente! Mantengase fuera del alcance de los ninos.
Tocar algunos de los componentes internos podría causar serias lesiones
corporales o inclusive la muerte. No desmonte este electrodoméstico.
Si su cordón de alimentación se daña, este deberá ser reemplazado por un
técnico especialista ya sea del fabricante o del distribuidor.
ESP
ESP
Atención
Page 5
7
8
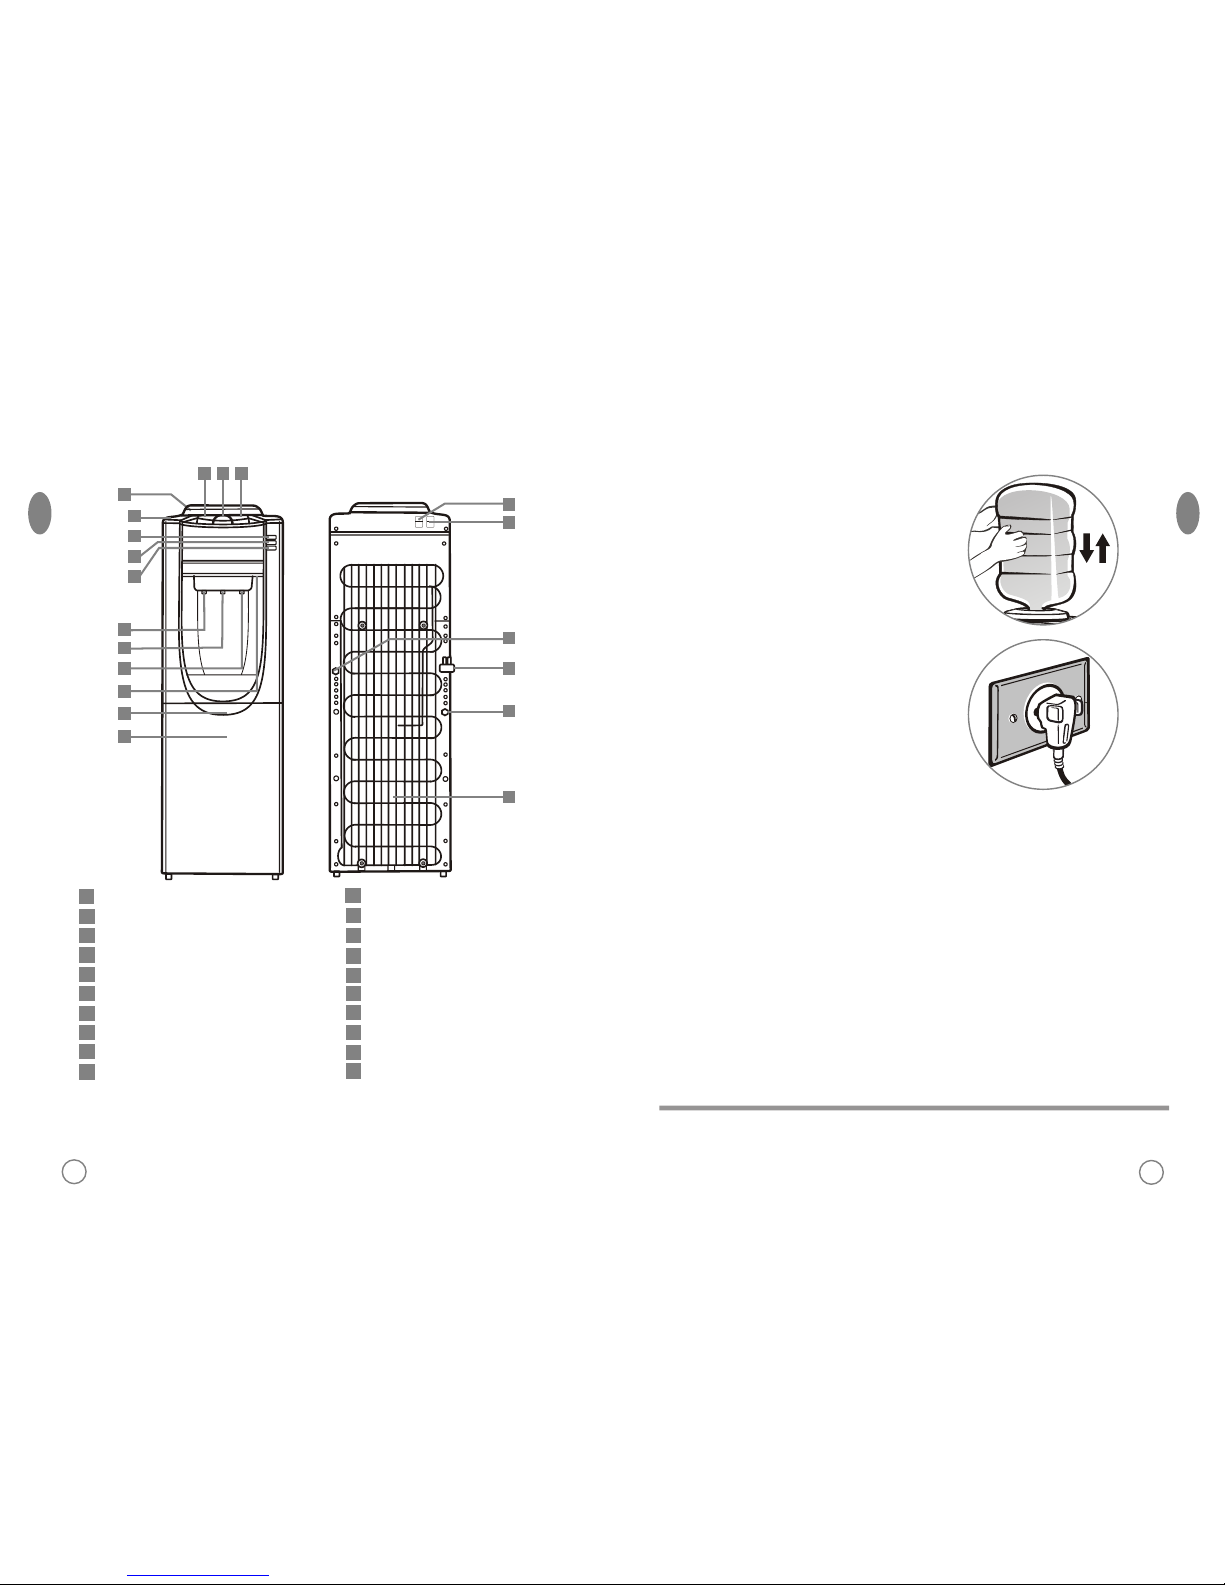
Descripción
1
Botón de agua caliente
Botón de agua normal
Botón de agua fría
Soporte para el botellón
Cubierta superior
Indicador luminoso de encendido
Indicador luminoso de calentamiento
Indicador luminoso de enfriamiento
Grifo de agua caliente
Grifo de agua normal
1
2
3
4
2 3
4
5
6
7
8
9
11
13
14
15
16
17
18
19
20
5
6
7
8
10
9
10
Grifo de agua fría
Agujero de drenaje de agua*
Recolector de agua
Puerta
Interruptor de enfriamiento
Interruptor de calentamiento
Salida de agua fría
Cable de suministro de energía
Salida de agua caliente
Condensador
11
12
13
14
15
16
17
18
19
12
20
*Agujero de drenaje de agua: el agua fuirá en el recolector de agua desde este
agujero cuando hay agua en el fondo. Limpie el espacio alrededor del agujero
de drenaje cuando sea necesario.
Instalación
1) Retire la etiqueta del botellón.
2) Inserte el botellón de forma vertical
en el soporte para el botellón, en la
parte superior del aparato.
3) No enchufe el cable de
alimentación eléctrica ni presione el
interruptor rojo hasta que el agua
salga por el grifo de agua caliente.
4) Enchufe el aparato a una toma
eléctrica y encienda el interruptor
de encendido. Los indicadores
luminosos se encienden una vez
que el aparato está funcionando.
5) Cuando el botellón esté vacío, tire
de él con ambas manos y
sustitúyalo por otro botellón de
agua.
6) Este aparato no debe encenderse
antes del interruptor de
alimentación.
Enchufar la maquina solo despues que el agua salga por el grifo rojo.
ESP
ESP
Atención
Page 6

9
10
Cómo usar
Indicadores luminosos
Los indicadores luminosos muestran
que el aparato está funcionando
correctamente. Después de conectar
el aparato verifique si los indicadores
luminosos estan encendidos.
Botónes
Utilice los botónes para que salia
agua de log grifos:
1) Botón de agua caliente
2) Botón de agua normal
3) Botón de agua fria
Gabinete de almacenamiento
con refrigeración (solo para
algunos modelos)
El dispensador de agua posee un
refrigerador para almacenar alimentos
y frutas en algunos modelos.
Los modelos sin refrigeración poseen
un gabinete de almacenamiento
hermético.
Cuando utilice la función de
refrigeración por primera vez, permita
que la función de refrigeración
funcione por lo menos durante dos
horas antes de poner nada en el
gabinete.
No se permite guardar objetos
húmedos o calientes en el gabinete
de refrigeración. Deje un espacio
adecuado entre los objetos para
asegurar el flujo de aire en el interior
(sólo para algunos modelos).
No se debe ponerse comida ni frutas en los modelos sin refrigeración para
evitar la putrefacción.
ESP
ESP
Atención
Page 7

11
12
Cuidado y limpieza
El aparato ha sido desinfectado antes
de salir de la fábrica. Limpie el
dispensador antes de instalar un
botellón lleno por primera vez.
Instrucciones de limpieza y de
drenaje
1) Antes de la limpieza, asegúrese de
que interruptor de alimentación
eléctrica esté en la posición O
(apagado) y desenchufe el
dispensador.
2) Inserte el botellón de forma vertical
en el soporte, en la parte superior
del aparato.
3) Abra los grifos y deje salir
aproximadamente un litro de agua en
algún recipiente.
4) Retire el botellón de agua del
dispensador.
5) Coloque un balde grande debajo de la
salida de drenaje. Retire la tapa de
drenaje y deje que el agua drene.
6) Luego del drenaje, vuelva a colocar la
tapa de drenaje. El aparato está listo
para ser utilizado.
ESP
ESP
Page 8

13
14
Para evitar accidentes, corte la alimentación eléctrica antes de proceder con
las siguientes instrucciones.
Desinfección
El aparato debe desinfectarse con un
desinfectante comprado separadamente
en una tienda, siguiendo las
instrucciones del desinfectante, y luego
debe limpiarse con agua
Generalmente, esto debe realizarse
cada tres meses.
Para eliminar los depósitos de
minerales
Mezcle 4 litros de agua con 200 g de
cristales de ácido cítrico, inyecte el agua
dentro del aparato y asegúrese de que
el agua pueda salir por el grifo de agua
caliente. Encienda el aparato y caliéntelo
durante aproximadamente 10 minutos.
Media hora más tarde, drene la mezcla y
limpie el aparato con agua dos o tres
veces más. Generalmente, esto debe
realizarse cada seis meses.
Nunca desarme este aparato por su
cuenta para evitar dañarlo.
Guía de soluciones
Espere un instante y el agua
caliente o fría volverá a estar
disponible.
Enchufe el aparato y encienda el
interruptor de calentamiento o de
refrigeración.
Consumo excesivo de agua caliente
o fría en un corto tiempo.
No hay suministro de energía
eléctrica.
No hay agua fría ni caliente
Reemplace el botellón.
Limpie el papel de desecho y el
sello del botellón y vuelva a instalar
el botellón.
Botellón vacío
Entrada del soporte del botellón
bloqueada por el sello del botellón.
No sale agua de los grifos
Sustitúyalo.
Botellón roto.
Pérdida en el soporte para el botellón
Coloque el aparato sobre una
superficie pareja y sólida.
Instalación incorrecta.
Funcionamiento con ruido
Antes de llevar el aparato a reparar, verifique lo seguiente:
ESP
ESP
Atención
Page 9

Thank you for choosing Frigidaire. This manual contains all the information you
will need to safely and correctly use your water dispenser. Please read all the
instructions prior to using the appliance, and keep this manual in a secure place
for future reference. Do not remove the attached adhesive identification label
containing code, model number, manufacturer and other information from the
water dispenser. This label will be used by the Frigidaire authorized service
representative in the event that your water dispenser needs servicing.
Environmental advice
Welcome
Before operating your Water Dispenser, please read all instructions contained
in this manual and keep it handy for future reference.
Do not try to install or turn on the machine without having read the indicated
safety precautions in this manual.
Function introduction ................................................................................... 17
Caution ................................................................................................ 18
Description ............................................................................................... 21
Installation ............................................................................................... 22
Operation instruction ........................................................................................ 23
............................................................................... 25
Solutions ............................................................................................... 28
Circuit diagram ................................................................................................... 29
Technical information ......................................................................................... 30
Cleaning and maintenance
The packaging material used is recyclable; we
recommend that you separate plastic, paper and
cardboard and give them to recycling companies.
To help preserve the environment, the refrigerant
used in this product is R134a (Hydrofluorocarbon HFC), which does not affect the ozone layer and
has little impact on the greenhouse effect.
According to WEEE (Waste of Electrical and
Electronic Equipment) guidelines, waste from
electrical and electronic devices should be
collected separately. If you need to dispose of this
appliance in the future, do NOT throw it away with
the rest of your domestic garbage. Instead, please
take the appliance to the nearest WEEE collection
point, where available.
ENG
ENG
15
16
Attention
Page 10

This machine is suitable for bottle of 3 or 5 gallons. Don't use unhealthy hard
water.
This machine should work under environment of temperature from 10°C to
38°C, relative humidity not higher than 90%
The dispenser can satisfy the need of tea & coffee and making cool drinking.
It's fit for the usa at home and in public.
With adoption of distinctive thermal isolation technology, this machine can
minimize thermal exchange between hot, normal and cold water.
For FQL153MBHW / FQL153MBHS models, with fridge for storing food and
fruit.
For FQC153MBHW / FQC153MBHS models, the storage cabinet is airproof. It
is not recommended to storage food or fruit in the cabinet to avoid putrefying.
For children
Destroy the carton, plastic bag and
other packing materials after the
washer is unpacked. Children might
use them for play.
Do not allow children to play with the
water dispenser. Close supervision of
children is necessary when the water
dispenser is used near children.
For the user / installer
Only plug the water dispenser directly
in the current if it is correctly grounded
and with the certain voltage.
A short power-supply cord is provided
to reduce the risks resulting from
becoming entangled in or tripping over
a longer cord.
Connect the plug firmly.
If the product is connected to an
adaptor plug or extension cord, be
sure it is not in an area where it will be
exposed to water. We do not
recommend the use of an extension
cord or adapter plug
Choose a place that is near a
grounded electrical outlet.
Do Not use an extension cord or an
adapter plug.
After placing the water dispenser,
check if it is not over the power cord.
Function introduction
Caution
ENG
ENG
17
18
Page 11

Please do not pull out or insert the
plug with wet hands to avoid
electric shocking.
Never turn on(off) the machine by
plugging the plug to (pulling the
plug out from) the socket. Never
increase the length of the power
supply cord to avoid fire.
Do not fasten, twist or tie the power
cord. Do not try to fix it. If it is
damaged, request the visit of a
professional technician. If the power
cord is damaged, it should be
replaced by the manufacturer,
service technician or a qualified
person to prevent any risk.
Keep this machine in place of dry
and avoid direct sunshine. Rear of
the machine should be at least
25cm far from the wall. Never put
the machine on paper or foam,
which may cause unstable
condition. Never put anything
flammable beside this machine.
To avoid damage to the
machine,don't plug the power cord
or turn on the heating switch until
water runs out from the tap of hot
water.
In case hot(or cold) water is not
needed for a long time, turn off the
switch accordingly to save power.
Never turn the machine upside down or
tilt it more than 45°.
Never use organic liquid to clean the
machine. Strictly prohibit splashing
water to the unit.
If the supply cord is damaged, it must
be replaced by a special cord or
assembly avaliable from the
manufacture or its service agent.
Thermostat has been adjusted. No
need to adjust it by yourself.
45º
Hot water! Keep out of the reach of children.
Do not disassemble the electrical part of this appliance. Any repair done by
unauthorized person, can cause serious injuries or death.
In case of damage, please contact an authorized technical service agent.
ENG
ENG
19
20
Attention
Page 12

1
Button of hot water
Button of normal water
Button of cold water
Bottle supporter
Top cover
Power pilot lamp
Heating pilot lamp
Cooling pilot lamp
Tap of hot water
Tap of normal water
1
2
3
4
2 3
4
5
6
7
8
9
11
13
14
15
16
17
18
19
20
5
6
7
8
10
9
10
Tap of hot water
Water drainage hole*
Water collector
Door
Cooling switch
Heating switch
Outlet of cold water
Power supply cord
Outlet of hot water
Condenser
11
12
13
14
15
16
17
18
19
12
20
* Water will flow into the water collector from this hole when there's water in the
button, please timely clean the palce around the water drainage hole.
1) Tear the label from the bottle.
2) Vertically insert the bottle into the
bottle supporter on top of the
machine. Don't plug the power cord
or push the red switch until the
water runs out from the tap of hot
water.
3) Insert the plug to socket, then turn
on the power switch.
4) Indicators light up accordingly once
the machine works.
5) Vertically pull out the bottle by two
hands when the bottle is empty,
then replace it with another bottle of
water.
6) Never turn on the machine before
plugging the power cord to the
socket.
Do not plug the power cord or push the red switch until all water runs out from
the tap of hot water.
Description
Installation
ENG
ENG
21
22
Attention
Page 13

Light Indicators
Insert the plug into socket, then turn
on the power switch. Indicators light
up accordingly once the machine
turns on..
Buttons
Use the appropriate button
according to the desired water.
1) Button of hot water
2) Button of normal water
3) Button of cold water
Freestanding bottle with fridge
storage (available in some
models only)
This machine should not be turned on
until 3 minutes later after turning off the
power switch.
When first time to utilize the
refrigerating function, let the
refrigerating function operated for at
least 2 hours before putting anything
into the cabinet.
No wet or hot goods is allowed to be
put into the cooling cabinet. Leave
suitable space between the goods to
ensure the interior airflow.
Operation instruction
ENG
ENG
23
24
Page 14

The machine had been disinfectend
before departed from factory.
Cleaning the dispenser prior to
installing a full bottle of water for the
first time.
Cleaning and draining
instruction
1) Before cleaning, make sure the
power switch in the "0"(off) position
and unplug the water dispenser.
2) Vertically insert the bottle into the
supporter on top of the machine.
3) Open the taps, let about 1 liter
water flows into a container.
4) Removed the water bottle from the dispenser.
5) Place a large bucket beneath the drain outlet.
Remove the drain cover and allow water to
drain.
6) After draining, replace the drain cover and
you can use the machine.
The dispenser heats water to a temperature of approximately 90°C.
It can caus severe scalded. Please operate it carefully.
Cleaning and maintenance
ENG
ENG
25
26
Attention
Page 15

Sanitizing
The machine should be disinfected
with disinfectant separately bought
from drugstore or marketplace
according to the instruction manual
of the disinfectant and then clean it
with water (see cleaning and
draining instructions).
Generally this should be done every
three months.
To remove mineral deposits
Mix 1 gallon of water with half
pound of citric acid crystals, inject
into the machine and make sure the
water can flow out of the hot water
tap. Switch on the power and heat it
about 10 minutes, 30 minutes later,
drain off the liquid and clean it with
water two or three times. Generally
this should be done every six
months.
Never disassemble this machine by
yourself to avoid risk of damaging
machine.
Before calling your service representative check the following items:
Not hot or cold water
Just wait a moment, then hot or cold water is avaliable again.
Connect pluhg to socket, turn on heating or cooling switch.
No water running out from taps
Empty bottle. Replace it with another one.
Clean out wasted paper & bottle seal, install bottle again.
Leakage from bottle supporter
Broken bottle. Replace it with a new bottle.
Noisy operation
Place the machine on placid and solid surface.
Solutions
To avoid accident, cut off the power supply before operation according to the
following instruction.
ENG
ENG
27
28
Attention
Page 16

29
30
Diagrama eléctrico / Circuit diagram
Modelos sín refrigeración / Models without fridge
Modelos con refrigeración / Models with fridge
Informaciones técnicas / Technical information
Modelos: EWLT1121BHW
Voltaje / Frecuencia - Voltage / Frequency
Potencia Nominal / Rating Power
Potencia de calentamiento / Heating Power
Potencia de esfriamiento / Cooling Power
Agua caliente / Hot Water
Agua fria / Cold Water
Temperatura ambiente / Room Temperature
Humedad relativa / Relative Humidity
Compartimiento para almacenaje / Storage compartment
Voltaje / Frecuencia - Voltage / Frequency
Potencia Nominal / Rating Power
Potencia de calentamiento / Heating Power
Potencia de esfriamiento / Cooling Power
Agua caliente / Hot Water
Agua fria / Cold Water
Temperatura ambiente / Room Temperature
Humedad relativa / Relative Humidity
Compartimiento para almacenaje con refrigeracion / Chiller compartment
Modelo / Model
Modelo / Model
L
S2
T3
T1
S1
T2
PE
Comp.
Calentador (Heater)
N
L
S2
T3
T1
S1
T2
PE
Comp.
Calentador (Heater)
N
T4
115 V / 60 Hz
510 W
420 W
90 W
4 L/h (>90°C)
2 L/h (<10°C)
10~38°C
<90 %
14,9 L
115 V / 60 Hz
520 W
420 W
100 W
4 L/h (>90°C)
1 L/h (<10°C)
10~38°C
<90 %
14,5 L
FQC153MBHW / FQC153MBHS
FQL153MBHW / FQL153MBHS
ESP
ESP
ENG
ENG
 Loading...