

Frigidaire FAX051P7A1, FAX051P7A2, FAX051P7A3, FAX051P7A4, FAX051P7A5 Installation Guide
...Page 1
m m
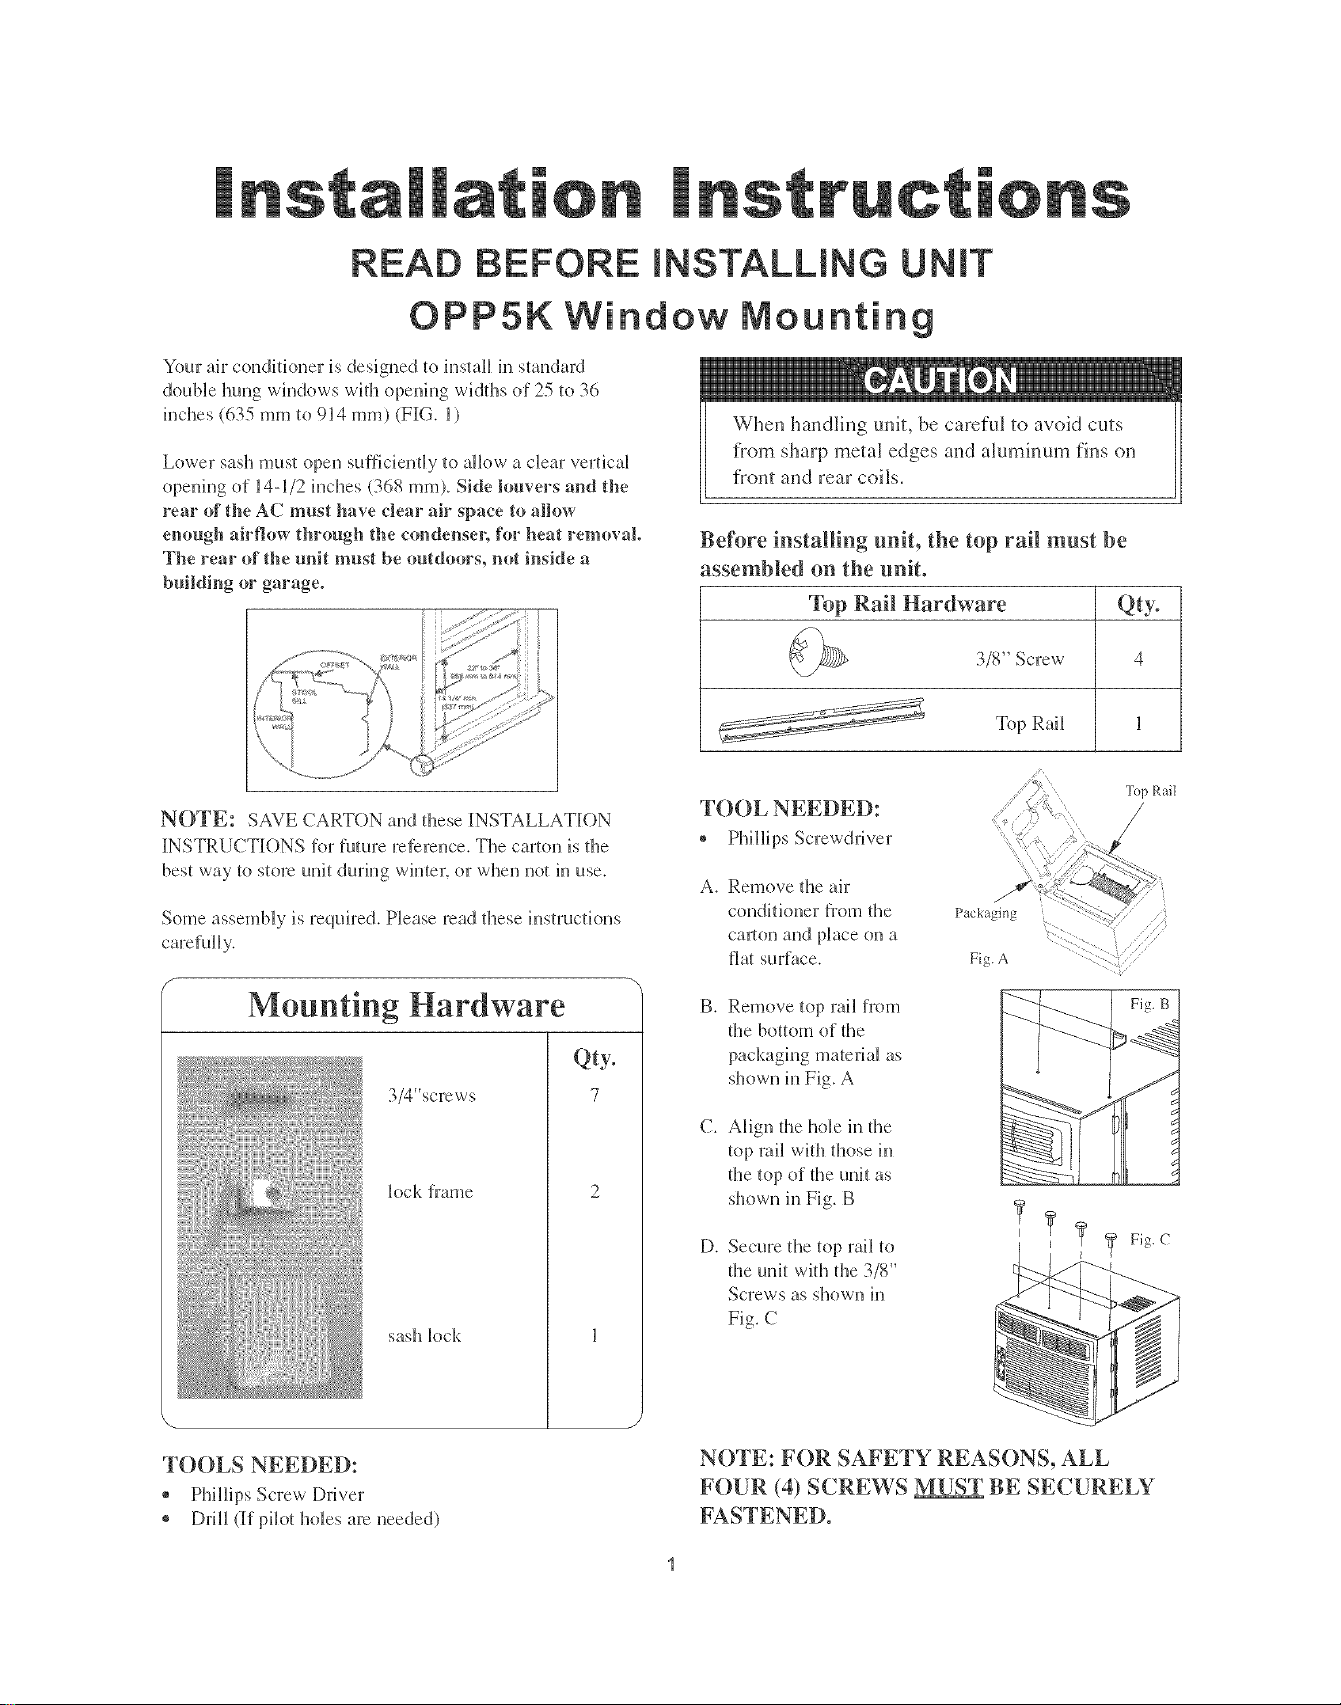
READ BEFORE INSTALLING UNIT
OPP5K Window Mounting
Your ah"conditioner is desigl_ed to install in skmdard
double lluug windows with opening widths ol 25 to 36
inches (635 mm to 914 ram) (FIG. l)
Lower sash must open suificiently to allow a clear vertical
opeuing of 14-1/2 inches (368 rnm). Side louvers and the
rear of the AC must have clear air space to allow
enough airflow through the condensel; for heat removal.
The rear of' the unit must be outdoors, not inside a
building or garage°
When handling unit, be careful to avoid cuts
from sharp metal edges and aluminum fins on
front and rear coils.
Beibre installing unit, the top rail must be
assembled on the uuR.
_l[bp Rail Hardware Qty.
3/8" Screw 4
Top Rai_ 1
NOTE: SAVE CARTON and these INSTALLATION
iNSTRUCTiONS for furore reiereJlce. The carton is the
best way to store unit during winter, or when not in use.
Some assemNy is required. Please read these instructions
Mounting Hardware
Qty.
3/4 *screws
k)ck frame
sash lock
TOOL NEEDED:
* Phillips Screwdriver
A. Remove the air
conditiouer flTom tile
carton and place on a
fiat surface.
B. Remove top rail from
tile bottom of tile
packaging material as
7
shown in Fig. A
C. Align the hole hi the
Fig. A
Top Rail
/
tile top of tile unit as
shown in Fig. B
D. Secure tile top rail to
rite unit with the 3/8"
Screws as shown in
Fig. C
TOOLS NEEDED:
* Drill (if pilot holes are needed)
NOTE: FOR SAFETY REASONS, ALL
FOUR (4) SCREWS MUST BE SECURELY
FASTENED.
Page 2
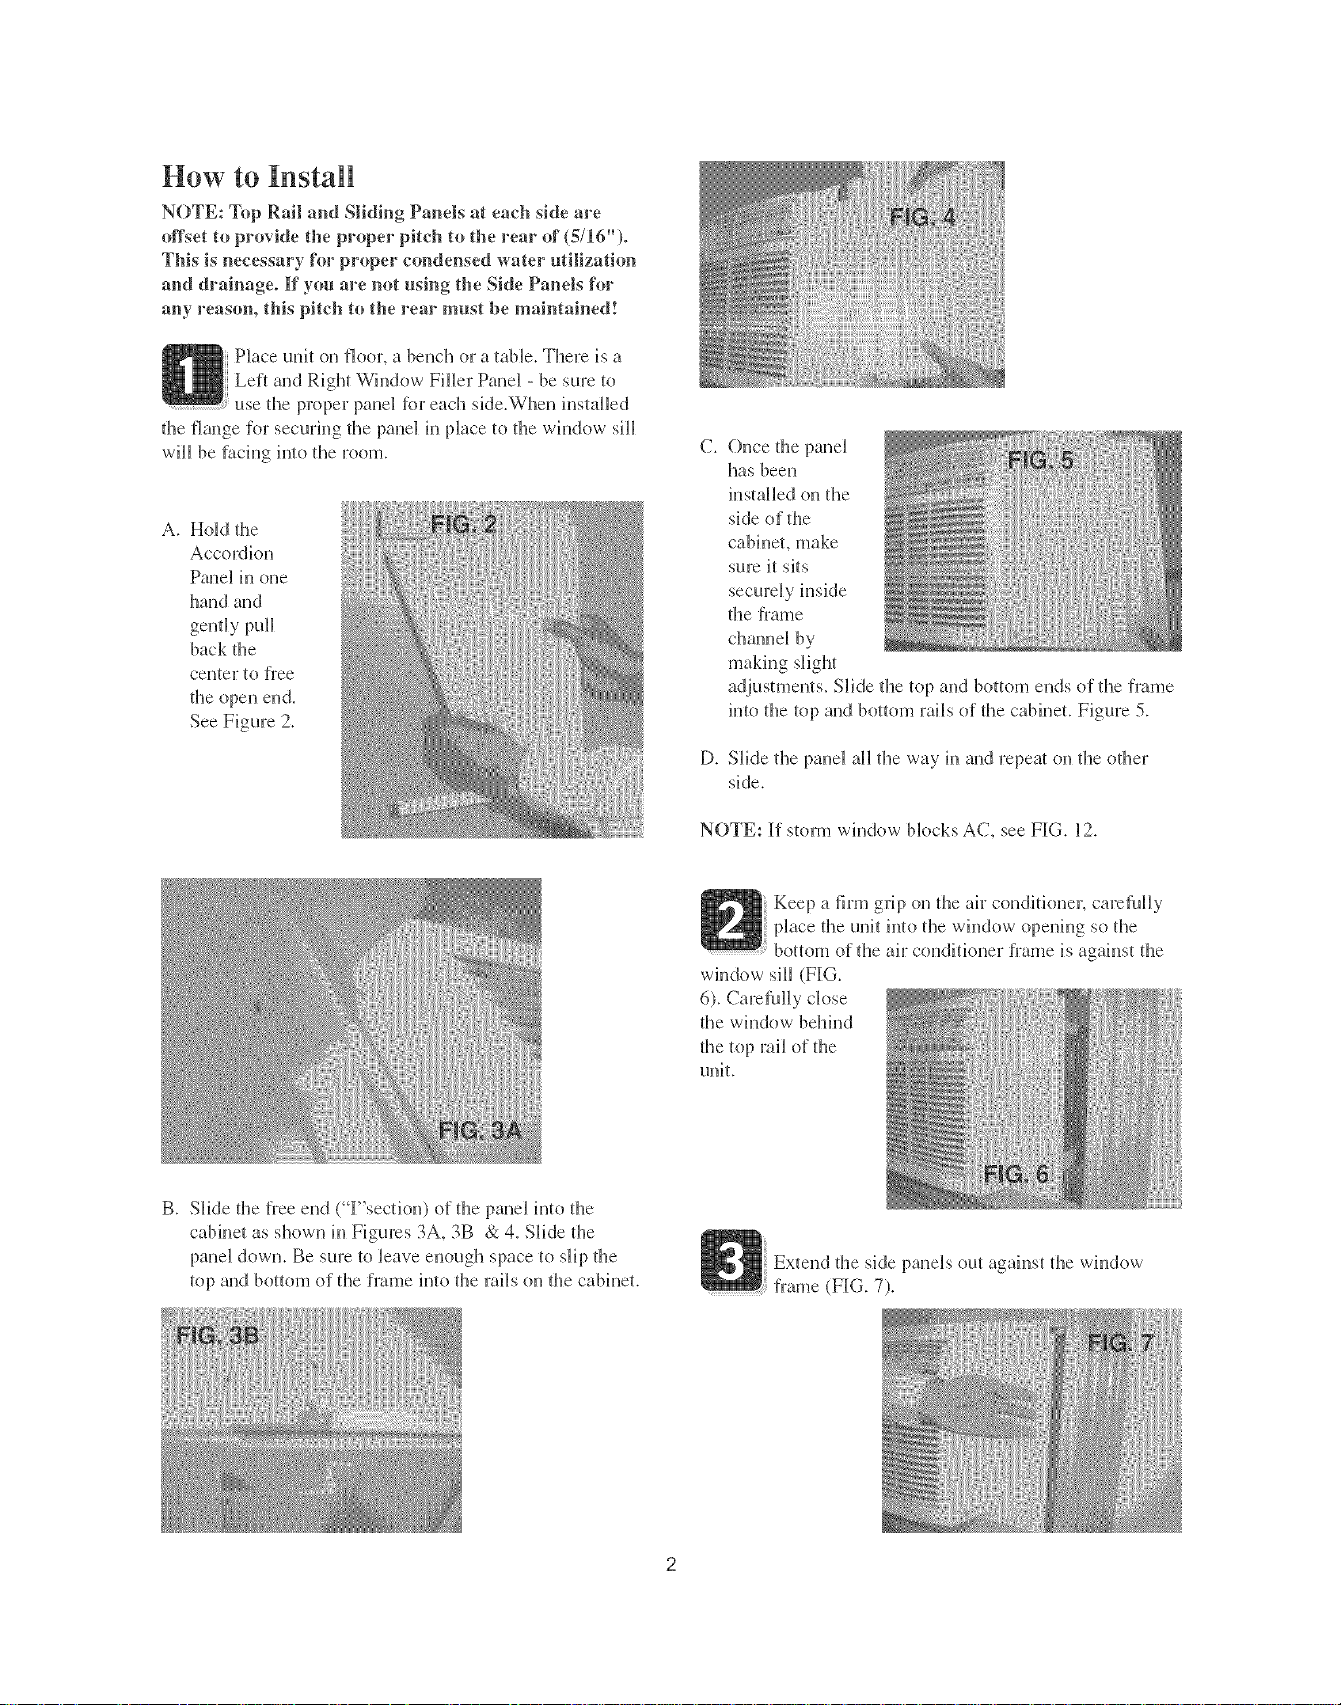
How to Install
NOTE: Top Rail and Sliding Panels a_teach side are
offset to provide the proper pi_.eh to the rear of (5/16").
This is necessary for proper condensed water utilization
and drainage. If you are not using the Side Panels for
any reason, this pitch _.othe rear must be main_.ained!
Place unit on floor, a bench or a taNe, There is a
Left and Right Window Filler Pane] - be sure to
use the proper panel _br each side,When installed
tile flange [or secarhlg tile panel hi place to the whldow sill
wilJ be [hchlg hlto the morn.
A. Hold _lle
Accordion
Pane] in one
hand and
gently pull
back the
center to }]ee
the open end.
See Figure 2,
C. Once the panel
has been
hlstaHed on the
side of tlle
cabinet, make
sure it sits
Hie }tame
making slight
adjustments. Slide the top and bottom eJ_dsof the frame
into the top and bottom rails o[ the cabinet. Figure 5.
B. Slide the flee end (F'section) of the panel hlto tlle
cabinet as shown in Figures 3A, 3B & 4_SHde the
pand down. Be sure to leave el_ough space to sJip the
top and bottom of the fl'ame hlto the mils on the cabhlet.
D. SJide the paneJ aHthe way hi and repeat on the other
side,
NOTE: If storm window Nocks AC, see FIG. 12.
Keep a firm grip on the air conditioner, carefully
pk_cethe unit into the whldow opening so the
bottom of the ah7c<mditkmer fi:ame is against the
window sill (FIG,
6), Care ftlH y CJose
the whldow bellh_d
the top rail of the
tuni t,
Extend the side pands out against the window
{rame (FIG. 7).
Page 3

Place the frame lock between the fi°ame
extensions and the window sill as shown
(Fig. 8). Drive 3/4" (19 nmO k)cking
screws through the frame k_ck and into the sit1
(FIG. 9). NOTE: '[b prevent wh_dow sill from
splitting, drill 1/8" (3 mm) pilot holes before
driving screws.
FIG. 8
Drive 1/2" (13 ram) ]ocMng screws
through fi°ame holes into window sash
(FIG. 10/11).
i l/iHH iii iWtl
Cut _bam seal and insert in the space
between the upper and lower sashes
(FIG. 13).
IfAC is Blocked by Storm
Add wood as shown in FIG. 14, or remove storm
window before air conditioner is installed.
FIG. 14 I_SASH
STORM WINDOW THICKNESS
FRAME AS REQUIRED,
OR OTHER I 1/2" MIN FOR PROPER
OBSTRUCTION (38 ram) , PITCH TO
BOARD
[ i
"Ib secure lower sash in place, attach right
angle sash lock with 3/4" (19 mm) screw
as shown (FIG. 12).
ENTIRE SILL.
FASTEN WITH
NAILS OR
SCREWS,
If Storm Window Frame must remain, be sm:e the
drain holes or slots arc not caulked or painted
shut.Accumulated Rain Water or Condensation
must be allowed to drain out.
Removing AC From
* 2i_rn AC off, and disconnect power cord.
* Remove sash seal from between windows,
and unscrew safcD_ lock.
* Remove screws installed through flame and
frame tock.
* Close (slide) side panels into frame.
* Keeping a firm gaip on air conditioner, raise
sash and carefully "rock" air conditioner
backward to drain any condensate water in
base of unit. Be careful not to spitl aW
remaining water while lifting unit from
window: Store parts WITH air conditioner.
 Loading...