

Page 1

Professional
Series
Owner's
Gas
Cooktop
Sealed Burner Units
Tempered-Glass Surface
Guide
Versión en español................................. 2
Product Registration .............................. 2
Important Safety Instructions .............. 3-4
Grounding Instructions .............................
(electric ignition models only) ................ 5
Liquefied Petroleum (Propane)
Gas Conversion...................................... 5
Flame Size............................................. 5
Setting Surface Controls ........................ 6
General Cleaning ................................. 7-9
Avoid Service Checklist ....................... 1 0
Service Information & Warranty .......11-12
P/N 318068129 (9812) Rev. A
Page 2
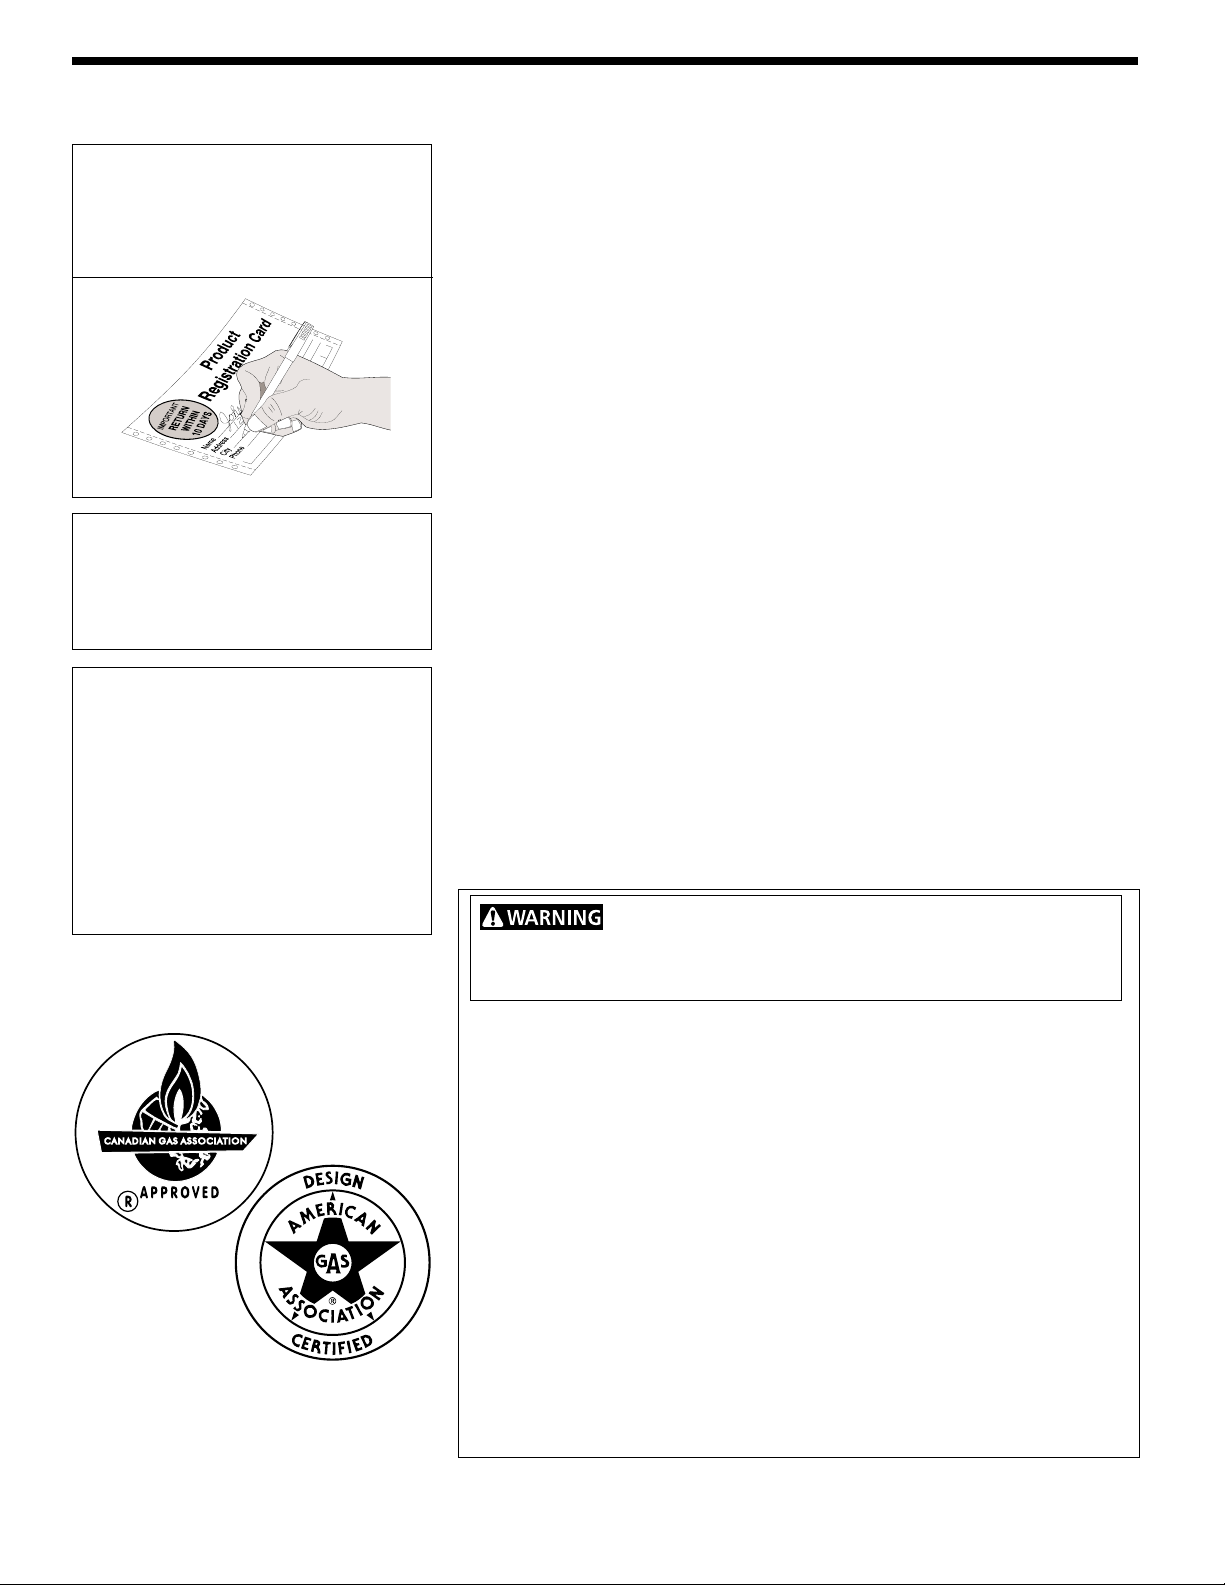
Product Registration
Register Your Product
The PRODUCT REGISTRATION CARD
should be filled in completely, signed
and returned to Frigidaire Company.
Note: This Owner's Guide contains
general operating instructions for your
cooktop and feature information for
several models. Your cooktop may not
have all the described features.
Thank you for choosing this appliance. The information contained within this
Owner's Guide will instruct you on how to properly operate and care for your
cooktop. Please read through the information contained in your literature pack to
learn more about your new appliance.
Record Your Model and Serial Numbers
Record in the space provided below the model and serial numbers found underneath
the cooktop.
Model Number: ____________________________________________________
Serial Number:_____________________________________________________
Date Purchased:____________________________________________________
Note: The instructions appearing in this Owner's Guide are not meant to cover every
possible condition and situation that may occur. Common sense and caution must
be practiced when installing, operating and maintaining any appliance.
Versión en español
Si desea obtener una copia en español
de este Manual del Usuario, sírvase
escribir a la dirección que se incluye a
continuación. Solicite la P/N 318201131.
Spanish Owner's Guides
Frigidaire Company
P. O. Box 9061
Dublin, Ohio 43017-0961
If the information in this manual is not
followed exactly, a fire or explosion may result causing
property damage, personal injury or death.
FOR YOUR SAFETY:
Do not store or use gasoline or other flammable vapors and
liquids in the vicinity of this or any other appliance.
WHAT TO DO IF YOU SMELL GAS:
• Do not try to light any appliance.
• Do not touch any electrical switch; do not use any phone
in your building.
• Immediately call your gas supplier from a neighbor's
phone. Follow the gas supplier's instructions.
• If you cannot reach your gas supplier, call the fire
department.
Installation and service must be performed by a qualified
installer , servicer or the gas supplier.
© 1998 White Consolidated Industries
All rights reserved
2
Page 3
IMPORTANT SAFETY INSTRUCTIONS
Read all instructions before using this appliance.
Save these instructions for future reference.
This guide contains important safety symbols and instructions. Please pay special attention to these symbols and follow all
instructions given. Here is a brief explanation of the use of these symbols.
This symbol will help alert you to situations that
may cause serious bodily harm, death or property damage.
may cause bodily injury or property damage.
This symbol will help alert you to situations that
• Remove all tape and packaging wrap before using the
cooktop. Remove edge mouldings from ceramic-glass.
Destroy the carton and plastic bags after unpacking
the cooktop. Never allow children to play with packaging
material. Do not remove the serial plate attached to the
cooktop.
• Proper Installation—Be sure your appliance is properly
installed and grounded by a qualified technician in
accordance with the National Fuel Gas Code ANSI
Z223.1 latest edition in the United States, or in Canada
CAN/CGA B149.1, and CAN/CGA B149.2, and the
National Electrical Code ANSI/NFPA No. 70—latest
edition in the United States, or in Canada CSA Standard
C22.1, Canadian Electrical Code, Part 1, and local code
requirements. Install and/or adjust only per installation
instructions provided in the literature package for this
cooktop.
Ask your dealer to recommend a qualified technician and an
authorized repair service. Know how to shut off gas supply
at the meter and disconnect the electrical power to the
cooktop at the circuit breaker or fuse box in case of an
emergency.
Do not store items of interest to children
in the cabinets above the cooktop.
• Do not leave children alone—Children should not be
left alone or unattended in the area where an
appliance is in use. They should never be allowed to sit or
stand on any part of the appliance.
• DO NOT TOUCH SURFACE BURNERS, GRATES, AREAS
NEAR THESE BURNERS. Surface burners may be hot even
though the flames are not visible. Areas near surface
burners may become hot enough to cause burns. During
and after use, do not touch or let clothing or other
flammable materials touch these areas until they have had
sufficient time to cool. Among these areas are the cooktop
and the surfaces facing the cooktop.
• Wear Proper Apparel—Loose-fitting or hanging
garments should never be worn while using the
appliance. Do not let clothing or other flammable materials
contact hot surfaces.
Never use your appliance for warming or
heating the room.
• User Servicing—Do not repair or replace any part of the
appliance unless specifically recommended in the
manuals. All other servicing should be done only by a
qualified technician. This may reduce the risk of personal
injury and damage to the cooktop.
• Never modify or alter the construction of a cooktop by
removing panels, wire covers, or any other part of the
product.
Stepping or leaning on this cooktop can
result in serious injuries and may also cause damage to
the cooktop. Do not allow children to climb or play around the
cooktop.
• Storage on Appliance—Flammable materials should
not be stored on the cooktop, near surface burners.
This includes paper, plastic and cloth items, such as
cookbooks, plasticware and towels, as well as flammable
liquids. Do not store explosives, such as aerosol cans, on the
cooktop. Flammable materials may explode and result in fire
or property damage.
• Do Not Use Water or Flour on Grease Fires—Smother
the fire with a pan lid, or use baking soda, a dry
chemical or foam-type extinguisher.
• When heating fat or grease, watch it closely. Fat or
grease may catch fire if allowed to become too hot.
• Use Only Dry Pot Holders—Moist or damp pot holders
on hot surfaces may result in burns from steam. Do not
let the pot holders touch the flame or burners. Do not use
a towel or other bulky cloth instead of a pot holder.
• Do Not Heat Unopened Food Containers—Buildup of
pressure may cause the container to burst and result
in injury.
3
Page 4
IMPORTANT SAFETY INSTRUCTIONS (continued)
• Know which knob controls each surface burner.
Always turn the knob to the LITE position when igniting the
burners. Visually check that the burner has lit. Then adjust
the flame so it does not extend beyond the edge of the
utensil.
Use Proper Flame Size—Adjust flame size
so it does not extend beyond the edge of the utensil. The
use of undersized utensils will expose a portion of the burner
flame to direct contact and may result in ignition of clothing.
Proper relationship of utensil to flame will also improve
efficiency.
Do not use stove top grills on your sealed
gas burners. If you use a stove top grill on a sealed gas burner,
it will cause incomplete combustion and can result in exposure
to carbon monoxide levels above allowable current standards.
This can be hazardous to your health.
• Use Proper Pan Size—This appliance is equipped with one
or more surface burners of different sizes. Select utensils
having flat bottoms large enough to cover the surface
burner. The use of undersized utensils will expose a portion
of the surface burner to direct contact and may result in
ignition of clothing. Proper relationship of utensil to the
surface burner will also improve efficiency.
• Utensil Handles Should Be Turned Inward and Not
Extend Over Adjacent Surface Burners—To reduce the
risk of burns, ignition of flammable materials, and spillage
due to unintentional contact with the utensil, the handle of
the utensil should be positioned so that it is turned inward,
and does not extend over adjacent surface burners.
• Never Leave Surface Burners Unattended at High Heat
Settings—Boilovers cause smoking and greasy spillovers
that may ignite, or a pan that has boiled dry may melt.
• Protective Liners—Do not use aluminum foil to line
surface burner pans. Any use of protective liners or
aluminum foil may interfere with heat and air distribution,
and combustion. Damage to the cooktop or personal injury
may result.
• Glazed Cooking Utensils—Only certain types of glass,
glass/ceramic, ceramic, earthenware, or other glazed
utensils are suitable for cooktop service without breaking
due to the sudden change in temperature. Check the
manufacturer's recommendations for cooktop use.
• Do Not Use Decorative Surface Burner Covers. If a
burner is accidentally turned on, the decorative cover will
become hot and possibly melt. You will not be able to see
that the burner is on. Burns will occur if the hot covers are
touched. Damage may also be done to the cooktop or
burners because the covers may cause overheating. Air will
be blocked from the burner and cause combustion
problems.
• Do Not Operate or Clean a Broken Cooktop Glass—If
glass top should break, cleaning solutions and spillovers
may penetrate the broken cooktop and create a risk of
electric shock. Contact a qualified technician immediately.
• Clean Cooktop Glass with Caution—If a wet sponge or
cloth is used to wipe spills on a hot cooking area, be careful
to avoid a steam burn. Some cleaners can produce harmful
fumes if applied to a hot surface.
• Do Not Place Hot Cookware on the Cooktop Glass. This
could cause glass to break.
• Avoid scratching the cooktop glass with sharp
objects.
SAVE THESE INSTRUCTIONS
4
Page 5
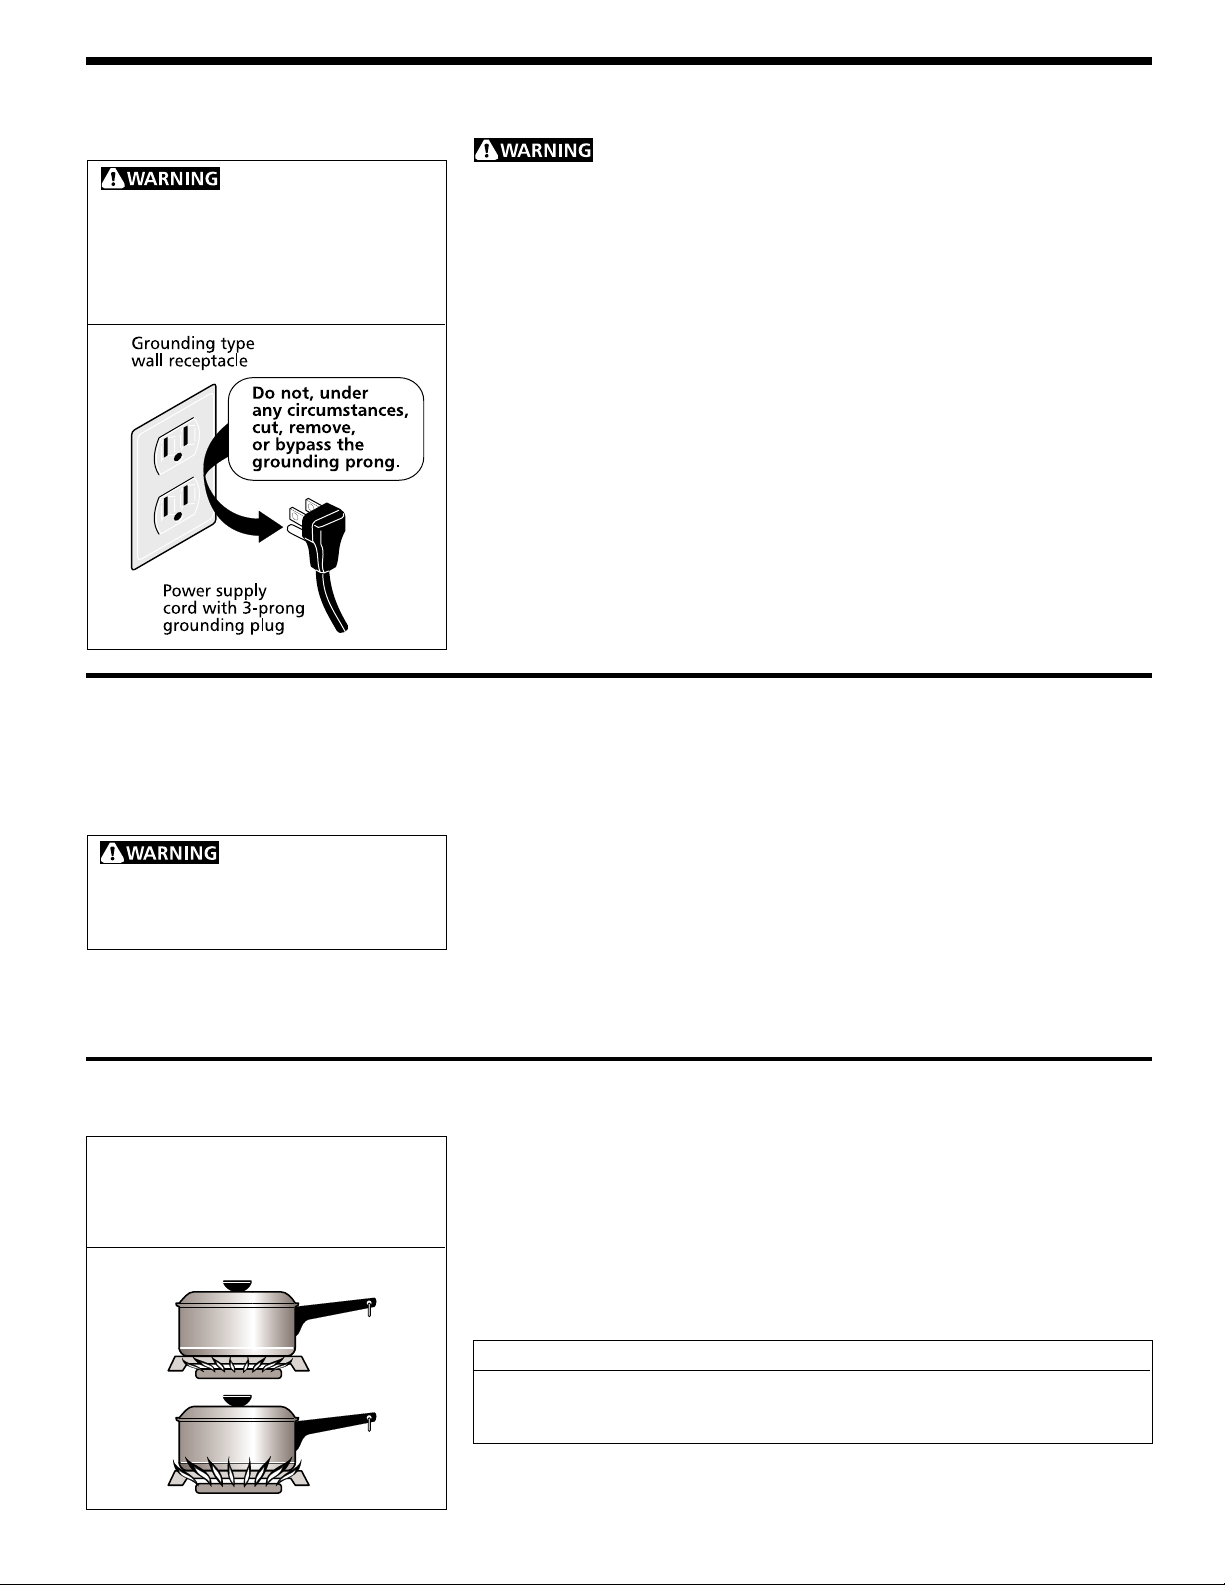
Grounding Instructions
(electric ignition models only)
Avoid fire hazard or
electrical shock. Do not use an adaptor
plug, an extension cord, or remove
grounding prong from electrical power
cord. Failure to follow this warning can
cause serious injury, fire or death.
IMPORTANT: READ AND SAVE THESE INSTRUCTIONS.
This appliance is equipped with a 3 prong grounding plug for your
protection against shock hazard and should be plugged directly into a properly
grounded receptacle. DO NOT cut or remove the grounding prong from this plug.
For personal
safety, this cooktop must be properly grounded. For maximum safety, the plug must
be plugged into a 120V—60 Hz. outlet that is correctly polarized and properly
grounded.
If a two-prong wall receptacle is the only available outlet, it is the personal
responsibility of the consumer to have it replaced with a properly grounded threeprong wall receptacle installed by a qualified electrician.
DO NOT UNDER ANY CIRCUMSTANCES CUT OR REMOVE THE THIRD ROUND
GROUNDING PRONG FROM THE POWER CORD PLUG. SEE THE INSTALLATION
INSTRUCTIONS PACKAGED WITH THIS COOKTOP FOR COMPLETE INSTALLATION
AND GROUNDING INSTRUCTIONS. DO NOT OPERATE THE COOKTOP USING A
TWO-PRONG ADAPTER OR AN EXTENSION CORD.
Liquefied Petroleum
(Propane) Gas
Conversion
Severe shock or damage
to the cooktop may occur if the cooktop is
not installed by a qualified installer or
electrician.
Flame Size
Never extend the flame beyond the outer
edge of the utensil. A higher flame simply
wastes heat and energy, and increases
your risk of being burned by the flame.
RIGHT
WRONG
This appliance can be used with Natural Gas and Propane Gas. It is shipped from
the factory for use with natural gas.
If you wish to convert your cooktop for use with propane gas, use the supplied fixed
orifices located in the package containing the Installation Instructions, in a bag
marked "FOR LP/PROPANE GAS CONVERSION". Follow the instructions packaged
with the orifices.
The conversion must be performed by a qualified service technician in accordance
with the manufacturer's instructions and all codes and requirements of the authority
having jurisdiction. Failure to follow instructions could result in serious injury or
property damage. The qualified agency performing this work assumes
responsibility for the conversion.
For most cooking, start on the highest control setting and then turn to a lower
one to complete the process. Use the chart below as a guide for determining
proper flame size for various types of cooking. The size and type of utensil used
and the amount of food being cooked will influence the setting needed for
cooking.
For deep fat frying, use a thermometer and adjust the surface control knob
accordingly. If the fat is too cool, the food will absorb the fat and be greasy. If the
fat is too hot, the food will brown so quickly that the center will be undercooked.
Do not attempt to deep fat fry too much food at once as the food will neither brown
nor cook properly.
*Flame Size
High Flame
Medium Flame
Low Flame
* These settings are based on using medium-weight aluminum pans with lids.
Settings may vary when using other types of pans.
Type of Cooking
Start most foods; bring water to a boil; pan broiling
Maintain a slow boil; thicken sauces, gravies; steam
Keep foods cooking; poach; stew
5
Page 6

Setting Surface
Controls
The color of the flame is the key to proper burner adjustment. A good flame is clear,
blue and hardly visible in a well-lighted room. Each cone of flame should be steady
and sharply defined. Adjust or clean burner if flame is yellow-orange. To clean
burner, see instructions under General Cleaning.
Each burner lights automatically from an electric ignitor each time a control knob
is turned to the LITE position.
To operate the surface burner:
1. Place cooking utensil on burner.
2. Push in and turn the Surface Control knob counterclockwise to LITE.
3. Visually check that the burner has lit.
4. After the burner ignites, turn the control knob to the desired flame size. The
knob can now be turned in either direction without being pushed in. The control
knobs do not have to be set at a particular mark. Use the guides and adjust the
flame as needed. DO NOT cook with the control knob in the LITE position, as
this will cause excess wear on the ignitor electrode.
5. To turn the burner off, turn the control knob clockwise as far as it will go, to the
OFF position.
In the event of an electrical power outage, the surface burners can be lit manually.
To light a surface burner, hold a lit match to the burner head, then slowly turn the
surface control knob to LITE. After the burner ignites, turn the control knob to the
desired flame size. Use caution when lighting surface burners manually.
Surface burners in use when an electrical power failure occurs will continue to
operate normally.
Do not operate the burner for an extended period of time
without cookware on the grate. The finish on the grate may chip without
cookware to absorb the heat.
Do not place plastic items such as salt and pepper shakers, spoon holders
or plastic wrappings on top of the cooktop when it is in use. These items could
melt or ignite. Pot holders, towels or wood spoons could catch fire if placed too close
to a flame.
36" Cooktop Burners
On 36" cooktops, the right and left rear burners are specially designed for low
temperature cooking, such as warming foods or simmering sauces. These burners
have a lower heat capacity to help maintain even heat distribution at low
temperatures.
The middle rear burner and the front burners can be used for all types of cooking.
In addition, the front burners have a higher heat capacity for fast, even heat during
high temperature cooking, such as boiling liquids or frying.
6
Page 7

General Cleaning
Cleaning Various Parts of Your Cooktop
Before cleaning any part of the cooktop, be sure all controls are turned OFF and the
cooktop is COOL. REMOVE SPILLOVERS AND HEAVY SOILING AS SOON AS
POSSIBLE. REGULAR CLEANINGS WILL REDUCE THE NUMBER OF MAJOR
CLEANINGS LATER.
Surfaces
Painted and Plastic Body
Parts, Control Knobs and
Decorative Trim Pieces
Control Panel
Porcelain Enamel
Burner Grates, Burner Pans
Surface Burners
How to Clean
For general cleaning, use hot, soapy water and a cloth. For more difficult soils and built-up
grease, apply a liquid detergent directly onto the soil. Leave on soil for 30 to 60 minutes.
Rinse with a damp cloth and dry. DO NOT use abrasive cleaners on any of these materials;
they can scratch.
Before cleaning the control panel, turn all controls to OFF and remove the control knobs. To
remove, pull each knob straight off the shaft. Clean as instructed above. Squeeze excess
water from the cloth before wiping the panel; especially when wiping around the controls.
Excess water in or around the controls may cause damage to the appliance. To replace
knobs after cleaning, line up the flat sides of both the knob and the shaft, then push the
knob(s) into place.
Clean burner grates, broiler pan and insert in the dishwasher and dry upon removal. If soils
are not removed, follow the cooktop cleaning instructions below.
Gentle scouring with a soapy scouring pad will remove most spots. Rinse with a 1:1 solution
of clean water and ammonia. If necessary, cover difficult spots with an ammonia-soaked
paper towel for 30 to 40 minutes. Rinse with clean water and a damp cloth, then scrub with
a soap-filled scouring pad. Rinse and wipe dry with a clean cloth. Remove all cleaners or
the porcelain may become damaged during future heating. DO NOT use spray oven
cleaners on the cooktop.
The holes in the burners of your cooktop must be kept clean at all times for proper ignition
and a complete, even flame. Clean the burner holes routinely with a small gauge wire or
needle and especially after bad spillovers which could clog these holes.
To remove and replace burner units per your model, see the instructions under General
Cleaning. To clean , soak the burners in a 1:1 solution of ammonia and water for 30 to 40
minutes. For stubborn stains, scrub with soap and water or a mild abrasive cleanser and a
damp cloth. Dry the burners thoroughly in a warm oven for 30 minutes. Then replace them,
making sure they are properly seated and level. DO NOT wash burner units in the
dishwasher.
7
Page 8

General Cleaning
(continued)
Before cleaning the
cooktop, be sure the controls are turned
to OFF and the cooktop is COOL.
Heavy burned-on spills can be removed
with a razor blade scraper . Use caution
to avoid damaging surface.
Do not use commercial
oven cleaners on any part of the cooktop.
Damage to the finish or parts could result.
To Clean the Cooktop Glass
The cooktop is designed to make cleaning easier. Because the four burners are
sealed, cleanups are easy when spillovers are cleaned up immediately. To clean,
wipe with a clean, damp cloth and wipe dry.
Correct and consistent cleaning is essential to maintaining your heat-resistant glass
top. Spills and spatters should be wiped up using a clean paper towel and sudsy
water. This should be done either as soon as possible after the spill occurs, after
cooking is completed, or at the latest, before using the cooktop again. Use caution
if the cooktop is hot. For heavy spills, spatter or burned-on materials, use a razor
blade scraper. Hold the razor blade scraper at a 30° angle and remove food spills
or burned on food residue.
Finish the cleaning process by applying a recommended heat-resistant glass
cooktop cleaning creme. Apply cleaner with clean, damp paper towel. Rinse with
a paper towel dampened with clean water and wipe dry. Always wipe the cooktop
thoroughly to avoid heating any cleaner residue.
DO NOT use the following on the heat-resistant glass cooktop:
• Abrasive plastic, nylon, metal scouring or cloth pads. They may scratch the
cooktop and make it more difficult to clean later. Always use a new, clean
paper towel when cleaning the heat-resistant glass top.
• Anything that may melt (plastics, aluminum foil, sugar or food with a high sugar
content).
• Heavy duty cleansers, rust or stain removers.
• Chlorine bleach, ammonia, hydrofluoric acid or any other kind of chemical
cleaners. They may etch or discolor the cooktop.
• Sponges, cloths or dish towels. Always use a new, clean paper towel when
cleaning the cooktop. Lint or soil remaining on the cooktop from a cloth or
sponge can burn and cause discoloration.
To Clean the Burner Grates, Contoured Burner Pans, Burner
Cap Assembly, and Burner Base
The burner grates, contoured burner pans, burner cap assembly, and burner base
should be routinely cleaned. Keeping the burner ports clean will prevent improper
ignition and an uneven flame. See instructions below.
Burner Grate
To Clean the Burner Grates
Be sure burners and grates are cool before you place your hand, a pot holder,
cleaning cloths or other material on them. The cast iron burner grates can be washed
in hot soapy water. Rinse thoroughly and dry the grates with a cloth- don't put them
on the cooktop while still wet. Be sure the grates are positioned securely over the
burners.
To remove burned on food, place the grates in a covered container or plastic bag.
Add 1/4 cup ammonia and soak for 30 minutes. Wash, rinse well and dry. An
abrasive cleaner can be used for stubborn stains.
8
Page 9

General Cleaning
(continued)
Note: The burner cap assembly refers to
all parts of the sealed burner unit (burner
cap, burner pan (some models), trim ring
(some models), locating tab, burner base
and electrode).
To Clean the Contoured Burner Pans
The square burner pans are attached to the cooktop and are not removable. The
burner pan forms a recessed well area located around each burner unit. If a spill
occurs in one of the four well areas, blot up spill with an absorbent cloth. Rinse with
a clean, damp cloth and wipe dry.
To Remove the Burner Cap Assembly
Your assembly will consist of a burner cap and trim ring. Remove the burner cap first
and then the trim ring. Do not operate the burners without the burner cap
assembly and trim ring in place.
To Clean the Burner Cap and Trim Ring
Use a soap-filled scouring pad or a mild abrasive cleanser to clean burner caps and
trim rings. If necessary, cover stubborn spots with an ammonia-soaked paper towel
for 30 minutes. Rub gently with a soap-filled scouring pad and rinse with a mixture
of clean water and vinegar. Wipe dry. Remove all cleaners or the porcelain may
become damaged during future heating.
To Clean the Burner Base and Gas Opening
The ports (or slots) around the burner base must be routinely cleaned. Use a smallgauge wire or needle to clean small slots or holes. Use care to prevent damage to
the electrode. If a cleaning cloth should catch the electrode, it could break or
damage the electrode. If the electrode is damaged or broken, the surface burner
will not light because it will not spark. Manual lighting with a match is still possible.
Use caution when
replacing the burner cap so the electrode
is not damaged. This may cause a
delayed ignition or prevent the burner
from igniting.
Any additions, changes or
conversions required in order for this
appliance to satisfactorily meet the
application needs must be made by a
Frigidaire Distributor or Qualified Agency.
For proper flow of gas and ignition of the burner—DO NOT ALLOW SPILLS, FOOD,
CLEANING AGENTS OR ANY OTHER MATERIAL TO ENTER THE GAS OPENING. Gas
must flow freely through the small hole in the brass orifice for the burners to light
properly. If the gas opening orifice becomes soiled or clogged, use a small-gauge
wire or needle to clean. ALWAYS keep the burner cap assembly and ring in place
whenever a surface burner is in use.
To Replace the Burner Cap and Ring Assembly
Make sure the burner cap and ring are thoroughly dry before placing back on the
burner.
1. Replace trim ring (some models).
2. Find the locating tabs on the burner cap and place in the locating slots in the
burner base. Make sure each burner cap is properly aligned and level.
3. Turn the burner on to determine if it will light. If the burner does not light after
cleaning, contact an authorized servicer. Do not service the sealed burner
yourself.
9
Page 10

Avoid Service Checklist
Before you call for service, review this list. It may save you time and expense. The
list includes common occurrences that are not the result of defective workmanship
or materials in this appliance.
OCCURRENCE
Surface burners do not light.
Surface burner flame burns half way
around.
POSSIBLE CAUSE/SOLUTION
Surface control knob has not been completely turned to LITE. Push in and turn the
surface control knob to LITE (until burner ignites) and then turn the surface control
knob to the desired flame size.
Burner ports are clogged. Clean burners. See "To Clean the Burner Grates,
Contoured Burner Pans, Burner Cap Assembly, and Burner Base" under General
Cleaning. With the burner off, use a small-gauge wire or needle to clean ports or
slots.
Electrical Power outage. Check house lights to be sure. Call your local electric
company for service. Surface burners can be lit manually. See Setting Surface
Controls in this Owner's Guide.
Gas supply is turned off. Turn gas supply on.
Power supply cord not plugged into outlet.
Burner ports or slots are clogged. With the burner off, clean by using a small-gauge
wire or needle to clean ports or slots.
Moisture is present after cleaning. Lightly fan the flame and allow the burner to
operate until flame is full. Dry the burners thoroughly following instructions under
General Cleaning.
Surface burner flame is orange.
Dust particles in main line. Allow the burner to operate a few minutes until flame
turns blue.
Salt air in coastal areas. A slightly orange flame is unavoidable.
10
Page 11

FRIGIDAIRE GALLERY COOKTOP WARRANTY
Your Frigidaire product is protected by this warranty (for United States)
THE CONSUMER WILL BE
RESPONSIBLE FOR:
FULL ONE-YEAR
WARRANTY
LIMITED WARRANTY
(Applicable to the
State of Alaska)
WARRANTY
PERIOD
One year from original
purchase date.
Time period listed above.
FRIGIDAIRE, THROUGH ITS AUTHORIZED
SERVICERS, WILL:
Pay all costs for repairing or replacing any parts of this
appliance which prove to be defective in materials or
workmanship.
All of the provisions of the full warranty above and the
exclusions listed below apply.
Costs of service calls that are listed under NORMAL
RESPONSIBILITIES OF THE CONSUMER.*
Costs of the technician's travel to the home and any
costs for pick up and delivery of the appliance
required because of service.
Your appliance is warranted by Frigidaire Home Products, a division of White Consolidated Industries, Inc. We authorize no person to change
or add to any of our obligations under this warranty. Our obligations for service and parts under this warranty must be performed by Frigidaire
Home Products Consumer Services or an authorized Frigidaire servicer.
*NORMAL
RESPONSIBILITIES
OF THE CONSUMER
This warranty applies only to products in ordinary household use, and the consumer is responsible for the
items listed below:
1. Proper use of the appliance in accordance with instructions provided with the product.
2. Proper installation by an authorized servicer in accordance with instructions provided with the appliance and in
accordance with all local plumbing, electrical and/or gas codes.
3. Proper connection to a grounded power supply of sufficient voltage, replacement of blown fuses, repair of loose
connections or defects in house wiring.
4. Expenses for making the appliance accessible for servicing, such as removal of trim, cupboards, shelves, etc., which
are not a part of the appliance when it was shipped from the factory.
5. Damages to finish after installation.
6. Replacement of light bulbs and/or fluorescent tubes (on models with these features).
EXCLUSIONS
IF YOU NEED
SERVICE
This warranty does not cover the following:
1. CONSEQUENTIAL OR INCIDENTAL DAMAGES SUCH AS PROPERTY DAMAGE AND INCIDENTAL EXPENSES RESULTING
FROM ANY BREACH OF THIS WRITTEN OR ANY IMPLIED WARRANTY.
Note: Some states do not allow the exclusion or limitation of incidental or consequential damages, so this limitation
or exclusion may not apply to you.
2. Service calls which do not involve malfunction or defects in workmanship or material, or for appliances not in ordinary
household use. The consumer shall pay for such service calls.
3. Damages caused by services performed by persons other than authorized Frigidaire servicers; use of parts other than
Frigidaire Home Products Genuine Renewal Parts; obtained from persons other than such servicers; or external causes
such as abuse, misuse, inadequate power supply or acts of God.
4. Products with original serial numbers that have been removed or altered and cannot be readily determined.
Keep your bill of sale, delivery slip, or some other appropriate payment record. The date on the bill establishes the warranty
period should service be required. If service is performed, it is in your best interest to obtain and keep all receipts. This
written warranty gives you specific legal rights. You may also have other rights that vary from state to state. Service under
this warranty must be obtained by following these steps, in order:
1. Contact Frigidaire Home Products Consumer Services or an authorized Frigidaire servicer.
2. If there is a question as to where to obtain service or parts, call or write our Consumer Relations Department at:
Frigidaire Home Products Consumer Relations
P.O. Box 212378
Augusta, Georgia 30917-2378
(800) 944-9044
Product features or specifications as described or illustrated are subject to change without notice. All warranties are made
by White Consolidated Industries, Inc. This warranty applies only in the 50 states of the U.S.A. and Puerto Rico.
Page 12

W ARRANTY (for Canada)
GAS COOKTOP
WARRANTOR:
FRIGIDAIRE HOME PRODUCTS
7075 Ordan Drive
Mississauga, Ontario
L5T 1K6
This cooktop is a branded product of Frigidaire Home Products.
WARRANTY PERIOD:
For the first and second year after purchase by the original
owner.
For the third through tenth years after purchase by the original
owner.
WARRANTY APPLIES TO:
a) Products purchased and installed in Canada for personal single family household use.
b) Defects resulting or arising out of the manufacturing process.
c) Products bearing legible manufacturer's model and serial number.
d) Replacements parts only for the remainder of the original warranty.
For service under this warranty, contact your local dealer/
retailer, authorized FRIGIDAIRE PARTS AND SERVICE depot
or:
FRIGIDAIRE PARTS AND SERVICE
7075 Ordan Drive
Mississauga, Ontario L5T 1K6
Tel: (905) 565-9200
Fax: (905) 565-0937
WARRANTOR WILL, THROUGH ITS
AUTHORIZED SERVICE DEPOT:
Pay all costs to repair or replace defective parts.
Pay the cost to replace any defective sealed burner parts
(excluding service and labour charge).
WARRANTY DOES NOT APPLY TO:
a) Transportation damage.
b) Supply and replacement of porcelain, fuses and glass.
c) Parts and service supplied or obtained from other than FRIGIDAIRE PARTS AND SERVICE or FRIGIDAIRE PARTS AND SERVICE
authorized depots.
d) Damage or failure as the result of the abuse, improper or commercial use.
CONSUMER/OWNER RESPONSIBILITY:
a) To provide proof of the original date of purchase by means of a bill of sale verifying purchase date.
b) To pay all costs to make the appliance readily accessible for service.
c) To ensure proper power supply and connection of the appliance to the same.
d) Proper installation, control setting and care of finish.
This warranty is in addition to any statutory warranties contained in any applicable legislation. The terms and conditions of this
warranty are not intended to exclude or limit your rights under those statutes. The warrantor however reserves the right to charge
transportation and travelling costs for distances in excess of 48 kilometers (30 miles) from the nearest FRIGIDAIRE PARTS AND
SERVICE authorized service depot.
This warranty plus the statutory warranties mentioned are the only warranties given to the consumer/owner for this product.
Page 13

Table de cuisson
Séries
Professionnelles
Guide de
à gaz
Brûleurs scellés
Surface de verre trempé
l'utilisateur
Enregistrement de l'appareil .......................... 2
Importantes mesures de sécurité ...............3-4
Instructions de mise à la terre
(modèles à allumage électrique seulement) .... 5
Conversion au gaz propane........................... 5
Dimension de la flamme ................................ 5
Commandes des brûleurs de surface ............ 6
Nettoyage général ......................................7-9
Liste de contrôle anti-panne ........................ 10
Notes ......................................................... 11
Garantie...................................................... 12
P/N 318068129 (9812) Rev. A
Page 14

Enregistrement de
l'appareil
Enregistrez votre appareil
La CARTE D'ENREGISTREMENT doit
être remplie avec soin, puis signée et
retournée à la compagnie Frigidaire.
Nous vous remercions d'avoir choisi cet appareil. Les informations contenues
dans ce guide de l'utilisateur vous indiqueront comment utiliser correctement
votre appareil et comment en prendre soin. Veuillez lire tous les renseignements
contenus dans votre documentation pour mieux connaître votre nouvel appareil.
Enregistrez les numéros de modèle et de série de votre
appareil
Indiquez ci-dessous les numéros de modèle et de série que vous trouverez sous la
table de cuisson.
Numéro de modèle
Numéro de série
Date de l'achat
Remarque: Ce guide donne des
instructions générales pour votre table de
cuisson et des renseignements
s'appliquant à plusieurs modèles. Votre
table de cuisson peut ne pas avoir toutes
les caractéristiques décrites.
Remarque: Les instructions données dans ce guide ne couvrent pas toutes les
conditions et situations possibles. Usez de bon sens et de prudence lors de
l'installation, de l'emploi et de l'entretien de tout appareil ménager.
Si l'information contenue dans ce guide n'est pas
exactement suivie, il pourra en résulter un feu ou une explosion
entraînant des dommages matériels, des blessures ou même la mort.
POUR VOTRE SÉCURITÉ:
N'entreposez pas ou n'utilisez pas de l'essence ou tout autre
vapeur ou liquide inflammable au voisinage de cet appareil
ou de tout autre appareil ménager.
QUE FAIRE SI VOUS DÉTECTEZ UNE ODEUR DE GAZ:
• Ne mettez pas d'appareil en marche.
• Ne touchez pas à un commutateur électrique; ne vous
servez pas du téléphone dans le bâtiment.
• Allez chez le voisin et appelez immédiatement le
fournisseur de gaz. Suivez ses instructions.
• S'il n'est pas possible d'appeler le fournisseur de gaz,
appelez les pompiers.
© 1998 White Consolidated Industries
Tous droits réservés
L'installation et l'entretien doivent être réalisés par un
installateur qualifié, un technicien de service après-vente ou
le fournisseur de gaz.
2
Page 15

IMPORTANTES MESURES DE SÉCURITÉ
Lisez ces instructions avant d'utiliser l'appareil.
Conserver ces directives pour référence future.
Ce guide contient des instructions et symboles de sécurité importants. Veuillez faire particulièrement attention à ces symboles et
suivre les instructions données. Voici une brève explication de ces symboles.
Ce symbole vous prévient des situations qui risquent
d'entraîner de graves blessures, la mort ou des dommages matériels.
• Enlevez tout le ruban et le matériau d'emballage avant
d'utiliser la table de cuisson. Enlevez les longueurs de
moulure décorative sur les rebords de la vitre
céramique. Détruisez le cartonnage et les sacs en
plastique après déballage de l'appareil. Ne laissez jamais
les enfants jouer avec le matériau d'emballage.
• Installation: assurez-vous que l'appareil est
correctement installé et mis à la terre par un technicien
qualifié, conformément à la dernière édition ANSI
Z223.1 du National Fuel Gas Code aux États Unis, ou au
Canada, conformément aux normes B149.1 et B149.2
CAN/ACG et aussi conformément à la dernière édition
n° 70 ANSI/NFPA du National Electrical Code aux États
Unis, ou au Canada, à la norme C22.1 de l'ACNOR, code
canadien de l'électricité, partie 1, ainsi qu'aux codes de
la région. N'installez l'appareil que selon les instructions
d'installation fournies dans la documentation.
Demandez à votre marchand de vous recommander un
technicien qualifié ainsi qu'un centre de réparation autorisé.
Sachez comment couper le gaz au compteur et couper le
courant électrique de la table de cuisson à la boîte de fusibles
ou au coupe-circuit en cas d'urgence.
Ce symbole vous prévient des situations pouvant
entraîner des blessures ou dommages matériels.
Ne rangez pas dans les armoires au-dessus
d'une table de cuisson des articles pouvant intéresser les
enfants.
• Ne laissez pas les enfants seuls ou sans surveillance
dans un lieu où un appareil fonctionne. Ne les laissez
jamais s'asseoir ou se tenir debout sur une pièce quelconque
de l'appareil.
• NE TOUCHEZ PAS LES BRÛLEURS DE SURFACE, LES
GRILLES OU LES ZONES PRÈS DE CES BRÛLEURS. Les
brûleurs de surface peuvent être suffisamment chauds même
si les flammes ne sont pas visibles. Les zones proches des
brûleurs peuvent devenir suffisamment chaudes pour brûler.
Pendant et après toute utilisation, ne touchez pas et ne laissez
pas les vêtements ou autres produits inflammables venir en
contact avec ces zones à moins qu'elles aient eu le temps de
se refroidir. Ces zones comprennent la surface de cuisson et
les surfaces orientées vers elle.
• Portez des vêtements appropriés: ne portez jamais de
vêtements amples ou flottants en utilisant cet appareil.
Ne laissez pas les matériaux inflammables et les vêtements
venir en contact avec des surfaces chaudes.
• Entretien par l'usager: ne réparez pas ou ne remplacez
pas des pièces de l'appareil à moins d'une
recommandation précise dans les guides. Toutes les
réparations doivent être faites par un technicien qualifié, afin
de réduire les risques de blessure et de dommage à la table
de cuisson.
• Ne modifiez jamais l'appareil, que ce soit en enlevant
des panneaux, protège-fils, ou toute autre pièce.
Il peut être dangereux pour les
personnes ou dommageable pour la table de cuisson de
monter ou de s'appuyer dessus. Ne laissez pas les enfants
grimper sur la table de cuisson ou jouer autour.
• Rangement sur l'appareil: ne rangez pas sur la table de
cuisson ou près des brûleurs de surface, des matériaux
inflammables, tel que papiers, plastiques, tissus, livres de
cuisine, objets en plastique et torchons, ainsi que liquides
inflammables. Ne posez pas sur la table de cuisson des
produits explosifs comme bombes aérosol. Les produits
inflammables pourraient exploser et entraîner un feu ou des
dommages matériels.
N'utilisez jamais votre appareil pour
réchauffer ou chauffer une pièce.
• N'éteignez pas les feux de friture avec de l'eau ou de la
farine: étouffez les feux avec un couvercle ou du
bicarbonate de soude, ou avec un extincteur à poudre
sèche ou à mousse.
• En chauffant de l'huile ou de la graisse, restez près de
l'appareil. La graisse ou l'huile peuvent prendre feu si elles
devenaient trop chaudes.
• N'utilisez que des moufles isolantes sèches: des
moufles mouillées ou humides en contact avec des
surfaces chaudes peuvent causer des brûlures par la
vapeur. Ne laissez pas les moufles isolantes toucher les
brûleurs ou la flamme. Ne vous servez pas de torchon ni de
chiffon à la place d'une moufle.
• Ne réchauffez pas des contenants non ouverts:
l'accumulation de pression peut faire exploser le
contenant et blesser.
3
Page 16

IMPORTANTES MESURES DE SÉCURITÉ (suite)
• Sachez quel bouton commande chacun des brûleurs de
surface. Tournez le bouton à la position «LITE» (ALLUMAGE)
pour mettre les brûleurs en marche. Vérifiez que le brûleur
est allumé. puis, réglez la flamme pour qu'elle ne dépasse
pas de l'ustensile.
Bonne dimension de la flamme:
réglez la flamme pour qu'elle ne dépasse pas du bord de
l'ustensile. Avec des ustensiles de dimension insuffisante, une
partie de la flamme du brûleur sera exposée et risquera de
mettre le feu aux vêtements. Un bon contact entre l'ustensile
et la flamme améliore aussi l'efficacité.
N'utilisez pas des grilles de réchaud
sur vos brûleurs à gaz scellés. Sinon, la combustion serait
incomplète et il pourrait en résulter un dégagement de
monoxyde de carbone à des doses supérieures aux niveaux
admis, ce qui serait dangereux pour votre santé.
• Tournez toujours les ustensiles pour que les poignées
se trouvent vers l'intérieur et non au-dessus d'autres
brûleurs: pour réduire le risque de brûlures, d'inflammation
de matériaux et de renversement par suite du contact
accidentel de l'ustensile, la poignée d'un ustensile doit être
placée vers l'intérieur et non au-dessus des brûleurs de
surface.
• Ne laissez jamais les brûleurs de surface sans
surveillance à des réglages élevés: les débordements
peuvent causer de la fumée, la graisse peut s'enflammer ou
bien une casserole sans liquide peut fondre.
• Revêtements protecteurs: n'utilisez pas de papier
aluminium pour recouvrir les cuvettes des brûleurs de surface.
Tout utilisation de revêtement protecteur ou d'aluminium
pourrait entraver la distribution de l'air et de la chaleur, et
gêner la combustion. Il pourrait aussi en résulter des blessures
ou un endommagement de la table de cuisson.
• Ustensiles de cuisson en poterie: seuls certains types
d'ustensiles en verre/céramique, céramique, poterie,
peuvent être utilisés sur le dessus de la cuisinière, sans casser
par suite de changement brusque de la température.
Vérifiez les recommandations du fabricant.
• N'utilisez pas de couvercle de brûleur décoratif. Si un
brûleur est accidentellement allumé, le couvercle risque de
chauffer et éventuellement de fondre. Vous risquez de vous
brûler en touchant le couvercle. Aussi, il y a risque
d'endommagement de la surface de cuisson et des brûleurs
s'il y a surchauffe du couvercle. L'air sera aussi bloqué, ce
qui entraînera des problèmes de combustion.
• Ne nettoyez pas et ne faites pas fonctionner une table
de cuisson avec une vitre cassée. Si le verre de la surface
est fissuré, les solutions de nettoyage et produits renversés
pourraient pénétrer dans l'intérieur de la surface de cuisson
et entraîner un risque de décharge électrique. Prenez
contact immédiatement avec un technicien qualifié.
• Nettoyez prudemment le verre de la surface de
cuisson. Si vous utilisez un linge ou une éponge humide
pour enlever les produits renversés sur une surface de cuisson
chaude, faites attention à ne pas vous brûler par la vapeur.
Certains produits de nettoyage peuvent dégager des vapeurs
dangereuses s'ils sont appliqués sur une surface chaude.
• Ne placez pas d'ustensiles de cuisine chauds sur le
verre de la table de cuisson. Ceci pourrait le casser.
• Évitez de gratter le verre de la table de cuisson avec des
objets pointus.
CONSERVEZ CES INSTRUCTIONS
4
Page 17

Instructions de mise à
IMPORTANT: LISEZ ET CONSERVEZ CES INSTRUCTIONS.
la terre
électrique seulement)
feu ou de choc électrique. Ne pas utiliser de
cordon prolongateur ni fiche d'adaptation.
Ne pas enlever la broche de mise à la terre du
cordon électrique . Si cet avertissement n'était
pas suivi, il pourrait en résulter de graves
blessures, la mort ou un incendie.
Prise murale mise
à la terre
Cordon d'alimentation
muni d'une fiche à trois
broches avec mise à la terre
(modèles à allumage
Éviter tout risque de
Ne jamais couper,
enlever ou mettre
hors circuit la
broche de mise à la
terre de cette fiche.
Cet appareil est équipé d'une fiche à trois broches avec mise
à la terre pour assurer votre protection contre les chocs électriques. Cette fiche doit
être branchée directement dans une prise correctement mise à la terre. NE coupez
PAS, n'enlevez pas la broche de mise à la terre de cette fiche.
Pour des raisons de sécurité personnelles, cette table de cuisson doit être
correctement mise à la terre. La fiche doit être branchée dans une prise
correctement polarisée et mise à la terre, de 120 volts, 60 hertz.
Si une prise murale à deux alvéoles est la seule prise votre disposition, il vous revient
de demander à un électricien qualifié de la remplacer par une prise murale à trois
alvéoles correctement mise à la terre.
EN AUCUN CAS, IL NE FAUT COUPER OU ENLEVER LA BROCHE DE MISE À LA
TERRE DE CETTE FICHE. CONSULTEZ LES INSTRUCTIONS D'INSTALLATION
EMBALLÉES AVEC CET APPAREIL POUR Y TROUVER TOUS LES RENSEIGNEMENTS
SUR L'INSTALLATION ET LA MISE À LA TERRE. VOUS NE DEVEZ JAMAIS VOUS
SERVIR DE L'APPAREIL AVEC UN CORDON PROLONGATEUR OU FICHE
D'ADAPTATION À DEUX BROCHES.
Conversion au gaz
propane
Un choc électrique
ou des dommages à la table de cuisson
peuvent se produire si celle-ci n'est pas
installée par un électricien ou installateur
qualifié.
Dimension de la
flamme
Ne laissez jamais la flamme dépasser du
bord extérieur de l'ustensile. Une flamme
plus haute gâche chaleur et énergie et
augmente les risques de brûlure.
Cet appareil peut être utilisé avec le gaz naturel ou le gaz propane. Il est expédié
de l'usine pour fonctionner au gaz naturel.
Si vous désirez convertir votre table de cuisson au gaz propane, servez-vous des
orifices fixes fournis dans l'enveloppe portant l'inscription «POUR CONVERSION AU
GAZ PROPANE» qui se trouve dans la pochette documents. Suivez les instructions
d'installation se trouvant dans l'enveloppe.
La conversion doit être réalisée par un technicien qualifié conformément aux
instructions du fabricant et de tous les codes et exigences des autorités ayant
juridiction. Sinon, il pourrait en résulter de graves blessures ou des dommages
matériels. L'agence qualifiée réalisant ces travaux assume la responsabilité de la
conversion.
Pour presque tous les types de cuisson, commencez par le réglage le plus élevé,
puis tournez sur un réglage plus faible pour terminer la cuisson. Suivez le tableau
ci-dessous pour déterminer la bonne dimension de la flamme correspondant aux
différents types de cuisson. La dimension et le type d'ustensiles utilisés ainsi que
la quantité d'aliments à cuire influencent le réglage nécessaire pour la cuisson.
Pour la grande friture, servez-vous d'un thermomètre et réglez la commande en
conséquence. Si la graisse est trop froide, la nourriture absorbe la graisse. Si la
graisse est trop chaude, la nourriture brunit rapidement et le centre n'est pas cuit.
N'essayez pas de frire à grande friture une trop grande quantité à la fois, la nourriture
risquant de brunir ou de ne pas cuire correctement.
BON
RIGHT
INCORRECT
WRONG
Dimension de la flamme
FLAMME HAUTE («HI»)
FLAMME MOY («MED»)
FLAMME BASSE («LO»)
* Certains réglages sont basés sur l'utilisation de casseroles en aluminium de poids moyen
avec couvercle. Les réglages peuvent varier avec d'autres types de casseroles.
5
Type de cuisson
Commencer la majorité des recettes; amener
l'eau à ébullition; gril dans poêle
Maintien d'une ébullition lente; épaississement
des sauces; cuisson à la vapeur
Mijotage, pochage, continuation de la cuisson
Page 18

Commandes des
brûleurs de surface
La couleur de la flamme est la clé d'un bon réglage. La flamme doit être
transparente, bleue, et à peine visible dans une pièce bien éclairée. Le cône doit
être uniforme, aux contours précis. Réglez ou nettoyez le brûleur si la flamme est
jaune-orange. Pour nettoyer le brûleur, voyez les instructions sous Nettoyage
général.
Chaque brûleur s'allume avec un allumeur électrique chaque fois que vous tournez
une commande à la position «LITE» (ALLUMAGE).
Emploi du brûleur de surface:
1. Placez l'ustensile sur le brûleur.
2. Appuyez sur le bouton de commande et tournez-le sur «LITE» (ALLUMAGE).
3. Vérifiez que le brûleur est bien allumé.
4. Après allumage du brûleur, tournez le bouton jusqu'à l'obtention de la dimension
de flamme voulue. Le bouton peut alors être tourné à droite ou à gauche sans
avoir à être poussé. Les boutons n'ont pas à être réglés à un repère particulier.
Servez-vous des guides et réglez la flamme au besoin. NE cuisez PAS avec le
bouton à la position «LITE» (ALLUMAGE), vous risquez d'user l'électrode de
l'allumeur.
5. Pour arrêter le brûleur, tournez le bouton de commande le plus loin possible
à droite jusqu'à «OFF» (ARRÊT).
En cas de panne de courant, les brûleurs peuvent s'allumer à la main. Pour ce faire,
tenez une allumette allumée à la tête du brûleur puis tournez lentement la
commande sur «LITE» (ALLUMAGE). Ensuite, tournez le bouton à la dimension de
flamme voulue. Soyez prudent lorsque vous allumez manuellement les brûleurs.
Les brûleurs de surface en cours d'utilisation lors d'une panne de courant continuent
à fonctionner normalement.
SIMMER = MIJOTER
Ne faites pas marcher le brûleur pendant une période de
temps prolongée sans ustensile sur la grille. Le fini de la grille pourrait
s'écailler si aucun ustensile n'absorbe la chaleur.
Ne placez pas de salière et poivrière en plastique, de porte-cuillère ou
d'emballage plastique sur le dessus de la table de cuisson en cours
d'utilisation. Ces articles peuvent fondre ou s'enflammer. Moufles isolantes,
torchons ou cuillères en bois peuvent prendre feu s'ils sont placés trop près d'une
flamme.
Brûleurs de la plaque de cuisson de 36 pouces
Sur les surfaces de cuisson de 36", les brûleurs arrière droit et gauche sont prévus
pour une cuisson à faible température, comme pour réchauffer ou pour mijoter des
sauces. Ces brûleurs ont une capacité thermique inférieure, ce qui leur permet de
maintenir une répartition uniforme de la chaleur à de faibles températures.
Le brûleur arrière, au milieu, et les brûleurs avant peuvent être utilisés pour tous les
types de cuisson. De plus, les brûleurs avant ont une capacité thermique supérieure,
leur permettant de chauffer rapidement et uniformément à des températures
élevées, comme pour faire bouillir des liquides et faire frire.
6
Page 19

Nettoyage général
Nettoyage des diverses parties de votre table de cuisson
Avant de nettoyer quelque partie de votre table de cuisson, assurez-vous que toutes
les commandes sont tournées à «OFF» (ARRÊT) et qu'elle s'est refroidie. ENLEVEZ
LES ÉCLABOUSSURES ET LES GROSSES TACHES DÈS QUE POSSIBLE. DES
NETTOYAGES RÉGULIERS PERMETTENT DE RÉDUIRE ULTÉRIEUREMENT LE
NOMBRE DE NETTOYAGES IMPORTANTS.
Surfaces
Parties peintes, et en
plastique, boutons de
contrôle, pièces du châssis
et moulure décorative
Panneau de commandes
Émail vitrifié
Grille des brûleurs, cuvettes
des brûleurs
Méthode de nettoyage
Pour le nettoyage général, utilisez de l’eau chaude savonneuse et un chiffon en tissu. Pour
la saleté plus rebelle et la graisse accumulée, appliquez un détergent liquide sur la tache.
Laissez pénétrer de 30 à 60 minutes. Rincez avec un chiffon humide et asséchez. N'UTILISEZ
PAS de nettoyeurs abrasifs sur aucune de ces parties; ils peuvent les égratigner.
Avant de nettoyer le panneau de commandes, tournez tous les boutons de commande à
«OFF» (ARRÊT) et retirez les boutons de l'appareil. Tirez-les hors des axes en exerçant une
traction verticale sur le bouton. Nettoyez-les tel qu'indiqué ci-dessus. Tordez le linge pour en
enlever le surplus d'eau avant de laver le panneau, tout particulièrement à proximité des axes
des commandes. Un excès d'eau près des commandes peut causer des dommages à
l'appareil. Pour replacer les boutons après le nettoyage, alignez le plat de l'axe de la
commande avec le plat dans la cavité du bouton et enfoncez le(s) bouton(s) à fond.
Nettoyez dans le lave-vaisselle et asséchez-les à leur sortie. Pour la saleté résiduelle suivez
les instruction de nettoyage de la plaque de cuisson ci-dessous.
Un récurage léger avec un tampon à récurer savonneux enlèvera la plupart des taches. Rincez
avec une solution composée d'une quantité égale d’eau propre et d'ammoniaque. Au
besoin, recouvrez les taches rebelles d'une serviette de papier imbibée d'ammoniaque
pendant 30 à 40 minutes. Rincez à l’eau propre avec un chiffon humide et récurez par la suite
avec un tampon saponifié. Rincez et asséchez avec un chiffon propre. Enlevez tout résidu
de nettoyeurs car la porcelaine peut être endommagée lors d'un chauffage ultérieur.
N'UTILISEZ PAS de nettoyeurs à four en vaporisateur sur le dessus de la cuisinière.
Brûleurs scellés
Les orifices des brûleurs de la table de cuisson doivent être toujours propres pour assurer un
allumage correct et complet, et une flamme régulière. Nettoyez les brûleurs régulièrement
et surout après un déversement pouvant obstruer les orifices.
Pour démonter et remonter les brûleurs, suivez les instructions dans la section Nettoyage
général. Pour les nettoyer, laissez-les tremper dans une solution faite d'une partie
d'ammoniaque et d'une partie d’eau pendant 30 à 40 minutes. Pour les taches rebelles,
frottez-les avec une eau savonneuse ou un nettoyeur abrasif doux à l'aide d'une linge
humide. Faites ensuite sécher les brûleurs à fond dans un four chaud pendant 30 minutes.
Replacez-les ensuite, tout en vous assurant qu'ils sont fermement assis et de niveau. NE
LAVEZ PAS les pièces des brûleurs au lave-vaisselle.
7
Page 20

Nettoyage général (suite)
Avant de nettoyer la
table de cuisson, assurez-vous que les
commandes sont à l'ARRÊT et que la
surface est froide.
Les produits renversés épais, «cuits»,
peuvent être enlevés avec un grattoir à
lame de rasoir. Faites attention de ne
pas endommager la surface.
N'utilisez pas de produits
de nettoyage pour four vendus dans le
commerce sur une partie quelconque de
la table de cuisson. Le fini ou même
certaines pièces pourraient être
endommagés.
Nettoyage du verre de la surface de cuisson
La surface de cuisson est conçue pour faciliter le nettoyage. Parce que les quatre
brûleurs sont scellés, les nettoyages sont faciles lors de renversements qui peuvent
être immédiatement nettoyés. Pour nettoyer, essuyez avec un linge humide et
propre et séchez.
Il est essentiel de bien nettoyer régulièrement votre table de cuisson. Les produits
et les éclaboussures doivent être essuyés à l'aide d'un papier essuie-tout propre et
d'eau savonneuse. Ceci doit être fait dès que possible après que le produit est
renversé, après la fin de la cuisson ou au plus tard avant d'utiliser à nouveau la table
de cuisson. Soyez prudent si la table de cuisson est chaude. Si les quantités
renversées sont importantes, si les produits sont brûlés, servez-vous d'un grattoir à
lame de rasoir. Tenez le grattoir à un angle de 30° et enlevez les éclaboussures ou
résidus brûlés.
Terminez le nettoyage en appliquant une crème de nettoyage spéciale pour
table de cuisson à verre thermorésistant. Appliquez le produit avec de l'essuie-
tout propre et humide. Rincez avec de l'essuie-tout trempé dans de l'eau propre puis
essuyez. Essuyez toujours la table de cuisson pour éviter de chauffer des résidus du
produit de nettoyage.
N'utilisez PAS les produits suivants sur une table de cuisson en verre
thermorésistant:
• Tampons de nettoyage en tissu ou en métal, en nylon ou en plastique abrasif.
Ils risquent d'égratigner la surface de cuisson et de rendre plus difficile le
nettoyage par la suite. Utilisez toujours de l'essuie-tout propre pour nettoyer la
surface.
• Tout ce qui peut fondre (plastique, aluminium, sucre ou aliment à teneur élevée
en sucre).
• Produits de nettoyage pour travaux durs, produits anti-taches ou anti-rouille.
• Javellisant au chlore, ammoniaque, acide fluorhydrique ou tout autre produit de
nettoyage chimique. Ils risquent de décolorer la surface de cuisson ou
d'entraîner des réactions en profondeur.
• Éponges, linges ou torchons. Servez-vous toujours d'essuie-tout propre pour
nettoyer la surface de cuisson. La charpie ou saleté restant sur la surface de
cuisson après nettoyage à l'éponge ou avec un linge pourrait brûler et entraîner
une décoloration.
Nettoyage des grilles de brûleur, des cuvettes de brûleur, de
l'ensemble de couvercle et de la base de brûleur
Les grilles de brûleur, les cuvettes, l'ensemble de brûleur et la base de brûleur
doivent être nettoyés régulièrement. Les gicleurs doivent être propres pour empêcher
un mauvais allumage et une flamme inégale. Voyez ci-dessous.
Grille de brûleur
Nettoyage des grilles de brûleur
Assurez-vous que les grilles et les brûleurs sont froids avant d'y placer la
main, un gant isolant, des linges de nettoyage ou tout autre substance. Les grilles
en fonte peuvent être lavées dans de l'eau savonneuse chaude. Rincez-les bien et
séchez-les avec un linge. Ne les placez pas sur la table de cuisson si elles sont encore
humides. Assurez-vous que les grilles sont bien placées sur les brûleurs.
Pour enlever la nourriture cuite sur les grilles, placez-les dans un récipient fermé ou
un sac en plastique, ajoutez 1/4 de tasse d'ammoniaque et faites tremper pendant
30 minutes. Lavez, rincez bien et séchez. Un produit de nettoyage abrasif peut être
utilisé pour les taches rebelles.
8
Page 21

Nettoyage général (suite)
Remarque: L'ensemble de couvercle
comprend toutes les pièces du brûleur
scellé (couvercle, cuvette [certains
modèles], anneau [certains modèles],
pattes de positionnement, base et
électrode).
Couvercle de brûleur
Patte de
positionnement
Étrangleur pour
gaz naturel
Anneau
Orifice en
Cuvette
de brûleur
(incorporée)
laiton (ne
pas enlever)
Ouverture
de gaz
Nettoyage de la zone concave
Les cuvettes de propreté carrées sont fixées à la surface de cuisson et ne sont pas
amovibles. La cuvette de propreté forme une zone en retrait autour de chaque
brûleur. En cas de renversement dans l'une des quatre zones, épongez avec un linge
absorbant, rincez bien avec un linge humide et propre puis essuyez.
Retrait de l'ensemble de couvercle
L'ensemble comprend un couvercle et un anneau. Enlevez d'abord le couvercle
puis l'anneau. Ne faites pas fonctionner les brûleurs sans l'ensemble de
couvercle et l'anneau en place.
Nettoyage du couvercle et de l'anneau
Utilisez un tampon à récurer rempli de savon ou un produit de nettoyage légèrement
abrasif. Au besoin, recouvrez les taches rebelles pendant 30 minutes d'un essuietout trempé dans l'ammoniaque. Frottez doucement avec un tampon à récurer
rempli de savon et rincez avec un mélange d'eau propre et de vinaigre. Essuyez.
Enlevez tous les produits de nettoyage sinon l'émail risque de s'abîmer lorsqu'il sera
chauffé.
Nettoyage de la base du brûleur et des orifices de sortie du gaz
Les orifices (ou fentes) autour de la base des brûleurs doivent être nettoyés
régulièrement. Servez-vous d'un fil fin ou d'une aiguille. Soyez prudent pour ne pas
endommager l'électrode. Si le linge de nettoyage se prenait dans l'électrode, il
pourrait la casser ou l'endommager. Si l'électrode est endommagée ou cassée, le
brûleur ne s'allumera pas parce que l'étincelle n'aura pas lieu. Il sera toujours
possible d'allumer avec une allumette.
Base de
brûleur
Électrode
N'endommagez pas
l'électrode en remettant en place le
couvercle du brûleur. Ceci pourrait
retarder l'allumage ou même l'empêcher.
Les additions, change-
ments ou conversions nécessaires pour
que cet appareil soit conforme à des
besoins précis doivent être effectués par
un dépositaire Frigidaire ou par une
agence qualifiée.
Pour permettre une bonne circulation du gaz et l'allumage du brûleur, NE LAISSEZ
PAS DE RENVERSEMENTS, NOURRITURE, PRODUITS DE NETTOYAGE OU AUTRES
PRODUITS PÉNÉTRER DANS LES ORIFICES DE SORTIE DU GAZ. Le gaz doit circuler
librement par la petite lumière de l'orifice en laiton pour que le brûleur s'allume
correctement. Si l'orifice est souillé ou obstrué, utilisez un fil ou une aiguille fine pour
le nettoyer. Laissez TOUJOURS l'ensemble de couvercle en place lorsque le brûleur
est utilisé.
Remise en place de l'ensemble de couvercle et d'anneau
Assurez-vous que l'ensemble est parfaitement sec avant de le remettre en place sur
le brûleur.
1. Remettez l'anneau (certains modèles).
2. Trouvez les pattes de positionnement du couvercle et placez-les dans les fentes
de la base. Assurez-vous que chaque couvercle est correctement aligné et de
niveau.
3. Allumez le brûleur. S'il ne s'allume pas après nettoyage, prenez contact avec
un réparateur autorisé. Ne réparez pas vous-même un brûleur scellé.
9
Page 22

Liste de contrôle antipanne
Avant d'appeler un agent de service après-vente, consultez cette liste. Elle pourra
vous économiser temps et argent. Cette liste décrit des situations courantes qui ne
sont causées ni par un défaut de fabrication ni par un matériau défectueux.
PROBLÈME
Les brûleurs de surface ne s'allument
pas.
La flamme n'est pas complète autour
des brûleurs.
La flamme est orange.
CAUSE POSSIBLE/SOLUTION
La commande n'est pas complètement sur «LITE» (ALLUMAGE). Appuyez sur la
commande et tournez-la sur «LITE» jusqu'à allumage du brûleur, puis tournez la
commande à la dimension de flamme voulue.
Les orifices des brûleurs sont obstrués. Nettoyez les brûleurs. Voyez Nettoyage des
grilles de brûleur, des cuvettes de brûleur, de l'ensemble de couvercle et de la base
de brûleur sous Nettoyage général. Le brûleur étant éteint, débouchez les orifices
à l'aide d'un fil métallique fin ou d'une aiguille.
Panne de courant. Vérifiez les lumières de la maison. Appelez la compagnie
d'électricité de la région. Les brûleurs de surface peuvent être allumés à la main.
Voyez Commandes des brûleurs de surface dans ce guide.
L'arrivée de gaz est fermée. Ouvrez-la.
Les orifices des brûleurs sont obstrués. Le brûleur étant éteint, débouchez les orifices
à l'aide d'un fil métallique fin ou d'une aiguille.
De l'humidité reste après le nettoyage. Ventilez légèrement la flamme et laissez le
brûleur fonctionner jusqu'à ce que la flamme soit complète. Séchez soigneusement
les brûleurs (voyez le chapitre Nettoyage général).
Des particules de poussière se trouvent dans la conduite principale. Laissez le brûleur
fonctionner quelques minutes jusqu'à ce que la flamme devienne bleue.
Air salé dans zones côtières. Une flamme légèrement orange est inévitable.
10
Page 23

Notes
11
Page 24

GARANTIE (pour le Canada)
TABLE DE CUISSON À GAZ
GARANT:
FRIGIDAIRE HOME PRODUCTS
7075 Ordan Drive
Mississauga, Ontario
L5T 1K6
Cette table de cuisson est un produit qui porte l'une des
marques de Frigidaire Home Products.
DURÉE DE LA GARANTIE:
La premièr et la deuxième année suivant la date d'achat par
le propriétaire initial.
La troisième à la dixième année suivant la date d'achat par le
propriétaire initial.
LA GARANTIE S'APPLIQUE:
a ) Aux produits achetés et installés au Canada, pour l'usage personnel d'une seule famille.
b) Aux défauts dus ou consécutifs à la fabrication.
c) Aux produits portant un numéro de modèle et un numéro de série du fabriquant, lisibles.
d) Aux pièces de rechange seulement pendant la durée de la garantie initiale qui reste à courir.
Pour obtenir le service prévu par cette garantie, communiquez
avec votre détaillant, un dépositaire de service autorisé par
FRIGIDAIRE - PIÈCES ET SERVICE, ou:
FRIGIDAIRE - PIÈCES ET SERVICE
7075 Ordan Drive
Mississauga, Ontario L5T 1K6
Tél: (905) 565-9200
Fax: (905) 565-0937
LE GARANT, PAR L'ENTREMISE DE SON DÉPOSITAIRE DE
SERVICE AUTORISÉ:
Réparera ou remplacera gratuitement toutes les pièces
défectueuses.
Remplacera gratuitement les pièces défectueuses des brûleurs
scellés (excluant les frais de main-d'oeuvre pour le service et
l'installation).
LA GARANTIE NE S'APPLIQUE PAS:
a ) Aux dommages causés par le transport.
b) À la fourniture ni au remplacement des pièces en porcelaine et en verre, ni aux fusibles.
c) Aux pièces ni au service fournis ou obtenus par d'autres que FRIGIDAIRE - PIÈCES ET SERVICE ou un dépositaire de service
autorisé par FRIGIDAIRE - PIÈCES ET SERVICE.
d) Aux dommages ni aux défaillances résultant d'un usage abusif, incorrect ou commercial.
RESPONSABILITÉ DU CONSOMMATEUR/PROPRIÉTAIRE:
a ) Fournir la preuve de la date originale de l'achat au moyen d'une facture faisant état de la date d'achat.
b) Payer tous les frais nécessaires pour que l'appareil soit accessible aux fins de réparation.
c) Assurer une alimentation électrique adéquate et un raccordement électrique bien fait à celle-ci.
d) L'installation adéquate, le réglage exact des commandes et l'entretien du revêtement.
Cette garantie est en sus de toute garantie légale contenue dans toute législation applicable. Les conditions de cette garantie
ne sont pas destinées à exclure ou à limiter vos droits en vertu de ces lois. Le garant se réserve toutefois le droit de facturer les
frais de transport et de déplacement, lorsque la distance est supérieure à 48 kilomètres (30 milles) du dépositaire de sevice
autorisé par FRIGIDAIRE - PIÈCES ET SERVICE le plus proche.
Cette garantie, plus les garanties légales déjà mentionnées, sont les seules garanties fournies au consommateur/propriétaire
pour ce produit.
 Loading...