

Page 1
Use & Care Manual
Freestanding
Wine Cooler
Record Serial/Model Numbers 2
Safety Instructions
First Steps
Energy Saving Tips
Setting
the Temperature Control
Wine Cooler Features
Care and Cleaning
Warranty
2
3
4
4
4
5
6
READ AND SAVE THESE INSTRUCTIONS
Troubleshooting Guide
P/N: 241846000 (Mar 2007)
7 - 8
Page 2
SERIAL / MODEL NUMBERS
0
1
2
3
4
5
6
7
8
READ AND SAVE THESE INSTRUCTIONS
This Owner’s Guide provides specific operating instructions
for your model. Use your Wine Cooler only as instructed in
this guide. These instructions are not meant to cover every
possible condition and situation that may occur. Common
sense and caution must be practiced when installing,
operating, and maintaining any appliance.
Record Your Model and Serial Numbers
Record the model and serial numbers in the space provided
below. The serial plate is located on the upper left wall
inside the Wine Cooler.
Model Number:
Serial Number:
Purchase Date:
IMPORTANT SAFETY INSTRUCTIONS
READ ALL INSTRUCTIONS BEFORE USING
THIS WINE COOLER.
be plugged directly into a properly grounded threeprong receptacle. The receptacle must be installed in
accordance with local codes and ordinances. Consult a
qualified electrician. Do not use an extension cord or
adapter plug.
• If voltage varies by 10% or more, performance of your
wine cooler may be affected. Operating wine cooler with
insufficient power can damage the compressor.
• To prevent the wine cooler from being turned off
accidentically, do not plug unit into an outlet controlled
by a wall switch or pull cord.
• Do not pinch, knot, or bend the cord in any manner.
OTHER PRECAUTIONS
• Never unplug the wine cooler by pulling on the cord.
Always grip the plug firmly, and pull straight out from
the receptacle.
• To avoid electrical shock, unplug the wine cooler before
cleaning and before replacing a light bulb.
NOTE: Turning the temperature control to OFF turns off
the compressor, but does not disconnect the power to
the light bulb or other electrical components.
• Do not operate wine cooler in the presence of explosive
fumes.
FOR YOUR SAFETY
Do not store or use gasoline, or other flammable vapors and
liquids in the vicinity of this or any other appliance. Read
product labels for flammability and other warnings.
CHILD SAFETY
• Destroy carton, plastic bags, and any exterior wrapping
material immediately after the wine cooler is unpacked.
Children should never use these items to play. Cartons
covered with rugs, bedspreads, plastic sheets or
stretch wrap may become airtight chambers, and can
quickly cause suffocation.
• Remove all staples from the carton. Staples can cause
severe cuts, and destroy finishes if they come in
contact with other appliances or furniture.
• An empty, discarded ice box, refrigerator, or freezer is a
very dangerous attraction to children.
Remove the door(s) of any appliance that is not in use,
even if it is being discarded.
ELECTRICAL INFORMATION
These guidelines must be followed to ensure that safety
mechanisms in the design of this wine cooler will
operate properly.
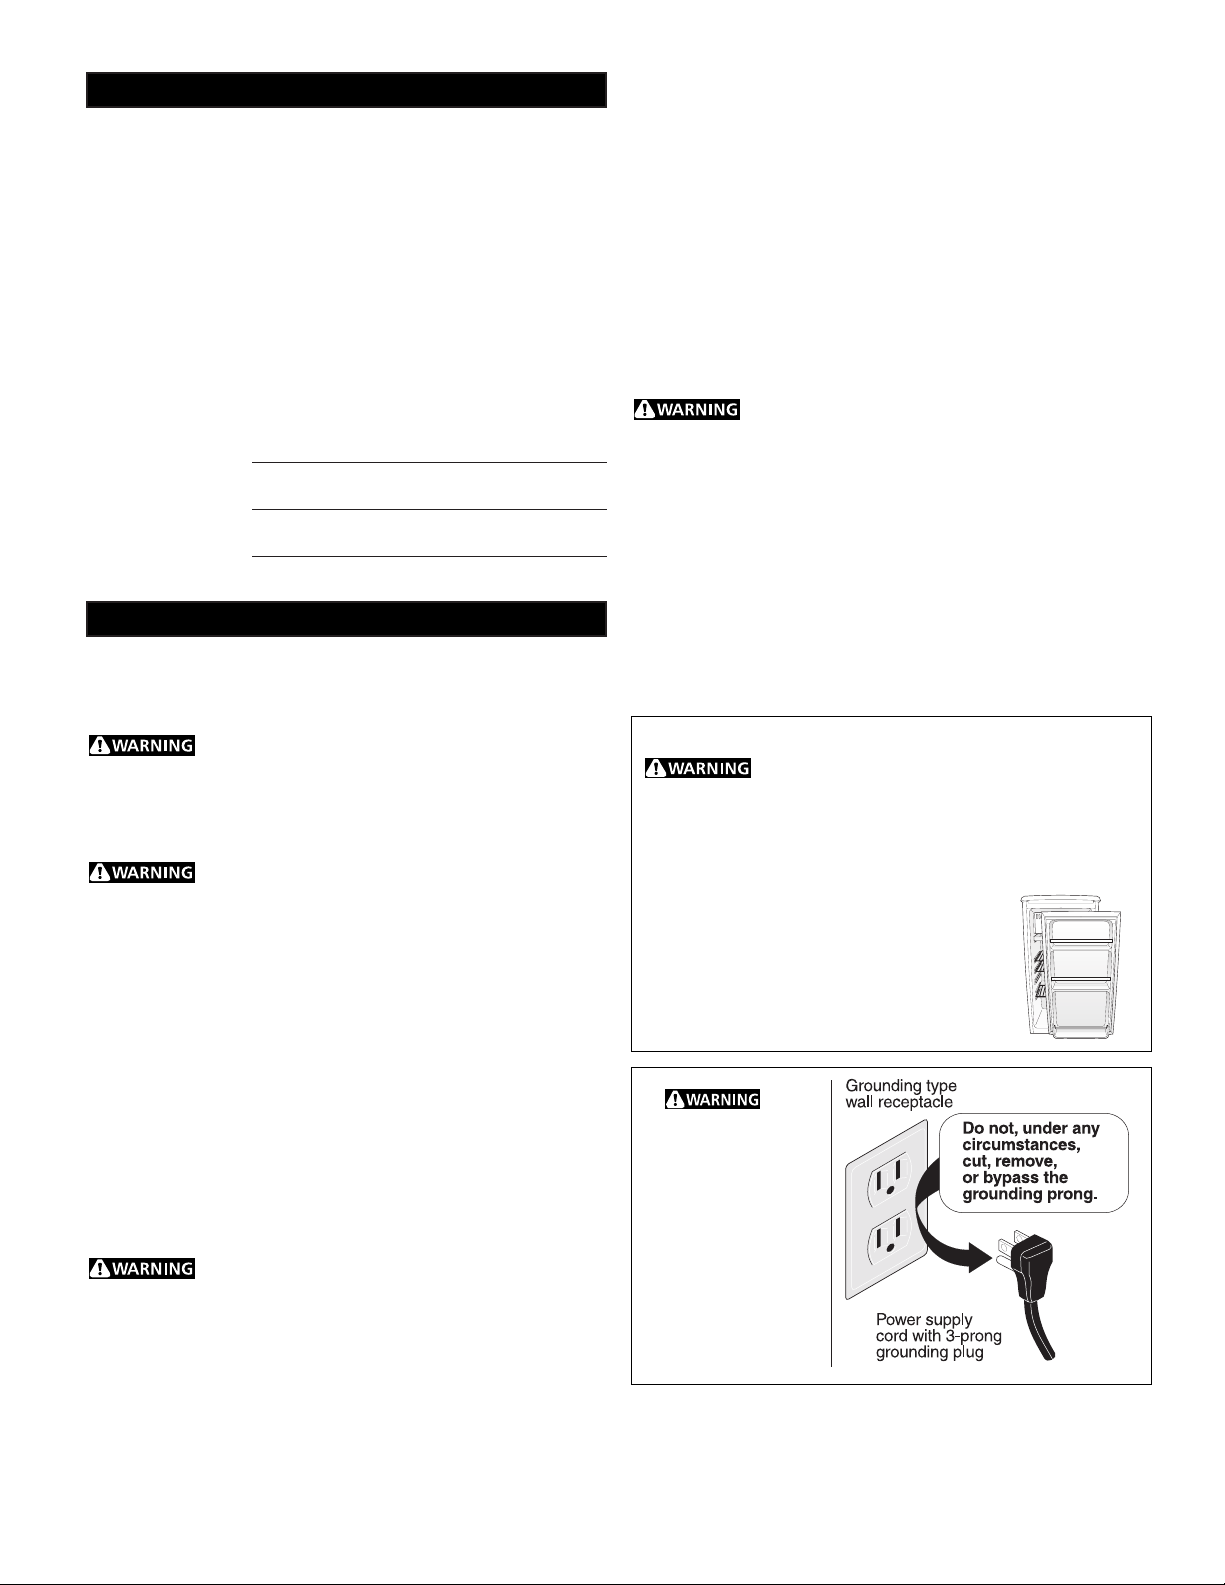
Proper Disposal of Your Wine Cooler
Risk of child entrapment. Child entrapment
and suffocation are not problems of the past. Junked or
abandoned Wine Coolers are still dangerous — even if they
will sit for "just a few days." If you are getting rid of your old
wine cooler, please follow the instructions below to help
prevent accidents.
BEFORE YOU THROW AWAY YOUR OLD
WINE COOLER:
• Remove doors.
• Leave shelves in place so children may not
easily climb inside.
Avoid fire hazard or
electric shock. Do
not use an
extension cord or an
adapter plug. Do not
remove any prong
from the power cord.
• Wine Cooler must be plugged into its own 115 Volt,
60 Hz., AC only electric outlet. The power cord of the
appliance is equipped with a three-prong grounding
plug for your protection against shock hazards. It must
2
Page 3
FIRST STEPS
This Owner’s Guide provides specific operating instructions
for your model. Use the refrigerator only as instructed in this
Owner’s Guide. Before starting the wine cooler, follow
these important first steps.
INSTALLATION
• Choose a place that is near a grounded electrical outlet.
Do Not use an extension cord or an adapter plug.
• For optimal performance, it is recommended that you
install the wine cooler where the ambient temperature is
between 70 and 78 degrees fahrenheit.
•
Allow space around the unit for good air circulation.
Leave a 2 inch space on the back and sides of the
wine cooler for adequate circulation.
• Be sure the wine cooler stays in the upright position
during transport.
• Keep the wine cooler from any hazardous or combustible
agents.
NOTE: The exterior walls of the wine cooler may become
quite warm as the compressor works to transfer heat from
the inside. Temperatures as much as 30° F warmer than
room temperature can be expected. For this reason it is
particularly important in hotter climates to allow enough
space for air circulation around your wine cooler.
LEVELING
The wine cooler must have all bottom corners resting firmly
on solid floor. The floor must be strong enough to support a
fully loaded wine cooler. NOTE: It is Very Important for
your wine cooler to be level in order to function properly. If
the wine cooler is not leveled during installation, the door
may be misaligned and not close or seal properly, causing
cooling, frost, or moisture problems.
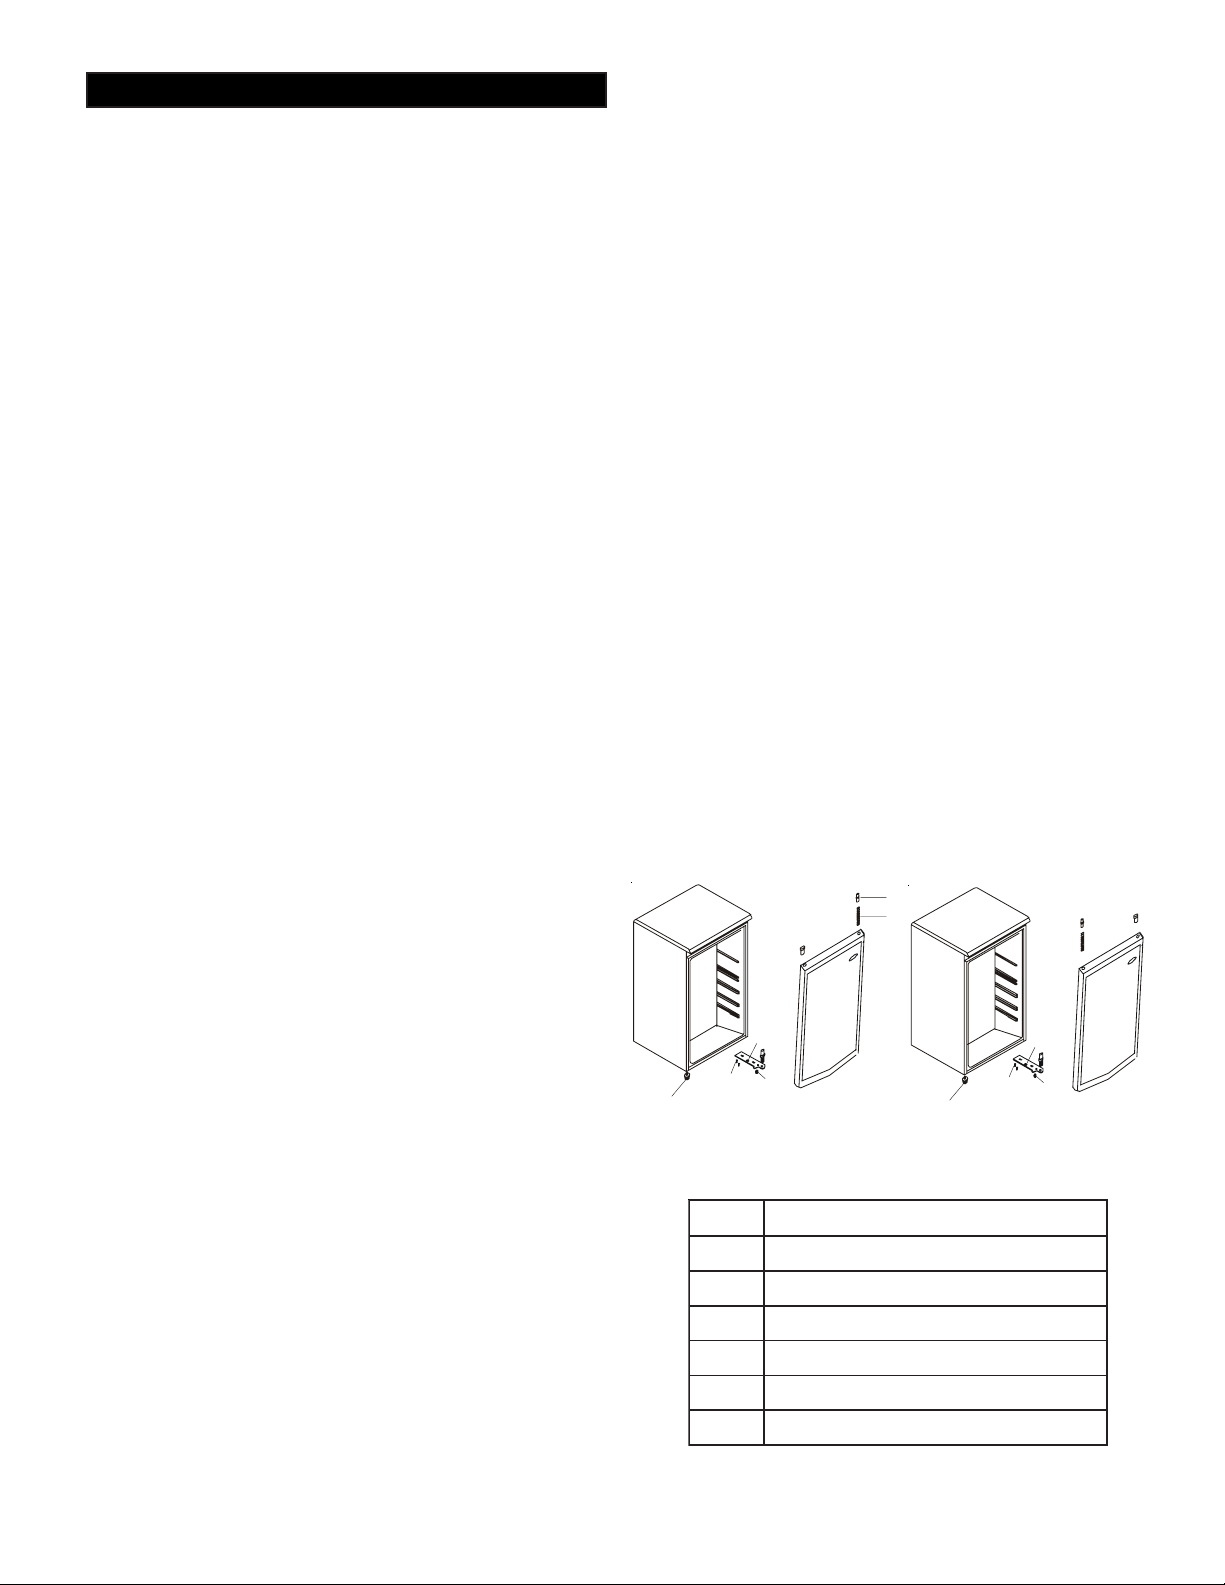
REVERSING THE DOOR SWING
The wine cooler glass door can be opened from left to right
and vice versa. Should you desire to change the opening
direction, please follow these instructions.
NOTE: All parts removed must be saved to do the
reinstallation of the door.
1. Remove the two screws (1) that hold the lower hinge
(2)(right side) to the frame. Also remove the screw-type
leveling front leg (3).
2. Remove the left front leg (4) and transfer it to the right
side.
3. Lift the door and place it on a padded surface to prevent
scratching it. Make sure to remove the spring (5) located
inside the upper right hole of the door, and the upper right
side pin (6).
4. Remove the plug button (7) from the upper left hole of
the door and transfer it to the uncovered hole on the right
side. Be sure to press the button firmly into the hole.
5. Insert the upper pin (6), previously removed from the
right side in step 3, and transfer it to the hole on the left
side of the top frame.
6. Insert the spring (5), previously removed from step
3,inside the upper left side hole of the door.
7. Set the door in its place making sure the pin (6) enters
the bushing at the lower upper frame section (hole).
8. While holding the door in the closed position, secure the
left hinge (2) previously removed in step 1.
9. Insert the 2 screws (1) previously removed in step 1 and
tighten them.
6
7
5
6
5
7
To Level Your Wine Cooler:
After removing all interior and exterior packaging materials,
use a carpenter’s level to level the wine cooler from front-toback. Adjust the leveling legs in front, ½ bubble higher, so
that the door closes easily when left halfway open.
CLEANING
• Wash any removable parts of the wine cooler interior,
and exterior with mild detergent and warm water. Wipe
dry. Do not use harsh cleaners on these surfaces.
• Do not use razor blades or other sharp instruments,
which can scratch the appliance surface when removing
adhesive labels. Any glue left from the tape can be
removed with a mixture of warm water and mild detergent, or touch the residue with the sticky side of tape
already removed. Do not remove the serial plate.
Important Safeguards: Do not store food in your wine
cooler as interior temperature may not get cool enough to
prevent spoilage. In summer months or areas of high
humidity, the glass door may build up moisture. To
remove the moisture, wipe it away.
2
1
4
Position prior to door reversal
3
FIGURE 1
1swercSegniHrooD
2egniHrooDrewoL
3sgeLgnileveLtnorF
4geLtnorFtfeL
5gnirpSemarFrooD
6niPemarFrooD
7ediStfeL)emarFro
3
2
1
4
Position prior to door reversal
oD(gulPegniH
3
FIGURE 2
Page 4

ENERGY SAVING TIPS
WINE COOLER FEATURES
• Install the wine cooler in the
coolest part of the room, out of
direct sunlight and away from
heating ducts or registers. Do not
place the wine cooler next to heatproducing appliances such as a
range, oven or dishwasher.
• Level the wine cooler so the door close tightly.
• Do not overcrowd the wine cooler or block cold air vents.
Doing so causes the wine cooler to run longer and use
more energy. Shelves should not be lined with aluminum
foil, wax paper or paper toweling. Liners interfere with
cold air circulation, making the wine cooler less efficient,
which could cause food spoilage.
• Cover foods and wipe containers dry before placing them
in the wine cooler. This cuts down on moisture build-up
inside the unit.
• Organize the wine cooler to reduce door openings.
Remove as many items as needed at one time and close
the door as soon as possible.
SETTING THE TEMPERATURE CONTROL
COOL DOWN PERIOD
ADJUSTABLE INTERIOR SHELVES
Multi-position adjustable interior shelves can be moved to
any position for larger or smaller packages. The shipping
spacers that stabilize the shelves for shipping should be
removed and discarded.
INTERIOR LIGHT (Some models)
The light comes on automatically when the door is opened.
To replace the light bulb, turn the temperature control to
OFF and unplug the electrical cord. Replace the old bulb
with a bulb of the same wattage.
1
7
2
3
4
5
For safe food storage, allow 4 hours for the wine cooler to
cool down completely. The wine cooler will run continuously
for the first several hours.
TEMPERATURE CONTROL
1. The wine cooler can be operated by adjusting the
temperature control knob to the various settings: OFF,
NORMAL, MIN or MAX.
2. Note that by turning the temperature control knob to
OFF, it only stops the cooling cycle but does NOT turn
off the wine cooler.
3. If the wine cooler is unplugged from the power supply,
you must wait 3 to 5 minutes before restarting the wine
cooler.
The temperature range MIN and MAX is 46° - 60° F, which
is ideal for wine storage.
1hctiwsthgillanretnI
2bonklortnocerutarepmeT
3revocpoT
4emarfroodnedoowelbisreveR
5roodssalG
6sgelgnilevelelbats
7kcareniW
ujdA
6
4
Page 5

CARE AND CLEANING
WARNING
disconnect the wine cooler from the power supply. Failure
to do so could result in electrical shock or personal injury.
1. Push the light switch(4) OFF.
2. Remove the light bulb cover (1) by gently pulling on
the bottom end of the cover.
3. Unscrew the bulb (2).
4. Replace with a 10 watt bulb of the same shape
and size.
5. Replace the light cover.
6. Push the light switch (4) ON.
2
Before removing the light bulb,
3
CARE OF PLASTIC PARTS
• Be sure and protect the door gasket. It should be kept
clean at all times.
• If the plastic parts in the wine cooler remain
contaminated by oil (animal or vegetable) for a long
period of time, they will age and crack easily. Please
clean them on a regular basis.
This part is used to hold liquid
and juice to prevent damage to
the door gasket. Please keep
this area clean and dry.
VACATION AND MOVING TIPS
1
4
1revoCbluB
2bluB
3gnisuoH
4hctiwSthgiL
CLEANING THE WINE COOLER
• Before cleaning, turn the temperature control to OFF,
unplug the wine cooler and remove the bottles.
• Clean your wine cooler once every two months.
Inside:Wash inside surfaces of the wine cooler with a
solution of two tablespoons of baking soda in one quart
(1.136 litres) warm water. Rinse and dry. Wring excess
water out of the sponge or cloth when cleaning in the
area of the controls, or any electrical parts.
Wash the removable parts with the baking soda solution
mentioned above, or mild detergent and warm water.
Rinse and dry. Never use metallic scouring pads,
brushes, abrasive cleaners, or alkaline solutions on any
surface. Do not wash removable parts in a dishwasher.
Vacations:
If the wine cooler will not be used for several months:
• Remove all wine bottles and unplug the power cord.
• Clean and dry the interior thoroughly.
• Leave the wine cooler door open slightly, blocking it open
if necessary, to prevent odor and mold growth.
Moving: When moving the wine cooler, follow these
guidelines to prevent damage:
• Disconnect the power cord plug from the wall outlet.
• Remove wine bottles and clean the wine cooler.
• Secure all loose items by taping them securely in place
to prevent damage.
• In the moving vehicle, secure wine cooler in an upright
position to prevent movement. Also protect outside of
WARNING
door open while on vacation, make
certain that children cannot get into the
wine cooler and become entrapped.
If leaving the wine cooler
Outside: Wash the cabinet with warm water and mild
liquid detergent. Rinse well and wipe dry with a clean
soft cloth.
5
Page 6

Compact Appliance Warranty Information
Your appliance is covered by a one year limited warranty. For one year from your original date of
purchase, Electrolux will pay all costs for repairing or replacing any parts of this appliance that prove to
be defective in materials or workmanship when such appliance is installed, used and maintained in
accordance with the provided instructions.
Exclusions
This warranty does not cover the following:
1. Products with original serial numbers that have been removed, altered or cannot be readily determined.
2. Product that has been transferred from its original owner to another party or removed outside the USA or
Canada.
3. Rust on the interior or exterior of the unit.
4. Products purchased "as-is" are not covered by this warranty.
5. Food loss due to any refrigerator or freezer failures.
6. Products used in a commercial setting.
7. Service calls which do not involve malfunction or defects in materials or workmanship, or for appliances
not in ordinary household use or used other than in accordance with the provided instructions.
8. Service calls to correct the installation of your appliance or to instruct you how to use your appliance.
9. Expenses for making the appliance accessible for servicing, such as removal of trim, cupboards, shelves,
etc.,which are not a part of the appliance when it is shipped from the factory.
10. Service calls to repair or replace appliance light bulbs, air filters, water filters, other consumables, or
knobs, handles, or other cosmetic parts.
11. Surcharges including, but not limited to, any after hour, weekend, or holiday service calls, tolls, ferry trip
charges, or mileage expense for service calls to remote areas, including the state of Alaska.
12. Damages to the finish of appliance or home incurred during installation, including but not limited to floors,
cabinets, walls, etc.
13. Damages caused by: services performed by unauthorized service companies; use of parts other than
genuine Electrolux parts or parts obtained from persons other than authorized service companies; or
external causes such as abuse, misuse, inadequate power supply, accidents, fires, or acts of God.
14. Labor costs after ninety (90) days from your original date of purchase incurred for product repair or replacement
as provided herein for carry-in appliances.
DISCLAIMER OF IMPLIED WARRANTIES; LIMITATION OF REMEDIES
CUSTOMER’S SOLE AND EXCLUSIVE REMEDY UNDER THIS LIMITED WARRANTY SHALL BE PRODUCT
REPAIR OR REPLACEMENT AS PROVIDED HEREIN. CLAIMS BASED ON IMPLIED WARRANTIES,
INCLUDING WARRANTIES OF MERCHANTABILITY OR FITNESS FOR A PARTICULAR PURPOSE, ARE
LIMITED TO ONE YEAR OR THE SHORTEST PERIOD ALLOWED BY LAW, BUT NOT LESS THAN ONE YEAR.
ELECTROLUX SHALL NOT BE LIABLE FOR CONSEQUENTIAL OR INCIDENTAL DAMAGES SUCH AS
PROPERTY DAMAGE AND INCIDENTAL EXPENSES RESULTING FROM ANY BREACH OF THIS WRITTEN
LIMITED WARRANTY OR ANY IMPLIED WARRANTY. SOME STATES AND PROVINCES DO NOT ALLOW THE
EXCLUSION OR LIMITATION OF INCIDENTAL OR CONSEQUENTIAL DAMAGES, OR LIMITATIONS ON THE
DURATION OF IMPLIED WARRANTIES, SO THESE LIMITATIONS OR EXCLUSIONS MAY NOT APPLY TO
YOU. THIS WRITTEN WARRANTY GIVES YOU SPECIFIC LEGAL RIGHTS. YOU MAY ALSO HAVE OTHER
RIGHTS THAT VARY FROM STATE TO STATE.
If You Need
Service
This warranty only applies in the USA and Canada. In the USA, your appliance is warranted by Electrolux Major Appliances
North America, a division of Electrolux Home Products, Inc. In Canada, your appliance is warranted by Electrolux Canada
Corp. Electrolux authorizes no person to change or add to any obligations under this warranty. Obligations for service and
parts under this warranty must be performed by Electrolux or an authorized service company. Product features or
specifications as described or illustrated are subject to change without notice.
USA
1.800.944.9044
Electrolux Major Appliances
North America
P.O. Box 212378
Augusta, GA 30907
Keep your receipt, delivery slip, or some other appropriate payment record to establish the warranty period
should service be required. If service is performed, it is in your best interest to obtain and keep all receipts.
Service under this warranty must be obtained by contacting Electrolux at the addresses or phone
numbers below.
Canada
1.800.668.4606
Electrolux Canada Corp.
5855 Terry Fox Way
Mississauga, Ontario, Canada
L5V 3E4
6
Page 7

GNITOOHSELBUORT
EDIUG
MELBORPESUACNOITCERROC
NOITAREPORELOOCENIW
.ecnailppasihtnislairetam
tsilsihT.esnepxednaemituoyevasyamtI.tsilsihtweiver,ecivresrofgnillacerofeB
serehttoneratahtsecnerucconommocsedulcni
ropihsnamkrowevitcefedfotlu
.nurtonseodrelooCeniW
.gnoloot
•relooCeniWaotnideggulpsi
•relooCeniWebtonyam
rohcumootsnurrelooCeniW
.toh
•relooCeniWneebyltnecersah
•relooCeniWebyamrood
.wol
•relooCeniW,ytridsiteksag
tluafdnuorgasahtahttiucric
.tpurretni
ehtnisilortnocerutarepmeT•
.noitisopFFO
ebyamgulpro,nideggulp
.esool
deppirtronwolbesufesuoH•
.rekaerbtiucric
.egatuorewoP•
uoromooR•
.emit
.nepoylthgils
sirehtaewedist
fodoireparofdetcennocsid
tohromrawfostnuomaegraL•
rotsneebevahdoof
ootdenepoerasrooD•
.gnolootroyltneuqerf
.yltnecerde
oottessilortnoCerutarepmeT•
.dettifylroopro,dekcarc,nrow
eeS• lortnoCerutarepmeTehtg
nitteS .noitceS
.r
ekaerbtiucric
ehtroflamrons'tI•relooCeniWrednuredra
.snoitidnoceseht
ehtrofsruoh4sekattI•relooCeniWnwodloocot
.yletelpmoc
esuaclliwdoofmraW•relooCeniWeht
ehtgniretneriamraW•relooCeniW.eromnurottisesuac
dnepO
eeS• "SMELBORPROOD" noitceS .
•lareveswollA.gnittesremrawaotbonklortnocnruT
rofsruoh
esuacrelooCeniWniatniamotredroniregnolnurot
metderised
.netfosselsroo
.erutarep
.dehcaersierutarepmetderised
.ezilibatsoterutarepmeteht
ehttuobaerusnuerauoyfI.tiucricrehtonaesU•
.naicinhcetdeifitrecaybdekcehctievah,teltuo
.teltuootnidehsupylthgitsigulperusnE•
teseR.esufyaled-emitpma51ahtiwesufecalper/kcehC•
.ynapmoCcirtcelElacolllaC.sthgilesuohkcehC•
hkrowot
litnueromnurot
lliwlaesroodehtniskaeL.teksagegnahcronaelC•
ottessilortnoCerutarepmeT•
relooCeniWroiretnIrelooCeniWroiretnI
relooCeniWroiretnIrelooCeniWroiretnI
relooCeniWroiretnI
ocootsierutarepmet.dlocootsierutarepmet
.dlocootsierutarepmet.dlocootsierutarepmet
.dl
.dlocootsierutarepmet
relooCeniWroiretnI
.mrawootsierutarepmet
slanretxerelooCeniW
ecafru
.mrawsierutarepmet
.wol
.mraw
oD•
.ylreporp
.ylt
necer
.emit
remraw
o
"SMELBORPROOD""SMELBORPROOD".noitceS
"SMELBORPROOD"
.ezilibatsoterutarepme
.ezilibatsoterutarepmeteht
.netfosselroodehtnepO.
dahsahrelooCeniWehtlitnutiaW•
.tenibacrelooCeniWehtedisnimorftaeh
tehtrof
oottessilortnoCerutarepmeT•
sirognolootnepotpeksiro
.yltneuqerfootdenepo
gnitaesebtonyamrooD•
tohromrawfostnuomaegraL•
derotsneebevahyamdoof
neebyltnecersahrelooCeniW•
fodoireparofdetcennocsid
sllawrelooCeniWlanretxeehT•
F°03sahcumsaebnac
.erutarepmetmoornaht
nocnruT•
denepo
eeS•"SMELBORPROOD""SMELBORPROOD"
.erutarepmetdetceles
sruohlareveswollA.gnittesremrawaotlortnocehtnruT•
rofsruohlareveswollA.gnittesredlocaotlort
siroodehtemityreverelooCeniWehtsretneriamraW•
stihcaerotecnahca
.yletelpmocnwodloocotsruoh4seriuqerrelooCeniW•
refsnartotskrowrosserpmocehtelihwlamronsisihT•
ESIONDNADNUOS
revenehwsleveldnuosreduoL
.nosirelooCeniW
nehwsleveldnuosregnoL
.nosemocrosserpmoc
telbatserom
.rosserpmoc
areporelooceniW•
.elcycNOeht
evahsrelooceniwnredoM•
dnayticapacegarotsdesaercni
.serutarepme
ycneiciffehgihaeriuqeryehT
rehgihtaset
fotratsehtgnirudserusserp
.roiretni
tseunitnocrotaregirfer
.nuro
,wolsilevelesiongnidnuorrusehtnehW.lamronsisihT•
ehtsl
ooctielihwgninnurrosserpmocehtraehthgimuoy
saraeppasidroffolevellliwdnuoS.lamronsisihT•
7
Page 8

MELBORPESUACNOITCERROC
(ESIONDNADNUOS
).tnoC
moornehwsnurnaF
.F°54wolebsierutarepmet
dnuosgnikcarcrognippoP
.nosemocrosserpmocnehw
.sepip
,dnuosgnilgrugrognilbbuB
.gniliobretawekil
.esiongnilttarrognitarbiV
.ylthgilsdevom
.llaw
.dnuoSgnippanS
sahtatsomrehtroiretxE•
.nafdnaretaehehtdetavitca
noisnapxeogrednustraplateM•
retawtohnisa,noitcartnocdna
loocotdesu(tnaregirfeR•
icsi)relooCeniW
gnitalucr
.metsysehttuohguorht
tI.leveltonsirelooCeniW•
inehwroolfehtnoskcor
sit
ehtgnihcuotsirelooCeniW•
ehtgninrutlortnoCdloC•
.ffodnanorelooCeniW
.lamronsisihT•
saraeppasidroffolevellliwdnuoS.lamronsisihT•
.nurotseunitnocrelooCeniW
.lamronsisihT•
ehtni"gnileveL"otrefeR.tinuehtleveL• sp
.noitceS
ehtni"gnileveL"otrefeR spetStsriF .noitce
.lamronsisihT•
S
etStsriF
.ylthgilsrelooCeniWevomrorelooCeniWehtleveleR•
RELOOCENIWEDISNITSORF/ERUTSIOM/RETAW
foedisninosmroferutsioM
.sllawrotaregirfer
.ylreporp
.dimuhdnatohsirehtaeW•
gnitaesebtonyamrooD•
tnepotpeksirooD•
ro,gnoloo
.yltneuqerfootdeneposi
"eeS• SMELBORPROOD .noitceS"
.lamronsisihT•
.netfosselroodehtnepO•
RELOOCENIWEDISTUOTSORF/ERUTSIOM/RETAW
foedistuonosmroferutsioM
.rotaregirfer
snimorf
.edistuo
gnitaesebtonyamrooD•
riadlocehtgnisuac,ylreporp
otrelooCeniWehtedi
morfriatsiommrawteem
"eeS• SMELBORPROOD .noitceS"
RELOOCENIWNIRODO
.rotaregirfernisrodO
.denaelcebotsdeenroiretnI• gnikabdna,retawmraw,egnopshtiwroiretninaelC•
.ados
SMELBORPROOD
.esolctonlliwrooD
.ylthgilsdevom
tI.leveltonsirelooCeniW•
sitinehwroolfehtnoskcor
.noitceS
ehtni"gnileveL"otrefeR.roodehtngilasim spetStsriF
dnaerauqsfotuotenibacehtecrofnacnoitidnocsihT•
NOTONSIBLUBTHGIL
.notonsiblubthgiL
.relooCeniWeht
.tuodenrubsiblubthgiL•
serutaeFrelooC .noitceS
gnihcaersitnerruccirtceleoN•
"eeS•
RELOOCENIW
ehtni"thgiLroiretnI"rednusnoitceridwolloF• eniW
NOITAREPO .noitceS"
8
 Loading...