

Page 1
DRYER
Owner's Guide
Table of Contents
Important Safety Instructions..........................................................2
Drying Procedures............................................................................3
Features.............................................................................................3
Common Drying Problems..............................................................4
Care and Cleaning...........................................................................4
Avoid Service Checklist...................................................................5
Warranty...........................................................................................6
Back Cover....................................................................................... 8
Product Registration
Thank you for choosing this
dryer. This owner's guide will
explain proper operation and care.
Register Your Product
The self-addressed PRODUCT
REGISTRATION CARD should be
filled in completely, signed and
returned.
Read and Save These Instructions
Record Your Model and Serial Numbers
Record below the model and serial numbers found on the dryer serial plate
located on the left side of the door opening. Keep these numbers for future
reference.
Model Number:
Serial Number:
Purchase Date:
P/N 134671200A (0606)
Page 2
or to prevent property damage, personal injury or loss of life.
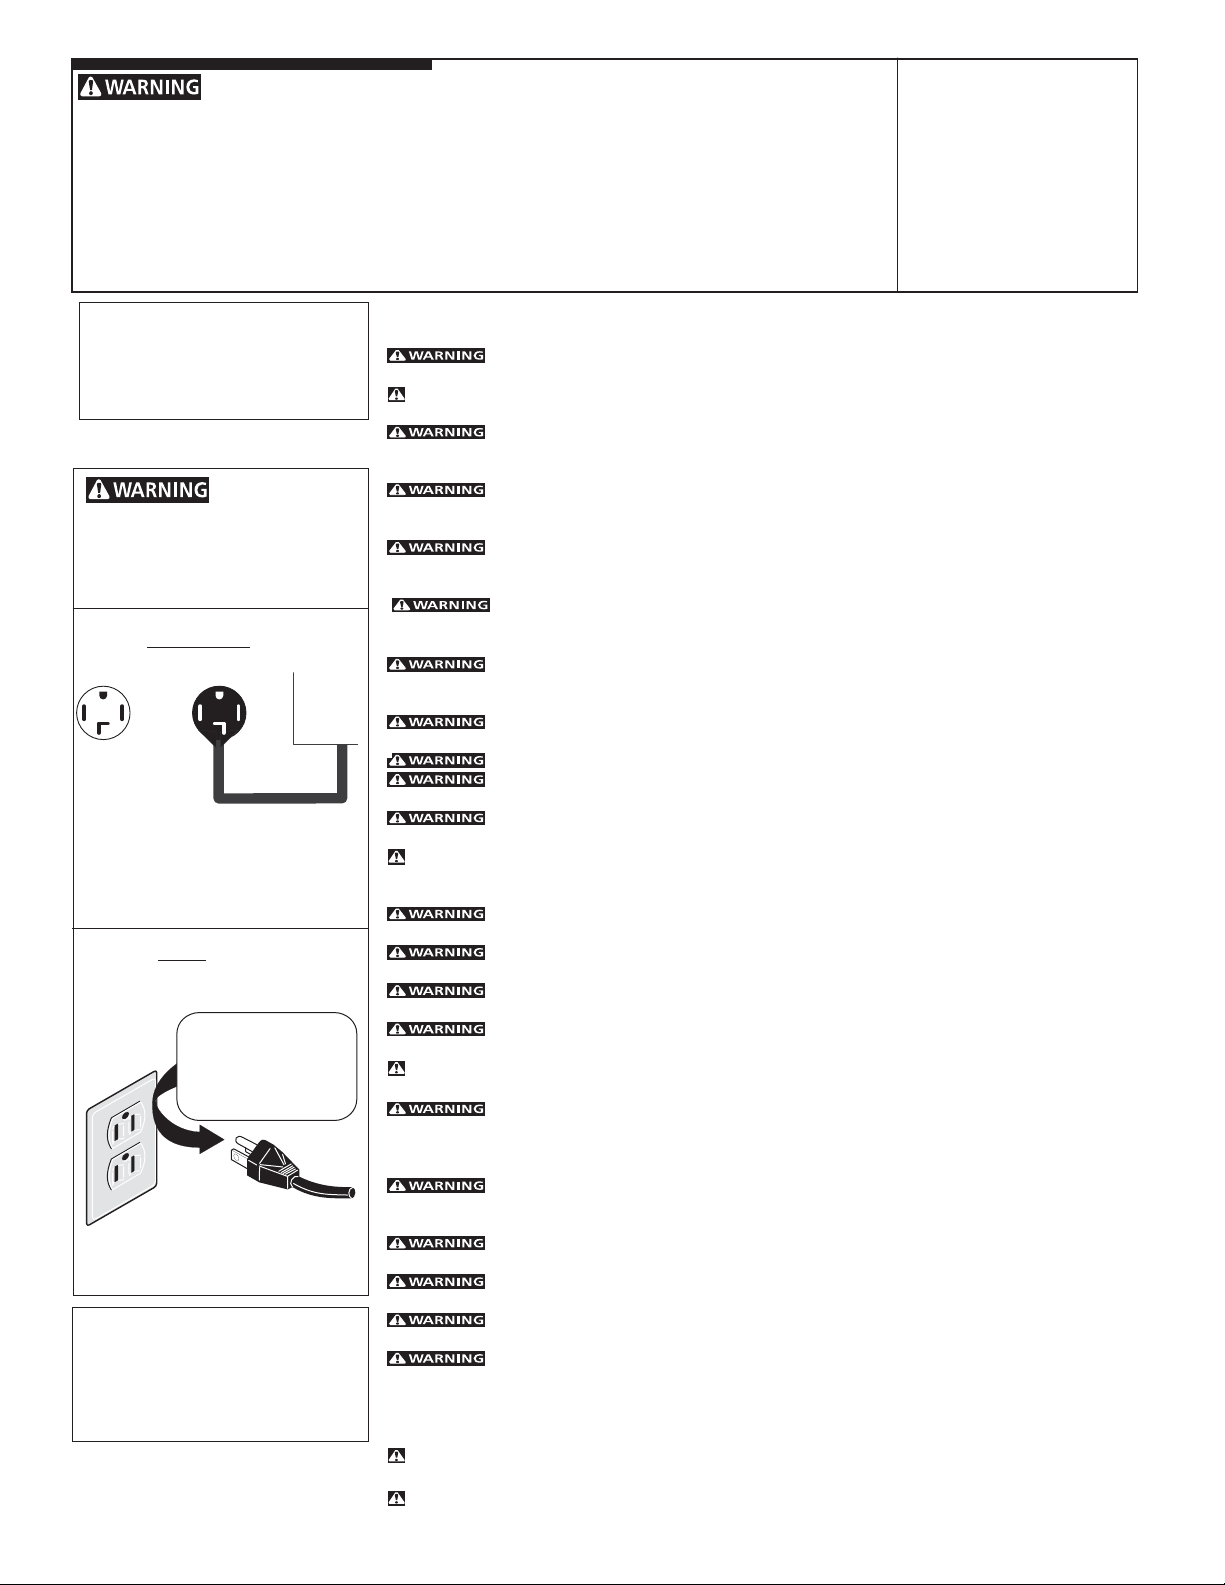
Grounding type
w
grounding plug
- Do not store or use gasoline or other flammable vapors and liquids in the vicinity of this or any other appliance.
- WHAT TO DO IF YOU SMELL GAS:
Installation and service must be performed by a qualified installer, service agency or the gas supplier.
Versión en español
Si desea obtener una copia en español
de este Manual del Usuario, sírvase
escribir a la dirección que se incluye a
continuación. Solicite la P/N 131878600.
electrical shock. Do not use an adaptor
plug or extension cord or remove
grounding prong from electrical power
cord. Failure to follow this warning can
cause serious injury, fire or death.
14-30R
FUSED 30 AMP
120/240 V OR
120/208 V
WALL
RECEPTACLE
Note: The instructions appearing in this
Owner's Guide are not meant to cover
every possible condition and situation
that may occur. Common sense and
caution must be practiced when installing,
operating and maintaining any appliance.
For your safety, the information in this manual must be followed to minimize the risk of fire or explosion
• Do not try to light any appliance.
• Do not touch any electrical switch; do not use any phone in your building.
• Clear the room, building or area of all occupants.
• Immediately call your gas supplier from a neighbor's phone. Follow the gas supplier's instructions.
• If you cannot reach your gas supplier, call the fire department.
Important Safety Instructions
Read all instructions before using this dryer.
To reduce the risk of fire, electrical shock, or injury to persons when using this dryer, comply with
Do not dry items that have been previously cleaned in, soaked in, or spotted with gasoline,
Do not dry articles containing rubber, plastic or similar materials such as bras, galoshes, bath
Clean the lint screen before or after each load. The interior of the dryer, lint screen housing and
- Risk of Fire - A clothes dryer produces combustible lint. The dryer must be connected to
Do not obstruct the flow of ventilating air. Do not stack or place laundry or throw rugs against
Do not spray any type of aerosol into, on or near dryer at any time.
Do not use fabric softeners or products to eliminate static unless recommended by the
Do not place items exposed to cooking oils in your dryer. Items contaminated with cooking oils
Do not allow children to play on or in the dryer. Close supervision of children is necessary when
Destroy the carton, plastic bag and other packing materials after the dryer is unpacked. Children
Keep laundry products out of children's reach. To prevent personal injury, observe all warnings
Before the dryer is removed from service or discarded, remove the dryer door to prevent
To prevent shock hazard and assure stability during operation, the dryer must be installed and
To prevent personal injury or damage to the dryer, the electrical power cord of a gas dryer must
ALWAYS disconnect the dryer from the electrical supply before attempting any service or
Do not use any type spray cleanser when cleaning dryer interior. Hazardous fumes or electrical
To prevent injury, do not reach into the dryer if the drum is moving. Wait until the dryer has stopped
To prevent injury and damage to the dryer:
2
Avoid fire hazard or
ELECTRIC
CORRECT
Use this way ONLY
GASGAS
DRYERS: DRYERS:
GAS
DRYERS:
GASGAS
DRYERS: DRYERS:
all receptacle
Do not under
any circumstances
cut, remove,
or bypass
the grounding prong
from this plug.
Power supply
cord with 3-prong
CORRECTCORRECT
CORRECT
CORRECTCORRECT
Use this way ONLYUse this way ONLY
Use this way ONLY
Use this way ONLYUse this way ONLY
DRYER
DRYER
DRYER
SERVICE CORD
the basic warnings listed below.
Failure to comply with these warnings could result in serious personal injuries.
Prevent Fire
cleaning solvents, kerosene, waxes, etc. Do not store these items on or near the dryer. These substances give
off vapors that could ignite or explode.
mats, rugs, bibs, baby pants, plastic bags and pillows that may melt or burn. Some rubber materials, when
heated, can under certain circumstances produce fire by spontaneous combustion.
exhaust duct should be cleaned approximately every 18 months by qualified service personnel. An excessive
amount of lint build-up in these areas could result in inefficient drying and possible fire. See Care and Cleaning,
. Do not operate the dryer if the lint screen is blocked, damaged or missing. Fire hazard,
overheating and damage to fabrics can occur. If your dryer has a drying rack, always replace the lint screen
when finished using the drying rack.
an exhaust outdoors. Regularly inspect the outdoor exhaust opening and remove any accumulation of lint
around the outdoor exhaust opening and in the surrounding area.
the front or back of the dryer.
manufacturer of the fabric softener or product.
may contribute to a chemical reaction that could cause a load to catch fire.
Failure to comply with these warnings could result in fire, explosion, serious bodily injury and/or damage to
the rubber or plastic parts of the dryer.
Protect Children
the dryer is used near children. As children grow, teach them the proper, safe use of all appliances.
might use them for play. Cartons covered with rugs, bedspreads or plastic sheets can become airtight chambers.
on product labels.
accidental entrapment.
Failure to comply with these warnings could result in serious personal injuries.
Prevent Injury
electrically grounded by a qualified service person in accordance with local codes. Installation instructions are
packed in the dryer for the installer's reference. Refer to INSTALLATION INSTRUCTIONS for detailed grounding
procedures. If the dryer is moved to a new location, have it checked and reinstalled by a qualified service person.
be plugged into a properly grounded and polarized 3-prong outlet. The third grounding prong must never
be removed. Never ground the dryer to a gas pipe. Do not use an extension cord or an adaptor plug.
cleaning. Failure to do so can result in electrical shock or injury.
shock could occur.
completely before reaching into the drum.
• All repairs and servicing must be performed by an authorized servicer unless specifically recommended
in this Owner's Guide. Use only authorized factory parts.
• Do not tamper with controls.
• Do not install or store the dryer where it will be exposed to the weather.
A thermal limiter switch automatically turns off the motor in the unlikely event of an overheated situation
(electric dryers only). A service technician must replace the thermal limiter switch after correcting the fault.
Failure to comply with these warnings could result in serious personal injuries.
This Owner's Guide provides
general operating instructions for
your dryer. It also contains
information about features for
several other models. Your dryer
may not have every feature
included.
Use the dryer only as instructed in
this Owner's Guide and the
Operating Instructions card
included with your dryer.
SAVE THESE INSTRUCTIONS
Printed in U.S.A.
Page 3
Drying Procedures
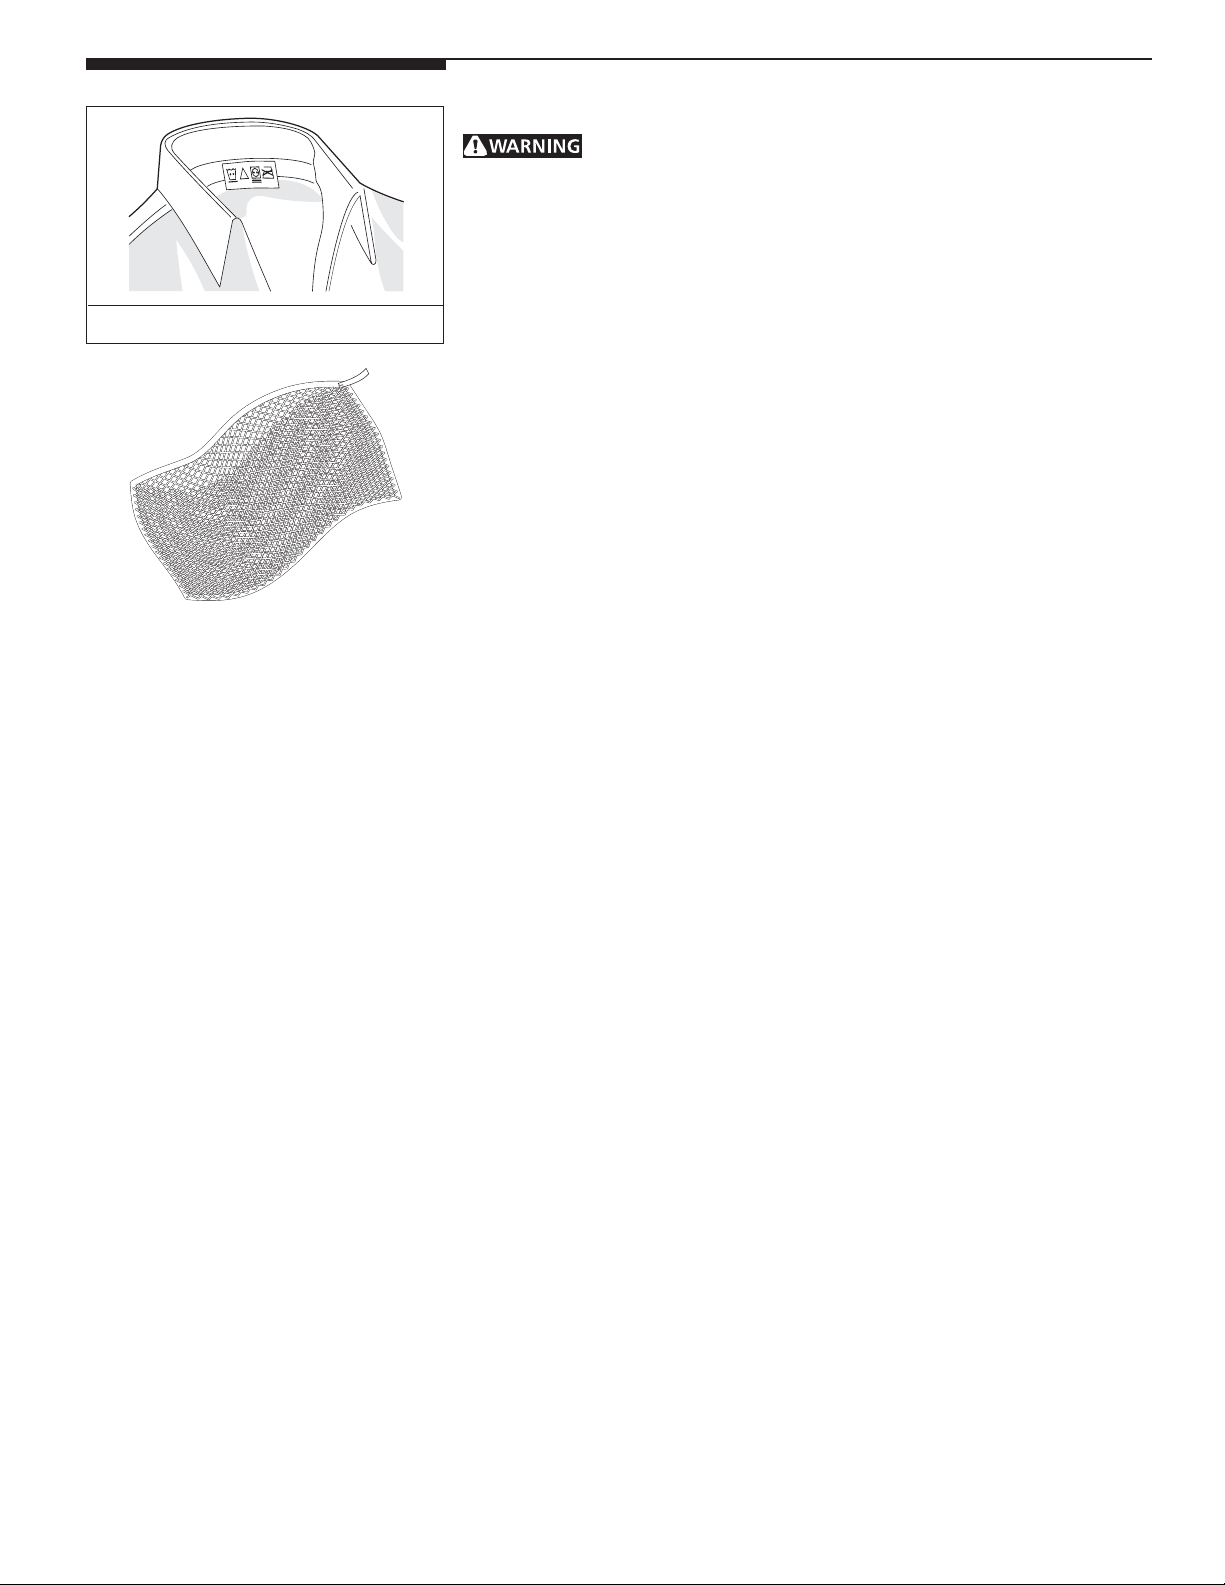
Follow fabric care label instructions.
• Follow the guidelines below for preparing the load for drying.
• Read the Operating Instructions card for operating your specific model.
• Always read and follow fabric care labels and laundry product labels.
To reduce the risk of fire, electrical shock, or injury to persons, read
Important Safety Instructions, pages 2-3, before operating this dryer.
1. Prepare items for drying.
• Dry items of similar fabric, weight and construction in the same load.
• Separate dark items from light-colored items. Separate items that shed lint from
those that attract lint. If an item sheds lint, turn it inside out.
• Be sure buckles, buttons and trim are heatproof and won't damage the drum finish.
Close zippers, fasten hooks and Velcro®-like fasteners. Tie strings and sashes to
prevent snagging and tangling.
• If possible, turn pockets inside out for even drying.
• Check for stains which may not have been removed in washing. Dryer heat may
permanently set some stains. Repeat stain removal process before drying.
• Place small items in a mesh bag to prevent tangling and for easy removal.
2. Check that lint screen is clean and in place.
3. Load the dryer.
• The average load will fill the drum 1/3 to 1/2 full. Items need room to tumble freely
for even drying and less wrinkling. Do not overload dryer.
• When drying large items, dry only 2 or 3 at a time. Fill out the load with small and
medium sized items.
• For delicate or very small loads, add 2 lint-free towels for better drying, less
wrinkling, and to prevent grease stains caused by fabric softener sheets.
• Do not overdry items. Overdrying can cause wrinkling, shrinkage, harshness, and
a build-up of static electricity, which can produce more lint.
• If desired, add a dryer fabric softener sheet.
4. Close the dryer door and set dryer controls (some models).
See Operating Instructions card for your specific model controls.
5. Turn cycle selector clockwise to the desired setting.
6. Start the dryer.
• Push Start Button for 2 seconds or turn the START knob clockwise to ON, hold for
1-2 seconds and release.
• To add or remove items when the dryer is running, open the door. The dryer will
always stop when the door is opened. Allow the drum to come to a complete stop
before reaching inside.
• To restart dryer, close the door then push the Start Button for 2 seconds or turn
the START knob clockwise to ON, hold for 1-2 seconds and release.
• The dryer will not start if the cycle selector is in the OFF position.
7. When the cycle ends, remove items immediately and hang or fold. If load is
removed before the cycle ends, turn cycle selector to OFF.
3
Page 4

Care and Cleaning
Clean lint screen after every load.
basic warnings listed in Important Safety Instructions and those listed below.
To reduce risk of fire or serious injury to persons or property, comply with the
• Before cleaning the dryer interior, unplug the electrical power cord to avoid electrical
shock hazards.
• Do not use any type spray cleanser when cleaning dryer interior. Hazardous fumes or
electrical shock could occur.
Inside
• Clean the lint screen after every load. Lint build-up in the screen restricts air flow, which
causes longer drying times. The screen is located at the bottom of the door opening.
Remove by pulling straight up. Remove the lint and replace the screen.
CAUTION - Risk of Fire - A clothes dryer produces combustible lint. The dryer must
be connected to an exhaust outdoors. Regularly inspect the outdoor exhaust opening
and remove any accumulation of lint around the outdoor exhaust opening and in the
surrounding area.
• Occasionally a waxy build-up may form on the lint screen from using dryer-added fabric
softener sheets. To remove this build-up, wash the lint screen in warm, soapy water. Dry
thoroughly and replace. Do not operate the dryer without the lint screen in place.
• If the dryer drum becomes stained from noncolorfast fabrics, clean the drum with a damp
cloth and a mild liquid household cleanser. Remove cleanser residue before drying the
next load.
• Every 18 months an authorized servicer should clean the dryer cabinet interior and
exhaust duct. These areas can collect lint and dust over time. An excessive amount of
lint build-up could result in inefficient drying and possible fire hazard.
Outside
• Clean the cabinet with mild soap and water. Never use harsh, gritty or abrasive
cleansers.
• If the cabinet becomes stained, clean with diluted chlorine bleach [1/2 cup
(120 ml) in 1 quart (.95 liter) water]. Rinse several times with clear water.
Do not store or place laundry products
on top of dryer at any time. They can
damage the finish or controls.
• Remove glue residue from tape or labels with a mixture of warm water and mild
detergent. Or, touch residue with the sticky side of the tape or label.
• Before moving the dryer, place a strip of cardboard or thin fiberboard under the front
leveling legs to prevent damage to floor.
Common Drying Problems
Many drying problems involve poor cleaning results, poor soil and stain removal, residues of lint and scum, and fabric damage. For satisfactory drying results,
follow these suggestions provided by The Soap and Detergent Association.
PROBLEMPROBLEM
PROBLEM
PROBLEMPROBLEM
Greasy, oily
stains
Lint
Pilling
(Fibers break off,
ball up and cling
to fabric.)
Shrinking
Wrinkling
POSSIBLE CAUSESPOSSIBLE CAUSES
POSSIBLE CAUSES
POSSIBLE CAUSESPOSSIBLE CAUSES
• Fabric softener sheet.
• Overloading.
• Overdrying causes static
electricity.
• Lint screen not clean when
cycle began.
• Lint is attached to "pills."
• Pilling is normal with
synthetic and permanent
press fabrics. This is due to
abrasion from normal wear.
• Overdrying.
• Overloading.
• Leaving items in dryer after
cycle ends.
SOLUTIONSSOLUTIONS
SOLUTIONS
SOLUTIONSSOLUTIONS
• Rub fabric softener stains with bar soap.
Rinse and rewash.
• Reduce load size and rewash using liquid
fabric softener in the final rinse.
• Or, add a fabric softener sheet and tumble
without heat.
• Use lint brush or roller to remove lint.
• Use a lint brush or shaver to remove pills.
• Irreversible condition.
• Reduce load size and tumble at medium or
low heat for 5-10 minutes.
• Remove items immediately. Hang or fold.
4
PREVENTIVE MEASURESPREVENTIVE MEASURES
PREVENTIVE MEASURES
PREVENTIVE MEASURESPREVENTIVE MEASURES
• Add a few bath towels to small loads for
proper tumbling.
• Some "silk-like" fabrics should be air dried.
• Use proper drying temperature.
• Place fabric softener sheet on top of load
before starting the dryer.
• Do not overload dryer.
• Use fabric softener in washer or dryer to
reduce static electricity.
• Remove items when they are slightly damp to
avoid overdrying.
• Check that lint screen is clean and in place.
• Use fabric softener to lubricate fibers.
• When ironing, use spray starch or fabric finish
on collars and cuffs.
• Turn items inside out to reduce abrasion.
• Follow fabric care label directions.
• If shrinking is a concern, check load often.
• Remove items while slightly damp and hang or
lay flat to complete drying.
• Block knits into shape.
• Do not overload dryer.
• Remove items as soon as cycle ends.
Page 5

AA
void Servoid Ser
A
void Ser
AA
void Servoid Ser
ChecklistChecklist
Checklist
ChecklistChecklist
vicevice
vice
vicevice
Before calling for service, review this list. It may save both time and expense. The list includes
common occurrences that are not the result of defective workmanship or materials in this dryer.
OCCURRENCEOCCURRENCE
OCCURRENCE
OCCURRENCEOCCURRENCE
Dryer does not start.
Dryer runs but won't heat.
Drying cycle takes too long,
outside of the dryer feels too
hot or smells hot.
POSSIBLE CAUSEPOSSIBLE CAUSE
POSSIBLE CAUSE
POSSIBLE CAUSEPOSSIBLE CAUSE
Electrical power cord is not securely plugged
in or plug may be loose.
House fuse blown or circuit breaker tripped.
Thermal limiter tripped.
There are 2 house fuses in the dryer circuit. If
1 of the 2 fuses is blown, the drum may turn
but the heater will not operate.
Gas supply valve is not open (gas models).
Dryer does not have anough air supply to
support the burner flame (gas models).
LP gas supply tank is empty or there has been
a utility interruption of natural gas (gas
models).
Lint screen is clogged with lint.
Exhaust duct requirements have not been
met.
SOLUTIONSOLUTION
SOLUTION
SOLUTIONSOLUTION
Make sure the plug fits tightly in wall outlet.
Reset circuit breaker or replace fuse.
Make sure electrical line is not overloaded and the dryer is on
a separate circuit.
Call authorized service person for replacement.
Replace fuse.
Check to make sure supply valve is open. See INSTALLATION
INSTRUCTIONS for procedure.
See INSTALLATION INSTRUCTIONS.
Refill or replace tank.
Dryer should heat when utility service is restored.
Make sure all lint has been removed from the dryer lint screen
before starting each cycle.
Exhaust duct must be at least 4 inches in diameter and made
of rigid or flexible metal.
Excessive wrinkling.
Scratching or chipping of the
drum finish.
Electric dryer is connected to a 208 volt circuit.
Drying procedures have not been followed.
Outside exhaust hood or exhaust duct may
be clogged or restricted.
High humidity.
Dryer is overloaded.
Items left in dryer too long.
Insufficient sorting of items.
Drying temperature too high.
Foreign objects such as coins, pins, clips or
buttons are inside the dryer.
Permanently attached items such as belt
buckles, zippers and fasteners may be hitting
the inside of the drum.
When in place, the duct must have no more than two 90°
bends and must not exceed length listed in INSTALLATION
INSTRUCTIONS.
Drying time will be 20% longer than drying on a 240 volt
circuit.
See Drying Procedures.
Clean out any obstruction.
Use a dehumidifier near the dryer.
Do not overload. See Drying Procedures.
Remove items as soon as cycle ends.
See Drying Procedures.
Follow fabric care label instructions.
Always remove foreign objects from pockets before
laundering. Remove objects from drum and restart dryer.
It may be necessary to baste a scrap of material securely
around ornaments before drying to prevent scratching and
damage to the dryer.
Drum damage caused by foreign objects or permanently
attached items is not covered by the warranty.
5
Page 6

Major Appliance Warranty Information
Your appliance is covered by a one year limited warranty. For one year from your original date of
purchase, Electrolux will pay all costs for repairing or replacing any parts of this appliance that prove to
be defective in materials or workmanship when such appliance is installed, used and maintained in
accordance with the provided instructions.
Exclusions
This warranty does not cover the following:
1. Products with original serial numbers that have been removed, altered or cannot be readily determined.
2. Product that has been transferred from its original owner to another party or removed outside the USA or
Canada.
3. Rust on the interior or exterior of the unit.
4. Products purchased "as-is" are not covered by this warranty.
5. Food loss due to any refrigerator or freezer failures.
6. Products used in a commercial setting.
7. Service calls which do not involve malfunction or defects in materials or workmanship, or for appliances
not in ordinary household use or used other than in accordance with the provided instructions.
8. Service calls to correct the installation of your appliance or to instruct you how to use your appliance.
9. Expenses for making the appliance accessible for servicing, such as removal of trim, cupboards, shelves,
etc.,which are not a part of the appliance when it is shipped from the factory.
10. Service calls to repair or replace appliance light bulbs, air filters, water filters, other consumables, or
knobs, handles, or other cosmetic parts.
11. Surcharges including, but not limited to, any after hour, weekend, or holiday service calls, tolls, ferry trip
charges, or mileage expense for service calls to remote areas, including the state of Alaska.
12. Damages to the finish of appliance or home incurred during installation, including but not limited to floors,
cabinets, walls, etc.
13. Damages caused by: services performed by unauthorized service companies; use of parts other than
genuine Electrolux parts or parts obtained from persons other than authorized service companies; or
external causes such as abuse, misuse, inadequate power supply, accidents, fires, or acts of God.
DISCLAIMER OF IMPLIED WARRANTIES; LIMITATION OF REMEDIES
CUSTOMER’S SOLE AND EXCLUSIVE REMEDY UNDER THIS LIMITED WARRANTY SHALL BE PRODUCT
REPAIR OR REPLACEMENT AS PROVIDED HEREIN. CLAIMS BASED ON IMPLIED WARRANTIES,
INCLUDING WARRANTIES OF MERCHANTABILITY OR FITNESS FOR A PARTICULAR PURPOSE, ARE
LIMITED TO ONE YEAR OR THE SHORTEST PERIOD ALLOWED BY LAW, BUT NOT LESS THAN ONE YEAR.
ELECTROLUX SHALL NOT BE LIABLE FOR CONSEQUENTIAL OR INCIDENTAL DAMAGES SUCH AS
PROPERTY DAMAGE AND INCIDENTAL EXPENSES RESULTING FROM ANY BREACH OF THIS WRITTEN
LIMITED WARRANTY OR ANY IMPLIED WARRANTY. SOME STATES AND PROVINCES DO NOT ALLOW THE
EXCLUSION OR LIMITATION OF INCIDENTAL OR CONSEQUENTIAL DAMAGES, OR LIMITATIONS ON THE
DURATION OF IMPLIED WARRANTIES, SO THESE LIMITATIONS OR EXCLUSIONS MAY NOT APPLY TO
YOU. THIS WRITTEN WARRANTY GIVES YOU SPECIFIC LEGAL RIGHTS. YOU MAY ALSO HAVE OTHER
RIGHTS THAT VARY FROM STATE TO STATE.
If You Need
Service
This warranty only applies in the USA and Canada. In the USA, your appliance is warranted by Electrolux Major Appliances
North America, a division of Electrolux Home Products, Inc. In Canada, your appliance is warranted by Electrolux Canada
Corp. Electrolux authorizes no person to change or add to any obligations under this warranty. Obligations for service and
parts under this warranty must be performed by Electrolux or an authorized service company. Product features or
specifications as described or illustrated are subject to change without notice.
USA
1.800.944.9044
Electrolux Major Appliances
North America
P.O. Box 212378
Augusta, GA 30907
Keep your receipt, delivery slip, or some other appropriate payment record to establish the warranty period
should service be required. If service is performed, it is in your best interest to obtain and keep all receipts.
Service under this warranty must be obtained by contacting Electrolux at the addresses or phone
numbers below.
Canada
1.800.668.4606
Electrolux Canada Corp.
5855 Terry Fox Way
Mississauga, Ontario, Canada
L5V 3E4
Page 7

3 Ways To Contact Us!
¡3 formas de contactar nos!
3 façons de nous contacter!
USA, EE.UU., É.-U.,
1-800-944-9044
CANADA, CANADÁ
1-800-265-8352
(English)(Français)
Or,O,Ou
USA, EE.UU., É.-U.
Electrolux Major Appliances North America,
a division of Electrolux Home Products, Inc.
P.O. Box 212378
Augusta, GA 30917
Or,O,Ou
Visit Frigidaire’s Web Site at:
Visite la página de Frigidaire en Internet:
Visitez le site Internet de Frigidaire au:
http://www/frigidaire.com
© 2005 Electrolux Major Appliances North America,
a division of Electrolux Home Products, Inc.
CANADA, CANADÁ
Electrolux Major Appliances North America,
a division of Electrolux Home Products, Inc.
5855 Terry Fox Way
Mississauga, Ontario, Canada
L5R 4C2
The Electrolux Group. The world’s No. 1 choice.
The Electrolux Group is the world’s largest producer of powered appliances for kitchen, cleaning and outdoor use combined. More than 55 million
Electrolux Group products (such as refrigerators, cookers, washing machines, vacuum cleaners, chain saws and lawn mowers) are sold each year
to a value of approximately USD 14 billion in more than 150 countries around the world.
PRINTED IN USA
 Loading...