

Fright Ideas BOO BOX MINI Operating Manual
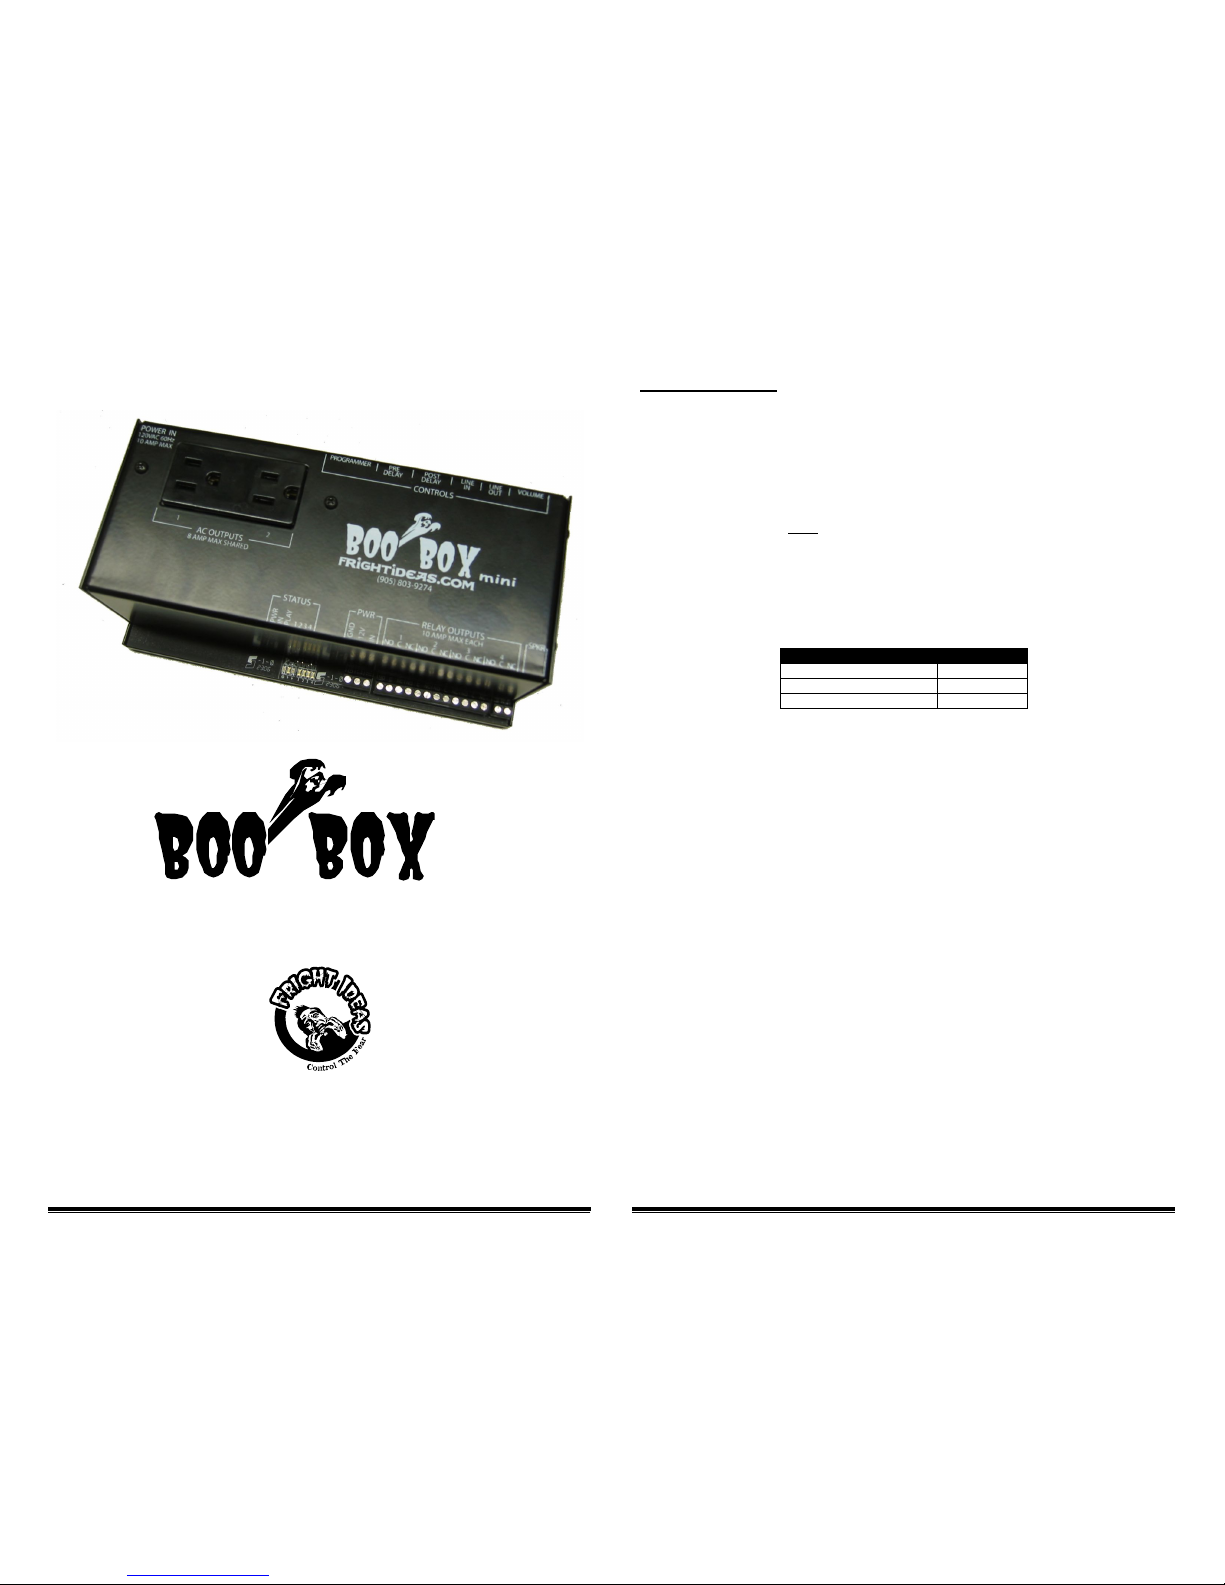
BooBox Mini Operating Manual
BooBox Mini Operating Manual
mini
OPERATING MANUAL
471 Maybank Avenue
Toronto, Ontario M6N 3S7
Tel: 905-803-9274 Fax: 647-439-1470
www.frightideas.com
Recording Sounds
To begin recording you will need the following connected to the mini:
• A powered speaker or speakers connected to the mini’s Line-Out OR a standard speaker connected to the
speaker output.
• An audio source such as a CD player or computer connected to Line-In. Make sure the source is not amplified.
• A stereo audio cable to connect your audio source to the mini’s Audio Line-In
• T he mini’s programmer connected to the programmer port
Once the above is connected try pressing play on the audio source, you should be able to hear the sound faintly
through the connected speaker. Do not turn up the source volume so your speakers are really loud! Use this sound
only as a guide so you know when to start and stop recording. Once the sound is recorded and the mini plays it back
it will be much louder than it is now.
You will have to experiment with the volume of your sound source to see what gives you the best recorded sound
quality. If the source is too loud the recording will sound distorted, if it’s too low you may not be able to turn the sound
up loud enough even with your speakers at full volume. Do a few test recordings, keep adjusting the source volume
and then previewing the sound from the mini until you’re happy with the quality and volume level.
Volume Levels for Common Sources
Source
Volume Level
Computer
20% to 40%
iPod or Portable CD Player
75%
The ambient sound must always be recorded first, once you are happy with how it sounds you can move on to
recording the scare sound. The scare sound can then be recorded and re-recorded as needed. If the ambient sound
is ever changed the scare sound will have to be re-recorded, even if it does not need t o be changed.
Sound Length
Record as long an ambient sound as possible, this sound will be looped while the mini waits to be triggered. The
looping point will be heard less often if this sound is long, just make sure you leave enough room f or your scare
sound, you have 4 minutes total space for your sounds. Your scare sound length is less critical, just make sure it’s
long enough to play for the entire length of the animation you want to record.
Recording and Previewing
To record the ambient sound hold “1” and press “REC ”, press “REC” again to stop recording. To record the scare
sound hold “2” and press “REC ”.
To preview the sound, make sure you stop the source if it is playing, then hold either “1” for the ambient sound or “2”
for the scare sound and then press “PLAY”. Pressing “PLAY” again will stop the sound.
Turning Off Ambien t Sound
To turn off the ambient sound make sure an audio source is connected to the audio-in, hold “REC” and press “1”.
Then within 3 seconds, press “REC” again.
How to Create Your Own Sounds
Getting a sound just right may require some editing. Programs known as waveform editors allow you to modify every
aspect of a sound. If you’ve never tried using one before it can actually be quite fun, and when you’re done with the
sound it will be exactly what you wanted.
Connecting Speakers
There are two options for connecting speakers to the BooBox mini. You can either connect an amplifier or pair of
powered speakers up to the mini’s Line Out, or use the mini’s internal 22 watt amplifier with a 4 or 8 ohm speaker.
BooBox Mini Operating Manual
BooBox Mini Operating Manual
Recording Animation
Once you have your sounds recorded into the mini you can begin recording the scare scene’s outputs. Make sure
you have removed the audio cable from the mini’s li ne-in jack before proceeding.
It’s also much easier to record the animation with the trigger removed and the mini at its default settings, this is
especially true when using a motion sensor for a trigger. If you have changed the input to normally-closed or
changed the mode to something other than 1 then you’ll probably be better off changing back to a normally-open
trigger mode and an operating mode of 1 before attempting to record.
Connect the RTP to the mini and press some of the output buttons. You’ll notice the relay outputs will activate in realtime as you press the buttons. You may also notice that the ambient sound has stopped playing, this is so you can
focus on programming the scare scene. To turn the ambient sound back on once you are done programming, hold
the play button for about 3 seconds, the scare will play and once it is done the ambient sound will begin.
Press REC on the RTP, the scare sound will start play ing. Press the output buttons to record them in sync with the
sound. You can press the buttons as many times as you want and hold them for as long as you want. Whatever you
do with those buttons will be recorded for up to 4 minutes. Press REC again to stop recording, the scene is
automatically saved. Press PLAY on the RTP to preview the scene.
The scene can be up to 4 minutes long, the length of the scare sound has nothing to do with how long a scene you
can record. If your scene is shorter than the sound clip the sound will simply be stopped, if it’s longer there will be
silence once the sound is done.
Recording 1, 2 or 3 Outputs at a Time
For more complex scares it can be easier if you don’t have to program all the outputs in one shot. The BooBox mini
lets you program as little as one output at a time. The outputs you have finished recording will playback while you
record the others so you can see the scene come together.
To choose the outputs you’d like to record:
1. Hold the REC button for a few seconds, the REC light will begin blinking
2. While still holding the REC button, hold down t he buttons of the outputs you’d lik e to record
3. Let go of the REC button
You will notice that only the outputs you have chosen to record will activate relays.
To go back to recording all 4 outputs at once just repeat the above process with all four buttons held.
If you’d like to erase what you have recorded and start from scratch simply enable all outputs for recording and press
REC twice, effectively recording nothing.
Connecting a Trigger
There are many different types of triggers, choosing the right one for your setup will help make your scare more
effective. Below is a quick summary of some popular triggers …
Trigger Types
Trigger
Pros
Cons
Contact
PIR Motion
Sensor
- Very affordable
- Unaffected by fog machines
- Easily installed
- Triggering time can vary a bit
Normally
Closed
Beam Sensor
- Triggering time is instant and
consistent
- Can be a bit pricey
- Installation can be tricky at first
- Affected by fog machines
Normally
Open
Pressure Mat
- Relatively affordable
- Simple installation
- Patrons can often spot the mat
- Patrons may not step on mat
- Hiding and protecting the wire
and mat
Normally
Open
Pushbutton
- Actor can judge best time to
trigger
- Need an actor
Normally
Open
Using PIR Motion Sensors
If you are using a PIR motion sensor for a trigger mak e sure you set the contact type to normally-closed.
PIR motion sensors have a built-in delay of about 2 minutes when they are powered up. During the delay the BooBox
mini’s “Playing” light will stay lit. This is normal, once the sensor is warmed up the mini will begin operating normally.
Determining your Trigger’s Contact-Type
If you are unsure of what contact-type your trigger is t hen you can figure it out quite easily. Connect your
trigger/sensor using the diagrams in this manual. Pow er up the mini, if your trigger is a motion sensor wait a few
minutes for it to warm up. Trip your sensor/trigger as you watch the yellow input light on the mini, if the yellow light
turns ON it’s a N.O. contact, if it turns off it’s N.C., if it does nothing there is a wiring problem.
Setting the Contact T ype to Normally-Closed (N.C.) or Normally-Open (N.O.)
1. Power down the BooBox mini, wait about 15 seconds
2. Connect the Real-Time Programmer
3. Hold the “REC” AND “PLAY” buttons to set to N.C. or just the REC button to set to N.O.
4. Power up the BooBox mini while holding the button(s)
5. When the red light on the programmer flashes twice you can let go of the buttons
NOTE: If you are using normally-closed outputs you m ust also hold those buttons down in step 3.
Trigger Pre-Delay
If your trigger can’t be placed in the perfect spot, you may want the mini to delay a bit before starting the scare scene.
Adjust the pre-delay anywhere from 0-25 seconds in 0.1 second increments. You’ll notice the mini will blink the
“PLAY” light to indicate it’s delaying.
Trigger Post-Delay (Recycle Time)
If you’d like to prevent the mini from triggering right aft er the end of the scare scene set the post-delay. Also known
as a recycle time, this delay can be set anywhere from 0-102 seconds. The “PLAY” light will blink during the delay.
 Loading...