

Page 1
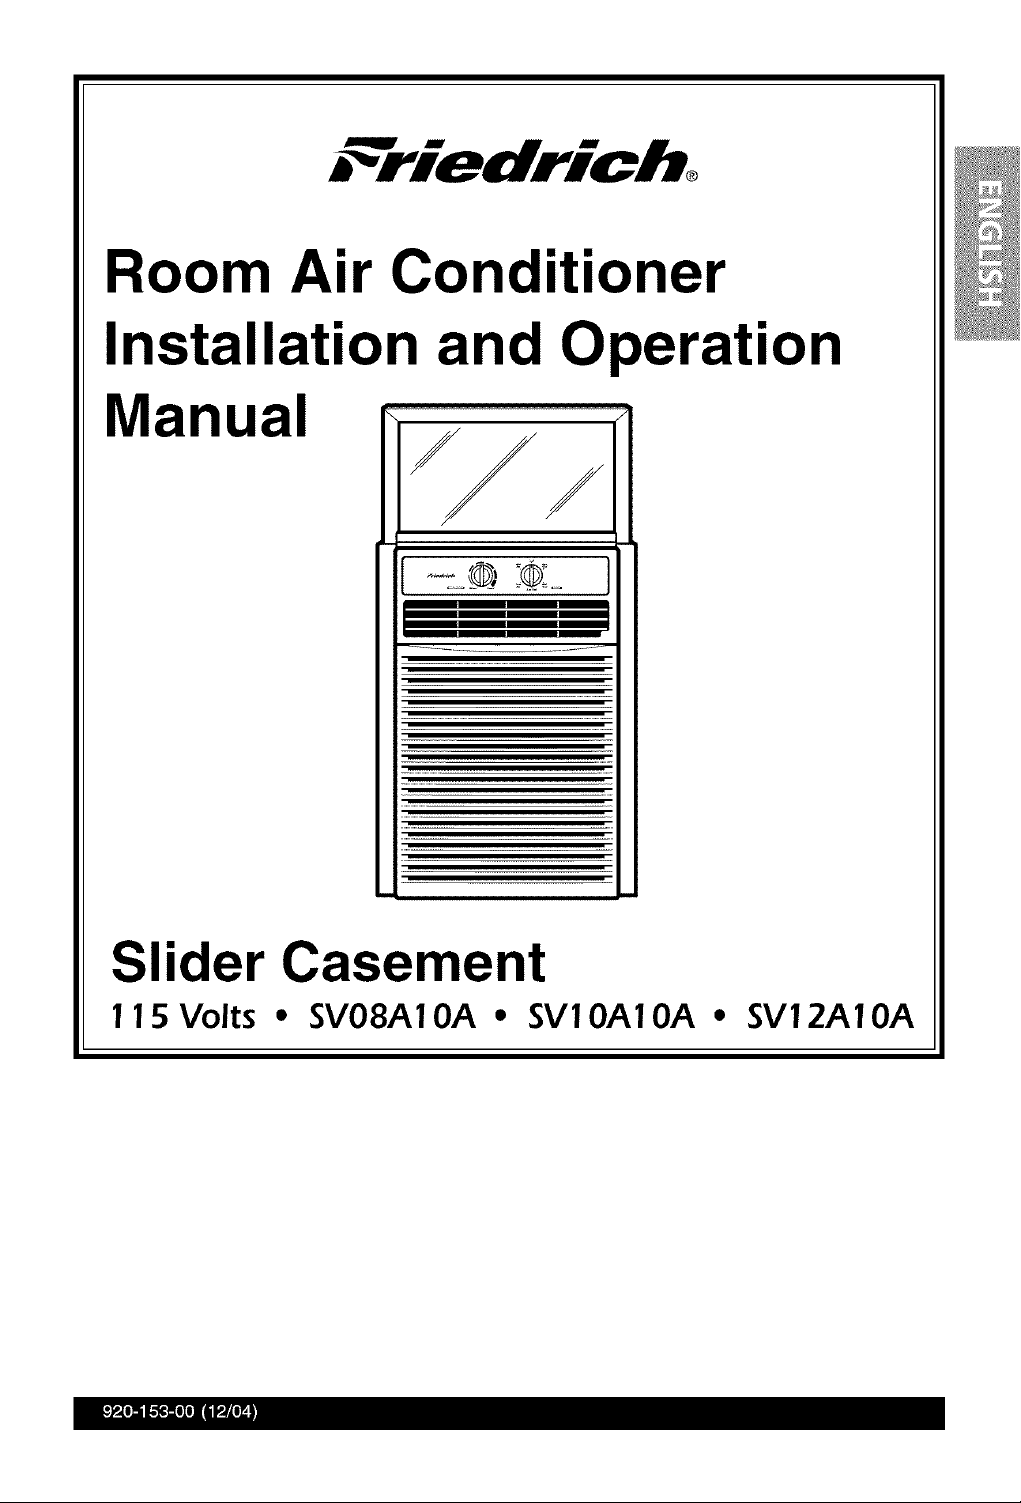
Room Air Conditioner
Installation and Operation
Manual
Slider Casement
115 Volts • SV08A10A • SV10A10A • SV12A10A
_P_To_II._olo] [_LJ_I]
Page 2
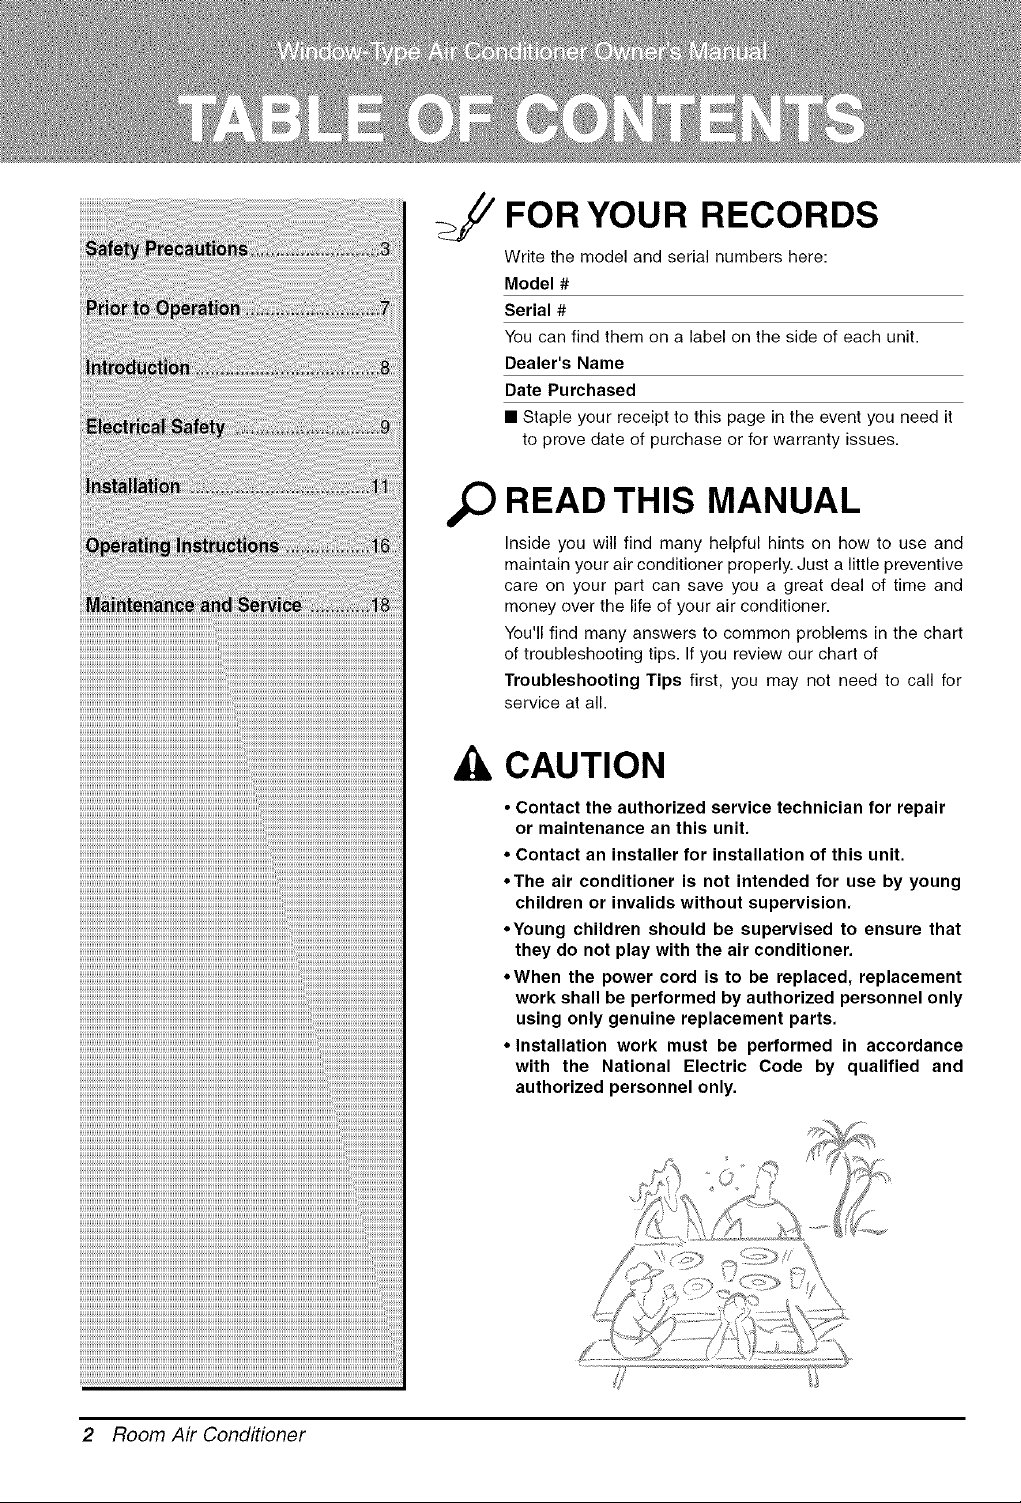
FOR YOUR RECORDS
Write the model and serial numbers here:
Model #
Serial #
You can find them on a label on the side of each unit.
Dealer's Name
Date Purchased
• Staple your receipt to this page in the event you need it
to prove date of purchase or for warranty issues.
aO READ THIS MANUAL
Inside you will find many helpful hints on how to use and
maintain your air conditioner properly. Just a little preventive
care on your part can save you a great deal of time and
money over the life of your air conditioner.
You'll find many answers to common problems in the chart
of troubleshooting tips. If you review our chart of
Troubleshooting Tips first, you may net need to call for
service at all.
CAUTION
• Contact the authorized service technician for repair
or maintenance an this unit.
• Contact an installer for installation of this unit.
• The air conditioner is not intended for use by young
children or invalids without supervision.
• Young children should be supervised to ensure that
they do not play with the air conditioner.
• When the power cord is to be replaced, replacement
work shall be performed by authorized personnel only
using only genuine replacement parts.
• Installation work must be performed in accordance
with the National Electric Code by qualified and
authorized personnel only.
2 Room Air Conditioner
Page 3

Safety Precautions
To prevent injury and property damage, follow these instructions.
• Incorrect operation due to ignoring instructions may cause harm or damage, the
seriousness of which is indicated by the following symbols.
,_W,8,,RN_NG This symbol indicates the possibility of death or serious injury. |
&CAUTION This symbol indicates the possibility of injury or damage to properties only.
• Meanings of other symbols used:
Never do this.
Be sure to follow the instruction.
ILWARNING>
• Installation
;¢;_%y
N
• No installation may cause fire or electric shock
accident.
• Doing so may cause explosion or fire.
• Doing so may cause fire or electric shock.
iiiiiiiiiiiiiiiiiiiiiiiiiiiiiiiiiiiiiiiiiiiiiiiiiiiiiiiiiiiiiiiiiiiiiiiiiiiiiiiiiiiiiiiiiiiiiiiiiiiiiiiiiiiiiiiiiiiiiiiiiiiiiiiiiiiiiiiiiiiiiiiiiiiiiiiiiiiiiiiiiiiiiiiiiiiiiiiiiiiiiii_i!
• Doing so may cause failure or electric shock.
Owner's Manual 3
Page 4
Safety Precautions
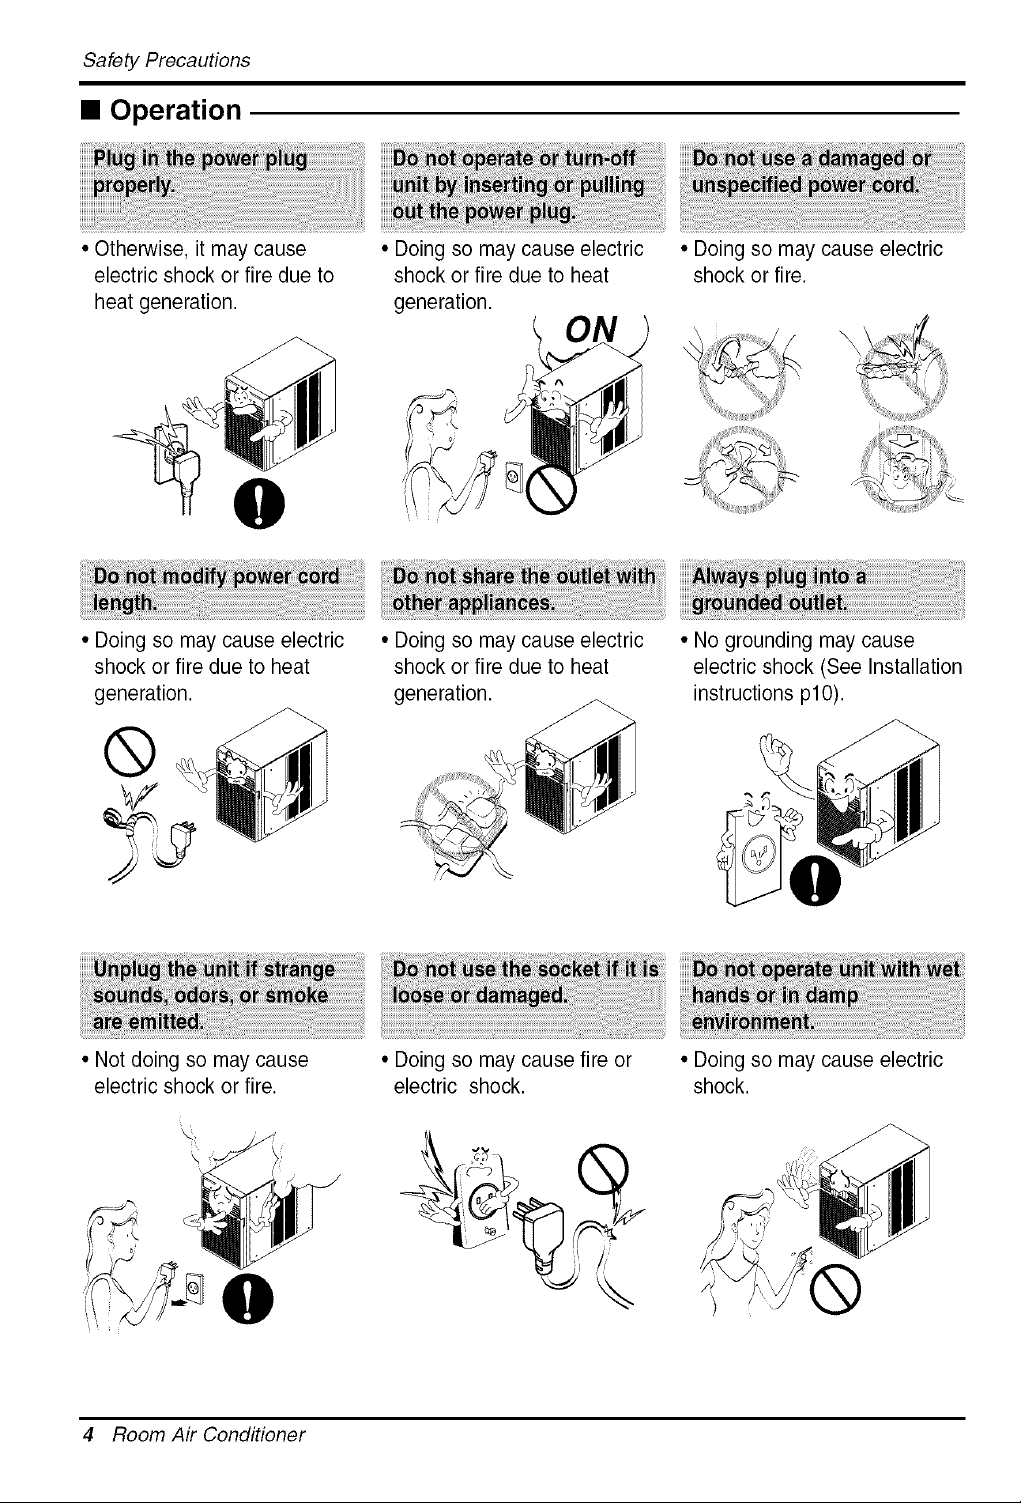
• Operation
• Otherwise, it may cause
electric shock or fire due to
heat generation.
• Doing so may cause electric
shock or fire due to heat
generation.
®
• Doing so may cause electric
shock or fire due to heat
generation.
• Doing so may cause electric
shock or fire due to heat
generation.
• Doing so may cause electric
shock or fire.
• No grounding may cause
electric shock (See Installation
instructions plO).
• Not doing so may cause
electric shock or fire.
4 Room Air Conditioner
• Doing so may cause fire or
electric shock.
• Doing so may cause electric
shock.
Page 5

Safety Precautions
• Doing so may cause failure of machine or
electric shock.
• Installation
• They are sharp and may
cause injury.
• It may cause failure of
appliance or accident.
• It is not designed to cool the entire house.
• Using a damaged outer case
may hinder airflow or cause
the chassis to fall.
• It may cause injury.
• Improper handling may cause
electric shock or damage.
• Prevent accidental startup and
the possibility of injury.
Owner's Manual 5
Page 6
Safety Precautions
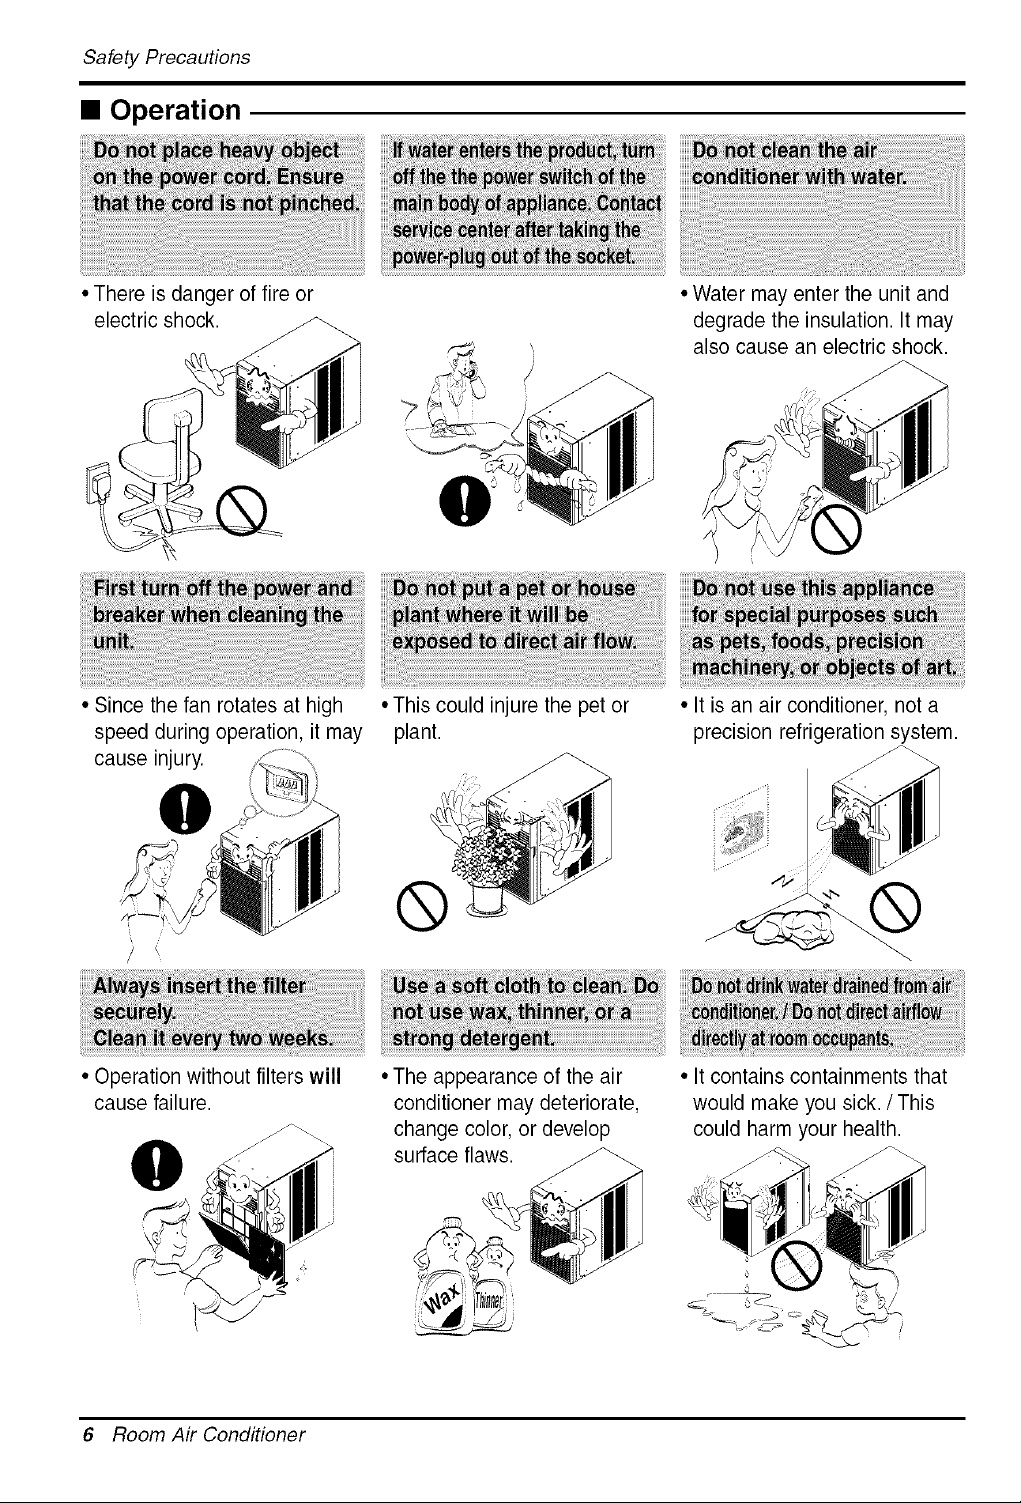
• Operation
• There is danger of fire or
electric shock.
• Since the fan rotates at high
speed during operation, it may
cause injury.
• This could injure the pet or
plant.
• Water may enter the unit and
degrade the insulation. It may
also cause an electric shock.
• It is an air conditioner, not a
precision refrigeration system.
i.....
• Operation without filters will
cause failure.
0
6 Room Air Conditioner
®
• The appearance of the air
conditioner may deteriorate,
change color, or develop
surface flaws.
• It contains containments that
would make you sick. / This
could harm your health.
Page 7
PriortoOperation
1. Contact an installation specialist for installation.
2. Plug in the power plug properly.
3. Use a dedicated circuit.
4. Do not use an extension cord.
5. Do not start/stop operation by plugging/unplugging the power cord.
6. If the cord/plug is damaged, only replace it with an authorized replacement
part.
1. Being exposed to direct airflow for an extended period of time could be
hazardous to your health. Do not expose occupants, pets, or plants to direct
airflow for extended periods of time.
2. Due to the possibility of oxygen deficiency, ventilate the room when used
together with stoves or other heating devices.
3. Do not use this air conditioner for non-specified special purposes (e.g.
preserving precision devices, food, pets, plants, and art objects). Such usage
could damage the items.
1. Do not touch the metal parts of the unit when removing the filter. Injuries can
occur when handling sharp metal edges.
2. Do not use water to clean inside the air conditioner. Exposure to water can
destroy the insulation, leading to possible electric shock.
3. When cleaning the unit, first make sure that the power and breaker are turned
off. The fan rotates at a very high speed during operation. There is a
possibility of injury if the unit's power is accidentally triggered on while
cleaning inner parts of the unit.
For repair and maintenance, contact your authorized service dealer.
Owner's Manual 7
Page 8

Introduction
_k_ This symbol alerts you to the risk of electric shock.
This symbol alerts you to hazards that could cause harm to
the air conditioner.
This symbol indicates special notes.
AWARNING
This appliance should be installed in accordance with the National Electric Code.
AIRFILTER
(INLETGRILLE)
VERTICALAIRDEFLECTOR
(HORIZONTALLOUVER)
--AIR DISCHARGE
BRACE
_ COMPRESSOR
CI
POWERCORD
8 Room Air Conditioner
Page 9

ElectricalSafety
115V~ 230V-
The shape may be different according to its model.
Use Wall Receptacle Power Supply
©
Standard 125V, 3-wire grounding
receptacle rated 15A, 125V AC
Standard 250V, 3-wire grounding
receptacle rated 15A, 250V AC
Use 15 AMP. time
delay fuse or 15 AMP.
circuit breaker.
[ ill
Power cord may include a current
interrupter device. A test and reset button is
provided on the plug case. The device
should be tested on a periodic basis by first
ii
pressing the TEST button and then the
RESET button. If the TEST button does not
trip or if the RESET button will not stay
engaged, discontinue use of the air
conditioner and contact a qualified service
technician.
Use of extension cords
Because of potential safety hazards, we
strongly discourage the use of an extension
cord. However, if you wish to use an
extension cord, use a CSA certified/UL-listed
3-wire (grounding) extension cord, rated 15A,
125V.
All wiring should be made in accordance with
local electrical codes and regulations.
Use 20 AMP. time
delay fuse or 20 AMP.
Standard 250V, 3-wire grounding
receptacle rated 20A, 250V AC
circuit breaker.
ELECTRICAL SAFETY
IMPORTANT GROUNDINGINSTRUCTIONS
Air conditioner has a three-prong grounding plug on
its power supply cord, which must be pluggedinto
properly grounded three-prong wall receptacle for
your protection against possible shock hazard.
230/208 VOLT UNITS
These units are equipped with a three-prong
grounding plug on the power supply cord, which
must be plugged into a matching properly grounded
three-prong wall receptacle for your protection
against possible shock hazard. If such an outlet is
Aluminum house wiring may pose special
problems.Consult a qualified electrician.
not present, one must be installed by a qualified
electrician in accordance with the National Electrical
Code and local codes and ordinances.
DO NOT USE AN EXTENSIONCORD on 230/208
Volt units.
Owner's Manual 9
Page 10

ElectricalSafety
IMPORTANT
(PLEASE READ CAREFULLY)
FOR THE USER'S PERSONAL SAFETY, THIS APPLIANCE MUST BE PROPERLY GROUNDED
A. SITUATIONS WHEN THE APPLIANCE WILL BE DISCONNECTED OCCASIONALLY:
Because of potential safety hazards, we strongly discourage the use of an adapter plug. However, if you wish to
use an adapter, a TEMPORARY CONNECTION may be made. Use UL-listed adapter, available from most local
hardware stores.
The large slot in the adapter must be aligned with the large slot in the receptacle to assure a proper polarity
connection.
CAUTION
Attaching the adapter ground terminal to the wall receptacle cover screw does not ground the appliance unless
the cover screw is metal, and not insulated, and the wall receptacle is groundedthrough the house wiring.The
customer should have the circuit checked by a qualified electrician to make sure the receptacle is properly
grounded.
Disconnect the power cord from the adapter, using one hand on each. Otherwise, the adapter ground terminal
might break. DO NOT USE the appliance with a broken adapter plug.
B. SITUATIONS WHEN THE APPLIANCE WILL BE DISCONNECTED OFTEN.
Do not use an adapter plug in these situations. Unplugging the power cord frequently can lead to an eventual
breakage of the ground terminal. The wall power outlet should be replaced by a three-slot (grounding) outlet
instead.
10 Room Air Conditioner
Page 11

Installation
NO. NAME OF PARTS QTY
1 Curtain 1
2 Curtain Frame 1
3 Upper Guide 1
4 Side Guide 2
5 Support Bracket 1
6 Bracket 1
7 Leveling Bolt & Nut 1
8 Bolt 2
9 Nut 2
10 Washer 2
11 Side Guide seal 1
12 Foam Seal Strip 1
13 Window Track Seal 1
14 Window Locking Bracket 1
15 Screw (Type A) 9
16 Screw (Type B) 3
17 Screw (Type C) 8
1.These instructions are for a horizontal sliding
or a casement window.
2. The electrical outlet must be within reach of
the power cord.
Horizontal sliding window
For installation in a casement window, the
window frame assembly and the side of the
building must be adequate to support the weight
of the air conditioner.
iiiiiiiiiiiiiiiiiiiiiiiiiii iiiiiiii
i iiiil !iiiiilj!i!i!ii,ijjjj,!iiii!i!iiiilililili!!i!!i !i !!; iiii!!
15 1/2" min.
16V2"max.
Casement window
Owner's Manual 11
Page 12

Installation
1.To prevent vibration and noise, make sure the
unit is installed securely and firmly
2. Install the unit where the sunlight does not
shine directly on the unit.
Cooled air
3. The outside of the cabinet must extend outward
for at least 14" and there should be no
obstacles, such as a fence or wall, within 20"
from the back of the cabinet because it will
prevent heat radiation of the condenser.
Restriction of outside air will greatly reduce the
cooling efficiency of the air conditioner.
All side louvers of the cabinet must remain exposed to the outside of the structure.
4. Install the unit at a slight incline so the back is slightly lower than the front(about 1/4").
This will force condensed water to flow to the outside.
5. Install the unit with the bottom about 30"-60" above the floor level.
Awning
Heat
radiation
Over 20"
Fence
You can choose between the two methods below according to your preference and window sill
shape.
• Fasten the stopper using Type A screw, and
pass the power cord through slit "A".
• Fasten the stopper using left screw hole, and
rotate properly to pass the power cord through
slit "B".
Screw (Type A'
Screw (Type A).
Power
D
12 Room Air Conditioner
Page 13

1. Loosely attach the Support Bracket to the
bottom of Bracket using Bolts, Washer, and
Nuts. Attach the Leveling Bolt and Nut. (Fig.
1)
Installation
Bracket
2. Remove protective backing from Window
Track Seal and apply seal to window track.
(Fig.2)
3. Measure and lightly mark a line 8-1/4 inches
from window jamb. Center the Support
Bracket assembly on the window track and
fasten with 4 Type C screws.(Fig. 2)
4. Put the Support Bracket against the outside
wall and tighten the Bolts on top of the
Bracket. Adjust the Leveling Bolt so that the
air conditioner will be installed with a very
slight tilt (about 1/4") downward toward the
outside for proper drainage.
Tighten the nut. (Fig. 3)
Support
I
lamb
i
1 i
I /4 Inch
Track
Leveling Bolt & Nut
Fig. 1
a:
Seal
DO NOT drill a hole in the bottom of the base
pan. The air conditioner is designed to operate
with the bottom of the base pan approximately
half-full of water.
5. Fasten Side Guides to the sides of the Air
Conditioner using 3 Type A screws per Guide.
Start with first screw at middle of Guide.
(Fig. 4)
6. Fasten Upper Guide on the top of the Air
Conditioner using 3 Type A screws. (Fig. 4)
About
Fig. 3
Fastening Side Guides
Upper
-Side Guide
Fig. 4
Owner's Manual 13
Page 14

Installation
7. Measure height of window opening from top
of Bracket assembly as shown Fig. 5.
Subtract 20-3/4 inches. Mark this
measurement on Curtain and cut the Curtain.
(Fig. 5)
8. Slide Curtain into Curtain Frame. Slide
Curtain Frame assembly into side Guides of
the Air Conditioner cabinet. Make sure
Curtain is firmly enclosed on all sides by the
Frame. (Fig. 6)
Fig. 5
me Curtain
Curtain_ig. 6
9. Cut side Guide seal into 2 equal lengths.
Remove protective backing and apply it to the
rear side of cabinet Side Guides, starting just
below Curtain Frame assembly. Pinch off
excess length so seal is even with the bottom
of side Guide. (Fig. 7)
10. Place Air Conditioner in window opening. It
should sit on Bracket assembly so that
Curtain Frame and cabinet Side Guides are
against top and side window jambs. Mate
front of Bracket with Base Guide attached to
the bottom of base pan.
11. Drill 1/8 inch holes in window track through
the existing holes on Base Guide. Screw 4
Type C screws through the holes. (Fig. 8)
12. If this is a casement window installation,
proceed to Casement Window Installation. If
not, slide inner window sash firmly against
side of the cabinet.
13. Drill 1/8 inch hole in window jamb to align
with the existing holes in the Curtain Frame.
Attach Curtain Frame to window frame with
2 Type B screws. (Fig. 8)
Type C screw
Window Track
weather seal
to side guides
just below edge of
Curtain Frame.
Fig. 7
Type B
Fig. 8
14 Room Air Conditioner
Page 15

Installation
seal strip
Check all seals and plug any remaining air
gaps with a suitable weatherproof caulk.
14. If this is a casement window installation,
proceed to Casement Window Installation.
If not, stuff the Foam Seal Strip between the
vertical sash and the window glass. (Fig. 9)
locking
15. Attach the L Bracket with a Type B screw.
(Fig. 9)
bracket
Fig. 9
1. Installation procedure is the same as that described in steps 1 through 11 and step 13 of the
Horizontal Sliding Window installation.
2. If the window opening is wider than 15-3/4 inches you will need to install a filler panel. Make this
panel from 3/4 inch thick wood and run it the full length of the window.
Attach it securely to the window frame and paint it to protect it from the weather.
3. Since styles and sizes of casement windows vary widely, it is advisable to have the air conditioner
installed by someone skilled in this type of installation.
Owner's Manual 15
Page 16

OperatingInstructions
A CAUTION
When the air conditioner has been performing its cooling operation and is turned off or set to the
fan position, wait at least 3 minutes before resetting to cooling mode again.
Med High
MEOFAN- Med speed fan operation without cooling.
LOWFAN- Low speed fan operation without cooling.
OFF- Turns air conditioner off.
Fai_T_i°°lj
Lo _ Me_
Fan Cool
Lo_Co01
H_ Cooling with high speed fan operation.COOL -
MEO- Cooling with med speed fan operation.
COOL
•ow Cooling with low speed fan operation.
COOL -
This thermostat controls the temperature of the indoor air.
Turn it clockwise for cooler and counter clockwise for a warmer
temperature.
Warmer Cooler
• FOR NORMAL COOLING
1.Turn the MODE Knob to the LOW COOL or
MED COOL.
2. Set the TEMP control to the desired
temperature mark (The mid point is a good
starting position.)
If the room temperature is not satisfactory after
a reasonable time, adjust the control to a
cooler or warmer setting, as appropriate.
• FOR MAXIMUM COOLING
1.Turn the MODE Knob to the HI COOL
setting.
2. Set the TEMP control to the highest
temperature setting (All the way to the right).
• FOR QUIETER OPERATION
1.Turn the MODE Knob to the LOW COOL
setting.
2. Set the TEMP control as needed.
16 Room Air Conditioner
Page 17

Additional controls and important information.
The ventilation lever must be in the CLOSE position in order to
maintain the best cooling conditions.
When fresh air is necessary in the room, set the ventilation
lever to the OPEN position.
The damper is then opened and room air is exchanged with
external air.
The direction of air can be controlled by adjusting the horizontal
and vertical louvers.
OperatingInstructions
CLOSE-L VENT-LOPEN
• HORIZONTAL AIR-DIRECTION CONTROL
The horizontal air direction is adjusted by
rotating the vertical louver right or left.
• VERTICAL AIR-DIRECTION CONTROL
The vertical air direction is adjusted by rotating the horizontal
louver up or down.
In humid weather, excess water may cause the BASE
PAN to overflow and run out the back of the unit.
To drain the water, remove the DRAIN CAP and
secure the DRAIN PIPE to the rear hole of the BASE
PAN.
Drain pipe _ --
Drain cap
Owner_Manual 17
Page 18

MaintenanceandService
TURNTHEAIRCONDITIONEROFFANDREMOVETHEPLUGFROMTHEPOWEROUTLET.
The air filter behind the front grille should be checked and cleaned at least once every 2 weeks or
more often if necessary.
To remove:
1. Open the inlet grille downward by pulling out the top of the inlet grille.
2. Remove the air filter from the front grille assembly by pulling the air filter up and out.
3. Clean the filter with warm, soapy water.
4. Rinse and gently shake the water from the filter and let it dry before replacing it.
CAUTION
DO NOT operate the air conditioner without a filter because dirt and lint will clog it and reduce
performance.
NOTE !
Before using the air conditioner secure the front grille with two
screws enclosed with the owner's manual.
1. Open the inlet grille downward and remove the air filter.
2. Fasten the front grille with screws.
3. Reinstall the air filter.
4. Close the inlet grille.
18 Room Air Conditioner
/.
Inlet Grille
Page 19

MaintenanceandService
Before calling for service
If you have problems with your air conditioner, read the following information and
try to solve the problem. If you cannot find a solution, turn off the air conditioner
and contact your dealer.
Air conditioner does not operate
1. Ensure that the air conditioner is plugged into a proper outlet.
2. Check the fuse or circuit breaker.
3. Check whether the voltage is unusually high or low.
Air does not feel cold enough on the cooling setting
1. Ensure that the temperature settings are correct.
2. Check to see if the air filter is clogged with dust. If so, clean the filter.
3. Ensure that the air flow from the outside is not obstructed and that there is a
clearance of over 20" between the back of the air conditioner and the wall or
fence behind it.
4. Close all doors and windows and check for any source of heat in the room.
Before calling for service, please review the following list of common
problems and solutions.
The air conditioner is operating normally when:
• You hear a pinging noise. This is caused by water being picked up by the fan on
rainy days or in highly humid conditions. This feature is designed to help remove
moisture in the air and improve cooling efficiency.
• You hear the thermostat click. This is caused by the compressor cycle starting
and stopping.
• You see water dripping from the rear of the unit. Water may be collected in the
base pan in highly humid conditions or on rainy days. This water overflows and
drips from the rear of the unit.
• You hear the fan running while the compressor is silent. This is a normal
operational feature.
Owner's Manual 19
Page 20

MaintenanceandService
The air conditioner may be operating abnormally when:
• Make sure the plug is completely
plugged into the outlet.
• Check the fuse/circuit breaker box and
replace the fuse or reset the breaker.
The air
conditioner
does not
operate at all
• In the event of a power failure, set the
power control to OFE When the power
is restored, wait 3 minutes to restart
the air conditioner to prevent the
compressor from overloading.
• Press the RESET button located on
the power cord plug. If the RESET
button will not stay engaged,
discontinue use of the air conditioner
and contact a qualified service
technician.
Air
conditioner
does not
cool
Ice appears
on the air
conditioner.
• Make sure there are no curtains,
blinds, furniture or other obstacles in
front of the air conditioner.
• Turn the knob to a higher setting.
The highest setting provides maximum
cooling.
• Clean the filter at least every 2 weeks.
Refer to the "Maintenance and
Service" section of the manual.
• After the air conditioner is turned on,
you need to give the air conditioner
some time to cool the room.
• Check for open furnace floor resisters
and cold air returns.
• CLOSE the air conditioner vent.
• Ice may block the air flow and obstruct
the air conditioner from properly
cooling the room.
Set the mode control at High cool with
the temperature setting 1 or 2.
(warmer setting)
20 Room Air Conditioner
Page 21

m m m m
FRIEDRICH AIR CONDITIONING CO.
Post Office Box 1540 • San Antonio, Texas 78295-1540
(2 ] 0) 357-4400 • FAX (210) 357-4490
ROOM AIR CONDITIONERS
LIMITED WARRANTY
FIRST YEAR
ANY PART: If ally part supplied by FRIEDRICH fails because of a defect in workmanship or material within twelve months from date of
original purchase, FRIEDRICH will repair the product at no charge, provided room air conditioner is reasonably accessible for service.
Any additional labor cost for removing inaccessible units and/or charges for mileage related to travel by a Service Agency that exceeds
25 miles one way will be the responsibility of the owner. This remedy is expressly agreed to be the exclusive remedy within twelve
months from the date of the original purchase.
SECONDTHROUGHFIFTHYEAR
SEALED REFRIGERANT SYSTEM: If the sealed refrigeration system (defined for this purpose as the compressor, condenser coil,
evaporator coil, reversing valve, check valve, capillary, filter drier, and all interconnecting tubing) supplied by FRIEDRICH in your Room
Air Conditioner fails because of a defect in workmanship or material within sixty months from date of purchase, FRIEDRICH will pay a
labor allowance and parts necessary to repair the Sealed Refrigeration System; PROVIDED FRIEDRICH will not pay the cost of diagnosis
of the problem, removal, freight charges and transportation of the air conditioner to and from the Service Agency, and the reinstallation
charges associated with repair of the Sealed Refrigeration System. All such cost will be the sole responsibility of the owner, This remedy
is expressly agreed to be the exclusive remedy within sixty months from the date of the original purchase,
APPLICABILITY AND LIMITATIONS: This warranty is applicable only to units retained within the Fifty States of the U.S.A., District of
Columbia, and Canada. This warranty is not applicable to:
1. Air filters or fuses,
2. Products on which the model and serial numbers have been removed,
3. Products which have defects or damage which results from improper installation, wiring, electrical current characteristics, or
maintenance; or caused by accident, misuse or abuse, fire, flood, alterations and/or misapplication of the product and/or units
installed ina corrosive atmosphere, default or delay in performance caused by war, government restrictions or restraints, strikes,
material shortages beyond the control of FRIEDRICH, or acts of God.
OBTAINING WARRANTY PERFORMANCE: Service will be provided by the FRIEDRICH Authorized Dealer or Service Organization
in your area, They are listed in the Yellow Pages.If assistance is required in obtaining warranty performance, write to: Room Air Conditioner
Service Manager, Friedrich Air Conditioning Co., P.O. Box 1540, San Antonio, TX 78295-1540.
LIMITATIONS: THIS WARRANTY IS GIVEN IN LIEU OF ALL OTHER WARRANTIES. Anything in the warranty notwithstanding,
ANY IMPLIED WARRANTIES OF FITNESS FOR PARTICULAR PURPOSE AND/OR MERCHANTABILITY SHALL BE LIMITED TO
THE DURATION OF THIS EXPRESS WARRANTY. MANUFACTURER EXPRESSLY DISCLAIMS AND EXCLUDES ANY LIABILITY
FOR CONSEQUENTIAL OR INCIDENTAL DAMAGE FOR BREACH OF ANY EXPRESSED OR IMPLIED WARRANTY.
NOTE: Some states do not allow limitations on how long an implied warranty lasts,or do not allow the limitation or exclusion of consequential
or incidental damages,so the foregoing exclusions and limitations may not apply to you.
OTHER: This warranty gives you specific legal rights, and you may also have other rights which vary from state to state,
PROOF OF PURCHASE: Owner must provide proof of purchase in order to receive any warranty related services,
All service calls for explaining the operation of this product will be the sole responsibility of the consumer.
All warranty service must be provided by an Authorized FRIEDRICH Service Agency, unless authorized by FRIEDRICH prior to
repairs being made,
In case of questions regarding the provisions of this warranty, the English version will govern.
Revised 12/04
Owner_Manual 21
Page 22

Memo
22 Room Air Conditioner
Page 23

m m m m
,,r#edTr#cn®
FRIEDRICH AIR CONDITIONING CO.
Visit our web site at www.friedrich.com
Post Office Box 1540 • 4200 N. Pan Am Expressway • San Antonio, Texas 78295-1540
• (210) 357-4400 • FAX (210) 357-4490
P/NO.: 3828A20291P
_Y.,[01l,,!_[0[0][_]
 Loading...