

Page 1
Model PXSE
Installation Instructions
WALL SLEEVE ADAPTER KIT
For Use With Packaged Terminal Units
Please read these instructions completely before attempting installation.
NOTE: This kit retrofi ts the earlier shallow "T" series Friedrich wall sleeve to accommodate more modern, deeper
"PD" series PTAC units. Refer to Chassis Installation/Operation Manual for additional information.
VERIFY KIT CONTENTS
Before starting installation, make sure that the following
parts are included:
• One sheet metal wall sleeve adapter.
• Two long and two short pieces of styrofoam insulation
with adhesive backing.
• Two long and two short adhesive-backed gasket pieces.
• Two Tinnerman's Clips.
• Ten #10 screws.
Electrical shock hazard.
Electrical power MUST be disconnected.
Failure to disconnect power can result in
property damage, personal injury and/or death.
WARNING
STEP 1: WALL SLEEVE ADAPTER ORIENTATION
The wall sleeve adapter increases the depth of existing wall sleeves to accept deeper PTAC units. The adapter
mounts to the front of the existing sleeve inside of the room. The sleeve should be oriented so that the Stickout
Flange is inside the existing sleeve and the Fold-over Flange is positioned to the bottom front of the adapter
as shown in illustration.
Wall
Existing Wall
Sleeve
Stickout
Flange
Sleeve
Adapter
Room
Fold-over
Flange
STEP 2
Insert the stickout flange of the wall sleeve adapter over the bottom flange of the existing sleeve.
Make sure that the top of the sleeve is level with the top surface of the adapter.
920-127-01 (1-05)
Page 2
STEP 3
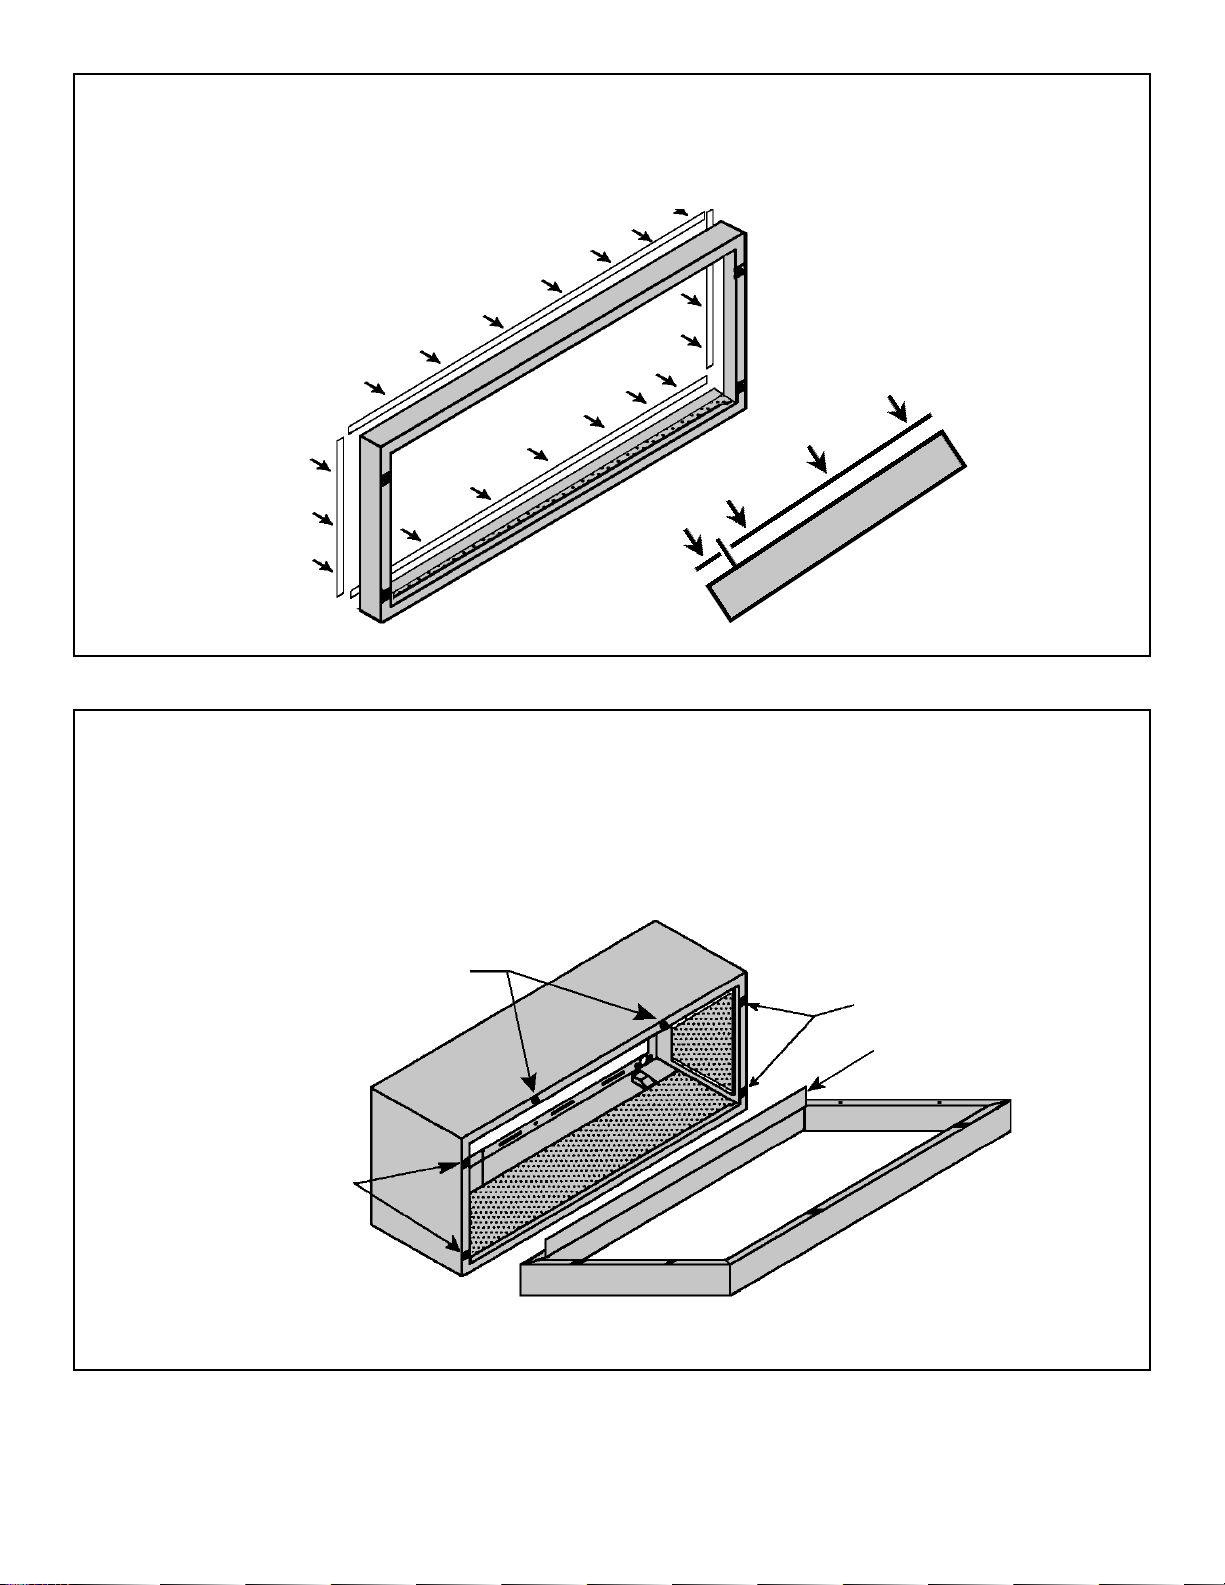
If not already installed, attach the white gasket pieces to the back flanges of the wall sleeve adapter where it will
mate with the existing sleeve.
STEP 4
Install two Tinnerman's clips over the holes on the top flange of the wall sleeve. The flat round hole on the
Tinnerman's clips should face outwards.
Install two Tinnerman's Clips
Existing Tinnerman's
Clips (four holes)
Existing Tinnerman's
Clips (four holes)
Stickout Flange
2
Page 3
STEP 5
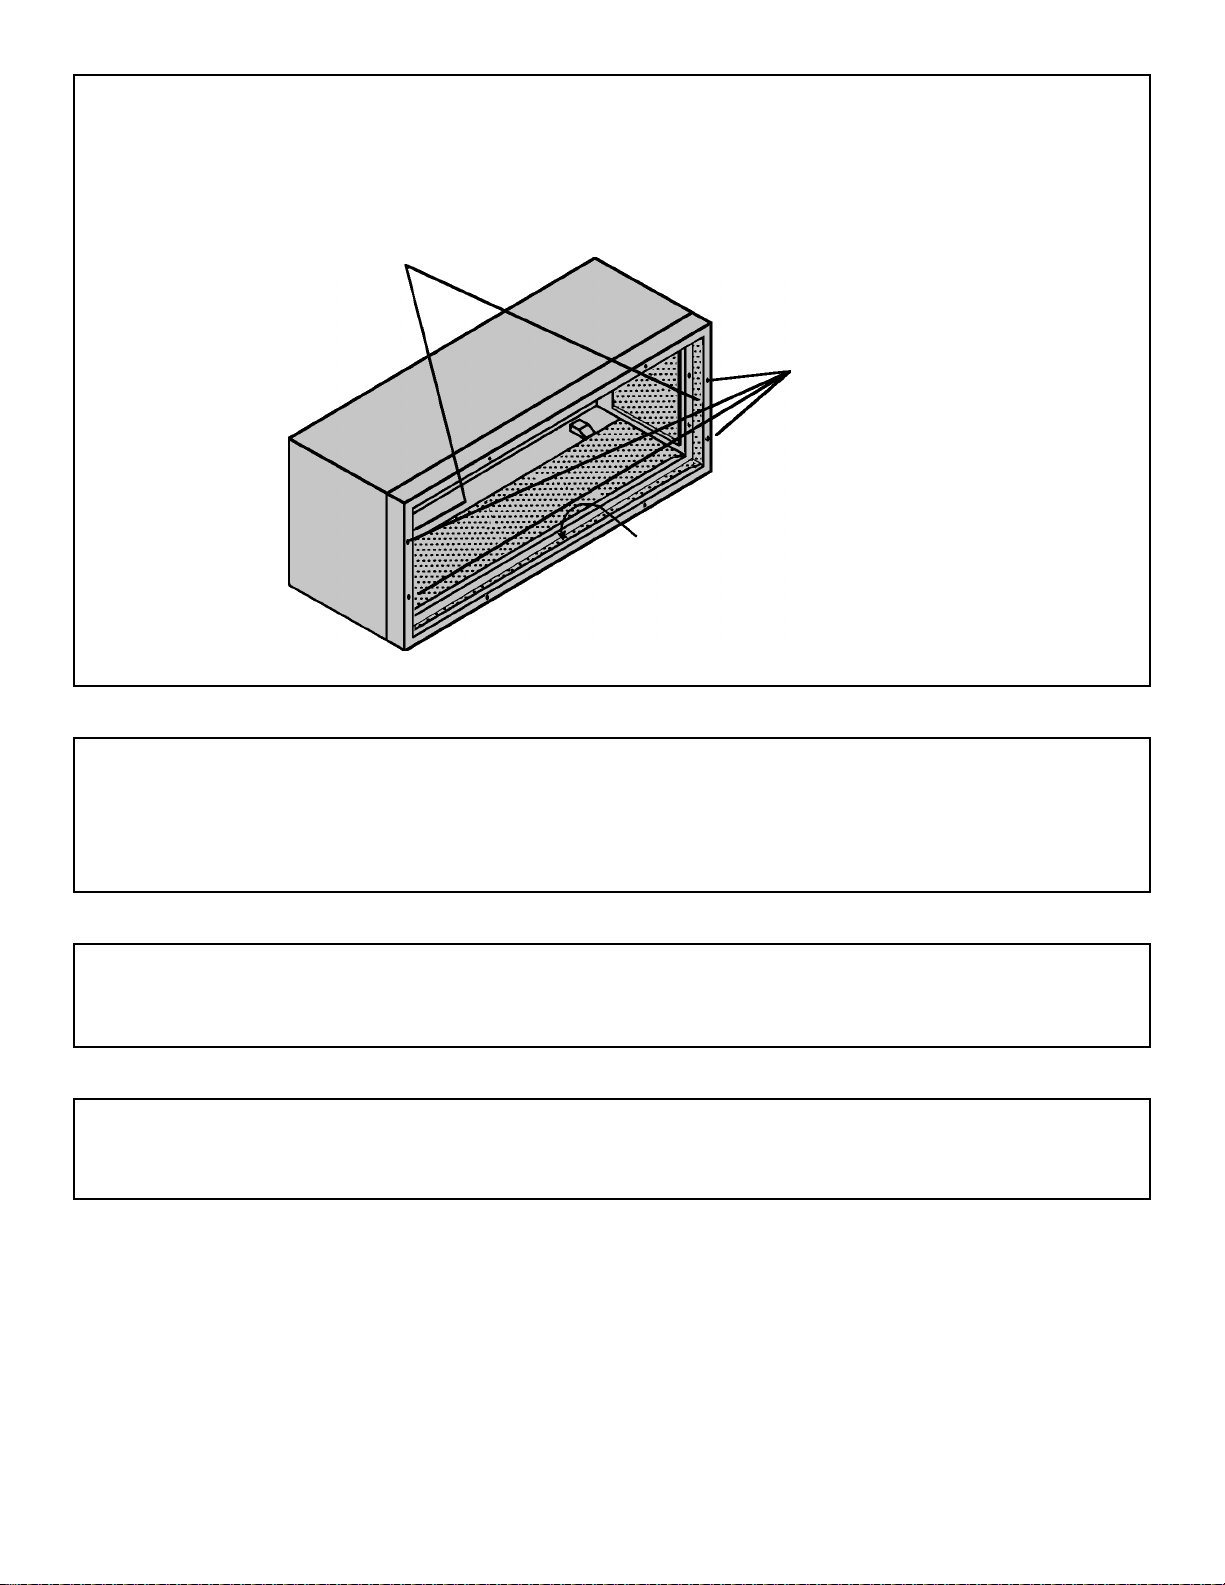
Remove the protective paper from the two short and one long stryrofoam pieces. Install the short styrofoam
insulation pieces on the short inside walls of the adapter. Install the adhesive-backed long piece on the top wall.
Field installed Insulation
#10 Mounting Screw Locations
Factory installed insulation
STEP 6
Fasten the adapter to the wall sleeve with six ½" long #10 screws. All screws are driven from the inside of the
adapter into the Tinnerman's clips mounted on the face of the wall sleeve. The stickout flange assists in properly
aligning the two parts.
STEP 7
Slide the unit into the wall sleeve/adapter assembly. Fasten the unit to the wall sleeve adapter with four screws.
STEP 8
Review the Installation Manual instructions on installing the unit and electrical requirements. Run test the unit.
3
Page 4

FRIEDRICH AIR CONDITIONING CO. INC.
Post Office Box 1540 · San Antonio, Texas 78295-1540
4200 N. Pan Am Expressway · San Antonio, Texas 78218-5212
(210) 357-4400 · FAX (210) 357-4480
www.friedrich.com
Printed in the U.S.A.
920-127-01 (1-05)
 Loading...