

Page 1
How to use your new
Freezer
Model MUZ5580
Page 2
Page 3
Page 4
Page 5
5
USING YOUR FREEZER
Preparations for freezing
.yletelpmoc looc ot doof dekooc evaeL â
.elbissop fi gnizeerf erofeb egdirf a ni doof llihC â
.ti gnize
erf erofeb doof eht kooc ot tnaw uoy woh redisnoC â
niatnoc latem ni doof ezeerf t’noD â
the freezer.
rezeerf laiceps esU â
plastic containers, aluminium foil (heavy grade only, if in doubt, double wrap). Don’t
use aluminium foil for acidic foods (such as citrus fruits).
Don’t use thin cling film or glass. Don’t use used food containers
(unless cleaned thoroughly first).
dluoc uoY .elbissop sa reniatnoc eht morf ria hcum sa edulcxE â
buy a special vacuum pump which sucks excessive air out
of the packaging.
nehw ’ecaps ria‘ fo tnuoma llams a evaeL â
gnizeerf
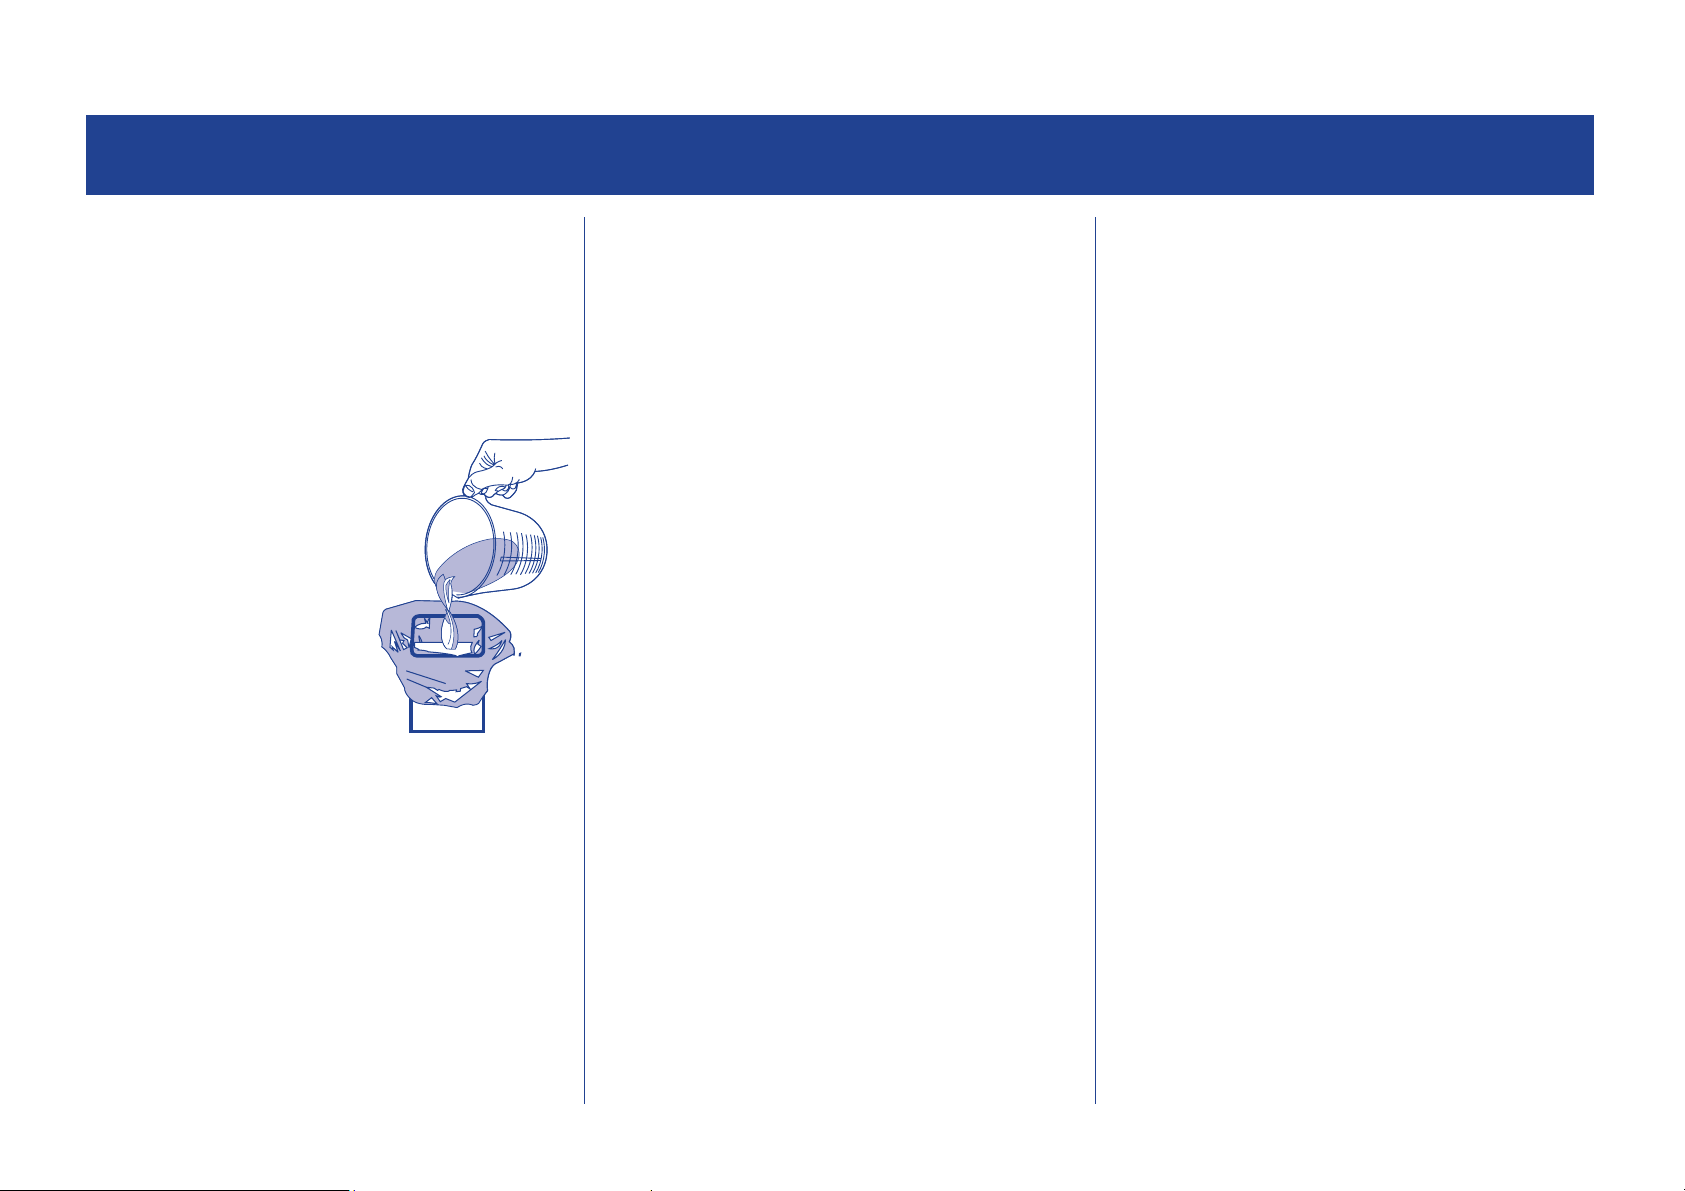
liquids, to allow for expansion.
â
you freeze liquids (or solids with liquids, such
as stew) in square blocks. This is known as
‘preforming’. Pour the liquid into a polythene
bag which is inside a square sided container.
Freeze it like this, then remove it from the
container and seal the bag.
fi yltneiciffe tsom rezeerf eht ni ecaps eht esu nac uoY
Label everything
what an item is. Storage times being exceeded could cause food poisoning.
et wol ni esu rof epat rezeerf laiceps yub nac uoY â
morf thgiarts ti evaworcim ot tnaw yam uoy fi sre
,sgab enehtylop ,mlif rezeerf ,stekramrepus morf elbaliava sgab
This tape is available in white, so you can use it to write the items contents on.
You can buy special freezer labels and pens. Labels come in different colours which
can help you use your Freezer effectively. For instance you could colour code meat
red and vegetables green. Using a different colour label for each quarter of the year
will help you rotate your frozen food more efficiently.
ra uoy fI .etad dna stnetnoc eht etirW â
on cooking
‘log-book’ of what is in each drawer. This will save opening the door and searching
around unnecessarily.
such as ‘thaw first’, or ‘cook from frozen’
.serutarepm
and keep a separate
Recommended storage periods
(when frozen from fresh)
gnittegrof diova pleh lliw gnillebal luferac os ,nezorf nehw emas eht kool sdoof ynaM â
Fruit Syrup or Sugar packed fruit up to 12 months
Open Frozen or Puréed Fruit up to 18 months
Fruit juices up to 6 months
Beef up to 10 months
Lamb up to 10 months
Veal up to 6 months
seton dna thgiew eht dda desinagro yllaer e
Pork up to 6 months
Minced meat up to 3 months
Cured meats up to 2 months
Sausages up to 3 months
Packed bacon up to 3 months
Smoked bacon/chops/gammon steaks up to 2 months
Unsmoked bacon/chops/gammon steaks up to 1 month
Chicken up to 8 months
Duck up to 5 months
Goose up to 5 months
Turkey up to 6 months
White fish up to 5 months
Oily fish including salmon up to 2 months
Smoked salmon up to 3 months
Caviar do not freeze
Shellfish up to 1 month
Butter up to 6 months
Cheese up to 6 months
Cream - double/whipping up to 3 months
Eggs - only freeze separated up to 10 months
Suet up to 6 months
Milk up to 1 month
Yogurt up to 6 weeks
Page 6
REVERSING THE DOOR SWING
6
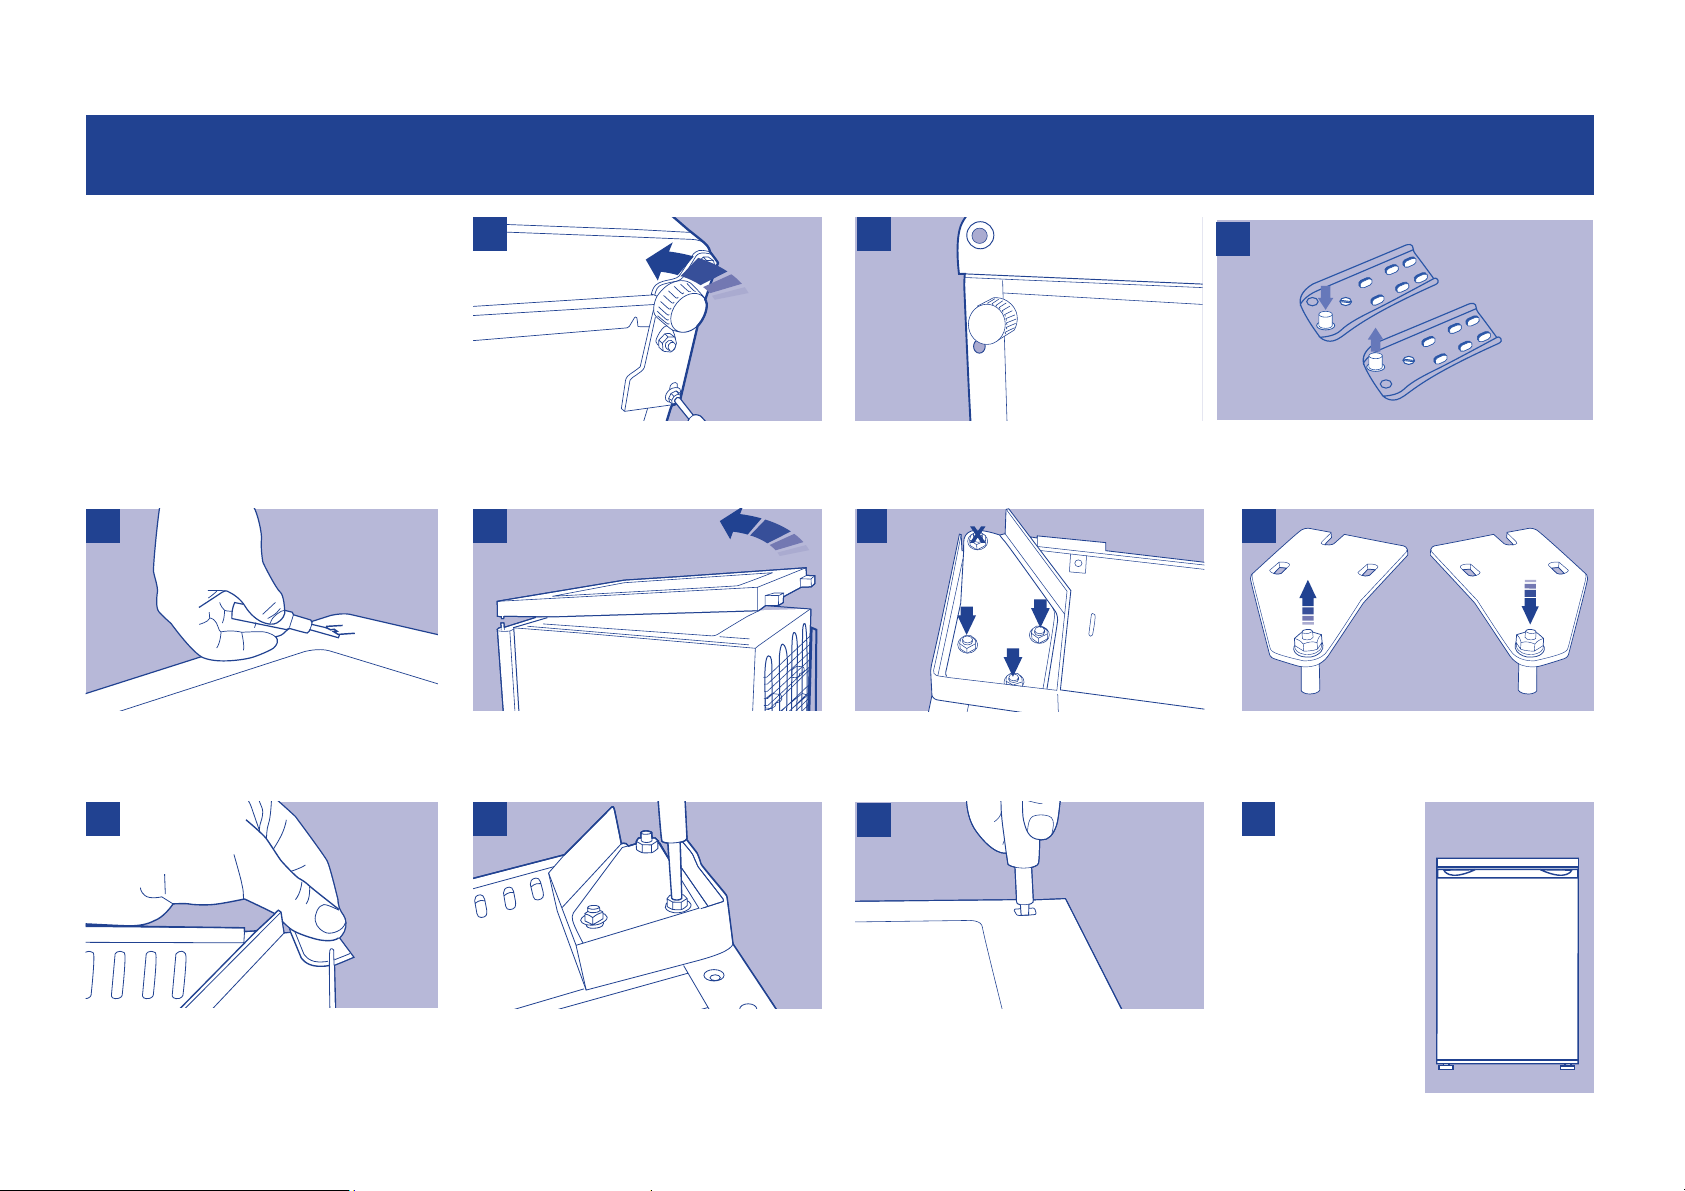
â Ensure the Freezer is unplugged and empty.
â We recommend you have someone to assist you.
Tools required
â Phillips style screwdriver
â Flat bladed screwdriver
â Small adjustable spanner
Before you start lay the Freezer on its back in order
to gain access to the base. You should rest it on
soft foam packaging or similar material to avoid
damaging the cooling pipes at the rear of the Freezer.
4 5
Stand the Freezer, use a flat bladed screw driver to
remove the 2 screw covers at the rear of the Freezer
lid.
1 2
Remove both adjustable feet and remove the bottom
hinge bracket by unscrewing the bolts. Support the
door to avoid damage.
Unscrew and lift the lid of the Freezer from the rear
and remove it. Put it in a safe place.
Remove levelling foot from this point and relocate it
into available point at opposite front corner.
6
Remove the top hinge bracket by unscrewing the
three retaining nuts. DO NOT undo the nut holding
the hinge pin. Support the door to avoid damage.
X
3
Unscrew and remove the hinge pin and refit it into the
adjacent hole
pin, spacers and washers into the bushing at the
bottom of the door. Replace both adjustable feet.
7
Unscrew and remove the top hinge pin, turn the
bracket over and replace it. Tighten securely.
. Refit the bracket fitting the hinge
8 9
Remove the three screws and the plastic blanking
plate and replace them on the opposite side of the
cabinet.
Refit the top bracket fitting the hinge pin, spacers
and washers into the bushing at the top of the door.
Check the door is aligned correctly before tightening.
10
Replace the lid by fitting the front first and sliding
into place, securing it with the two screws. Replace
the screw covers.
Check that door is
11
aligned horizontally
and vertically. Re-
adjust the levelling feet. See
‘Levelling the Freezer’ on
page
2.
Page 7
7
CLEANINGDEFROSTING
Defrosting
After a period of time frost will build up in certain areas in the Freezer
compartment. As a temporary measure, this frost should be scraped
away using a plastic scraper. NEVER use a metal or sharp instrument.
Remove existing foods and baskets, ideally the frozen food should be
put into another freezer. Scrape off and remove the frost, then move
your foods back in order to gain access to other sections of the Freezer.
Complete defrosting will however,
become necessary, approximately
once a year, or if the frost layer
exceeds 4mm to maintain the
efficiency of the freezer. This should
be carried out if the frost build up
cannot be scraped away, or if it begins
to interfere with the food storage. Choose a time when the stock of
frozen food is low and proceed as follows:
1
Take out the frozen food, turn the Freezer off at the mains supply
and leave the doors open. Ideally the frozen food should be put
into another freezer or freezer. If this is not possible wrap the food,
firstly in several sheets of newspaper or large towels and then a
thick rug or blanket and keep it in a cool place.
2
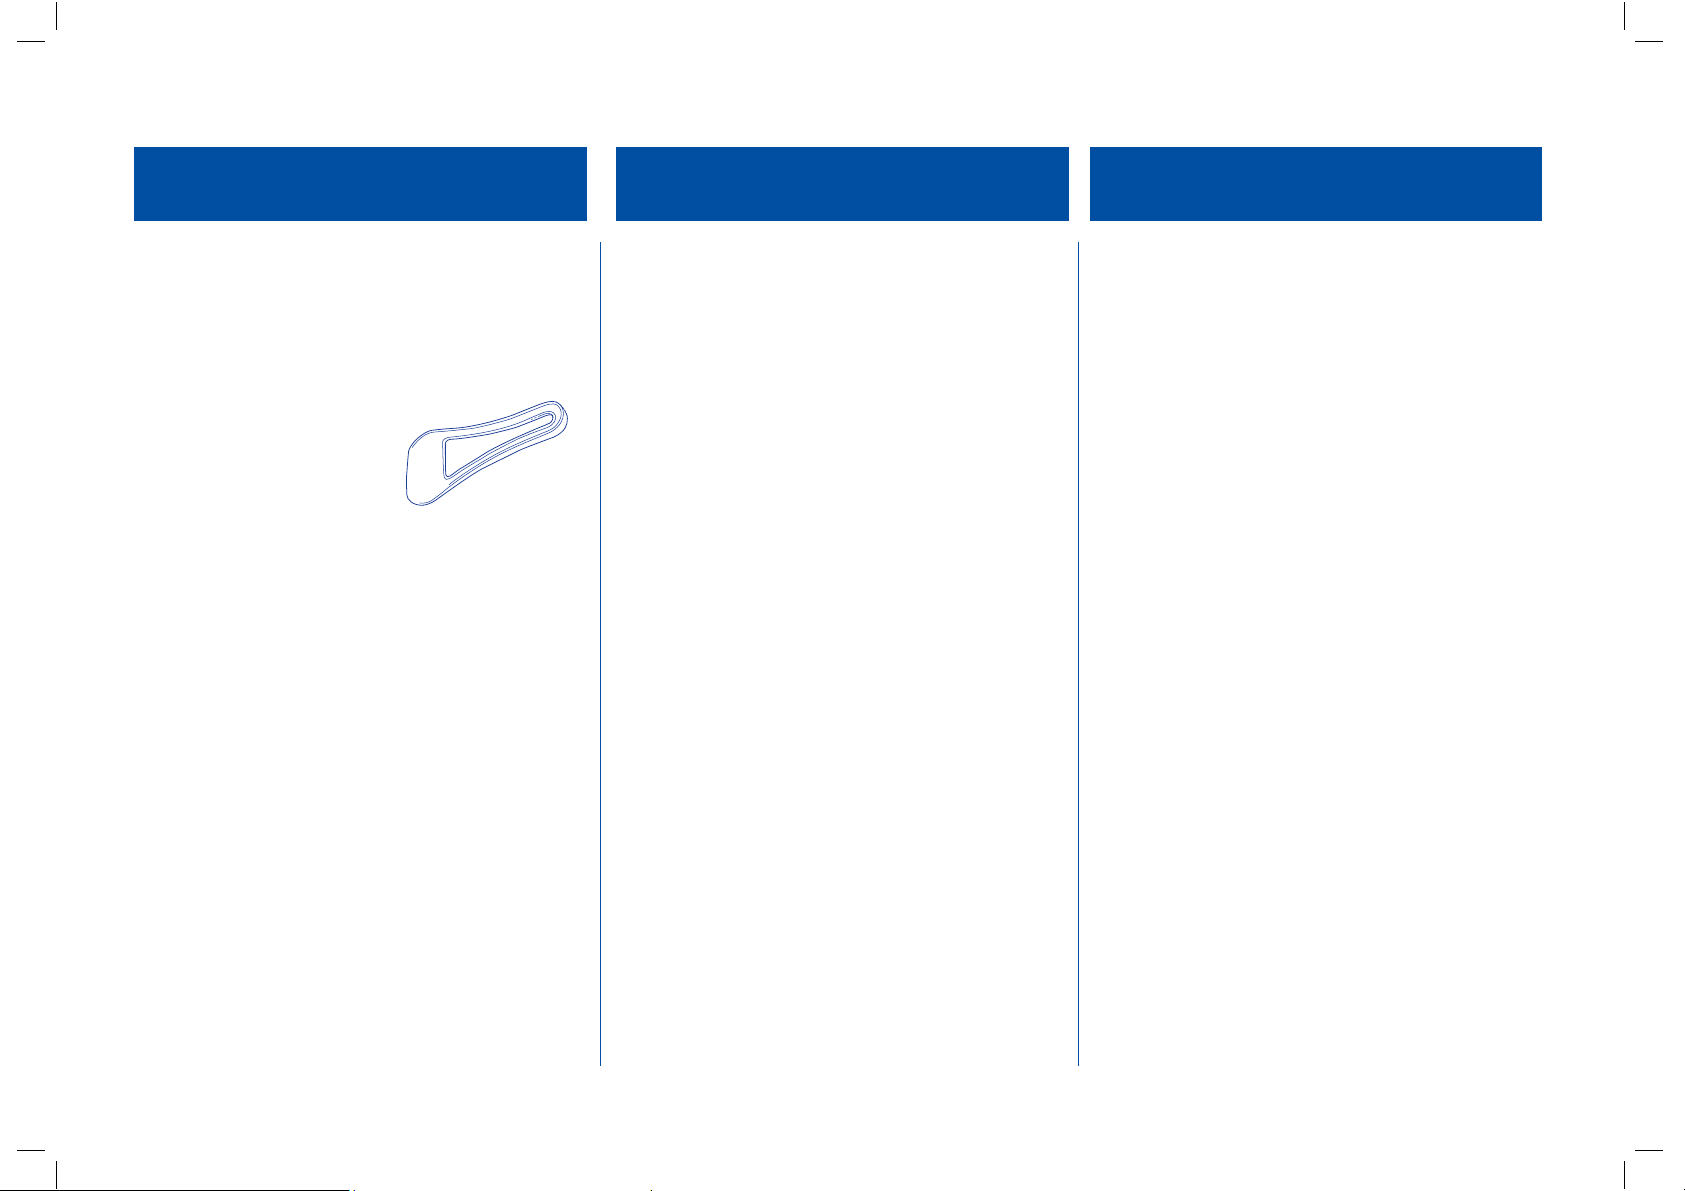
Scrape away as much frost build up as possible using the plastic
scraper (scraper not included).
3 Thawing of the remaining frost can be speeded up by placing bowls
of hot water inside the freezer compartment. As the solid frost
loosens, prize it away with the ice scraper and remove.
4
When defrosting is completed, clean your freezer as described in
CLEANING.
SCRAPER NOT
INCLUDED
Cleaning inside the Freezer
After defrosting you should clean the Freezer internally with a weak
solution of bicarbonate of soda. Then rinse with warm water using a
‘wrung-out’ sponge or cloth. Wipe the Freezer dry before replacing the
baskets and shelves.
Cleaning the outside of the Freezer
Use standard furniture polish to clean the Freezer exterior. Make sure that
the doors are closed, to prevent polish getting on the magnetic door seal
or inside.
The grille of the condenser at the back of the Freezer and the adjacent
components can be vacuumed using a soft brush attachment.
Cleaning tip
â Defrost when food stocks are low.
Page 8
Page 9
Page 10

SAFETY
10
Safety and warning information
Before you switch ON the appliance
Please read the operating and installation instructions carefully. They
contain important information on how to install, use and maintain
the appliance. Keep all documentation for subsequent use or for the
next owner.
Technical safety
This appliance contains a small quantity of environmentally friendly but
flammable R600a refrigerant. Ensure that the tubing of the refrigeration
circuit is not damaged during transportation and installation. Leaking
refrigerant may ignite.
If damage has occurred
- Keep naked flames and/or ignition sources away from the appliance.
- Pull out the mains plug.
- Thoroughly ventilate the room for several minutes.
- Notify customer services.
The more refrigerant an appliance contains, the larger the room must be.
Leaking refrigerant can form a flammable gas-air mixture in rooms which
are too small. The room must be at least 1m
The amount of refrigerant in your appliance is indicated on the rating label
on your appliance.
3
per 8 g of refrigerant.
Important information when using the appliance
â This appliance is not intended for use by persons (including children)
with reduced physical, sensory or mental capabilities, or experience or
knowledge, unless they have been given supervision or instructions
concerning the use of the appliance by a person responsible for their
safety. Children should be supervised to ensure that they do not play
with the appliance.
â If the supply cord is damaged, it must be replaced by the manufacturer,
its service agent or similarly qualified persons in order to avoid a hazard.
â Never use electrical appliances inside the refrigerator (e.g. heater,
electric ice maker, etc.). Explosion hazard!
â Never use a steam cleaner to clean the appliance. The steam may pen-
etrate electrical parts and cause a short circuit. Risk of electric shock!
â Do not store products which contain flammable propellants (e.g. spray
cans) or explosive substances in the appliances. Explosion hazard!
â Do not stand or support yourself on the base, drawers or doors, etc.
â Before defrosting and cleaning the appliance, pull out the mains plug or
switch off the fuse. Do not pull out the mains plug by tugging the cable.
â Commercially frozen pre-packed food should be stored in accordance
with the frozen food manufacturers instruction.
â Bottles containing a high percentage of alcohol must be sealed and
stored in an upright position.
â Keep plastic parts and the door seal free of oil and grease. Otherwise,
the plastic and door seal will become porous.
â Never cover or block the ventilation openings for the appliance.
â Do not store bottled or canned drinks (especially carbonated drinks)
in the ice compartment. Bottles and cans may explode!
â Never put frozen food, or ice cubes, straight
into your mouth. Risk of frost burns to the lips and tongue!
â Avoid prolonged touching of frozen food, ice or the inner freezer walls
or tubing etc. Risk of frost burns to the skin.
â Do not scrape off frost or stuck frozen food with a knife or pointed
object. You could damage the refrigerant tubing. Leaking refrigerant
may ignite. Only use a plastic scraper.
â In the case of malfunction, under no circumstances should you attempt
to repair the appliance yourself. Repairs carried out by inexperienced
persons may cause injury or further malfunctioning to the appliance.
â When the appliance is unplugged please wait for 5 minutes before
plugging it in again. Otherwise, the compressor will be overloaded.
from the ice compartment
â Do not use electrical appliances such as a hairdryer or heaters
near your refrigerator.
â Do not store inflammable gases or liquids inside your refrigerator.
Children in the household
â Keep children away from the packaging and its parts. Danger of
suffocation from folding cardboard and plastic film!
â Do not allow children to tamper with the controls or play with the
appliance. It is not a toy. Under no circumstances should children
be allowed to sit on the bins or hang from the door.
â If the appliance features a lock, keep the key out of the reach
of children.
General requirements
â The appliance is designed for domestic use inside the home and is not
intended for commercial or industrial use.
â The appliance
according to the instruction manual.
â Try to avoid keeping the door open for long periods or opening the
door too frequently in order to conserve energy.
â Do not fill the appliance with too much food: cold air must circulate
freely for food to be preserved properly.
must be used to store food products by adults only and
Page 11
ELECTRICAL CONNECTIONS
11
THIS APPLIANCE MUST BE EARTHED.
current specifications.
if eht fI
off and carefully disposed of. To avoid a possible shock hazard, do not
insert the discarded plug into a socket.
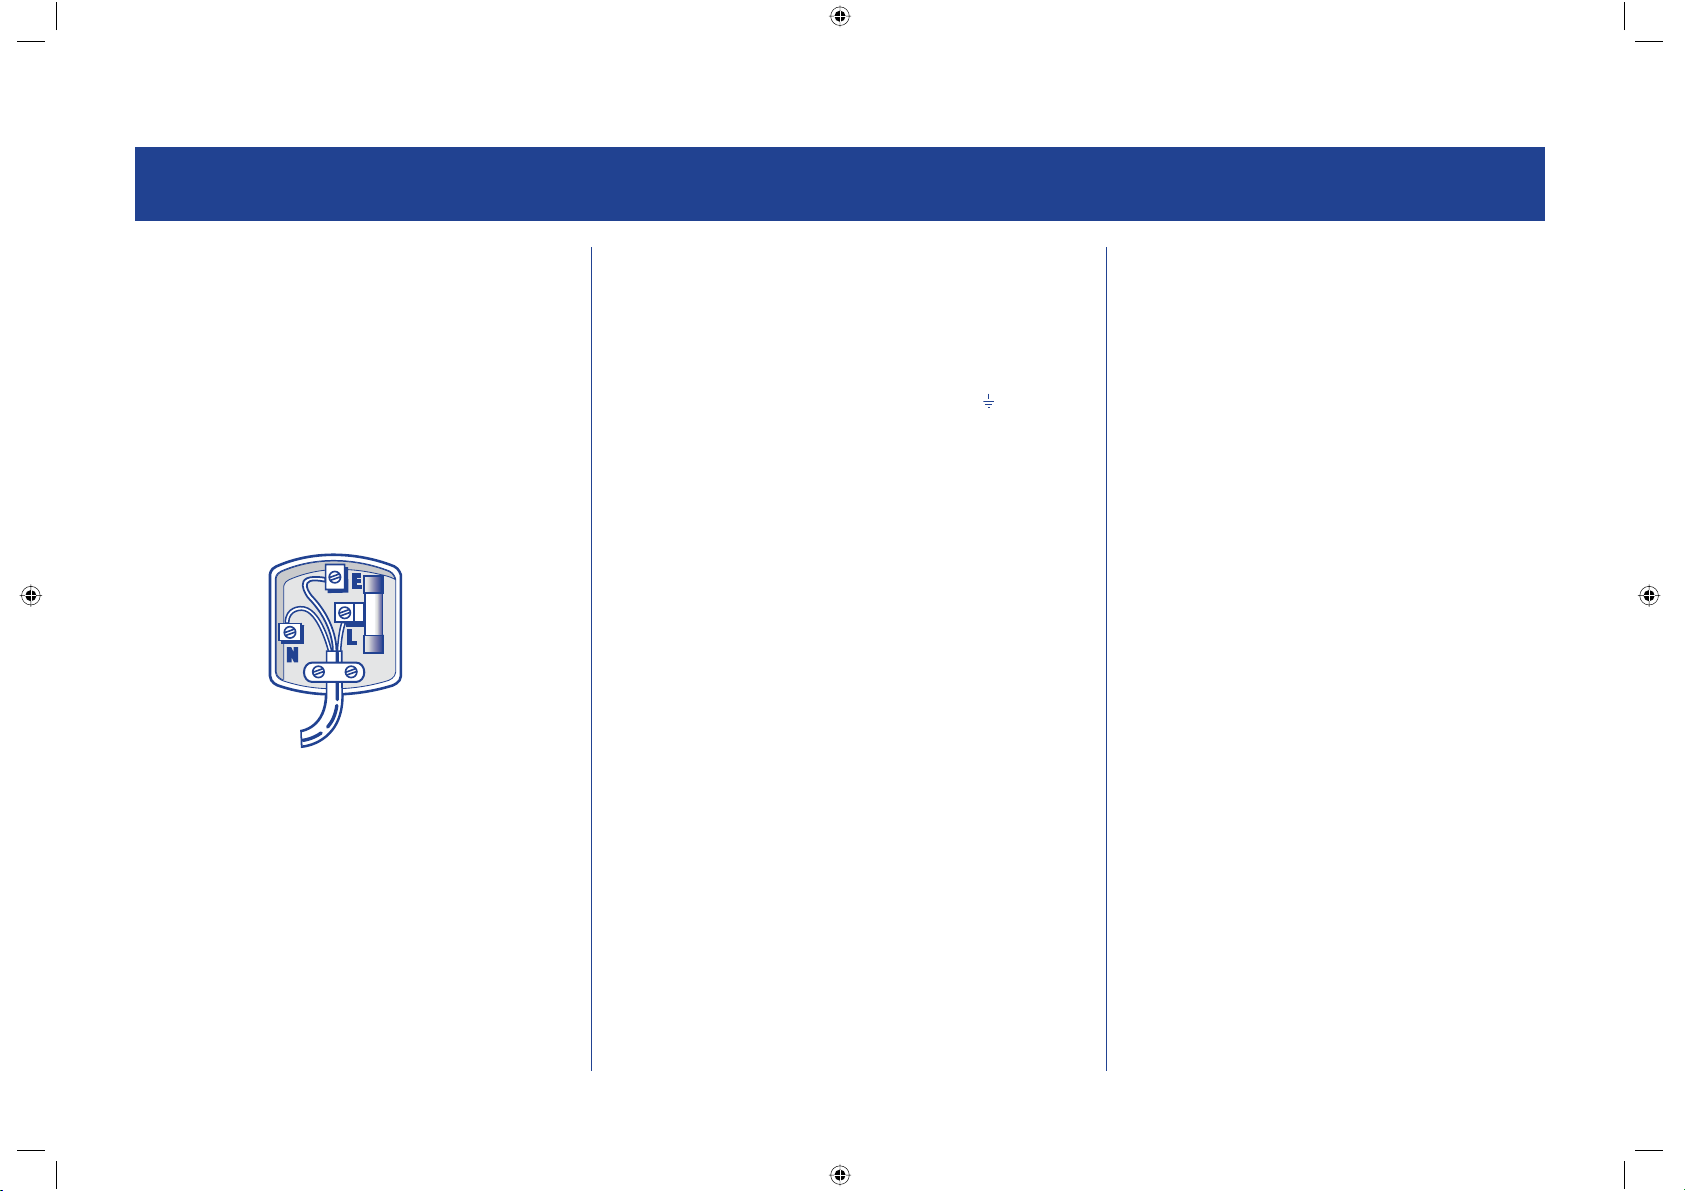
Fitting a new plug
If for any reason you need to fit a new plug, the flexible mains lead must
be connected as shown here.
CONNECT BLUE TO
NEUTRAL (N)
i esu rof elbatius eb lliw hcihw
CONNECT GREEN
AND YELLOW TO EARTH (E)
(Note: some appliances do
not have earth wires.)
CONNECT BROWN
TO LIVE (L)
MAKE SURE THE CABLE
IS HELD BY THE CLAMP
3631 SB ot gulp nip eerht desuf a htiw dettif si ecnailppa sihT
ot stekcos htiw dettif sesuoh lla n
accordance with the following code:
If the colours of the wires in the mains lead of this appliance do not
correspond with the coloured markings identifying the terminals in your
tuc eb dluohs ti ,steltuo tekcos ruoy rof elbatius ton si gulp dett
plug, proceed as follows:
The wire which is coloured Green and Yellow MUST be connected to the
terminal which is marked with the letter E (Earth) or symbol
Green. The wire which is colour ed Blue MUST be connected to the
terminal which is marked with the letter N or coloured Black. The wire
which is coloured Brown MUST be connected to the terminal which is
marked with the letter L or coloured Red.
Before refitting the plug cover, check that there are no cut or stray strands
of wire inside the plug.
Use a 13 Amp BS1362 fuse, only BSI or ASTA approved fuses should be
used. If you are in any way unsure which plug or fuse to use, always refer
to a qualified electrician.
Note: After replacing or changing a fuse on a moulded plug which has
a fuse cover, the cover must be refitted to the plug, the appliance must
not be used without a fuse cover. If lost, replacement fuse covers can be
obtained from an electrical shop.
This appliance complies with the following EEC Directives: 73 / 23 EEC
(Low Voltage Directive) 89 / 336 EEC (EMC Directive).
ni deruoloc era ecnailppa siht ot dettif dael sniam eht ni seriw ehT
or coloured
Page 12
 Loading...