

Page 1
Page 2
Page 3
3
USING YOUR LARDER FRIDGE
Switching on your Larder Fridge
1 Before connecting the Larder Fridge to the mains supp ly make sure that
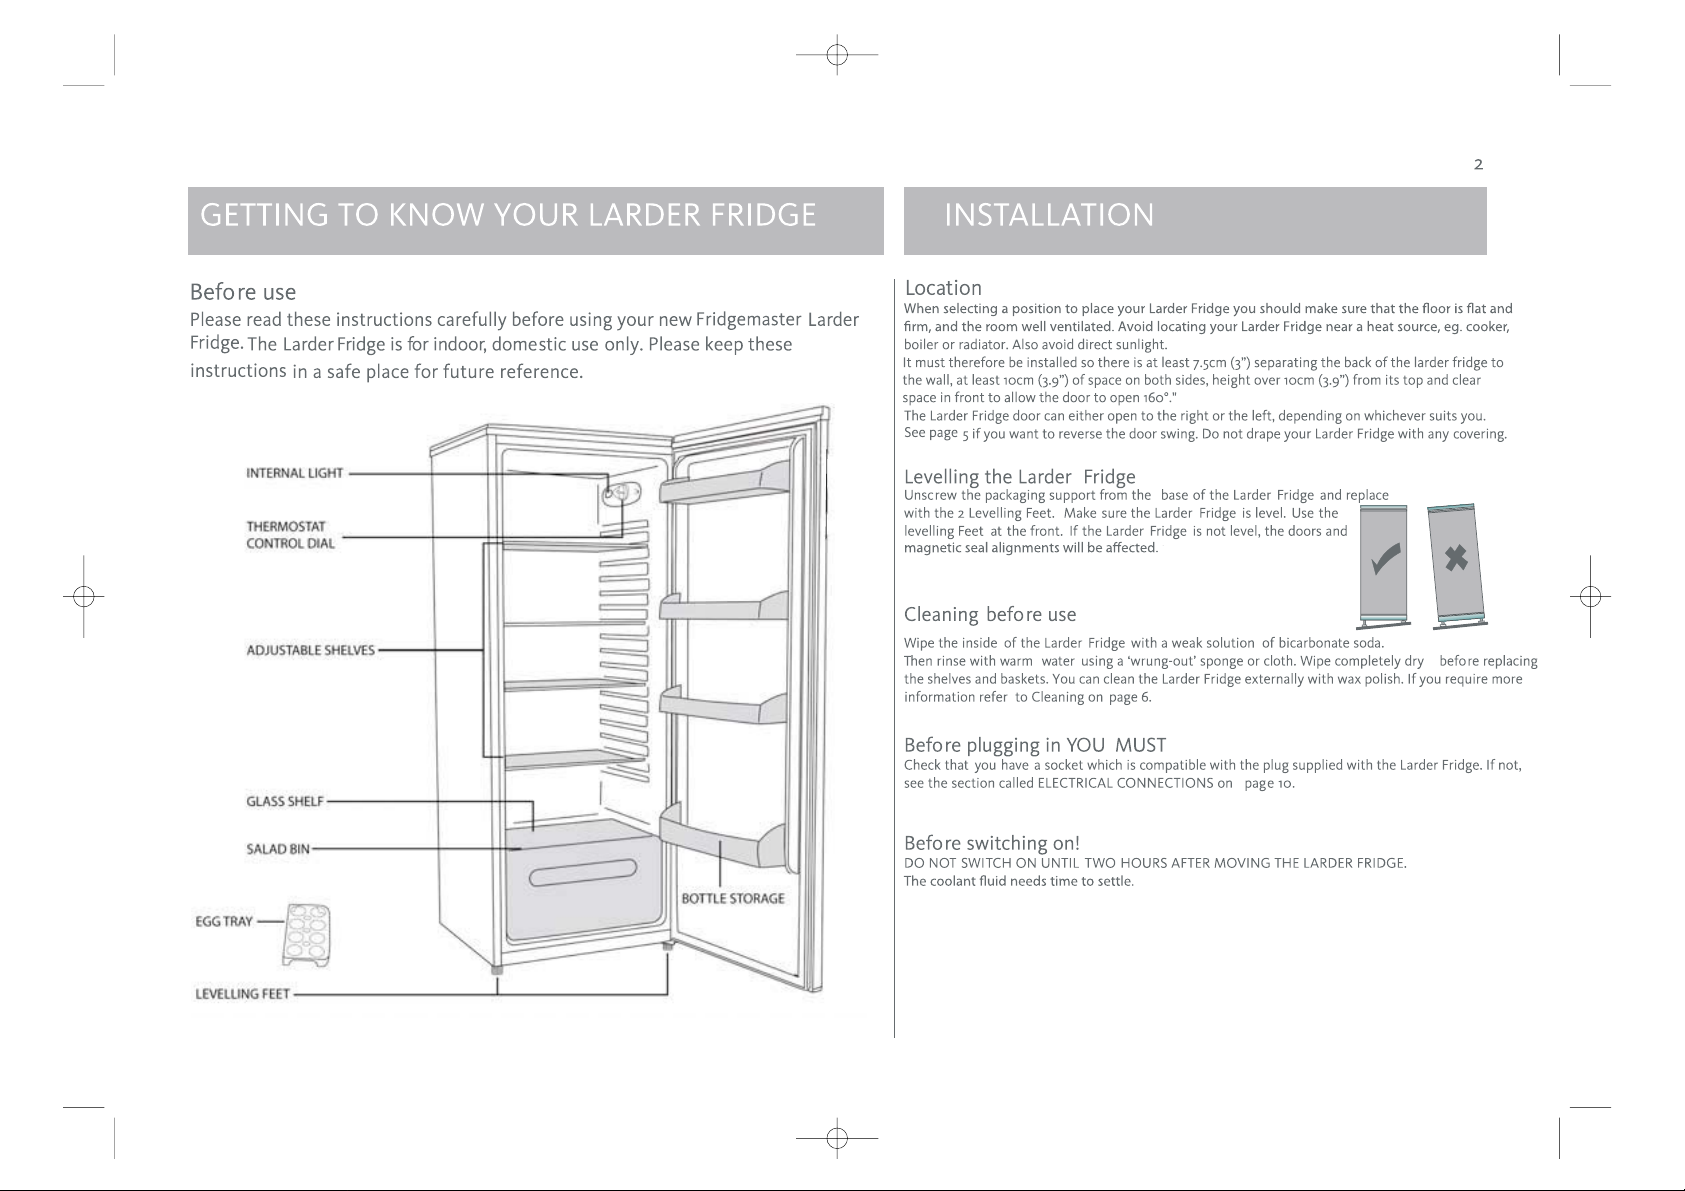
the therm ostat control dial, located ins ide the Larder Fridge
compartment next to the internal light, is set at position 0 whic h is Off.
2 Turn the thermostat knob clockwise to set it to the desired position,
bearing in mind that the higher the number, the colder the
temperature.
3 Wait 24 hours before placing food into the Larder Fridge.
Is the Larder Fridge cold enough?
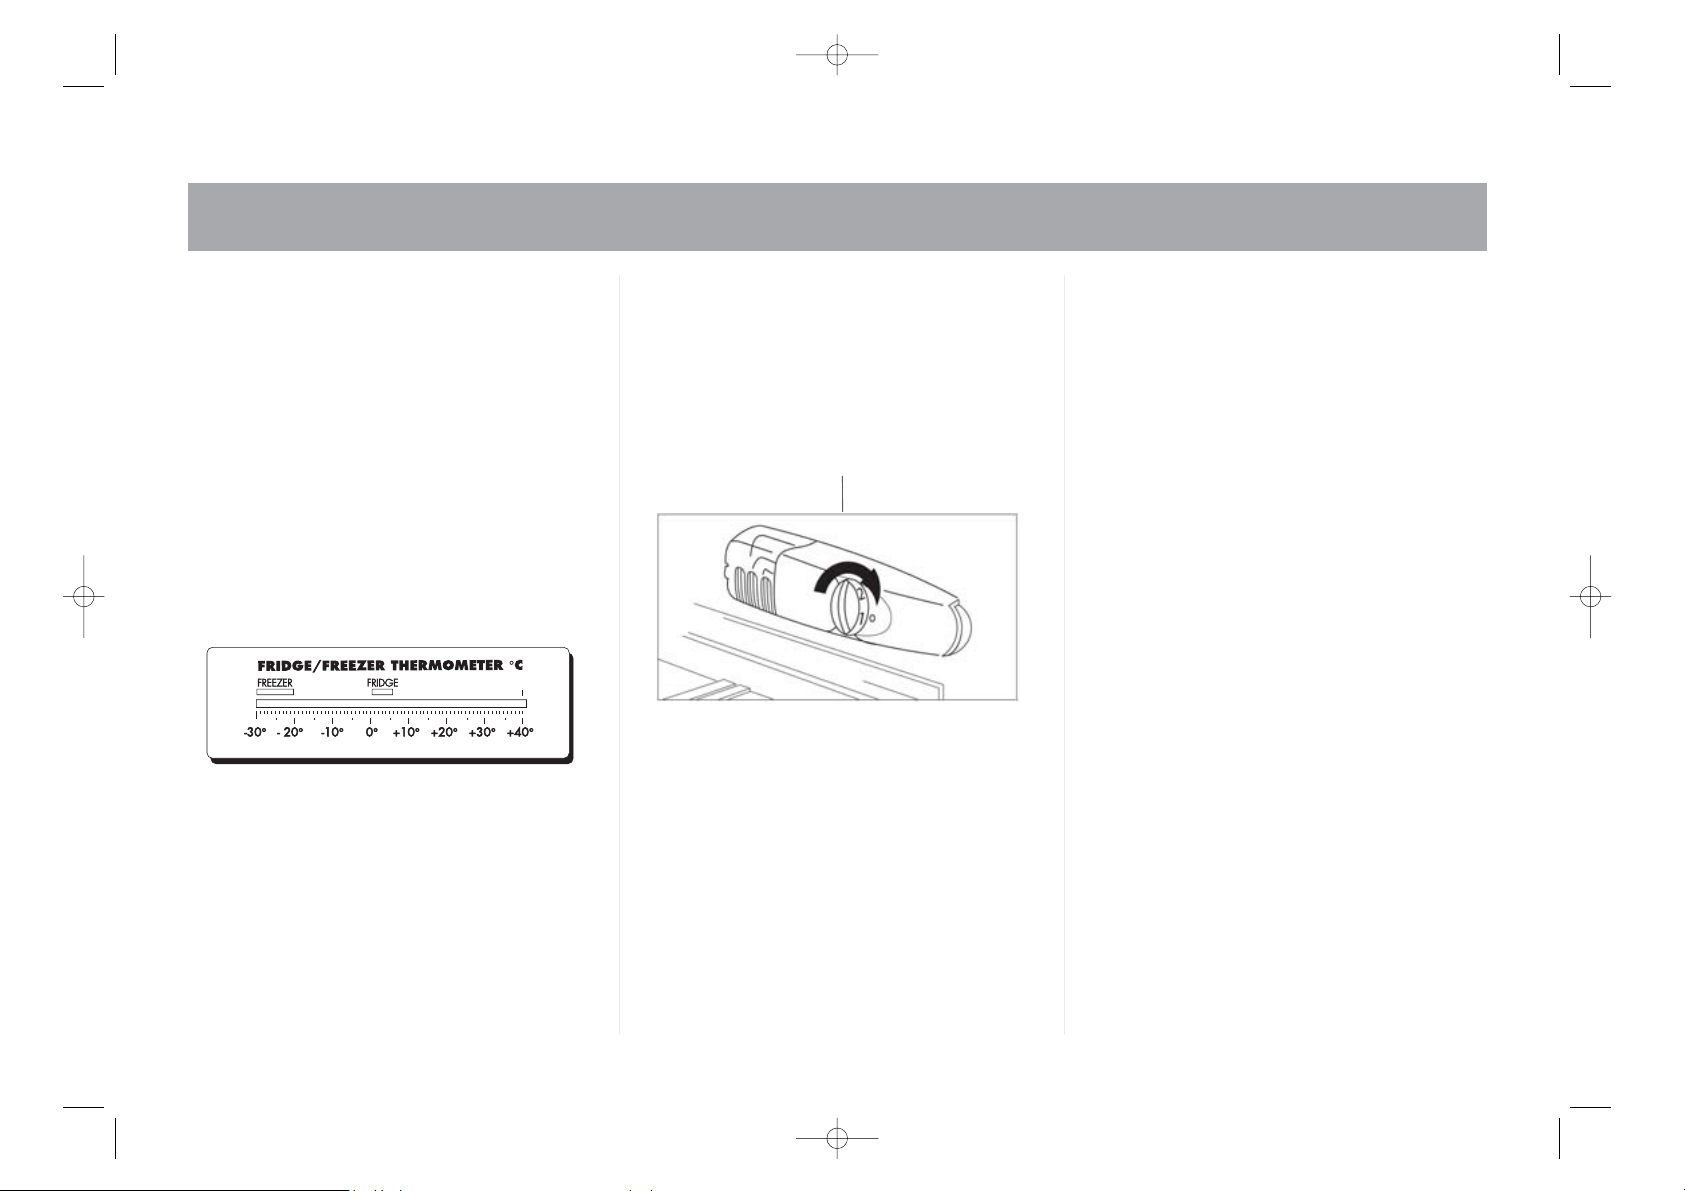
If you are concerned that your Larder Fridge is not being kept cold
enough, and wish to check the temperature, you will need a special
refrigerator thermometer available from most supermarkets and
hardware shops. Place the thermometer in the coldest part of your Larder
Fridge and where it can be easily read. Leave overnight, the temperature
in the Larder Fridge should be between Ò& and Ò& .
See ‘Adjusting the temperature’.
Adjusting the temperature
The internal temper ature of your Larder Fridge is controlled
thermostat. Position 7 makes the Larder Fridge coldest. Position 1 makes
it warmest and 0 turns the Larder Fridge Off. The recommended setting
for the Larder Fridge is between 3 and 4 for short-term storage and 5
and 6 for long-term. The Larder Fridge may not operate at the correct
temperat ure if it is in a particularly hot or cold room or if you open the
Larder Fridge door often.
THERMOSTAT &ONTROL DIAL
by a
Noises inside the Larder Fridge
If you have not owned a Larder Fridge before, you may notice that it
makes some rather unusual noises. Most of these are perfectly normal,
but you should be aware of them!
Gurgling, whooshing
These noises are caused by the circulation of the refrigerant liquid in the
cooling system. It has become more pronounced since the introduction of
&F& free gases. This is not a fault and will not affect the performance of
your Larder Fridge.
Shopping for chilled foods
Don’t buy in your lunch hour!
Unless you have a Larder Fridge at work to keep the food cold in the
afternoon. Leaving food in your car or at room temperature for a
prolonged period of time could raise food temperature to the level at
which harmful bacteria grow.
Keep chilled foods together
When you are going around the supermarket and when you are travelling
home. If you keep all the chilled foods together they will help to keep
each other cold.
Use a cool bag
Special insulated bags can be bought from most supermarkets and
hardware shops. These keep food cold for longer, but are only for getting
chilled foods home, not storing it.
Unwrap as soon as you get home
Always unpack and place chilled foods in the Larder Fridge before storing
dry food-stuffs.
Humming, purring or pulsating
This is the compressor motor working, as it pumps the refrigerant around
the system.
Page 4
USING YOUR LARDER FRIDGE
4
Tips for keeping food perfect in the
Larder Fridge
Take extra care with meat and fish
Cooked meats should always be stored on a shelf above raw meats to
avoid bacterial transfer. Keep raw meats on a plate which is large enough
to collect juices and cover it with cling film or foil.
Leave space around food
This will allow cold air to circulate around the Larder Fridge.
Wrap up food!
To prevent transfer of flavours and drying out, food should be separately
packed or covered. Fruit and vegetables need not be wrapped.
Let pre-cooked food cool properly
Always let pre-cooked food cool down before you put it in the Larder
Fridge. This will stop the internal temper ature of the Larder Fridge from
rising.
Shut the door!
To prevent cold air escaping, limit the number of times you open the door.
When returning from shopping, sort foods to be kept in your Larder Fridge
while the door is closed.
Where to store your foods in the
Larder Fridge
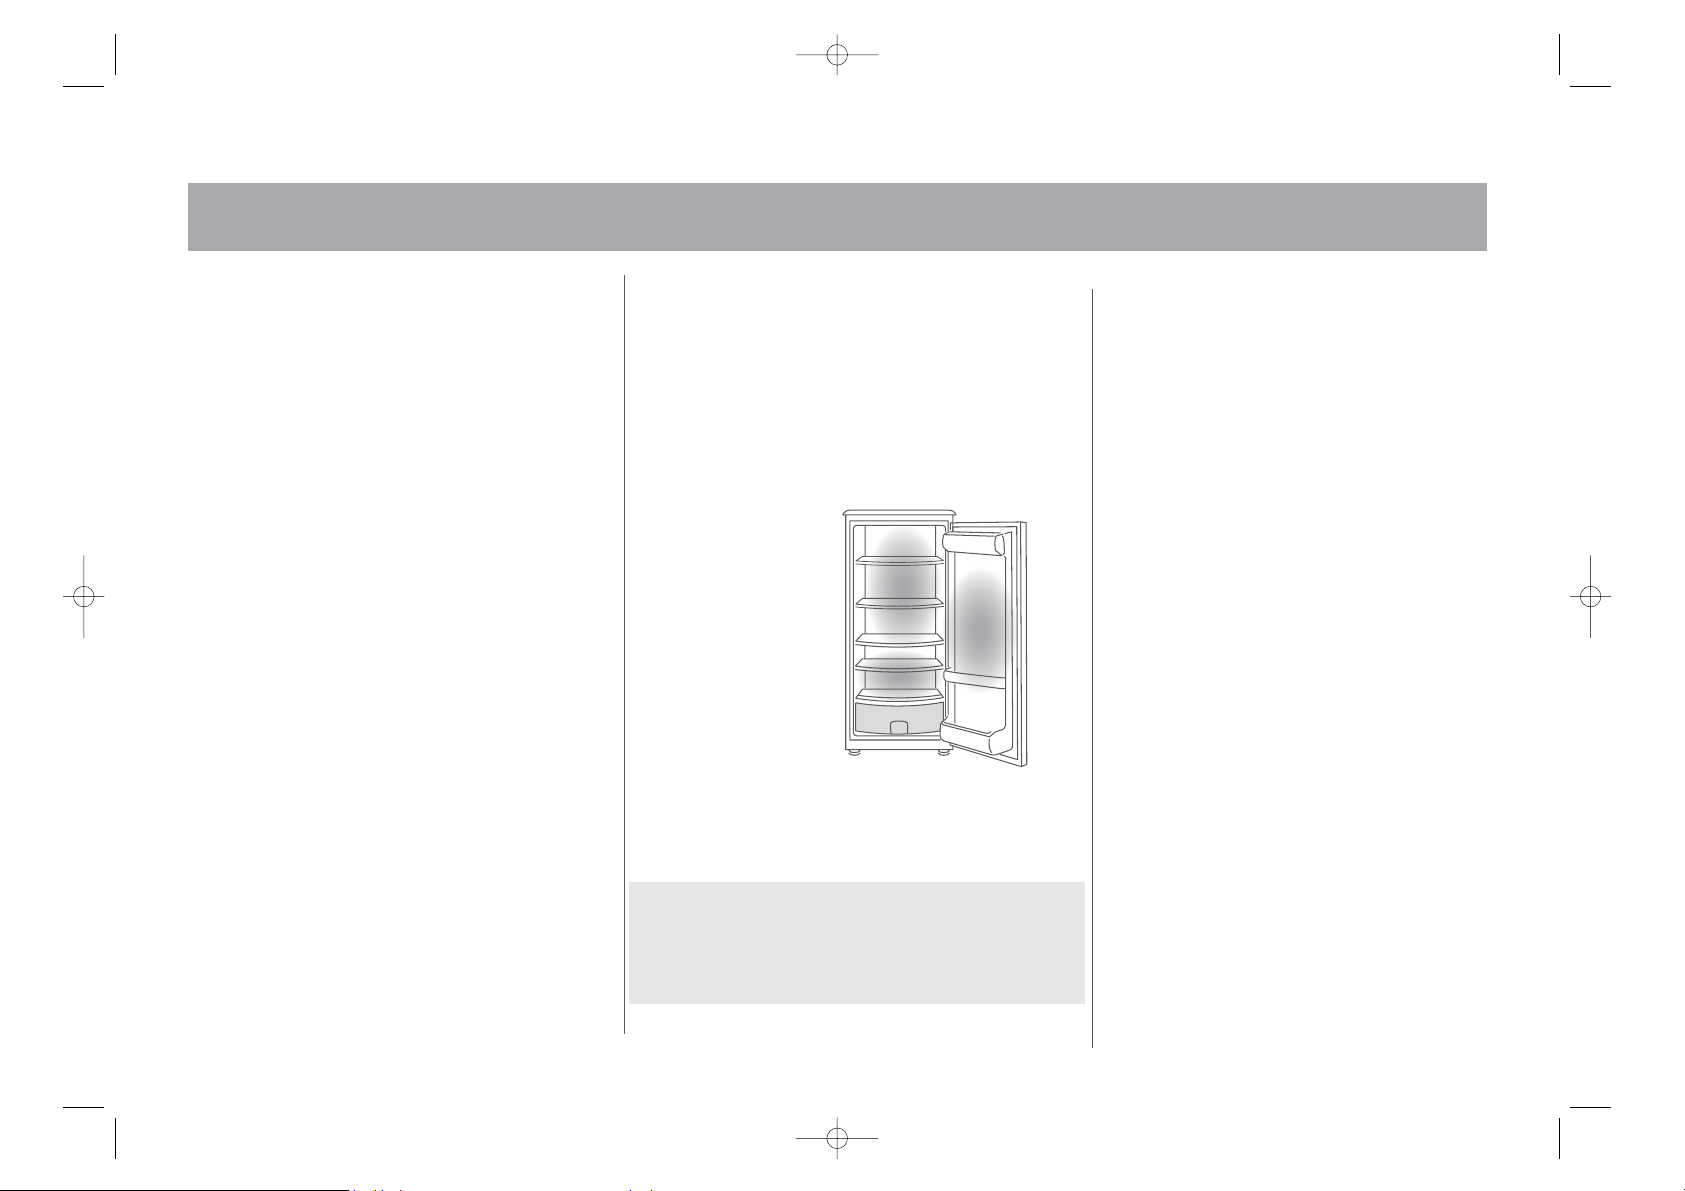
Cool area
This is where to store foods which will keep longer if they are kept cool.
Milk, yogurt, fruit juices, hard cheeses eg, cheddar. Opened jars and
bottles of salad dressings, sauces and jams. Fats, eg, butter, margarine,
low-fat spreads, cooking fats and lard. Eggs
Coldest area: 0°C to 5°C
This is where foods which must be cold to keep them safe should be kept.
â Raw and uncooked foods should always be wrapped.
â Pre-cooked chilled foods,
eg. ready meals, meat pies,
soft cheeses.
â Pre-cooked meats eg. ham.
â Prepared salads (including
pre-washed chopped,
pre-packed mixed green
salads, rice, potato salad etc).
â Desserts, eg. fromage frais,
home-prepar ed food and
leftovers or cream cakes.
Salad bin
This is the most humid part of the Larder Fridge.
Vegetables, fruit, fresh salad items eg. unwashed whole lettuce, whole
tomatoes, radishes etc.
WE RECOMMEND THAT ALL PRODUCE KEPT IN THE SALAD BIN IS WRAPPED .
COOL
COOL
COLDEST
SALAD BIN
NOTE
:
ALWAYS WRAP AND STORE RAW MEAT, POULTRY AND FISH ON THE
LOWEST SHELF AT THE BOTT OM OF THE LARDER FRIDGE.
THIS WILL STOP THEM DRIPPING ONTO, OR TOUCHING, OTHER FOODS.
DO NOT STORE INFLAMMABLE GASES OR LIQUIDS.
Page 5
5
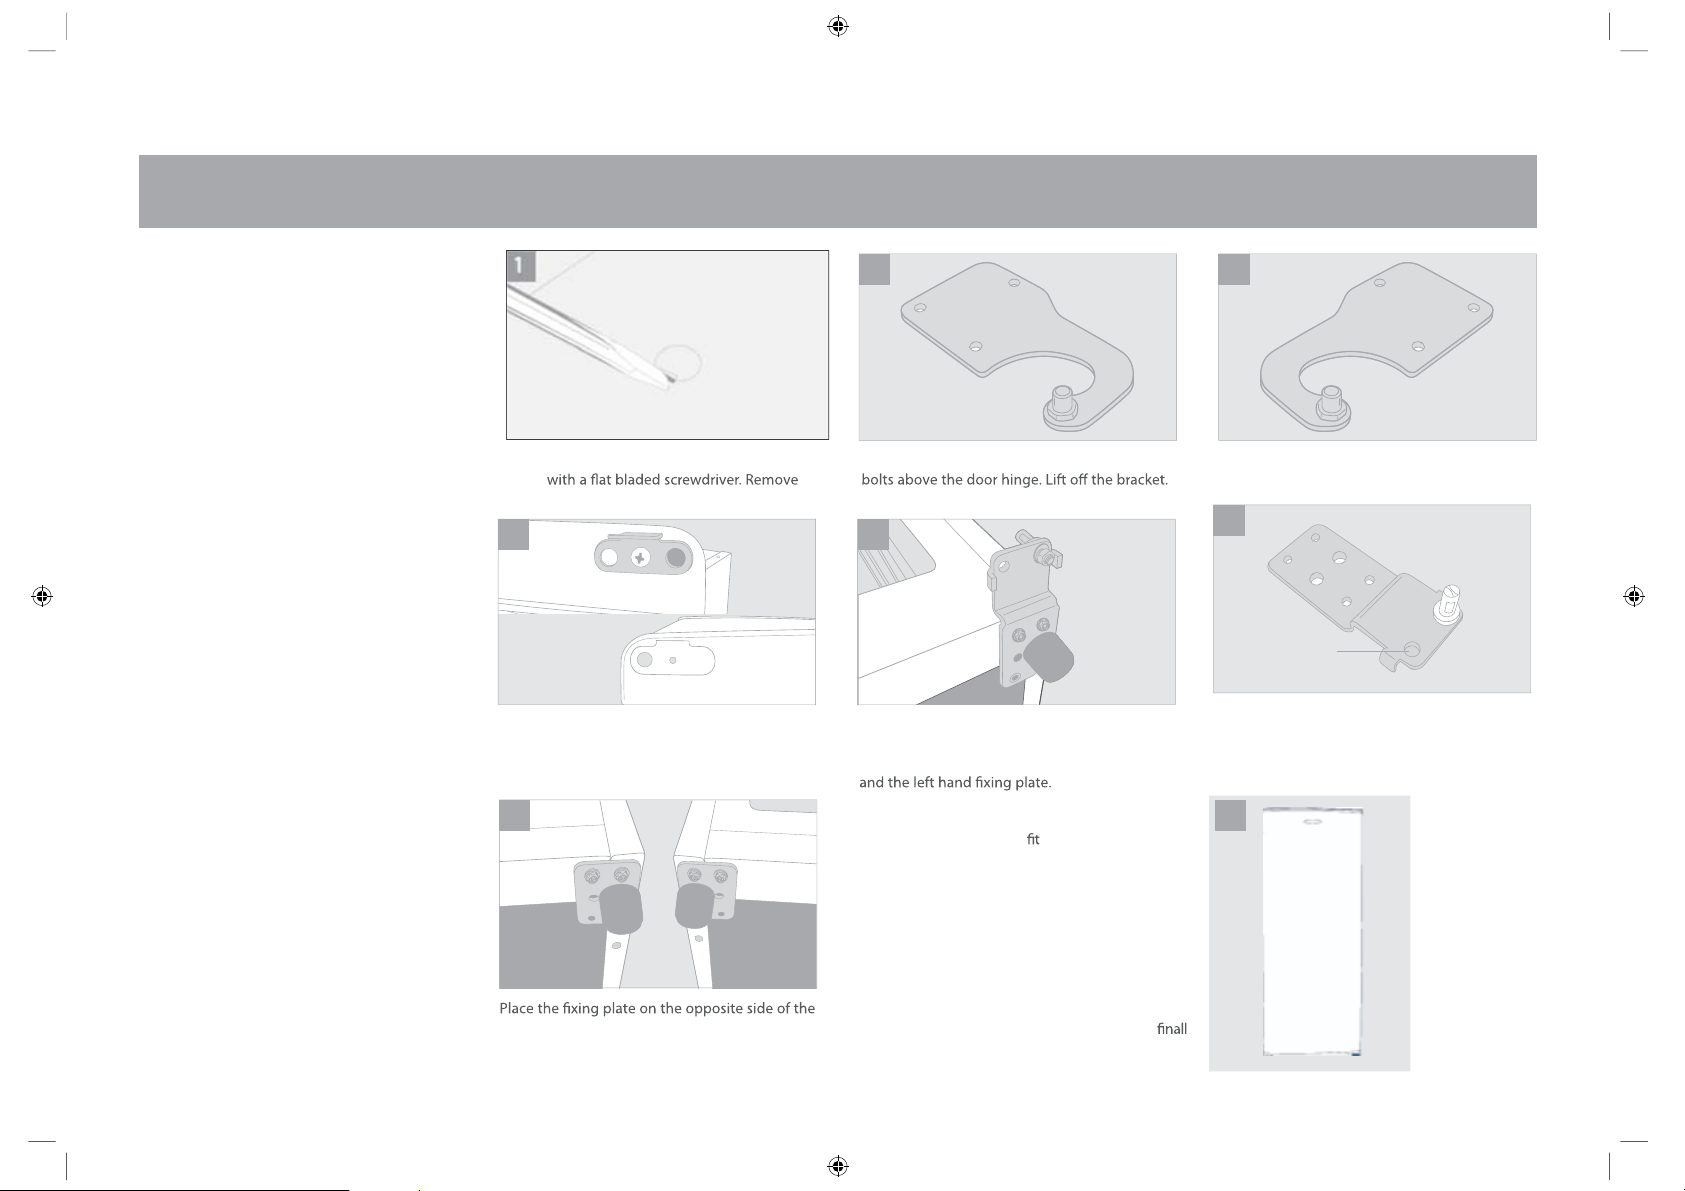
REVERSING THE DOOR SWING
The door of your refrigerator can be reversed.
. Ensure the fridge is unplugged and empty.
. We recommend you have someone to assist you
Tools required
. Philips style screwdriver
. Flat bladed screwdriver
. 8mm socket
.10mm socket or spanner
When trying to gain access to the base of the
fridge, do not tip it back at more than a 45° angle.
Rest the fridge on soft foam packaging or similar
material to avoid damaging the back of the appliance
1
Remove the four blanking pl ates from the top of the
fridge
the screws underneath with a Phillips screwdriver.
4
Remove the hinge insert plate from the bottom of
fridge door. Replace the plate on
the opposite side.
7
2
Use the 8mm socket or spanner to remove the three
Remove the fridge door.
5
Tilt the fridge back, no more than 45°, to
access the bottom hinge and feet. Remove the feet
and the bolts securing the right hand hinge plate
against the cabinet, on
any side, warm the seal
with hot water and tease
it into position. This can be
done using a hair dryer but
care must be taken not to
overheat the seal or burn
your hands
esodnotlaes roodIf the
3
Remove the pin from the bracket and replace it into
the same hole from the other side.
6
Position 2
Remove the hinge pin from position 1 and replace
it in position 2. Place the hinge on the opposite side
of the cabinet, secure it with the three bolts, and
screw in the foot into position.
8
appliance, secure it with the three bolts, and screw
the foot into position.
Check the door is
and that the seal closed on all sides b efore
tightening hinge bolts. Replace the lid and screws.
aligned horizontally and verically
is
y
Page 6
CLEANING TROUBLESHOOTING MAINTENANCE
6
Cleaning inside the Larder Fridge
Swi tch and unp lug the Larder Fridge before cleaning the inside. You
should clean the Larder Fridge internall y with a weak solution of
bicarbona te of soda. Then rinse with warm wate r using a ‘wrung-out’
sponge or cloth. Wipe the Larder Fridge dry before replacing the food.
Plug in and switch on the mains supply.
Condensation / frost may form on the back wall of the larder fridg e it will
normall y run down the back wall of the larder fridg e and evaporate by
itself.
Cleaning the outside of the Larder Fridge
Use standard furniture polish to clean the Larder Fridge exterior.
Make sure that the doors are closed, to prevent polish getting on the
magnetic door seal or inside. Do not use harsh cleaners, scouring pads or
solvents to clean any part of your larder fridge.
Cleaning tips.
NOTE Do not use harsh cleaners, scouring pads or solvents to clean
any part of the Larder Fridge.
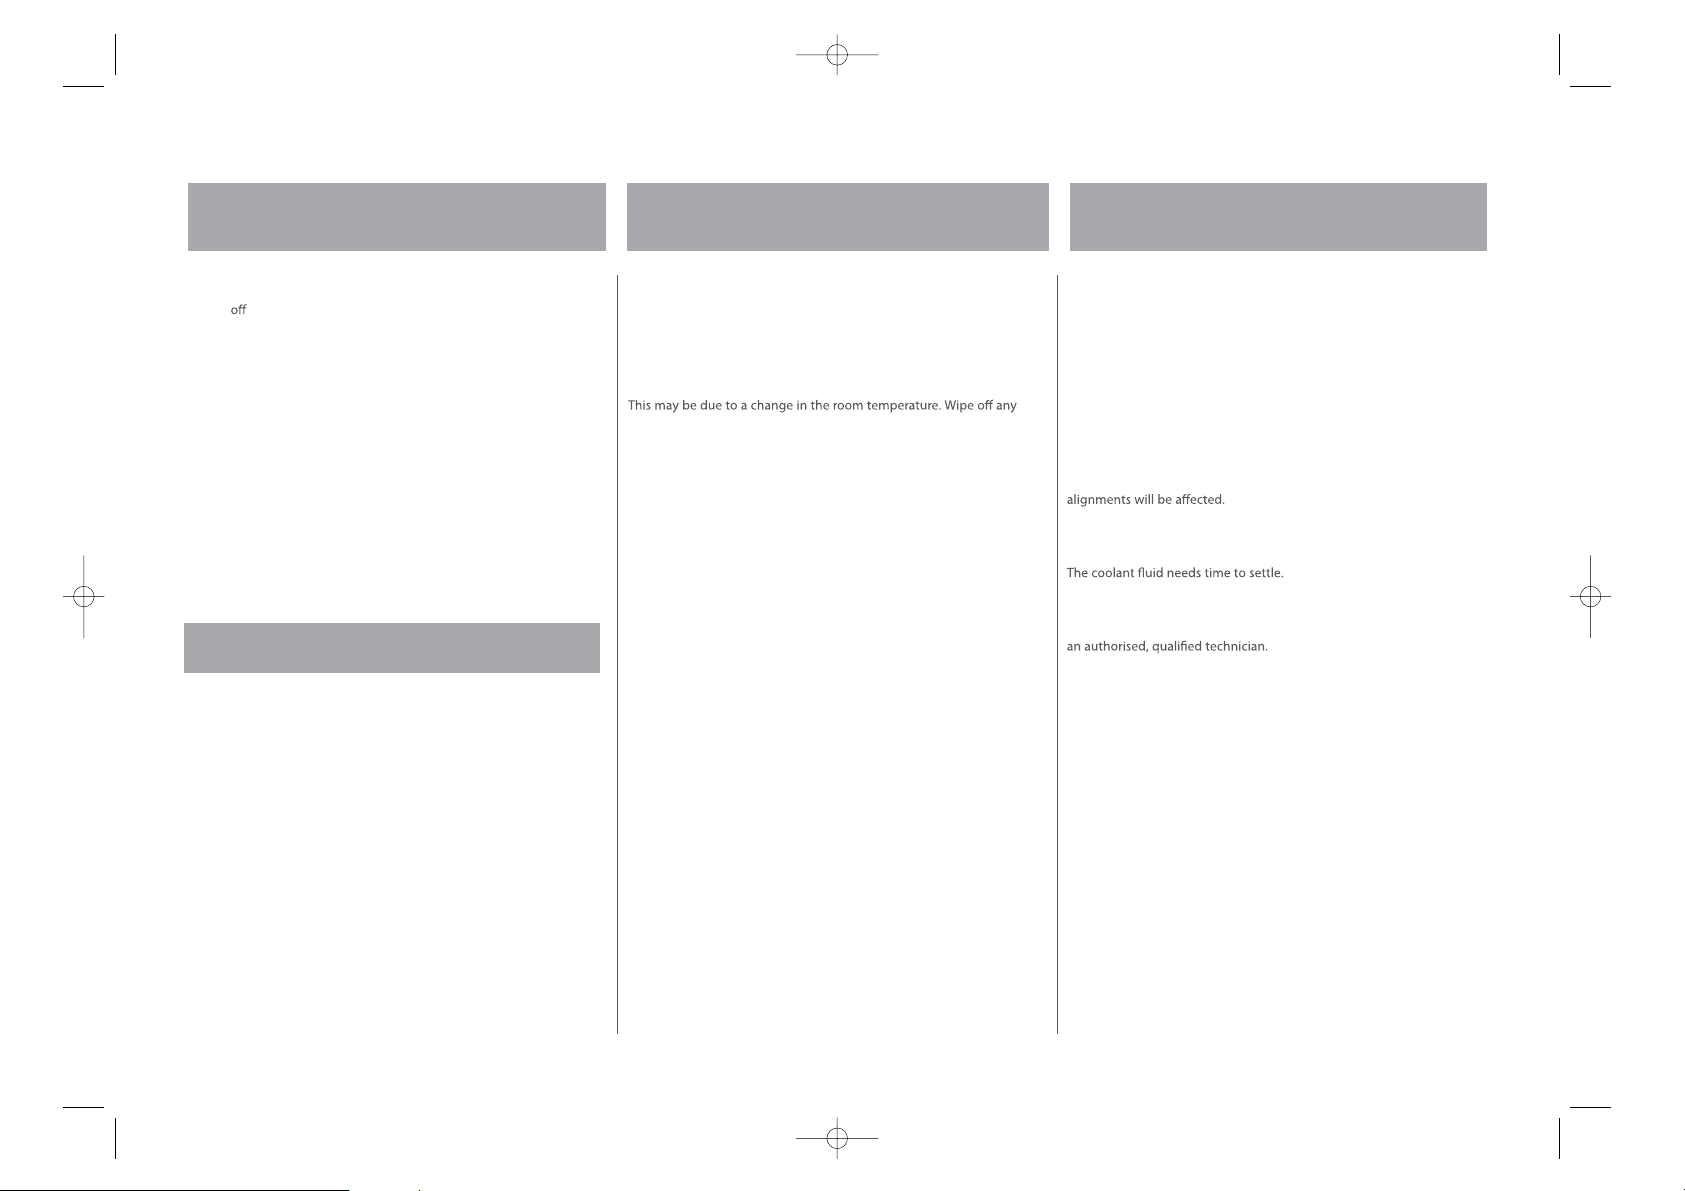
The Larder Fridge is not working
Check it is plugged in and switched on. Check that the fuse in the plug
has not blown. Plug in another appliance, such as a lamp, to see if the
socket is working.
Condensation appears on the outside of the
Larder Fridge
residue of moisture. If the problem continues call the Customer Service
Department.
Noises
You may hear some unusual noises from time to time. See ‘Noises inside
the Larder Fridge’ on page
If you are not able to identify and eliminate the faults according to the
above recommendations, contact the Customer Service Department,
advising of model number of the appliance which is shown on the back
of the rating plate.
Do not attempt to repair your Larder Fridge yourself as it might
endanger you and others
3.
.
Moving your Larder Fridge
Care when handling
Hold the Larder Fridge around its sides or base when moving it. Under no
circumstance should it be lifted by holding the edges of the top surface.
Location
Do not locate your Larder Fridge near a heat source, eg. cooker, boiler or
radiator. Also avoid direct sunlight.
Levelling the Larder Fridge
Make sure the Larder Fridge is level. Use the rotating levelling feet at
the front. If the Larder Fridge is not level, the doors and magnetic seal
Do Not Turn on the Larder Fridge for 2 Hours
After the Larder Fridge is in place it needs to be left for 2 hou rs.
Servicing
Repairs and maintenance of the appliance should only be performed by
Page 7
7
MAINTENANCE
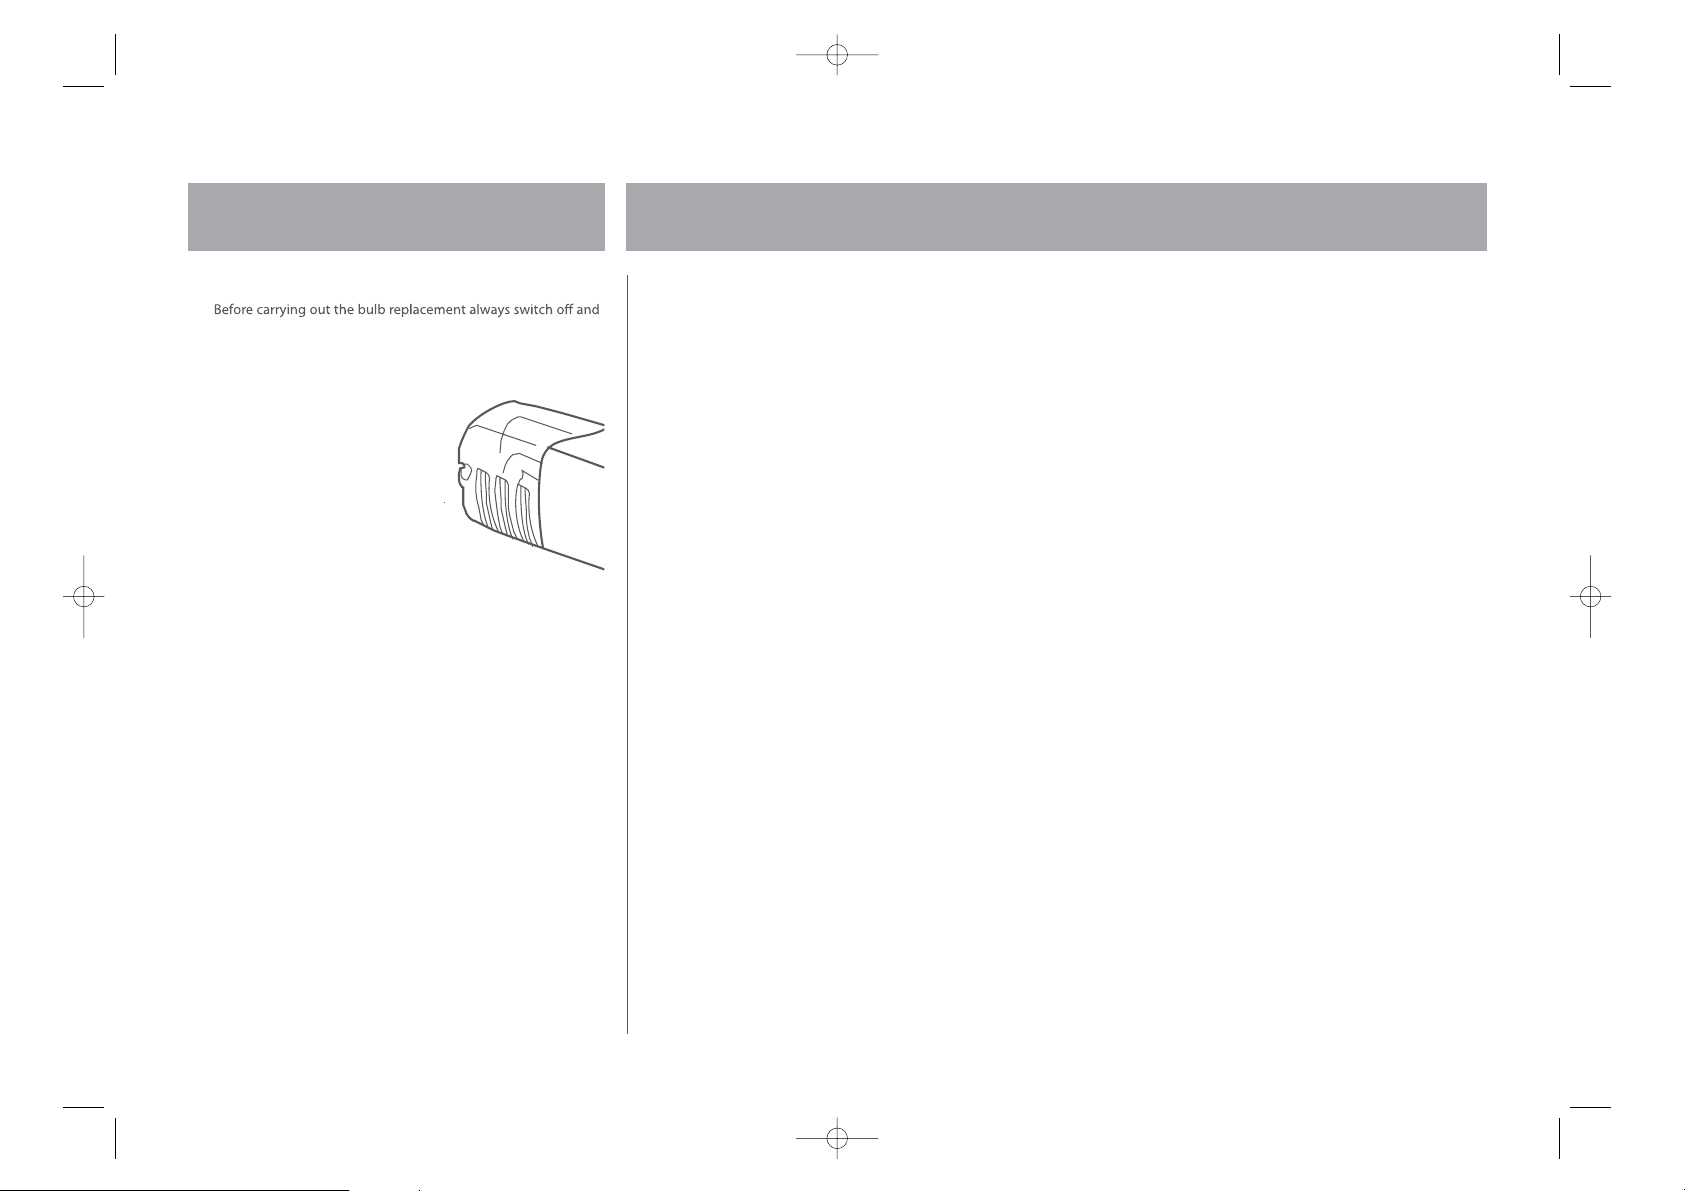
Changing the internal light
1
disconnect the electrical supply.
2 Undo the screw retaining the light bulb cove r.
3 Push the cover in and slide toward the rear of the Fridge.
4 Remove the old bulb by unscrewing in an anti-clockwise direction.
5 Replace with a new bulb
(15w) by screwing it in a
clockwise direction making
sure that it is secure in the
bulb holder.
6 Replace the light cover and
re-insert the screw.
7 Re-connect your Larder Fridge
to the electrical supply and
switch on.
Page 8
Page 9
9
SAFETYSAFETY
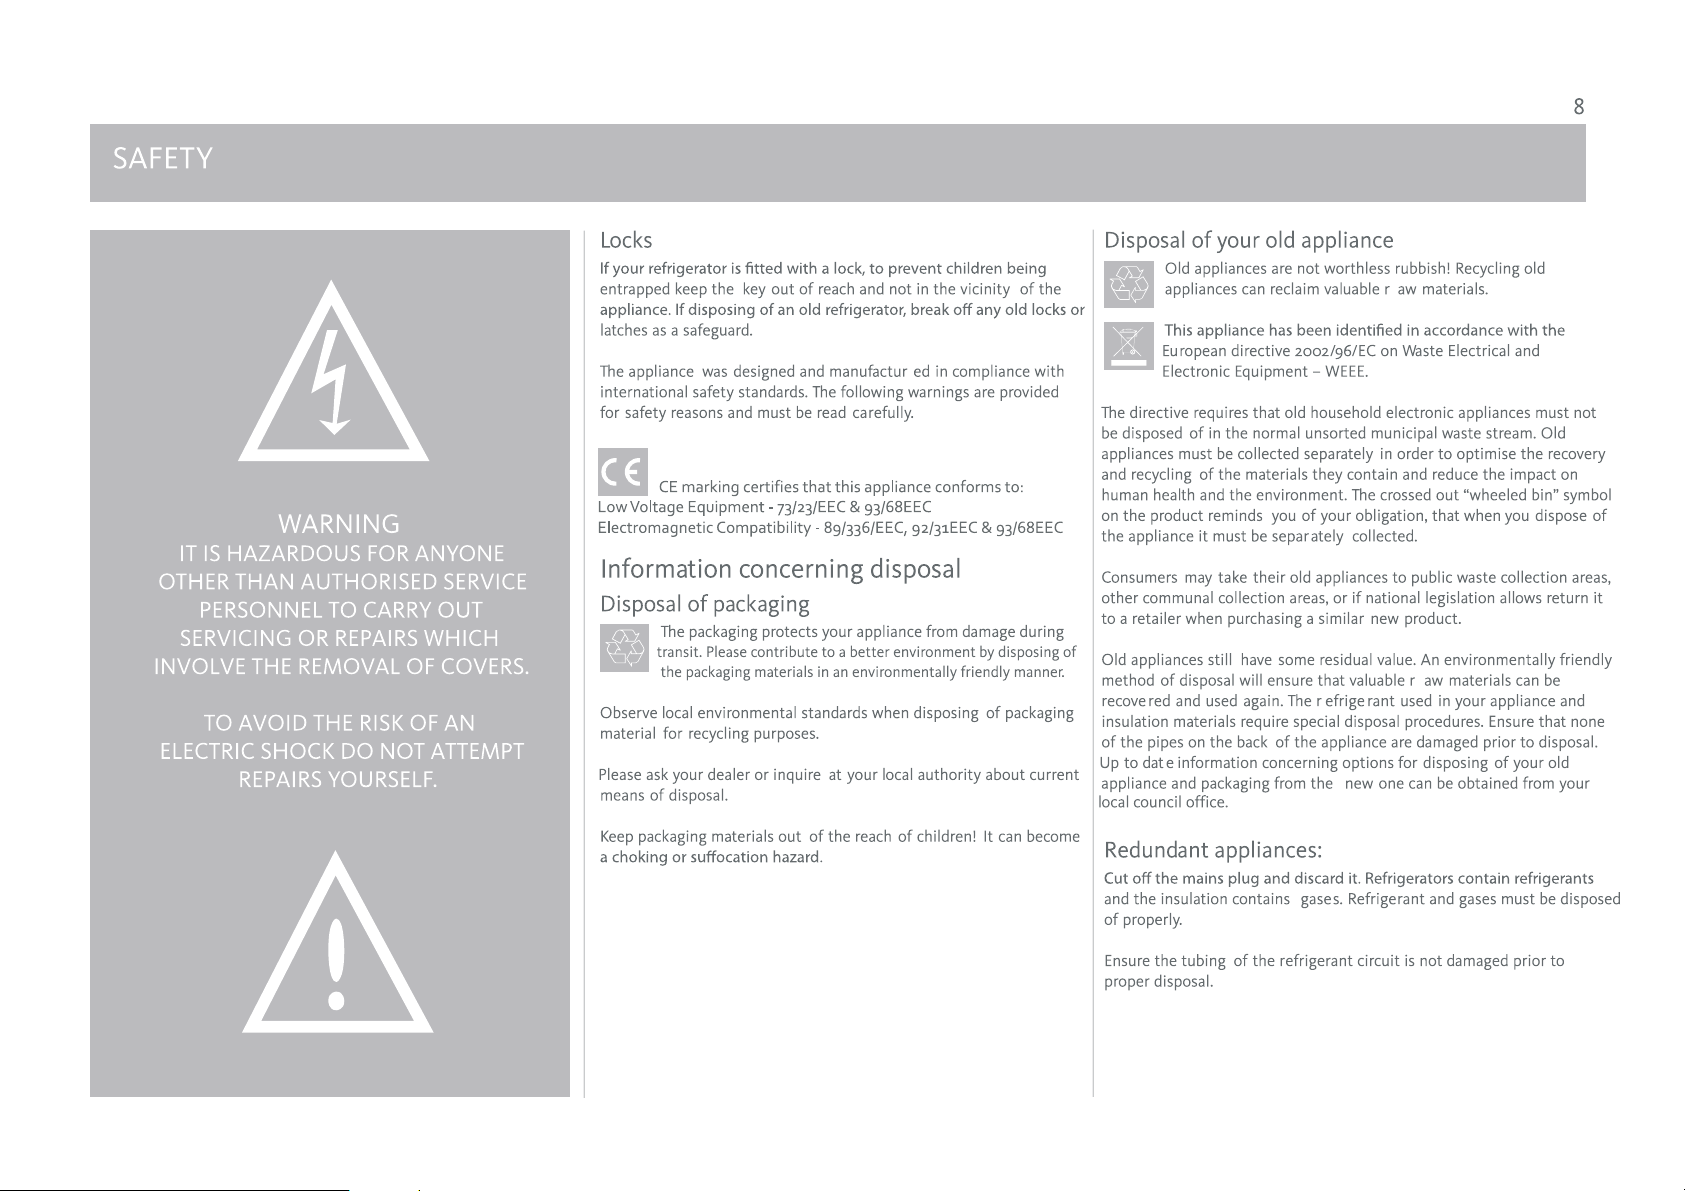
Safety and warning information
Before you switch ON the appliance
Please read the operating and installation instructions carefull y. They
contain important information on how to install, use and maintain
the appliance. Keep all documentation for subsequent use or for the
next owner.
Technical safety
This appliance contains a small quantity of environmentally friendly but
flammable R600a refrigerant. Ensure that the tubing of the refrigeration
circuit is not damaged during transportation and installation. Leaking
refrigerant may ignite.
If damage has occurred
- Keep naked flames and/or ignition sources away from the appliance.
- Pull out the mains plug.
- Thoroughly ventilate the room for several minutes.
- Notify customer services.
The more refrigerant an appliance contains, the larger the room must be.
Leaking refrigerant can form a flammable gas-air mixture in rooms which
are too small. The room must be at least 1m
The amount of refrigerant in your appliance is indicated on the rating
label on your appliance.
3
per 8 g of refrigerant.
Important information when using the appliance
â dednetni ton si ecnailppa sihT for use by )nerdlihc gnidulcni( snosrep
with reduced physical, sensory or mental capabilities, or experience or
knowledge , unless they have been given supervision or instructions
concerning the use of the appliance by a person responsible for their
safety. Children should be supervised to ensure that they do not play
with the appliance.
â If the supply cord is damaged, it must be replaced by the manufacturer,
its service agent or similarly qualified persons in order to avoid a hazard.
â Never rotaregirfer eht edisni secnailppa l
electric ice maker, etc.). Explosion hazard!
â Never maets ehT .ecnailppa eht naelc ot renaelc maets a esu may pen-
etrate electrical parts and cause a short circuit. Risk of electric shock!
â stnalleporp elbammalf
cans) or explosive substances in the appliances. Explosion hazard!
â Do not stand or support yourself on the base, drawers or doors, etc.
â Befo ro gulp sniam eht tuo llup ,ecnailppa eht gninaelc dna gnitso
switch off the fuse. Do not pull out the mains plug by tugging the cable.
â rf yllaicremmoC ozen dekcap-erp food rots eb dluohs ed in acco ecnadr
with the frozen food manufacturers instruction.
â rep hgih a gniniatnoc selttoB centage of dna delaes eb tsum lo
stored in an upright position.
â eerf laes rood eht dna strap citsalp peeK of ,esiwrehtO .esaerg dna lio
the plastic and door seal will become porous.
â Never cover sgninepo noitalitnev eht kco
â )sknird detanobrac yllaicepse( sknird dennac ro delttob erots ton oD
in the ice snac dna sel
â Never put frozen food, or ice cubes, straight from the ice compar tnemt
into your mouth. Risk of frost burns to the lips and tongue!
â gnihcuot degnolorp diovA of frozen food, ice or the inner freezer walls
or tubing etc. Risk of frost burns to the skin.
â ton oD scrape off frost or stuck fr ozen food with a knife or pointed
object. You could damage the refrigerant tubing. Leaking refrigerant
may ignite. Only use a plastic scraper.
â In the case of malfunction, under no circumstances should you tpmetta
to repair the appliance yourself. Repairs carried out by inexperienced
persons may cause injury or further malfunctioning to the appliance.
â esaelp deggulpnu si ecna
plugging it in again. Otherwise, the compressor will be overloaded.
a
cirtcele esu (e.g. ,retaeh
n
iatnoc hcihw stcudorp erots ton oD (e.g. spray
r
fed er
h
ocla
l
ro for .ecnailppa eht
b
t
toB .tnemtrapmoc may explode!
ilppa eht nehW wait for 5 minutes before
â sretaeh ro reyrdriah a sa hcus secnailppa lacirtcele esu ton oD
near your refriger ator.
â regirfer ruoy edisn
i
sdiuqil ro sesag elbammalfni erots ton oD ator.
Children in the household
â nerdlihc peeK away regnaD .strap sti dna gnigakcap eht morf of
suffocation from folding cardboard and plastic film!
â eht htiw yalp ro slortnoc eht htiw repmat ot
appliance. It is not a toy. Under no circumstances should children
be allowed to sit on the bins or hang from the door.
â If the appliance featu eht peek ,kcol a serkey out of the reach
of children.
nerdlihc wolla ton oD
General requirements
â dengised si ecnailppa ehT for domestic use inside the home and is not
intended for commercial or industrial use.
â cnailppa ehT e m u s t be used to store food stcudorp by adults only and
according to the instruction manual.
â Try to avoid keeping the door open for long periods or opening the
door too frequently in order to conserve energy.
â ton oD fill the appliance with too much food: cold air must circulate
freely for food to be preserved properly.
Page 10
ELECTRICAL CONNECTIONS
10
THIS APPLIANCE MUST BE EARTHED.
insert the discarded plug into a socket.
Fitting a new plug
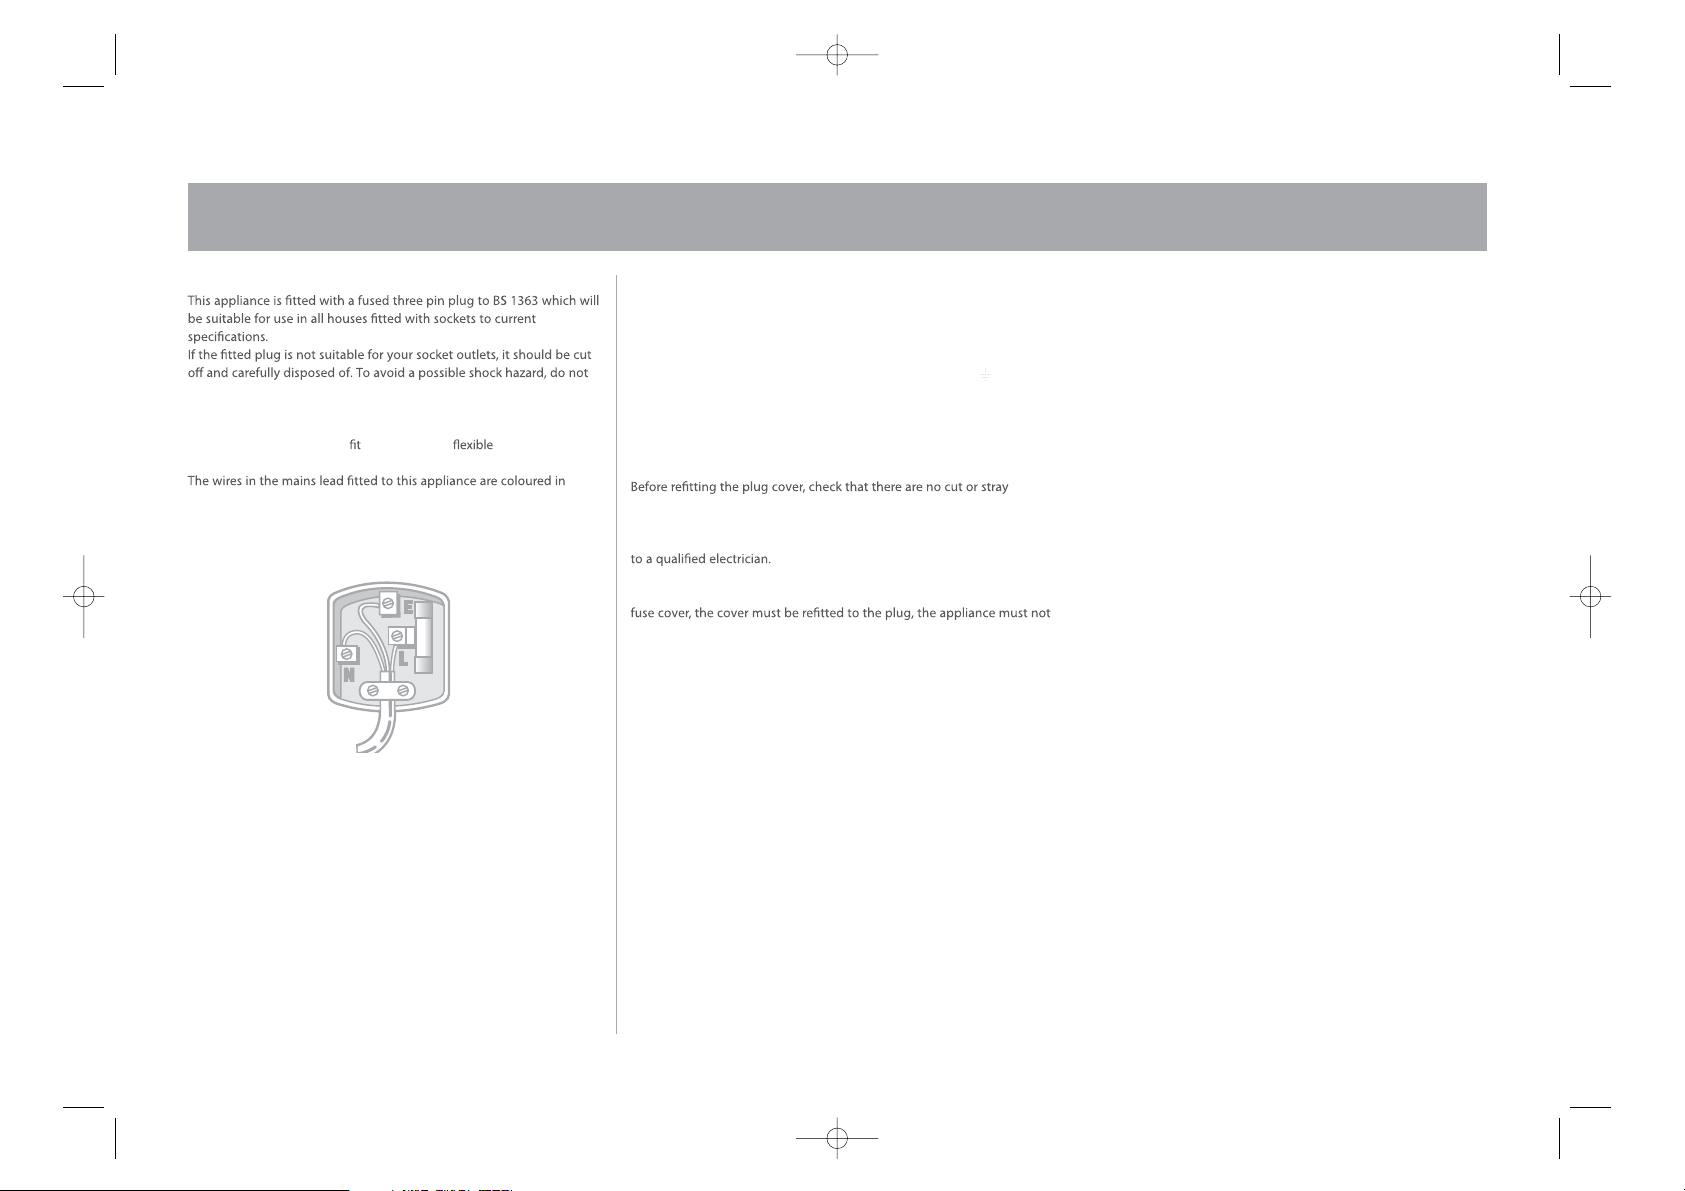
If for any reason you need to a new plug , the mains lead must be
connected as shown here.
accordance with the following code:
CONNECT GREEN AND
YELLOW TO EARTH (E)
13 AMP FUSE
CONNECT
BLUE TO
NEUTRAL (N)
CONNECT
BROWN TO
LIVE (L)
MAKE SURE THE OUTER
SHEATH OF THE MAINS
LEAD IS SECURELY HELD BY
THE CLAMP
If the colours of the wires in the mains lead of this appliance do not
correspond with the coloured markings identifying the terminals in your
plug, proceed as follows:
The wire which is coloured Green and Yellow MUST be connected to the
terminal which is marked with the letter E (Earth) or symbol or
coloured Green. The wire which is coloured Blue MUST be connected to
the terminal which is marked with the letter N or coloured Black. The
wire which is coloured Brown MUST be connected to the terminal which
is marked with the letter L or coloured Red.
strands of wire inside the plug.
Use a 13 Amp BS1362 fuse, only BSI or ASTA approved fuses should be
used. If you are in any way unsure which plug or fuse to use, always refer
Note: After replacing or changing a fuse on a moulded plug which has a
be used without a fuse cover. If lost, replacement fuse covers can be
obtained from an electrical shop
.
This appliance complies with the following EEC Directives:
73 / 23 EEC (Low Voltage Directive)
89 / 336 EEC (EMC Directive).
Page 11
Page 12
 Loading...