

Page 1
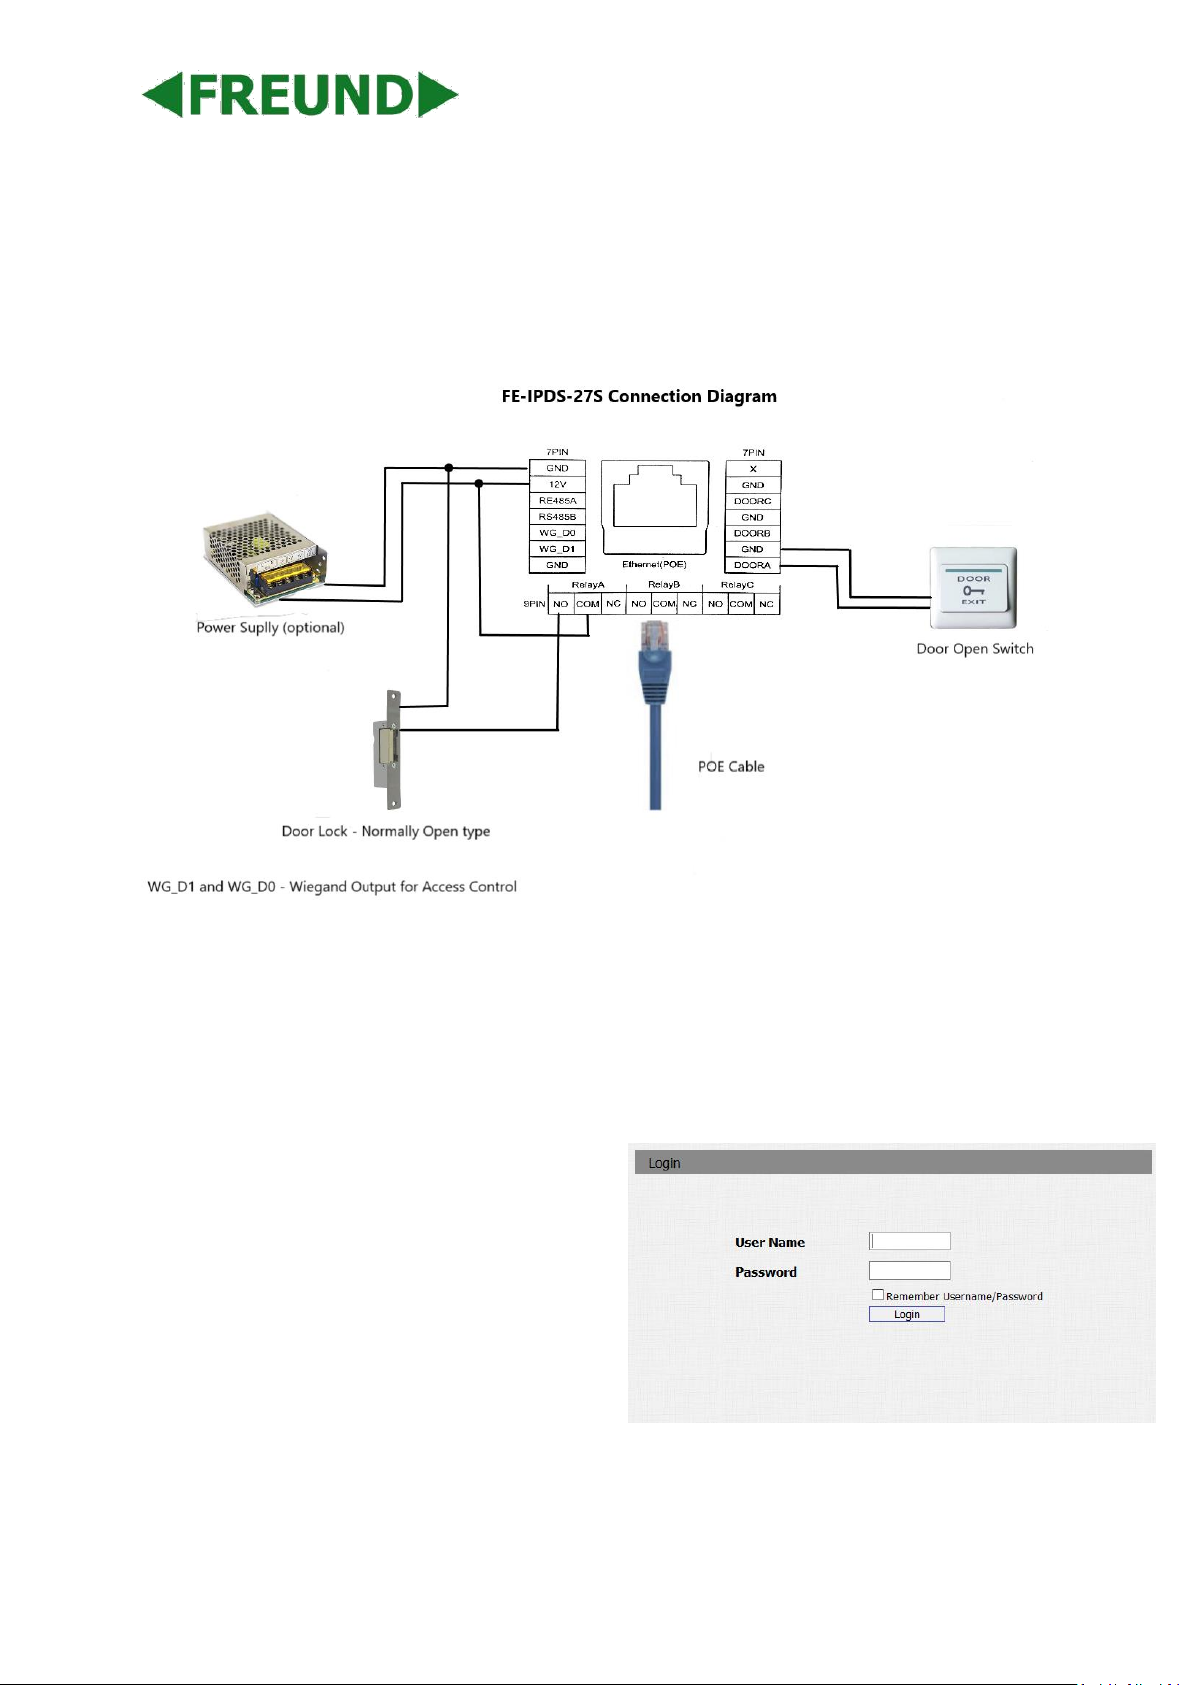
FE-IPDS-27S Quick Guide
Product Overview
Plug in PoE cable, or connect ethernet cable and external power supply. Door Open Switch is needed
so doors can be opened from the inside.
After FE-IPDS-27S is powered on, enter *2396#, click
System Information to obtain its IP address.
Enter IP address into Web Browser. Log in page will
show up.
Default values for User Name and Password is
admin.
Note: Make sure that Video option is enabled as an option on SIP-server and video codecs are enabled
on SIP-server Extension setup.
Page 2
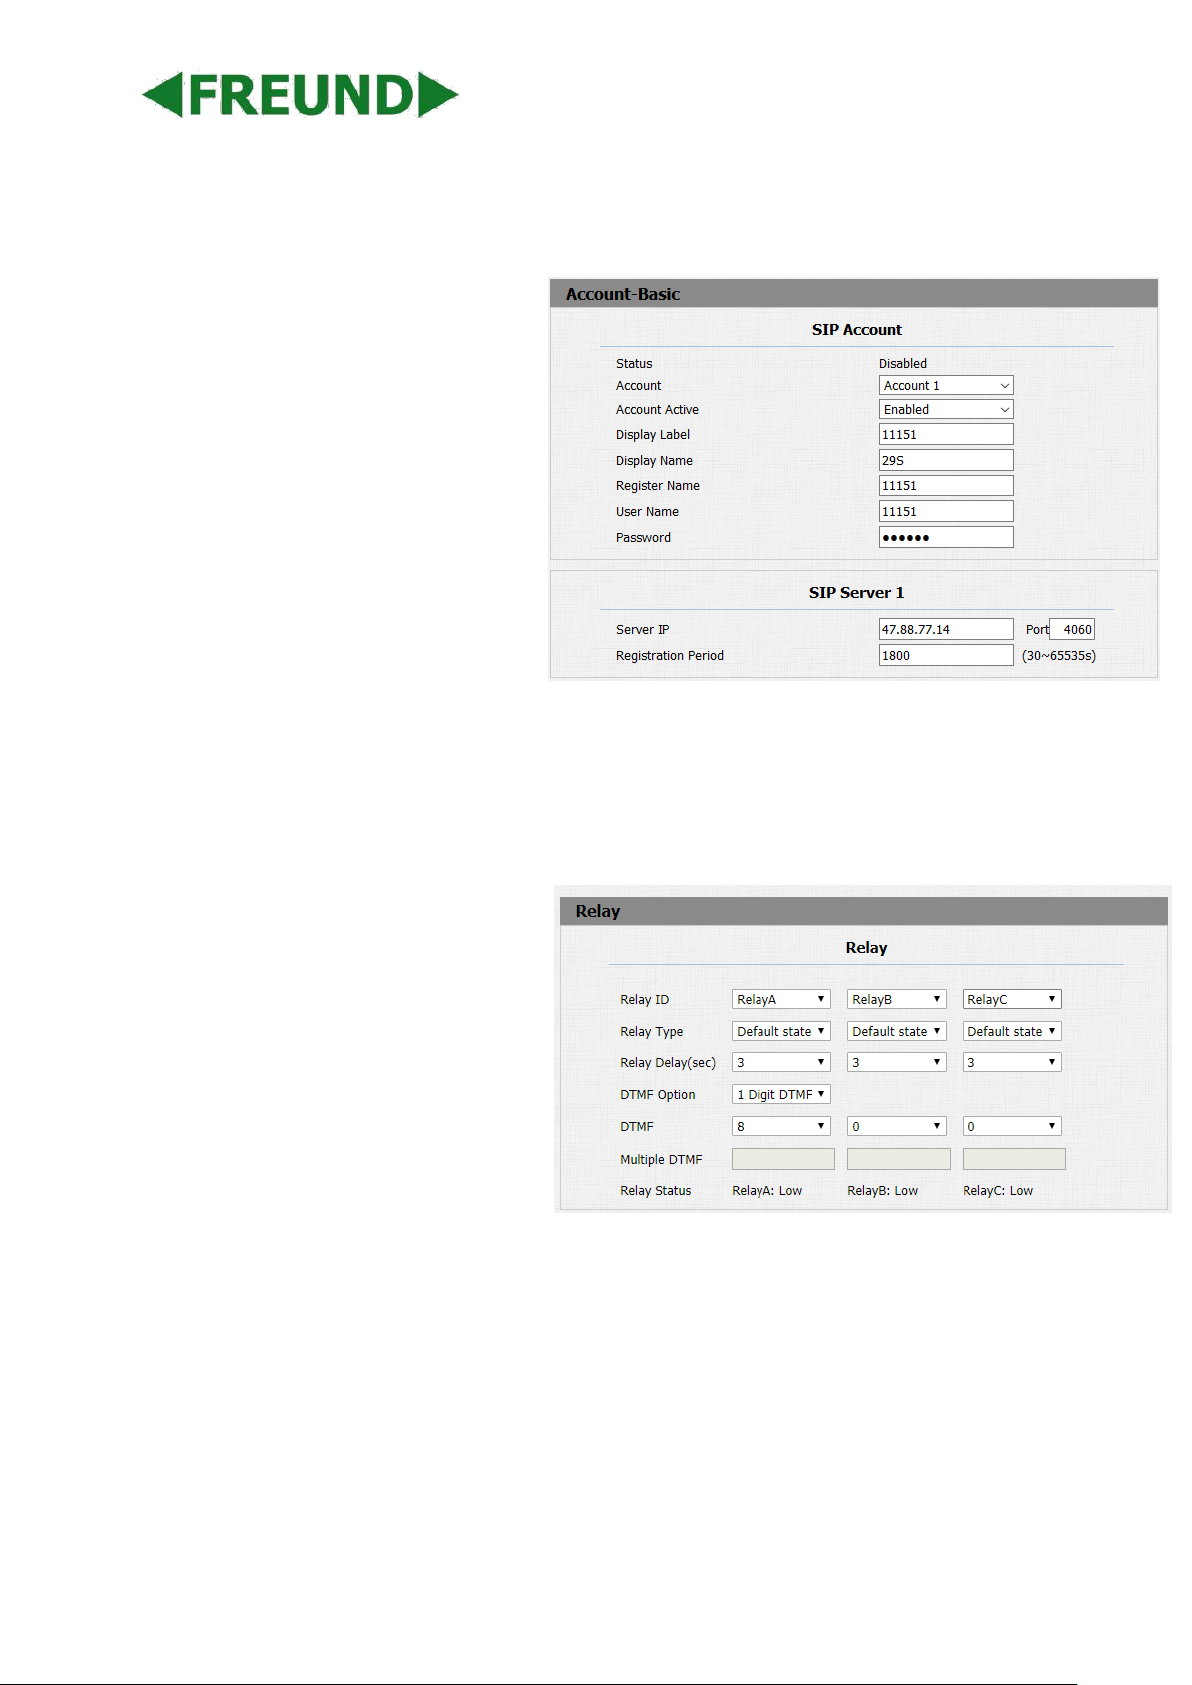
After login go to Account->Basic to connect intercom to SIP server.
Status: To display register result.
Display Label: To configure label displayed
on the phone’s LCD screen.
Display Name: To configure name sent to
the other call party for displaying.
Register Name: To enter extension number
you want and the number is allocated by SIP
server.
User Name: To enter user name of the
extension.
Password: To enter password for the
extension.
Server IP: To enter SIP server’s IP address or
URL.
Click Submit button at the bottom to save the changes.
Go to Intercom -> Relay to configure relay.
Relay Select: IPDS-27S support 3 relays
Relay Type: Different locks use different
relay types, default state or invert state. If
you connect the Lock in NO connector, select
default state. Otherwise using invert state.
Relay Delay(sec): Allows door remain
“open” for certain period The range is from
1 to 10 seconds
DTMF Option: IPDS-27S support 1、2、3、
4 digits DTMF unlock code. Please select one
type and enter the corresponding code.
DTMF: Setup 1 digit DTMF code for remote unlock
Multiple DTMF: Setup multiple digits DTMF code for remote unlock.
Status: the status will be changed by the relay state.
Click Submit button at the bottom to save the changes.
Page 3
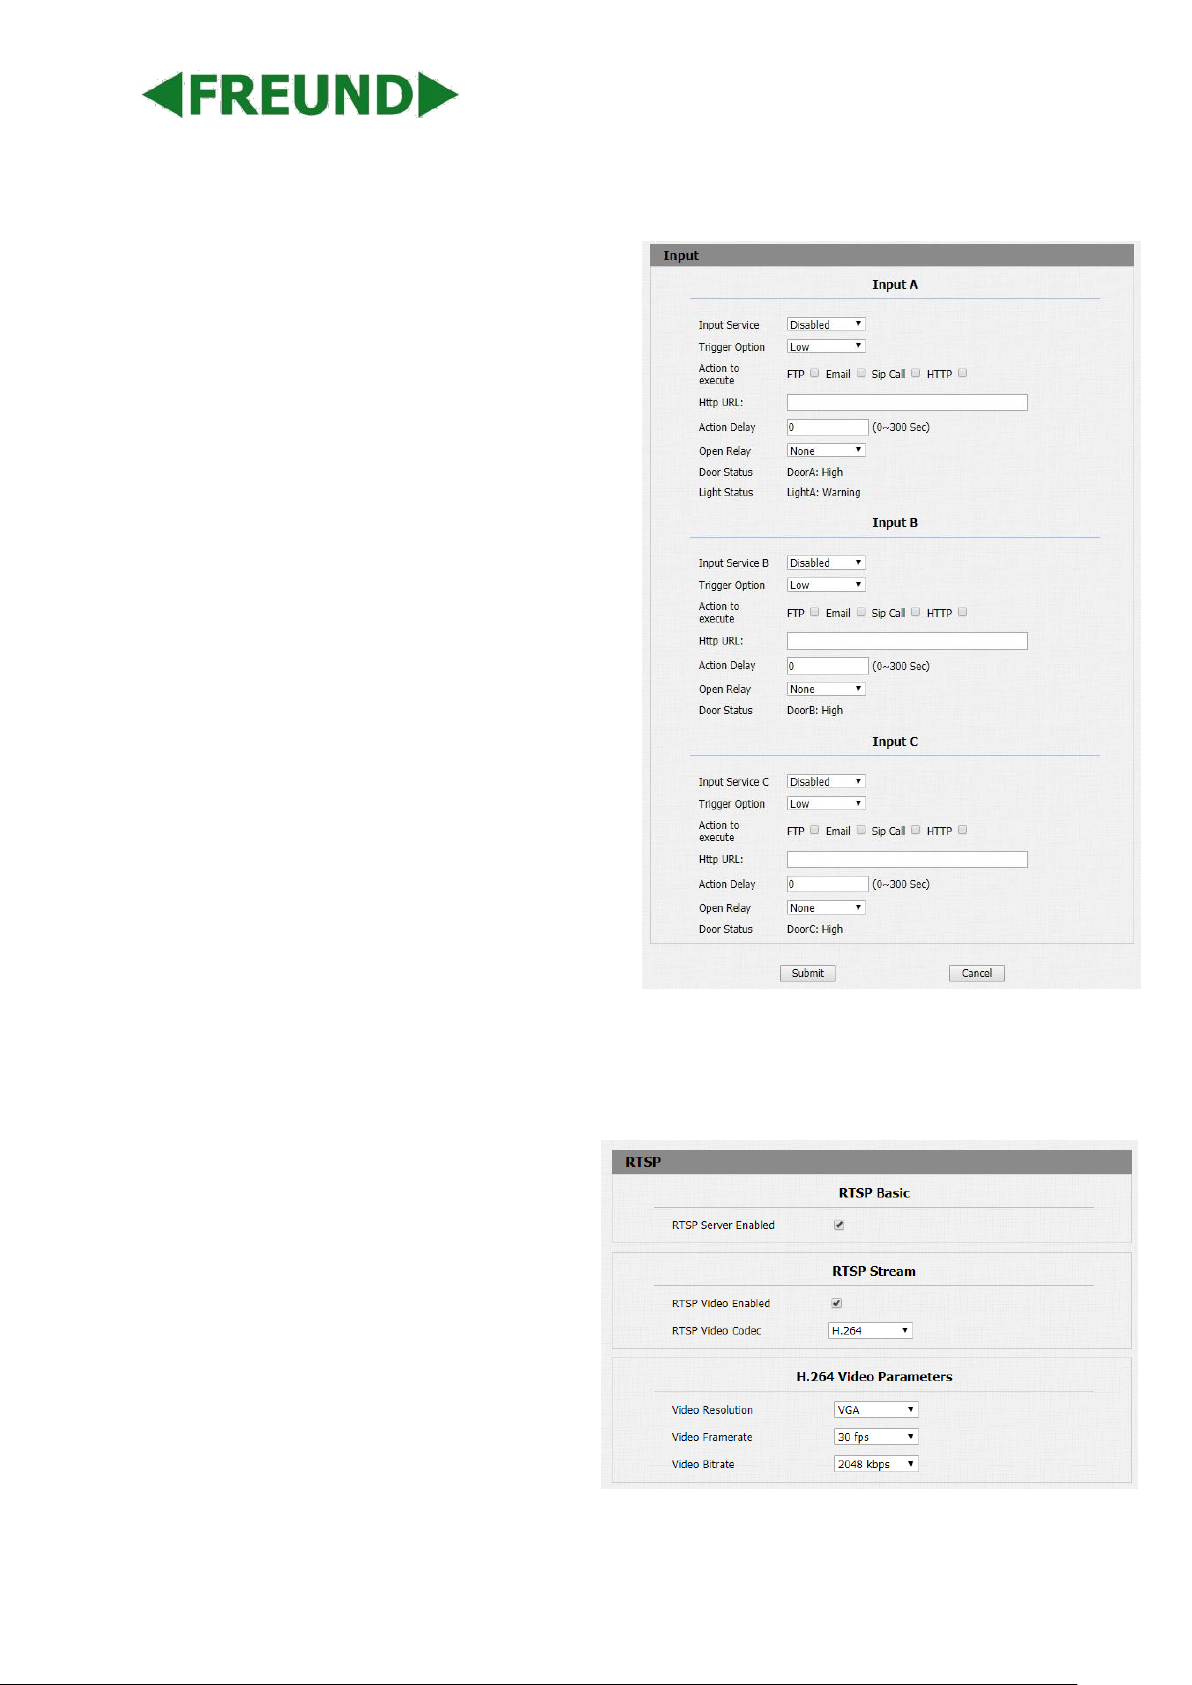
Go to Intercom -> Input to configure Door Open Switch from diagram on the first page.
Trigger Option: According to different lock connection
to choose different trigger mode. If users connect in
normal open contact, select low. If you choose High,
please connect in normal close contact.
Action to execute: Choose one or more ways to
receive the action message.
Http URL: If you tick Http URL, then enter the Http
server IP address in the HTTP URL area. When the
Input is triggered, it will send Http message. URL
format: http://http server IP address/any information
(such as http://192.168.35.48/mac=000 ). Then you
will check this information which captures the
network packet.
Action Delay: Setup the action delay time. After the
delay time, the phone will send to the action
information in the corresponding way.
Open Relay: To choose a suitable relay for input
connector.
Go to Intercom -> RTSP to configure RTSP
For video preview on Freunds terminals RTSP on
intercom must be enabled.
For Integra VoIP app this option does not need to
be enabled
 Loading...