

Page 1
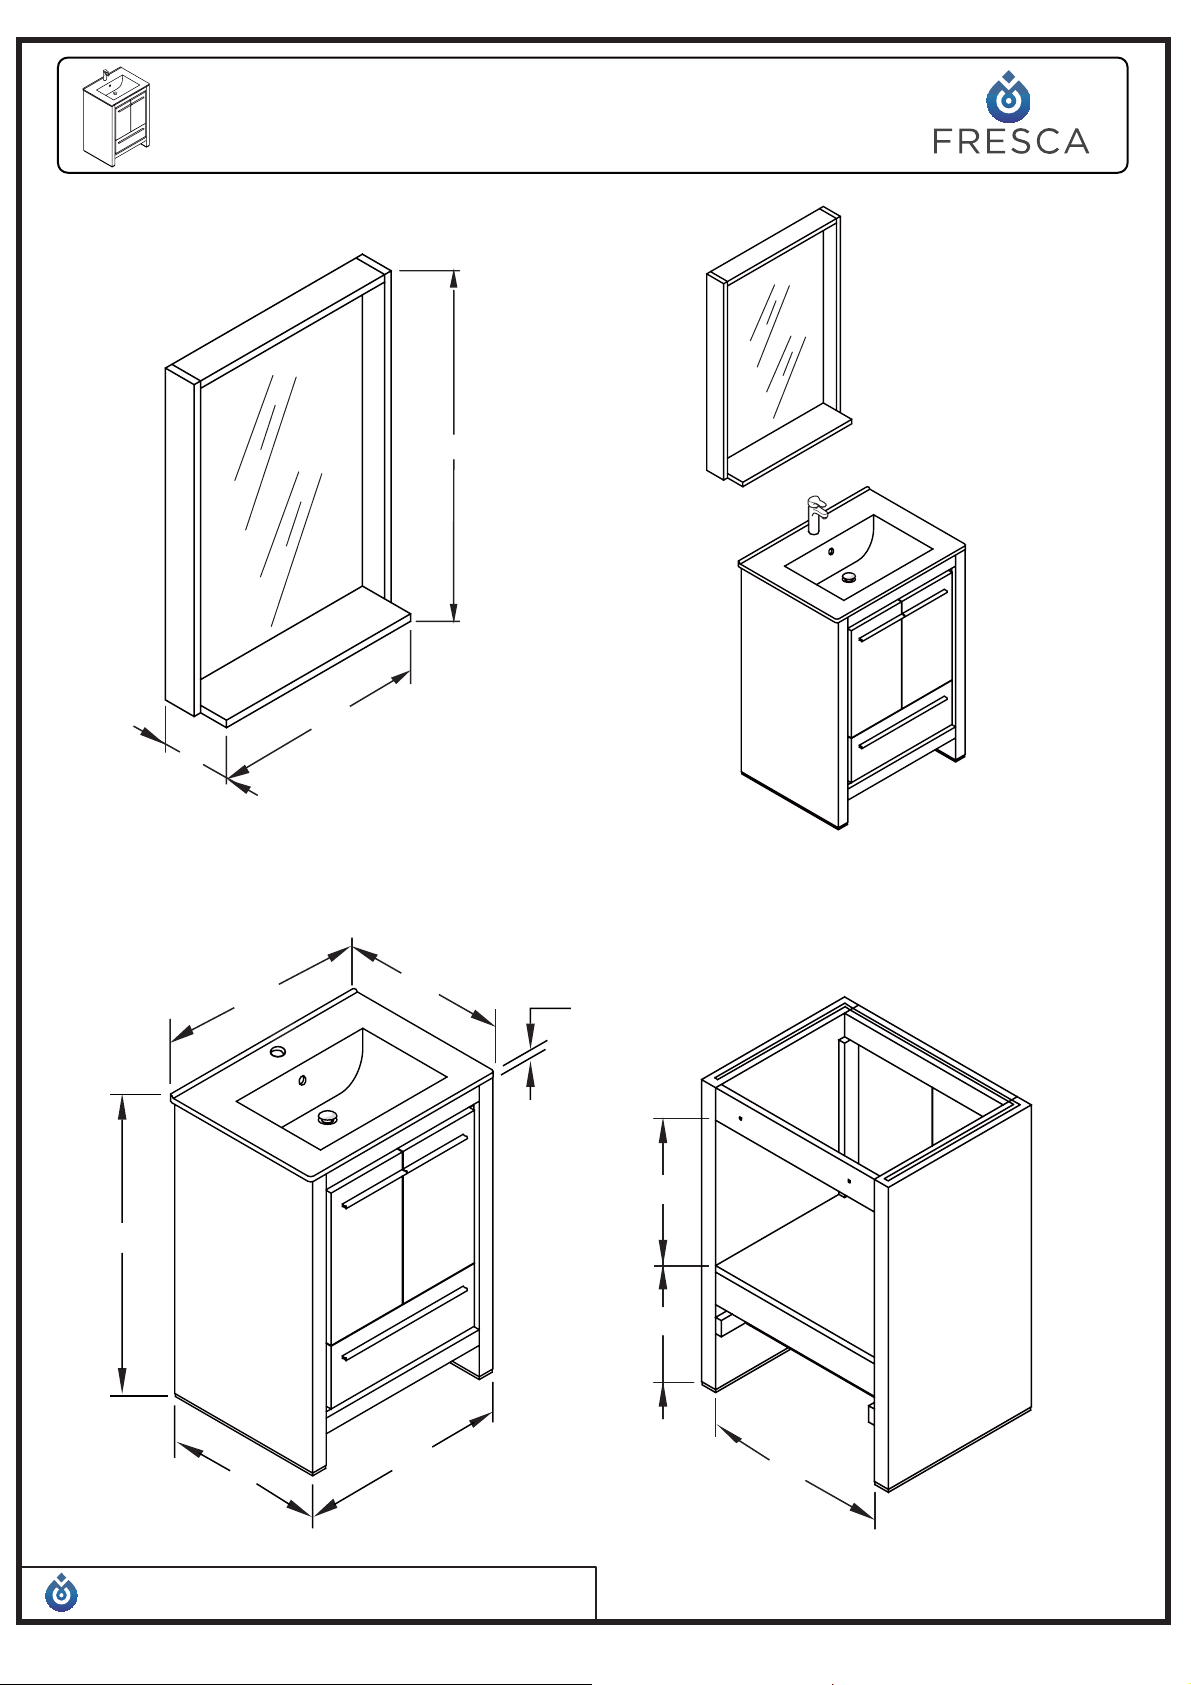
FVN8125
ALLIER
INSTALLATION GUIDE
Mirror
31 1/2
21 5/8
6
"
"
18 1/2 "
"
kcaB ytinaVtnorF ytinaV
5/8 "24"
15 1/2 "
33 1/2
©2013 Fresca ™ All rights reserved. This material may not be reproduced, displayed, modified or distributed without the express prior written permission of the copyright holder.
"
ALLIER
"23 1/2
18 "
INSTALLATION GUIDE
13 3/4 "
20
"
PAGE 1
Page 2
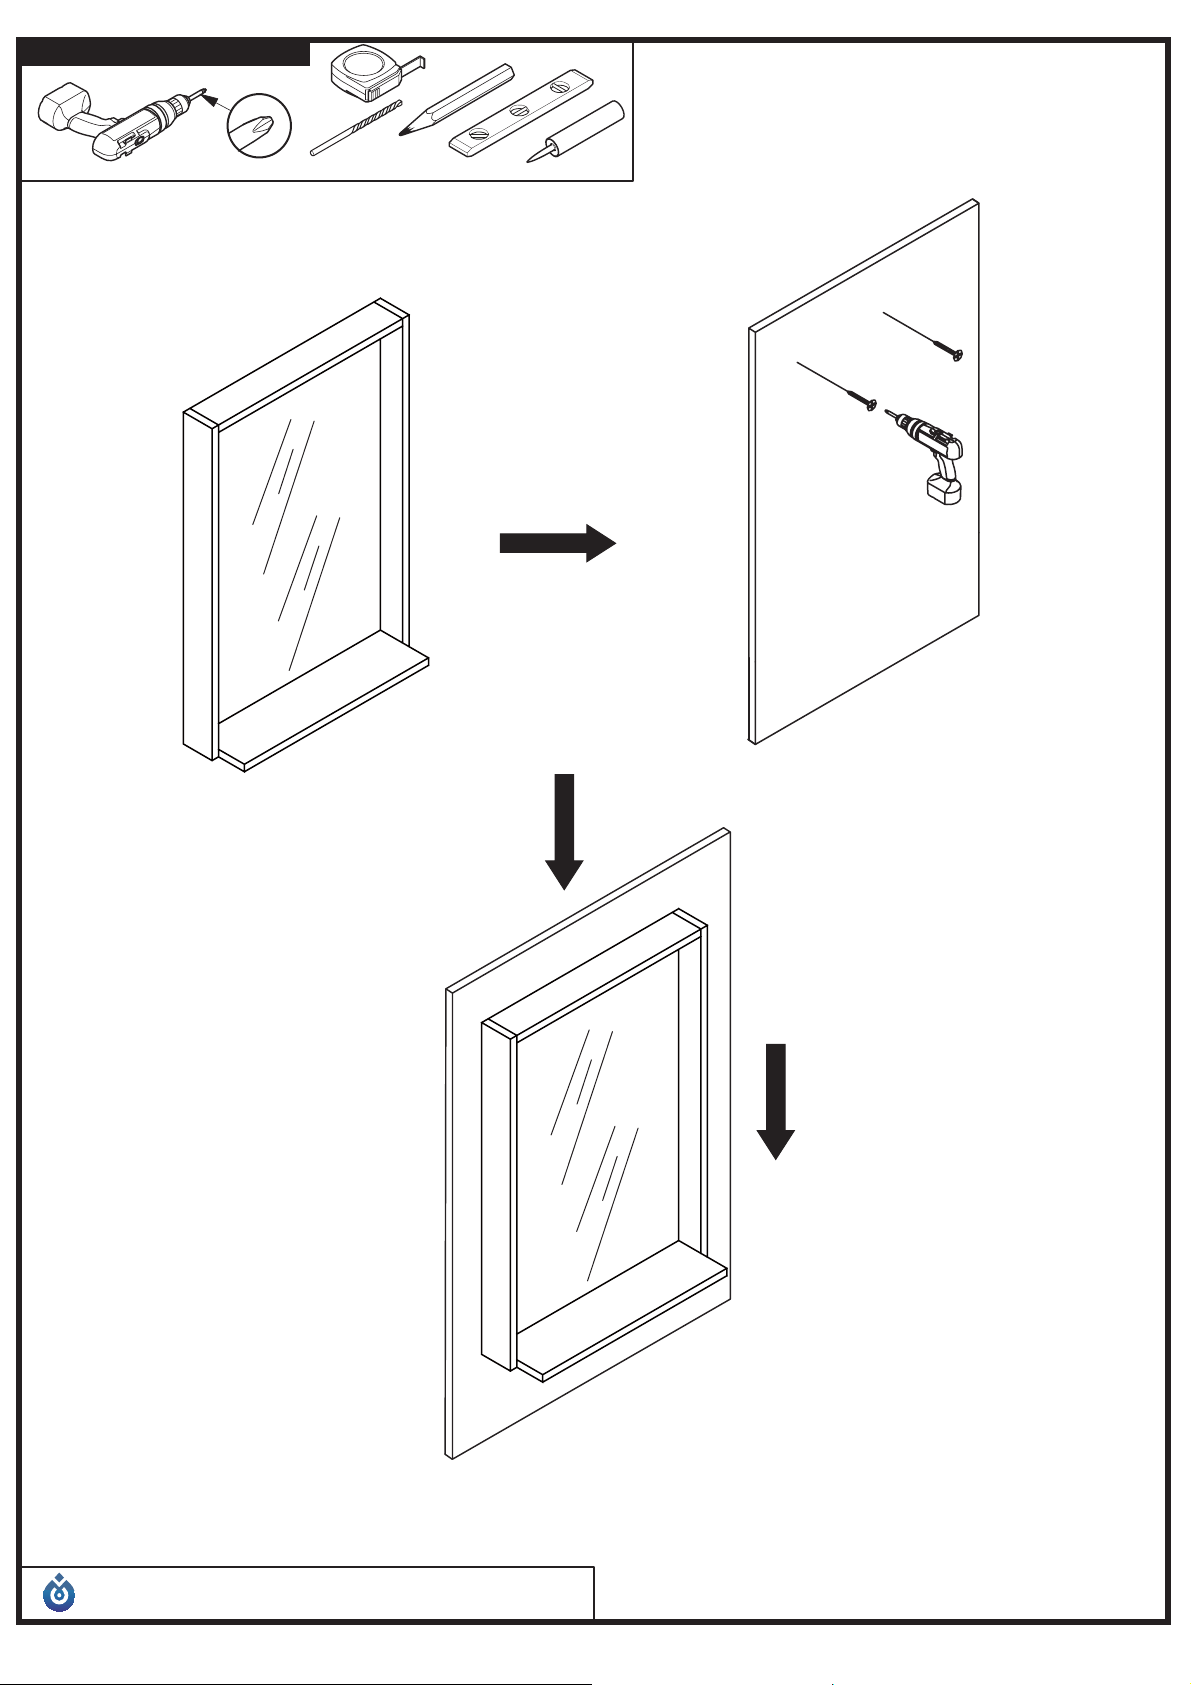
TOOLS FOR ASSEMBLY
#2
MIRROR INSTALLATION
1/8" Drill bit
wall
wall
ALLIER
©2013 Fresca ™ All rights reserved. This material may not be reproduced, displayed, modified or distributed without the express prior written permission of the copyright holder.
INSTALLATION GUIDE
PAGE 2
Page 3
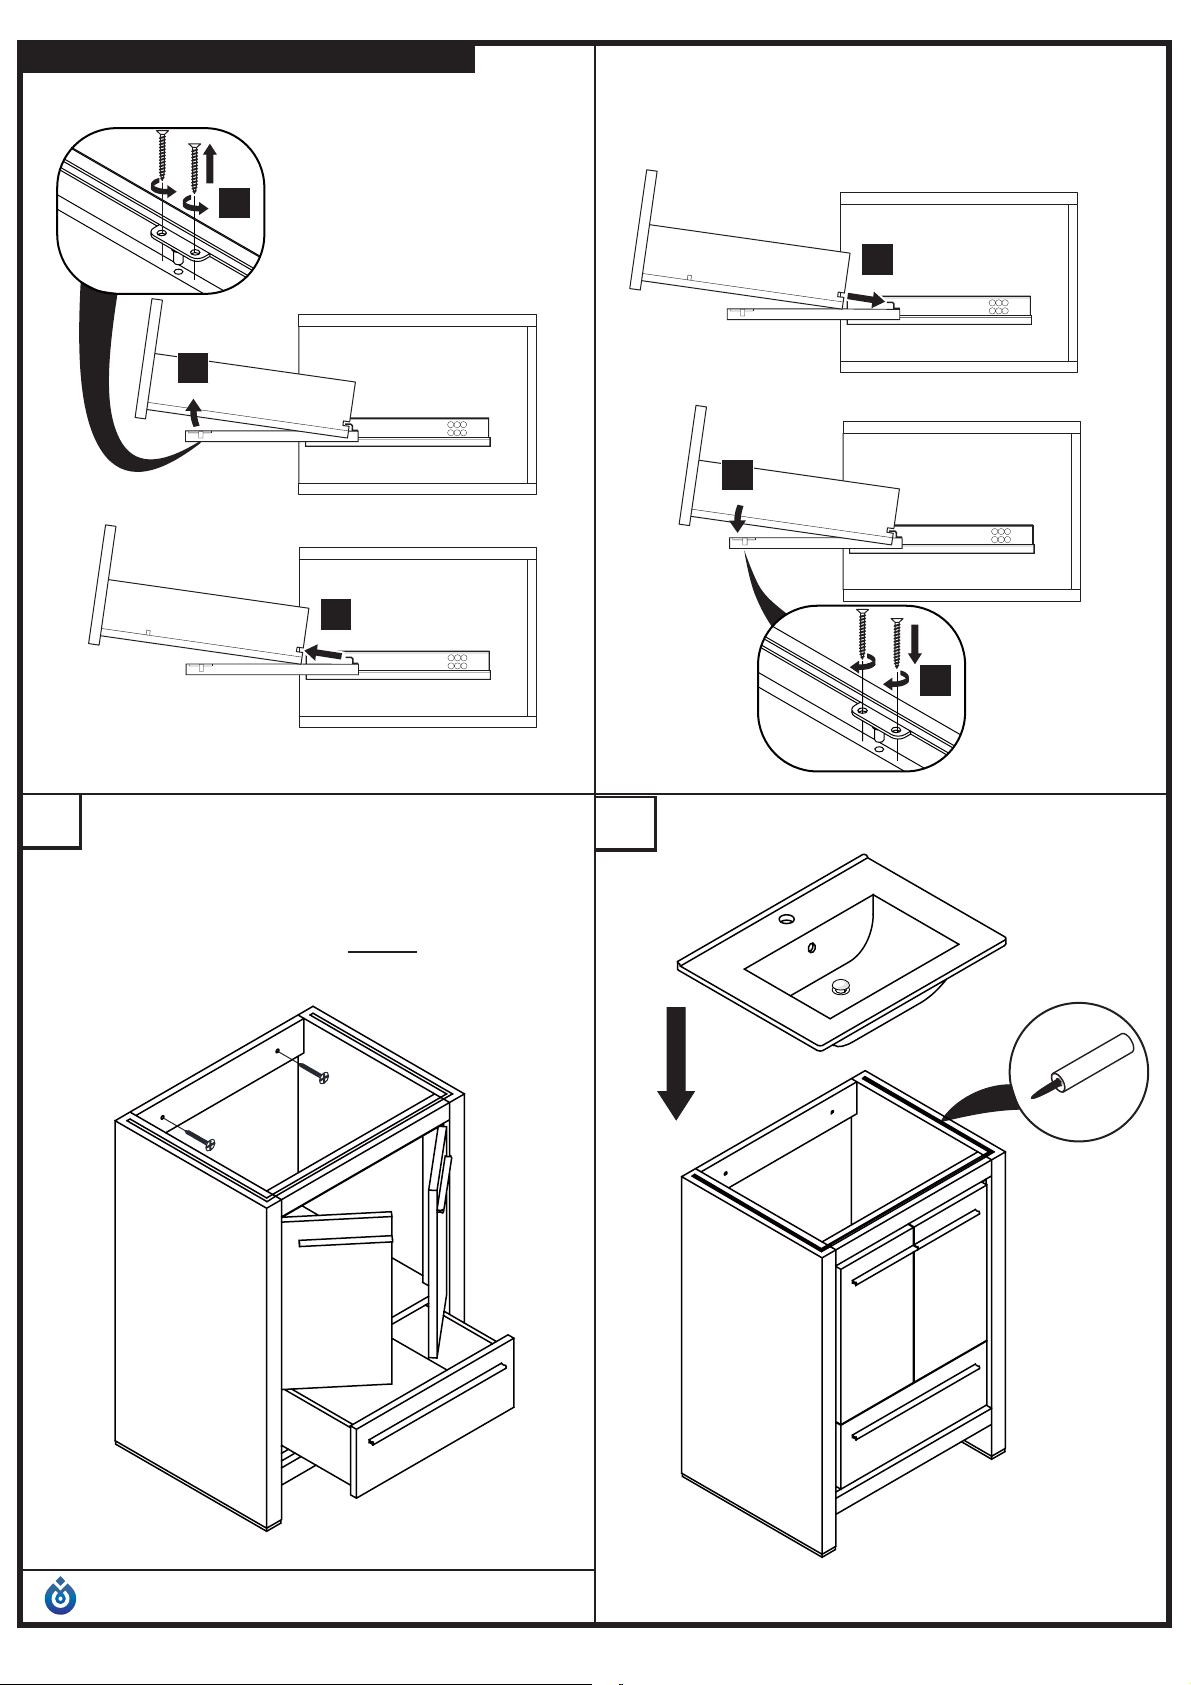
DRAWER REMOVAL & INSTALLATION
REMOVAL INSTALLATION
1
2
3
1
2
1
IMPORTANT:
Remove drawer and open the door
Consult an expert for the proper
screws/bolts to use when attaching
to various wall constructions.
Screws provided do not attach to all
wall construction types.
2
3
Install top panel
SILICONE
ALLIER
©2013 Fresca ™ All rights reserved. This material may not be reproduced, displayed, modified or distributed without the express prior written permission of the copyright holder.
INSTALLATION GUIDE
PAGE 3
Page 4
ALLIER
©2013 Fresca ™ All rights reserved. This material may not be reproduced, displayed, modified or distributed without the express prior written permission of the copyright holder.
INSTALLATION GUIDE
PAGE 4
Page 5
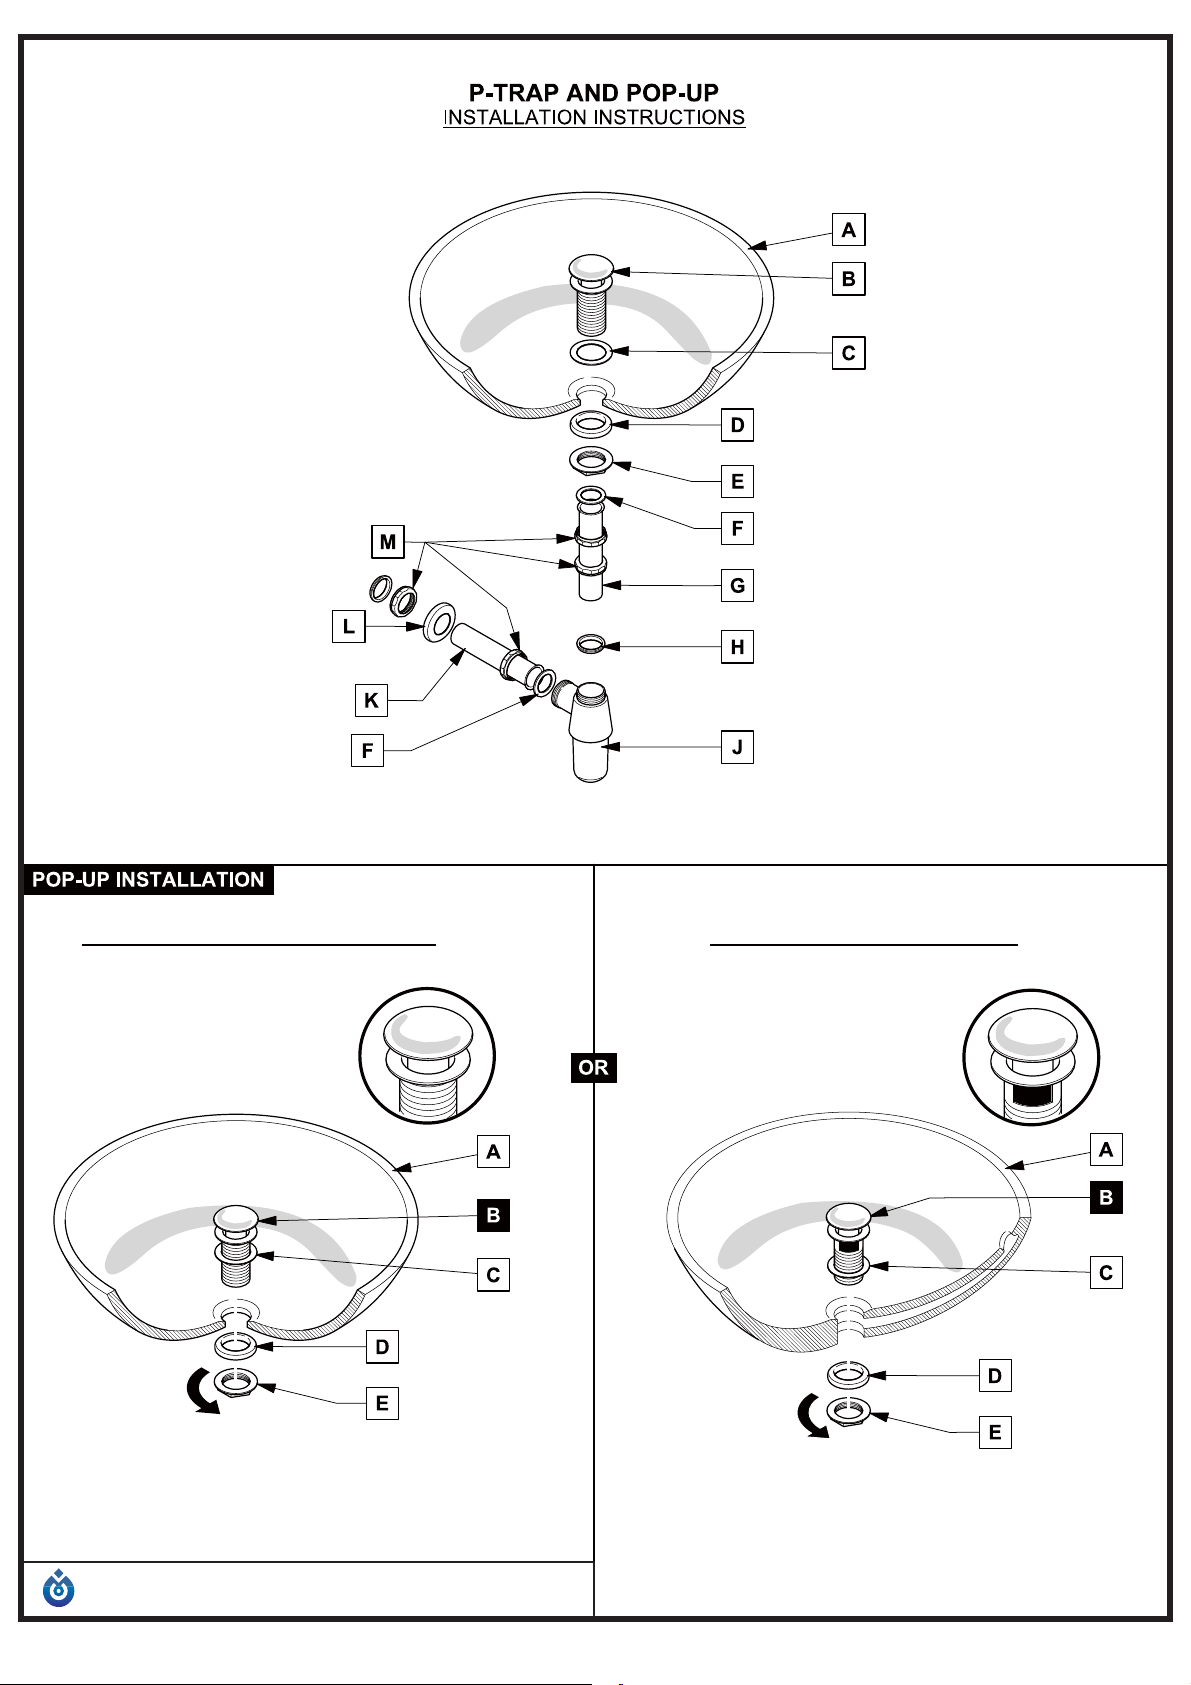
Generic sink used for illustrations. Your sink may vary
Generic sink used for illustrations. Your sink may vary
Sink
Pop-up
Silicon
Washer
Silicon
Washer
Brass
Nut
Mounting
Ring
Ring
Drain Pipe
Rubber
Washer
Tail
Pipe
Rubber
Washer
Rubber
Washer
P-Trap
FOR SINKS WITHOUT OVERFLOW FOR SINKS WITH OVERFLOW
PAGE 5
ALLIER
©2013 Fresca ™ All rights reserved. This material may not be reproduced, displayed, modified or distributed without the express prior written permission of the copyright holder.
INSTALLATION GUIDE
Page 6
ALLIER
©2013 Fresca ™ All rights reserved. This material may not be reproduced, displayed, modified or distributed without the express prior written permission of the copyright holder.
INSTALLATION GUIDE
PAGE 6
 Loading...