

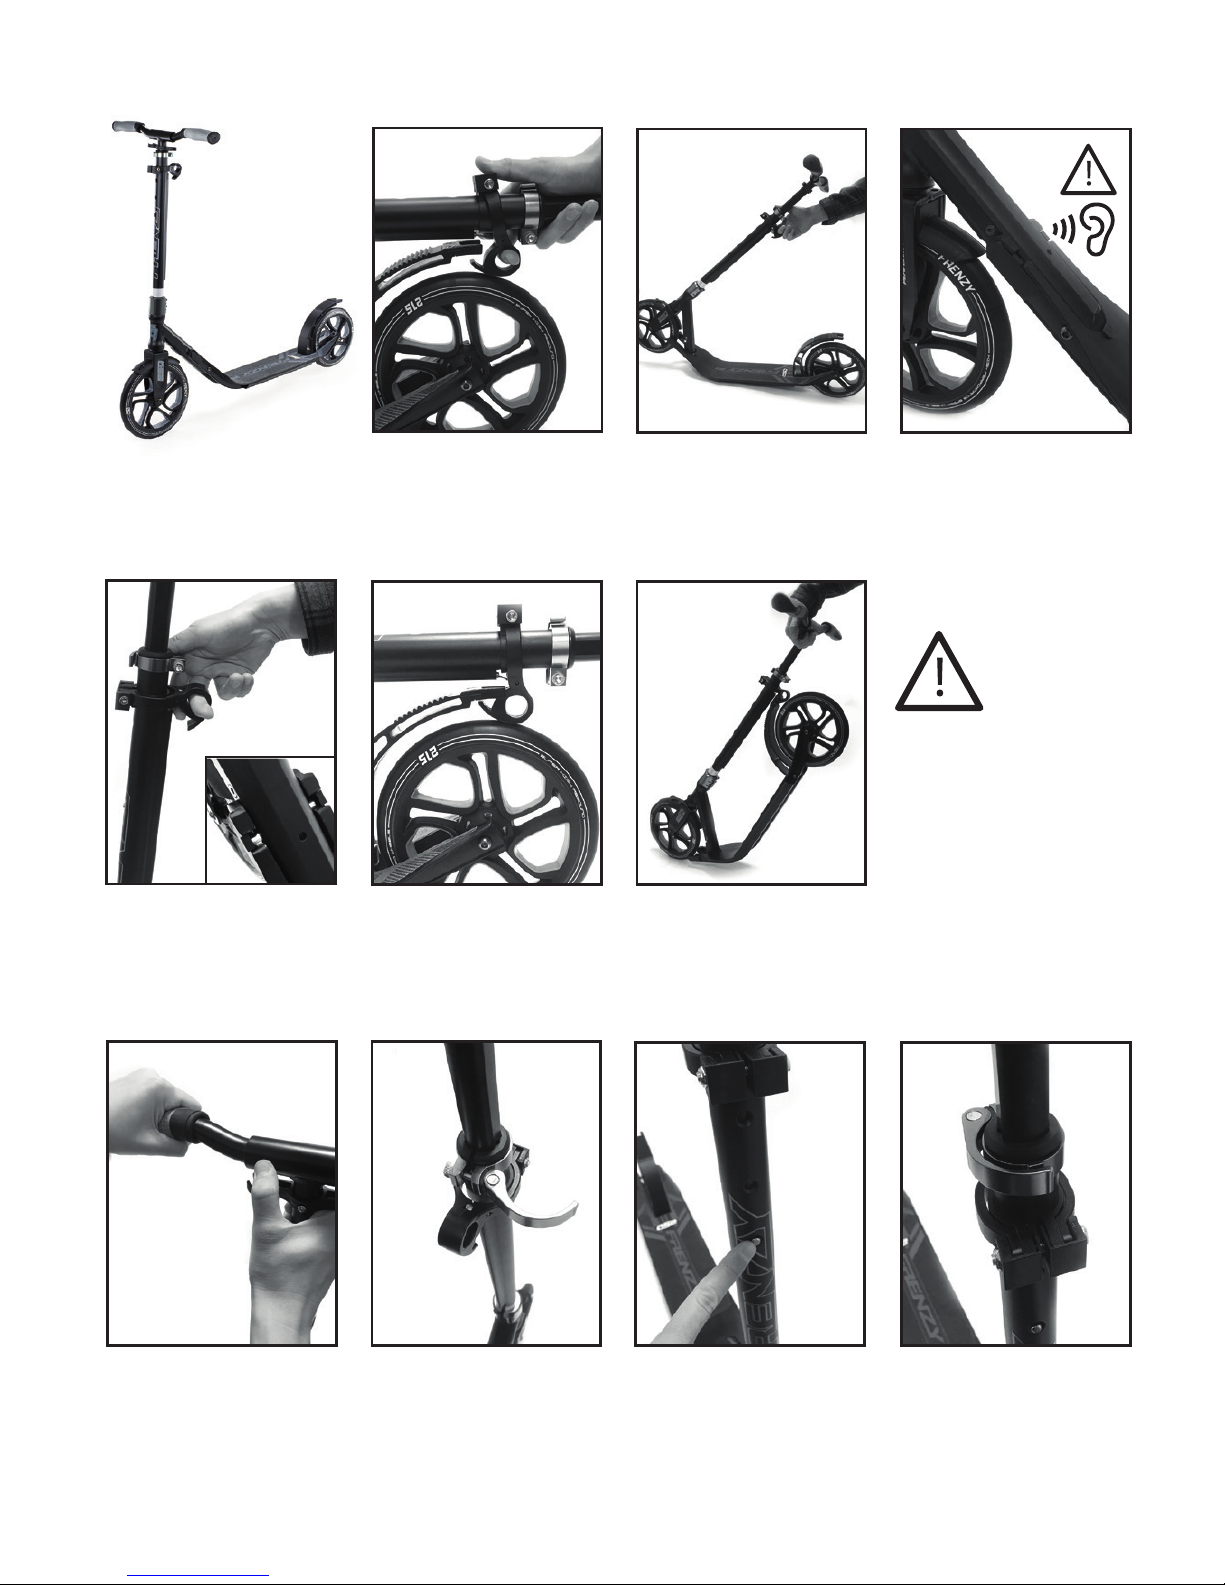
ASSEMBLY INSTRUCTIONS
UNFOLDING THE SCOOTER:
FOLDING THE SCOOTER:
ADJUSTING THE HANDLE BARS:
1. Locate the release catch on the bars and pull to release lock from the fender brake.
2. Keeping the catch pulled up, lift the bars upright until they lock into place, release the catch.
3. Always make sure the locking mechanism is fully located before riding. NOTE: Listen for the click
4. Lift release catch fully, you will now be able to collapse the scooter.
5. Ensure that the catch has locked securely onto the fender brake.
6. This scooter has been designed for easy transportation while folded, pick up by the handle and pull it along!
7. To fold handle bars away, press metal nipples and pull grips apart, secure in the plastic clips below.
8. To raise or lower handle bar height, unfold the metal clamp on the upright bar to release its clasp.
9. Press the metal nipple on the upright to allow movement to the next preset height.
10. Once the appropaite height (the metal nipple must be showing through a hole) has been achieved,
the clamp must be closed to ensure there is no movement and the height is secured.
NOTE: Make sure the clamp is tightened fully to avoid excess bar movement.
WARNING!
Make sure the locking
mechanism clicks fully
in to place before riding.
(1.)
(2.) (3.)
(4.)
(5.)
(6.)
(9.) (10.)
(7.) (8.)
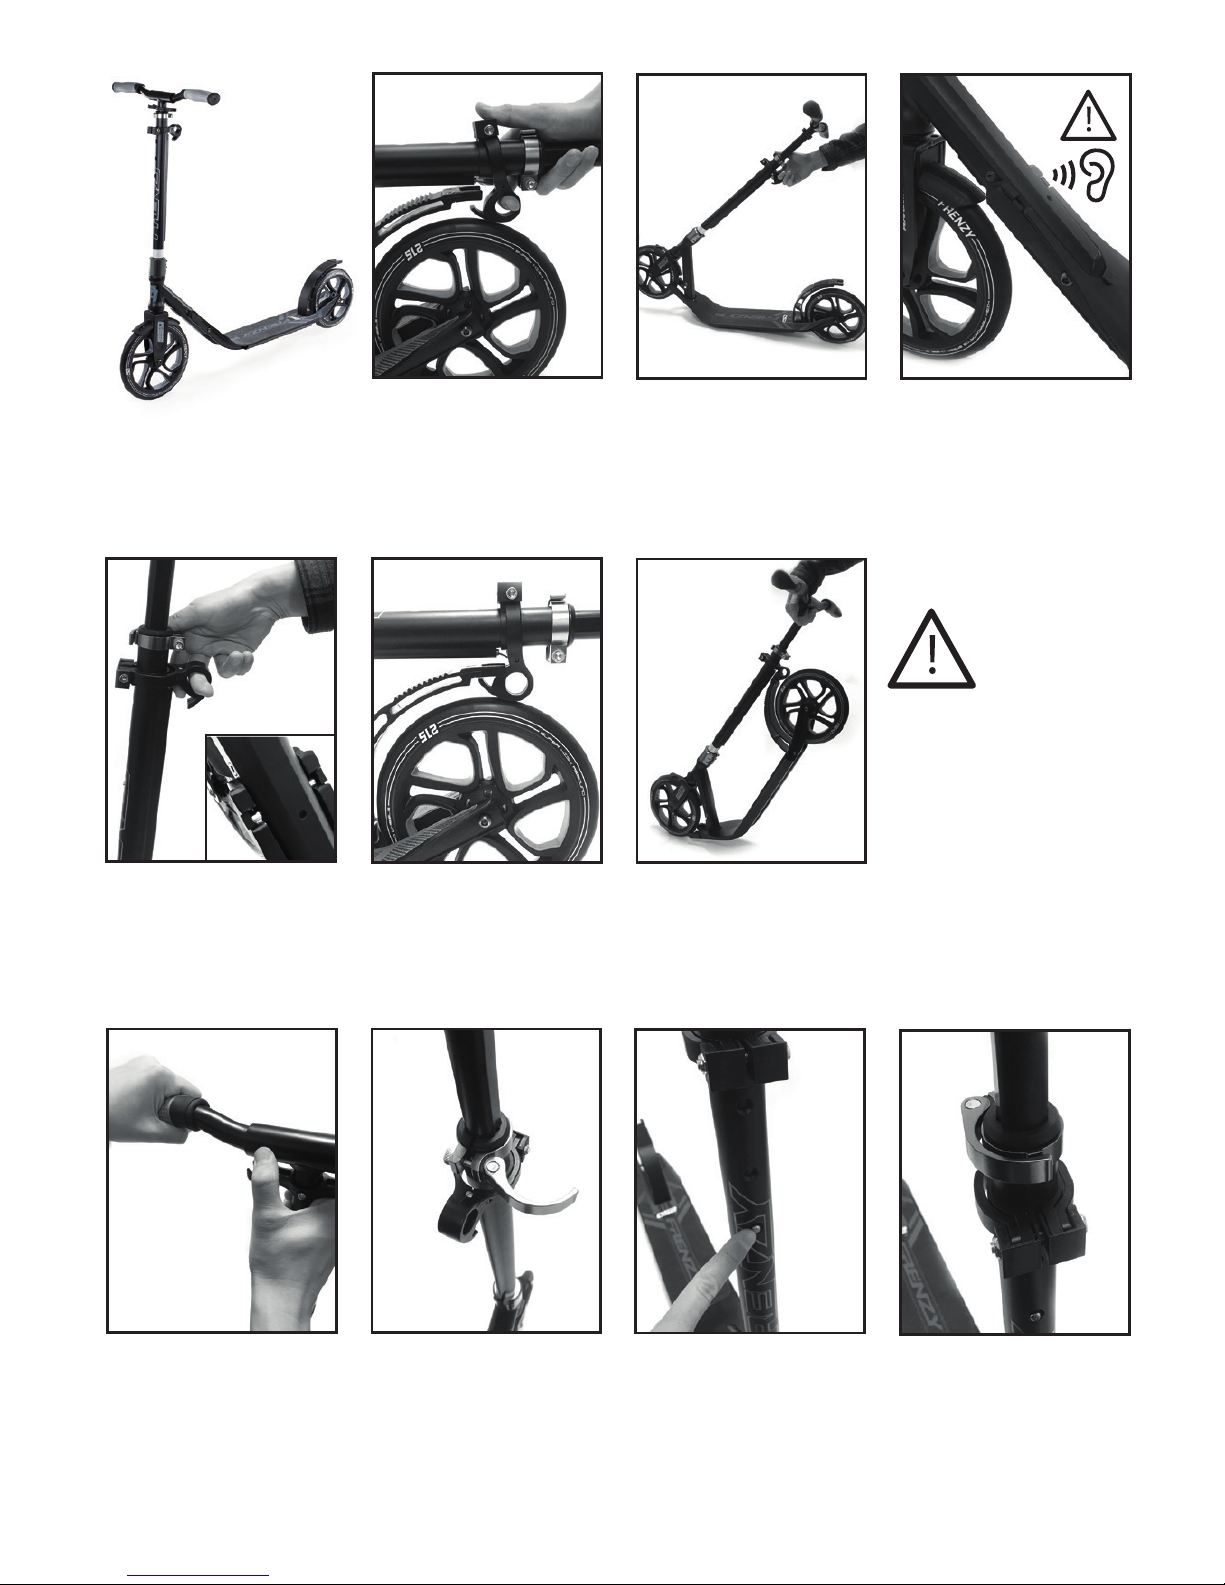
MONTAGEANLEITUNGEN
AUSKLAPPEN DES SCOOTERS:
EINKLAPPEN DES SCOOTERS:
EINSTELLEN DES LENKERS:
(4.)
(5.)
(6.)
1. Ziehe an dem Önungsriegel, um die Arretierung an der Hinterbremse zu lösen.
2. Klappe die Lenkstange hoch, bis sie einrastet, während Du den Önungsriegel gezogen hältst.
Nun lasse den Riegel los.
3. Versichere Dich, dass die Arretierung eingerastet ist, bevor Du losfährst. HINWEIS: Achte auf das Klicken!
4. Ziehe am Riegel, damit Du den Scooter zusammen klappen kannst.
5. Versichere Dich, dass der Riegel sicher an der Hinterbremse eingerastet ist.
6. Dieser Scooter ist so gebaut, dass er einfach zu transportieren ist.
Im eingeklappten Zustand kannst ihn einfach hinter Dir herziehen
7. Drücke auf die Metallnippel und ziehe die Grie heraus. Diese kannst Du dann in die
Plastikhalterung darunter stecken.
8. Um die Höhe des Lenkers einzustellen, öne die Metallklemme an der Lenkstange.
9. Dann kannst Du die Höheneinstellung der vorbestimmten Positionen vornehmen,
indem Du auf den Metallnippel drückst.
10. Nachdem Du die Höheneinstellung vorgenommen hast, muss der Metallnippel aus dem Loch herausragen
und die Metallklemme geschlossen werden, um sicherzustellen, dass die Lenkstange sich nicht bewegen kann.
HINWEIS: Versichere Dich, dass die Metallklemme voll angezogen ist, um jegliches Spiel des Lenkers zu vermeiden.
WARNUNG!
Versichere Dich, dass die
Arretierung vollständigt
eingerastet ist,
bevor Du fährst.
(1.)
(2.) (3.)
(9.)
(10.)
(7.) (8.)
 Loading...