

FreeWheel RACK Installation Manual
TM
Wheelchair Attachment RACK
Installaon Guide
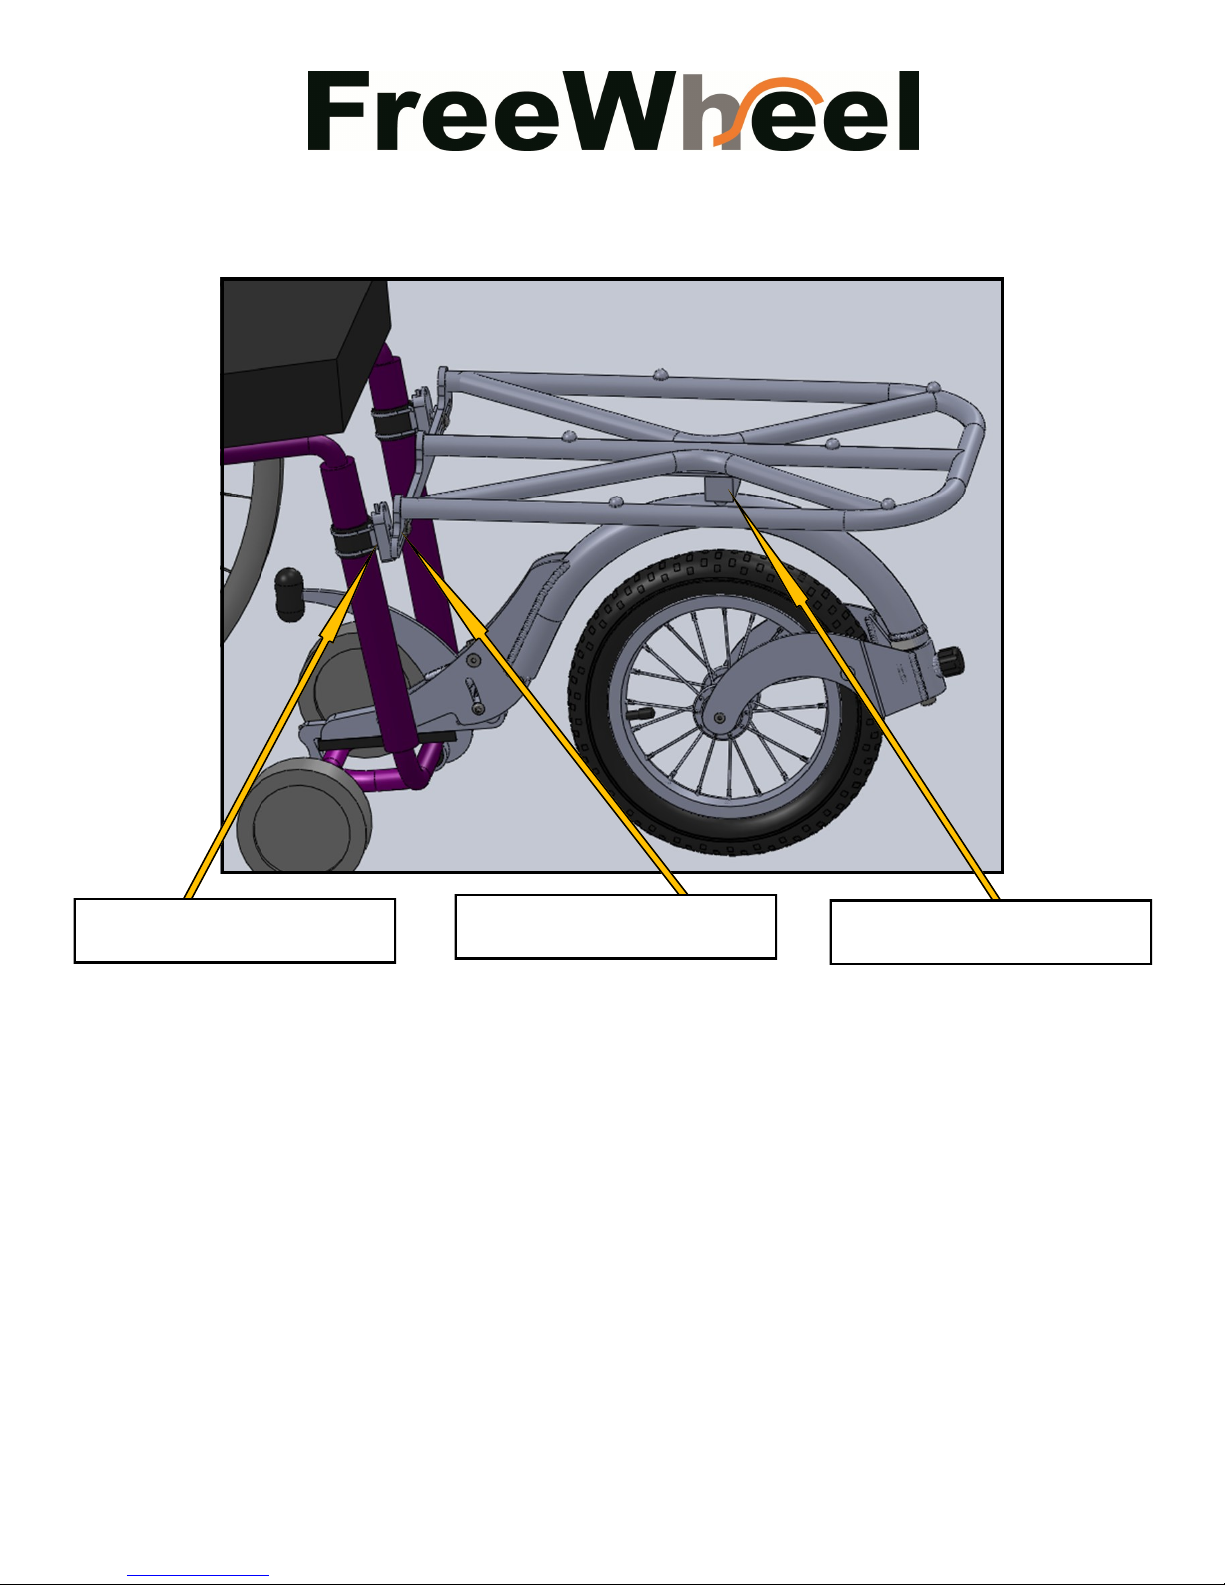
1. Socket and Slider/Lock
2. Width Adjustment
3. Block Centered
Parts Included
1. 6 O-Rings, 4 Zip-Ties, 2 Foam Strips, 2 Sockets, 2 Sliders/Locks, 2 Retaining Screws
2. 2 Ball Fittings, 2 Washers, 2 Buttonhead Screws
3. 1 Block, 2 Socket Head Cap Screws
Tools Needed
Phillips Screw Driver, 5/32” allen wrench, wheel bearing grease
When Using Your RACK
1. Do not overload your RACK. Manufacturer maximum weight specifications is 25 lbs.
2. To make it easy to insert the Ball Fitting into the Socket, it helps to lightly dab wheel bearing
grease on each Ball Fitting (can be found at any auto parts store).
3. If the width between your vertical tubes is over 13-3/4” please contact us for an additional
part.
For additional information or questions please go to our website or email us at:
WWW.GOFREEWHEEL.COM or INFO@GOFREEWHEEL.COM
*** OVER ***
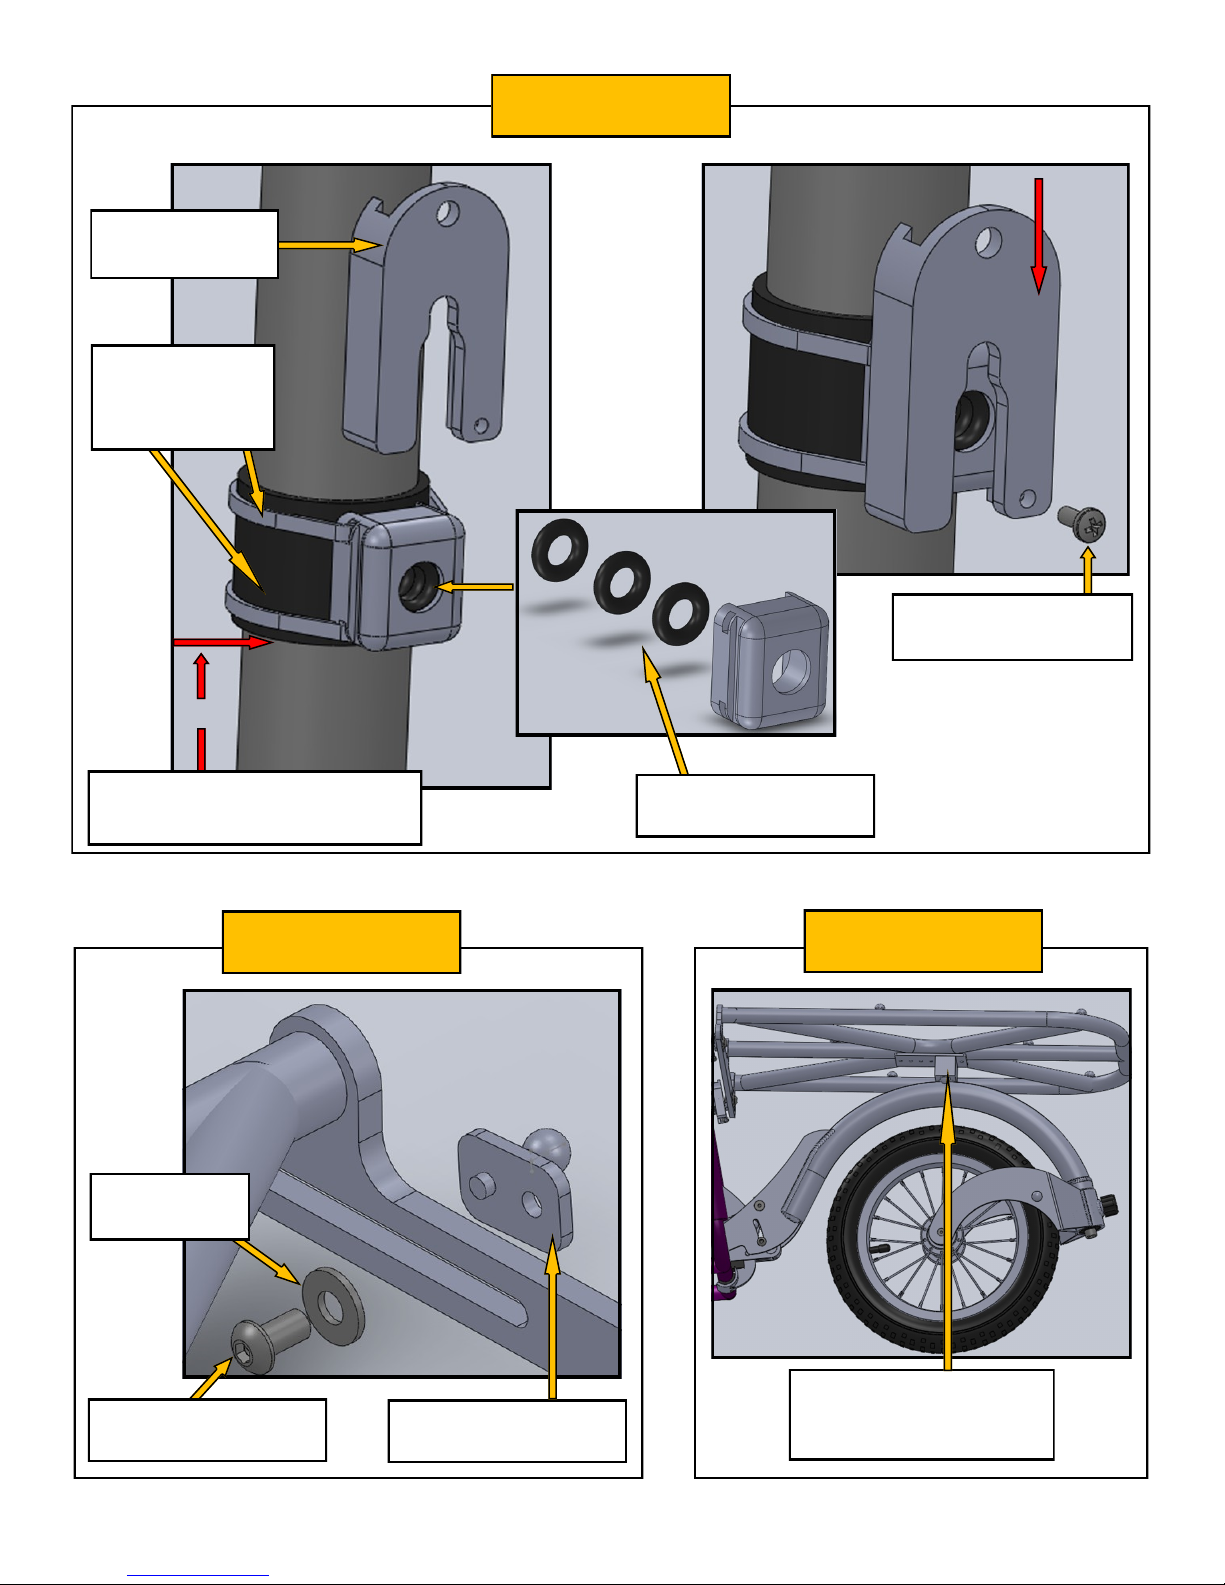
Slider/Lock
Zip-Ties and
Foam Backing
STEP 1
Retaining Screw
11”
Boom of foam strip 11” from
oor withOUT FreeWheel on
STEP 2
Washer
3 - O-Rings
STEP 3
Buonhead Screw
Ball Fing
Center Block at top of
FreeWheel
 Loading...