

Page 1
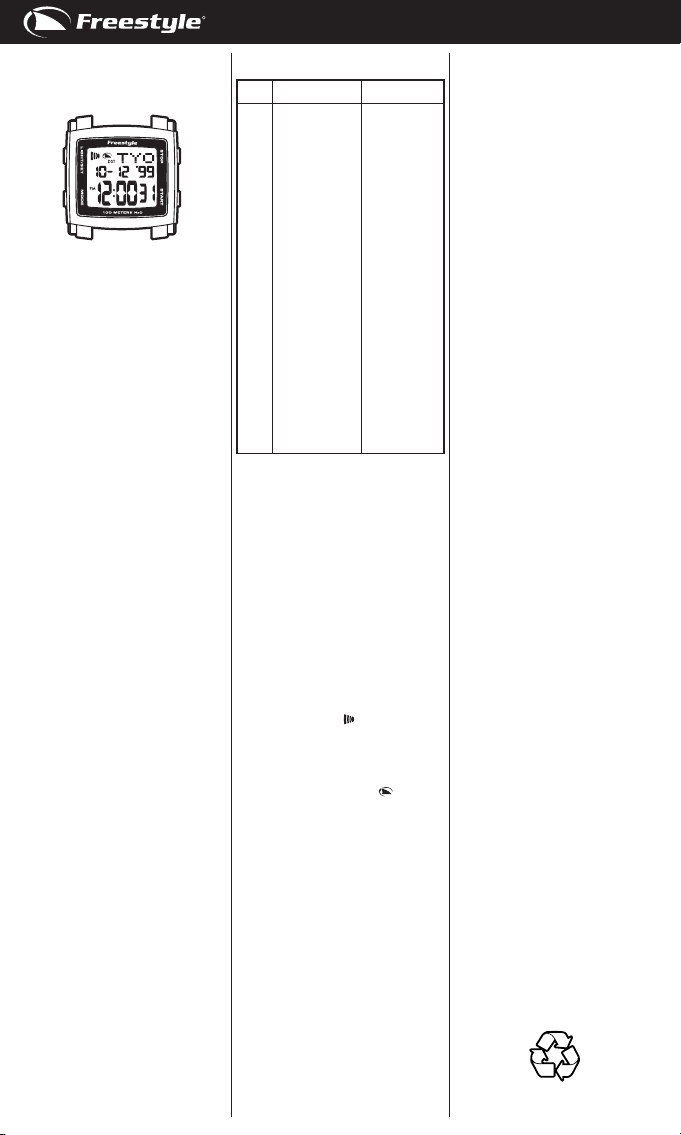
CORY LOPEX III
S4 S1
S2S3
S1. Stop Button
S2. Start/split Button
S3. Mode Button
S4. Light/set Button
DISPLAY MODES:
The watch has six display modes: NORMAL
TIME, WORLD TIME, ALARM (ALM), STOPWATCH (STW), RECALL and TIMER (TMR).
To change from one display mode to
another, press S3 button once.
NOTE: In any display mode, if there is no
key manipulation for a few minutes, the
watch will automatically return to NORMAL
TIME mode.
NOTE: In any setting mode, if there is no key
manipulation for a few minutes, the watch
will automatically save the entered data and
exit the setting procedure.
TO SET THE TIME AND CALENDAR:
1. Press S3 button to select NORMAL TIME
mode.
2. Press and hold S4 button for around 2
seconds, the hour format will blink.
3. Press S1 or S2 button to toggle between
12-hour and 24-hour format. The P.M.
indicator may be displayed to indicate
the time period 12:00 A.M. – 11:59 P.M. in
12-hour format.
4. Press S3 button, the second digits will
blink.
5. Press S1 or S2 button to reset the second
digits to 00.
6. Press S3 button, the minute digits will
blink.
7. Press S1 button to decrease the value or
S2 button to increase it. Holding down the
button will speed up the process.
8. Press S3 button, the hour digits will blink.
9. Press S1 button to decrease the value or
S2 button to increase it. Holding down the
button will speed up the process.
10.Follow the same pattern to set the year,
month, date and local city selection.
11.To set the local city selection, press S1
or S2 button to select among the 24
preset cities / time zones.
12.After nished making all the settings,
press S4 button to conrm.
NOTE: The day (of the week) is automatically
set in accordance with the date. The date
can be set within the range of 1 January
2000 to 31 December 2099.
NOTE: The selected hour format will apply
to both NORMAL TIME mode and WORLD
TIME mode.
TO TOGGLE BETWEEN DAYLIGHT SAVINGS
TIME (DST) AND STANDARD TIME IN
NORMAL TIME MODE:
In NORMAL TIME mode, press S1 button to
toggle between Daylight Savings Time (DST)
and Standard Time. The DST indicator will
be displayed when Daylight Savings Time
is displayed.
TO SELECT AND DISPLAY THE TIME OF
WORLD TIME CITY IN WORLD TIME MODE:
1. Press S3 button to select WORLD TIME
mode.
2. Press S2 button to select among the 24
preset cities / time zones.
3. Press S1 button to toggle between Day light Savings Time (DST) and Standard
Time. The DST indicator will be displayed
when Daylight Savings Time is displayed.
WORLD TIME CITY CODE REFERENCE
TABLE:
City
Code
MIDWAY
MDY
HONOLULU
HNL
ANCHORAGE
ANC
LOS ANGELES
LAX
DENVER
DEN
CHIGAGO
CHI
NEW YORK
NYC
CARACAS
CCS
RIO DE JANEIRO
RIO
-2HR
-1HR
LONDON
LON
PARIS
PAR
CAIRO
CAI
MOSCOW
MOW
DUBAI
DXB
KARACHI
KHI
DHAKA
DAC
BANGKOK
BKK
HONG KONG
HKG
TOKYO
TYO
SYDNEY
SYD
NOUMEA
NOU
AUCKLAND
AKL
TO SET THE ALARM TIME:
1. Press S3 button to select ALARM mode.
2. Press S2 button to select among alarm
entries 1, 2 and 3 to set.
3. Press and hold S4 button for around 2
seconds, the minute digits will blink.
4. Press S1 button to decrease the value or
S2 button to increase it. Holding down the
button will speed up the process.
5. Press S3 button, the hour digits will blink.
6. Press S1 button to decrease the value or
S2 button to increase it. Holding down the
button will speed up the process.
7. After nished making all the settings,
press S4 button to conrm.
NOTE: The alarm will automatically be
activated after being set.
TO TURN ON/OFF THE ALARM:
In ALARM mode
1. Press S2 button to select among alarm
entries 1, 2 and 3 to set.
2. Press S1 button to activate the alarm.
The alarm indicator
3. Press S1 button again to deactivate the
alarm. The alarm indicator will disappear.
TO TURN ON/OFF THE HOURLY CHIME:
In NORMAL TIME mode,
1. Press S2 button to activate the hourly
chime. The chime indicator
appear.
2. Press S2 button again to deactivate the
hourly chime. The chime indicator will
disappear.
WHEN AN ALARM OR HOURLY CHIME
GOES OFF:
A tune will be emitted by the hour when the
hourly chime is activated.
An alarm tune will be emitted at the designated time when the alarm is activated. To
stop the tune, press any button.
TO USE THE STOPWATCH:
1. Press S3 button to select STOPWATCH
mode.
2. The stopwatch will then be displayed
in its current state–reset, running or
stopped.
3. To resume a counting, press S2 button to
resume from where it left off.
4. To start a new counting, reset the stop
watch to zero rst.
Press S1 button to stop counting, then
press S1 button again to reset.
For the measurement of elapsed time:
In STOPWATCH mode,
1. Press S2 button to start counting.
2. To stop counting, press S1 button. Press
City
-2HR
-1HR
Hour Difference
-11HR
-10HR
-9HR
-8HR
-7HR
-6HR
-5HR
-4HR
-3HR
-2HR
-1HR
0
+1HR
+2HR
+3HR
+4HR
+5HR
+6HR
+7HR
+8HR
+9HR
+10HR
+11HR
+12HR
will appear.
will
ENGLISH
S2 button to resume from where it left off.
3. To reset to zero, press S1 button to stop
counting and then press S1 button again.
For the measurement of split time:
In STOPWATCH mode,
1. Press S2 button to start counting.
2. While the stopwatch is running, press S2
button to register a lap. The lap number
and lap time of the recorded lap will be
displayed and the stopwatch is still
running in the background.
After around 5 seconds, the lap number
and split time of the current lap will be
displayed.
3. Repeat the last step until all the laps
have been registered.
4. To stop counting, press S1 button. Press
S2 button to resume from where it left off.
5. To reset to zero, press S1 button to stop
counting and then press S1 button again.
NOTE: Illustration of lap time and split time:
a) Lap time – individual lap time.
b) Split time – cumulative lap time.
NOTE: The stopwatch can record up to a
maximum of 20 laps (the rst 19 laps and
the last lap registered).
NOTE: The stopwatch can count up to a
maximum of 23 hours, 59 minutes and 59.99
seconds.
NOTE: You can leave the stopwatch running
while switching over to other operating
modes.
TO USE THE RECALL FUNCTION:
1. Press S3 button to select RECALL mode.
2. Press S1 or S2 button to scroll through
the recorded individual lap time and total
elapsed time.
NOTE: The recall function is available only
when there is lap record stored.
NOTE: The lap record will be cleared when
the stopwatch is reset.
TO SET THE TIMER:
1. Press S3 button to select TIMER mode.
2. Press and hold S4 button for around 2
seconds, the second digits will blink.
3. Press S1 button to decrease the value or
S2 button to increase it. Holding down the
button will speed up the process.
4. Press S3 button, the minute digits will
blink.
5. Press S1 button to decrease the value or
S2 button to increase it. Holding down the
button will speed up the process.
6. Press S3 button, the hour digits will blink.
7. Press S1 button to decrease the value or
S2 button to increase it. Holding down the
button will speed up the process.
8. After nished making all the settings,
press S4 button to conrm.
NOTE: The maximum countdown value of
the timer is 23 hours, 59 minutes and 59
seconds.
TO USE THE TIMER:
1. Press S3 button to select TIMER mode.
2. The timer will be displayed in its current
state – reset, running, or stopped.
3. To resume a counting, press S2 button to
resume from where it left off.
4. To start a new counting, reload the timer
rst.
Press S2 button to stop counting and
then press S1 button.
5. After reaching zero in a countdown, a
tune will be emitted. To stop the tune,
press any button.
NOTE: You can leave the timer running while
switching over to other operating modes.
TO USE THE BACKLIGHT:
Press S4 button to turn on the backlight for
around 3 seconds.
To reduce carbon foot print, these
Freestyle instructions are printed with
soy inks on recycled paper.
NON-BG0041-FS-INST-PKG-R02
Page 2

Page 3

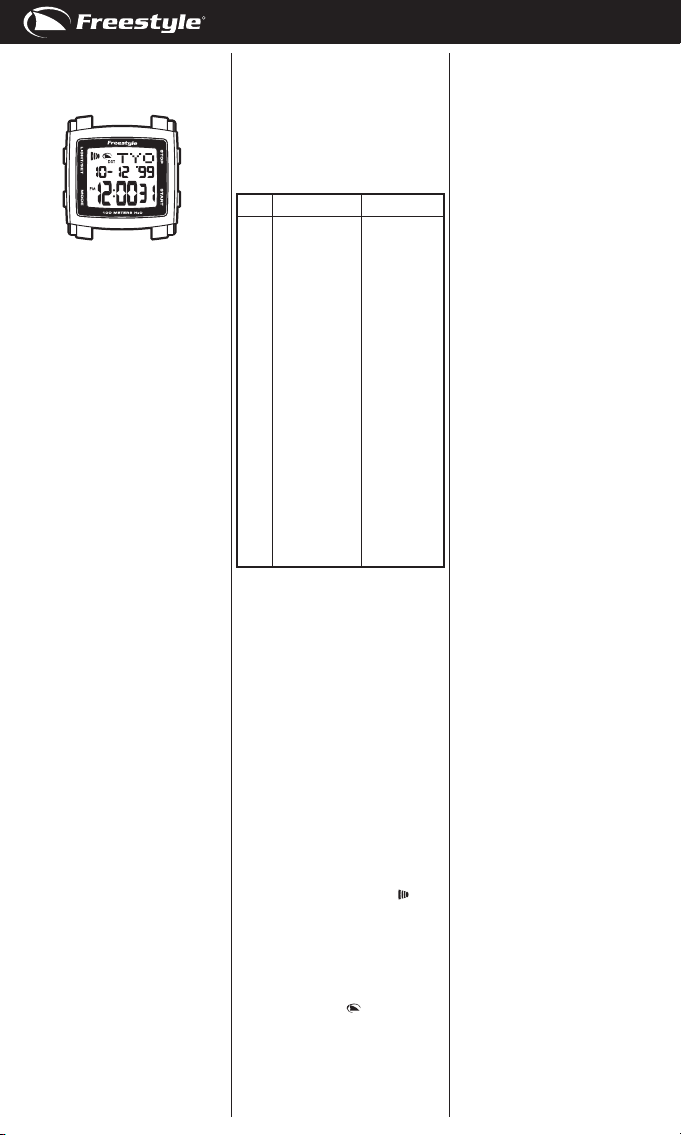
CORY LOPEX III
S4 S1
S2S3
S1. Botón de parada
S2. Botón de inicio/fracción de tiempo
S3. Botón de modo
S4. Botón de luz/ajuste
MODOS DE PANTALLA
El reloj cuenta con seis modos de pantalla:
hora normal (NORMAL TIME), hora mundial
(WORLD TIME), alarma (ALM), cronómetro
(STW), memoria (RECALL) y temporizador
(TMR).
Para pasar de un modo de pantalla a otro,
pulse el botón S3 una vez.
NOTA: En cualquier modo de ajuste, si no
se pulsa ningún botón en unos minutos, el
reloj volverá automáticamente al modo de
hora normal.
NOTA: En cualquier modo de ajuste, si no
se toca ningún botón en unos minutos, el
reloj guardará automáticamente los datos
introducidos y saldrá del procedimiento
de ajuste.
CÓMO PONER LA HORA Y EL CALENDARIO
1. Pulse el botón S3 para seleccionar el
modo de hora normal.
2. Pulse y mantenga pulsado durante unos
dos segundos el botón S4; el formato de
hora parpadeará.
3. Pulse el botón S1 o S2 para cambiar
entre los formatos 12 horas y 24 horas.
El indicador P.M. se muestra para indicar
el periodo horario entre 12:00 A.M. y
11:59 P.M. en formato 12 horas.
4. Pulse el botón S3; los dígitos de los
segundos parpadearán.
5. Pulse el botón S1 o S2 para restablecer
los dígitos de los segundos a 00.
6. Pulse el botón S3; los dígitos de los
minutos parpadearán.
7. Pulse el botón S1 para disminuir el
valor o el botón S2 para aumentarlo. Si
mantiene el botón pulsado, el proceso
será más rápido.
8. Pulse el botón S3; los dígitos de la hora
parpadearán.
9. Pulse el botón S1 para disminuir el
valor o el botón S2 para aumentarlo. Si
mantiene el botón pulsado, el proceso
será más rápido.
10.Siga el mismo patrón para ajustar los
valores correspondientes a año, mes,
fecha y selección de ciudad local.
11.Para ajustar la selección de ciudad local,
pulse el botón S1 o S2 para elegir entre
las 24 ciudades/zonas horarias preselec
cionadas.
12.Una vez nalizados todos estos ajustes,
pulse el botón S4 para conrmar.
NOTA: El día (de la semana) se ajusta
automáticamente de acuerdo con la fecha.
Se puede ajustar la fecha dentro del intervalo entre el 1 de enero de 2000 y el 31 de
diciembre de 2099.
NOTA: El formato horario seleccionado se
aplicará tanto al modo de hora normal como
al modo de hora mundial.
PARA CAMBIAR ENTRE HORA DE VERANO
(DST) Y HORA ESTÁNDAR EN EL MODO DE
HORA NORMAL
En el modo de hora normal, pulse el botón
S1 para cambiar entre hora de verano
(DST) y hora estándar. El indicador DST
se mostrará cuando se muestre la hora
de verano.
PARA SELECCIONAR Y MOSTRAR LA HORA
DE LA CIUDAD ELEGIDA EN EL MODO DE
HORA MUNDIAL
1. Pulse el botón S3 para seleccionar el
modo de hora mundial.
2. Pulse el botón S2 para elegir una de las
24 ciudades/zonas horarias preseleccio nadas.
3. Pulse el botón S1 para cambiar entre
hora de verano (DST) y hora estándar.
El indicador DST se mostrará cuando se
muestre la hora de verano.
CUADRO DE REFERENCIA DE CÓDIGOS
HORARIOS POR CIUDAD
Código
ciudad
CÓMO PONER LA HORA DE LA ALARMA
1. Pulse el botón S3 para seleccionar el
modo de alarma.
2. Pulse el botón S2 para elegir una de las
alarmas (1, 2 o 3).
3. Pulse y mantenga pulsado durante unos
dos segundos el botón S4; los dígitos de
los minutos parpadearán.
4. Pulse el botón S1 para disminuir el valor
o el botón S2 para aumentarlo. Si man tiene el botón pulsado, el proceso será
más rápido.
5. Pulse el botón S3; los dígitos de la hora
parpadearán.
6. Pulse el botón S1 para disminuir el
valor o el botón S2 para aumentarlo. Si
mantiene el botón pulsado, el proceso
será más rápido.
7. Una vez nalizados todos estos ajustes,
pulse el botón S4 para conrmar.
NOTA: La alarma se activará automáticamente una vez haya sido ajustada.
CÓMO ACTIVAR/DESACTIVAR LA ALARMA
En el modo de alarma:
1. Pulse el botón S2 para elegir una de las
alarmas (1, 2 o 3).
2. Pulse el botón S1 para activar la alarma.
El icono de la alarma
3. Pulse el botón S1 otra vez para desactivar
la alarma. El indicador de la alarma
desaparecerá.
CÓMO ACTIVAR/DESACTIVAR EL REPIQUE
HORARIO
En el modo de hora normal:
1. Pulse el botón S2 para activar el repique
horario. El icono de la repique
cerá.
2. Pulse el botón S2 otra vez para desactivar
el repique horario. El indicador del
repique desaparecerá.
CÓMO APAGAR LA ALARMA O EL REPIQUE
HORARIO CUANDO SUENE
Cuando el repique horario está activado,
cuando llegue la hora sonará una melodía.
MDY
HNL
ANC
LAX
DEN
CHI
NYC
CCS
RIO
-2HR
-1HR
LON
PAR
CAI
MOW
DXB
KHI
DAC
BKK
HKG
TYO
SYD
NOU
AKL
Ciudad
MIDWAY
HONOLULU
ANCHORAGE
LOS ÁNGELES
DENVER
CHIGAGO
NUEVA YORK
CARACAS
RÍO DE JANEIRO
-2HR
-1HR
LONDON
PARÍS
EL CAIRO
MOSCÚ
DUBAI
KARACHI
DHAKA
BANGKOK
HONG KONG
TOKIO
SYDNEY
NOUMEA
AUCKLAND
Diferencia horaria
-11HR
-10HR
-9HR
-8HR
-7HR
-6HR
-5HR
-4HR
-3HR
-2HR
-1HR
0
+1HR
+2HR
+3HR
+4HR
+5HR
+6HR
+7HR
+8HR
+9HR
+10HR
+11HR
+12HR
aparecerá.
apare-
Se emitirá una melodía de alarma a la
ESPAÑOL
hora ajustada cuando se active la alarma.
Para detener la melodía, pulse cualquier
botón.
CÓMO UTILIZAR EL CRONÓMETRO
1. Pulse el botón S3 para seleccionar el
modo de CRONÓMETRO.
2. Se mostrará el cronómetro en su estado
actual (reseteado, en funcionamiento o
parado).
3. Para reanudar el contador, pulse el botón
S2 para reanudarlo desde el punto en el
que fue detenido.
4. Para reiniciar el contador, debe volver a
poner el cronómetro a cero.
Pulse el botón S1 para detener el
contador y a continuación el botón S1
otra vez para restablecerlo.
Cómo medir el tiempo transcurrido:
En el modo de CRONÓMETRO:
1. Pulse el botón S2 para iniciar el contador.
2. Para detener el contador, pulse el botón
S1. Para reanudar el contador desde el
punto en el que se detuvo, pulse el botón
S2.
3. Para restablecer a cero, pulse el botón S1
para detener el contador y a continuación
el botón S1 otra vez.
Cómo medir una fracción de tiempo:
En el modo de CRONÓMETRO:
1. Pulse el botón S2 para iniciar el contador.
2. Mientras está funcionando el cronómet ro, pulse el botón S2 para registrar una
etapa. Se mostrará el número y el tiempo
de la etapa grabada mientras el
cronómetro continua funcionando de
fondo.
Después de unos 5 segundos, se
mostrará el número de la etapa y la
fracción de tiempo de la etapa actual.
3. Repita el último paso hasta que haya
registrado todas las etapas.
4. Para detener el contador, pulse el botón
S1. Para reanudar el contador desde el
punto en el que se detuvo, pulse el botón
S2.
5. Para restablecer a cero, pulse el botón S1
para detener el contador y a continuación
el botón S1 otra vez.
NOTA: Ilustración de tiempo de etapa y
fracción de tiempo:
a) Tiempo de etapa: tiempo de etapa
individual.
b) Fracción de tiempo: tiempo de etapa
acumulado.
NOTA: El cronómetro puede grabar un
máximo de 20 etapas (las primeras 19
etapas y la última etapa grabada).
NOTA: El cronómetro puede contar hasta
un máximo de 23 horas, 59 minutos y 59,99
segundos.
NOTA: Se puede dejar el cronómetro funcionando mientras se cambia a otros modos de
funcionamiento.
CÓMO UTILIZAR LA FUNCIÓN DE MEMORIA
1. Pulse el botón S3 para seleccionar el
modo de memoria.
2. Pulse el botón S1 o S2 para pasar de un
tiempo de etapa individual grabado a otro
y el tiempo total transcurrido.
NOTA: La función de memoria solo está
disponible cuando existe un registro de
etapas.
NOTA: El registro de etapas se borrará al
restablecer el cronómetro.
CÓMO AJUSTAR EL TEMPORIZADOR
1. Pulse el botón S3 para seleccionar el
modo de temporizador.
2. Pulse y mantenga pulsado durante unos
dos segundos el botón S4; los dígitos de
los segundos parpadearán.
3. Pulse el botón S1 para disminuir el valor
o el botón S2 para aumentarlo. Si man
tiene el botón pulsado, el proceso será
más rápido.
4. Pulse el botón S3; los dígitos de los
minutos parpadearán.
5. Pulse el botón S1 para disminuir el valor
o el botón S2 para aumentarlo. Si
mantiene el botón pulsado, el proceso
será más rápido.
6. Pulse el botón S3; los dígitos de la hora
parpadearán.
Page 4

7. Pulse el botón S1 para disminuir el valor
o el botón S2 para aumentarlo. Si
mantiene el botón pulsado, el proceso
será más rápido.
8. Una vez nalizados todos estos ajustes,
pulse el botón S4 para conrmar.
NOTA: El valor máximo de cuenta atrás del
temporizador es de 23 horas, 59 minutos y
59 segundos.
CÓMO USAR EL TEMPORIZADOR
1. Pulse el botón S3 para seleccionar el
modo de temporizador.
2. Se mostrará el temporizador en su
estado actual (reseteado, en funciona
miento o parado).
3. Para reanudar el contador, pulse el botón
S2 para reanudarlo desde el punto en el
que fue detenido.
4. Para reiniciar el contador, vuelva a cargar
el temporizador primero.
Pulse el botón S2 para detener el conta
dor y a continuación el botón S1.
5. Una vez alcanzado el cero en una cuenta
atrás, sonará una melodía. Para detener
la melodía, pulse cualquier botón.
NOTA: Se puede dejar el temporizador
funcionando mientras se cambia a otros
modos de funcionamiento.
CÓMO UTILIZAR LA RETROILUMINACIÓN
Pulse el botón S4 para encender la retroiluminación durante unos 3 segundos.
ESPAÑOL
Para reducir la huella del carbono,
las instrucciones de Freestyle se han
imprimido con tinta de soja en papel
reciclado.
NON-BG0041-FS-INST-PKG-R02
Page 5
CORY LOPEX III
S4 S1
S2S3
S1. Stopp Taste
S2. Start/Zwischenzeit Taste
S3. Modus Taste
S4. Licht/Einstellungs Taste
ANZEIGEMODI
Die Uhr hat sechs Anzeigenmodi: NORMALZEIT, WELTZEIT, ALARMFUNKTION
(ALM), STOPPUHR (STW), ABRUF und
TIMER (TMR).
Zum Wechsel von einem Anzeigemodus
zu einem anderen, drücken Sie einmal
Taste S3.
HINWEIS: Wenn in einem Anzeigemodus
für einige Minuten keine Taste gedrückt
wird, stellt sich die Uhr automatisch in den
NORMALZEIT-Modus zurück.
HINWEIS: Wenn in einem Einstellmodus
für einige Minuten keine Taste gedrückt
wird, speichert die Uhr automatisch die
eingegebenen Daten und verlässt den
Einstellvorgang.
ZEIT UND KALENDER EINSTELLUNG
1. Wählen Sie mit der Taste S3 den
NORMALZEIT-Modus.
2. Betätigen Sie die Taste S4 und halten sie
ca. 2 Sekunden, bis die Stundenanzeige
zu blinken beginnt.
3. Zur Einstellung des Stundenformats
betätigen Sie die Taste S1 oder S2, um
zwischen dem 12- und 24-Stunden
format zu wechseln. Die PM-Anzeige
erscheint, um die Zeit 12:00 A.M. - 11:59
PM im 12-Stundenformat anzuzeigen.
4. Betätigen Sie die Taste S3, worauf die
Sekundenanzeige zu blinken beginnt.
5. Betätigen Sie die Taste S1 oder S2, um
die Sekundenanzeige auf “00” zurück zusetzen.
6. Betätigen Sie die Taste S3, worauf die
Minutenanzeige zu blinken beginnt.
7. Zur Erhöhung des Werts betätigen Sie
die Taste S1, zur Herabsetzung die Taste
S2. Halten Sie die Taste gedrückt, um die
Anzeige schneller vorlaufen zu lassen.
8. Betätigen Sie die Taste S3, worauf die
Stundenanzeige zu blinken beginnt.
9. Zur Erhöhung des Werts betätigen Sie
die Taste S1, zur Herabsetzung die Taste
S2. Halten Sie die Taste gedrückt, um die
Anzeige schneller vorlaufen zu lassen.
10. Wiederholen Sie die gleichen Schritte,
um Tag, Monat, Datum, sowie die Stadt
einzustellen.
11. Zur Einstellung der Stadt betätigen Sie
die Taste S1 oder S2 und wählen aus 24
voreingestellten Städten / Zeitzonen.
12. Wenn Sie alle Einstellungen abgeschlos sen haben, betätigen Sie zur Bestätigung
die Taste S4.
HINWEIS: Der Name des Wochentags stellt
sich automatisch nach dem Datum ein. Das
Datum muss zwischen dem 1. Januar 2000
und dem 31.Dezember 2099 liegen.
HINWEIS: Das gewählte Stundenformat
wird in den NORMALZEIT- und WELTZEITModi angezeigt.
WECHSEL ZWISCHEN DER SOMMER(DST) UND WINTERZEIT IM NORMALZEITMODUS
Im NORMALZEIT-Modus betätigen Sie die
Taste S1, um zwischen der Sommerzeit
(DST) und Winterzeit zu wechseln. Die DSTAnzeige erscheint, wenn die Sommerzeit
angezeigt wird.
AUSWAHL UND ANZEIGE DES WELTZEITUND STADTZEIT-MODUS
1. Wählen Sie mit der Taste S3 den
WELTZEIT-Modus.
2. Betätigen Sie die Taste S2 und wählen
aus 24 voreingestellten Städten /
Zeitzonen.
3. Betätigen Sie die Taste S1 um zwischen
der Sommerzeit (DST) und Winterzeit zu
wechseln. Die DST-Anzeige erscheint,
wenn die Sommerzeit angezeigt wird.
WELTZEIT STÄDTE-CODE TABELLE:
Stadt
Code
MDY
HNL
ANC
DEN
NYC
-2HR
-1HR
LON
MOW
DXB
DAC
BKK
HKG
NOU
ALARMZEIT EINSTELLUNG
1. Wählen Sie mit der Taste S3 die ALARM FUNKTION.
2. Wählen Sie mit der Taste S2 die Alarm funktionseinstellungen 1, 2 oder 3.
3. Betätigen Sie die Taste S4 und halten sie
ca. 2 Sekunden, bis die Minutenanzeige
zu blinken beginnt.
4. Zur Erhöhung des Werts betätigen Sie
die Taste S1, zur Herabsetzung die Taste
S2. Halten Sie die Taste gedrückt, um die
Anzeige schneller vorlaufen zu lassen.
5. Betätigen Sie die Taste S3, worauf die
Sekundenanzeige zu blinken beginnt.
6. Zur Erhöhung des Werts betätigen Sie
die Taste S1, zur Herabsetzung die Taste
S2. Halten Sie die Taste gedrückt, um die
Anzeige schneller vorlaufen zu lassen.
7. Wenn Sie alle Einstellungen abgeschlos sen haben, betätigen Sie zur Bestätigung
die Taste S4.
HINWEIS: Die Alarmzeit wird automatisch
nach der Eingabe aktiviert.
ALARMZEIT EIN/AUSSTELLEN
Im Alarmfunktionsmodus
1. Wählen Sie mit der Taste S2 die Alarm funktionseinstellungen 1, 2 oder 3.
2. Betätigen Sie die Taste S1 zur
Aktivierung der Alarmfunktion.
angezeigt.
3. Drücken Sie nochmals die Taste S1
um die Alarmfunktion auszuschalten.
Die Anzeige der Alarmfunktion ver
schwindet.
EIN/AUSSTELLEN DES STUNDENSIGNALS:
Im NORMALZEIT-Modus
1. Betätigen Sie die Taste S2, um das
Stundensignal zu aktivieren. Die Anzeige
des Stundensignals
2. Betätigen Sie nochmals die Taste S2,
um das Stundensignal auszuschalten.
Die Anzeige des Stundensignals ver
schwindet.
WENN DER ALARM ODER DAS STUNDENSIGNAL ERTÖNT:
Ein Signal ertönt stündlich, wenn die
Stundensignal-Funktion aktiviert ist.
LAX
CHI
CCS
RIO DE JANEIRO
RIO
PAR
CAI
KHI
TYO
SYD
AKL
Stadt
MIDWAY
HONOLULU
ANCHORAGE
LOS ANGELES
DENVER
CHIGAGO
NEW YORK
CARACAS
-2HR
-1HR
LONDON
PARIS
KAIRO
MOSKAU
DUBAI
KARACHI
DHAKA
BANGKOK
HONG KONG
TOKYO
SYDNEY
NOUMEA
AUCKLAND
Stundendifferenz
-11HR
-10HR
-9HR
-8HR
-7HR
-6HR
-5HR
-4HR
-3HR
-2HR
-1HR
0
+1HR
+2HR
+3HR
+4HR
+5HR
+6HR
+7HR
+8HR
+9HR
+10HR
+11HR
+12HR
wird
erscheint.
DEUTSCH
Wenn die Alarmfunktion aktiviert ist, ertönt
zur vorbestimmten Zeit ein Signalton.
Um den Ton abzustellen, betätigen Sie
irgendeine Taste.
VERWENDUNG DER STOPPUHR
1. Wählen Sie mit der Taste S3 den
STOPPUHR-Modus.
2. Die Stoppuhr zeigt den aktuellen Status
an - zurückgesetzt, laufend oder
gestoppt.
3. Zur Fortsetzung ab der letzten Zeitmes
sung drücken Sie die Taste S2.
4. Um eine neue Zeitmessung zu beginnen
muss die Stoppuhr zuerst auf Null
zurückgesetzt werden.
Zum Anhalten der Stoppuhr drücken Sie
die Taste S1 und dann nochmals die
Taste S1 zum Zurückstellen.
Zur Messung der Zwischenzeit:
Im STOPPUHR Modus
1. Drücken Sie Taste S2, um die Messung
zu beginnen.
2. Zum Anhalten der Zählung betätigen Sie
die Taste S1. Um ab der letzten Messung
fortzusetzen, drücken Sie Taste S2.
3. Um die Stoppuhr auf Null zurück
zusetzen, betätigen Sie zum Abbruch
der Zeitmessung die Taste S1 und dann
nochmals Taste S1.
Messung der Zwischenzeit (Split Time):
Im STOPPUHR Modus
1. Drücken Sie Taste S2 um die Messung
zu beginnen.
2. Während die Stoppuhr läuft betätigen
Sie die Taste S2, um die Rundenzeit zu
registrieren. Die Rundennummer und
die registrierte Zwischenzeit werden
angezeigt, wobei die Stoppuhr im Hinter
grund läuft.
Nach ca. 5 Sekunden werden die
Nummer und die Zwischenzeit der
aktuellen Runde angezeigt.
3. Wiederholen Sie den letzten Schritt, bis
alle Runden registriert wurden.
4. Zum Anhalten der Zählung betätigen Sie
die Taste S1. Um ab der letzten Messung
fortzusetzen, drücken Sie nochmals
Taste S2.
5. Zur Rücksetzung der Stoppuhr auf Null,
betätigen Sie zum Abbruch der Zeitmes
sung die Taste S1 und dann nochmals
die Taste S1.
HINWEIS: Abbildung der Runden- und
Zwischenzeit.
a) Rundenzeit - individuelle Rundenzeit.
b) Zwischenzeit - kumulative Rundenzeit.
HINWEIS: Die Stoppuhr kann bis max. 20
Runden (die ersten 19 Runden und die letzte
Runde) speichern.
HINWEIS: Die Stoppuhr kann bis zu maximal 23 Stunden und 59 Minuten und 59,99
Sekunden zählen.
HINWEIS: Sie können den TIMER laufen
lassen, während Sie zu anderen Modi
wechseln.
DIE VERWENDUNG DES ABRUF MODUS:
1. Wählen Sie den ABRUF-Modus mit der
Taste S3.
2. Betätigen Sie die Taste S1 oder S2 und
blättern Sie durch die einzelnen gespe icherten Rundenzeiten und die Gesa mtzeit.
HINWEIS: Der Abrufmodus ist nur verfügbar, wenn Runden gespeichert wurden.
HINWEIS: Die Rundenspeicherung wir nach
der Zurücksetzung der Stoppuhr gelöscht.
EINSTELLUNG DES TIMERS:
1. Wählen Sie den TIMER-Modus mit der
Taste S3.
2. Betätigen Sie die Taste S4 und halten sie
ca. 2 Sekunden, bis die Sekundenanzeige
zu blinken beginnt.
3. Zur Herabsetzung des Werts betätigen
Sie die Taste S1, zur Erhöhung die Taste
S2. Halten Sie die Taste gedrückt, um die
Anzeige schneller vorlaufen zu lassen.
4. Betätigen Sie die Taste S3, worauf die
Minutenanzeige zu blinken beginnt.
5. Zur Herabsetzung des Werts betätigen
Sie die Taste S1, zur Erhöhung die Taste
S2. Halten Sie die Taste gedrückt, um die
Anzeige schneller vorlaufen zu lassen.
Page 6

6. Betätigen Sie die Taste S3, worauf die
Sekundenanzeige zu blinken beginnt.
7. Zur Herabsetzung des Werts betätigen
Sie die Taste S1, zur Erhöhung die Taste
S2. Halten Sie die Taste gedrückt, um die
Anzeige schneller vorlaufen zu lassen.
8. Wenn Sie alle Einstellungen abgeschlos sen haben, betätigen Sie zur Bestätigung
die Taste S4.
HINWEIS: Die Stoppuhr kann bis zu
maximal 23 Stunden und 59 Minuten und 59
Sekunden zählen.
VERWENDUNG DES TIMERS:
1. Wählen Sie den TIMER-Modus mit der
Taste S3.
2. Der Timer zeigt den aktuellen Status an
- zurückgesetzt, laufend oder gestoppt.
3. Zur Fortsetzung ab der letzten Messung
drücken Sie die Taste S2.
4. Zur Wiederaufnahme der Zählung muss
zuerst der Timer neu geladen werden.
Betätigen Sie zum Abbruch der Zählung
Taste S2 und dann die Taste S1.
5. Wenn bei einer Rückwärtszählung
(Countdown) Null erreicht wird, ertönt
ein Signalton. Um den Ton abzustellen,
betätigen Sie irgendeine Taste.
HINWEIS: Sie können den Timer laufen lassen, während Sie in andere Modi wechseln.
VERWENDUNG DER HINTERGRUNDBELEUCHTUNG:
Betätigen Sie die Taste S4, um die Hintergrundbeleuchtung für etwa 3 Sekunden
einzuschalten.
DEUTSCH
Diese Freestyle-Gebrauchsanweisung
wurde mit Tinte auf Sojabasis auf
Recycling-Papier gedruckt um den
Kohleausstoß zu reduzieren.
NON-BG0041-FS-INST-PKG-R02
Page 7

CORY LOPEX III
S4 S1
S2S3
S1. Bouton Arrêter
S2. Bouton Démarrer / Temps intermédiaire
S3. Bouton Mode
S4. Bouton d’éclairage / Réglages
MODES D’AFFICHAGE
La montre offre six modes d’afchage:
HEURE LOCALE, HEURE INTERNATIONALE, ALARME (ALM), CHRONOMETRE
(STW), RAPPEL et MINUTEUR (TMR).
Pour changer le mode d’afchage, appuyez
une fois sur le bouton S3.
REMARQUE: Dans n’importe quel mode
d’afchage, si aucune activité n’est détectée
durant quelques minutes, la montre
retournera automatiquement en mode
HEURE LOCALE.
REMARQUE: En mode de réglage, si aucune
activité n’est détectée durant quelques
minutes, la montre sauvegardera automatiquement les données entrées et quittera la
procédure de réglage.
REGLAGE DE L’HEURE ET DU CALENDRIER :
1. Appuyez sur le bouton S3 pour sélec tionner le mode NORMAL TIME (HEURE
NORMALE).
2. Appuyez et maintenez le bouton S4
durant environ 2 secondes, et le format
horaire clignotera.
3. Appuyez sur le bouton S1 ou S2 pour
permuter entre le format 12 heures
et le format 24 heures. L’indicateur PM
s’afchera pour indiquer la période entre
12:00 A.M et 11:59 P.M pour le format de
12 heures.
4. Appuyez sur le bouton S3 et les chiffres
des secondes clignoteront.
5. Appuyez sur le bouton S1 ou S2 pour
réinitialiser les chiffres des secondes à
00.
6. Appuyez sur le bouton S3, les chiffres
des minutes clignoteront.
7. Appuyez sur le bouton S1 pour diminuer
la valeur ou sur S2 pour augmenter la
valeur. Maintenez le bouton enfoncé pour
accélérer la procédure.
8. Appuyez sur le bouton S3, les chiffres
des heures clignoteront.
9. Appuyez sur le bouton S1 pour diminuer
la valeur ou sur S2 pour augmenter la
valeur. Maintenez le bouton enfoncé pour
accélérer la procédure.
10. Suivez la même procédure pour régler
l’année, le mois, la date et la sélection de
votre ville.
11. Pour sélectionner la ville, appuyez sur le
bouton S1 ou S2 pour choisir parmi 24
villes / zones horaires.
12. Après avoir effectué tous les réglages,
appuyez sur le bouton S4 pour conrmer.
REMARQUE : Le jour (de la semaine) est
automatiquement réglé correspondant à la
date. La date peut être réglée entre le 1er
janvier 2000 et le 31 décembre 2099.
REMARQUE : Le format horaire sélectionné
s’appliquera aux deux modes de l’HEURE
LOCALE et de l’HEURE INTERNATIONALE.
PERMUTATION ENTRE L’HEURE D’ETE
(DST) ET L’HEURE LEGALE EN MODE
HEURE LOCALE :
En mode HEURE LOCALE, appuyez sur le
bouton S1 pour permuter entre l’heure d’été
(DST) et l’heure légale. L’indicateur DST
s’afchera lorsque l’heure d’été est afchée.
SELECTION ET AFFICHAGE DE L’HEURE
DES VILLES DU MONDE EN MODE HEURE
INTERNATIONALE :
1. Appuyez sur le bouton S3 pour sélection ner le mode HEURE INTERNATIONALE.
2. Appuyez sur le bouton S2 pour sélection ner une ville parmi 24 villes du monde /
zones horaires.
3. Appuyez sur le bouton S1 pour permuter
entre l’heure d’été (DST) et l’heure légale.
L’indicateur DST s’afchera lorsque
l’heure d’été est afchée.
TABLEAU DE REFERENCE DES CODES
ATTRIBUES AUX VILLES DU MONDE:
Code
de la
ville
MDY
HNL
ANC
LAX
DEN
CHI
NYC
CCS
RIO
-2HR
-1HR
LON
PAR
CAI
MOW
DXB
KHI
DAC
BKK
HKG
TYO
SYD
NOU
AKL
REGLAGE DE L’HEURE DE L’ALARME :
1. Appuyez sur le bouton S3 pour sélection ner le mode ALARME.
2. Appuyez sur le bouton S2 pour sélection ner l’alarme désirée parmi les trois
alarmes 1, 2 et 3.
3. Appuyez et maintenez le bouton S4
durant environ 2 secondes, les chiffres
des minutes clignoteront.
4. Appuyez sur le bouton S1 pour diminuer
la valeur ou sur S2 pour augmenter la
valeur. Maintenez le bouton enfoncé pour
accélérer la procédure.
5. Appuyez sur le bouton S3, les chiffres
des heures clignoteront.
6. Appuyez sur le bouton S1 pour diminuer
la valeur ou sur S2 pour augmenter la
valeur. Maintenez le bouton enfoncé pour
accélérer la procédure.
7. Après avoir effectué tous les réglages,
appuyez sur le bouton S4 pour conrmer.
REMARQUE: L’alarme sera automatiquement activée une fois qu’elle aura été réglée.
ACTIVATION / DESACTIVATION DE
L’ALARME :
En mode ALARME
1. Appuyez sur le bouton S2 pour sélection
ner et régler une alarme parmi les trois
alarmes 1, 2 et 3.
2. Appuyez sur le bouton S1 pour activer
l’alarme. L’indicateur de l’alarme
apparaitra.
3. Appuyez de nouveau sur le bouton S1
pour désactiver l’alarme. L’indicateur de
l’alarme disparaitra.
ACTIVATION / DESACTIVATION DU CARILLON HORAIRE :
En mode HEURE LOCALE,
1. Appuyez sur le bouton S2 pour activer le
carillon horaire. L’indicateur du carillon
2. Appuyez de nouveau sur le bouton
S2 pour désactiver le carillon horaire.
L’indicateur du carillon disparaitra.
Ville
MIDWAY
HONOLULU
ANCHORAGE
LOS ANGELES
DENVER
CHIGAGO
NEW YORK
CARACAS
RIO DE JANEIRO
-2HR
-1HR
LONDRES
PARIS
LE CAIRE
MOSCOW
DUBAI
KARACHI
DHAKA
BANGKOK
HONG KONG
TOKYO
SYDNEY
NOUMEA
AUCKLAND
apparaitra.
Différence horaire
-11HR
-10HR
-9HR
-8HR
-7HR
-6HR
-5HR
-4HR
-3HR
-2HR
-1HR
0
+1HR
+2HR
+3HR
+4HR
+5HR
+6HR
+7HR
+8HR
+9HR
+10HR
+11HR
+12HR
FRANÇAIS
LORSQUE L’ALARME OU LE CARILLON
HORAIRE RETENTIT:
Une mélodie retentira toutes les heures
lorsque la fonction de carillon est activée.
Une sonnerie d’alarme retentira à l’heure
réglée lorsque l’alarme est activée. Pour
arrêter la sonnerie d’alarme, appuyez sur
n’importe quel bouton.
UTILISATION DU CHRONOMETRE :
1. Appuyez sur le bouton S3 pour sélection ner le mode CHRONOMETRE.
2. Le chronomètre afchera le statut en
cours – réinitialisé, compteur en cours
ou compteur arrêté.
3. Pour réactiver le compteur, appuyez sur
le bouton S2 et le compteur se remettra
en marche à partir du point où il a été
arrêté.
4. Pour démarrer de nouveau le compteur,
réinitialisez tout d’abord le chronomètre
à zéro.
Appuyez sur le bouton S1 pour arrêter le
compteur puis appuyez de nouveau sur
le bouton S1 pour réinitialiser le compt eur à zéro.
Pour mesurer le temps écoulé,
En mode CHRONOMETRE,
1. Appuyez sur le bouton S2 pour démarrer
le compteur.
2. Appuyez sur le bouton S1 pour arrêter
le compteur. Appuyez sur le bouton S2
pour remettre le compteur en marche à
partir du point où il a été arrêté.
3. Appuyez sur le bouton S1 pour arrêter le
compteur puis appuyez de nouveau sur
le bouton S1 pour réinitialiser le compt
eur à zéro.
Pour mesurer un temps intermédiaire,
En mode CHRONOMETRE,
1. Appuyez sur le bouton S2 pour démarrer
le compteur.
2. Alors que le chronomètre est en cours,
appuyez sur le bouton S2 pour
enregistrer un tour. Le numéro du tour et
la durée du tour enregistré s’afcheront
et le chronomètre continue à tourner
dans le fond.
Après environ 5 secondes, le numéro du
tour et le temps intermédiaire du tour en
cours s’afcheront.
3. Répétez la dernière étape jusqu’à ce que
tous les tours soient enregistrés.
4. Pour arrêter le compteur, appuyez sur
le bouton S1. Appuyez sur le bouton S2
pour remettre le compteur en marche à
partir du point où il a été arrêté.
5. Appuyez sur le bouton S1 pour arrêter le
compteur puis appuyez de nouveau sur
le bouton S1 pour réinitialiser le compt
eur à zéro.
REMARQUE: Illustration du temps intermédiaire et du temps de passage:
a) Temps de passage – temps de passage
individuel.
b) Temps intermédiaire – temps de pas
sage cumulés.
REMARQUE: Le chronomètre peut enregistrer un maximum de 20 temps de passage
(les 19 premiers temps de passage et le
dernier enregistrés).
REMARQUE: Le chronomètre peut compter
jusqu’à un temps maximum de 23 heures,
59 minutes et 59,99 secondes.
REMARQUE: Vous pouvez laisser le chronomètre en marche tout en permutant sur
un autre mode.
UTILISATION DE LA FONCTION DE
RAPPEL:
1. Appuyez sur le bouton S3 pour sélection ner le mode RECALL (RAPPEL).
2. Appuyez sur le bouton S1 ou S2 pour
faire déler les temps de passage
individuels sauvegardés et le temps
écoulé au total.
REMARQUE: la fonction de rappel est
uniquement disponible lorsque des temps
de passage sont sauvegardés.
REMARQUE: Les temps de passage sauvegardés seront effacés lorsque le chronomètre
sera réinitialisé.
Page 8

REGLAGE DU MINUTEUR :
1. Appuyez sur le bouton S3 pour sélection ner le mode TIMER (MINUTEUR).
2. Appuyez et maintenez le bouton S4
durant environ 2 secondes, les chiffres
des secondes clignoteront.
3. Appuyez sur le bouton S1 pour diminuer
la valeur ou sur S2 pour augmenter la
valeur. Maintenez le bouton enfoncé pour
accélérer la procédure.
4. Appuyez sur le bouton S3, les chiffres
des minutes clignoteront.
5. Appuyez sur le bouton S1 pour diminuer
la valeur ou sur S2 pour augmenter la
valeur. Maintenez le bouton enfoncé pour
accélérer la procédure.
6. Appuyez sur le bouton S3, les chiffres
des heures clignoteront.
7. Appuyez sur le bouton S1 pour diminuer
la valeur ou sur S2 pour augmenter la
valeur. Maintenez le bouton enfoncé pour
accélérer la procédure.
8. Après avoir effectué tous les réglages,
appuyez sur le bouton S4 pour conrmer.
REMARQUE: La valeur maximum du
minuteur est de 23 heures, 59 minutes et
59 secondes.
UTILISATION DU MINUTEUR:
1. Appuyez sur le bouton S3 pour sélection ner le mode TIMER (MINUTEUR).
2. Le minuteur afchera le statut en
cours – réinitialisé, compteur en cours
ou compteur arrêté.
3. Pour réactiver le compteur, appuyez sur
le bouton S2 et le compteur se remettra
en marche à partir du point où il a été
arrêté.
4. Pour démarrer de nouveau le compteur,
réinitialisez tout d’abord le minuteur à
zéro. Appuyez sur le bouton S2 pour
arrêter le compteur puis appuyez sur le
bouton S1.
5. Lorsque le compte à rebours atteint
zéro, une tonalité sonore sera émise.
Pour arrêter la tonalité sonore, appuyez
sur n’importe quel bouton.
REMARQUE: Vous pouvez laisser le
minuteur en marche tout en permutant sur
un autre mode.
UTILISATION DU RETRO ECLAIRAGE
Appuyez sur le bouton S4 pour activer le
rétro éclairage durant 3 secondes.
FRANÇAIS
Pour réduire l’émission de carbone
dans l’atmosphère, ces instructions
Freestyle sont imprimées avec des
encres de soja sur du papier recyclé.
NON-BG0041-FS-INST-PKG-R02
Page 9

CORY LOPEX III
S4 S1
S2S3
S1. Tasto Stop
S2. Tasto Start/Split
S3. Tasto Mode
S4. Tasto Light/Set
MODALITA’ DISPLAY:
L’orologio ha 6 modalità display: NORMAL
TIME (ORA NORMALE), WORLD TIME (ORA
INTERNAZIONALE), ALARM (SVEGLIA)
(ALM), STOPWATCH (CRONOMETRO) (STW),
RECALL (RICHIAMO) e TIMER (TMR).
Per passare da una modalità display ad
un’altra e viceversa, premere una volta il
tasto S3.
NOTA: In qualsiasi modalità display, se nessun tasto viene premuto per alcuni minuti,
l’orologio ritornerà automaticamente alla
modalità NORMAL TIME.
NOTA: In qualsiasi modalità di impostazione,
se nessun tasto viene premuto per alcuni
minuti, l’orologio salverà automaticamente
i dati inseriti e uscirà dalla procedura di
impostazione.
COME IMPOSTARE L’ORA E IL CALENDARIO:
1. Premere il tasto S3 per selezionare la
modalità NORMAL TIME.
2. Premere e tenere premuto il tasto S4 per
circa 2 secondi, il formato ora lampeg gerà.
3. Premere il tasto S1 o S2 per scegliere tra
il formato 12 ore e quello 24 ore.
L’indicatore P.M. sarà visualizzato per
indicare il periodo di tempo 12:00 A.M. -
11:59 P.M. nel formato 12 ore.
4. Premere il tasto S3, la cifra dei secondi
lampeggerà.
5. Premere il tasto S1 o S2 per azzerare il
numero dei secondi no a 00.
6. Premere il tasto S3, la cifra dei minuti
lampeggerà.
7. Premere il tasto S1 per diminuire il va
lore o il tasto S2 per aumentarlo.
Premere a lungo il tasto farà avanzare la
progressione più velocemente.
8. Premere il tasto S3, la cifra delle ore
lampeggerà.
9. Premere il tasto S1 per diminuire il valore
o il tasto S2 per aumentarlo. Premere a
lungo il tasto farà avanzare la progres sione più velocemente.
10. Seguire lo stesso procedimento per
impostare l’anno, il mese, la data e la
selezione della città.
11. Per selezionare la città, premere il tasto
S1 o S2 per scegliere tra 24 città/fusi
orari già preimpostati.
12. Dopo avere impostato, premere il tasto
S4 per confermare.
NOTA: Il giorno (della settimana) è impostato automaticamente in conformità alla
data. La data può essere compresa tra il 1
gennaio 2000 e il 31 dicembre 2099.
NOTA: Il format ora selezionato verrà applicato sia alla modalità NORMAL TIME che
alla modalità WORLD TIME.
COME SCEGLIERE TRA ORA LEGALE
(DST) E ORA SOLARE NELLA MODALITA’
NORMAL TIME:
Nella modalità NORMAL TIME, premere il
tasto S1 per scegliere tra Ora Legale (DST) e
Ora Solare. L’indicatore DST sarà mostrato
sul display quando l’Ora Legale è attiva.
COME SELEZIONARE E VISUALIZZARE
LA CITTA’ ORA INTERNAZIONALE NELLA
MODALITA’ WORLD TIME:
1. Premere il tasto S3 per selezionare la
modalità WORLDTIME.
2. Premere il tasto S2 per scegliere tra le
24 città/fusi orari già preimpostati.
3. Premere il tasto S1 per scegliere tra
Ora Legale (DST) e Ora Solare.
L’indicatore DST sarà mostrato sul
display quando l’Ora Legale è attiva.
TABELLA DI RIFERIMENTO DEI CODICI
CITTA’ ORA INTERNAZIONALE
Codice
Città
MDY
HNL
ANC
DEN
NYC
-2HR
-1HR
LON
MOW
DXB
DAC
BKK
HKG
NOU
COME IMPOSTARE LA SVEGLIA:
1. Premere il tasto S3 per selezionare la
modalità ALARM.
2. Premere il tasto S2 per scegliere tra
l’impostazione di indicazione di sveglia 1,
2 o 3.
3. Premere e tenere premuto il tasto S4
per circa 2 secondi, il numero dei minuti
lampeggerà.
4. Premere il tasto S1 per diminuire il
valore o il tasto S2 per aumentarlo.
Premere a lungo il tasto farà avanzare la
progressione più velocemente.
5. Premere il tasto S3, la cifra delle ore
lampeggerà.
6. Premere il tasto S1 per diminuire il
valore o il tasto S2 per aumentarlo.
Premere a lungo il tasto farà avanzare la
progressione più velocemente.
7. Dopo avere impostato, premere il tasto
S4 per confermare.
NOTA: La sveglia si attiverà automaticamente dopo essere stata impostata.
COME ATTIVARE/DISATTIVARE LA
SVEGLIA:
Nella modalità ALARM
1. Premere il tasto S2 per scegliere tra
l’impostazione di indicazione di sveglia 1,
2 o 3.
2. Premere il tasto S1 per attivare la sveg
lia. L’indicatore di sveglia
mostrato sul display
3. Premere di nuovo il tasto S1 per
disattivare la sveglia. L’indicatore di
sveglia scomparirà.
COME ATTIVARE/DISATTIVARE LA SUONERIA ORARIA:
Nella modalità NORMAL TIME,
1. Premere il tasto S2 per attivare la
suoneria oraria. L’indicatore di
suoneria oraria
display
2. Premere di nuovo il tasto S2 per disat tivare la suoneria oraria. L’indicatore di
suoneria oraria scomparirà.
QUANDO LA SVEGLIA O LA SUONERIA
ORARIA SI DISATTIVA:
LAX
CHI
CCS
RIO DE JANEIRO
RIO
PAR
CAI
KHI
TYO
SYD
AKL
Città
MIDWAY
HONOLULU
ANCHORAGE
LOS ANGELES
DENVER
CHIGAGO
NEW YORK
CARACAS
-2HR
-1HR
LONDRA
PARIGI
CAIRO
MOSCA
DUBAI
KARACHI
DHAKA
BANGKOK
HONG KONG
TOKYO
SYDNEY
NOUMEA
AUCKLAND
Ore Di Differenza
-11HR
-10HR
-9HR
-8HR
-7HR
-6HR
-5HR
-4HR
-3HR
-2HR
-1HR
0
+1HR
+2HR
+3HR
+4HR
+5HR
+6HR
+7HR
+8HR
+9HR
+10HR
+11HR
+12HR
sarà
sarà mostrato sul
ITALIANO
Un suono verrà emesso ad ogni ora quando
la suoneria oraria è attiva.
Un suono di sveglia verrà emesso all’ora
prestabilita quando la sveglia è attiva. Per
interrompere il suono, premere un tasto
qualsiasi.
COME USARE IL CRONOMETRO:
1. Premere il tasto S3 per selezionare la
modalità STOPWATCH.
2. Il cronometro verrà mostrato nel suo
stato attuale – azzerato, in funzione o
fermo
3. Per riprendere un conteggio, premere
il tasto S1 per riprendere da dove era
stato interrotto
4. Per iniziare un nuovo conteggio, bisogna
prima azzerare il cronometro.
Premere il tasto S1per interrompere il
conteggio, poi premere di nuovo il tasto
S1 per azzerare il contatore.
Come misurare il tempo trascorso:
Nella modalità STOPWATCH,
1. Premere il tasto S2 per iniziare il conteg gio.
2. Per interrompere il conteggio, premere il
tasto S1. Premere il tasto S2 per ripren
dere da dove era stato interrotto
3. Per azzerare, premere il tasto S1 per
interrompere il conteggio quindi premere
di nuovo il tasto S1.
Come misurare il tempo intermedio:
Nella modalità STOPWATCH,
1. Premere il tasto S2 per iniziare il conteg
gio.
2. Mentre il tempo sul cronometro scorre,
premere il tasto S2 per registrare un
giro. Il numero e il tempo del giro regis trato saranno mostrati sul display
mentre il tempo continuerà a scorrere
sullo sfondo del cronometro.
Dopo circa 5 secondi, il numero del giro e
il tempo intermedio del giro attuale
saranno mostrati.
3. Ripetere l’ultimo passaggio no a che
tutti i giri non sono stati registrati.
4. Per interrompere il conteggio, premere il
tasto S1. Premere il tasto S2 per ripren
dere da dove era stato interrotto
5. Per azzerare, premere il tasto S1 per
interrompere il conteggio quindi premere
di nuovo il tasto S1.
NOTA: Illustrazione del tempo di giro e del
tempo intermedio:
a) Lap time – tempo di un singolo giro.
b) Split time – tempo di giro intermedio.
NOTA: Il cronometro può memorizzare no
ad un massimo di 20 giri (i primi 19 giri e
l’ultimo giro registrato).
NOTA: Il cronometro può calcolare no ad
un massimo di 23 ore, 59 minuti e 59,99
secondi.
NOTE: Si può lasciare scorrere il tempo
sul cronometro mentre si passa ad altre
modalità operative
COME USARE LA FUNZIONE RICHIAMO:
1. Premere il tasto S3 per selezionare la
modalità RECALL.
2. Premere il tasto S1 o S2 per scorrere
attraverso il tempo di giro individuale e il
tempo totale trascorso memorizzato.
NOTA: La funzione di richiamo è disponibile solo quando almeno un giro è stato
memorizzato.
NOTA: Il giro registrato verrà eliminato
quando si azzera il cronometro.
COME IMPOSTARE IL TIMER:
1. Premere il tasto S3 per selezionare la
modalità TIMER.
2. Premere e tenere premuto il tasto S4
per circa 2 secondi, il numero dei
secondi lampeggerà.
3. Premere il tasto S1 per diminuire il va
lore o il tasto S2 per aumentarlo.
Premere a lungo il tasto farà avanzare la
progressione più velocemente.
4. Premere il tasto S3, la cifra dei minuti
lampeggerà.
5. Premere il tasto S1 per diminuire il va
lore o il tasto S2 per aumentarlo.
Premere a lungo il tasto farà avanzare la
progressione più velocemente.
Page 10

6. Premere il tasto S3, la cifra delle ore
lampeggerà.
7. Premere il tasto S1 per diminuire il va
lore o il tasto S2 per aumentarlo.
Premere a lungo il tasto farà avanzare la
progressione più velocemente.
8. Dopo avere impostato, premere il tasto
S4 per confermare.
NOTA: Il valore massimo del conteggio alla
rovescia del timer è di 23 ore, 59 minuti e
59 secondi.
COME USARE IL TIMER:
1. Premere il tasto S3 per selezionare la
modalità TIMER.
2. Il timer verrà visualizzato nello stato
attuale – azzerato, in funzione o fermo
3. Per riprendere un conteggio, premere
il tasto S2 per riprendere da dove era
stato interrotto
4. Per iniziare un nuovo conteggio, ricari
care il timer innanzitutto.
Premere il tasto S2 per interrompere il
conteggio, poi premere il tasto S1.
5. Dopo aver raggiunto lo 00 in un conteg
gio alla rovescia, un suono verrà emesso.
Per interrompere il suono, premere un
tasto qualsiasi.
NOTA: Si può lasciare scorrere il tempo
sul cronometro mentre si passa ad altre
modalità operative
COME USARE LA RETROILLUMINAZIONE:
Premere il tasto S4 per accendere la retroilluminazione per circa 3 secondi.
ITALIANO
Per ridurre l’impatto ambientale,
queste istruzioni Freestyle sono
stampate con inchiostri di soia su
carta riciclata .
NON-BG0041-FS-INST-PKG-R02
Page 11

CORY LOPEX III
S4 S1
S2S3
S1. Botão Parar
S2. Botão Iniciar/Dividir
S3. Botão Modo
S4. Botão Luz/ congurar
MODOS DE VISUALIZAÇÃO:
O relógio tem seis modos de visualização:
HORA NORMAL, HORÁRIO MUNDIAL,
ALARME (ALM), CRONÓMETRO (CRM),
RECUPERAR e TEMPORIZADOR (TMR).
Para mudar de um modo de apresentação
para outro, prima uma vez o botão S3.
NOTA: Em qualquer modo de visualização,
se não houver manuseamento de botões
durante alguns minutos, o relógio regressará automaticamente ao modo HORA
NORMAL.
NOTA: Em qualquer modo de conguração,
se não houver manuseamento de botões
durante alguns minutos, o relógio guardará
automaticamente os dados introduzidos e
sairá do modo de conguração.
AJUSTAR A HORA E O CALENDÁRIO:
1. Prima o botão S3 para seleccionar o
modo HORA NORMAL.
2. Prima e mantenha premido o botão S4
cerca de 2 segundos, os dígitos das
horas piscarão.
3. Prima o botão S1 ou S2 para alternar
entre o formato de 12 e 24 horas. O
indicador PM poderá ser visualizado
para indicar o período de tempo 12:00
AM – 11:59 PM no formato de 12 horas.
4. Prima o botão S3, os dígitos dos segun
dos piscarão.
5. Prima o botão S1 ou S2 para repor os
dígitos dos segundos a 00.
6. Prima o botão S3, os dígitos dos minutos
piscarão.
7. Prima o botão S1 para diminuir o valor
ou S2 para aumentar. Se mantiver o
botão premido acelerará o processo.
8. Prima o botão S3, os dígitos das horas
piscarão.
9. Prima o botão S1 para diminuir o valor
ou S2 para aumentar. Se mantiver o
botão premido acelerará o processo.
10. Siga os mesmos passos para acertar o
ano, o mês, a data e seleccionar a
cidade.
11. Para congurar a selecção da cidade,
prima o botão S1 ou S2 para seleccionar
uma das 24 cidades/fusos horários pré congurados.
12. Após acabar de efectuar todos os
ajustes, prima o botão S4 para conrmar.
NOTA: O dia (da semana) é congurado
automaticamente de acordo com a data. A
data pode ser acertada entre 1 de Janeiro de
2000 e 31 de Dezembro de 2099.
NOTA: O formato de hora seleccionado
será aplicado no modo HORA NORMAL e
HORÁRIO MUNDIAL.
PARA ALTERNAR ENTRE O HORÁRIO DE
VERÃO (DST) E HORA PADRÃO NO MODO
HORA NORMAL:
No MODO NORMAL, prima o botão S1 para
alternar entre o Horário de Verão (DST)
e a Hora Padrão. O indicador DST será
visualizado quando o Horário de Verão for
visualizado.
PARA SELECCIONAR E VISUALIZAR A
HORA DA CIDADE NO MODO HORÁRIO
MUNDIAL:
1. Prima o botão S3 para seleccionar o
modo HORÁRIO MUNDIAL.
2. Prima o botão S2 para seleccionar uma
das 24 cidades pré-conguradas / fusos
horários.
3. Prima o botão S1 para alternar entre o
Horário de Verão (DST) e a Hora Padrão.
O indicador DST será visualizado quando
o Horário de Verão for visualizado.
TABELA DE REFERÊNCIA CÓDIGO DE
CIDADE DE HORÁRIO MUNDIAL:
Código
Cidade
CONFIGURAR A HORA DO ALARME:
1. Prima o botão S3 para seleccionar o
modo ALARME.
2. Prima o botão S2 para seleccionar entre
as entradas de alarme 1, 2 e 3 para
ajustar.
3. Prima e mantenha premido o botão S4
cerca de 2 segundos, os dígitos dos
minutos piscarão.
4. Prima o botão S1 para diminuir o valor
ou S2 para aumentar. Se mantiver o
botão premido acelerará o processo.
5. Prima o botão S3, os dígitos das horas
piscarão.
6. Prima o botão S1 para diminuir o valor
ou S2 para aumentar. Se mantiver o
botão premido acelerará o processo.
7. Após acabar de efectuar todos os
ajustes, prima o botão S4 para conrmar.
NOTA: O alarme será activado automaticamente depois de ajustado.
LIGAR (ON)/ DESLIGAR (OFF) O ALARME:
No modo ALARME
1. Prima o botão S2 para seleccionar entre
as entradas de alarme 1, 2 e 3 para
ajustar.
2. Prima o botão S1 para activar o alarme.
Surgirá o indicador do alarme
3. Prima de novo o botão S1 para desactivar
o alarme. O indicador de alarme desa
parecerá.
LIGAR (ON)/ DESLIGAR (OFF) O SINAL
SONORO HORÁRIO:
No modo HORA NORMAL,
1. Prima o botão S2 para activar o sinal
horário sonoro. Surgirá o indicador do
de
MDY
HNL
ANC
LAX
DEN
CHI
NYC
CCS
RIO
-2HR
-1HR
LON
PAR
CAI
MOW
DXB
KHI
DAC
BKK
HKG
TYO
SYD
NOU
AKL
Cidade
MIDWAY
HONOLULU
ANCHORAGE
LOS ANGELES
DENVER
CHIGAGO
NOVA IORQUE
CARACAS
RIO DE JANEIRO
-2HR
-1HR
LONDRES
PARIS
CAIRO
MOSCOVO
DUBAI
KARACHI
DHAKA
BANGUECOQUE
HONG KONG
TÓQUIO
SIDNEY
NOUMEA
AUCKLAND
Diferença Horária
-11HR
-10HR
-9HR
-8HR
-7HR
-6HR
-5HR
-4HR
-3HR
-2HR
-1HR
0
+1HR
+2HR
+3HR
+4HR
+5HR
+6HR
+7HR
+8HR
+9HR
+10HR
+11HR
+12HR
.
PORTUGUÊS
sinal sonoro .
2. Prima de novo o botão S2 para
desactivar o sinal horário sonoro. O
indicador do sinal sonoro desaparecerá.
QUANDO UM ALARME OU SINAL SONORO
HORÁRIO DISPARA:
Uma melodia será emitida à hora para a
qual o sinal sonoro horário está activado.
Será emitida uma melodia de alarme à hora
indicada aquando da activação do alarme.
Para parar a melodia, prima qualquer botão.
UTILIZAR O CRONÓMETRO:
1. Prima o botão S3 para seleccionar o
modo CRONÓMETRO.
2. O cronómetro será visualizado no
seu estado actual – reajustar, a funcio
nar ou parado.
3. Para retomar uma contagem, prima
o botão S2 para retomar a partir de onde
parou.
4. Para iniciar uma nova contagem, em
primeiro lugar reponha o cronómetro a
zero.
Prima o botão S1 para parar a contagem
e em seguida prima o botão S1 de novo
para reajustar.
Para medir o tempo decorrido:
No modo CRONÓMETRO,
1. Prima o botão S2 para iniciar a
contagem.
2. Para parar a contagem, prima o botão
S1. Prima o botão S2 para retomar a
partir de onde parou.
3. Para repor a zero, prima o botão S1 para
parar a contagem e depois prima o botão
S1 de novo.
Para a medição do tempo parcial:
No modo CRONÓMETRO,
1. Prima o botão S2 para iniciar a
contagem.
2. Enquanto o cronómetro estiver em
funcionamento, prima o botão S2 para
registar uma volta. Visualizará o
número da volta e o tempo de volta da
volta registada. O cronómetro continuará
em funcionamento em segundo plano.
Após cerca de 5 segundos, visualizará o
número de volta e o tempo parcial da
volta actual.
3. Repita o último passo até que todas as
voltas tenham sido registadas.
4. Para parar a contagem, prima o botão
S1. Prima o botão S2 para retomar a
partir de onde parou.
5. Para repor a zero, prima o botão S1 para
parar a contagem e depois prima o botão
S1 de novo.
NOTA: Ilustração do tempo parcial e tempo
total:
a) Tempo parcial – tempo individual da
volta.
b) Tempo total – tempo acumulado da volta.
NOTA: O cronómetro pode gravar até um
máximo de 20 voltas (as primeiras 19 voltas
e a última registada).
NOTA: O cronómetro pode contar até um
máximo de 23 horas, 59 minutos e 59,99
segundos.
NOTA: Pode deixar o cronómetro em
funcionamento enquanto muda para outros
modos de operação.
UTILIZAR A FUNÇÃO RECUPERAR:
1. Prima o botão S3 para seleccionar o
modo RECUPERAR.
2. Prima o botão S1 ou S2 para visualizar
os tempos de parciais e os tempos totais
gravados.
NOTA: A função recuperar apenas está
disponível quando se encontra armazenada
a gravação de voltas.
NOTA: O(s) registo(s) de volta será(ão)
Page 12

apagado(s) quando o cronómetro for
reiniciado.
UTILIZAR O TEMPORIZADOR:
1. Prima o botão S3 para seleccionar o
modo TEMPORIZADOR.
2. Prima e mantenha premido o botão S4
cerca de 2 segundos, os dígitos dos
segundos piscarão.
3. Prima o botão S1 para diminuir o valor
ou S2 para aumentar. Se mantiver o
botão premido acelerará o processo.
4. Prima o botão S3, os dígitos dos minutos
piscarão.
5. Prima o botão S1 para diminuir o valor
ou S2 para aumentar. Se mantiver o
botão premido acelerará o processo.
6. Prima o botão S3, os dígitos das horas
piscarão.
7. Prima o botão S1 para diminuir o valor
ou S2 para aumentar. Se mantiver o
botão premido acelerará o processo.
8. Após acabar de efectuar todos os
ajustes, prima o botão S4 para conrmar.
NOTA: O temporizador pode contar até
um máximo de 23 horas, 59 minutos e 59
segundos.
UTILIZAR O TEMPORIZADOR:
1. Prima o botão S3 para seleccionar o
modo TEMPORIZADOR.
2. O temporizador será visualizado no seu
estado actual – reajustar, a funcionar ou
parado.
3. Para retomar uma contagem, prima
o botão S2 para retomar a partir de onde
parou.
4. Para iniciar uma nova contagem, car
regue primeiro o temporizador.
Prima o botão S2 para parar a contagem
e em seguida prima o botão S1.
5. Quando chegar a zero numa contagem
regressiva, será emitida uma melodia.
Para parar a melodia, prima qualquer
botão.
NOTA: Pode deixar o temporizador em
funcionamento enquanto muda para outros
modos de operação.
UTILIZAR A LUZ POSTERIOR:
Prima o botão S4 para ligar a luz posterior
cerca de 3 segundos.
PORTUGUÊS
Para reduzir a emissão de carbono,
estas instruções Freestyle foram
impressas com tinta de soja em papel
reciclado.
NON-BG0041-FS-INST-PKG-R02
Page 13

CORY LOPEX III
S4 S1
S2S3
S1.ストップボタン
S2.スタート/スプリットボタン
S3.モードボタン
S4.ライトボタン/セットボタン
表 示 モード
この時計には次の6つの表示モードが
あります。NORMAL TIME(ノーマルタイ
ム)モード、WORLD TIME(ワールドタイ
ム)モード、ALARM(アラーム:ALM)モー
ド、STOPWATCH (ストップウォッチ:STW)
モード、RECALL(リコール)モード、TIMER(
タイマー:TMR)モード
表示モードを変換するには、S3ボタンを1
回押してください。
注: いずれのモードでも、3秒間キーの
操作が行われなかった場合は自動的に
NORMAL TIMEモードに戻るように設定さ
れています。
注: いずれのモードでも、設定中に数分
間キーの操作が行われなかった場合は自
動的に入力データが保存され設定モード
が終了します。
時刻・カレンダーを合わせる
1. S3ボタンを押してNORMAL TIMEモー
ドを選択します。
2. S4ボタンを約2秒間長押しすると、時刻
フォーマットが点 滅しま す。
3. S1あるいはS2ボタンを押すと12時間表
示と24時間表示が切り替わります。12
時間表示では、午前12時から午後
11時59分の間にP.M.の文字が表示さ
れます。
4. S3ボタンを押します。秒桁が点滅し
ま す。
5. S1あるいはS2ボタンを押して秒刻を00
にリセットし ます。
6. S3ボタンを押します。分桁が点滅し
ま す。
7. S1ボタンを押すと数字が増え、S2ボタ
ンを押すと数字が減ります。ボタンを長
押しすると早く進みます。
8. S3ボタンを押します。時桁が点滅し
ま す。
9. S1ボタンを押すと数字が増え、S2ボタ
ンを押すと数字が減ります。ボタンを長
押しすると早く進みます。
10. 同じ作業を、年・月・日・都市選択につい
て それ ぞ れ 繰り返して行っ てください 。
11. 都市の設定は、S1あるいはS2ボタンを
押して予め設定されている24都市/タイ
ムゾーン から選択します。
12. 全ての設定が終わったらS4を押して設
定を決定します。
注: 曜日は日付設定にしたがって自動的
に設定されます。日付は2000年1月1日から
2099年12月31日まで設定が可能です。
注: 選択した時間フォーマットはNORMAL
TIME とWORLD TIME モード設定の両方に
適用されます。
NORMAL TIME モードで夏時間(DST)と標
準 時 間 を 切り替 える
NORMAL TIMEモードにします。S1ボタンを
押して夏時間(DST)と標準時間が切り替え
ます。夏時間の表示に設定されている場合
はDSTの文字が表示されます。
WORLD TIMEモードで海外都市の時刻を
選 択・表 示 す る
1. S3ボタンを押してWORLD TIMEモード
を 選 択しま す。
2. S2ボタンを押して予め設定されている
24都市/タイムゾーンから希望の都市/
タイムゾ ーンを 選択しま す。
3. S1ボタンを押して夏時間(DST)と標準
時間が切り替えます。夏時間の表示に
設定されている場合はDSTの文字が表
示されます。
WORLD TIMEの都市コード表
都市コード 都市 時差
MDY ミッドウェイ -11時間
HNL ホノルル -10時間
ANC アンカレッジ -9時間
LAX ロサンゼルス -8時間
DEN デンバー -7時間
CHI シカゴ -6時間
NYC ニューヨーク -5時間
CCS カラカス -4時間
RIO リオデジャ -3時間
ネイロ
-2HR -2時間 -2時間
-1HR -1時間 -1時間
LON ロンドン 0
PAR パリ +1時間
CAI カイロ +2時間
MOW モスクワ +3時間
DXB ドバイ +4時間
KHI カラチ +5時間
DAC ダッカ +6時間
BKK バンコク +7時間
HKG 香港 +8時間
TYO 東京 +9時間
SYD シドニー +10時間
NOU ヌメア +11時間
AKL オークランド +12時間
アラー ムを 設 定 する
1. S3ボタンを押してALARMモードを選択
しま す。
2. S2ボタンを押してアラームエントリー
1、2、3からエントリーナンバーを選択し
ま す。
3. S4ボタンを約2秒間長押しすると、分桁
が点滅します。
4. S1ボタンを押すと数字が増え、S2ボタ
ンを押すと数字が減ります。ボタンを長
押しすると早く進みます。
5. S3ボタンを押します。時桁が点滅し
ま す。
6. S1ボタンを押すと数字が増え、S2ボタ
ンを押すと数字が減ります。ボタンを長
押しすると早く進みます。
7. 全ての設定が終わったらS4を押して設
定を決定します。
注: 設定後アラームは自動的にオンに
なります。
アラームのオン・オフを設定する
ALARMモードにします。
1. S2ボタンを押してアラームエントリー
1、2、3からエントリーナンバーを選択し
ま す。
2. S1ボタンを押してアラームをオンにし
ます。アラーム のアイコン
れます。
3. S1ボタンをもう一度押しとアラームが
オ フ に なりま す。ア ラ ー ム の アイコ ン が
非表示になります。
毎 時 チャイムの オ ン・オフ を 設 定 する
NORMAL TIMEモードにします。
1. S2ボタンを押すと毎時チャイムがオン
に なります。チャイム の アイコン
表示されます。
2. もう一度S2ボタンを押すと毎時チャイ
ムがオフになります。チャイムのアイコ
ンが非表示になります。
が表示さ
. が
日本語
アラー ム・毎 時 チャイムを 鳴 ったら
毎時チャイム機能がオンになっている場合
は一時間ごとにお知らせ音がなります。
アラーム機能がオンになっている場合は、
指定の時間にアラーム音が鳴ります。音を
止めたいときは、いずれかのボタンを押し
てください。
ストップ ウォッチ を 使う
1. S3ボタンを押してSTOPWATCHモード
を 選 択しま す。
2. その時点でのストップウォッチの状態(
リセット/測定中/停止)が表示され
ま す。
3. ストップした時点から再びカウントを開
始するにはS2ボタンを押します。
4. 新しく測定しなおす場合は、ストップウ
ォッチをゼロに戻してください。
S1ボタンを押してカウントをストップし
てからもう一度S1ボタンを押してリセッ
トしま す。
経過タイムの測定
STOPWATCHモードにします。
1. S2ボタンを押すとカウントが始まり
ま す。
2. 測定をストップするにはS1ボタンを押
します。S2ボタンを押すと、ストップした
時 点からカ ウントを再開します。
3. ゼロにリセットするには、S1ボタンを押
して測定をストップしてからもう一度S1
ボタン を押し ます。
スプリットタイムの 測 定
STOPWATCHモードにします。
1. S2ボタンを押すとカウントが始まり
ま す。
2. ストップウォッチがカウントしている間
にS2ボタンを押してラップを登録しま
す。登録したラップの番号とタイムが表
示さ れます。この間 もストップ ウォッチ
は同時 にカウントを行っています。
約5秒後に現在のラップ番号とスプリッ
トタイムが表示されます。
3. 全てのラップの登録が終わるまで、先ほ
ど のステ ップを 繰り返してください 。
4. 測定をストップするにはS1ボタンを押
します。S2ボタンを押すと、ストップした
時 点からカ ウントを再開します。
5. ゼロにリセットするには、S1ボタンを押
して測定をストップしてからもう一度S1
ボタン を押し ます。
注: ラップタイムとスプリットタイムの
説明
a) ラップタイム – 個々のラップタイム
b) スプリットタイム – ラップタイムの累計
注: ストップウォッチは最大で20までラッ
プを記録することができます(最初の19ラ
ップと 最 後 のラップ )。
注: ストップウォッチでは最大23時間59分
59.99秒までカウントすることができます。
注: ストップウォッチの使用中に他のモー
ドに 切り替 えることができ ます。
呼び出し機能を使う
1. S3ボタンを押してRECALLモードを選択
しま す。
2. S1あるいはS2ボタンを押すと登録した
各ラップ のラップタイムと合計経過タイ
ム をスクロ ー ル することがで きま す。
注: 呼び出し機能はラップ記録が保存さ
れている場合のみ使用可能です。
注: 登録したラップは、ストップウォッチの
リセットを行った時点で消去されます。
タイマ ー を 設 定 する
1. S3ボタンを押してTIMERモードを選択
しま す。
2. S4ボタンを約2秒間長押しすると、秒桁
が点滅します。
3. S1ボタンを押すと数字が増え、S2ボタ
Page 14

ンを押すと数字が減ります。ボタンを長
押しすると早く進みます。
4. S3ボタンを押します。分桁が点滅し
ま す。
5. S1ボタンを押すと数字が増え、S2ボタ
ンを押すと数字が減ります。ボタンを長
押しすると早く進みます。
6. S3ボタンを押します。時桁が点滅し
ま す。
7. S1ボタンを押すと数字が増え、S2ボタ
ンを押すと数字が減ります。ボタンを長
押しすると早く進みます。
8. 全ての設定が終わったらS4を押して設
定を決定します。
注: タイマーは最長23時間59分59秒のカ
ウントダ ウン を 行うこと が で き ま す。
タイマ ーを 使う
1. S3ボタンを押してTIMERモードを選択
しま す。
2. その時点でのタイマーの状態(リセッ
ト/カウント中/停止)が表示されます。
3. ストップした時点から再びカウントを開
始するにはS2ボタンを押します。
4. 新しくカウントしなおす場合は、タイマ
ーをリロードしてください。
S2ボタンを押してカウントをストップし
てからS1ボタンを押します。
5. タイマーがゼロになるとお知らせ音が
鳴ります。音を止めたいときは、いずれ
か の ボタンを 押してください 。
注: タイマーのカウント中に他のモードに
切り替えることがで きま す。
バックライトを使う
S4ボタンを押すとバックライトが約3秒間
点灯 します。
日本語
カー ボンフットプリントの減 少を目的と
してFreestyleの取扱説明書は大豆イ
ンキ とリサ イクル 紙 を使 用 してい ます
NON-BG0041-FS-INST-PKG-R02
 Loading...