

Page 1
BOILER
Model FS81239
Model FS81240
S4
S3
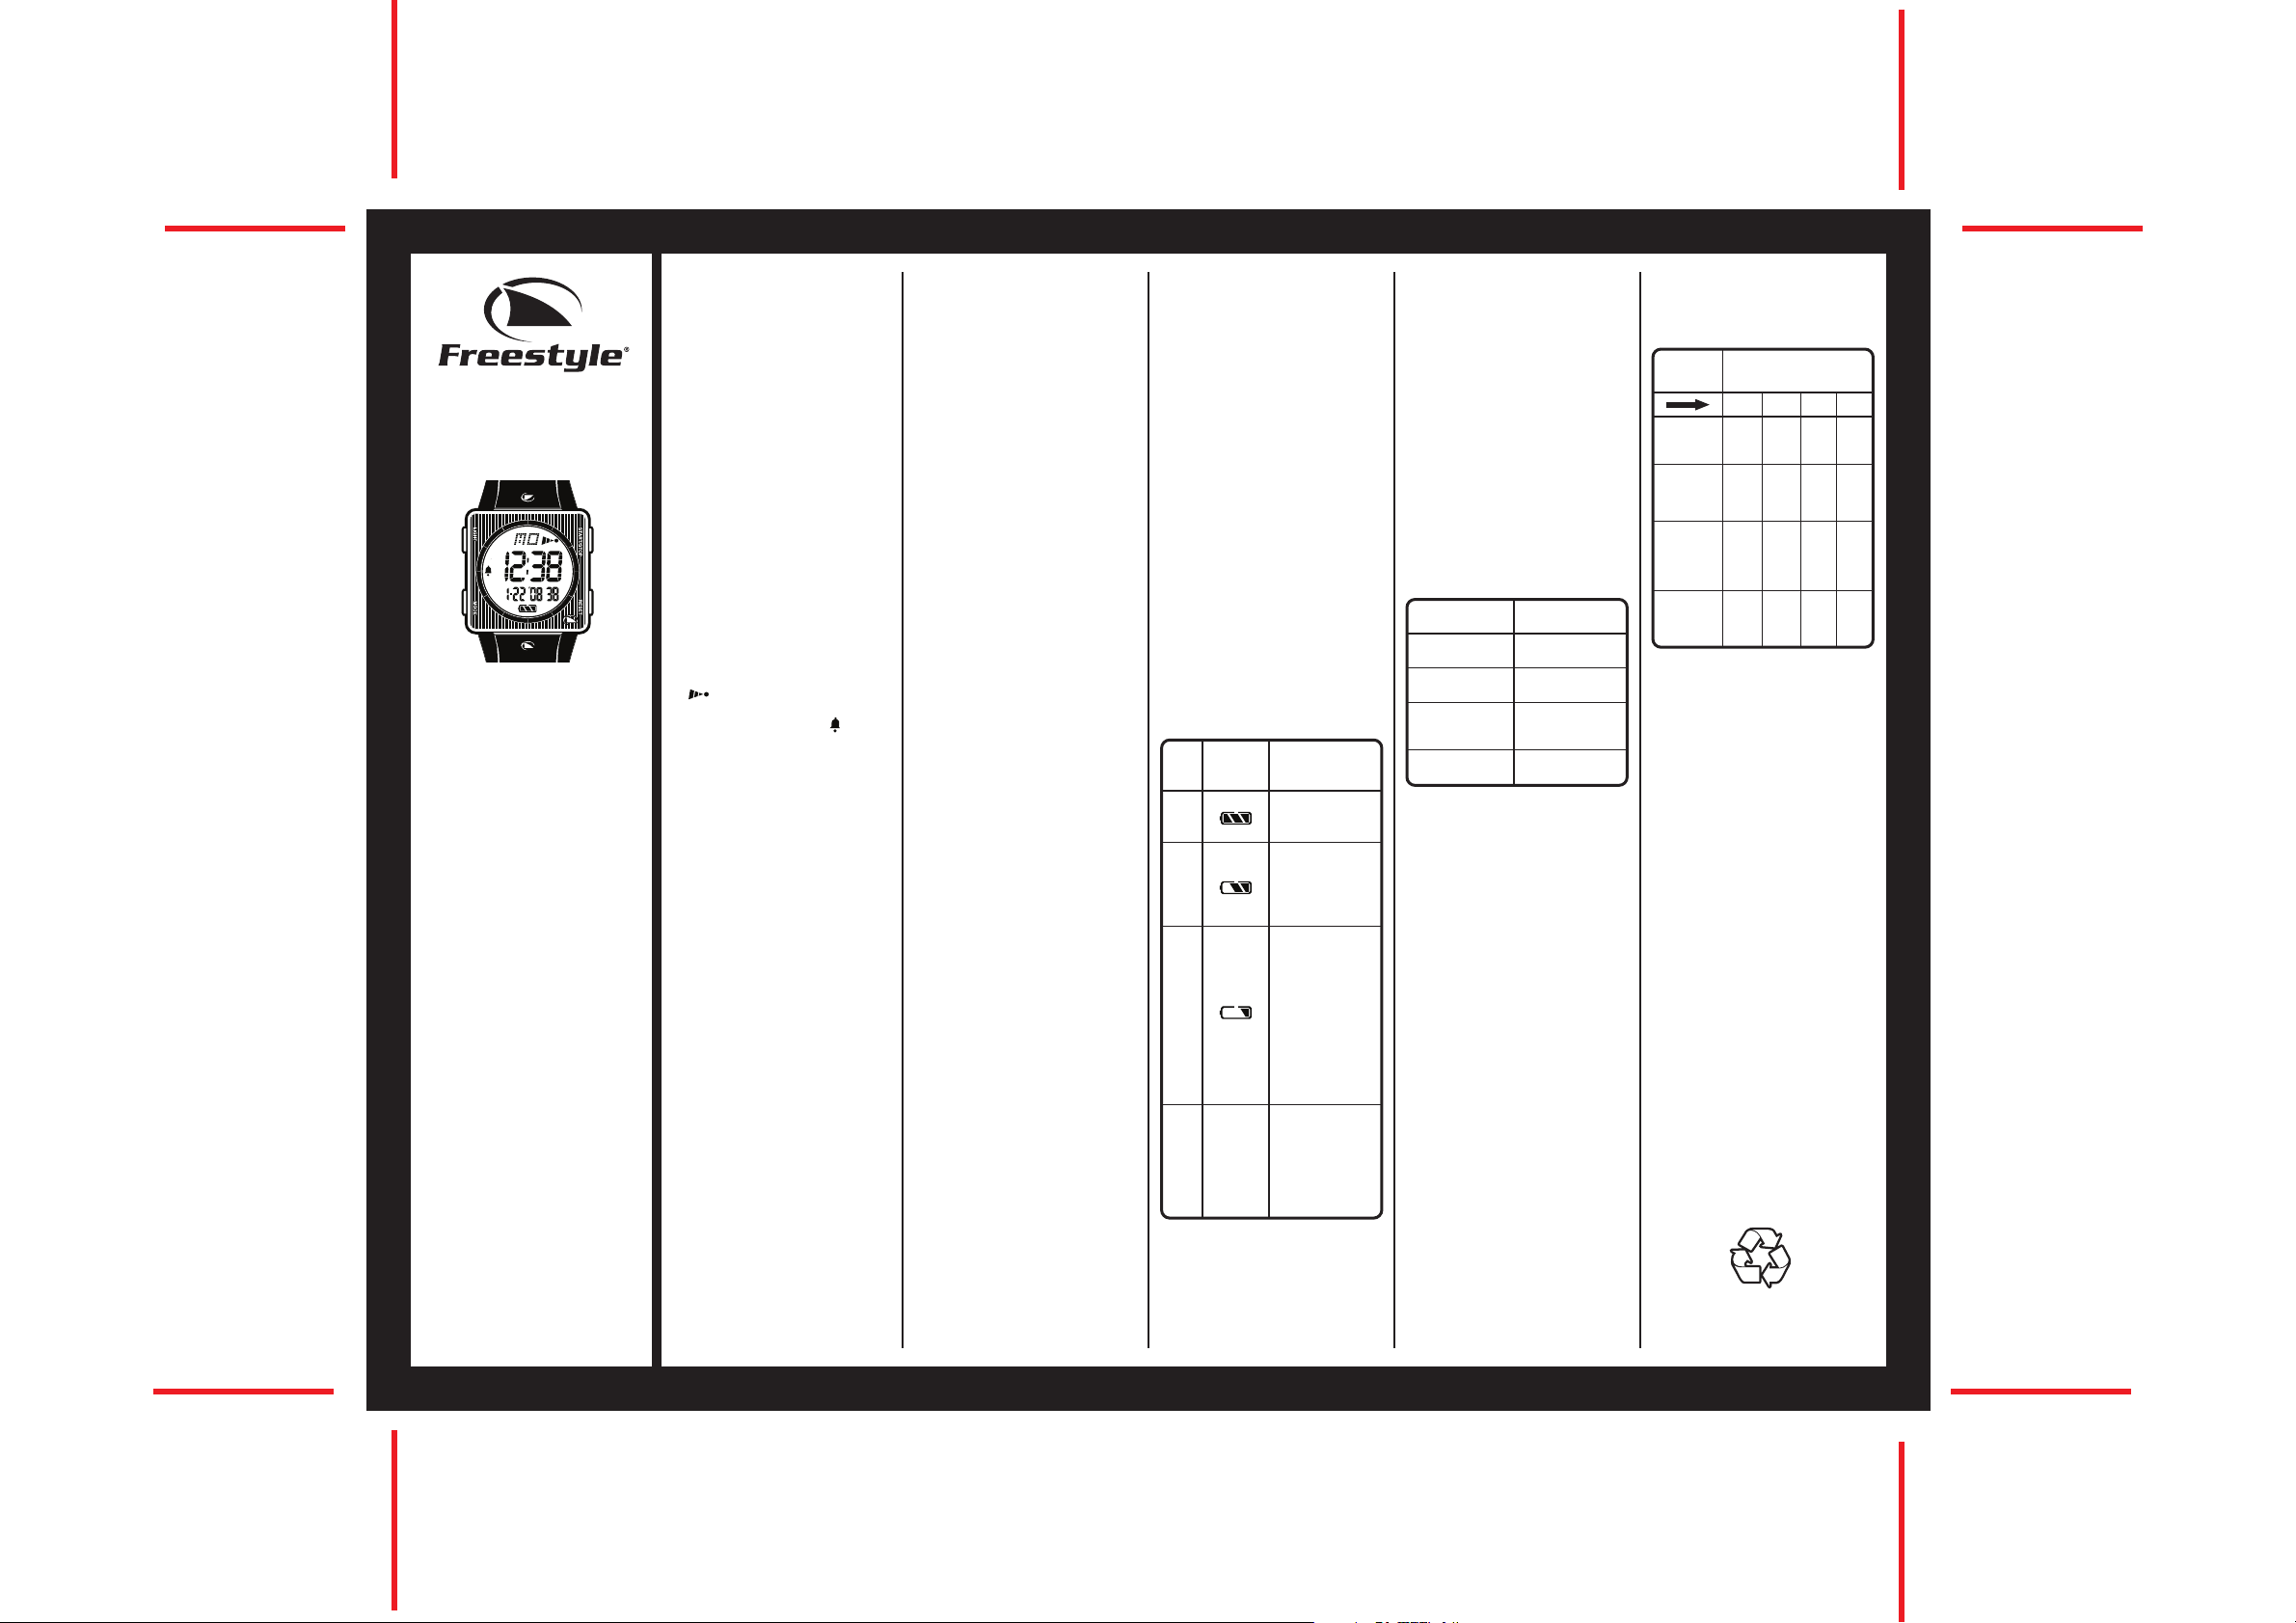
S1 – Start Button
S2 – Reset Button
S3 – Mode Button
S4 – Light Button
DISPLAY MODES
The watch has five display modes:
NORMAL TIME, ALARM (AL),
CHRONOGRAPH (ST), DUAL TIME (T2)
and TIMER (TR).
To change from one display mode to
another, press S3 button once.
NOTE: In any setting mode, if there is
no manipulation for around 1 minute,
the watch will automatically save the
entered data and exit the setting
procedure.
TO SET THE TIME AND CALENDAR
1. Press S3 button to select NORMAL
TIME mode.
2. Press S1 button to toggle between
12-hour and 24-hour format.
3. Press and hold S2 button for
around 3 seconds, the second digits
will blink
4. Press S1 button to reset second
digits to 00. This will increase the
time by 1 minute if the original
setting is at 30 to 59 seconds.
5. Press S3 button, the minute digits
will blink
6. Press S1 button to set the minute
digits. Holding down the button will
speed up the process.
7. Press S3 button, the hour digits
will blink
8. Press S1 button to set the hour
digits.
9. Follow the same pattern to set the
month, date and year.
10.After finished making all the
settings, press S2 button to
confirm.
NOTE: The day (of the week) is
S1
S2
automatically set in accordance with
the date. The date can be set within
the range of 1 January 2000 to 31
December 2099.
TO SET THE ALARM TIME
1. Press S3 button to select ALARM
mode.
2. Press and hold S2 button for
around 3 seconds, the minute digits
will blink.
3. Press S1 button to set the minute
digits. Holding down the button will
speed up the process.
4. Press S3 button, the hour digits
will blink.
5. Press S1 button to set the hour
digits.
6. After finished making all the
settings, press S2 button to
confirm.
NOTE: The alarm will automatically
be activated after being set.
TO USE THE ALARM AND HOURLY
CHIME
In ALARM mode,
1. Press S1 button once to activate
the daily alarm. Alarm indicator
will appear.
2. Press again to activate the hourly
chime. Chime indicator
appear.
3. Press a third time to activate both
functions. Both of the indicators
will appear.
4. Press a fourth time to deactivate
both functions. Both of the
indicators will disappear.
WHEN AN ALARM OR HOURLY CHIME
GOES OFF
A tune will go off by the hour if the
hourly chime function is activated.
A 10-second alarm tune will be emitted
at the designated time when the alarm
is activated. To stop the tune, press
any button.
TO USE THE CHRONOGRAPH
1. Press S3 button to select
CHRONOGRAPH mode.
2. The chronograph will then be
displayed in its current state –
reset, running, or stopped.
3. To resume a counting, press S1
button to resume from where it left
off.
4. To start a new counting, reset the
stop watch to zero first.
Press S1 button to stop counting,
then press S2 button to reset the
counter to zero
.
For the measurement of elapsed time:
In CHRONOGRAPH mode,
1. Press S1 button to start counting.
2. To stop counting, press S1 button.
Press S1 button again to resume
from where it left off.
3. To reset to zero, press S1 button to
stop counting and then press S2
button.
will
For the measurement of split time:
In CHRONOGRAPH mode,
1. Press S1 button to start counting.
2. While the chronograph is running,
press S2 button to register a lap.
The chronograph is still running in
the background.
To display the currently accumulated time, press S2 button
again.
3. Repeat the last step until all the
laps have been registered.
4. To stop counting, press S1 button.
Press S1 button again to resume
from where it left off.
5. To reset to zero, press S1 button to
stop counting, then press S2 button
to reset the counter to zero.
For the measurement of two finishes:
In CHRONOGRAPH mode,
1. Press S1 button once to start
counting.
2. While the chronograph is running,
press S2 button once to register
and display the time of the first
runner. The chronograph is still
running in the background.
3. Press S1 button to stop and register
the time of the second runner.
4. Press S2 button to display the time
of the second runner.
5. To reset to zero, press S2 button
again.
NOTE: You can leave the chronograph
running while switching over to other
operating modes.
TO SET THE DUAL TIME
1. Press S3 button to select DUAL
TIME mode.
2. Press and hold S2 button for
around 3 seconds, the hour digits
will blink.
3. Press S1 button to set the hour
digits. Holding down the button
will speed up the process.
4. After finishing making the setting,
press S2 button to confirm.
NOTE: In DUAL TIME settings, only the
hour digits are open to setting. The
value of the minute digits and second
digits will be the same as that of
NORMAL TIME.
TO SET THE TIMER
1. Press S3 button to select TIMER
mode.
2. Press and hold S2 button for
around 3 seconds, the second digits
will blink.
3. Press S1 button to set the second
digits. Holding down the button will
speed up the process.
4. Press S3 button, the minute digits
will blink.
5. Press S1 button to set the minute
digits.
6. Press S3 button, the hour digits
will blink.
7. Press S1 button to set the hour
digits.
8. After finished making all the
settings, press S2 button to
confirm.
TO USE THE TIMER
In TIMER mode,
1. Press S1 button to start counting.
2. To stop counting, press S1 button.
Press S1 button again to resume
from where it left off.
3. After reaching zero in a countdown,
a 10-second tune will be emitted.
To stop the tune, press any button.
4. The timer will reload automatically
when the tune stops.
TO USE THE BACKLIGHT
Press S4 button to turn on the
backlight for around 3 seconds.
SOLAR CELL
This watch uses a solar cell (Maxell
ML1220) that is recharged from solar
energy by simply exposing the watch
face to external light sources. As with
other rechargeable batteries, when
the solar cell loses its ability to achieve
full charge, replace the battery with a
Maxell ML1220 rechargeable battery.
NOTE: After replacing the battery, all
data stored in watch memory will be
erased. Thus, there is a need to reset
the desired time of the watch.
The table below shows the rechargeable battery power indicator status:
Level
Battery
power
indicator
1.
2.
3.
4.
NO DISPLAY
NOTES:
• From a fully charged battery (Level
1), if the watch is stored in a dark
place or is without any light
exposure for a period of around 5
months, the battery will drain
completely. The battery then needs
to be recharged immediately up to
Function
Status
All functions are
enabled.(power
saving function)
Alarm, hourly time
signal, button signal
and backlight are
disabled. (power
saving function)
Time keeping
functions are still
enabled, the screen
display will turn into
sleep power saving
mode after flashing
for 30 seconds. Press
any button, the screen
display will flash
again for 30 seconds
to alert you to charge
the battery.
All functions are
disabled. Need to
recharge or replace
the battery immediately if it cannot be
recharged.
Level 3 to be able to reset the watch
functions manually. This will
usually take about 5 hours.
• Leaving the watch in direct sunlight
or another strong light source can
cause the battery power indicator
to temporarily show a reading that
may be higher than the actual
battery level. By pressing the S4
button (Light Button) momentarily,
actual battery power level will be
displayed.
• From a Full Charge battery
condition, normal watch functions
are expected to last for a period of
12 months.
Exposing the watch to a light source
for the periods shown below each day
restores the power used during normal
operating conditions:
CHARGING CONDITIONS
Exposure Level
(Brightness)
Outdoor Sunlight
(50,000 Lux)
Sunlight through a
window (10,000 Lux)
Daylight through a
window on a Cloudy
Day (5,000 Lux)
Indoor fluorescent
lighting (500 Lux)
NOTES:
• Stable watch operation is achieved
through frequent battery recharging.
• Under certain conditions of
charging, the watch can become
very hot. Avoid leaving the watch
under the following conditions
during battery recharging and be
extra cautious when handling the
watch:
– On the dashboard of a car
under direct sunlight
– Too close to an incandescent
lamp
• If the watch is overly hot, the display
will be blank. It will return to
normal when the ambient
operating temperature is achieved.
Approximate
Exposure Time
10 minutes
48 minutes
1.5 hours
16 hours
The table below shows the amount of
light exposures and the corresponding
charging duration to enhance the
battery power from lower to higher
levels:
Exposure
Level
(Brightness)
Outdoor
Sunlight
(50,000 Lux)
Sunlight
through a
window
(10,000 Lux)
Daylight
through a
window on a
Cloudy Day
(5,000 Lux)
Indoor
fluorescent
lighting
(500 Lux)
NOTE: All of the above exposure time
values are for reference only. Actual
exposure time depends on lighting
conditions.
POWER SAVING FUNCTION
The watch will turn into Sleep Mode
(blank display) when it is placed in the
dark or exposed to light below 5 Lux
intensity within 15 seconds. Depending
on the Battery Level status when the
watch is at Sleep Mode, the watch still
keeps time up to Battery Level 3. When
the watch is exposed to ambient light
of above 5 Lux, the display of the watch
will automatically return to normal
mode within a period of 5 seconds.
The display can also return to normal
immediately as soon as any button is
activated or pressed.
To reduce carbon foot print, these
Freestyle instructions are printed with
Approximate Exposure Time
Level 4
Level 3
Level 2
10
30
minutes
2
hours
4
hours
32
hours
3
hours
10
hours
..........
..........
minutes
30
minutes
1
hours
5
hours
soy inks on recycled paper.
Level 1
36
hours
90
hours
..........
..........
FS-812-1050-01
TRIM
Boiler IMS V1 01-12-2008
 Loading...