

Page 1
Proximity Capacitive Touch Sensor Evaluation
Quick Start Guide
All information on Freescale Proximity Sensor Products can be found at
http://www.freescale.com/proximity . The information for the Evaluation kit can be found by typing
KITMC33941EVM into your favorite search engine.
1. Download the latest version of the KITMC33941EVM
windows application from the Product Summary page.
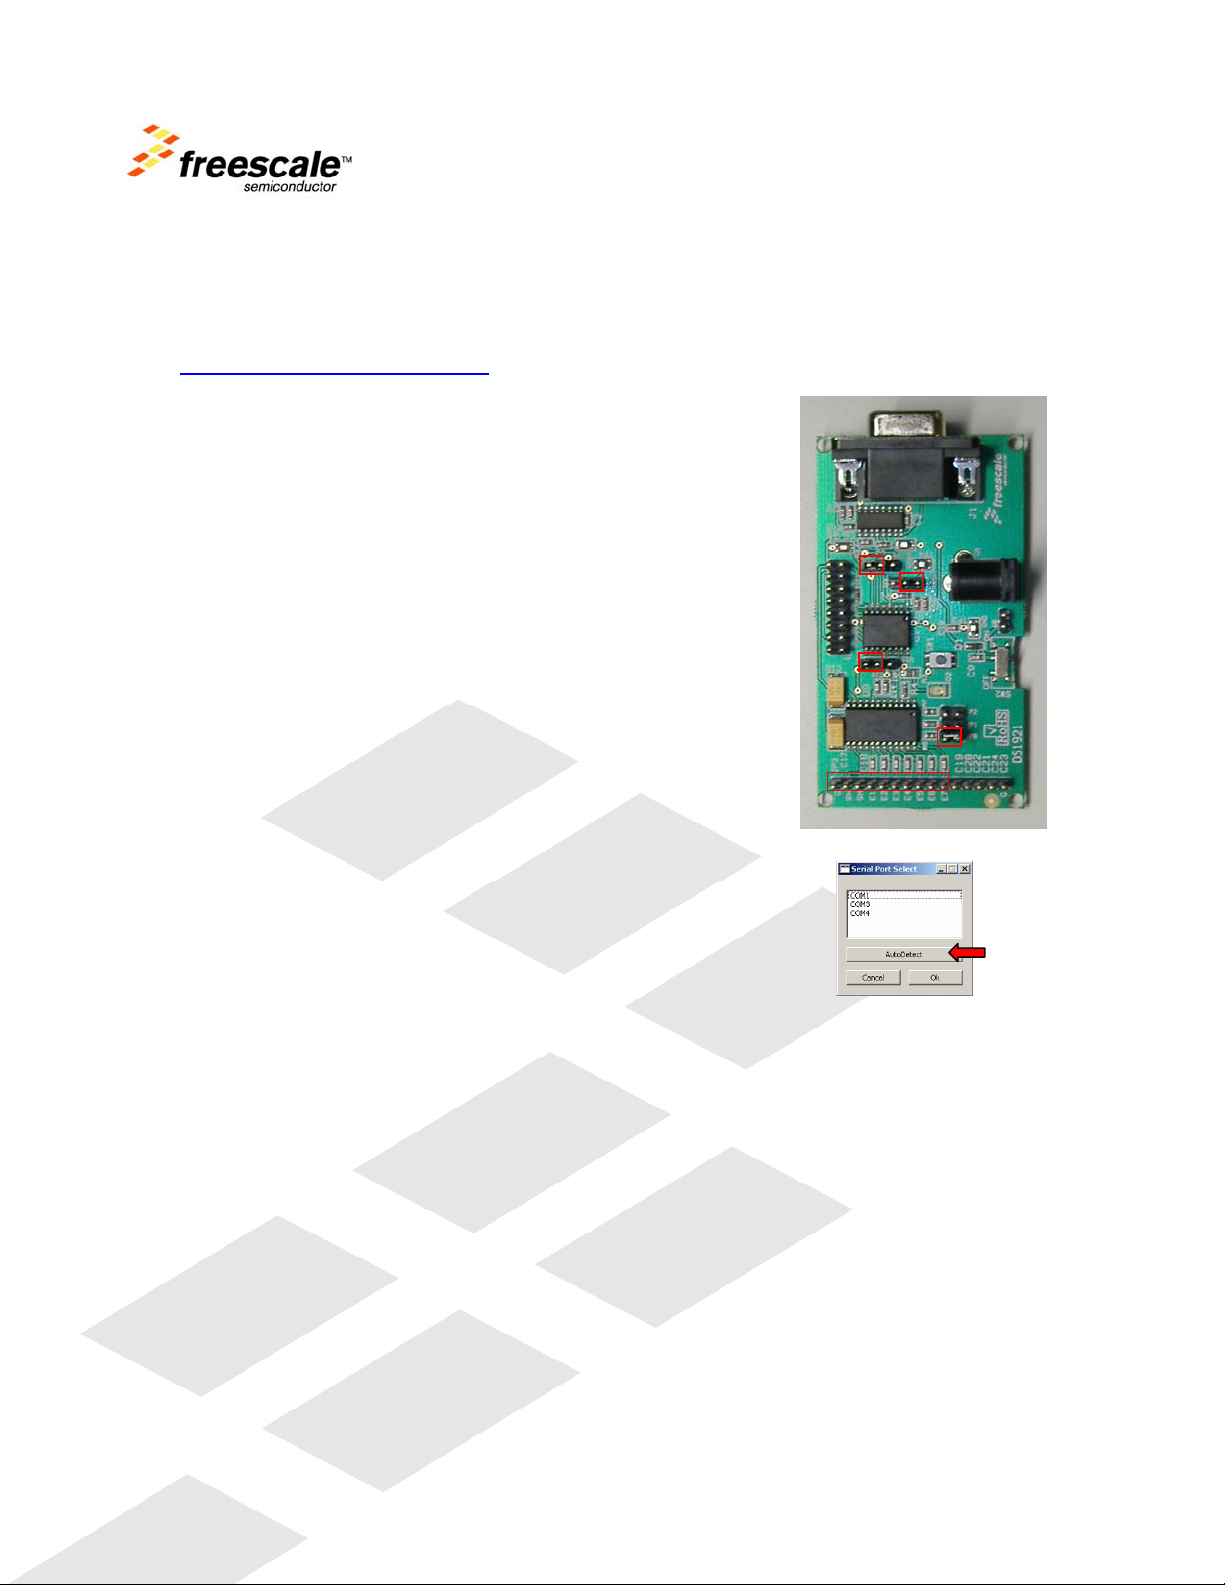
2. Set up the Hardware for the kit.
a. Plug in the 9V external power supply.
b. Locate the jumper near the 16 pin header and
insure that ONLY JP0 and not JP1 or JP2 are
connected.
c. Then connect the auxiliary sensor board to the
header in the left most 10 positions.
d. Connect the Serial Port Cable to your computer.
e. Set the Power switch into the ON position.
f. A green LED labeled D2 on the board will become
lit to show that power is on.
3. Run the Windows Application by double clicking on the
EXE.
a. When the Application starts it will popup a window
asking for your COM port selection. Select the
AutoDetect button. If the application detects the demo
board it will inform you of the COM port number. If it
does you are ready to use the software. Skip to the
next section.
4. If the port cannot be AutoDetected you can try resetting it in your Control Panel.
a. Select Start > Settings > Control Panel > System
b. Select ‘Hardware’ tab, then ‘Device Manager’
c. Under ‘Ports (COM and LPT)’ double click on your ‘Communications Port’.
d. Select ‘Port Settings’ tab and Click ‘Advanced’
i. Insure that ‘Use FIFO buffers’ is enabled.
ii. If it is, continue troubleshooting.
e. Select ‘General’ tab and click ‘Troubleshoot…’
f. Follow the steps in the windows to Troubleshoot your COM port.
5. You should now be ready to play with all of the demo applications!
If you are still having difficulty operating the Capacitive Touch Sensor Evaluation, please submit a
Service Request through the Freescale website or contact your local Freescale Field Applications
Engineer.
For information on how to use the Windows Application continue to the next section.
Page 2
Capacitive Touch Sensor Evaluation Windows
Application:
6. COM Port Selection
a. This tool will automatically come up when the application opens, or it may be
changed at any time by selecting Options Æ Serial Port…
b. Select the AutoDetect button if you already have the KIT connected to your
computer. You may also select the COM port from the list if you already know
what it is.
c. Press Ok to continue.
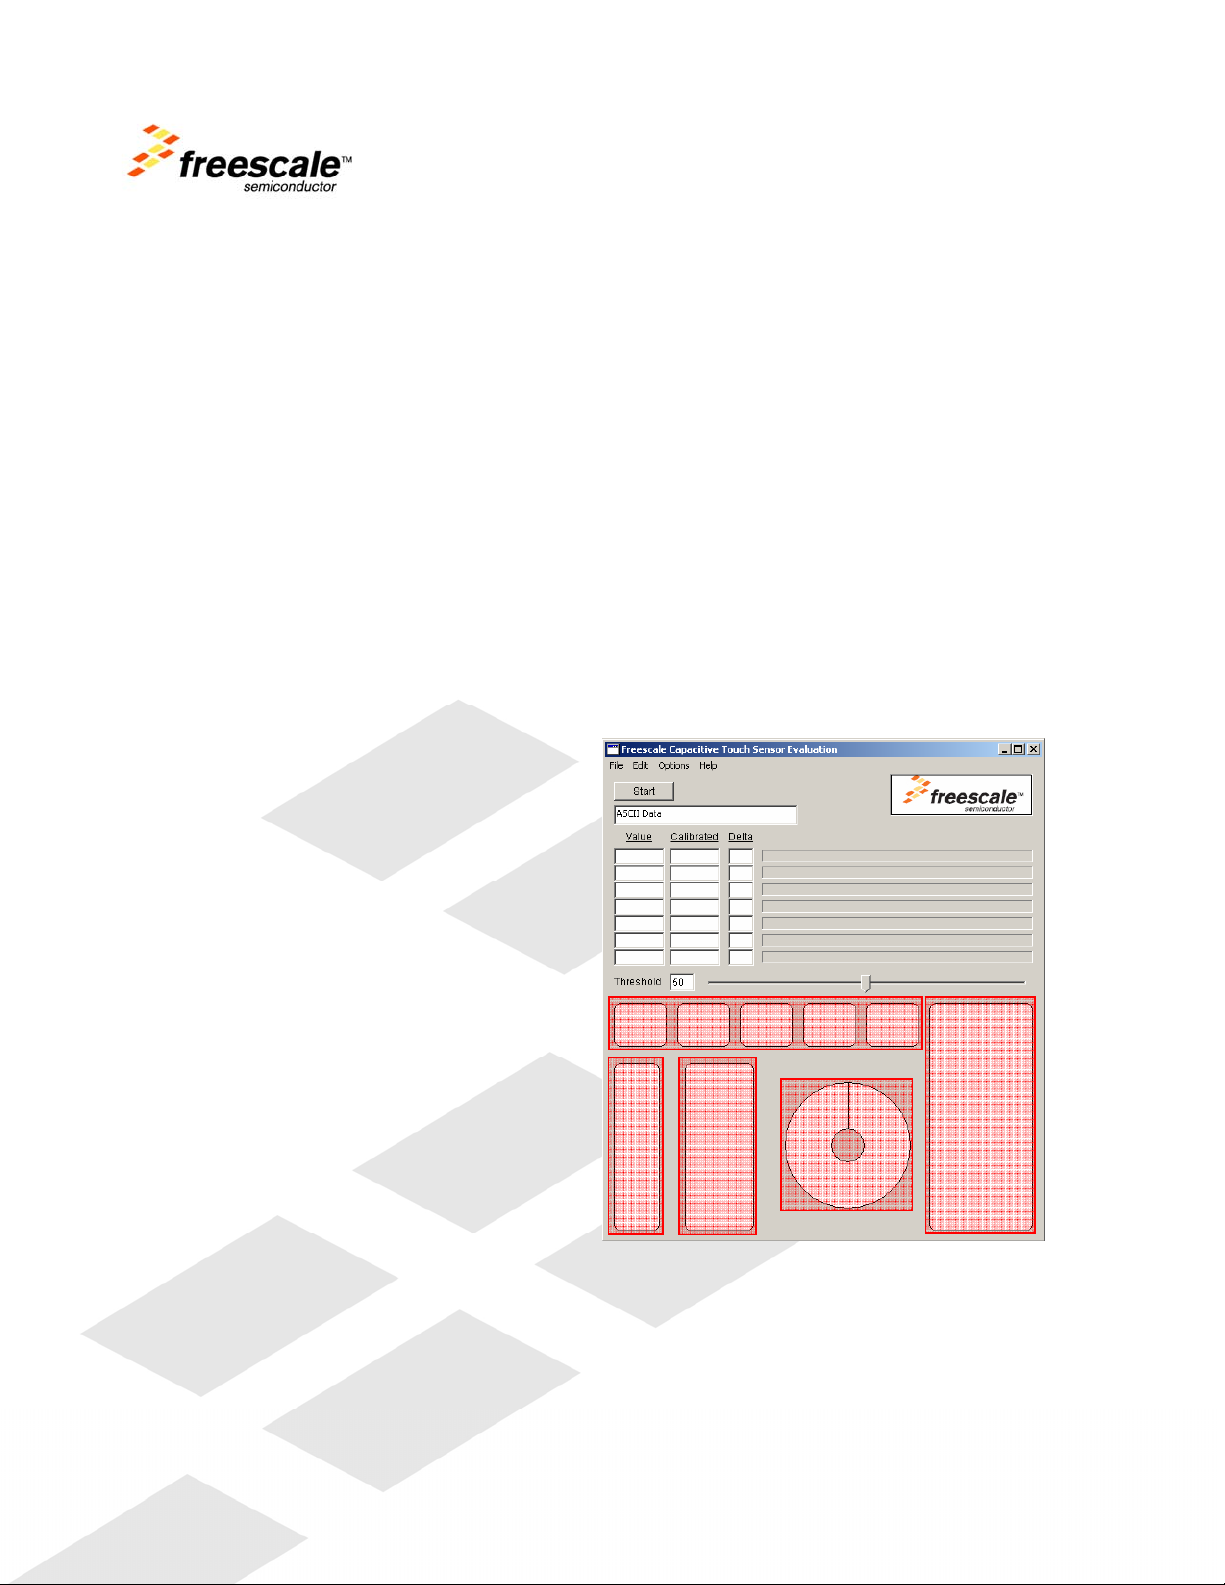
7. Press Start in the top left corner of the interface to begin using the Evaluation Kit.
a. During Calibration ‘Calibrating’ will flash under the Freescale logo. When
Calibration is complete the message will change to ‘Ready’.
b. On the auxiliary sensor board touch any of the 5 buttons located near the top.
When you press them they will turn green on the Windows Interface.
8. Next you can test out the sliders,
encoder and proximity pad by
clicking on them in the Window’s
App. The red boxes on the right
show where to click to enable the
specific components on the
hardware. Once they are selected
they will turn red, this indicates that
they the hardware pads are ready to
be used.
9. If at any time you need to Calibrate
the Electrodes, select Options Æ
Calibrate Now. ‘Calibrating’ should
flash below the Freescale Logo, and
when complete ‘Ready’ will be
displayed for a short time.
a. In addition to Calibrate Now
there is also an
AutoCalibrate setting. See
the next section for a
detailed description.
10. The display bit depth used for all calculations and the Application Display can be
changed by selecting Options Æ Resolution and selecting the desired value from the sub
menu.
Note: This will not change the Firmware output, only the values used for the
display will change.
2 3
1
4
5
Page 3

Touch Detection Algorithms used in the Software:
11. Group 1: 5 Buttons:
First, the Delta values are added together for each multiplexed pad. Thus when
touching pad 2, electrodes 2 and 3 are added. Once the appropriate values have
been added the electrodes are sorted and if the greatest touched pad has a
cumulative value greater than the Threshold the button is turned green.
12. Groups 2 and 3: 2 Sliders
On each of the sliders the exact position is obtained by dividing the Deltas to obtain a
ratio. For example, on the left slider, if Electrode one has a delta of 20 and Electrode
two has a delta of 100 then the slider will show 100% - 20/100 * 50 = 90%. If
electrode one has a higher value than electrode two then the equation would be
20/100 * 50 = 10%. When the electrodes have equal values the slider will be at
exactly 50%.
13. Group 3: Encoder
The encoder consists of four electrodes. An encoder has exactly two states. It either
moves counterclockwise or clockwise. Thus, the only information that needs to be
calculated is the direction. If the encoder is counting up (1Æ2, 2Æ3, 3Æ4, 4Æ1)
then it is moving clockwise. If the encoder is counting down (4Æ3, 3Æ2, 2Æ1, 1Æ4)
then it is moving counterclockwise.
14. Group 4: Proximity Pad
Since each color is represented by 8-bit numbers when 24-bit color is u sed, the delta
is directly displayed across its whole range by displaying the 8-bit scaled value as the
intensity of the red block. Thus as the delta nears 256 the proximity pad will appear
very nearly white, and when the delta nears 0, the pad will appear bright red.
 Loading...