

Page 1
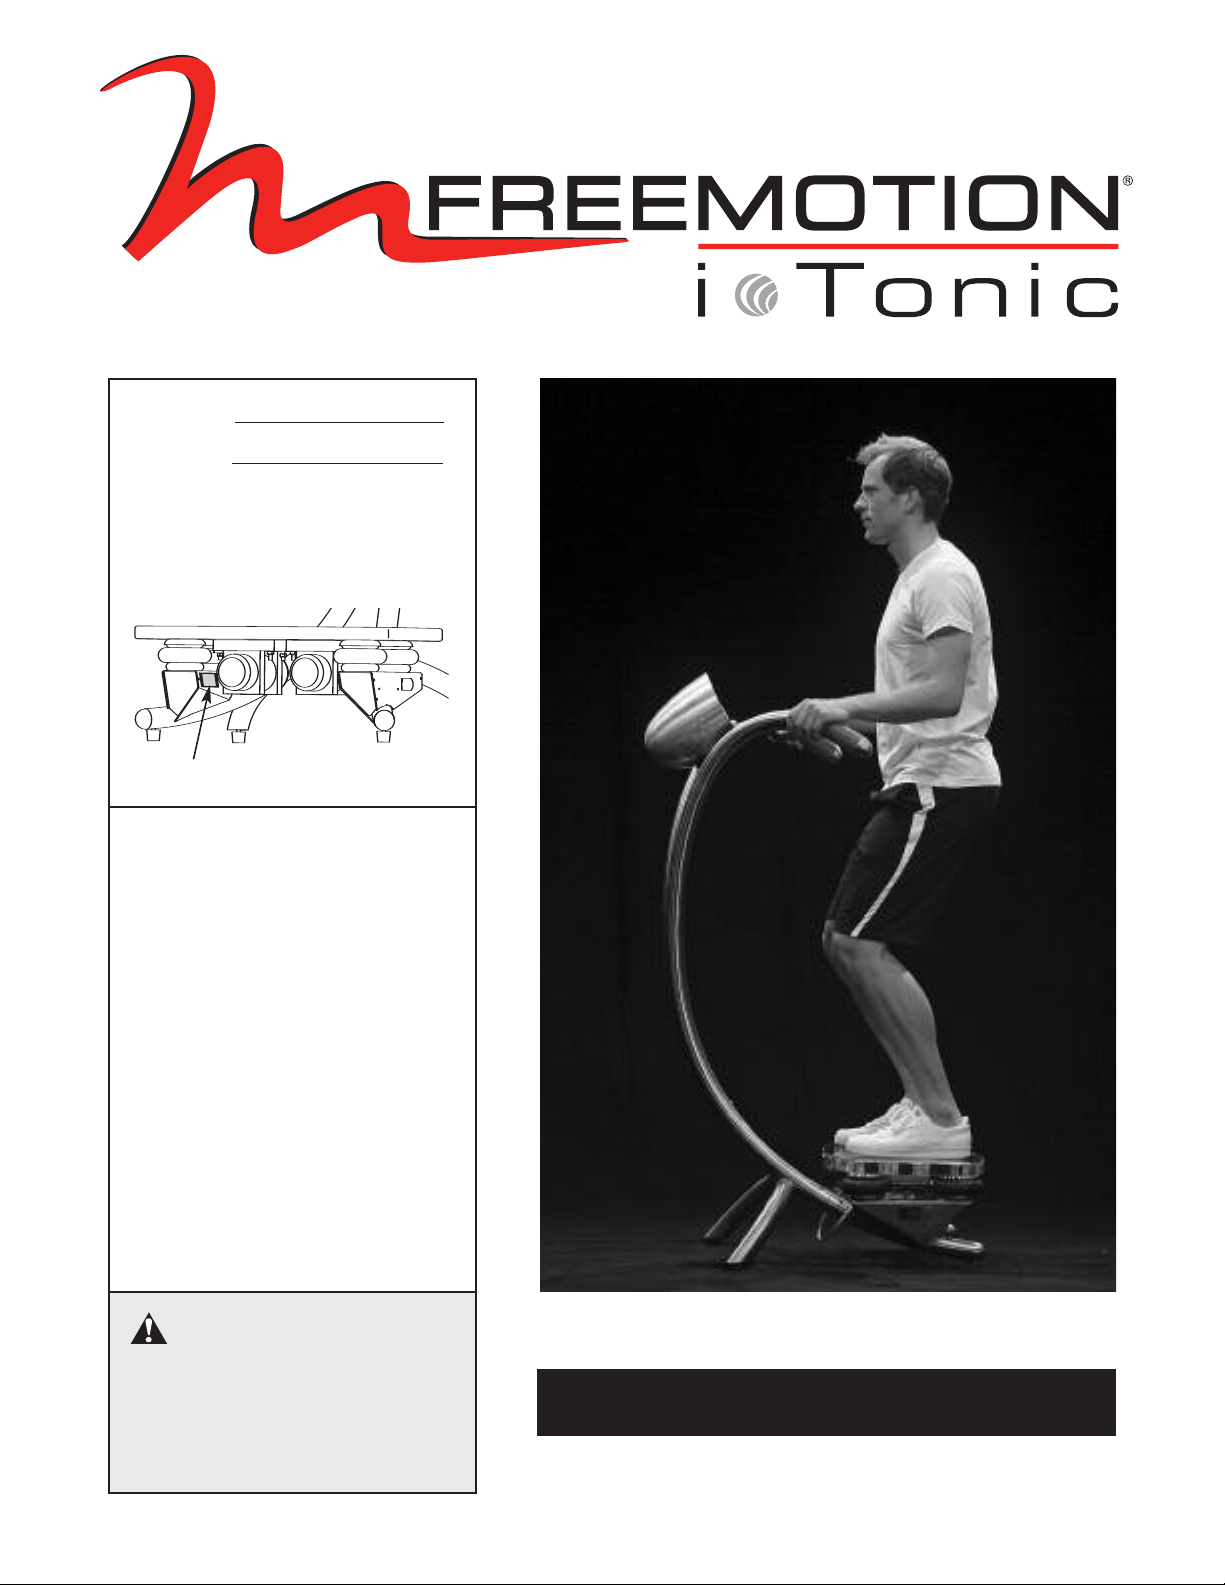
Model No. _
Serial No.
The model number and serial number are found in the location shown
below. Write the model number and
serial number in the space above.
Model and Serial Number Decal
QUESTIONS?
At FreeMotion Fitness, we’re
committed to providing complete
customer satisfaction. If you
have questions, see HOW TO
CONTACT CUSTOMER CARE on
page 2.
CAUTION
Read all precautions and instructions in this manual before
using this equipment. Keep this
manual for future reference.
SER’S
U
ANUAL
M
Page 2

Page 3

TABLE OF CONTENTS
How to Contact Customer Care . . . . . . . . . . . . . . . . . . . . . . . . . . . . . . . . . . . . . . . . . . . . . . . . . . . . .2
SECTION 1
Important Precautions
Warning Decal Placement
Before You Begin . . . . . . . . . . . . . . . . . . . . . . . . . . . . . . . . . . . . . . . . . . . . . . . . . . . . . . . . . . . . . . . .5
How to Set Up the Vibration Platform . . . . . . . . . . . . . . . . . . . . . . . . . . . . . . . . . . . . . . . . . . . . . . . . .6
SECTION 2
How to Use the Vibration Platform . . . . . . . . . . . . . . . . . . . . . . . . . . . . . . . . . . . . . . . . . . . . . . . . . . .7
SECTION 3
Maintenance . . . . . . . . . . . . . . . . . . . . . . . . . . . . . . . . . . . . . . . . . . . . . . . . . . . . . . . . . . . . . . . . . . . .9
Troubleshooting . . . . . . . . . . . . . . . . . . . . . . . . . . . . . . . . . . . . . . . . . . . . . . . . . . . . . . . . . . . . . . . .10
SECTION 4
Exercise Guidelines . . . . . . . . . . . . . . . . . . . . . . . . . . . . . . . . . . . . . . . . . . . . . . . . . . . . . . . . . . . . .13
SECTION 5
How to Order Replacement Parts . . . . . . . . . . . . . . . . . . . . . . . . . . . . . . . . . . . . . . . . . . . . . . . . . . .29
. . . . . . . . . . . . . . . . . . . . . . . . . . . . . . . . . . . . . . . . . . . . . . . . . . . . . . . . . . . . .3
. . . . . . . . . . . . . . . . . . . . . . . . . . . . . . . . . . . . . . . . . . . . . . . . . . . . . . . . . .4
FREEMOTION is a registered trademark of ICON IP, Inc.
1
Page 4

HOW TO CONTACT CUSTOMER CARE
If you have questions after reading this manual, or if you require assistance, please contact Customer Care at the
address and phone number listed below. Please be prepared to provide the following information:
• the MODEL NUMBER OF THE PRODUCT (see the front cover of this manual for the location)
®
• the NAME OF THE PRODUCT (FREEMOTION
• the SERIAL NUMBER OF THE PRODUCT (see the front cover of this manual for the location)
Customer Care: 1-800-201-2109, Monday–Friday, 8 a.m.–5 p.m. Mountain Time
FreeMotion Fitness, Inc. • 1096 Elkton Drive, Suite 600 • Colorado Springs, CO 80907
ITONIC vibration platform)
2
Page 5

IMPORTANT PRECAUTIONS
WARNING: To reduce the risk of serious injury, read the following important precautions
nd information before operating the vibration platform.
a
. It is the responsibility of the owner to ensure
1
that all users of the vibration platform are adequately informed of all warnings and precautions.
2. Operate the vibration platform only as described in this manual.
3. Do not operate the vibration platform until it
is properly assembled (see HOW TO SET UP
THE VIBRATION PLATFORM on page 6).
4. Keep the vibration platform indoors, away
from moisture and dust. Do not place the vibration platform in a garage or covered patio,
or near water.
5. Place the vibration platform on a level surface. To protect the floor or carpet from damage, place a mat beneath the vibration platform.
6. Regularly inspect and tighten all parts of the
vibration platform.
7. Keep children under the age of 12 and pets
away from the vibration platform at all times.
8. The vibration platform should not be used by
persons weighing more than 400 lbs. (182 kg).
1. Keep your back straight when using the vibra-
1
tion platform; do not arch your back. When
standing on the vibration platform, bend your
knees slightly and balance your weight on the
balls of your feet.
12. If you feel pain or dizziness while exercising,
stop immediately and cool down.
13. The following is a list of factors and conditions that may make exercising on the vibration platform inadvisable (this list is not exhaustive; it is intended only for reference). If
one or more factors or conditions apply to
you, consult your physician before using the
vibration platform.
• Knee or hip implant
• Pacemaker
• Recently placed screws, pins, bolts, or
spirals
• Acute hernia, discopathy, or spondylitis
• Serious heart or vascular disease
• Acute thrombosis
• Tumor
• Serious migraine
• Epilepsy
• Serious diabetes
• Recent wound due to operation
• Fresh inflammation
• Pregnancy
Never allow more than one person on the
9.
vibration platform at a time.
10. Always wear appropriate exercise clothes and
athletic shoes when operating the vibration
platform. Do not wear loose clothes that
could become caught on the vibration platform.
It is recommended that you use the vibration
14.
platform no more than 15 minutes per day and
no more than 3 times per week.
15. Be careful when stepping down from the vibration platform; your muscles will feel different after you exercise on the vibration platform.
3
Page 6
16. When connecting the power cord, follow the intructions on page 6. No other appliance
s
hould be on the same circuit as the vibration
s
platform.
17. Do not modify the power cord or use an
dapter to connect the power cord to an im-
a
proper receptacle. Keep the power cord away
from heated surfaces. Do not use an extension
cord.
18. Never leave the vibration platform unattended
while it is running.
19. Never insert or drop any object into any
pening on the vibration platform.
o
DANGER: Always unplug the power
20.
ord before cleaning the vibration platform
c
and before performing the maintenance and
djustment procedures described in this
a
manual. Servicing other than the procedures
in this manual should be performed by an authorized service representative only.
WARNING: Before beginning this or any exercise program, consult your physician. This
is especially important for persons over the age of 35 or persons with pre-existing health problems.
Read all instructions before using. FreeMotion Fitness assumes no responsibility for personal injury
or property damage sustained by or through the use of this product.
SAVE THESE INSTRUCTIONS
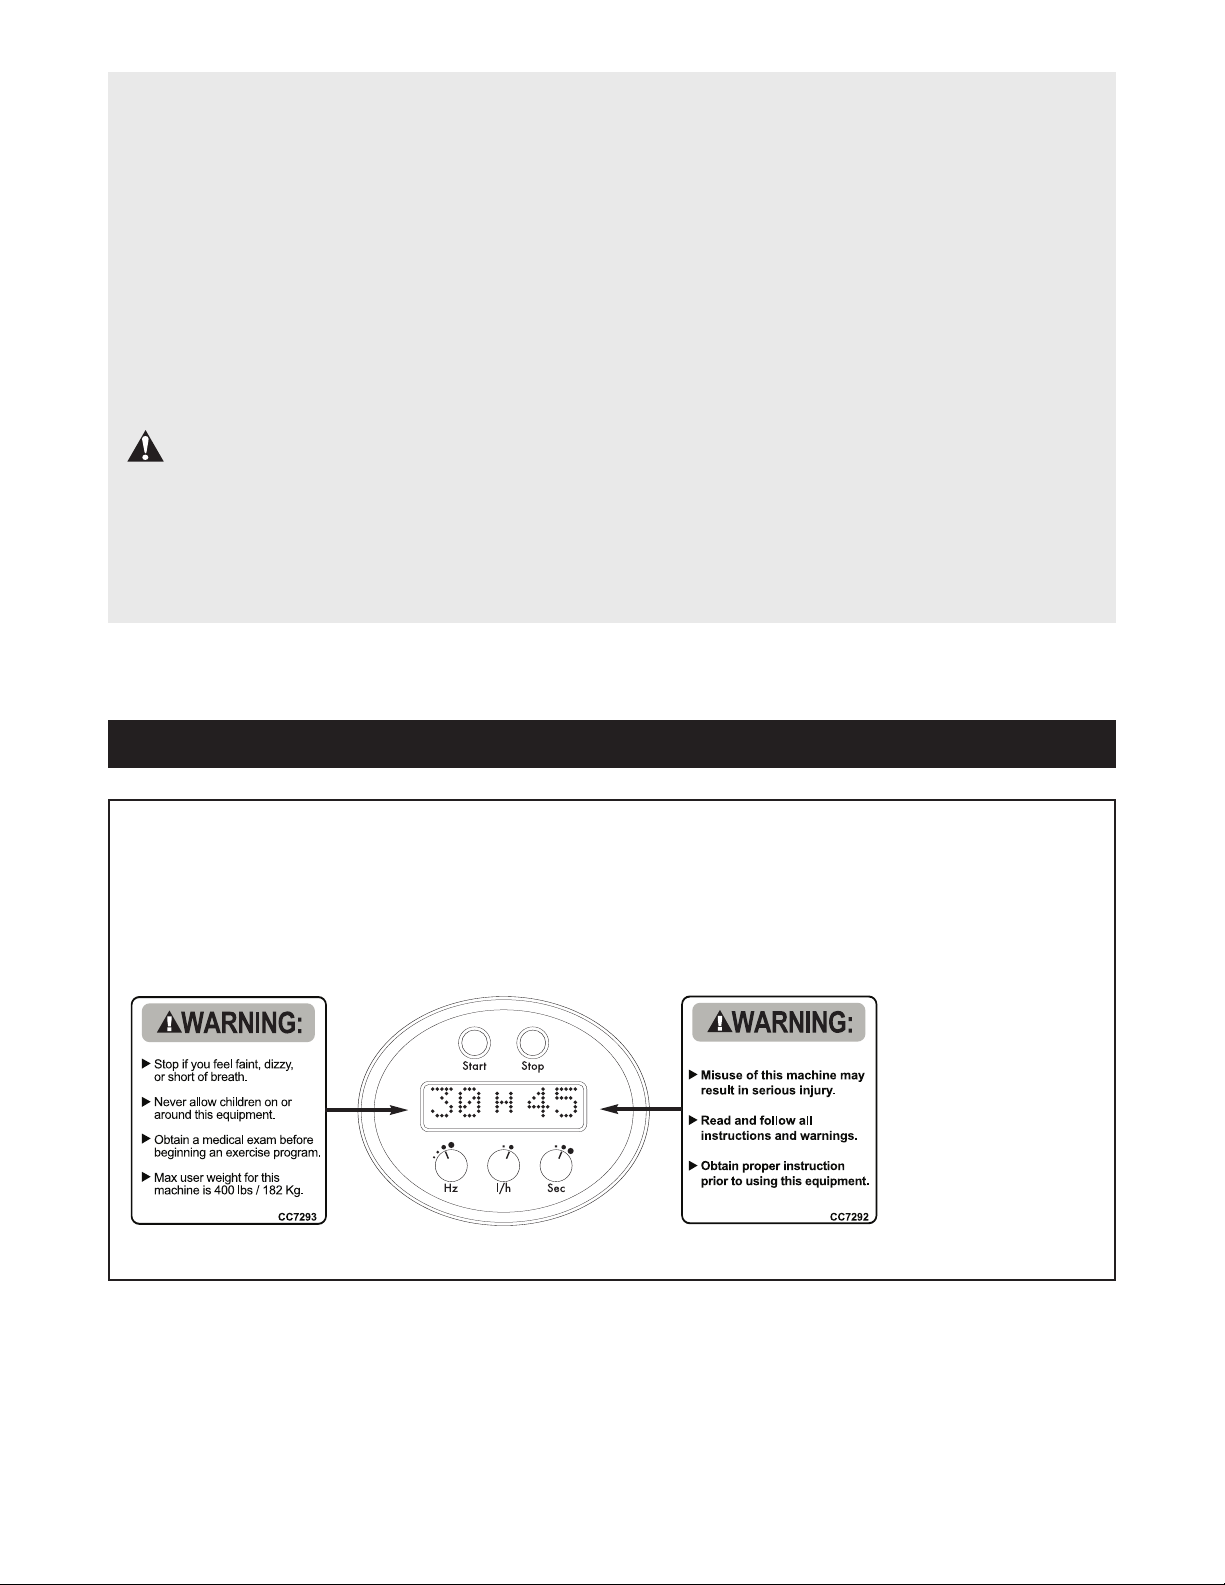
WARNING DECAL PLACEMENT
The warning decals shown below have been placed on the console in
the locations shown. If a decal is missing or illegible, see HOW TO
CONTACT CUSTOMER CARE on page 2 and order a free replacement decal. Apply the decal in the location shown. Note: The
decal may not be shown at actual size.
4
Page 7

BEFORE YOU BEGIN
Congratulations for selecting the revolutionary
FREEMOTION®ITONIC vibration platform. The vibration platform offers whole body vibration options that
ill make your workouts effective and enjoyable.
w
or your benefit, read this manual carefully before
F
using the FREEMOTION ITONIC vibration platform.
If you have questions after reading this manual, please
see HOW TO CONTACT CUSTOMER CARE on page
2. To help us assist you, note your product model numer and serial number before contacting us. The model
b
number and serial number can be found on a decal at-
ached to the vibration platform (see the front cover of
t
this manual for the location of the decal).
5
Page 8
HOW TO SET UP THE VIBRATION PLATFORM
UK
HOW TO ATTACH AND ADJUST THE LEVELING
EET
F
Turn the four leveling feet into the underside of the
frame, one in each corner. If the vibration platform
rocks slightly during use, turn the leveling feet under
the front and rear of the frame until the rocking motion
is eliminated.
DANGER: Improper connection
of the equipment-grounding conductor can
result in an increased risk of electric shock.
Check with a qualified electrician or serviceman if you are in doubt as to whether the
product is properly grounded. Do not modify
the plug provided with the product—if it will
not fit the outlet, have a proper outlet
installed by a qualified electrician. Do not use
an adapter to connect the plug to an improper
receptacle.
HOW TO CONNECT THE POWER CORD IN THE
UNITED STATES
This product must be grounded.
tion or break down, grounding provides a path of least
resistance for electric current to reduce the risk of electric shock.
This product is for use on a dedicated, 20-amp,
120-volt circuit. No other appliance should be on
the same circuit. This product is equipped with a cord
having an equipment-grounding conductor and a
grounding plug.
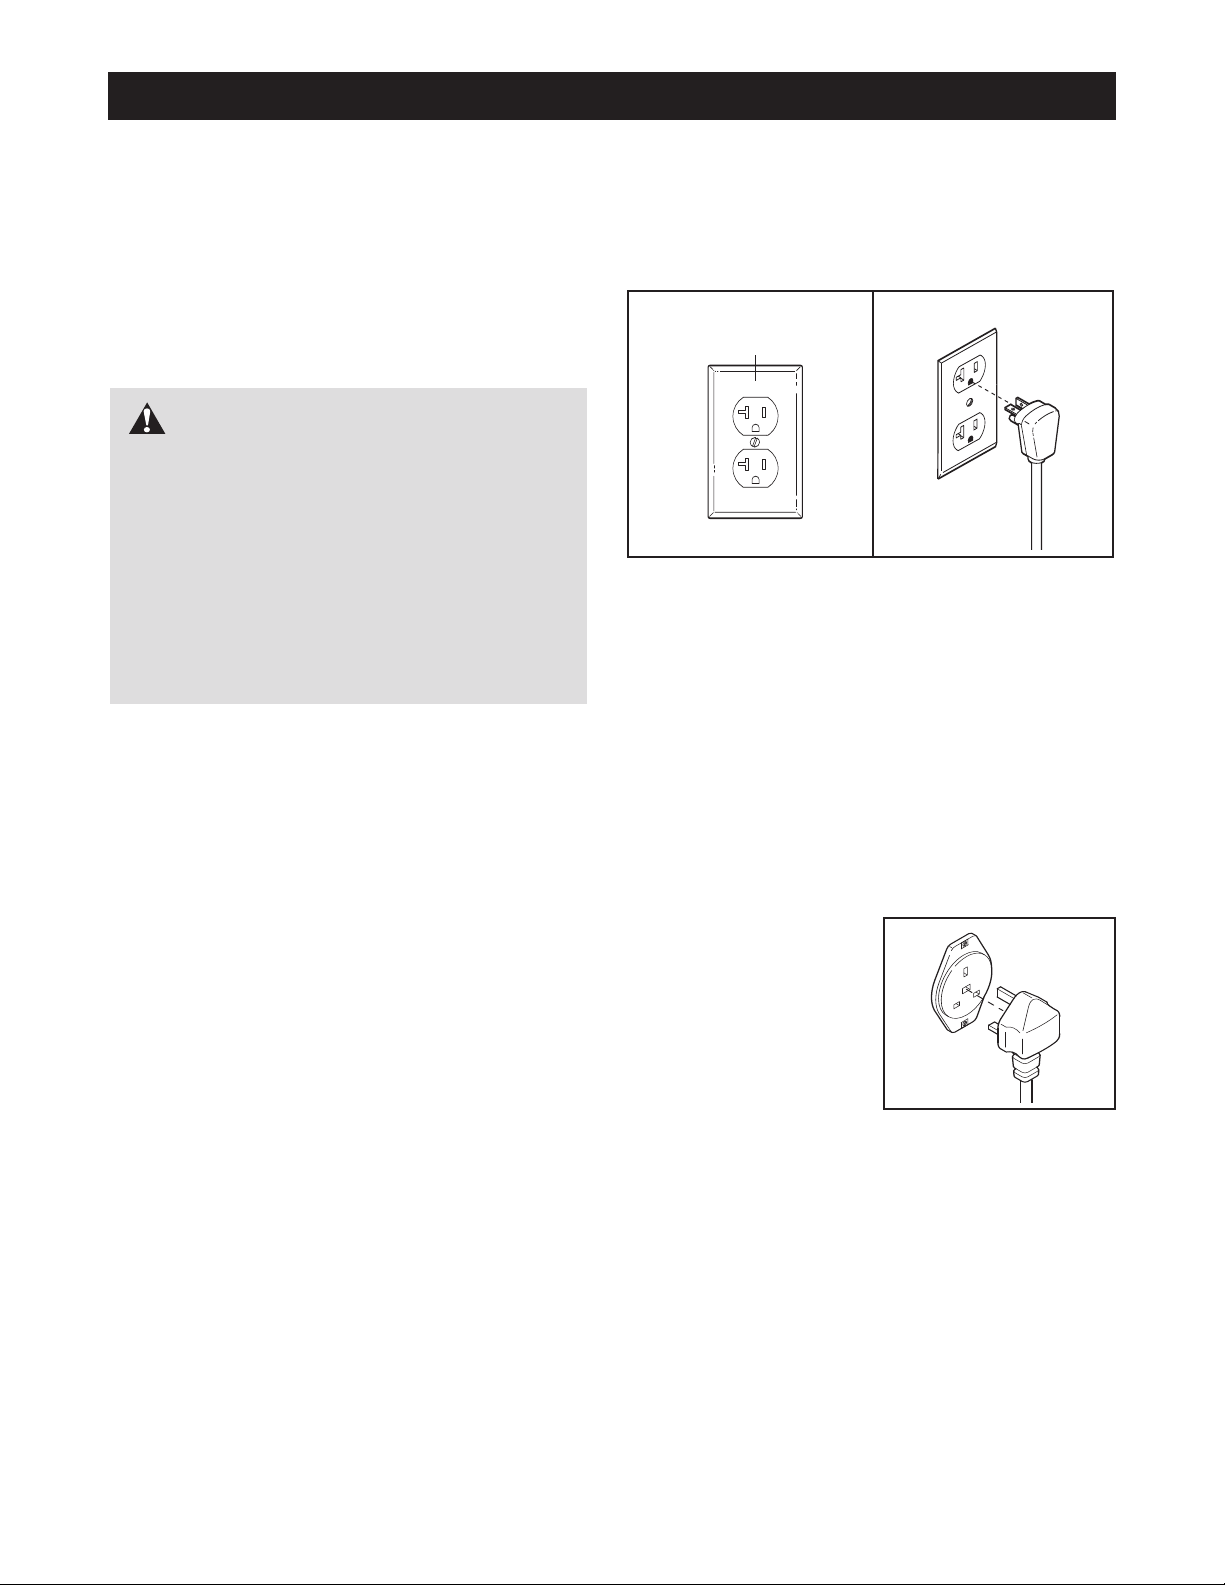
Plug the grounding plug into a standard NEMA 5-20
receptacle. Do not modify the plug or the receptacle.
Do not use an adapter, a surge protector, or an exten-
If it should malfunc-
sion cord. Note: If the included power cord in not long
nough, see HOW TO CONTACT CUSTOMER CARE
e
on page 2 of this manual and order a 3.6 m (12-foot)
power cord. The receptacle must be grounded.
NEMA 5-20
Receptacle
HOW TO CONNECT THE POWER CORD IN THE UK
This product must be earthed. If it should malfunc-
tion or break down, earthing provides a path of least
resistance for electric current to reduce the risk of electric shock.
This product is for use on a dedicated, 10-amp,
240-volt circuit. No other appliance should be on
the same circuit. The product is equipped with a cord
having an equipment-earthing conductor and an earthing plug.
Plug the earthing plug
into a receptacle as
shown at the right. Do
not modify the plug or
the receptacle. Do not
use an adapter or an extension cord. The receptacle must be earthed.
6
Page 9
HOW TO USE THE VIBRATION PLATFORM
HOW TO TURN ON THE POWER
IMPORTANT: If the vibration platform has been exposed to cold temperatures, allow it to warm to
room temperature before turning on the power. If
you do not do this, the console displays or other
electronic components may become damaged.
Plug in the power cord (see
page 6). Next, locate the
on/off switch on the right
side of the vibration platform
near the power cord. Make
sure that the on/off switch is
in the on position.
HOW TO USE THE STRAPS
Some exercises on the vibration platform require the
use of straps (see EXERCISE GUIDELINES on page
13). To use the straps, connect the ends of the straps
to the hooks beneath the right and left sides of the
platform. Then, adjust the straps to the desired length.
On
Position
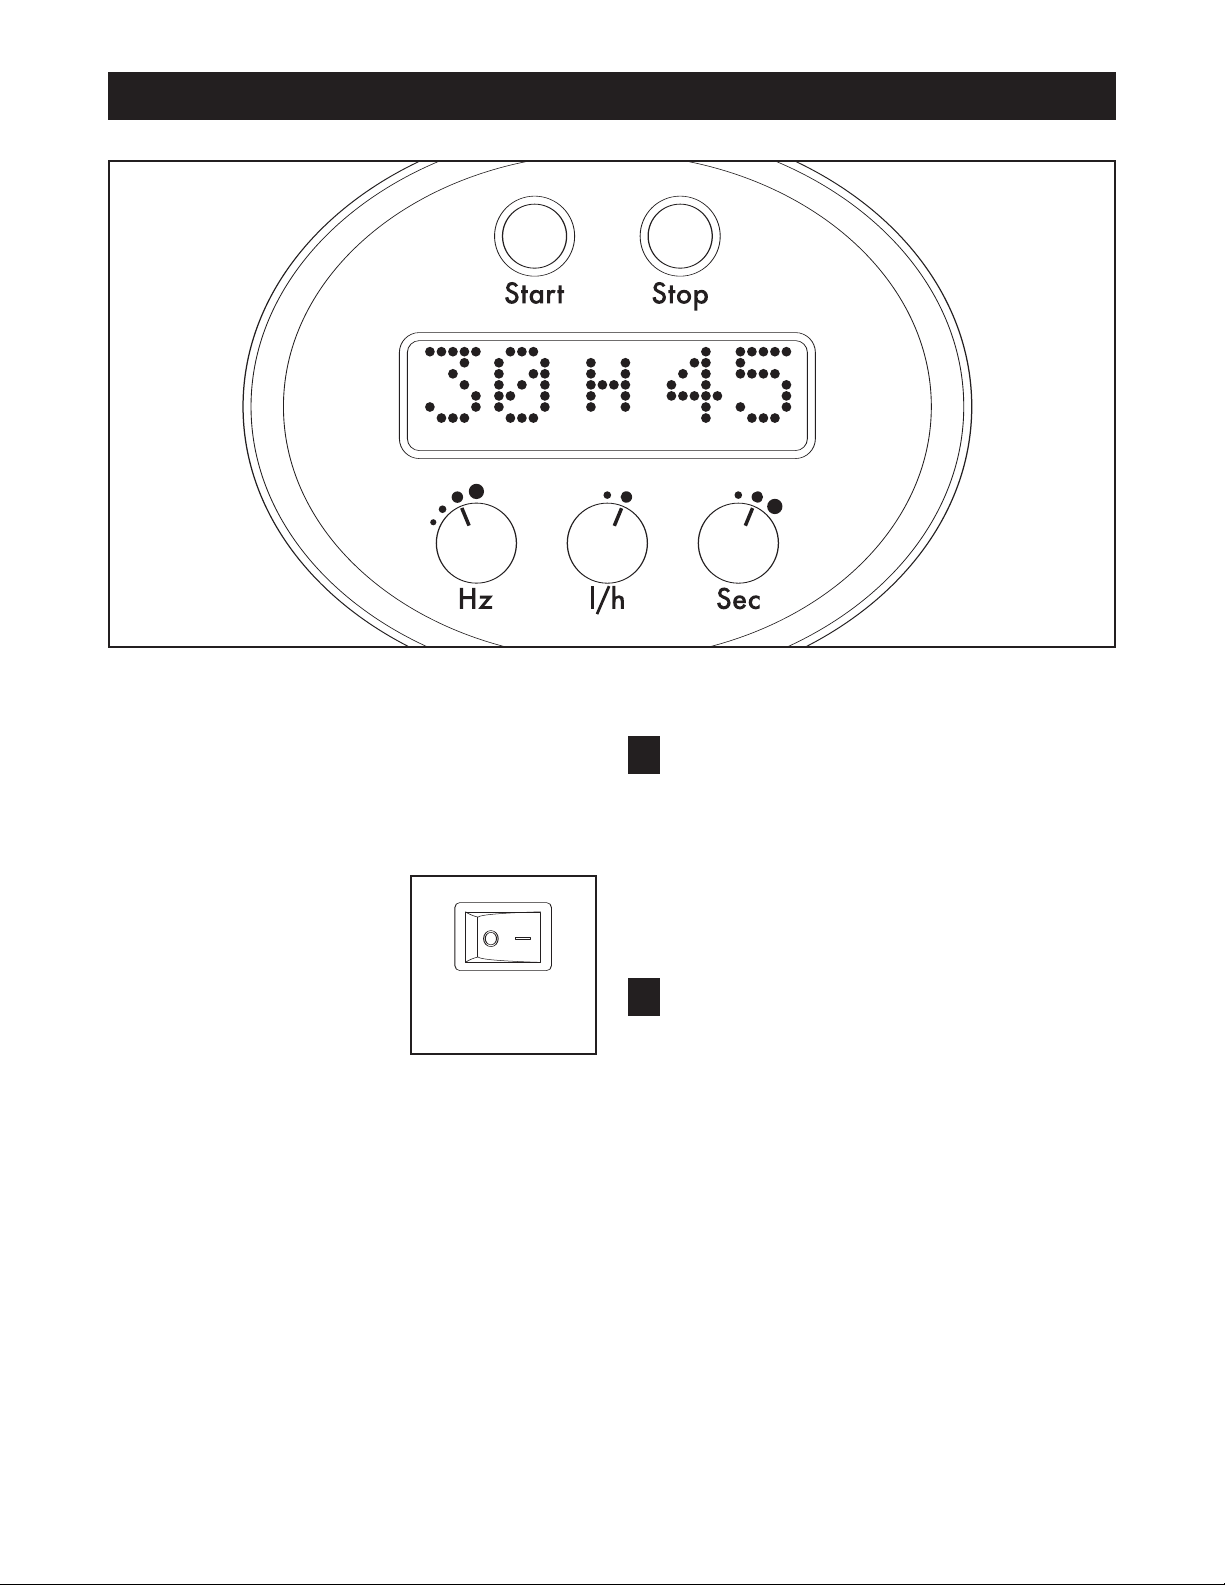
HOW TO USE THE CONSOLE
Turn on the power.
1
See HOW TO TURN ON THE POWER above.
When you turn on the power, the display of the
console will light, the software version number will
scroll across the display, and then the word
ITONIC will appear. The console is now ready for
use.
Select exercise settings.
2
Press the Start button, and then select the desired
frequency, amplitude, and time settings for your vibration session:
Frequency (Hz)–Turn the Hz knob to set the frequency of the vibrations to 25Hz, 30Hz, 35Hz or
Massage (50Hz). The selected setting will appear
in the display above the knob.
Amplitude (l/h)–Turn the l/h knob to set the amplitude of the vibrations to low or high. An “L” or an
“H” will appear in the display above the knob to indicate the selected setting.
Time (Sec)–Turn the Sec knob to set the length of
the vibration session for 30, 45, or 60 seconds.
The selected setting will appear in the display
above the knob.
7
Page 10

Start the vibration session and exercise on the
vibration platform.
Continue programming vibration sessions as
43
desired.
Press the Start button on the console or press the
tart button on the right side of the frame to begin
s
the vibration session. Note: If you do not begin exercising within 30 seconds of entering your exercise settings, the vibration platform will enter a dor-
ant mode and the word ITONIC will scroll across
m
the display. To exit the dormant mode, press the
Start button once.
See the accompanying exercise chart for the correct form of exercises that can be performed on
the vibration platform. When standing on the vibration platform, bend your knees slightly and balance your weight on the balls of your feet.
The display will count down the seconds remaining
in the session. When there is no time remaining,
the vibration platform will stop automatically. To
stop the vibration session at any time, press the
Stop button on the console.
When a vibration session is completed, you can
ontinue to program additional vibration sessions
c
as desired. Note: If you do not program or start a
new vibration session within 90 seconds of the
previous session, the vibration platform will enter a
ormant mode and the word ITONIC will scroll
d
across the display. To exit the dormant mode,
press the Start button once.
Important: It is recommended that you use the
vibration platform no more than 15 minutes per
day and no more than 3 times per week.
When, you are finished exercising, turn off the
5
power.
When you are finished using the vibration platform, switch the on/off switch to the off position and unplug the power cord.
8
Page 11

MAINTENANCE
If you have questions about maintenance or trou-
leshooting, see HOW TO CONTACT CUSTOMER
b
CARE on page 2.
Regularly inspect and properly tighten all external parts
of the vibration platform. To clean the vibration platform, apply a small amount of mild multi-purpose
cleaner to a 100 percent cotton cloth and wipe the console and external surfaces. Do not spray cleaner di-
rectly onto the vibration platform or use ammonia
or acid-based cleaners to clean the vibration platform.
LEVELING THE VIBRATION PLATFORM
If the vibration platform rocks slightly during use, turn
the leveling feet under the front and rear of the frame
until the rocking motion is eliminated.
HOW TO MOVE THE VIBRATION PLATFORM
Before moving the vibration platform, make sure
that the power cord is unplugged.
Due to the size and weight of the vibration platform, moving it requires two persons. While one
person lifts the upper part of the frame, lift the rear of
the frame and carefully move the vibration platform to
the desired location. Then, lower the vibration platform
to the floor. CAUTION: To reduce the risk of injury,
bend your knees and keep your back straight.
Make sure to use your legs rather than your back
to lift the vibration platform.
HOW TO REPLACE THE FUSE
If the vibration platform does not function and the console does not light, even when the power cord is
plugged in and the on/off switch is in the on position,
the fuse may need to be replaced.
To replace the fuse, first switch the on/off switch to the
off position and unplug the power cord.
Remove the power
cord from the jack
on the right side of
the vibration platform. Then, using a
flat-head screwdriver, remove the
fuse holder located
next to the plug
jack. Remove the
fuse from the fuse
holder.
Check to see if the wire inside the fuse is intact. If the
wire is broken or faulty, discard the fuse and insert a
new fuse into the fuse holder. Note: The correct type of
fuse to use is listed on the fuse holder. Then, replace
the fuse holder and plug the power cord into the jack.
Plug in the power cord, switch the on/off switch to the
on position, and run the vibration platform to check for
correct operation.
see HOW TO CONTACT CUSTOMER CARE on page
2 of this manual.
If further assistance is needed,
Fuse
Cover
Plug
Jack
9
Page 12

TROUBLESHOOTING
Most vibration platform problems can be solved by following the steps below. If further assistance is
eeded, please see HOW TO CONTACT CUSTOMER CARE on page 2 of this manual.
n
STEP INSTRUCTIONS YES NO
1
2
3
4
5
6
7
Check the position of the on/off switch. Is it in the on position?
Switch the on/off switch to the on position. Is the display
working?
Pull the plug from the wall outlet. Check the plug for damage. Is the plug all right?
Reconnect the plug to the wall outlet. Is the display
working?
Check to see if the wall outlet is connected to
household/mains electricity. Is electricity available to the wall
outlet?
Repair the household/mains electricity and reconnect the
vibration platform plug to the wall outlet. Is the display
working?
Check the fuse (see HOW TO REPLACE THE FUSE on
page 9). Is the fuse all right?
Go to step 3 Go to step 2
Go to step 9 Go to step 3
Go to step 5 Go to step 4
Go to step 10 Go to step 5
Go to step 7 Go to step 6
Go to step 9 Go to step 7
Contact
Customer Care
Go to step 8
See HOW TO REPLACE THE FUSE on page 9 and
8
9 Does the text on the console display normally? Go to step 11 Go to step 10
10
11
12
replace the fuse. Reconnect the vibration platform plug to
the wall outlet. Is the display working?
Switch the on/off switch to the off position and then switch
the on/off switch to the on position. Does the text on the
console display normally?
Check the Start and Stop buttons on the console.
Are these buttons stuck?
Program a vibration session as described on page 7. Do the
settings enter normally?
Go to step 9
Go to step 11
Contact
Customer Care
Go to step 13
Contact
Customer Care
Contact
Customer Care
Go to step 12
Contact
Customer Care
10
Page 13

STEP INSTRUCTIONS YES NO
ress the Start button. Does the vibration platform begin
13
P
unning?
r
Go to step 17 Go to step 14
Check the connection between the motor and the platform.
4
1
15
16
17
18 Does the time setting appear in the console display? Go to step 19
19
s the motor plug connected correctly and is it undam-
I
aged?
Unplug the vibration platform from the wall outlet. Repair
the motor plug, if possible. Is the connection between the
motor and the platform all right?
Reconnect the vibration platform plug to the wall outlet.
Press the Start button twice and test the vibration platform.
Does the vibration platform begin running?
Is the vibration platform operating normally, without any
unusual noise or vibration?
Program a vibration session as described on page 7.
Press the Start button. After a few seconds, press the Stop
button. Does the vibration platform stop running?
Contact
Customer Care
Go to step 16
Go to step 17
Go to step 18 Go to step 23
Go to step 20
o to step 15
G
Contact
Customer Care
Contact
Customer Care
Contact
Customer Care
Contact
Customer Care
20
21
22
23
24 Is any irregular and/or strange noise noticeable?
Press the Start button. Does the vibration session continue
as programmed?
Press the Stop button. Press the start button on the lower
right side of the frame. Does the vibration platform begin
running?
Check the start button on the lower right side of the frame.
The button should move freely. If the button is stuck,
loosen the button. Press the start button on the frame
again. Does the vibration platform begin running?
Make sure that the vibration platform is not touching any
surrounding objects and that there are no loose objects on
the platform. Make sure that all nuts and bolts are securely
tightened. Program a vibration session as described on
page 7 and press the Start button. Is any irregular vibration
noticeable?
Go to step 21
Operating
normally
Operating
normally
Contact
Customer Care
Contact
Customer Care
Contact
Customer Care
Go to step 22
Contact
Customer Care
Go to step 24
Operating
normally
11
Page 14

NOTES
12
Page 15

EXERCISE GUIDELINES WEEK 1
STEP UP/STEP DOWN
Hz: 30
Amplitude: L
ime:30 seconds
T
Rest: 30 seconds
Reps: 1
Movement: Dynamic
SQUAT
30
Hz:
Amplitude: L
Time: 30 seconds
Rest: 30 seconds
Reps: 1
Movement: Static
CALF RAISE
Hz: 30
Amplitude: L
Time: 30 seconds
Rest: 30 seconds
Reps: 1
Movement: Static
Stand on floor facing vibration platform, feet hipwidth apart. Engage abs.
Press Start and slowly
tep forward onto platform.
s
Follow with second foot.
Stand on platform, feet
hip-width apart in 130-degree squat. Engage abs
and maintain neutral head
and spine. Press Start and
Stand on platform, feet
hip-width apart in 130-degree squat. Rise up on
toes, engage abs, and
maintain neutral head and
Step down with lead foot
and follow with second
foot. Alternate stepping
and maintain controlled
reathing.
b
maintain controlled breathing while holding position.
For dynamic exercise, extend upward and slowly
lower to squat position.
spine. Press Start and
maintain controlled breathing while holding position.
For dynamic exercise, rise
to toes and lower slowly.
PUSH UP
Hz: 30
Amplitude: L
Time: 30 seconds
Rest: 30 seconds
Reps: 1
Movement: Dynamic
CRUNCH
Hz: 30
Amplitude: L
Time: 30 seconds
Rest: 30 seconds
Reps: 1
Movement: Dynamic
Place mat on platform.
Face vibration platform,
hands on platform shoulder-width apart. Extend to
plank position on toes,
chest over hands, arms
extended, maintaining a
straight spine and engag-
Place mat on platform. Sit
on platform facing side
ways, engage abs, and lift
feet off floor. Bend knees
and cross hands over
chest. Press start button
-
ing abs. Press start button
on frame and maintain
controlled breathing while
holding position. For dynamic exercise, slowly
lower body and return to
start position.
on frame and maintain
controlled breathing while
holding position. For dynamic exercise, slowly
lower upper body and re
turn to start position.
13
-
Page 16

WEEK 1
BICEPS CURL
Hz: 30
Amplitude: L
ime:30 seconds
T
Rest: 30 seconds
Reps: 1
Movement: Static
ABS BRIDGE
30
Hz:
Amplitude: L
Time: 30 seconds
Rest: 30 seconds
Reps: 1
Movement: Static
TRICEPS DIP
Hz: 30
Amplitude: L
Time: 30 seconds
Rest: 30 seconds
Reps: 1
Movement: Static
Stand on floor facing platform. Adjust straps to
elbow height. With feet
hip-width apart, stand in a
30-degree squat. Engage
1
abs and maintain a neutral
spine. With a strap in each
Place mat on platform.
Face platform. Place forearms on platform, elbows
shoulder-width apart.
Maintain contact with platform and grip lower portion
of frame. With feet on
Place mat on platform. Sit
on platform edge facing
away from vibration platform with legs extended,
heels on floor. Press start
button on frame, shift body
off platform, and lower
hand, palms face up, arms
bent to 90 degrees, and
elbows close to sides, pull
straps toward shoulders.
ress Start and maintain
P
controlled breathing while
holding position.
floor, elevate hips, bending
70 degrees at waist. Rise
on toes and engage abs.
Press start button on
frame and maintain controlled breathing while
holding position.
until elbows are bent 90
degrees. Maintain controlled breathing while
holding position. For dynamic exercise, slowly
lower body and return to
start position.
HAMSTRING
STRETCH
Hz: 35
Amplitude: L
Time: 30 seconds
Rest: 30 seconds
Reps: 1
Movement: Static
CALF MASSAGE
Hz: 50/M
Amplitude: L
Time: 30 seconds
Rest: 30 seconds
Reps: 1
Movement: Static
Stand on platform, facing
away from vibration plat
form, feet hip-width apart,
knees slightly bent. Push
Start button and slowly
bend forward at the waist,
Place mat on platform. Lie
on floor in front of vibration
platform with calves resting flat on platform. Press
-
extending hands to feet,
relaxing head and chin into
chest. Maintain controlled
breathing while holding position.
start button on frame and
maintain controlled breath
ing while holding position.
14
-
Page 17

EXERCISE GUIDELINES WEEK 2
STEP UP/STEP DOWN
Hz: 30
Amplitude: L
ime:45 seconds
T
Rest: 45 seconds
Reps: 1
Movement: Dynamic
SQUAT
30
Hz:
Amplitude: L
Time: 45 seconds
Rest: 45 seconds
Reps: 1
Movement: Static
CALF RAISE
Hz: 30
Amplitude: L
Time: 45 seconds
Rest: 45 seconds
Reps: 1
Movement: Static
Stand on floor facing vibration platform, feet hipwidth apart. Engage abs.
Press Start and slowly
tep forward onto platform.
s
Follow with second foot.
Stand on platform, feet
hip-width apart in 130-degree squat. Engage abs
and maintain neutral head
and spine. Press Start and
Stand on platform, feet
hip-width apart in 130-degree squat. Rise up on
toes, engage abs, and
maintain neutral head and
Step down with lead foot
and follow with second
foot. Alternate stepping
and maintain controlled
reathing.
b
maintain controlled breathing while holding position.
For dynamic exercise, extend upward and slowly
lower to squat position.
spine. Press Start and
maintain controlled breathing while holding position.
For dynamic exercise, rise
to toes and lower slowly.
PUSH UP
Hz: 30
Amplitude: L
Time: 45 seconds
Rest: 45 seconds
Reps: 1
Movement: Dynamic
CRUNCH
Hz: 30
Amplitude: L
Time: 45 seconds
Rest: 45 seconds
Reps: 1
Movement: Dynamic
Place mat on platform.
Face vibration platform,
hands on platform shoulder-width apart. Extend to
plank position on toes,
chest over hands, arms
extended, maintaining a
straight spine and engag-
Place mat on platform. Sit
on platform facing side
ways, engage abs, and lift
feet off floor. Bend knees
and cross hands over
chest. Press start button
-
ing abs. Press start button
on frame and maintain
controlled breathing while
holding position. For dynamic exercise, slowly
lower body and return to
start position.
on frame and maintain
controlled breathing while
holding position. For dynamic exercise, slowly
lower upper body and re
turn to start position.
15
-
Page 18

WEEK 2
BICEPS CURL
Hz: 30
Amplitude: L
ime:45 seconds
T
Rest: 45 seconds
Reps: 1
Movement: Static
ABS BRIDGE
30
Hz:
Amplitude: L
Time: 45 seconds
Rest: 45 seconds
Reps: 1
Movement: Static
TRICEPS DIP
Hz: 30
Amplitude: L
Time: 45 seconds
Rest: 45 seconds
Reps: 1
Movement: Static
Stand on floor facing platform. Adjust straps to
elbow height. With feet
hip-width apart, stand in a
30-degree squat. Engage
1
abs and maintain a neutral
spine. With a strap in each
hand, palms face up, arms
Place mat on platform.
Face platform. Place forearms on platform, elbows
shoulder-width apart.
Maintain contact with platform and grip lower portion
of frame. With feet on
Place mat on platform. Sit
on platform edge facing
away from vibration platform with legs extended,
heels on floor. Press start
button on frame, shift body
off platform, and lower
bent to 90 degrees, and
elbows close to sides, pull
straps toward shoulders.
Press Start and maintain
ontrolled breathing while
c
holding position.
floor, elevate hips, bending
70 degrees at waist. Rise
on toes and engage abs.
Press start button on
frame and maintain controlled breathing while
holding position.
until elbows are bent 90
degrees. Maintain controlled breathing while
holding position. For dynamic exercise, slowly
lower body and return to
start position.
HAMSTRING
STRETCH
Hz: 35
Amplitude: L
Time: 45 seconds
Rest: 45 seconds
Reps: 1
Movement: Static
CALF MASSAGE
Hz: 50/M
Amplitude: L
Time: 45 seconds
Rest: 45 seconds
Reps: 1
Movement: Static
Stand on platform, facing
away from vibration plat
form, feet hip-width apart,
knees slightly bent. Push
Start button and slowly
bend forward at the waist,
Place mat on platform. Lie
on floor in front of vibration
platform with calves resting flat on platform. Press
-
extending hands to feet,
relaxing head and chin into
chest. Maintain controlled
breathing while holding position.
start button on frame and
maintain controlled breath
ing while holding position.
16
-
Page 19

EXERCISE GUIDELINES WEEK 3
STEP UP/STEP DOWN
Hz: 30
Amplitude: L
ime:45 seconds
T
Rest: 45 seconds
Reps: 1
Movement: Dynamic
SQUAT
30
Hz:
Amplitude: L
Time: 45 seconds
Rest: 45 seconds
Reps: 1
Movement: Dynamic
CALF RAISE
Hz: 30
Amplitude: L
Time: 45 seconds
Rest: 45 seconds
Reps: 1
Movement: Static
Stand on floor facing vibration platform, feet hipwidth apart. Engage abs.
Press Start and slowly
tep forward onto platform.
s
Follow with second foot.
Stand on platform, feet
hip-width apart in 130-degree squat. Engage abs
and maintain neutral head
and spine. Press Start and
Stand on platform, feet
hip-width apart in 130-degree squat. Rise up on
toes, engage abs, and
maintain neutral head and
Step down with lead foot
and follow with second
foot. Alternate stepping
and maintain controlled
reathing.
b
maintain controlled breathing while holding position.
For dynamic exercise, extend upward and slowly
lower to squat position.
spine. Press Start and
maintain controlled breathing while holding position.
For dynamic exercise, rise
to toes and lower slowly.
PUSH UP
Hz: 30
Amplitude: L
Time: 45 seconds
Rest: 45 seconds
Reps: 1
Movement: Dynamic
CRUNCH
Hz: 30
Amplitude: L
Time: 45 seconds
Rest: 45 seconds
Reps: 1
Movement: Dynamic
Place mat on platform.
Face vibration platform,
hands on platform shoulder-width apart. Extend to
plank position on toes,
chest over hands, arms
extended, maintaining a
straight spine and engag-
Place mat on platform. Sit
on platform facing side
ways, engage abs, and lift
feet off floor. Bend knees
and cross hands over
chest. Press start button
-
ing abs. Press start button
on frame and maintain
controlled breathing while
holding position. For dynamic exercise, slowly
lower body and return to
start position.
on frame and maintain
controlled breathing while
holding position. For dynamic exercise, slowly
lower upper body and re
turn to start position.
17
-
Page 20

WEEK 3
BICEPS CURL
Hz: 30
Amplitude: L
ime:45 seconds
T
Rest: 45 seconds
Reps: 1
Movement: Static
UPRIGHT ROW
30
Hz:
Amplitude: L
Time: 45 seconds
Rest: 45 seconds
Reps: 1
Movement: Static
ABS BRIDGE
Hz: 30
Amplitude: L
Time: 45 seconds
Rest: 45 seconds
Reps: 1
Movement: Static
Stand on floor facing platform. Adjust straps to
elbow height. With feet
hip-width apart, stand in a
30-degree squat. Engage
1
abs and maintain a neutral
spine. With a strap in each
hand, palms face up, arms
Stand on floor facing vibration platform. With feet hipwidth apart, stand in 130degree squat. Adjust
upper body straps to waist
height and slide bar
Place mat on platform.
Face platform. Place forearms on platform, elbows
shoulder-width apart.
Maintain contact with platform and grip lower portion
of frame. With feet on
bent to 90 degrees, and
elbows close to sides, pull
straps toward shoulders.
Press Start and maintain
ontrolled breathing while
c
holding position.
through loops. Press Start,
engage abs and pull upward, leading with elbows.
Maintain controlled breathing while holding position.
floor, elevate hips, bending
70 degrees at waist. Rise
on toes and engage abs.
Press start button on
frame and maintain controlled breathing while
holding position.
TRICEPS DIP
30
Hz:
Amplitude: L
Time: 45 seconds
Rest: 45 seconds
Reps: 1
Movement: Static
SIDE PLANK
Hz:
30
Amplitude: L
Time: 30 seconds
Rest: 30 seconds
Reps: 1
Movement: Static
Place mat on platform. Sit
on platform edge facing
away from vibration platform with legs extended,
heels on floor. Press start
button on frame, shift body
off platform, and lower
Place mat on platform. Lie
on one side, place forearm
in center of platform and
rest other arm at side.
Place feet one in front of
other. Hips, torso, and
upper body form straight
until elbows are bent 90
degrees. Maintain controlled breathing while
holding position. For dynamic exercise, slowly
lower body and return to
start position.
line. Engage abs. Press
start button on frame and
maintain controlled breathing while holding position.
Repeat on other side.
18
Page 21

WEEK 3
IP STRETCH
H
Hz: 35
Amplitude: L
ime:30 seconds
T
Rest: 30 seconds
Reps: 1
Movement: Static
HAMSTRING
STRETCH
35
Hz:
Amplitude: L
Time: 45 seconds
Rest: 45 seconds
Reps: 1
Movement: Static
CALF MASSAGE
Hz: 50/M
Amplitude: L
Time: 60 seconds
Rest: 60 seconds
Reps: 1
Movement: Static
lace mat on platform.
P
Facing one side to platform, kneel on platform
with inside leg. Place out-
ide leg forward in lunge
s
position, both legs bent to
Stand on platform, facing
away from vibration platform, feet hip-width apart,
knees slightly bent. Push
Start button and slowly
bend forward at the waist,
Place mat on platform. Lie
on floor in front of vibration
platform with calves resting flat on platform. Press
0 degrees. Engage abs,
9
press Start, and maintain
controlled breathing while
holding position. Repeat
ith other leg.
w
extending hands to feet,
relaxing head and chin into
chest. Maintain controlled
breathing while holding position.
start button on frame and
maintain controlled breathing while holding position.
19
Page 22

EXERCISE GUIDELINES WEEK 4
STEP UP/STEP DOWN
Hz: 30
Amplitude: L
ime:45 seconds
T
Rest: 45 seconds
Reps: 1
Movement: Dynamic
SQUAT
30
Hz:
Amplitude: L
Time: 60 seconds
Rest: 60 seconds
Reps: 1
Movement: Dynamic
UNSUPPORTED
CALF RAISE
Hz: 30
Amplitude: L
Time: 45 seconds
Rest: 45 seconds
Reps: 1
Movement: Static
Stand on floor facing vibration platform, feet hipwidth apart. Engage abs.
Press Start and slowly
tep forward onto platform.
s
Follow with second foot.
Stand on platform, feet
hip-width apart in 130-degree squat. Engage abs
and maintain neutral head
and spine. Press Start and
Stand on platform, feet
hip-width apart in 130-degree squat. Rise up on
toes, engage abs, and
maintain neutral head and
spine. Release grip on
Step down with lead foot
and follow with second
foot. Alternate stepping
and maintain controlled
reathing.
b
maintain controlled breathing while holding position.
For dynamic exercise, extend upward and slowly
lower to squat position.
frame. Press Start and
maintain controlled breathing while holding position.
For dynamic exercise, rise
to toes and lower slowly.
PUSH UP
Hz: 30
Amplitude: L
Time: 60 seconds
Rest: 60 seconds
Reps: 1
Movement: Dynamic
CRUNCH
Hz: 30
Amplitude: L
Time: 45 seconds
Rest: 45 seconds
Reps: 1
Movement: Dynamic
Place mat on platform.
Face vibration platform,
hands on platform shoulder-width apart. Extend to
plank position on toes,
chest over hands, arms
extended, maintaining a
straight spine and engag-
Place mat on platform. Sit
on platform facing side
ways, engage abs, and lift
feet off floor. Bend knees
and cross hands over
chest. Press start button
-
ing abs. Press start button
on frame and maintain
controlled breathing while
holding position. For dynamic exercise, slowly
lower body and return to
start position.
on frame and maintain
controlled breathing while
holding position. For dynamic exercise, slowly
lower upper body and re
turn to start position.
20
-
Page 23

WEEK 4
BICEPS CURL
Hz: 30
Amplitude: L
ime:60 seconds
T
Rest: 60 seconds
Reps: 1
Movement: Static
UPRIGHT ROW
30
Hz:
Amplitude: L
Time: 60 seconds
Rest: 60 seconds
Reps: 1
Movement: Static
ABS BRIDGE
Hz: 30
Amplitude: L
Time: 60 seconds
Rest: 60 seconds
Reps: 1
Movement: Static
Stand on floor facing platform. Adjust straps to
elbow height. With feet
hip-width apart, stand in a
30-degree squat. Engage
1
abs and maintain a neutral
spine. With a strap in each
hand, palms face up, arms
Stand on floor facing vibration platform. With feet hipwidth apart, stand in 130degree squat. Adjust
upper body straps to waist
height and slide bar
Place mat on platform and
place core board lengthwise in front of platform.
Face platform. Place forearms on platform, elbows
shoulder-width apart.
Maintain contact with platform and grip lower portion
bent to 90 degrees, and
elbows close to sides, pull
straps toward shoulders.
Press Start and maintain
ontrolled breathing while
c
holding position.
through loops. Press Start,
engage abs and pull upward, leading with elbows.
Maintain controlled breathing while holding position.
of frame. With feet on
floor, elevate hips, bending
70 degrees at waist. Rise
on toes and engage abs.
Press start button on
frame and maintain controlled breathing while
holding position.
TRICEPS DIP
30
Hz:
Amplitude: L
Time: 60 seconds
Rest: 60 seconds
Reps: 1
Movement: Dynamic
SIDE PLANK
30
Hz:
Amplitude: L
Time: 45 seconds
Rest: 45 seconds
Reps: 1
Movement: Static
Place mat on platform. Sit
on platform edge facing
away from vibration platform with legs extended,
heels on floor. Press start
button on frame, shift body
off platform, and lower
Place mat on platform. Lie
on one side, place forearm
in center of platform and
rest other arm at side.
Place feet one in front of
other. Hips, torso, and
upper body form straight
until elbows are bent 90
degrees. Maintain controlled breathing while
holding position. For dynamic exercise, slowly
lower body and return to
start position.
line. Engage abs. Press
start button on frame and
maintain controlled breathing while holding position.
Repeat on other side.
21
Page 24

WEEK 4
HIP STRETCH
Hz: 35
Amplitude: L
Time: 45 seconds
Rest: 45 seconds
Reps: 1
Movement: Static
HAMSTRING
STRETCH
Hz: 35
Amplitude: L
Time: 60 seconds
Rest: 60 seconds
Reps: 1
Movement: Static
CALF MASSAGE
Hz: 50/M
Amplitude: L
Time: 60 seconds
Rest: 60 seconds
Reps: 1
Movement: Static
Place mat on platform.
acing one side to plat-
F
form, kneel on platform
with inside leg. Place outside leg forward in lunge
position, both legs bent to
Stand on platform, facing
away from vibration platform, feet hip-width apart,
knees slightly bent. Push
Start button and slowly
bend forward at the waist,
Place mat on platform. Lie
on floor in front of vibration
platform with calves resting flat on platform. Press
90 degrees. Engage abs,
ress Start, and maintain
p
controlled breathing while
holding position. Repeat
with other leg.
extending hands to feet,
relaxing head and chin into
chest. Maintain controlled
breathing while holding position.
start button on frame and
maintain controlled breathing while holding position.
22
Page 25

EXERCISE GUIDELINES WEEK 5
STEP UP/STEP DOWN
Hz: 30
Amplitude: L
ime:45 seconds
T
Rest: 45 seconds
Reps: 1
Movement: Dynamic
SQUAT
30
Hz:
Amplitude: H
Time: 60 seconds
Rest: 60 seconds
Reps: 1
Movement: Dynamic
UNSUPPORTED
CALF RAISE
Hz: 30
Amplitude: H
Time: 60 seconds
Rest: 60 seconds
Reps: 1
Movement: Static
Stand on floor facing vibration platform, feet hipwidth apart. Engage abs.
Press Start and slowly
tep forward onto platform.
s
Follow with second foot.
Stand on platform, feet
hip-width apart in 130-degree squat. Engage abs
and maintain neutral head
and spine. Press Start and
Stand on platform, feet
hip-width apart in 130-degree squat. Rise up on
toes, engage abs, and
maintain neutral head and
spine. Release grip on
Step down with lead foot
and follow with second
foot. Alternate stepping
and maintain controlled
reathing.
b
maintain controlled breathing while holding position.
For dynamic exercise, extend upward and slowly
lower to squat position.
frame. Press Start and
maintain controlled breathing while holding position.
For dynamic exercise, rise
to toes and lower slowly.
PUSH UP
Hz: 30
Amplitude: H
Time: 60 seconds
Rest: 60 seconds
Reps: 1
Movement: Dynamic
CRUNCH
Hz: 30
Amplitude: L
Time: 60 seconds
Rest: 60 seconds
Reps: 1
Movement: Dynamic
Place mat on platform.
Face vibration platform,
hands on platform shoulder-width apart. Extend to
plank position on toes,
chest over hands, arms
extended, maintaining a
straight spine and engag-
Place mat on platform. Sit
on platform facing side
ways, engage abs, and lift
feet off floor. Bend knees
and cross hands over
chest. Press start button
-
ing abs. Press start button
on frame and maintain
controlled breathing while
holding position. For dynamic exercise, slowly
lower body and return to
start position.
on frame and maintain
controlled breathing while
holding position. For dynamic exercise, slowly
lower upper body and re
turn to start position.
23
-
Page 26

WEEK 5
BICEPS CURL
0
Hz:3
mplitude:
A
Time: 60 seconds
Rest: 60 seconds
Reps: 1
Movement: Static
UPRIGHT ROW
30
Hz:
Amplitude: H
Time: 60 seconds
Rest: 60 seconds
Reps: 1
Movement: Static
ABS BRIDGE
Hz: 30
Amplitude: H
Time: 60 seconds
Rest: 60 seconds
Reps: 1
Movement: Static
H
Stand on the floor facing
platform. Adjust straps to
lbow height. With feet
e
ip-width apart, stand in a
h
130-degree squat. Engage
abs and maintain a neutral
spine. With a strap in each
hand, palms face up, arms
Stand on floor facing vibration platform. With feet hipwidth apart, stand in 130degree squat. Adjust
upper body straps to waist
height and slide bar
Place mat on platform.
Face platform. Place forearms on platform, elbows
shoulder-width apart.
Maintain contact with platform and grip lower portion
of frame. With feet on
bent to 90 degrees, and
elbows close to sides, pull
traps toward shoulders.
s
ress Start and maintain
P
controlled breathing while
holding position.
through loops. Press Start,
engage abs and pull upward, leading with elbows.
Maintain controlled breathing while holding position.
floor, elevate hips, bending
70 degrees at waist. Rise
on toes and engage abs.
Press start button on
frame and maintain controlled breathing while
holding position.
TRICEPS DIP
Hz: 30
Amplitude: H
Time: 60 seconds
Rest: 60 seconds
Reps: 1
Movement: Dynamic
SIDE PLANK
Hz:
30
Amplitude: H
Time: 60 seconds
Rest: 60 seconds
Reps: 1
Movement: Static
Place mat on platform. Sit
on platform edge facing
away from vibration platform with legs extended,
heels on floor. Press start
button on frame, shift body
off platform, and lower
Place mat on platform. Lie
on one side, place forearm
in center of platform and
rest other arm at side.
Place feet one in front of
other. Hips, torso, and
upper body form straight
until elbows are bent 90
degrees. Maintain controlled breathing while
holding position. For dynamic exercise, slowly
lower body and return to
start position.
line. Engage abs. Press
start button on frame and
maintain controlled breathing while holding position.
Repeat on other side.
24
Page 27

WEEK 5
INGLE LEG SQUAT
S
0
Hz:3
Amplitude: L
Time: 30 seconds
Rest: 30 seconds
Reps: 1
Movement: Static
HIP STRETCH
Hz: 35
Amplitude: L
Time: 45 seconds
Rest: 45 seconds
Reps: 1
Movement: Static
HAMSTRING
STRETCH
Hz: 35
Amplitude: L
Time: 60 seconds
Rest: 60 seconds
Reps: 1
Movement: Static
tand on platform side-
S
ways with inside foot in
enter of platform. Bend
c
knee of inside leg to 130degree squat. Hold other
foot off platform in front for
balance. Engage abs.
Place mat on platform.
Facing one side to platform, kneel on platform
with inside leg. Place outside leg forward in lunge
position, both legs bent to
Stand on platform, facing
away from vibration platform, feet hip-width apart,
knees slightly bent. Push
Start button and slowly
bend forward at the waist,
ress Start and maintain
P
controlled breathing while
olding position. For dy-
h
namic exercise, lower to
90-degree squat and extend slowly.
90 degrees. Engage abs,
press Start, and maintain
controlled breathing while
holding position. Repeat
with other leg.
extending hands to feet,
relaxing head and chin into
chest. Maintain controlled
breathing while holding position.
GLUTE STRETCH
Hz: 35
Amplitude: L
Time: 45 seconds
Rest: 45 seconds
Reps: 1
Movement: Static
CALF MASSAGE
Hz: 50/M
Amplitude: L
Time: 60 seconds
Rest: 60 seconds
Reps: 1
Movement: Static
Sit sideways on platform,
drop outside leg, and bring
knee to the floor. Place inside leg on platform,
slightly bent. Bend forward
Place mat on platform. Lie
on floor in front of vibration
platform with calves resting flat on platform. Press
at the waist, press start
button on frame, and
maintain controlled breathing while holding position.
Repeat with other leg.
start button on frame and
maintain controlled breathing while holding position.
25
Page 28

EXERCISE GUIDELINES WEEK 6
STEP UP/STEP DOWN
0
Hz:3
mplitude:
A
Time: 45 seconds
Rest: 45 seconds
Reps: 1
Movement: Dynamic
SQUAT
Hz: 30
Amplitude: H
Time: 60 seconds
Rest: 60 seconds
Reps: 1
Movement: Dynamic
UNSUPPORTED
CALF RAISE
Hz: 30
Amplitude: L
Time: 60 seconds
Rest: 60 seconds
Reps: 1
Movement: Static
L
Stand on floor facing vibration platform, feet hip-
idth apart. Engage abs.
w
ress Start and slowly
P
step forward onto platform.
Follow with second foot.
Stand on platform, feet
hip-width apart in 130-degree squat. Engage abs
and maintain neutral head
and spine. Press Start and
Stand on platform, feet
hip-width apart in 130-degree squat. Rise up on
toes, engage abs, and
maintain neutral head and
spine. Release grip on
Step down with lead foot
and follow with second
oot. Alternate stepping
f
nd maintain controlled
a
breathing.
maintain controlled breathing while holding position.
For dynamic exercise, ex
tend upward and slowly
lower to squat position.
frame. Press Start and
maintain controlled breathing while holding position.
For dynamic exercise, rise
to toes and lower slowly.
-
PUSH UP
30
Hz:
Amplitude: L
Time: 60 seconds
Rest: 60 seconds
Reps: 1
Movement: Dynamic
CRUNCH
Hz: 30
Amplitude: L
Time: 60 seconds
Rest: 60 seconds
Reps: 1
Movement: Dynamic
Place mat on platform.
Face vibration platform,
hands on platform shoulder-width apart. Extend to
plank position on toes,
chest over hands, arms
extended, maintaining a
straight spine and engag-
Place mat on platform. Sit
on platform facing sideways, engage abs, and lift
feet off floor. Bend knees
and cross hands over
chest. Press start button
ing abs. Press start button
on frame and maintain
controlled breathing while
holding position. For dynamic exercise, slowly
lower body and return to
start position.
on frame and maintain
controlled breathing while
holding position. For dynamic exercise, slowly
lower upper body and return to start position.
26
Page 29

WEEK 6
BICEPS CURL
Hz: 30
Amplitude: L
ime:60 seconds
T
Rest: 60 seconds
Reps: 1
Movement: Static
UPRIGHT ROW
30
Hz:
Amplitude: L
Time: 60 seconds
Rest: 60 seconds
Reps: 1
Movement: Static
ABS BRIDGE
Hz: 30
Amplitude: L
Time: 60 seconds
Rest: 60 seconds
Reps: 1
Movement: Static
Stand on floor facing platform. Adjust straps to
elbow height. With feet
hip-width apart, stand in a
30-degree squat. Engage
1
abs and maintain a neutral
spine. With a strap in each
hand, palms face up, arms
Stand on floor facing vibration platform. With feet hipwidth apart, stand in 130degree squat. Adjust
upper body straps to waist
height and slide bar
Place mat on platform.
Face platform. Place forearms on platform, elbows
shoulder-width apart.
Maintain contact with platform and grip lower portion
of frame. With feet on
bent to 90 degrees, and
elbows close to sides, pull
straps toward shoulders.
Press Start and maintain
ontrolled breathing while
c
holding position.
through loops. Press Start,
engage abs and pull upward, leading with elbows.
Maintain controlled breathing while holding position.
floor, elevate hips, bending
70 degrees at waist. Rise
on toes and engage abs.
Press start button on
frame and maintain controlled breathing while
holding position.
TRICEPS DIP
Hz: 30
Amplitude: L
Time: 60 seconds
Rest: 60 seconds
Reps: 1
Movement: Dynamic
SIDE PLANK
Hz:
30
Amplitude: L
Time: 60 seconds
Rest: 60 seconds
Reps: 1
Movement: Static
Place mat on platform. Sit
on platform edge facing
away from vibration platform with legs extended,
heels on floor. Press start
button on frame, shift body
off platform, and lower
Place mat on platform. Lie
on one side, place forearm
in center of platform and
rest other arm at side.
Place feet one in front of
other. Hips, torso, and
upper body form straight
until elbows are bent 90
degrees. Maintain con
trolled breathing while
holding position. For dynamic exercise, slowly
lower body and return to
start position.
line. Engage abs. Press
start button on frame and
maintain controlled breathing while holding position.
Repeat on other side.
-
27
Page 30

WEEK 6
SINGLE LEG SQUAT
35
Hz:
mplitude:
A
Time: 45 seconds
Rest: 45 seconds
Reps: 1
Movement: Dynamic
HIP STRETCH
Hz: 35
Amplitude: L
Time: 60 seconds
Rest: 60 seconds
Reps: 1
Movement: Static
HAMSTRING
STRETCH
Hz: 35
Amplitude: L
Time: 60 seconds
Rest: 60 seconds
Reps: 1
Movement: Static
L
Stand on platform sideways with inside foot in
center of platform. Bend
nee of inside leg to 130-
k
degree squat. Hold other
foot off platform in front for
balance. Engage abs.
Place mat on platform.
Facing one side to platform, kneel on platform
with inside leg. Place outside leg forward in lunge
position, both legs bent to
Stand on platform, facing
away from vibration platform, feet hip-width apart,
knees slightly bent. Push
Start button and slowly
bend forward at the waist,
Press Start and maintain
controlled breathing while
holding position. For dy-
amic exercise, lower to
n
90-degree squat and extend slowly.
90 degrees. Engage abs,
press Start, and maintain
controlled breathing while
holding position. Repeat
with other leg.
extending hands to feet,
relaxing head and chin into
chest. Maintain controlled
breathing while holding position.
GLUTE STRETCH
Hz: 35
Amplitude: L
Time: 45 seconds
Rest: 45 seconds
Reps: 1
Movement: Static
CALF MASSAGE
Hz:
50/M
Amplitude: L
Time: 60 seconds
Rest: 60 seconds
Reps: 1
Movement: Static
Sit sideways on platform,
drop outside leg, and bring
knee to the floor. Place inside leg on platform,
slightly bent. Bend forward
Place mat on platform. Lie
on floor in front of vibration
platform with calves resting flat on platform. Press
start button on frame and
maintain controlled breathing while holding position.
at the waist, press start
button on frame, and
maintain controlled breathing while holding position.
Repeat with other leg.
28
Page 31

HOW TO ORDER REPLACEMENT PARTS
To order replacement parts for the vibration platform, please see HOW TO CONTACT CUSTOMER CARE on
page 2 of this manual.
29
Page 32

FreeMotion Fitness, Inc. • 1096 Elkton Drive, Suite 600 • Colorado Springs, CO 80907
Part No. CC7284 R0307A Printed in USA © 2007 ICON IP, Inc.
 Loading...