

Freeman PE4118GF User Manual
MODEL: PE4118GF
4-IN-1 18 GA CORDLESS
FLOORING NAILER/
STAPLER
PE4118GF-V1 08/18

MODEL: PE4118GF MODEL: PE4118GF
CHANGE THE NOSE COVER
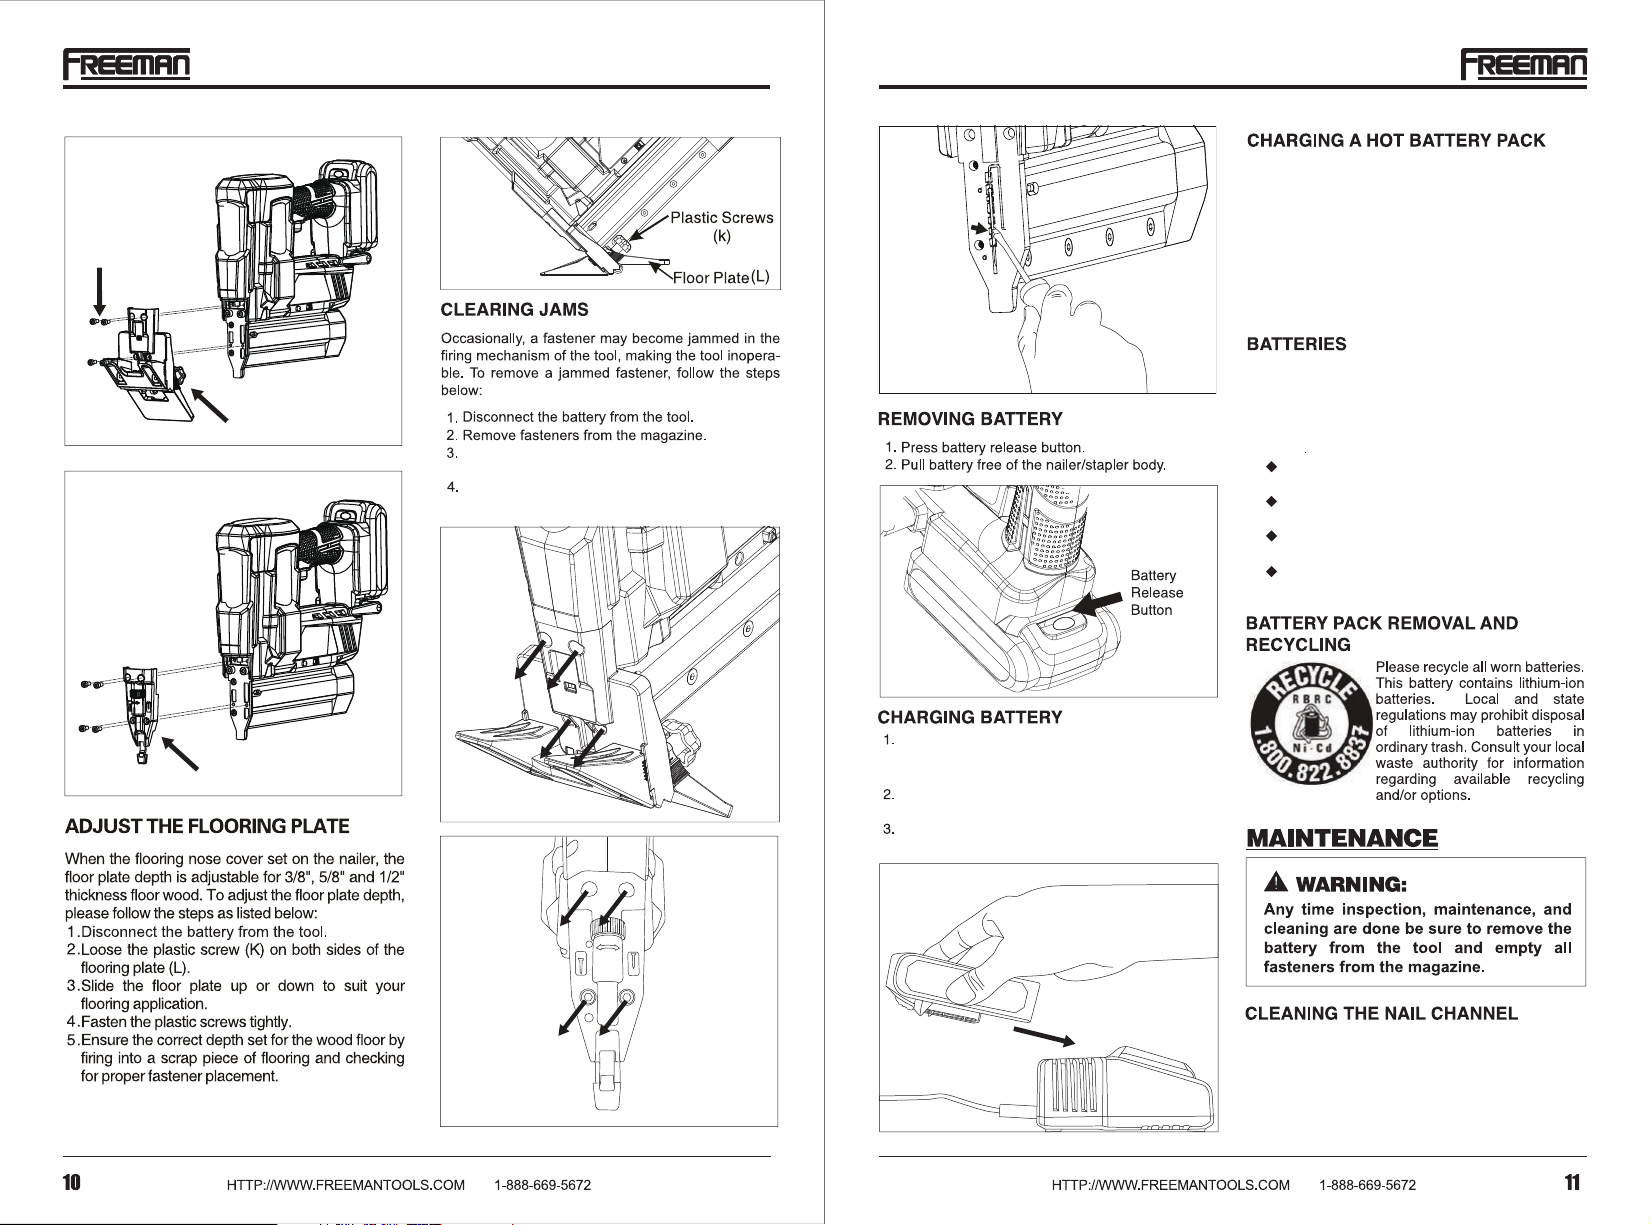
ADJUST THE FLOORING PLATE
REMOVING BATTERY
This product can expose you to chemicals including lead, which is known to
the State of California to cause cancer
and birth defects or other reproductive
harm. For more information, go to
www.P65Warnings.ca.gov.
MODEL: PE4118GF MODEL: PE4118GF
45º
MODEL: PE4118GF MODEL: PE4118GF
.
.
.
.
100V-240V, 50/60Hz
20V, 36Wh
45 min
6.88 lbs
.
.
MODEL: PE4118GF MODEL: PE4118GF
*
Work Contact Element is only available with the
*
straight nose piece.
Depth of Drive is only available with the straight
*
nose piece.
No-Mar Pad is only available with the straight
*
nose piece.
1.
Disconnect the battery from the tool.
2.
Remove fasteners from the tool. Failure to
do so will cause the fasteners to eject from
the front of the tool.
3.
Remove four bolts on the nose of the tool.
4.
Remove the 45º flooring attachment.
5.
Attach the straight nose piece by screwing in
four bolts on the nose of the tool.
Four Bolts
45° Flooring Attachment
MODEL: PE4118GF MODEL: PE4118GF
Remove the four bolts on nose cover or 45º
flooring attachment with a hex wrench.
Use a flat screw driver to remove the jammed
fastener and push the drive blade back into place.
After a tool has been used for a prolong amount of
time, the batteries in the battery pack will become
hot. This only occurs when the tool has been used
continuously for a extended period of time. When
the battery becomes hot, let it cool for 30 minutes
before recharging. Refer to the CHARGING
BATTERY section for normal charging of batteries.
If the charger does not charge your battery under
normal circumstances, contact the authorized
dealer.
These batteries will wear out over time, like all
batteries. If this happens, do not disassemble the
battery and attempt to fix it. This could cause
serious burns especially when wearing rings and
jewelry. To have the longest possible battery life, we
suggest the following.
Once a battery pack has been fully charged,
remove it from the charger.
The battery should be stored in a temperature
that is below 80°F and away from moisture.
Batteries should be stored with a 30%-50%
charge.
If a battery has been stored for six months or
more, charge the battery as normal.
Regular Nose Cover
45° Flooring Attachment
Regular Nose Cover
To charge the battery, line up the slot of the
battery with the slot of the charger and slide into
place.
The battery indication light should turn from green
to red when the battery is charging.
When the indication light has turned green, the
battery should be fully charged.
Problems with driving nails or cycling of nails while
firing may be due to glue residue from the nail strips.
If this is the case, clean
mechanism.
the area around the driving
MODEL: PE4118GF MODEL: PE4118GF
Remove the tool battery.
Slide magazine cover down to remove nails and
expose the nail channel.
Use a small amount of air tool oil on a clean cloth
to swab and wipe down the nail channel, untill all
traces of glue are removed.
Reinstall nails in the magazine and close the
magazine cover.
1.
Before using the tool, be sure to keep it as warm
as possible.
2.
Fire the tool into a scrap piece of material 5 to 6
times.
 Loading...