


Instructions
for
Use

Freedom Innovations | Kinnex | Instructions for Use
Contents
System Components 4
Terms/Symbols Used In This Guide 4
Warnings/Safety Precautions 6
Product Description 7
Intended Use 7
Indications 7
Product Specications 7
Physical Properties 7
Environmental 7
Basic Operations 8
Manual Adjustments 8
Button Symbols and Functions 8
Battery Function 8
LED Button Quick Reference Sheet 10
Changing Footwear/Shoe Selection 12
Apparel Assist Mode 12
Manual Lock Feature 12
Long Term Storage Mode 13
Kinnex App for Patients 14
Downloading and Launching App 14
Connecting & Pairing via Kinnex App 14
Check Battery Charge Level via Kinnex App 14
Change Footwear Option via Kinnex App 14
Making Minor Adjustment via Kinnex App 15
Connecting/Tools via Kinnex App 15
Tools Utilization within Kinnex App 15
Warranty 16
Technical Support 16
Electromagnetic Compatibility Precautions 17
Kinnex Product Detail 18
2
System Components
Freedom Innovations | Kinnex | Instructions for Use
Part Description
Kinnex Battery Wall Charger F14-00-CHRG1-00 YES 1 YES
Universal wall adapters F14-00-ADAPT-00 YES 1 YES
Kinnex IFU R-720-239 YES 1 YES
Kinnex User Guide R-720-241 YES 1 YES
Kinnex Certied Prosthetist Set up Guide R-720-240 YES 1 YES
Footshell Varies YES 1 YES
Part Number
Included w/Kinnex Qty Available/Sold Separately
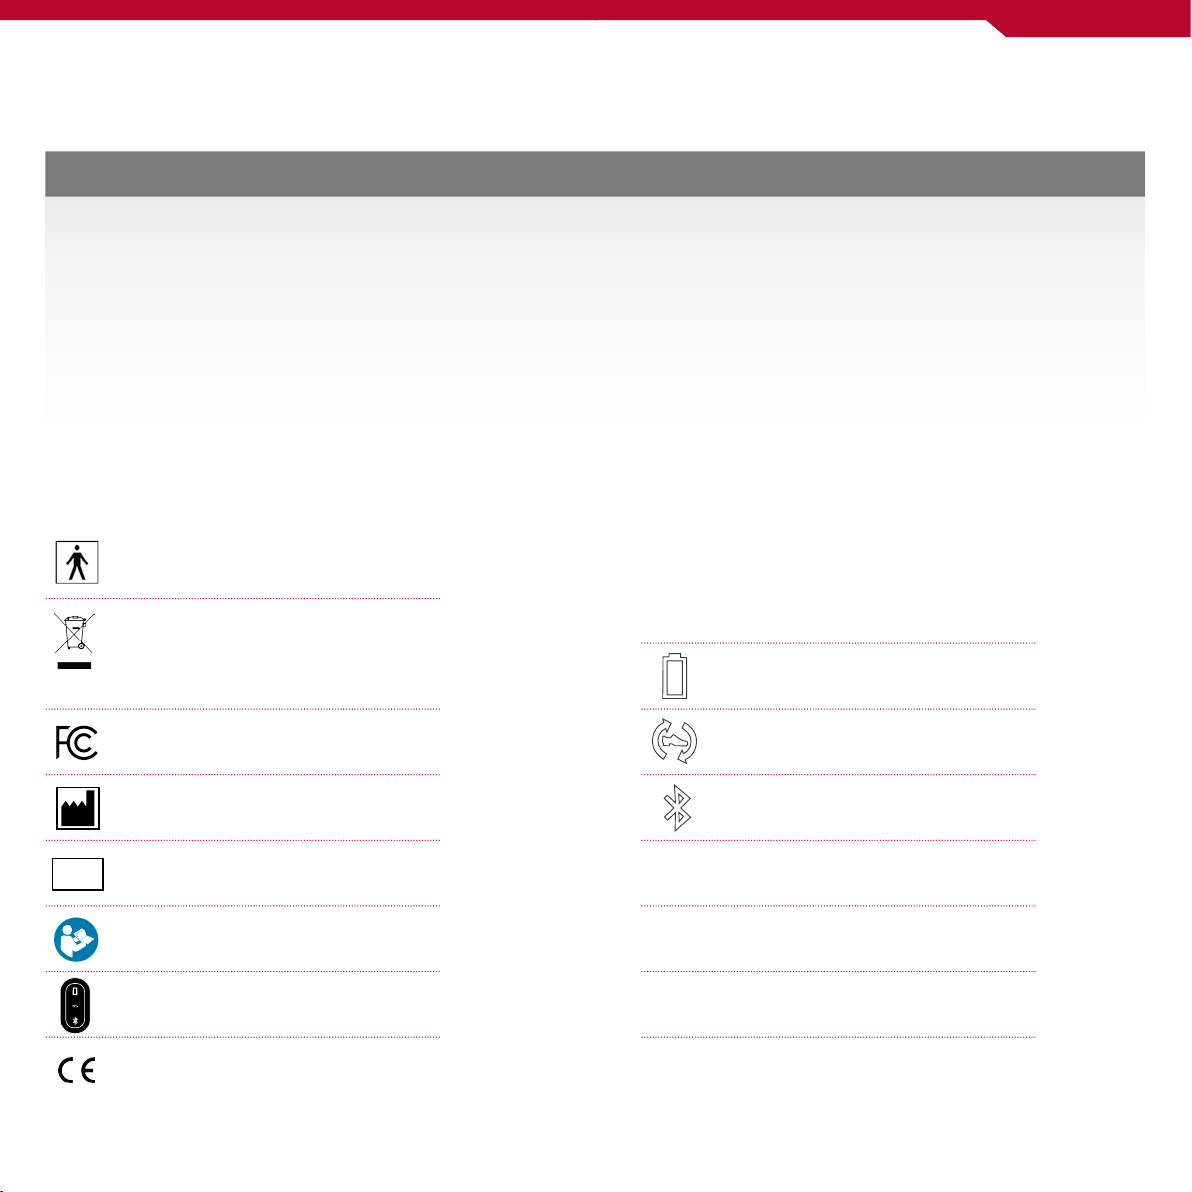
Terms/Symbols Used In This Guide
Type BF applied part
WEEE Directive on waste electrical and
electronic equipment, which should not be
disposed of in regular wastes at the end
of its usable life
FCC Declaration of Conformity
Battery
Change footwear
Manufacturer
N
Serial number
S
Consult operating instructions
Key Pad Function
CEMark
CP
Kinnex
Don
Do
Bluetooth
Certied Prosthetist
Kinnex Ankle/Foot System
Put on
Take o
54
Freedom Innovations | Kinnex | Instructions for Use
Product Description
Kinnex is a microprocessor controlled hydraulic ankle/foot that
monitors sensors to control plantar and dorsiexion resistance.
Intended Use
Kinnex is intended for use by individuals with lower limb amputations
who would benet from improved gait dynamics.
Warnings / Safety Precautions
• Failure to comply with safety precautions can result in Kinnex
malfunctioning and risk of injury to the user.
• Always exercise good judgment and common sense when using
Kinnex.
• Initial operating of Kinnex should be done in the presence of a
trained care professional.
• Do not attempt to open or modify any component of Kinnex.
• If any issues or concerns with the Kinnex arise, contact Prosthetist
for assistance. DO NOT attempt to make technical repairs.
• Cover Kinnex with a foot cover while in use to prevent foreign
objects from being lodged in joints.
• Engage Kinnex Manual Lock when driving a vehicle.
(see “Manual Lock”)
Improper and unsafe use of Kinnex may result in injury. Please read
•
the instruction manual thoroughly before using.
• Do not use Kinnex while the battery is charging. Be sure to
disconnect it from the charger prior to putting on the prosthesis.
• If it becomes necessary to isolate Kinnex from the mains while
charging, unplug the battery charger.
• If unusual movement or product wear is detected in a structural
part of a prosthesis at any time, immediately discontinue use of
the device and consult a clinical specialist.
• Do not use if Kinnex enclosure or covers are broken.
• Kinnex contains a Lithium-ion battery that is not eld replaceable
and requires factory service for repair. Lithium-ion batteries contain
hazardous metals and should never be disposed of in residential
or commercial garbage. They should never be incinerated because
they may explode. Reference local regulations for proper disposal
of product.
• Kinnex contains small parts and cords that can be a potential
choking hazard.
• Kinnex is not for running, jumping or high activity usage.
Indications
Kinnex is indicated for use as a component in a prosthetic leg for
individuals with lower limb deciency including:
• Persons or Individuals with unilateral or bilateral transtibial and
transfemoral amputations
• Individuals with congenital limb loss below the knee
Product Technical Specs
Kinnex is tested and compliant with the following standards
• IEC/EN 60601-1 • MDD 93/42/EEC
• ISO 10328 • ISO 13485
Physical Properties
Weight Limit for low activity users: 125 kg
Weight Limit for moderate activity users: 100 kg
Average Product Weight: 1.49 kg (without footshell)
Build Height: 186 mm
Heel height adjustability: 0 – 51 mm
Suitable for ambulatory level: K3
Environmental
• Operating Temperature Range: 0 to 45 °C
• Storage Temperature Range: -20 to 80 °C
• Humidity Range: 0 – 100%
• Altitude Range: 0 – 5,000 m
• Weather resistance: rated to IP67
- Kinnex is safe for occasional contact with fresh water (up to 1 m
for up to 30 minutes). If Kinnex was in contact with water, the user
should dry the ankle with a towel once out of the water.
- Kinnex should not be used for bathing.
- Kinnex should not be immersed in saltwater or chlorinated water as
these may cause corrosion. Failure to comply will void the warranty.
- If Kinnex is sprayed by or accidentally submerged in salt water or
chlorinated water, immediately rinse with fresh water and allow to dry.
76

Freedom Innovations | Kinnex | Instructions for Use
Basic Operations
Manual Adjustments
To manually adjust Kinnex, utilize the three buttons on the front
of Kinnex. The buttons are used to control and interact with Kinnex
when a mobile device is not available or desired.
Button Symbols and Functions
• Battery/Power Status Button
• Change Footwear Button
• Bluetooth Button
Battery Function
Charging Battery
• To charge the battery:
- Remove the rubber plug from the port at the top front of the ankle.
- Connect either to wall or car power supply provided with Kinnex.
• The green battery indicator light at the front of the ankle
will begin to ash indicating that the ankle is charging. After
a short period of time, the indicator light will turn o but
charging will continue. While charging, the indicator light
can be turned back on by pressing and releasing the battery
button on the front of the ankle. The duration of the ash
indicates the amount of charge in the battery. The longer the
ash, the closer the battery is to being charged.
- Once the ankle is completely charged, the indicator light will be
solid green when the button is pressed and released.
• A full charge requires three hours or less using the
wall power supply.
Caution: Use only the wall power supply provided with Kinnex for
battery charging.
Battery Charge Level
• To manually check the charge level of Kinnex when unplugged
(discharging) using the button located on the front of the ankle:
- Press and release the battery button on the front of the ankle.
- Indicator lights will illuminate briey giving the charge level as
shown in table below:
Indicator Light Charge Level
Solid green
Flashing green
Solid red
Flashing red
51% – 100%
31% – 50%
11% – 30%
1% – 10%
• To manually check the charge level of Kinnex while charging
(plugged in):
- Press and release the battery button on the front of the ankle.
- The green indicator light will ash briey. The longer the ash,
the closer the battery is to being charged.
A solid light indicates the battery is fully charged.
Battery Low Indicators
10% charge indicator: When the battery charge level reaches 10%,
•
the indicator light at the front of the ankle will ash red, and the
ankle will go into a low battery mode in order to provide an alert
that the battery is about to be fully depleted.
• 2% charge indicator: When the battery charge level reaches 2%,
the ankle will power o and go into a low stiness mode.
• Note: If the ankle goes into the low battery mode or powers o and
the battery cannot be charged at that time, the prosthetic wearer
can change shoes to those with the same heel height as the shoes
used during the initial dynamic alignment (typically 10 mm) and
engage the Manual Lock.
98

LED Button Quick Reference Sheet
Each button on Kinnex incorporates one or more indicator lights to
indicate the status of Kinnex. The table below lists what the indicator
lights mean.
Indicator Light Location Meaning Action
Solid green Battery button Battery is fully charged Kinnex is fully charged and
Freedom Innovations | Kinnex | Instructions for Use
ready to use
Flashing green Battery button Charging (plugged in):
Battery is charging
Plugged in (discharging):
Battery charge level has
dropped below 50%
Solid red Battery button Battery charge level is low Charge battery as soon as
Flashing red Battery button Battery is depleted;
Kinnex is set to a constant
resistance
Solid white Change footwear button Apparel Assist is engaged Kinnex is ready to do apparel
Flashing white Change footwear button Manually adjusting footwear Stand evenly weighted and wait
Solid blue Bluetooth button Connected in clinician mode Clinician can congure Kinnex;
Flashing blue Bluetooth button Ready for clinician mode connection Clinician can connect to Kinnex;
Charging (plugged in):
Continue charging battery until
solid green light for full charge
Unplugged (discharging):
Charge the battery in the next
few hours
possible
Engage manual lock, change
footwear if necessary and charge
battery as soon as possible
5 seconds
to exit, press Bluetooth button for
3 seconds until the Blue indicator
light turns o
to exit, press Bluetooth button for
3 seconds until the Blue indicator
light turns o
Alternating red and white Battery and change footwear
buttons
Alternating red and blue Battery and Bluetooth buttons Kinnex system error Contact Prosthetist
User:
Attempt to change footwear failed
Prosthetist:
Sensor calibration failed
User:
Repeat change
Prosthetist:
Repeat sensor calibration process
1110

Freedom Innovations | Kinnex | Instructions for Use
Changing Footwear/Shoe Selection
The change footwear button will allow you to manually change
your footwear without use of the Kinnex App:
• Follow these steps to manually change footwear.
1. Don Kinnex with new footwear
2. Press and hold the change footwear button until the
.
indicator light in the button begins to ash white.
3. Once the white indicator light begins to ash, stand with
toes even and with feet shoulder width apart.
4. Remain still until the white indicator light stops ashing.
(Usually takes <5 seconds.)
5. If Kinnex ankle cannot adjust within 10 seconds it will
indicate an error condition by alternating ashing of the
white and red indicator lights. The error light indicatorwill
ash for 15 seconds or until the change footwear button
his pressed and released.
Apparel Assist Mode
Apparel Assist is designed to help in putting on clothes or
footwear. When active Kinnex will stay in the current position
until the change footwear button is pressed or until weight is
put on it.
• To manually use Apparel Assist:
1. Move Kinnex to the desired orientation.
2. Quickly press and release the change footwear (middle)
button 2 times.
3. The change footwear button white indicator light will turn
on while Kinnex is in Apparel Assist mode.
4. Don apparel as needed.
5. Press and release the change footwear (middle) button
1 time to release Kinnex.
6. The white indicator light will turn o upon completion.
Manual Lock Feature
(See Kinnex Product Detail page 18)
The Manual Lock pull ring located on the rear of the Kinnex
allows for manual locking of Kinnex without use of the Kinnex
App. This feature will lock the ankle at the “neutral position”
(90° angle with 10 mm heel).
To engage Manual Lock:
1. Fully unweight Kinnex.
2. Remove the pull ring from the housing at the back of the ankle.
3. Pull upward on the ring until a click is heard.
4. Rotate the ankle to a neutral position (90° angle with 10 mm heel)
until another click is heard and the ankle no longer moves.
5. Snap the pull ring back into the housing.
To disengage Manual Lock:
1. Fully unweight Kinnex.
2. Remove the pull ring from the housing at the back of the ankle.
3. Pull upward on the ring until a click is heard. The ankle should now
move freely.
4. Snap the pull ring back into the housing.
Caution:
Engaging the Manual Lock feature for driving and when battery level is
low or completely depleted is required.
Long-Term Storage Mode
If Kinnex needs to be stored for more than 60 days, it should be put into
long-term storage mode to avoid over discharge of the battery pack.
• To put Kinnex into long-term storage mode:
1. Press and hold both the Change Footwear and the Bluetooth
Buttons simultaneously for 6 seconds.
2. After 6 seconds, all three lights will ash on and o
simultaneously as an indicator that the command was successful.
3. After the lights turn o Kinnex will enter into longer term storage
mode and power o.
• To bring the ankle out of long-term storage mode:
1. Charge the battery as you normally would by removing the rubber
plug from the port at the top front of the ankle and connect the
wall power supply provided with Kinnex.
2. The green indicator light at the front of the ankle will begin to
ash indicating that the ankle is charging and powered on.
1312

Freedom Innovations | Kinnex | Instructions for Use
Kinnex App for Patients
The Kinnex App for patients will allow patient to change the following
settings of the product via app:
• Check battery charge level.
• Change footwear options.
• Make minor adjustment to the ankle settings based on established
settings made by Prosthetist.
• NOTE: User will not be able to connect via the Kinnex App when
Kinnex is in wireless “Clinician Mode”. (A blinking blue light on
the ankle will indicate that Kinnex is in “Clinician Mode.” To exit
“Clinician Mode,” press and hold the Bluetooth button until the
blue light turns o.)
Downloading and Launching App
Download the Kinnex App from the Apple App Store or the Google
•
Play App Store.
Connecting and Pairing to Kinnex via Kinnex App
• Once App is open, tap the “Connect” button.
• Tap the serial number (or custom name) of the ankle to connect.
Note: When connecting to Kinnex with mobile device for the rst
•
time, the Kinnex App will instruct to press the Bluetooth button
to acknowledge the pairing request. If the pairing request is not
acknowledged within 30 seconds, the connection attempt will fail.
Making Minor Adjustment to Kinnex via Kinnex App
By utilizing the “Adjust” feature in the Kinnex App, minor
adjustments to the ankle setting can be made based on
Adjust
established settings made by the Prosthetist. To do this, select
the “Adjust” button in the Kinnex App.
• From here the user will be able to increase or decrease
the adjustments to the Heel, Ankle, and Toe based on
parameters established by the Prosthetist.
Connecting/Tools via Kinnex App
Selecting the “Tools” Button in the App will allow access to
the following:
Tools
• Apparel Assist Mode
• Disconnecting from Kinnex
• Unpairing and disconnecting with Kinnex
Tools Utilization within Kinnex App
The following features are available within the Tools Section of the
Kinnex App.
Apparel Assist Mode
When activated, the Apparel Assist Mode will maintain Kinnex
in its current position until one of the following occurs:
• The button is deactivated in the App.
• The change footwear button is pressed.
• Weight is put on the Kinnex.
Check Battery Charge Level via Kinnex App
Check the battery charge level of Kinnex by selecting the
“Status” button in the Kinnex App.
Status
Change Footwear Option via Kinnex App
Change footwear option by selecting the “Footwear” button in
the Kinnex App. Once inside the “Shoes” Window, simply click
Shoes
on shoe of choice.
Disconnect
The Disconnecting feature will disconnect the app from Kinnex.
However it will not unpair Kinnex from the App. This will allow
connection without repairing at a later time.
Unpair and Disconnect
The unpair and disconnect feature will unpair and disconnect
the App from Kinnex. A window will pop up requesting to
conrm unpairing prior to proceeding. If Kinnex is unpaired
from the App and assistance is required, please contact
Prosthetist.
1514

Freedom Innovations | Kinnex | Instructions for Use
Warranty
See terms of Warranty for details.
Technical Support
• For User Support, please contact Prosthetist.
• For Prosthetist Technical Support, please contact
Freedom Innovations toll-free at +31 53 20 30 300.
Electromagnetic Compatibility Precautions
The Freedom Kinnex™ microprocessor ankle/foot system needs special
precautions regarding electromagnetic compatibility (EMC).
Specically it needs to be installed and put into service according to
the EMC information provided as follows:
• Kinnex may be susceptible to electromagnetic interference from
portable and mobile RFcommunications devices such as mobile
(cellular) telephones.
• Kinnex may be interfered with by other equipment, even if that
other equipment complies with CISPR EMISSION requirements.
This device complies with Part 15 of the FCC Rules. Operation is
•
subject to the following two conditions:
(1) this device may not cause harmful interference, and
(2) this device must accept any interference received, including
interference that may cause undesired operation.
Emissions
Test
RF Emissions
EN 55011/CISPR
RF Emissions
EN 55011/CISPR
Compliance
Group 1 Kinnex uses RF energy only for its
Class B Kinnex is suitable for use in all
Electromagnetic Environment –
Guidance
internal function. Therefore, its RF
emissions are low and are not likely
to cause any interference in nearby
electronic equipment.
establishments, including domestic
establishments and those directly
connected to the public low-voltage
power supply network that supplies
buildings used for domestic purposes.
Guidance and Manufacturer’s Declaration
– Electromagnetic Emissions
Kinnex is intended for use in the electromagnetic environment
specied below. The customer or user of Kinnex should assure that
it is used in such an environment.
CE Conformity
The Freedom Kinnex is tested and certied to comply with
the MDD 93/42/EEC (EN 55011 Class B and EN60601-1
and EN60601-1-2), STSI EN 300-328 under R&TTE Directive
1999/5/EC and, ISO10328. The device complies with Part 15
of the FCC Rules and carries the CE mark.
Authorized Representative
Advena Ltd.
Pure Oces
Plato Close, Warwick, CV 34 6 WE
United Kingdom
1716

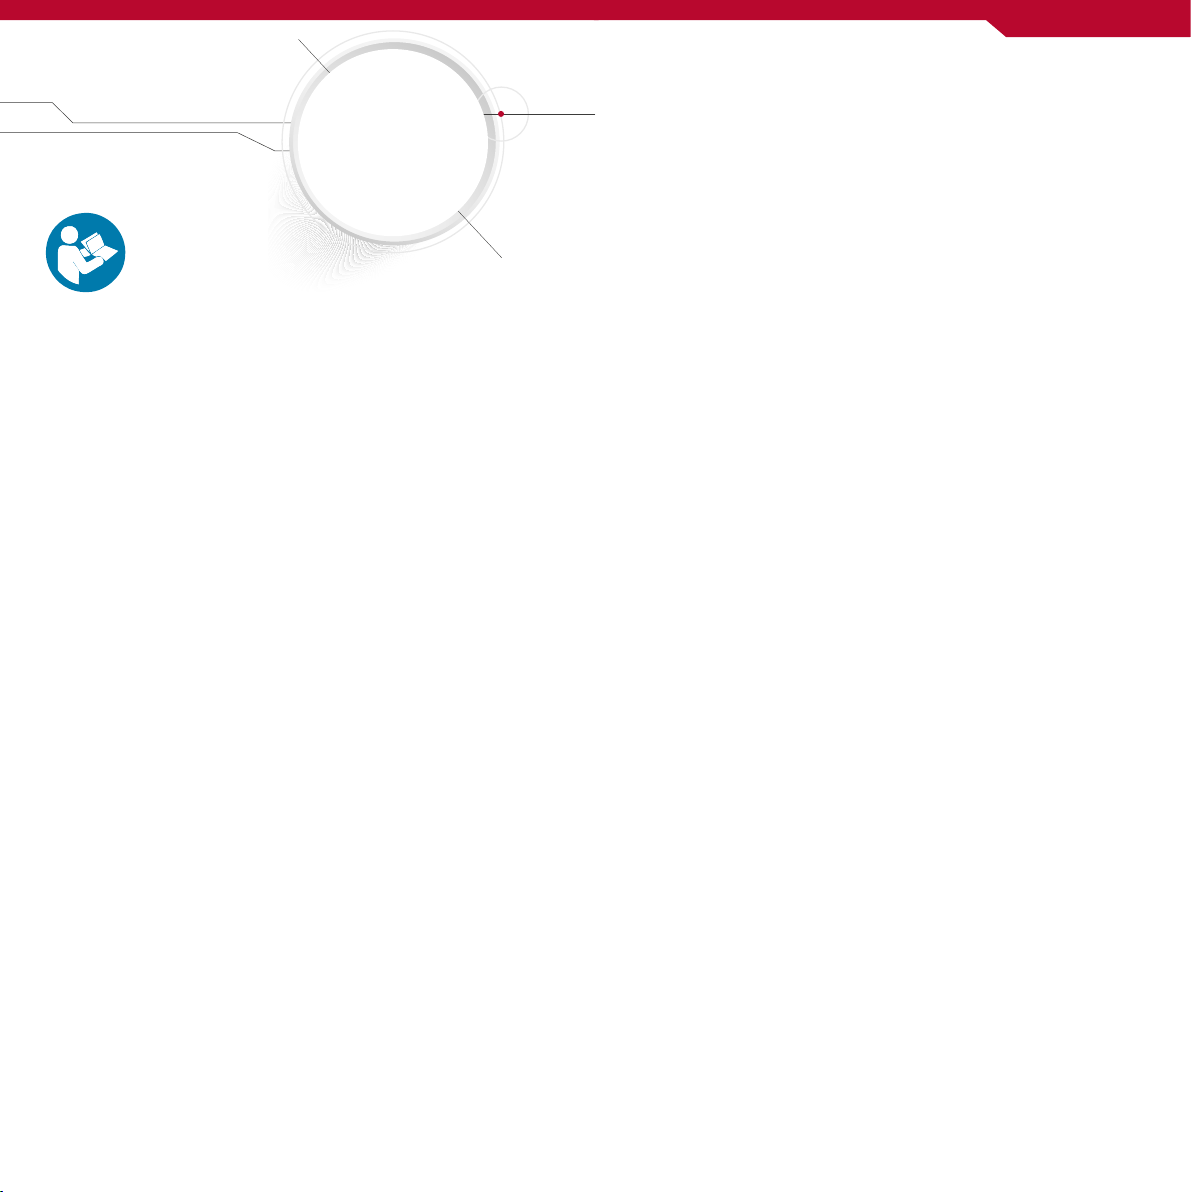
Kinnex Product Detail
A. Key Pad buttons
B. Charging port
C. RapidResponse
D. Carbon ber foot plate
E. Manual Lock
™
Valve Technology
Freedom Innovations | Kinnex | Instructions for Use
B
1
A
2
3
C
D
E
Key Pad Button Functions
Power Status Button
• Check battery power levels
1
2
3
18
Change Footwear Button
• Change shoes and calibrate ankle to new shoes
• Apparel Assist Mode
Bluetooth Button
• Pair ankle to smart device
• Clinician Mode

Connect with us
#freedomeveryday
Freedom Innovations Europe B.V.
Jaargetijdenweg 4
7532 SX Enschede
The Netherlands
Tel.: +31(0)53-20 30 300
Fax: +31(0)53-20 30 305
www.freedom-innovations.eu
info@freedom-innovations.eu
© 2017 Freedom Innovations Europe B.V.
R-720-239 Kinnex IFU, Rev. C, English Europe
All rights reserved.
Kinnex is a trademark of Freedom Innovations, LLC.
 Loading...