

Freedom Charge FDMC-1222 Installation Instructions Manual

INSTALLATION(INSTRUCTIONS
1222 Instructions 3-9-15.doc Page 1 of 5
2015 - Ford Mustang Qi Wireless Charging Kit
(Kit # FDMC-1222)
Please read thoroughly before starting installation and check that kit contents are complete.
Items Included in the Kit:
Tools & Supplies Needed:
Qi Wireless Charging Module with
Mustang Specific Substrate
Power Harness with 3 amp Fuse
2015 Mustang Specific Non Slip Mat
These Instructions with Template
Removable Consumer Product Label
Plastic Trim Removal Tool
10mm socket driver
7mm Socket Drive
Center Punch/Scribe Tool
Power Drill
1/2” Drill Bit
Wire Ties
Soldering Iron & Solder
(Recommended)
Tape or Heat Shrink Electrical Tubing
*Note this product is designed to work with Qi compatible devices. Please confirm that
your device is Qi compatible before installation. Visit www.brandmotion.com for phone
compatibility guide.
Safety Precautions:
• Work in well ventilated area that is clear of obstructions.
• Secure vehicle with tire chucks in both front and rear of tires.
• Turn vehicle accessories OFF and ensure ignition key is in OFF position.
• Wear safety goggles and snug fitting clothes.
• Use tools only for their intended purpose and which are in good repair.
• Only perform this task if confidence, skill, and physical ability permit.
NOTE: We strive to provide accurate and up-to-date installation instructions.
IMPORTANT: Do not place smart keys
within 15cm of charging mat. Vehicle
may not detect key to start vehicle. Do
not place metal objects in tray while
charging.
INSTALLATION(INSTRUCTIONS
1222 Instructions 3-9-15.doc Page 2 of 5
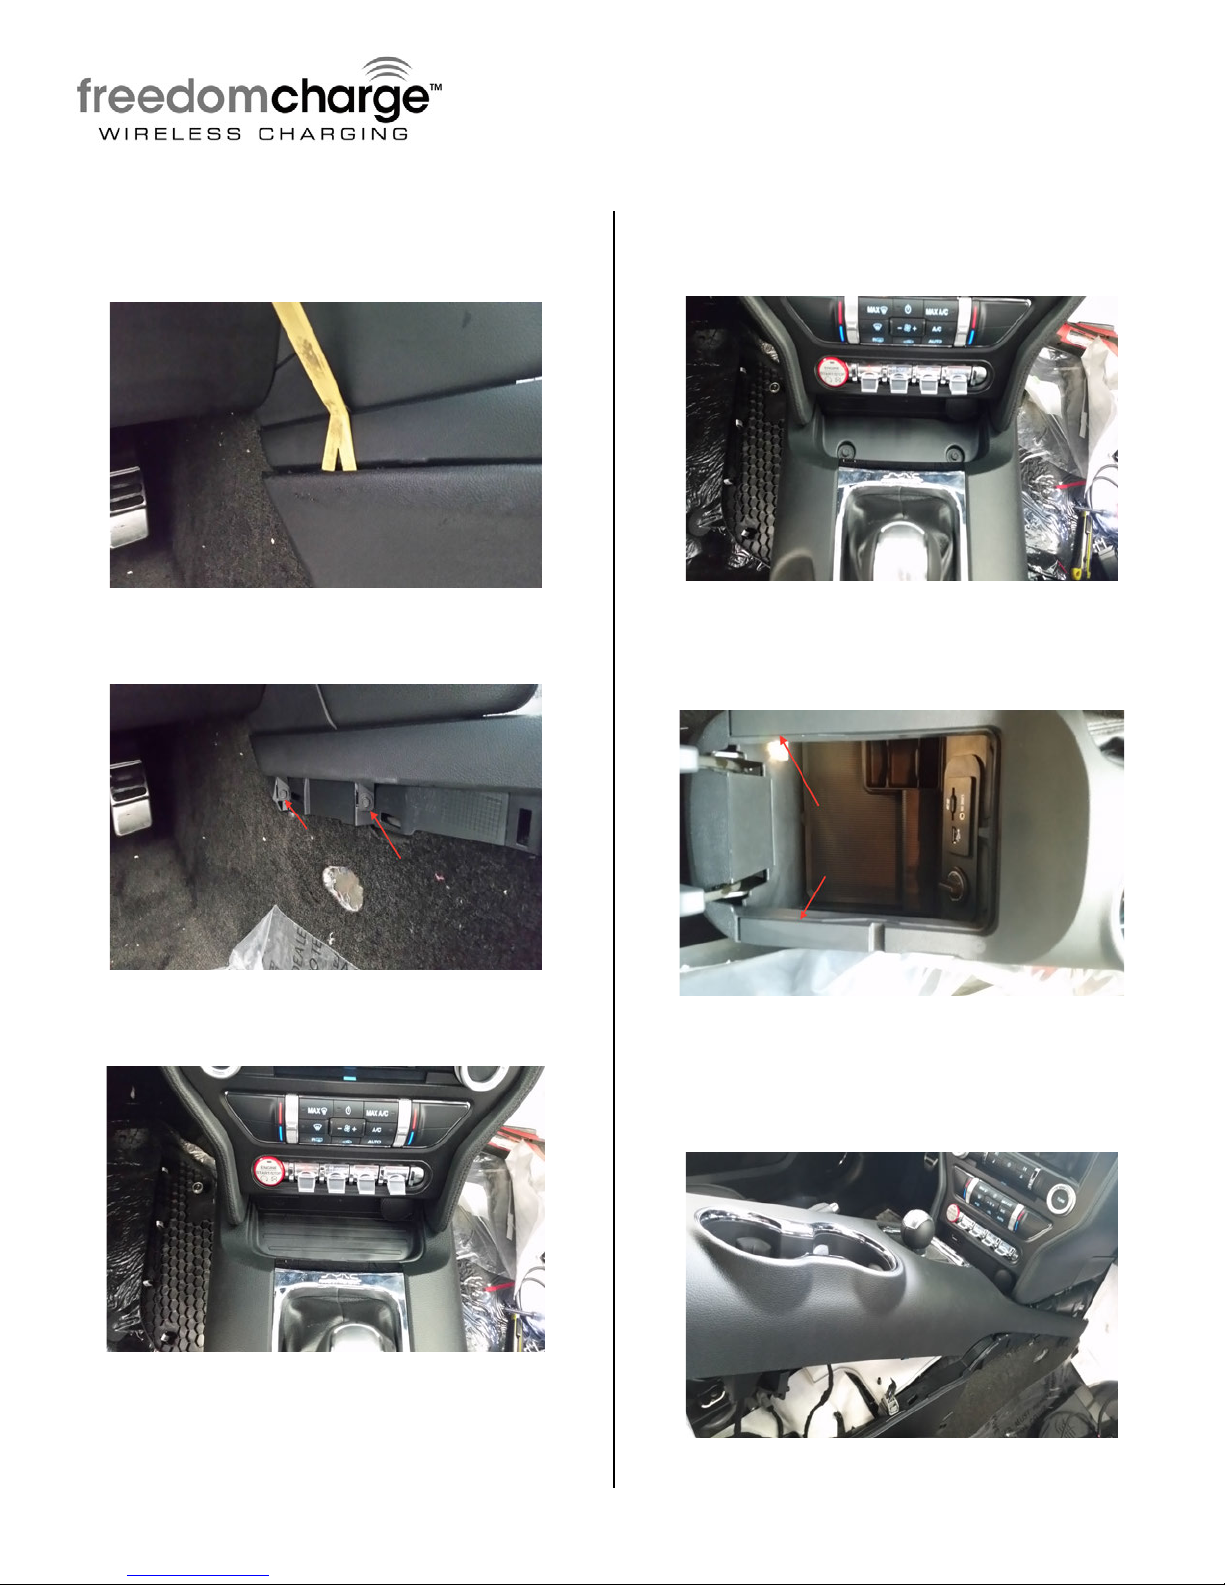
Step 1: Use a plastic trim removal tool to remove
left and right side front console trim.
Step 2: Remove (2) 7mm sockets from the front of
the left and the right side of the console.
Step 3: Remove rubber tray insert from front of
console.
Step 4: Remove (2) 7 mm sockets from under
rubber tray. Removal is not required but it does
help with lifting the top of console.
Step 5: Use a plastic trim removal tool to loosen
the console top trim from inside the armrest.
Step 6: Lift up from rear of console to unclip the
top of console. Ensure the front of console side is
pulled out slightly.
 Loading...