

Page 1
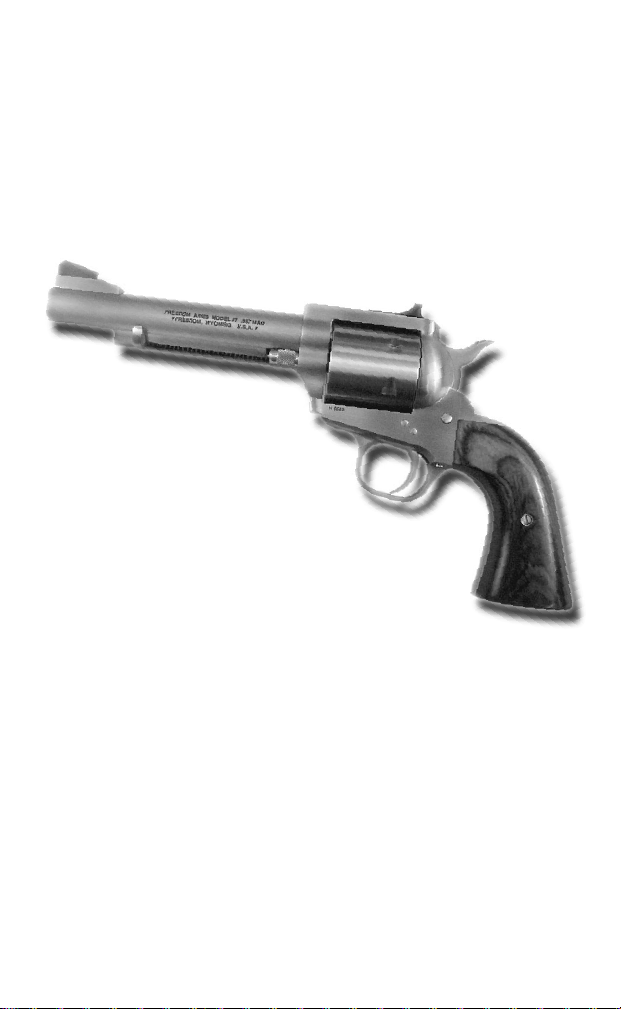
INSTRUCTION MANUAL
FOR
FREEDOM ARMS® MODEL 1997
MID-FRAME REVOLVERS
Manufacturing the "World's Finest Revolvers"
IMPORTANT: KEEP THIS BOOKLET
HANDY FOR REFERENCE.
This manual should always accompany the firearm, even upon
sale, transfer, loan or otherwise. For your own safety and the
safety of others study this manual before using your Freedom
Arms revolver. It is your responsibility to learn and to under-
stand how to correctly operate and safely use this firearm. If
you have any questions or comments please call or write to us:
Freedom Arms, Inc.
P.O. Box 150, #1 Freedom Lane
Freedom, Wyoming 83120
(307) 883-2468
©
Freedom Arms, 1997. All rights reserved.
Page 2

FREEDOM ARMS, INC.
P.O. BOX 150
#1 FREEDOM LANE
FREEDOM, WYOMING 83120
(307) 883-2468
Printed in U.S.A.
0303ATP.5M
Page 3

IMPORTANT INFORMATION ABOUT
YOUR FREEDOM ARMS REVOLVER
Please record for your future reference.
Serial Number
Caliber
Special Features
Purchase Price
Purchased From
Date of Purchase
Page 4

IMPORTANT
TO VALIDATE THE WARRANTY ON YOUR
FREEDOM ARMS® REVOLVER, DETACH,
FILL IN, AND RETURN THE WARRANTY
REGISTRATION CARD WITHIN 30 DAYS
OF REVOLVER PURCHASE.
Page 5
Serial No.
Barrel Length
0303ATP.5M
WARRANTY
REGISTRATION CARD
Customer Name
Address
City _______________________________________________ State ____________ Zip
Phone No.
Dealer Purchased from
Address
City _______________________________________________ State ____________ Zip
Date Purchased
Page 6

TABLE OF CONTENTS
Basic Safety Rules ...................................... 2
Hammer Operation ..................................... 5
Safety Position ............................................ 6
Transfer Bar ................................................ 7
Full-Cock Position ...................................... 8
Half-Cock Position ................................... 10
Loading ..................................................... 14
Unloading ................................................. 15
Firing & Recommended Grip ................... 15
Carrying Loaded Revolver ....................... 17
Removing Cylinder .................................. 18
Cleaning Revolver .................................... 19
Other Information ..................................... 20
Warranty Information ............................... 22
FREEDOM ARMS, INC.
POST OFFICE BOX 150
#1 FREEDOM LANE
FREEDOM, WYOMING 83120
(307) 883-2468
(307) 883-2005 (fax)
e-mail address: [email protected]
See us on the internet at www.freedomarms.com
Page 7
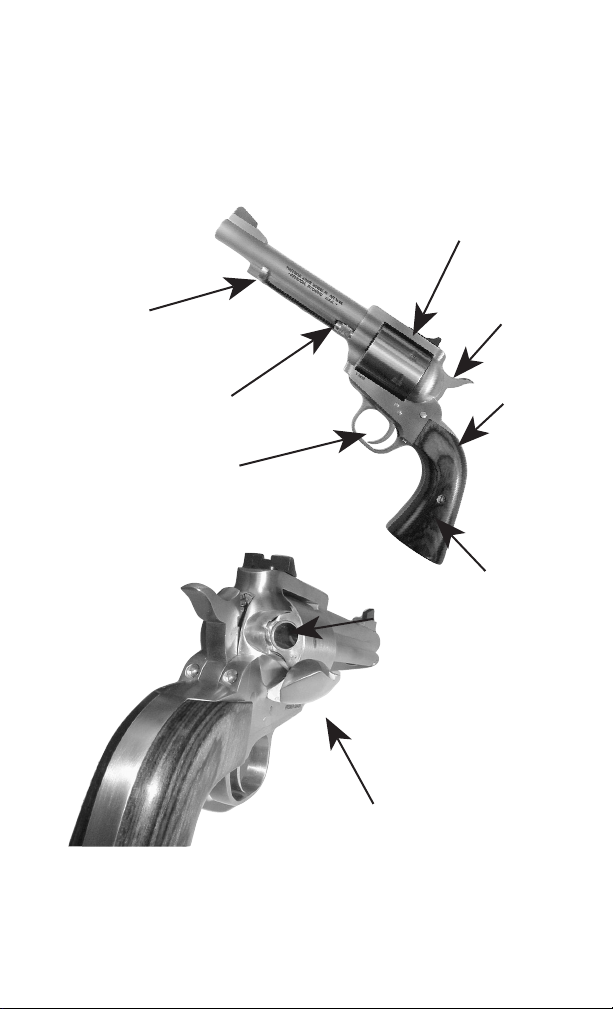
Freedom Arms Model 1997
®
Receiver
Ejector Tab
Cylinder Pin
Trigger
Hammer
Grip Frame
Grips
Chamber
Loading Gate
Page 8
1
Page 9

FULLY UNDERSTAND HOW TO CORRECTLY
OPERATE YOUR FIREARM BEFORE LOADING AND
FIRING IT. THE BASIC SAFETY RULES INCLUDE:
1. As with any precision tool, you must respect your firearm
and thoroughly understand how to correctly operate and
properly care for it before you ever use it. If you do not fully
understand how this firearm operates or functions, or you have
any question about its use after studying this manual, then
before you use the firearm please call or write to us at Freedom
Arms, or seek help from a qualified instructor.
2. Handle every firearm as if it were loaded. This precaution
will help to keep focused in your mind the fact that this
product, if improperly used or stored, is capable of causing
serious bodily injury or death at any moment.
3. Always keep your firearm pointed in a safe direction to avoid
injuring someone or damaging property due to an accidental or
unintended firing. Always means just that: always. And keep
this in mind when determining what is a safe direction: a bullet
can and will ricochet off water or hard surfaces; a bullet can
and will penetrate walls, floors, and windows. ALWAYS BE
AWARE OF THE DIRECTION YOUR FIREARM IS
POINTING. ALWAYS BE AWARE OF YOUR
TARGET, AND WHAT IS BEHIND, ABOVE, BELOW
OR TO THE SIDE OF THE TARGET.
4. Always keep your revolver unloaded until you are ready to
fire it. Be sure your firearm is unloaded before handing it to
another person, or before storing it, or whenever releasing it
from your possession.
5. Before loading your revolver, we suggest that you remove
the cylinder, then inspect the interior of the barrel and the
cylinder as well as the visible operating parts to be sure they are
clean and free of obstructions. Any obstruction in the barrel or
2
Page 10
345
Page 11
Page 12
Page 13
injuring others, you must practice and become familiar with
each of these hammer positions BEFORE loading your
revolver.
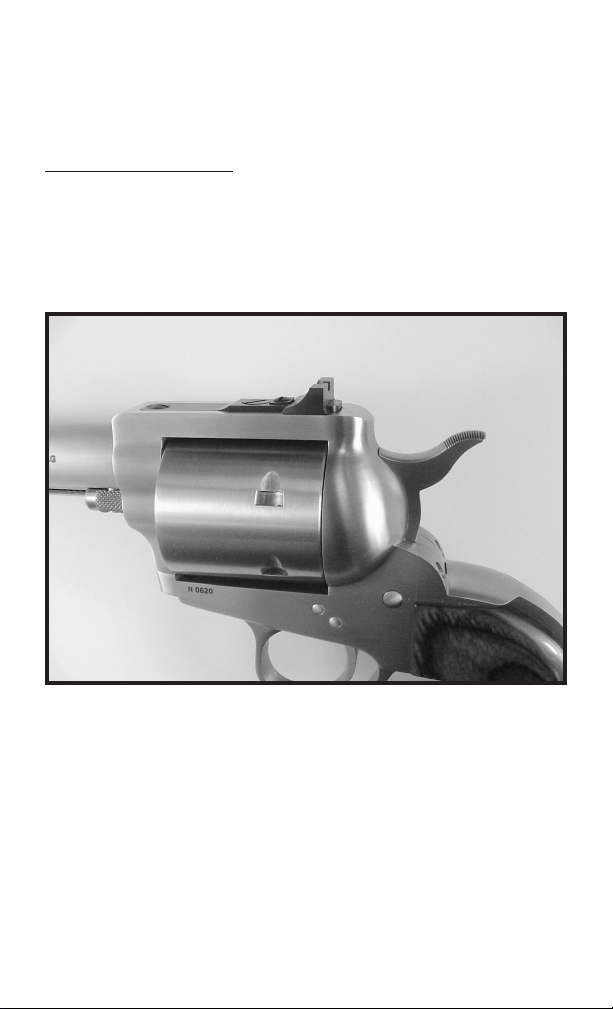
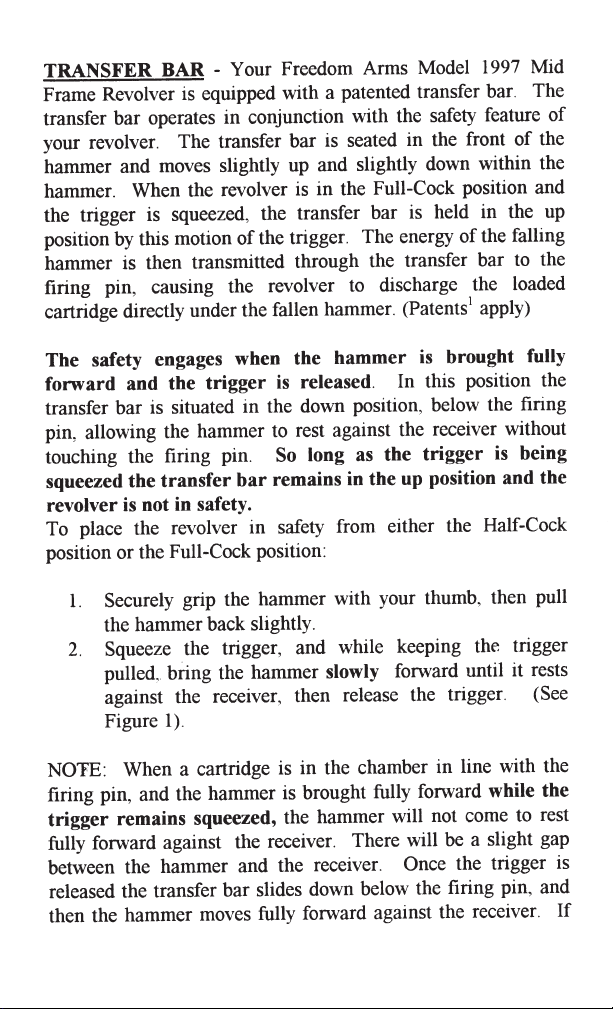
SAFETY POSITION - In this position, the hammer is fully
forward resting against the receiver, and the trigger is fully
released (See Figure 1). When the hammer is in this position,
the trigger cannot be pulled all the way back. Do not try to
force the trigger all the way back as this can damage the trigger
or the transfer bar.
Figure 1 -- Safety Position
CAUTION: EVEN IF THE HAMMER IS FULLY
FORWARD, IF THE TRIGGER IS BEING SQUEEZED
AND A LIVE CARTRIDGE IS IN THE CHAMBER IN LINE
WITH THE FIRING PIN, THE REVOLVER COULD FIRE IF
THE HAMMER IS STRUCK WITH SUFFICIENT FORCE.
THE TRIGGER MUST BE RELEASED AND THE
HAMMER FULLY FORWARD TO ENGAGE THE
SAFETY.
6
Page 14
7
Page 15
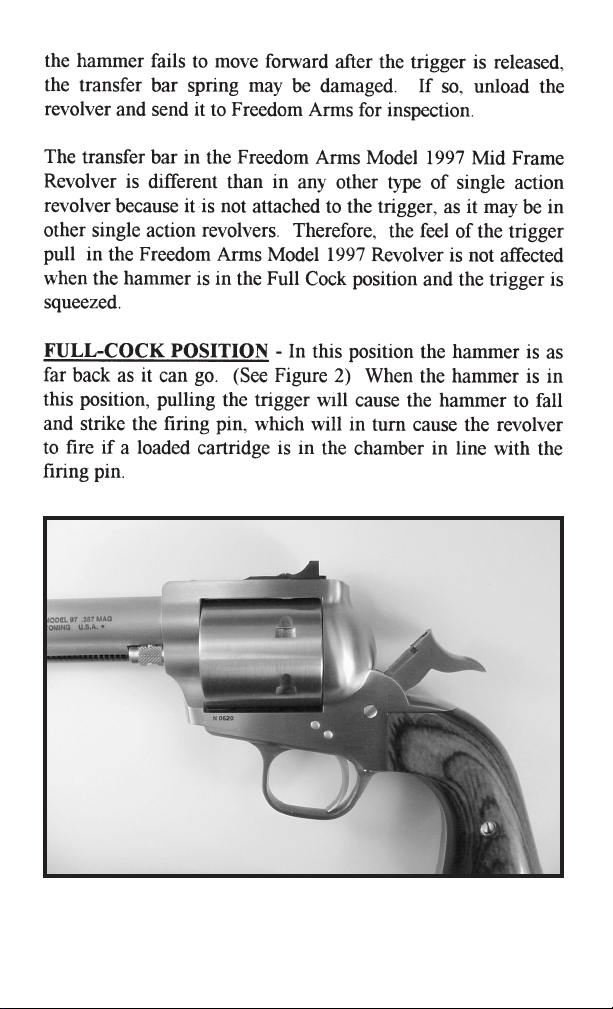
Figure 2 -- Full-Cock Position
8
Page 16
9
Page 17
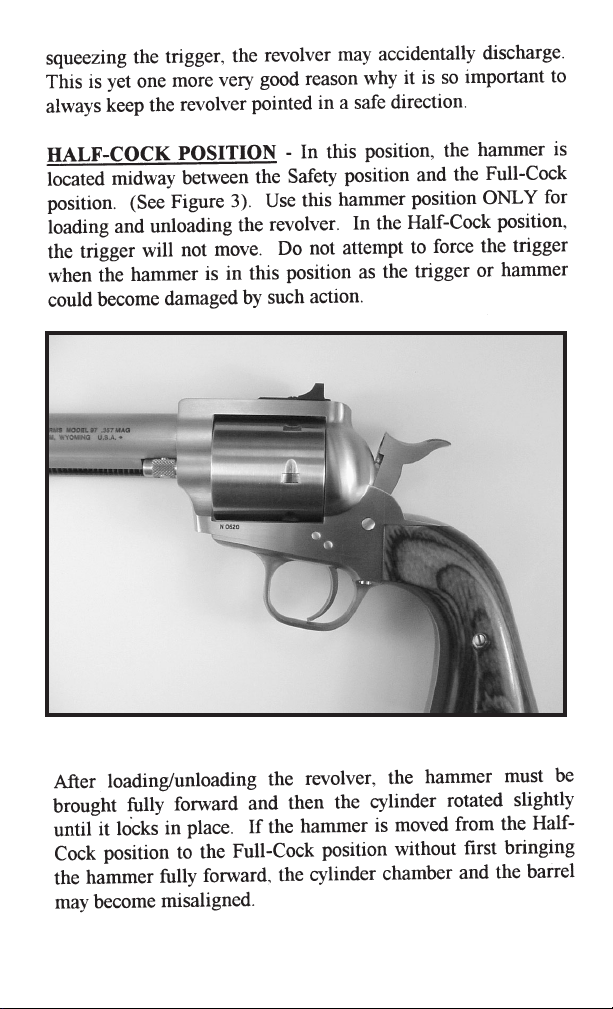
Figure 3 -- Half-Cock Position
10
Page 18

To place the hammer in the Half-Cock position from the Safety
position:
1. Securely grip the hammer with your thumb.
2. Keeping your finger out of the trigger guard, slowly pull
the hammer back approximately half way between the
Safety position and the Full-Cock position. As the
hammer is drawn back you will hear an audible click as
the trigger drops into the half cock notch in the hammer.
(If you do not hear the click, you must immediately
unload the revolver and either send it to Freedom Arms
or take it to a qualified gunsmith for inspection. Do not
continue to use the revolver as the trigger spring may be
damaged, potentially resulting in a dangerous condition.)
3. After you hear the click slowly let the hammer forward
until it engages in the Half-Cock position. (See
Figure 3).
BE CERTAIN THAT THE HAMMER IS LOCKED IN
THE HALF-COCK POSITION BEFORE RELEASING IT
FROM YOUR GRIP.
To place the hammer in the Half-Cock position from the FullCock position:
1. Securely grip the hammer with your thumb.
2. While keeping a secure grip on the hammer gently pull
the trigger and allow the hammer to move forward
slightly. As the hammer begins to move forward
immediately remove your finger from the trigger guard
and continue letting the hammer down slowly until the
hammer locks in the Half-Cock position. (See Figure 3)
11
Page 19
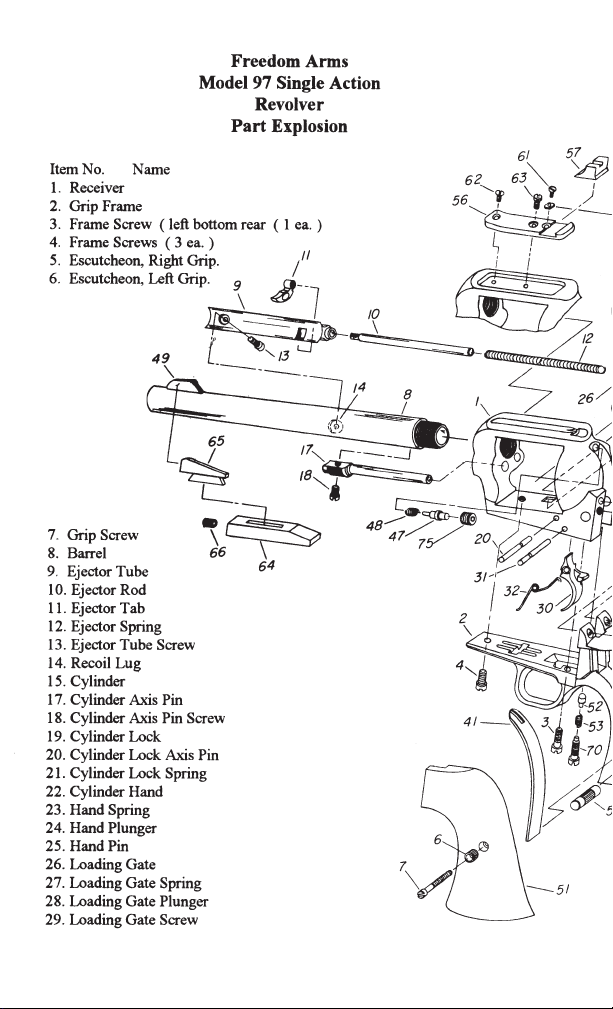
12
Page 20
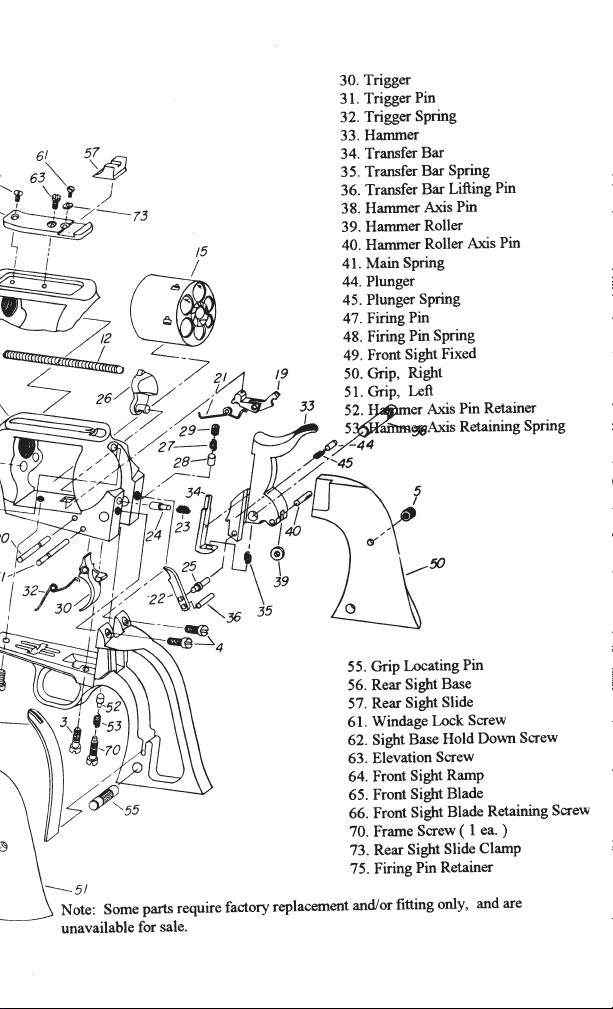
13
Page 21

BE CERTAIN THAT THE HAMMER IS LOCKED IN
THE HALF-COCK POSITION BEFORE RELEASING IT
FROM YOUR GRIP.
LOADING
TO LOAD THE REVOLVER:
1. Lower the hammer fully forward to the Safety position
then pull it back to the Half-Cock position. This
sequence allows the cylinder to rotate. The cylinder may
now be rotated manually in a clockwise direction. You
will feel a slight resistance as you rotate the cylinder, and
you will hear a clicking sound as each chamber cycles
past the firing pin.
2. Use your thumb to open the loading gate by swinging it
out to the right until it stops.
3. When loading the cylinder you must ALWAYS leave
one chamber empty, and that empty chamber should
ALWAYS be in line with the firing pin when finished
loading. Here is one method of accomplishing this:
(a) Make certain that the cylinder is completely empty.
(b) Place a cartridge in the exposed chamber just to the left
of the loading gate.
(c) Skip the next chamber.
(d) Load the rest of the chambers.
(e) After loading the chambers in this manner, the first
loaded chamber will swing into view just to the left of
the open loading gate. When that first loaded chamber
swings fully into view, the empty chamber will be at the
top of the cylinder in line with the firing pin.
4. Close the loading gate.
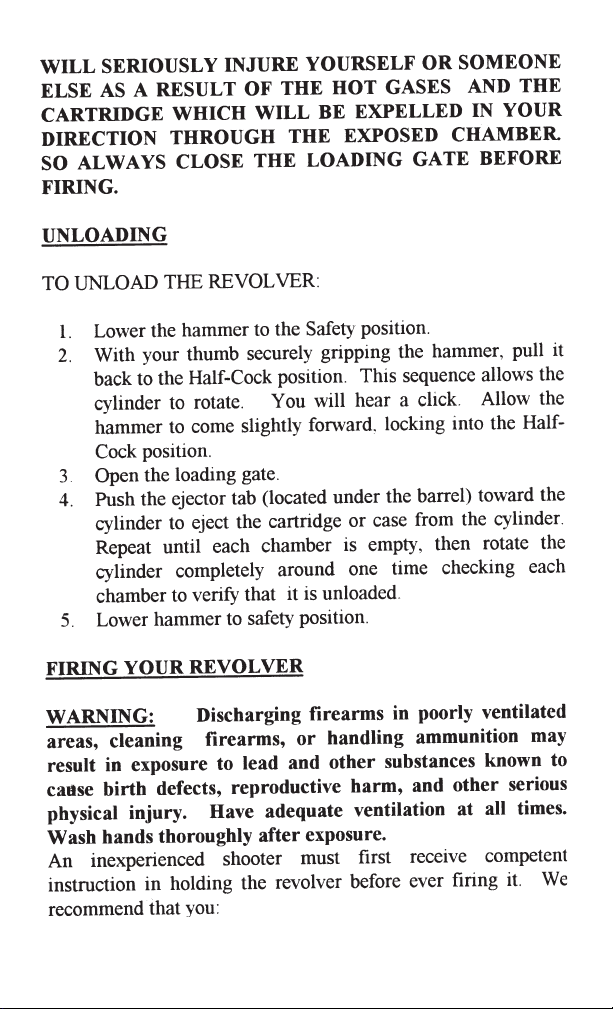
5. Lower hammer to safety position.
THE LOADING GATE MUST BE FULLY CLOSED
BEFORE FIRING THE REVOLVER. IF YOU FIRE THE
REVOLVER WITH THE LOADING GATE OPEN YOU
14
Page 22
15
Page 23
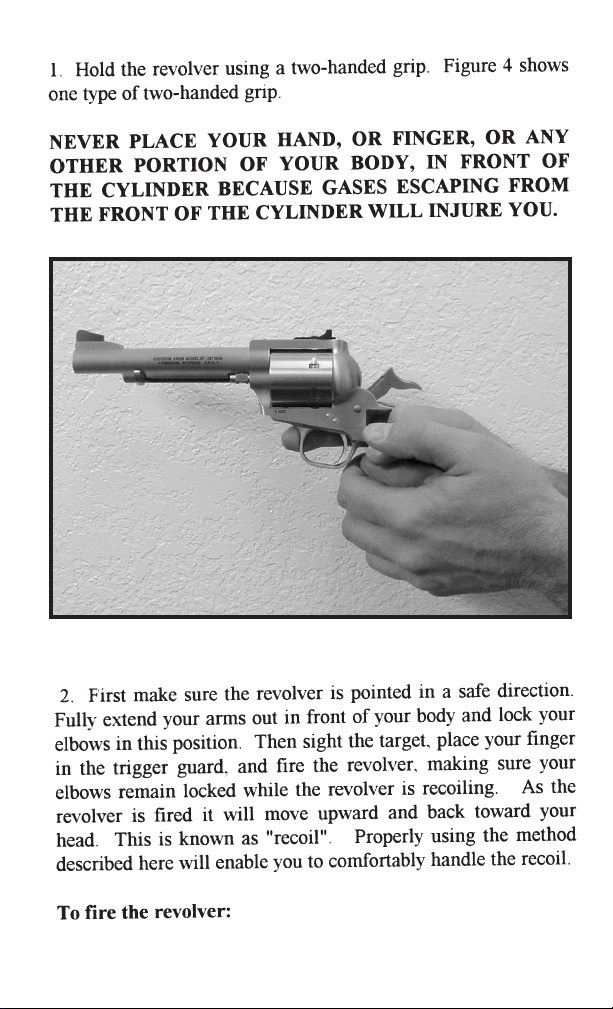
Figure 4 -- Two-Handed Grip
16
Page 24
17
Page 25
18
Page 26
19
Page 27
202122
Page 28
Page 29
Page 30

In the event that any defect in material or workmanship occurs
or appears within the warranty period, the original retail
purchaser shall contact Freedom Arms, No. 1 Freedom Lane,
P.O. Box 150, Freedom Wyoming 83120, (307) 833-2468,
within ten days after the first appearance or occurrence of such
defect. Upon notification, Freedom Arms shall advise the
original retail purchaser of the appropriate action to be taken in
order to remedy the defect. If requested to do so by Freedom
Arms, the original retail purchaser shall, at his own expense,
return the firearm to Freedom Arms, in Freedom, Wyoming.
In the event that the defect in material or workmanship
occurred within the warranty period, and in the further event
that the warranty has not become void or inapplicable by one or
more of the reasons specified above, and Freedom Arms
received proper and timely notice, then Freedom Arms, at its
discretion, shall repair the firearm at its own cost, and shall
also at its own cost return the firearm to the original retail
purchaser. All repairs to a defective firearm covered under this
limited warranty shall be undertaken only at the Freedom Arms
headquarters in Freedom, Wyoming, unless specific written
authorization is first received from Freedom Arms authorizing
the repair of the firearm at another facility.
As an additional condition of this limited warranty, the original
purchaser shall, within thirty days after they have purchased
the firearm from the retail dealer, complete the Warranty
Registration Card provided to him at the time of his purchase
of the firearm, and mail it to Freedom Arms at the address
appearing on the card. The fulfillment of this additional
condition is required to validate the warranty coverage
described herein.
If any customized work is done on any Freedom Arms revolver
other than by Freedom Arms, then this limited warranty shall
become void and of no further force and effect.
23
Page 31
24
Page 32

LIMITATIONS ON IMPLIED WARRANTIES
THIS WRITTEN LIMITED WARRANTY IS MADE
EXPRESSLY IN LIEU OF ANY OTHER WARRANTIES,
EXPRESSED OR IMPLIED IN FACT OR BY LAW,
INCLUDING ANY IMPLIED WARRANTY OF
MERCHANTABILITY OR FITNESS FOR A PARTICULAR
PURPOSE, AND IS IN LIEU OF ANY OTHER
OBLIGATION OR LIABILITY OF ANY NATURE
WHATSOEVER ON THE PART OF FREEDOM ARMS TO
ANYONE BY REASON OF THE MANUFACTURE AND/OR
USE OF ANY FIREARM MANUFACTURED BY IT. THERE
ARE NO WARRANTIES WHICH EXTEND BEYOND THE
PERIOD DESCRIBED IN THIS LIMITED WARRANTY.
ANY AND ALL IMPLIED WARRANTIES SPECIFICALLY
ARISING UNDER AND REQUIRED BY LAW ARE
HEREBY EXPRESSLY LIMITED IN DURATION TO THE
WARRANTY PERIOD SET FORTH IN THIS LIMITED
WARRANTY.
1
Portions of this revolver are protected by U.S. Patent
Numbers 5,625,970, 5,664,356, 5,673,506, and other foreign
patents pending. Also protected by German Patent Number
196 23 474.
Freedom Arms is a registered trademark of Freedom Arms Inc.
25
Page 33
PLEASE RECORD YOUR
CHAMBER LOCK KEY NUMBER
26
 Loading...