

Freedom9 freeGuard Slim 300 Quick Install Manual
Quick Install Guide
freeGuard
Slim 300
freedom to succeed
Quick Install Guide for the freeGuard Slim 300
PACKAGE CONTENTS:
• freeGuard Slim 300
• Power cord
• Power supply
• Quick install guide
• CD with user manual
freeGuard Slim 300
(FSL300M)
• Cable tie (with 4-40 screw)
• RJ-45 to DB-9 console cable adapter
GETTING STARTED
This guide provides information for the initial setup and
configuration of the appliance.
For more complex applications, see the following
documentation provided with your freeGuard Slim 300
device:
• User guide
• CLI reference Guide
A. CONNECTING THE APPLIANCE:
Network Traffic and Security Management
The freeGuard Slim 300 appliance is a compact, low power device that delivers high
performance security and networking
traffic management capabilities to seam
lessly enhance existing network infrastruc
-
-
tures.
B. CONNECTING THE POWER CABLES:
1. Connect the power supply to the appliance power
receptacle on the back panel of the unit
2. Connect the power supply to the AC power source
3. The Power LED on the front panel will turn ON
You are ready to configure your freeGuard Slim 300
applicance. There are two options:
Option 1: Connecting the serial cable for
text-based configuration
Option 2: Connecting the cables for web-based
setup
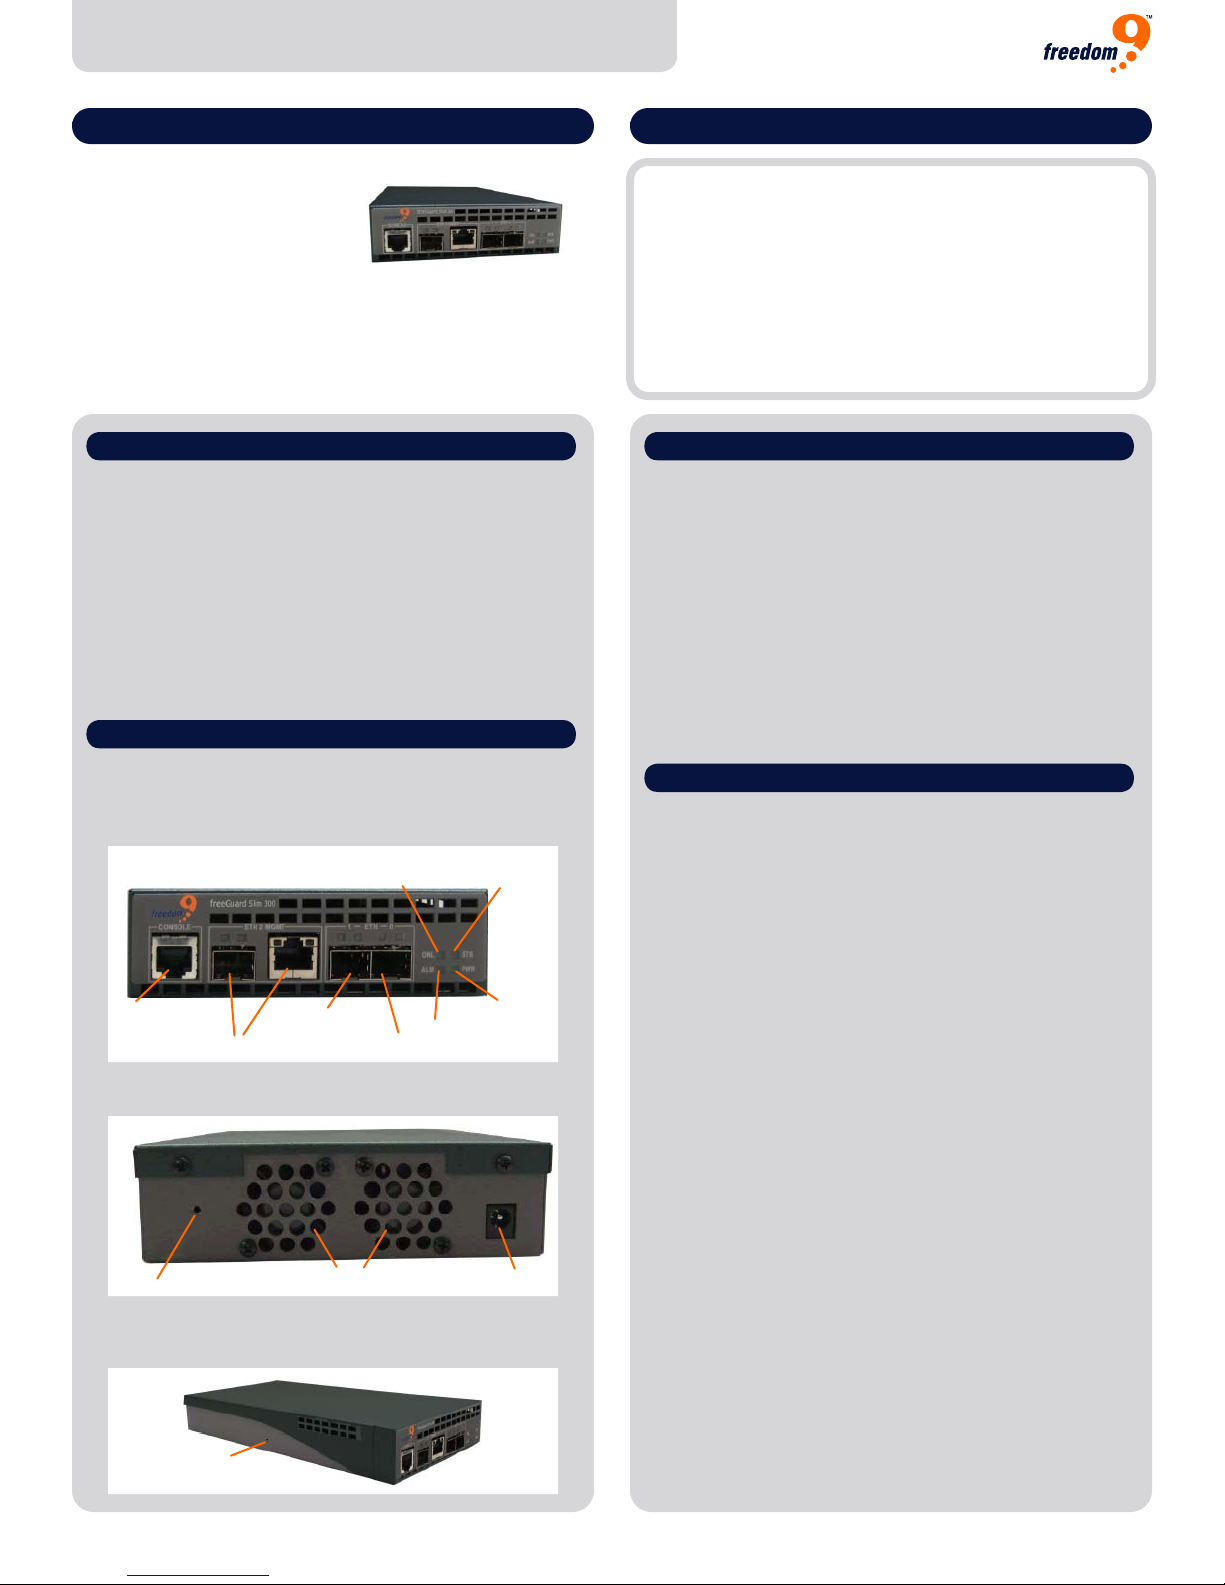
Front and back panels
The freeGuard Slim 300 front panel is shown in figure 1.
Figure 1
Serial port
(38,400, 8, No, 1, None)
ETH2 MGMT
SFP and RJ45 port
ETH1 SFP port
Online LED Status LED
ETH0 SFP port
Alarm indicator
Power LED
The freeGuard Slim 300 back panel is shown in figure 2.
Figure 2
Cable clamp mounting hole
Fan Power receptable
The freeGuard Slim 300 reset button is shown in figure
3.
Figure 3
Reset button
B-Option 1: TEXT-BASED CONFIG
1. Plug one end of the serial cable into the serial port
labeled CONSOLE on the back panel of the appliance
2. Plug the RJ-45 to DB9 console cable adapter to the
management station
3. Plug the serial cable with the DB9 connector to the
management station
4. Turn on the freeGuard Slim 300 appliance and the
management station if they are not already on
Use your preferred terminal program to manage the
device. The serial console settings are as follows:
Baud rate: 38,400
Data bits: 8
Parity: No
Stop bit: 1
Flow control: None
5. The freeGuard Slim 300 appliance takes approxi
mately 60 seconds to completely initialize. After the
appliance is completely initialized, you will see the
following prompt:
Press Enter to active this console
6. Press the Enter key to enter a login name and
password. The default login credentials are:
Login: admin
Password: admin
Now you are ready to perform other configuration tasks
using the appliance
-
Revision 1.0 Specifications are subject to change without notice. Copyright 2008 Freedom9 Inc.
ww
w.freedom9.com
1-888-998-9189
Page 1
Quick Install Guide
freeGuard
Slim 300
freedom to succeed
B-Option2: WEB-BASED CONFIG:
1. Plug one end of the Ethernet cable into the interface
(eth0) on the front panel of the appliance
2. Plug the other end of the Ethernet cable into the
Ethernet port on the management station
3. Turn on the appliance and the management station if
they are not already on
4. Adjust the IP Address of the management station to
192.168.1.10/24
5. Using a web browser, point the browser to
http://192.168.1.1
6. You will be prompted to enter a user name and
password. Enter the following:
User name: admin
Password: admin
7. Change the default password for the freeGuard Slim
300 appliance by going to the System > Admin >
Administrators page from the menu
8. Select Admin in the User Name field. Enter the old
password and the new password. Click Apply.
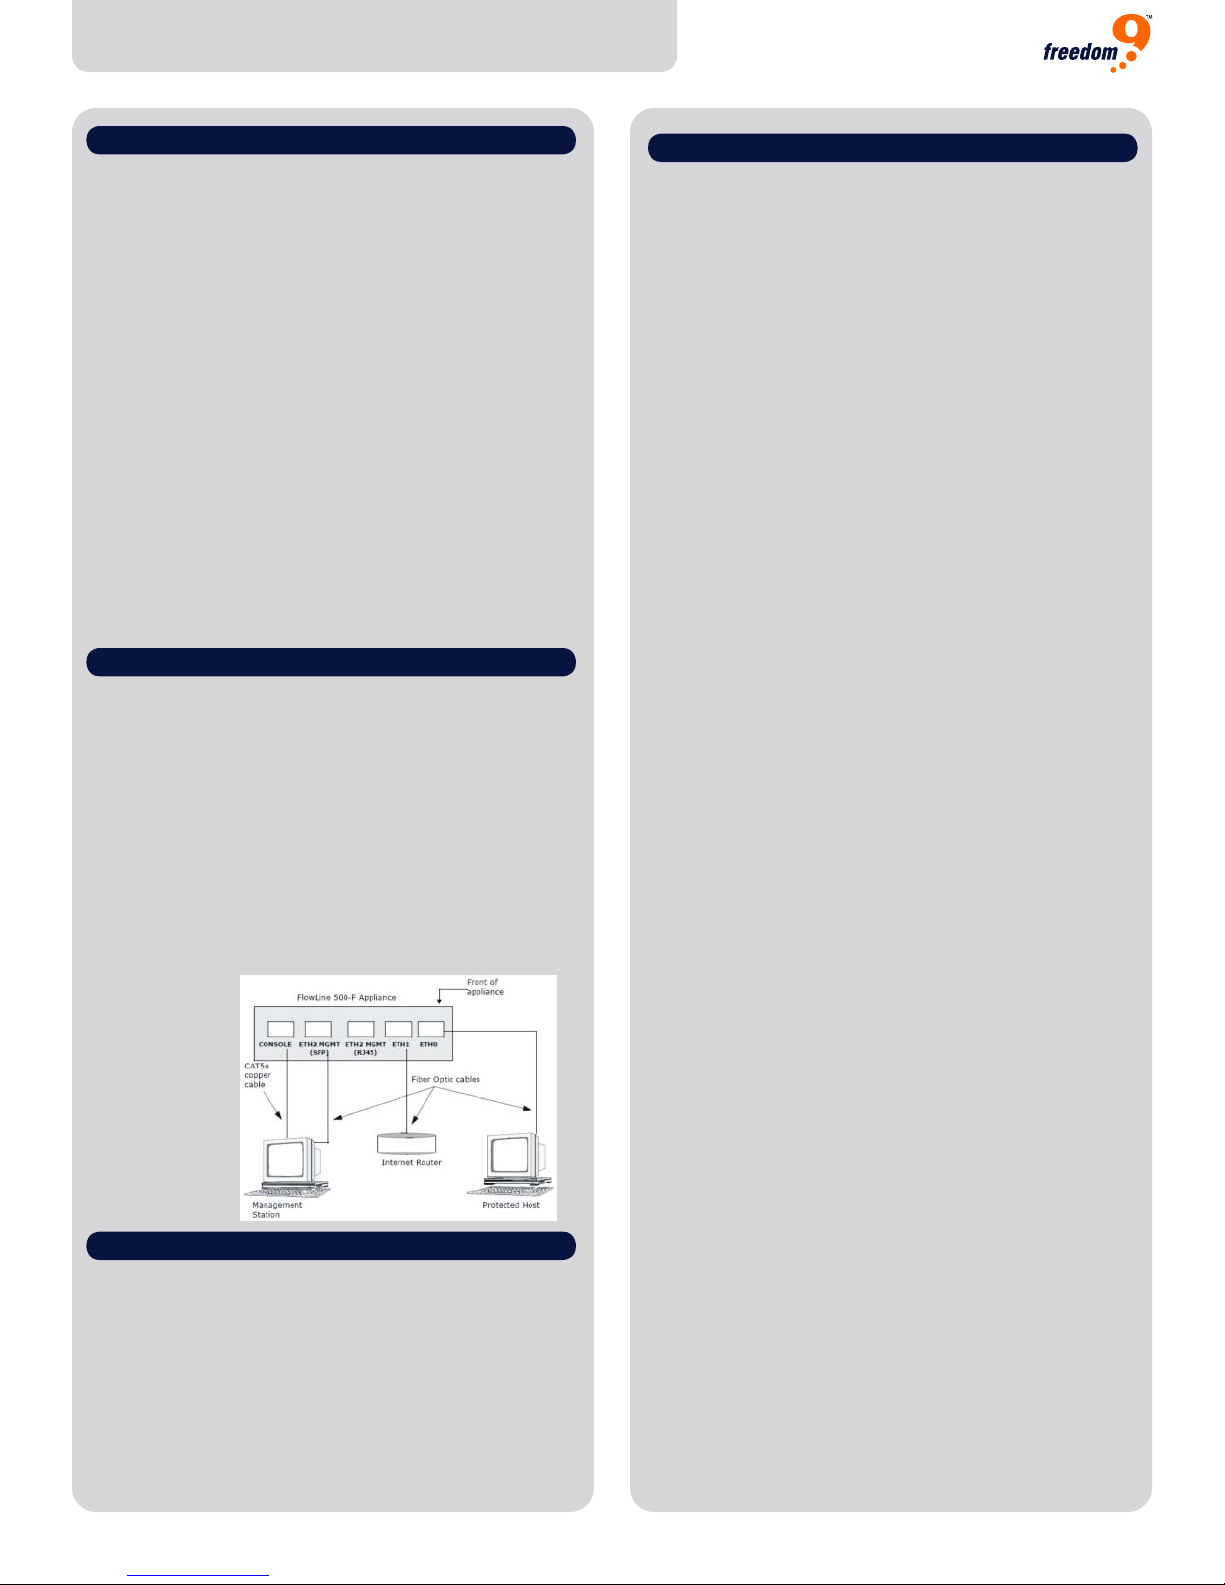
C. CONNECTING TO OTHER DEVICES:
Once the power is connected to the appliance, you can
connect it to other network devices. Use either of the
two Ethernet interfaces labeled eth0 or eth1. These
interfaces allow you to connect to other network devices
as required. You can use ETH2 MGMT as a management
port, either SFP or RJ45 port.
Figure 4 displays the eth1 interface connected to an
Internet router using a fiber optic cable, while the eth0
interface is connected to a switch on your local area
network (LAN) using another fiber optic cable
Figure 4
D. CONFIGURATIONS:
Initial Configuration of the Appliance
The default configuration for ETH2 MGMT is RJ45 port, based
on your deployment scenario, additional configuration may be
required.
To Verify the Default Configuration
You can use the follow command to verify the default
configuration:
cli->get config
set interface eth2 ip 192.168.1.1/24
set interface eth2 manage http
D. CONFIGURATIONS (Continued):
Changing the Default ETH2 MGMT to Use a Fiber
Optics Interface
You can use the following command:
set interface eth2 link-type fiber
Setting the time on your appliance
The default setting for the freeGuard Slim 300 appliance is
GMT. If you want to change this setting, use the following
command:
cli->set clock 07/26/2007 12:00:00
Enable logging
Use the following commanc to enable logging for monitoring,
trouble shooting and tracking. Set up a Syslog server to collect
logs.
1. You can provide the IP Address of a syslog server using the
following commands. The default is enabled.
cli-> set syslog enable
cli-> set syslog config 192.168.65.199
2. Once the syslog server is enabled, you can enable log
messages to be sent to the syslog server as follows:
cli-> set log module policy level
information destinaton syslog
Every new connection will now be sent to the syslog server
3. If you do not have a syslog server and want to enable
internal logging on the appliance, you can enable internal
logging using the following command:
cli-> set log module policy level
notification destination internal
4. To view the internal log messages, use the following
command:
cli-> get log message
Jul 26 12:02:09 2007 freedom9 id=slim100
policy[138] [INFO] proto=17
re=192.168.65.174:137 dst=192.168.255:137
packet dropped due to policy deny!
Default Configurations
The following are the default settings used when the appliance
is powered on for the first time. Be sure to have your manage
ment IP Address available during configuration.
Mode: Transparent
Zone for eth0: Global
Zone for eth1: Global
Zone for br0: Global
IP Address for br0: 192.168.1.1/24
Policies: NetFlow is enabled
Top-talkers is enabled
Management: Bandwidth management
features are disabled.
The following management protocols are
enabled:
SSH
Syslog
SNMP (Pubic community)
HTTP and HTTPS
Ping
Setting up the syslog and NetFlow servers
Use the following CLI commands to set up your syslog and
NetFlow servers:
set syslog config ip-address
set netflow config ip-address port port
-
Revision 1.0 Specifications are subject to change without notice. Copyright 2008 Freedom9 Inc.
w.freedom9.com
ww
1-888-998-9189
Page 2
 Loading...