

Page 1
Assembly Instructions
Union Tall Bookcase
Before you begin to assemble your new piece of furniture, please check to ensure that all parts have been supplied.
Follow instructions closely as deviation from them may void your warranty and present a possible safety risk.
It is recommended that assembly is done on a soft surface like carpet to avoid any damage.
If you experience any problems with your new purchase please phone our Customer Service Hotline 1800 807 416 (Customers
outside Australia should contact their closest Freedom store.)
Care Information
Periodically check and re-tighten any fasteners. Wipe down all surfaces weekly with a clean cloth. Do not clean any surfaces with
harsh abrasives or chemicals.
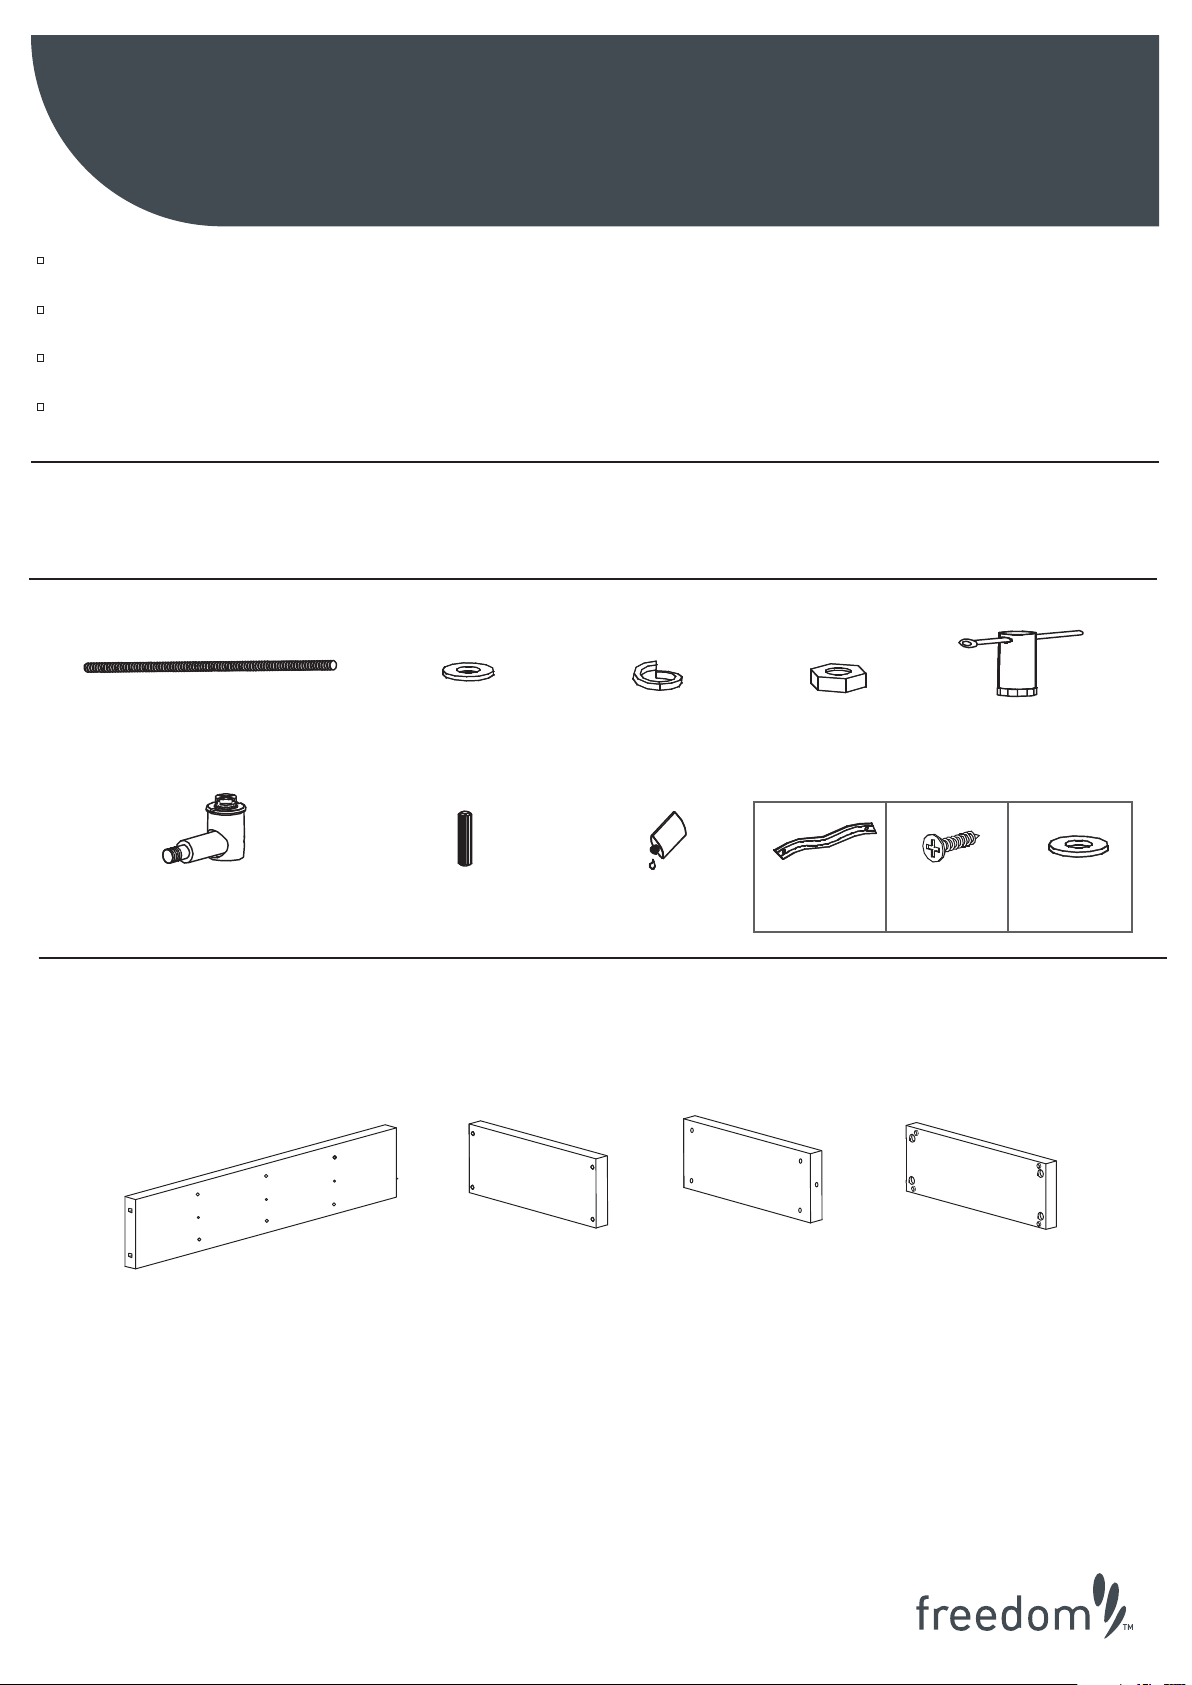
Hardware
4xPart A
12xPart F
Parts
4xPart B
6xPart G
4xPart C
1xPart H1xPart H
4xPart D
1xPart E
1xPart M 1xPart N
2xPart O
Page 1
2xPart I
1xPart J
3xPart K
1xPart L
Page 2
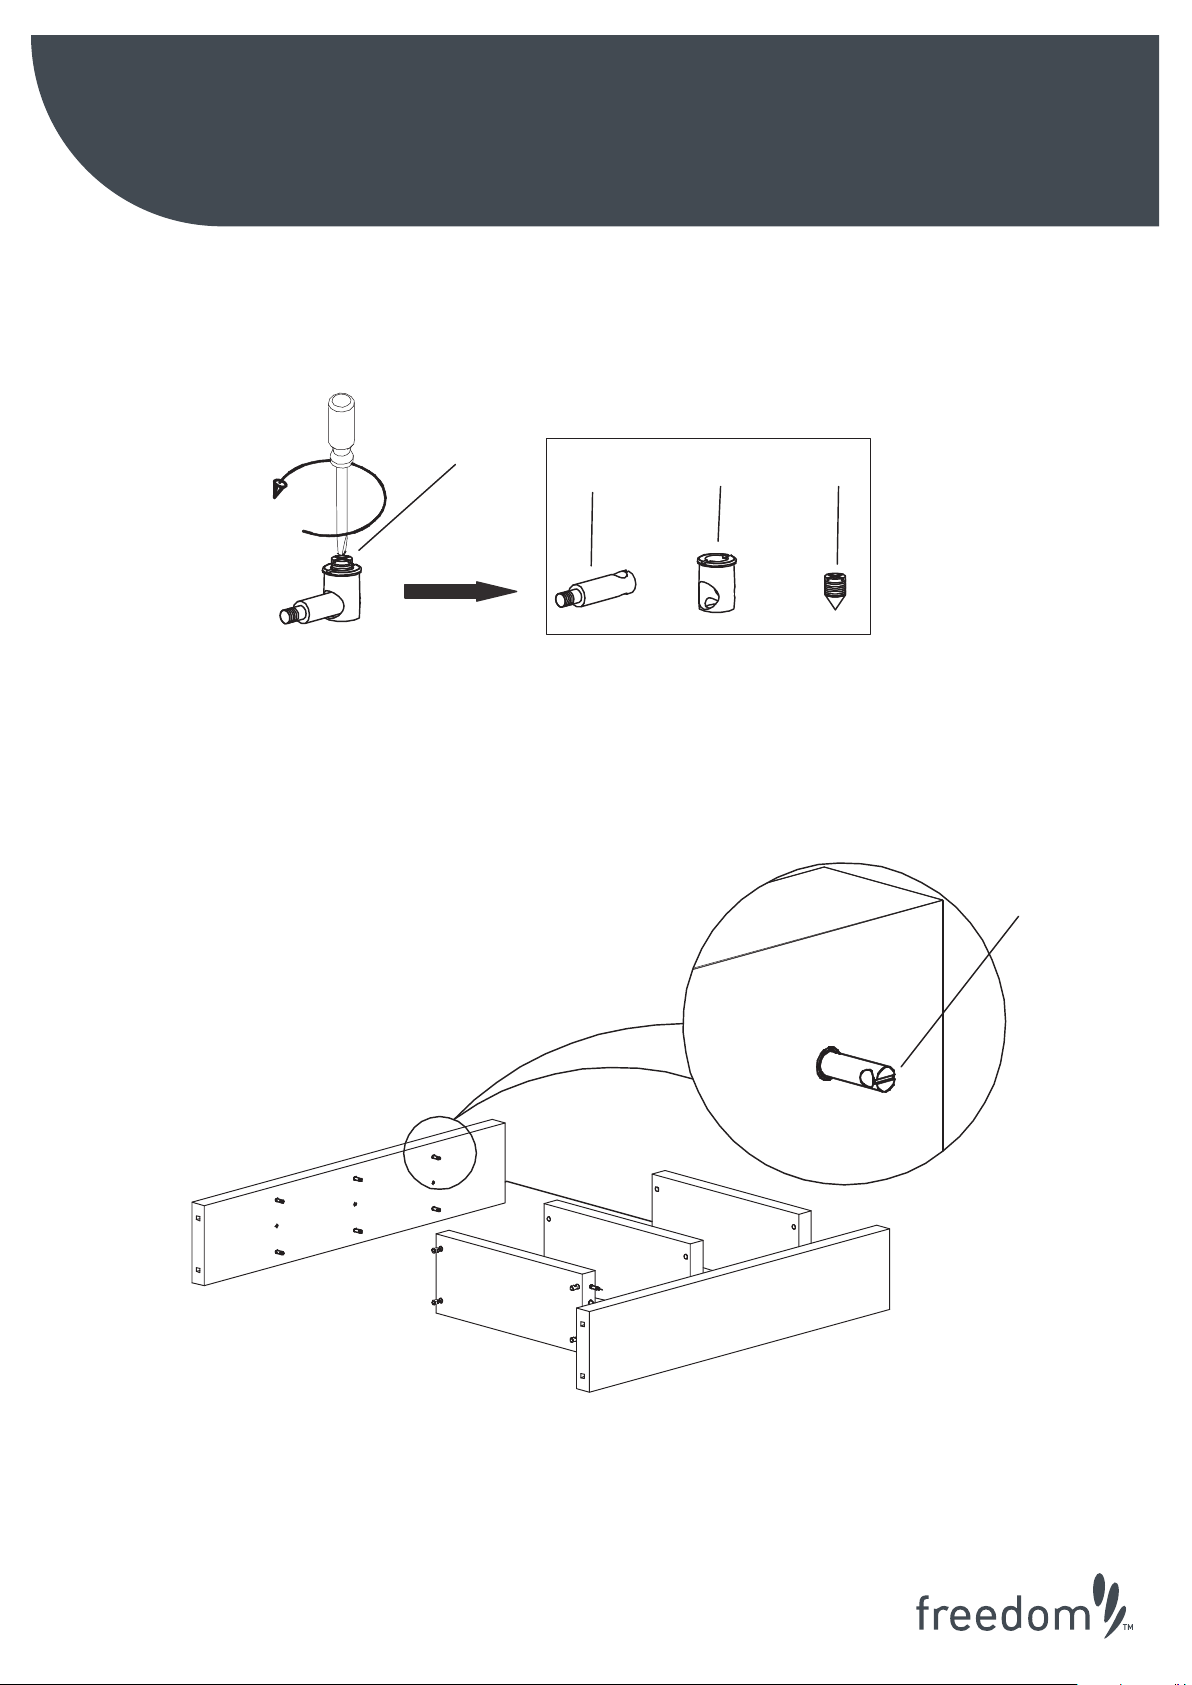
Step: 1
Assembly Instructions
Union Tall Bookcase
Part F
F1
F2
F3
Step: 2
Part I
F1
Part K
Part K
Part K
Part I
Page 2
Page 3

Step: 3
Assembly Instructions
Union Tall Bookcase
F1
G+H
F2
Step: 4
F3
Page 3
Page 4

Step: 5
Assembly Instructions
Union Tall Bookcase
Part A
Part J
Step: 6
Part B
Part C
Part D
Part J
Part E
Part L
Page 4
Page 5

Step: 7
Assembly Instructions
Union Tall Bookcase
Part J
Part L
Page 5
Page 6

Assembly Instructions
Union Tall Bookcase
Description: Fix your bookcase unit to the wall for extra stability
1. Place the unit into required position
2. Ensure unit is level before securing to the wall .
3. Place the wall fitting into position (Step 1.1)
4. Mark the location point for the screw for a fixing the wall fitting onto the unit top
5. Insert Part A screw into the wall fitting
6. Mark the location point for the wall screw for fixing the wall fitting to the wall
7. Wall fixings are not supplied, please secure your unit to the wall using the appropriate fixings for your
wall type. These are readily available from your local D.I.Y/Home Improvement store. If in doubt consult a
qualified person, before drilling your wall check for hidden pipes or electric cables.
8. Position the unit against the wall and secure the wall fitting to wall using the appropriate wall plug and
screw(Step 2.1)
Step
1.1
Part O
Step
2.1
Wall
Part N
Part M
Wall
Page 6
 Loading...