How it Works
Log In / Sign Up
Buy Points
How it Works
FAQ
Contact Us
Questions and Suggestions
Users
Freedom
Loading...
F
Farmhouse Hutch
Farthing Coffee Table
FCVMR38
Felix 2 Seat Sofa
Felix 3 Seat Sofa
FG-50
2
Filigree Bed
Filigree Single Bed
Flare Bar Stool
Flexi 3 Shelf mini
Flexi 3 Shelf minipdf
Flexi 4 Shelf Large Casters
Flexi 4 Shelf Large Casterspdf
Flexi 4 Shelf Small with Castors
Flexi 4 Tier with Castors
Flexi 5 Shelf
Flexi Combo Unit Shelf
Flexi Kitchen Trolley
Flexi Robe
Flex Sofabed
Flip Top Desk
Flynn Dining Chair
Focus 40 Blue
Forma Bookcase
Forma Desk
Format Bookcase
Format Desk
Fort Bunk Bed
Forte Barstool
Fortress tent
FR-3neo
FR7183
Freedom
Freedom FR7183
Frenchie Ottoman
Frenchie Sofa 2.5S
Frieda ETU 2 Door
Frost String Lights
G
Gem String Lights
Georgia Dining Bench
Georgia Dining Chair
Georgia Dining Table
Georgia Table
Ghost Coffee Table
Gin Bar Stool
Gin Bar Table
Giselle Queen Bed
Gleen Chair
Gordan Bedside
Gordan Tallboy
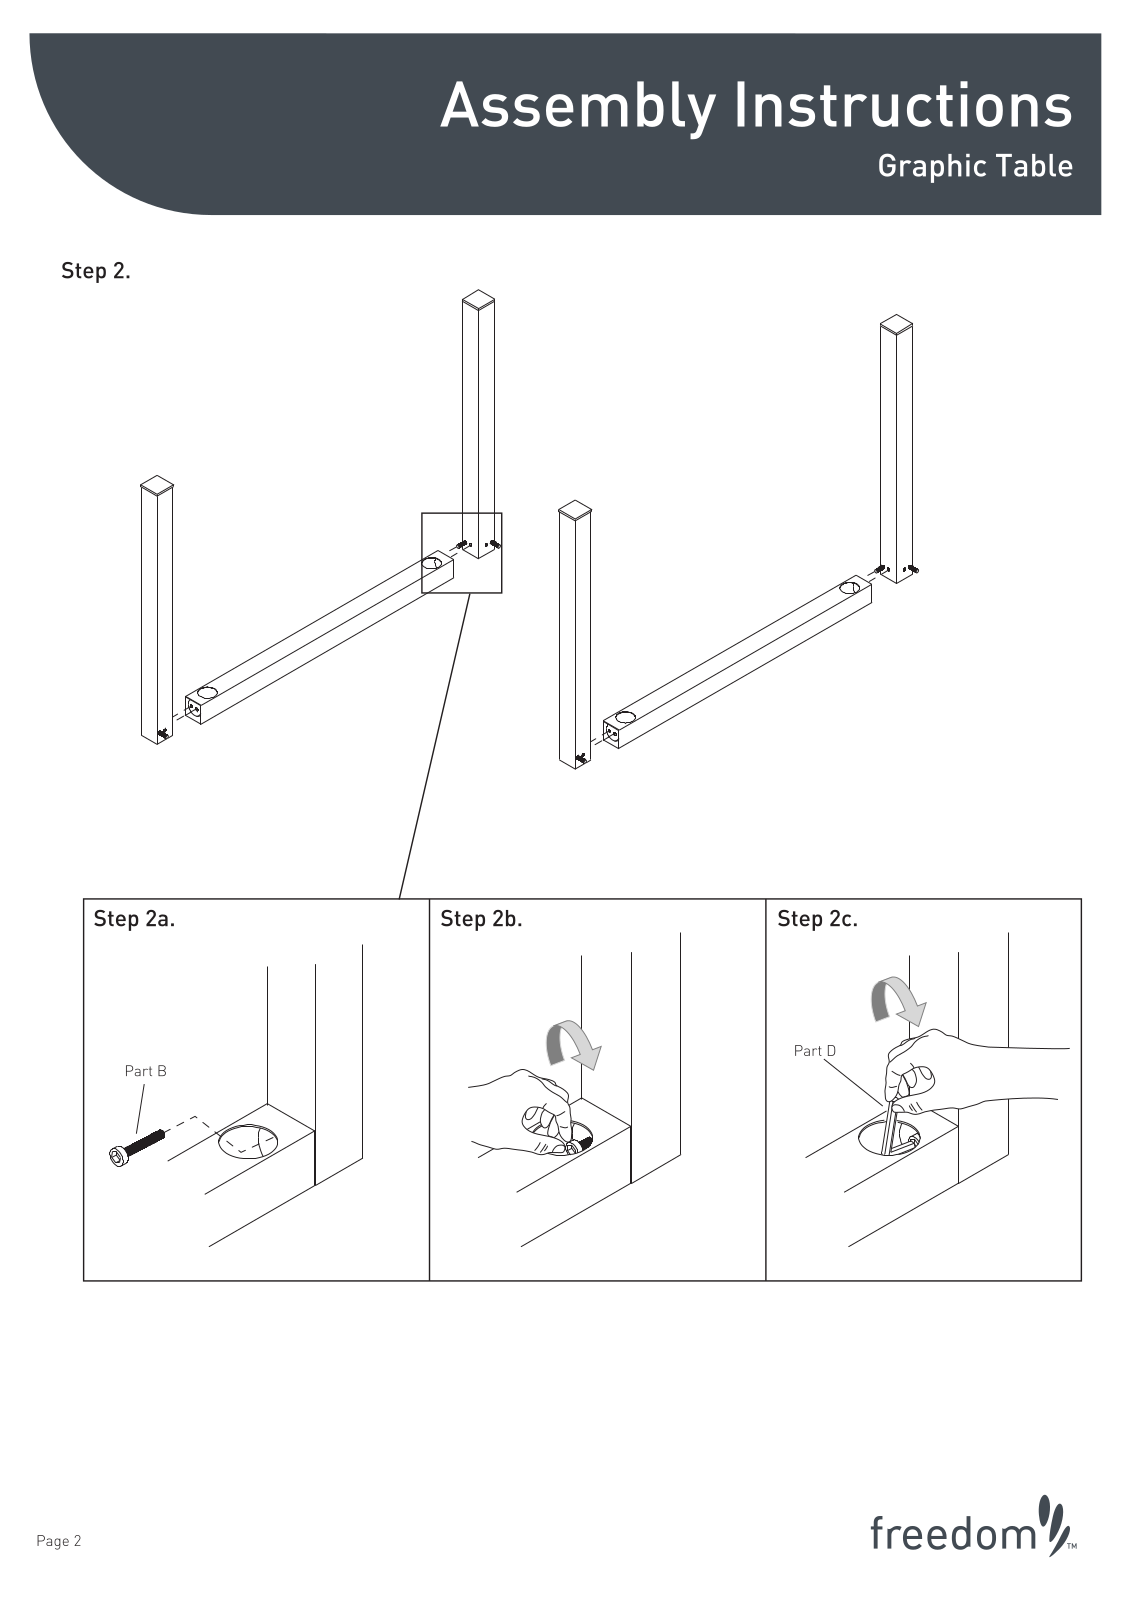
Graphic Table
H
Handy Shoe Tidy
Harris XL-200
Helix ETU
Helsinki Bed
Henderson Bed
Henderson Dining Table
Hinge Adjustment
Horden Floor Lamp
Hotel 2 Seat Sofabed
Hotel 3 Seat Sofabed
Hotel Arm Chair Sofabed
HPA5013
HPA506
HPE10010
HPE5013
HPE506
HPH506
Hunter Bed
Hunter Dining Table
I
Industry Office Chair
Italica Chair
Italica Dining Table
J
Jackson King Bed
Jackson Queen Bed
Jasmine Bed
Jasmine Single Bed
Jasper Cabinet Doors
Jasper Wall Cabinet
Javi 2 Extension Dining Table
Javier Sofabed
JAWS
JAZ Chair
Jepara Desk
Jetson Storage Unit 2 Shelf
Jetson Storage Unit 4 Shelf
Jetson Trunk
Jetty 2 Seat Arm Chair
Jetty Armchair
Jetty Bench
2
Jetty Coffee Table
Jetty Dining Chair
Jetty Dining table
3
Jetty Director's Chair
Jetty Sun Lounge
Jetty Umbrella
Jimmy Double Robe
Jimmy Extendable Mobile Robe
Jing Bar Stool
K
Kassali Bench
Loading...
Loading...
Nothing found
Graphic Table
Assembly Instruction
4 pgs
1.73 Mb
0
Table of contents
Loading...
Freedom Graphic Table Assembly Instruction
...
Freedom Assembly Instruction
Download
Specifications and Main Features
Frequently Asked Questions
User Manual
Download
Page 1
Page 2
Page 3
Page 4
Loading...
+
hidden pages
Unhide
You need points to download manuals.
1 point = 1 manual.
You can buy points or you can get point for every manual you upload.
Buy points
Upload your manuals