

Freedom Beaumont Privacy Blind Installation Instructions Manual
Page 1 of 3
www.freedom.com.au
Tools (not supplied)
x4
Pencil
x4
Drill
Thank you for purchasing the Beaumont Privacy Blinds. Please check to ensure that all hardware and parts have been
supplied. This page lists all contents included in the packaging.
Follow instructions closely as deviation from them may present a possible safety risk and may void your warranty.
If you experience any problems with your new purchase, please contact Freedom Curtain and Blind Customer Care on
1800 676 612.
Phillips head
screwdriver
WARNING: Check what substrate you are fixing into and that there is sucient support for the weight of
the blinds and brackets. We suggest fixing into studs, brick or timber and that the appropriate
attachments for the drill are used.
readymade
beaumont privacy blinds
Gently dust with a clean cloth or using a venetian blind cleaner
Do not wash
Do not clean with harsh or abrasive materials
Installing the Beaumont Privacy Blind
x2
x2
x2
Ladder
Tape Measure
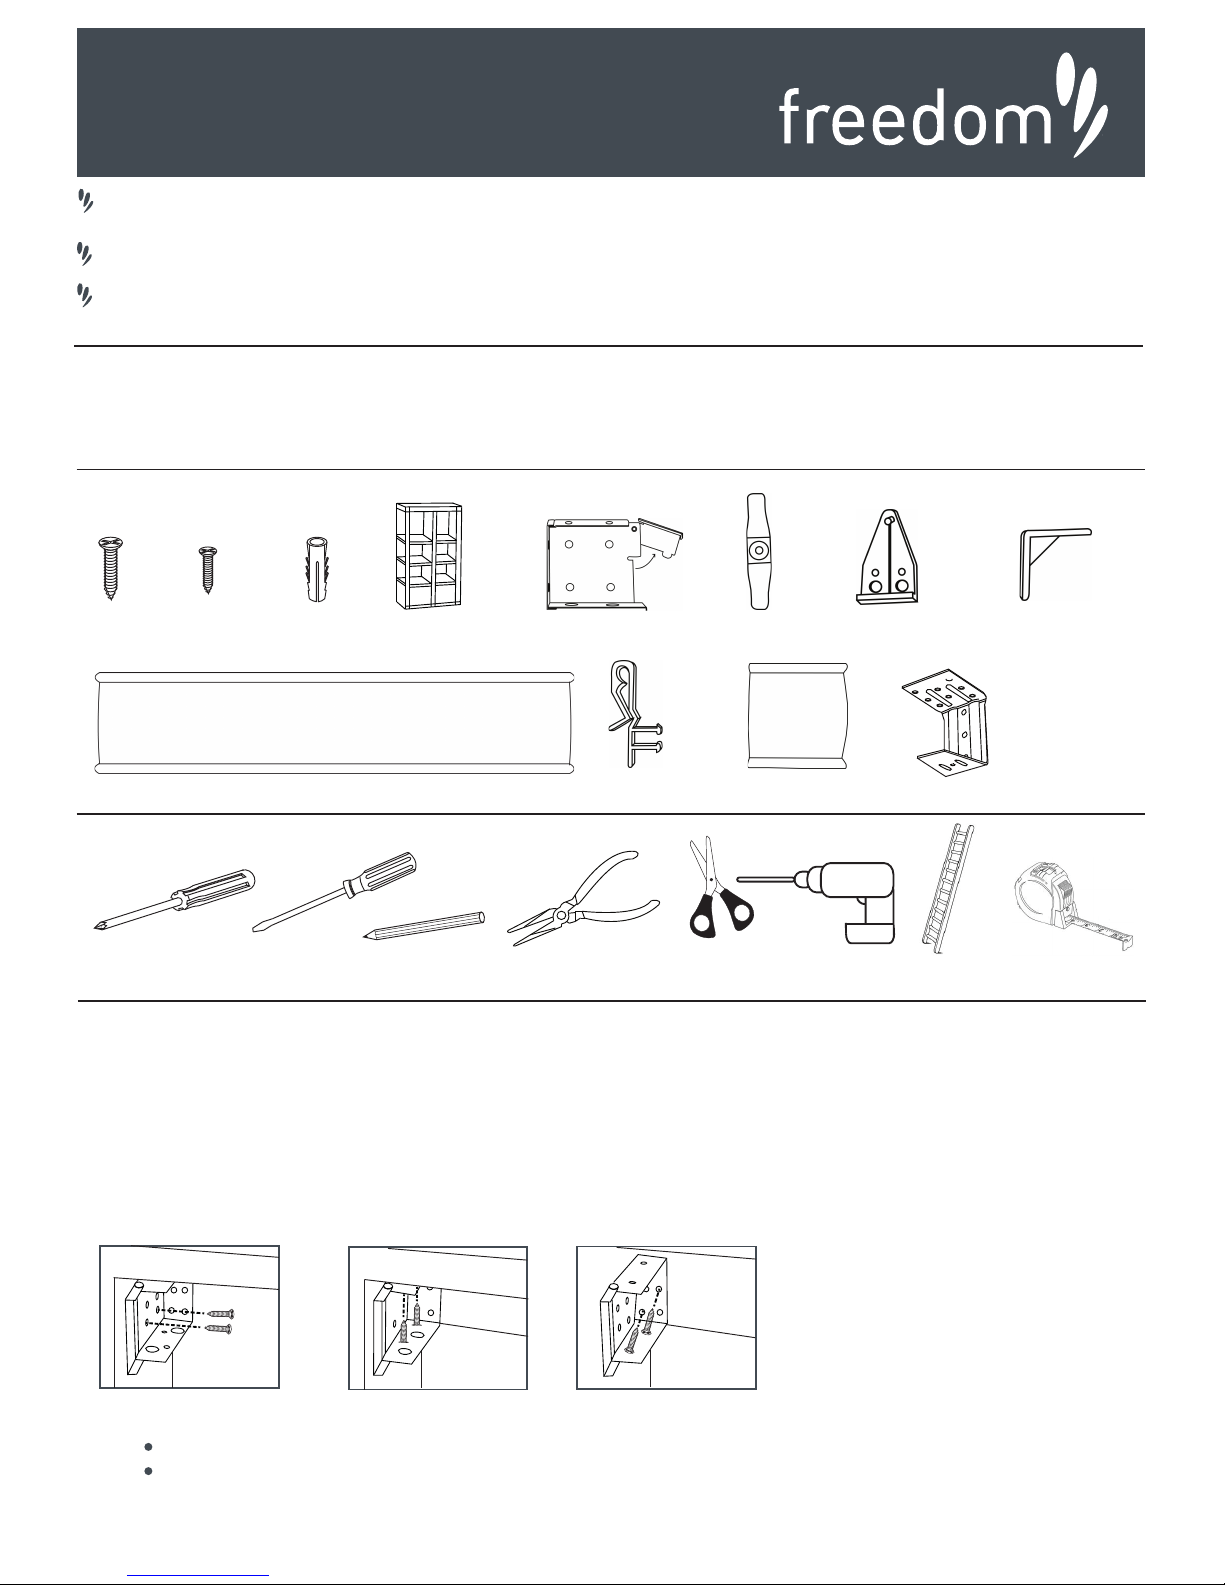
Screws
(large)
Masonry Plugs
Valance
Valance Clips Valance Returns
Valance Return
Clips
Mounting Brackets Cord Cleat Hold down clips
Centre Support
(included with blinds
105cm wide & above)
Care Information
Hardware
x6
Screws
(small)
x min 2
Note: When installing blinds inside the window frame, brackets can be mounted three ways - top, side or
face. For outside mount to the window architrave, face mounting is the method used.
Please refer to the diagrams which demonstrate the various mounting options.
Face Mount
Side Mount Top Mount
Extenders
x2
x min 2
x min 1
(A)
(B)
(C)
(D)
(E)
(F)
(G)
(H)
(I)
(J)
(K)
(L)
x2
Point nose pliers
To determine which mounting option is best suited to your window, consider the following;
Does the blind fit inside the window frame? If not, an outside face mount will be required.
Does the window have enough depth to mount the bracket inside the frame? If not, an outside face
mount will be required.
Scissors
Flat head
screwdriver
Page 2 of 3www.freedom.com.au
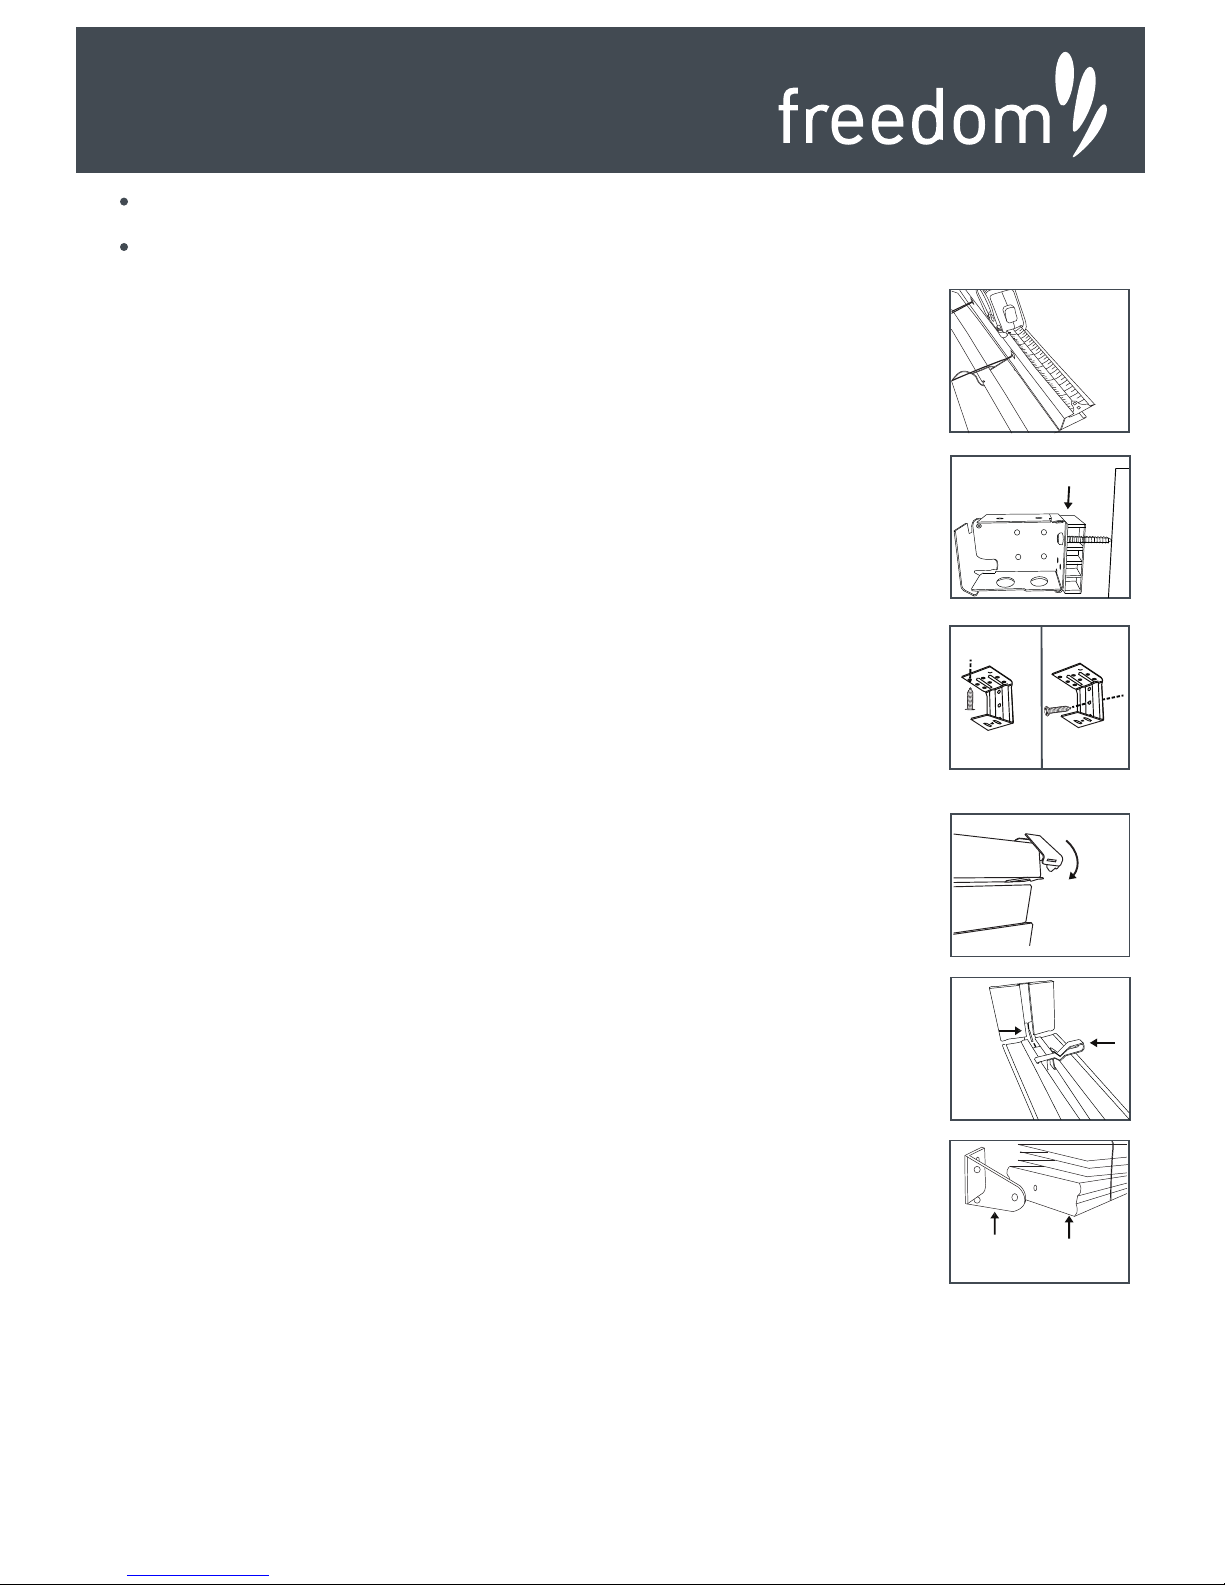
1. Measure the blind head rail using a metal tape measure. Add 5mm to each end.
HOW TO OPERATE
Always tilt blind horizontally before raising and lowering to extend life of the blind.
To Lower Blind: Pull cords to the centre of the blind and down slightly to release the lock. Gently release the cords until
5. Mount the centre support bracket(s) (L).
If top mounting, align the top of the centre support bracket (L) to the top of the mounting
brackets (E). Install centre support bracket (L) by screwing into top of bracket. Ensure position of
centre support bracket (L) does not interfere with the ladder cords of the blind.
If face fixing, align the top of the centre support bracket (L) into the back of the mounting
brackets (E). Ensure position of centre support bracket (L) does not interfere with the ladder cords
of the blind.
6. Push head rail into the brackets, then close the flap of the mounting brackets (E) to lock into
place.
7. Attach the valance clips (J) to the back of the valance (I). Clips (J) to be positioned at each end of
the valance (I).
8. For outside mount: Slide right angle valance return clip (H) into groove at the back of the
valance (I). Align edge of valance return (K) and slide onto valance return clip (H). Repeat for other
return (K).
9. Attach the valance (I) onto the head rail of blind by sliding valance clip (J) over the top front edge
of the head rail.
10. Hold down clip (G) can be used when blind is lowered to stop the blind from being blown around.
To install; lower the blind to your desired position, place hold down clips (G) in base rail and mark
screw holes where hold down clips (G) meet the window frame.
11. Pre-drill holes and screw in hold down clips (G) using a Phillips head screwdriver.
INSTALLING CHILD SAFETY DEVICE
To avoid creating a possible strangulation hazard for children, the corded internal window covering must be installed in
such a way that a loose cord cannot form a loop 220mm or longer at a height of less than 1600mm above floor level. Attach
cleat to the window frame using screws provided at least 1600mm above floor. Ensure cords are fully wrapped around cleat
at all times. Check cords periodically to ensure that have not twisted together to form a loop. DO NOT TIE CORDS
TOGETHER
.
Note: Blinds 105cm wide and above will require centre support bracket(s) (L) to be installed.
2. Taking into consideration the chosen method of mounting, position mounting brackets (E) at
each end of the window frame and using a pencil, mark to correspond with the measurement taken
in step 1.
3. Pre-drill screw holes.
4. Fix the mounting brackets (E) with a screwdriver. Do not tighten screws until the brackets are
level.
Valance
clip
Top Mount Face Mount
Valance
return
clip
close the
flap to lock
measure
head rail
Note: If face mounting, you will need to determine if the extenders (D) will be required or not.
These are used between the mounting bracket (E) and the architrave. This gives clearance to
the slats when opening and closing.
Hold down
clip
Base bar
readymade
beaumont privacy blinds
What are your window frames made out of? Installation into metal frames is not recommended. In this
case an outside face mount is the best option.
Are there any door handles, locks or fittings that may interfere with the blind if inside mounted? If so,
consider an outside face mount.
Step 1
Step 3
Step 5
Note: The ladder cords are the cords that run vertically down the blind to hold the slats in
position.
Step 6
Step 7
Step 10
extender placed
behind the bracket
 Loading...