

Page 1
USER MANUAL
Rev. 804
MUSICPAL
WIRELESS DIGITAL INTERNET RADIO /
MP3 STREAMER / (W)LAN
Page 2

Freecom MusicPal
EN
Dear User,
Congratulations on the purchase of your Freecom MusicPal. The MusicPal enables
you to receive Internet Radio or play stored music files from a connected media server
(UPnP).
If you are a novice in networks and routing basics, please check out Appendix "Network
Basics" to get to know the terminology and processes used in this manual.
Freecom Technologies GmbH • Germany
www.freecom.com
Package Contents
Please check the package contents. Make sure it includes the following items:
reecom MusicPal
• F
• Power pack
• Network cable (UTP)
• CD-ROM with instruction manual and application software
• Quick installation guide
Attention!
All rights reserved. The product names contained in this user‘s guide are used solely for
identification purposes and may be trademarks or registered trademarks of those companies. This device is designed for office and home use.
Warning! This device is an appliance made according to EN 55022 class B.
Freecom shall assume no liability for damages of any kind, for loss of data or any consequential claims resulting thereof (including, and without restriction, claims relating to
business losses, business interruptions, loss of business data or other financial damage)
that result from the use of this Freecom product or improper operation of this Freecom
product. This shall also apply in cases where Freecom has been notified that such claims
may exist.
Subject to change as technical advances dictate.
© 2008 Freecom Technologies
2
Page 3

EN
Table of Contents
User manual
General Information ........................................................................................................... Page 5
System requirements .................................................................................................. Page 6
Compatibility ................................................................................................................. Page 7
Safety precautions ....................................................................................................... Page 8
Advantages of the Freecom MusicPal ..................................................................Page 8
Software features ......................................................................................................... Page 9
Hardware features ........................................................................................................ Page 9
Chapter 1:
Connecting / Installing the Freecom MusicPal .........................................................Page 10
Hardware (LAN) ............................................................................................................. Page 10
Hardware (WLAN) ......................................................................................................... Page 11
Installation of the
Fr
eecom Network Storage Assistant Software (PC) ........................................Page 12
Installation of the
Fr
eecom Network Storage Assistant Software (Mac) .....................................Page 13
Chapter 2:
Getting to know the Freecom MusicPal ...................................................................... Page 14
Connections, LEDs and control elements
of t
he Freecom MusicPal............................................................................................ Page 14
Chapter 3:
Freecom MusicPal Functions ...........................................................................................Page 16
Overview.......................................................................................................................... Pa
Now Playing .................................................................................................................... Page 19
Favorites ........................................................................................................................... Page 20
Internet Radio ................................................................................................................Page 21
Media server (UPnP) .................................................................................................... Page 22
Extras ................................................................................................................................. Page 23
Settings ............................................................................................................................ Page 24
ge 16
3
Page 4

Freecom MusicPal
EN
Chapter 4:
The Freecom Network Storage Assistant (PC/Mac) ................................................Page 63
Features of the Freecom Network Storage Assistant (PC) ............................ Page 63
Features of the Freecom Network Storage Assistant (Mac) ......................... Page 66
Chapter 5:
Configuring the Freecom MusicPal through the web interface ....................... Page 68
Overview.......................................................................................................................... Pa
How do I access the configuration menu? .......................................................... Page 69
Now Playing .................................................................................................................... Page 70
Settings ............................................................................................................................ Page 71
Administration ............................................................................................................... Page 95
ge 68
Chapter 6:
Freecom MusicPal in practical usage .......................................................................... Page 96
What do I need what for? ......................................................................................... Page 96
Media server (UPnP) in connection with the Freecom MusicPal ................ Page 97
Using your PC as media server (UPnP)
(p
laying MP3s from your local PC) ......................................................................... Page 99
Using your Mac as media server (UPnP) .............................................................. Page 105
How can I Iisten to Internet Radio? ........................................................................ Page 105
How can I update my firmware? ............................................................................. Page 105
The vTuner Premium Internet Radio Service
...................................................... Pa
ge 107
Appendix:
Network Basics ..................................................................................................................... Page 113
4
Page 5

EN
General Information
General Information
Technical Support
For any technical questions, please visit our web site at www.freecom.com. This website
offers a comprehensive range of information, answers to frequently asked questions,
firmware and product guides (available for download). You can also use our forum to
exchange experience with other users or discuss any problems or difficulties you may
be having.
Or else contact Freecom Support for more in-depth assistance.
Freecom on the Internet
You can find information on the MusicPal and other Freecom products on our Internet
home page at the URL address http://www.freecom.com. To do this you require an Internet
connection and a web browser, such as Internet Explorer or Firefox.
Trademark
Freecom is a trademark of Freecom Technologies GmbH. Microsoft and Windows are
trademarks of the Microsoft Corporation. Other brands and product names are registered
trademarks or trademarks of their relevant proprietors.
This product is protected by certain intellectual property rights of Microsoft. Use or distribution
of such technology outside of this product is prohibited without a license from Microsoft.
5
Page 6

Freecom MusicPal
EN
System requirements
Your system needs to meet the following hardware and software requirements for the
device to function properly.
Network requirements
our PC should be equipped with an Ethernet network interface. If this is not the
• Y
case, first of all a network has to be installed.
ou need a broadband connection (DSL 1 Mbit/s or higher) in combination with a
• Y
router or similar network devices where DHCP is available.
Software requirements
You only need to meet to the software requirements if you carry out the MusicPal configuration using the HTML configuration on the PC, or wish to use your computer as
local UPnP server.
indows Vista
• W
• Windows 2000
• Windows XP
• MacOS X 10.3 or higher
Hardware requirements
You only need to meet to the hardware requirements if you carry out the MusicPal
configuration using the HTML configuration on the PC, or wish to use your computer
as local UPnP server.
• P
C: Intel Pentium III / AMD Duron 900 MHz or higher
• Mac: PowerPC G3/G4/G5, Power Book G3/G4 or Intel Mac
• 256 MB RAM (Vista: 512 MB RAM) or higher
• CD drive for installing software
• LAN / WLAN
• Internet connection for online warranty registration and updates and downloads of
software
6
Page 7

EN
General Information
Compatibility
The following play-list, file and streaming formats can be played with your Freecom
MusicPal.
Compatible play-list formats
3u
• m
• pls
• asx
Compatible file formats
MA
• W
• MP3
• WAV
• LPCM
Compatible streaming formats
PnP
• U
• DLNA 1.5
7
Page 8

Freecom MusicPal
EN
Safety precautions
To guarantee a faultless functioning of your Freecom MusicPal, please observe the following safety precautions. If you do not observe them, you might lose your warranty
claim and damage the MusicPal.
ind you don‘t drop the Freecom MusicPal and don‘t expose it to other types of
• M
sudden mechanical jolts - this might lead to data loss or damage to the device
on‘t use the Freecom MusicPal if the ambient temperature is under 10 °C or over
• D
35 °C.
f the Freecom MusicPal is moved from a cold environment into a warmer one, please
• I
let the MusicPal adapt to the ambient temperature before using the device. If you
don‘t do this, it might lead to condensation in the casing, which in its turn might
cause malfunctions in the device.
on‘t place any liquids or drinks on the MusicPal. If liquids get spilt and come in
• D
contact with the electronics in the device interior, this damages the hardware and
leads to malfunctions.
on‘t use the MusicPal in an environment that is full of dust. Dust in the casing can
• D
damage the electronics in the interior and lead to malfunctions in the device.
nly use the power pack delivered with the MusicPal.
• O
• By opening the MusicPal you forfeit your warranty claim.
Advantages of the Freecom MusicPal
The Freecom MusicPal is the optimal solution for private home entertainment. The
uncomplicated installation and configuration enables you to use Freecom MusicPal
within a very short time. By connecting to a router or media server (UPnP) through LAN
or WLAN it‘s as easy as winking to play your locally stored music files by means of the
media server (UPnP). The Freecom MusicPal also enables you to hear Internet Radio
programmes without any problem. Most of the Freecom MusicPal functions can be used
at once, with little previous knowledge.
The sound quality depends on the bit rate of the radio stream or of the MP3 files. The
basic rule is that the higher the bit rate, the better the sound quality. On Internet Radio
higher bit rates also cause a higher data traffic over your Internet connection. In case
your Internet connection does not have sufficient bandwidth, then there may be interruptions during playback.
8
Page 9

EN
General Information
Software features
• Media server (UPnP)
Connect to your local media server (UPnP) and access a categorised display of all music
files saved there.
• Internet Radio
With the provided Internet connection (broadband connection is recommended), you can
receive Internet Radio programmes from all over the world.
Hardware features
• Display
Clearly laid out and excellently illuminated display.
• Control elements on casing
The control elements on the casing front side make child‘s play of the MusicPal configuration procedure.
• Electrical requirements
Voltage: 100 – 240 V AC
Frequency: 50 Hz – 60 Hz, single-phase
• Environmental requirements
Operating temperature: 10°C – 35°C (50°F – 95°F)
Storage temperature: -10°C – 70°C (14°F – 158°F)
Air humidity: 20 – 80% relative humidity, no condensation
Maximum operating altitude above sea level: 3000 m
• Dimensions and weight
Weight: 600 g (21.2 ounce)
Dimensions: 26,5 x 11,5 x 8 cm (10.4 x 4.5 x 3.2 inch)
9
Page 10
10
Freecom MusicPal
EN
1
Chapter 1: Connecting / Installing the Freecom MusicPal
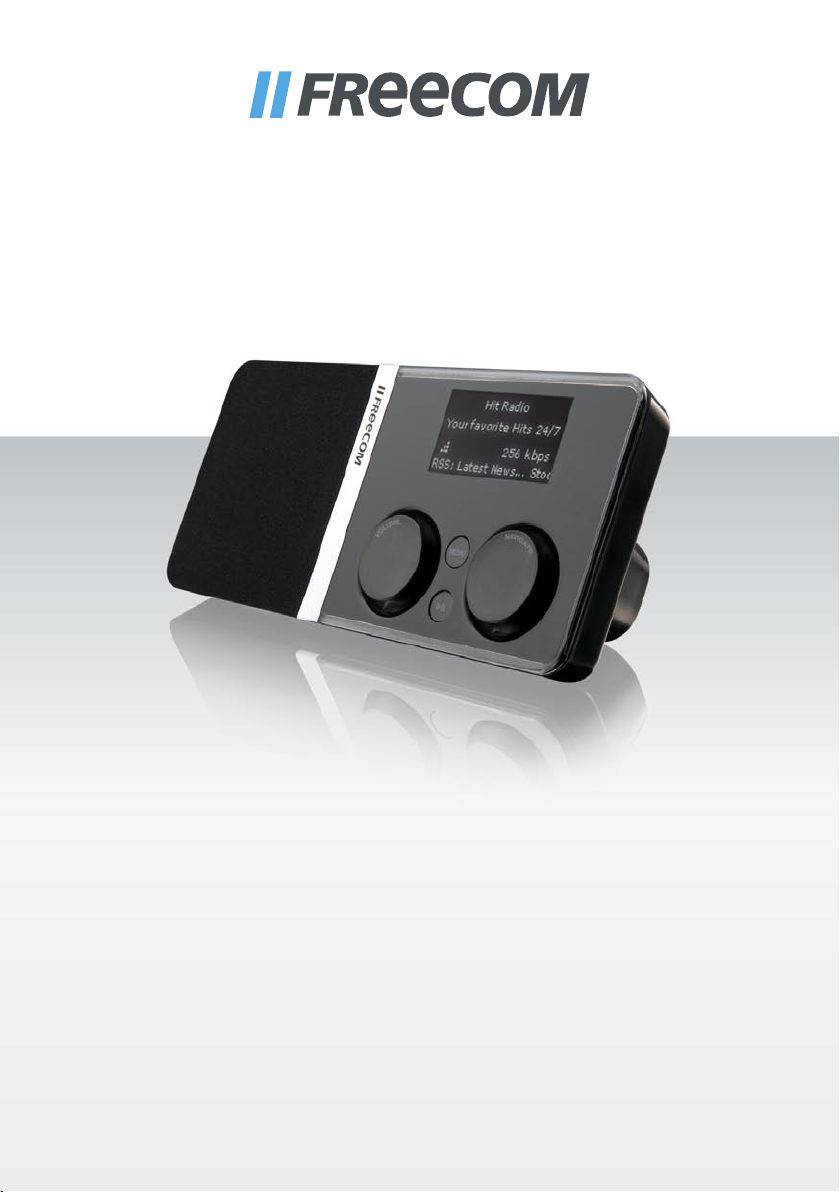
1.1 Hardware (LAN)
Installation of the Freecom MusicPal proceeds according to the following steps:
1. Connect the power pack to your Freecom MusicPal and
plug into a power socket.
2. Take the enclosed Ethernet cable and use it to connect the
LAN port on the back of the Freecom MusicPal with the
LAN port of your media server (UPnP) or router/switch.
3. Set your router to DHCP in the IP configuration. For more
details, refer to the Appendix in this manual.
4. Check the LINK/ACT light of the Freecom MusicPal LAN
port. If it is illuminated, the Freecom MusicPal is correctly
connected.
5. Select Internet Radio from the main menu of your Freecom
MusicPal.
Page 11
11
EN
1
Connecting / Installing the Freecom MusicPal
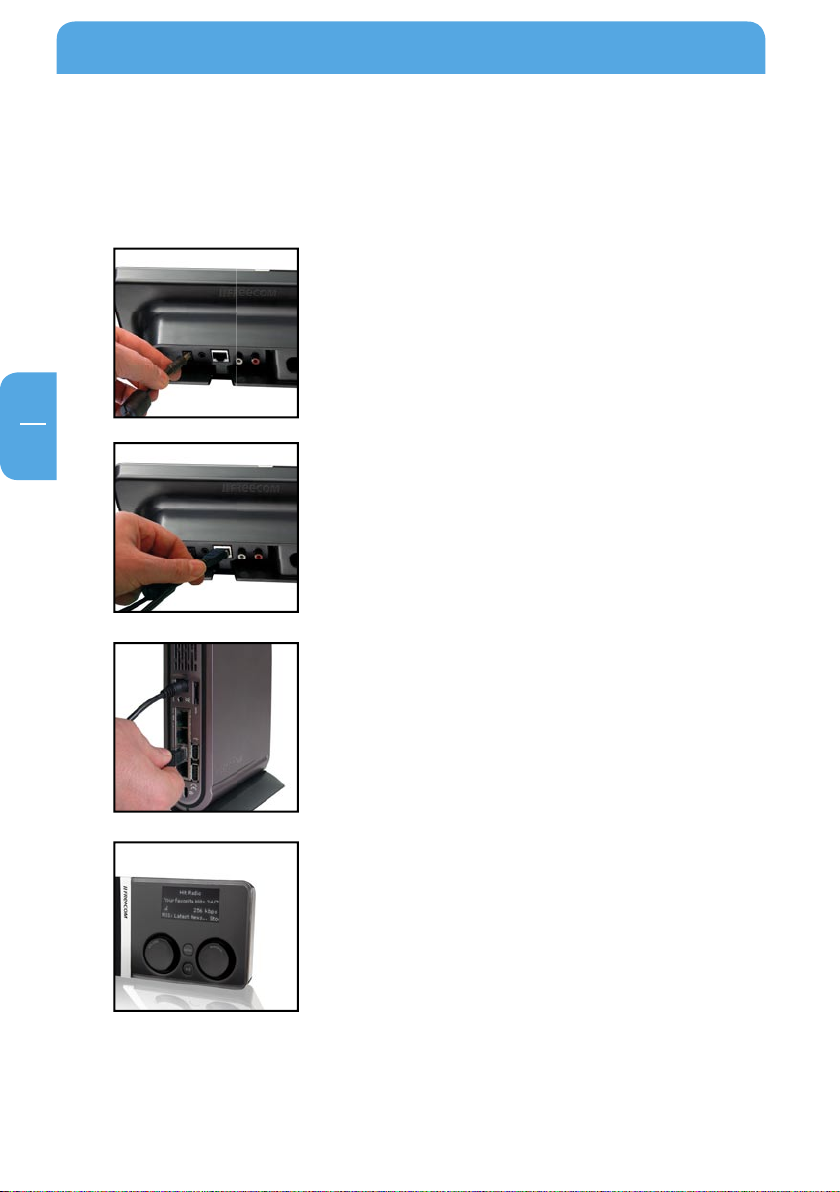
1.2 Hardware (WLAN)
1. Connect the power pack to your Freecom MusicPal and plug
into a power socket.
2. Select Settings in the main menu after you have switched
on the MusicPal.
3. Select WLAN Access Point.
4. Select the desired WLAN Access Point from the list. In case
your WLAN Access Point is encrypted by WPA/WEP you will
be prompted to enter a password.
5. Select Internet Radio from the main menu of your Freecom
MusicPal.
Page 12
Freecom MusicPal
EN
1
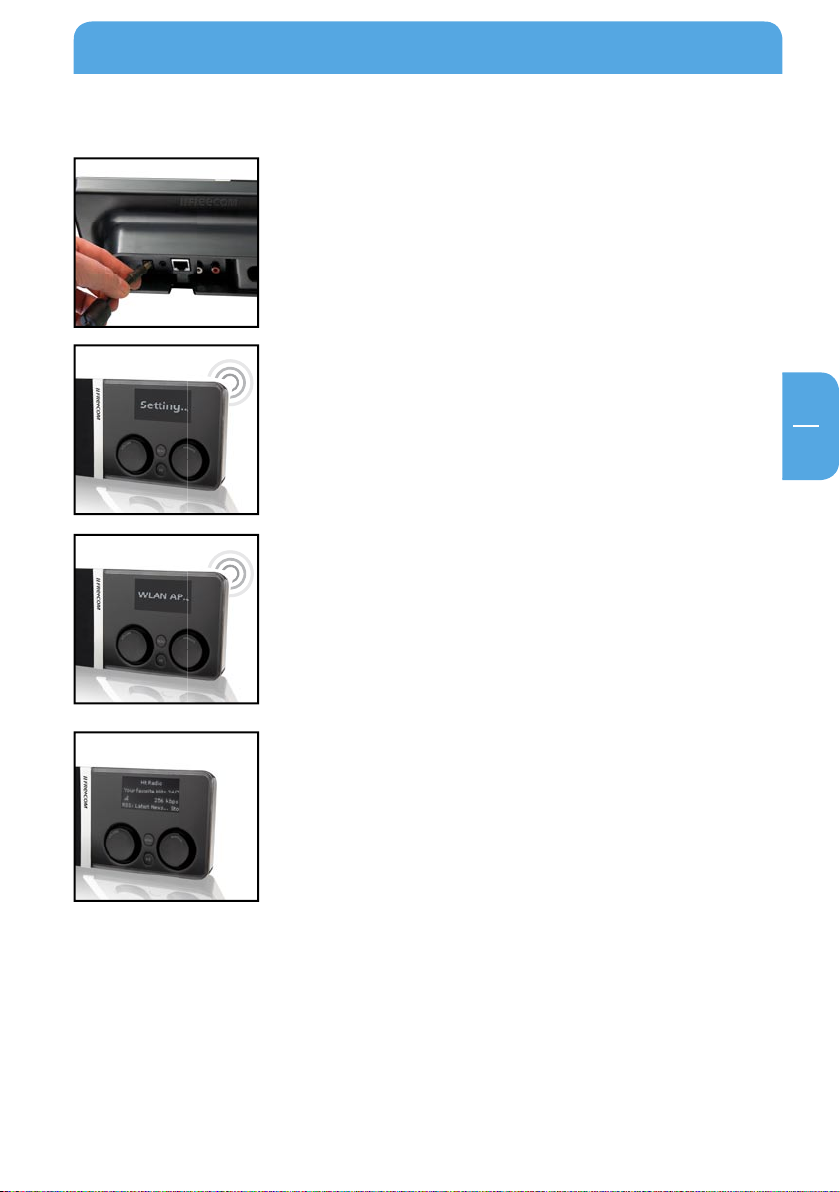
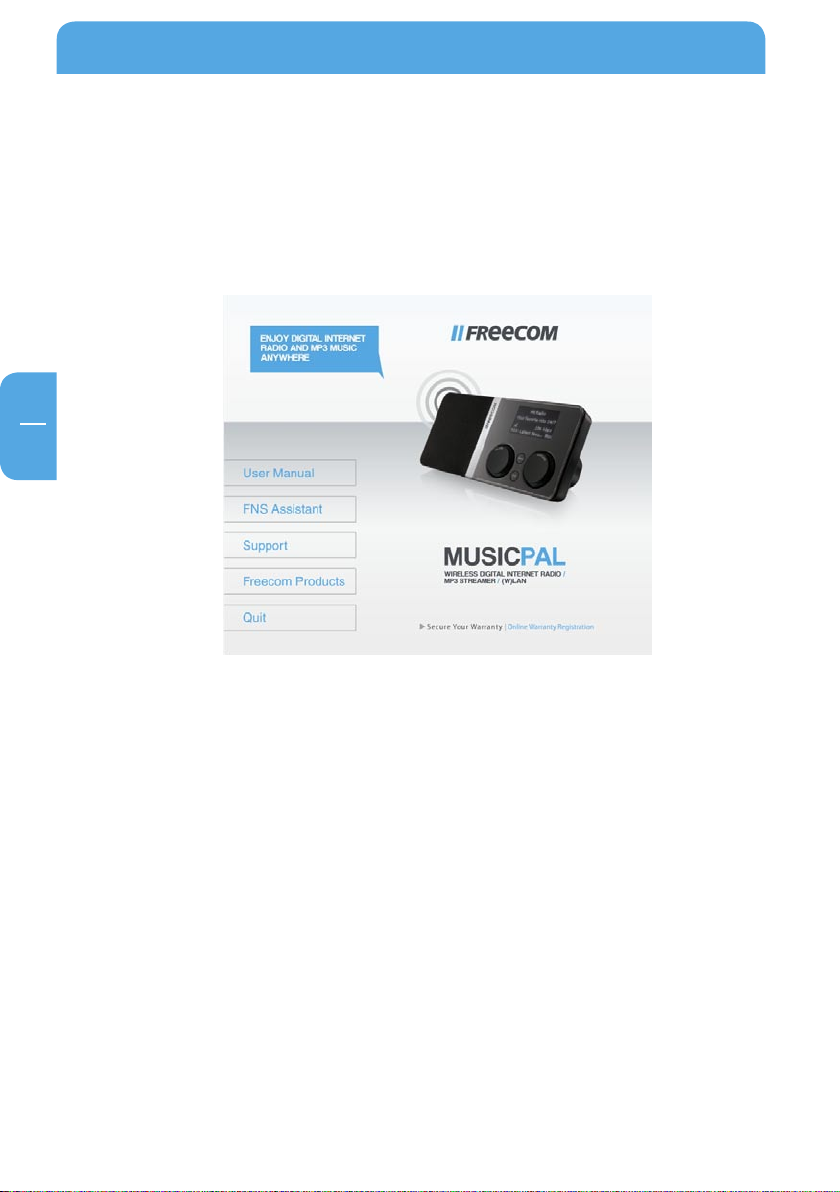
1.3 Installation of the Freecom Network Storage Assistant Software (PC)
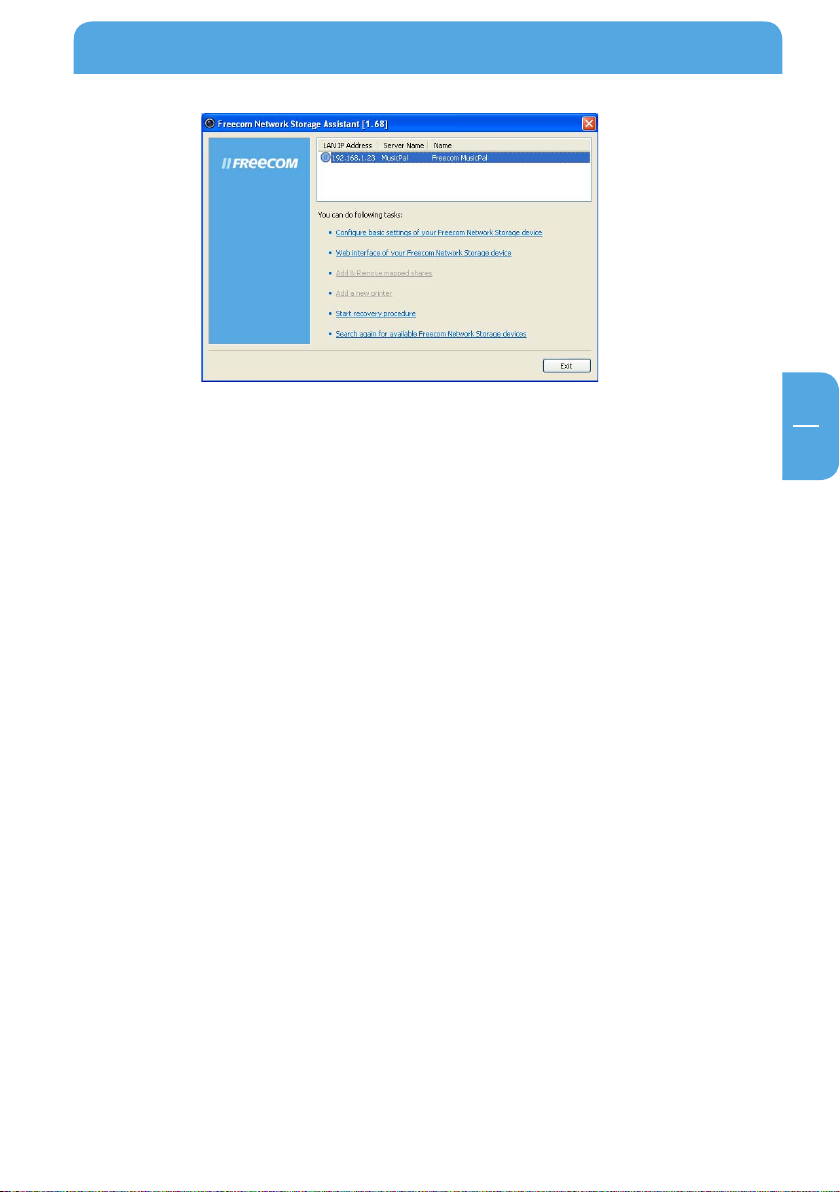
The Freecom Network Storage Assistant quickly detects and performs the basic set up
of your MusicPal. When you start it, it displays all MusicPals available in your network
and helps you configure the MusicPal.
1. Install the Freecom Network Storage Assistant from the enclosed Manual & Application CD.
12
Start the Freecom Network Storage Assistant.
2.
3.
Check the Freecom Network Storage Assistant whether your MusicPal was detected.
This may take some time. If your MusicPal is not immediately detected, click "Search
again for available Freecom Network Storage devices" to repeat the search.
Page 13
EN
1
Connecting / Installing the Freecom MusicPal
4. For a detailed functional description on the Freecom Network Storage Assistant,
please refer to chapter 4.
1.4 Installation of the Freecom Network Storage Assistant Software (Mac)
The Freecom Network Storage Assistant quickly detects and performs the basic set-up
of your MusicPal. When you start it, it displays all MusicPals available in your network
and helps you configure the MusicPal.
1. Insert the Freecom MusicPal software & Manual CD into your CD drive. Please click
on "Start" in the main directory of the CD.
Click on "Software Installation" -> "FNS Assistant". The installation starts now. Follow
2.
the instructions on the screen.
Start the Freecom Network Storage Assistant.
3.
Check the Freecom Network Storage Assistant whether your MusicPal was detected.
4.
This may take some time. If your MusicPal is not immediately detected, click "Search
again for available Freecom Network Storage devices" to repeat the search.
For a detailed functional description on the Freecom Network Storage Assistant,
5.
please refer to chapter 4.
13
Page 14
14
Freecom MusicPal
EN
2
12 3 4
Chapter 2: Getting to know the Freecom MusicPal
2.1 Connections, LEDs and control elements of the Freecom MusicPal
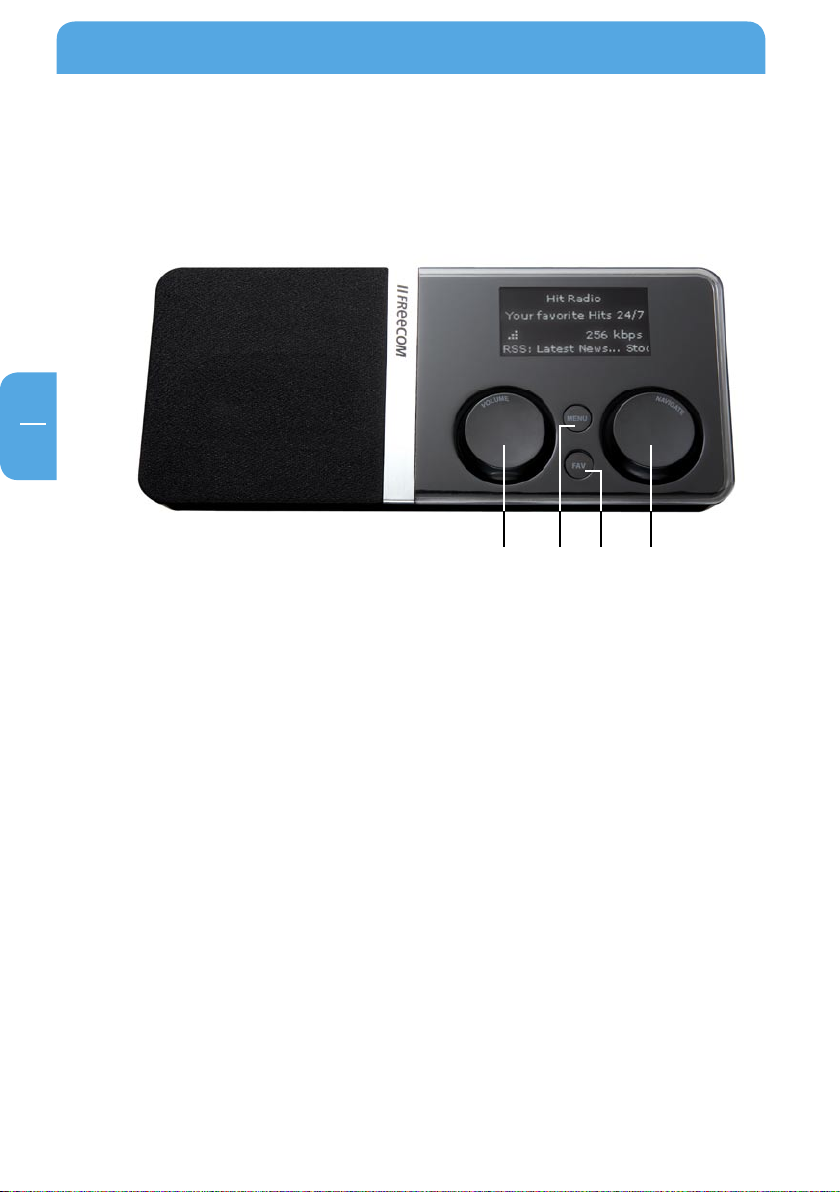
2.1.1 Freecom MusicPal Front Side:
1 "Navigate" rotary knob
The Navigate rotary knob enables you to navigate within the Freecom MusicPal
menu.
- Turning to the left or right navigates up or down through the menu.
- Press the "Navigate" knob to confirm your selection.
2 "Volume" rotary knob
The Volume rotary knob is for volume control of your Freecom MusicPal.
- Rotating the knob to the left or right turns the volume up or down.
- You pause play by briefly pressing the volume knob; press it briefly again to continue playing.
- If you press the volume knob for a longer period (approx. 3 seconds), the Freecom
MusicPal switches into standby; date and time are shown on the display.
To restart the Freecom MusicPal, activate any control element..
3 Menu button
The menu button is a quick means of going back to the previous menu.
4 "Favorites" button
Use the Favorites button to change directly to your Favorites list. If you only have one
entry in the list, this is played immediately.
Page 15
15
EN
2
Getting to know the Freecom MusicPal
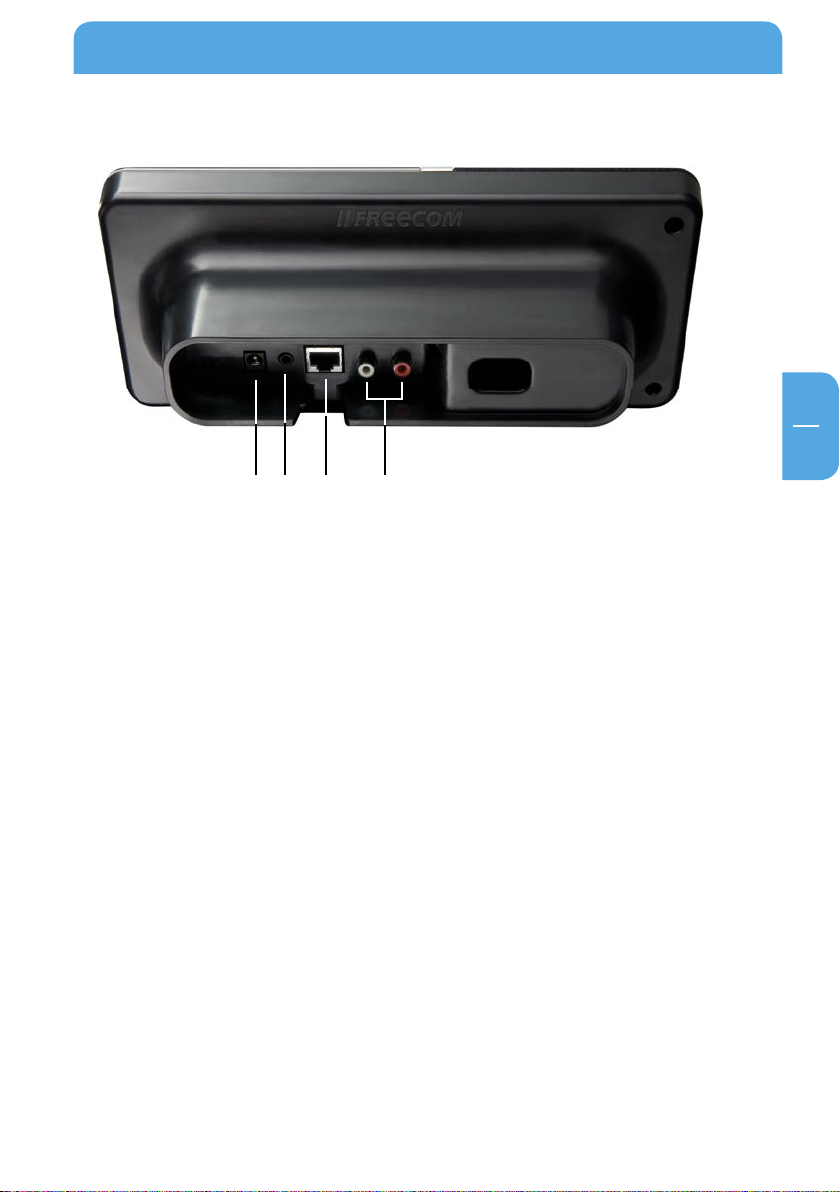
2.1.2 Freecom MusicPal Rear Side:
1 Power
Only use the cable included in delivery to connect up.
2 Loudspeaker output
Here you can connect to headphones or external box systems, for instance from
your PC.
3 LAN (RJ45)
The LAN connection creates the connection between the Internet or a local
UPnP server.
4 LineOut
Here you can connect to your stereo system.
1
2 4
3
Page 16

EN
3
Media Server
Favorites
Off
Once
Weekdays
Daily
Set Date & Time
Show Clock Idle Time
RSS Feed
Show Clock
Use ‘Now Playing
’
20 Percent
40 Percent
80 Percent
60 Percent
20 Percent
40 Percent
80 Percent
60 Percent
Off
Maximum
Maximum
Select your region
USA/other
Canada
Europe
France
Spain
Japan
WLAN disabled
your WLAN Poin
t
Select Access Poin
t
Internet Radio
Extras
RSS Feeds
Settings
RSS Feeds
Repea
t
Shuffle
Off
20 Percent
40 Percent
60 Percent
80 Percent
Maximum
Now Playing
Weather
Stock Quotes
Outpu
t
Bass Boos
t
Play Mode
Deutsch
English
Español
Italiano
Français
Nederlands
Startup sound
Brightness Active
World Clock
Calendar
Weather
Stock Quotes
Wake-Up Timer
Clock
Display
Language
Sound
WLAN Region
WLAN Access Poin
t
Sleep Timer
Edit Favorites
Information
Name
LAN IP
WLAN IP
Check for Updates
Extras Settings
World Clock
Calendar
(if enabled)
HTML Browser
Line-out Boost
HTML Browser
Brightness Sleep Timer
Brightness Sleeping
New Stations
Most Popular Stations
Web Added Stations
e.g. Germany
Genres
Countries
Web-Favorites
Shoutcas
t
Search Stations
Dansk
16
Freecom MusicPal
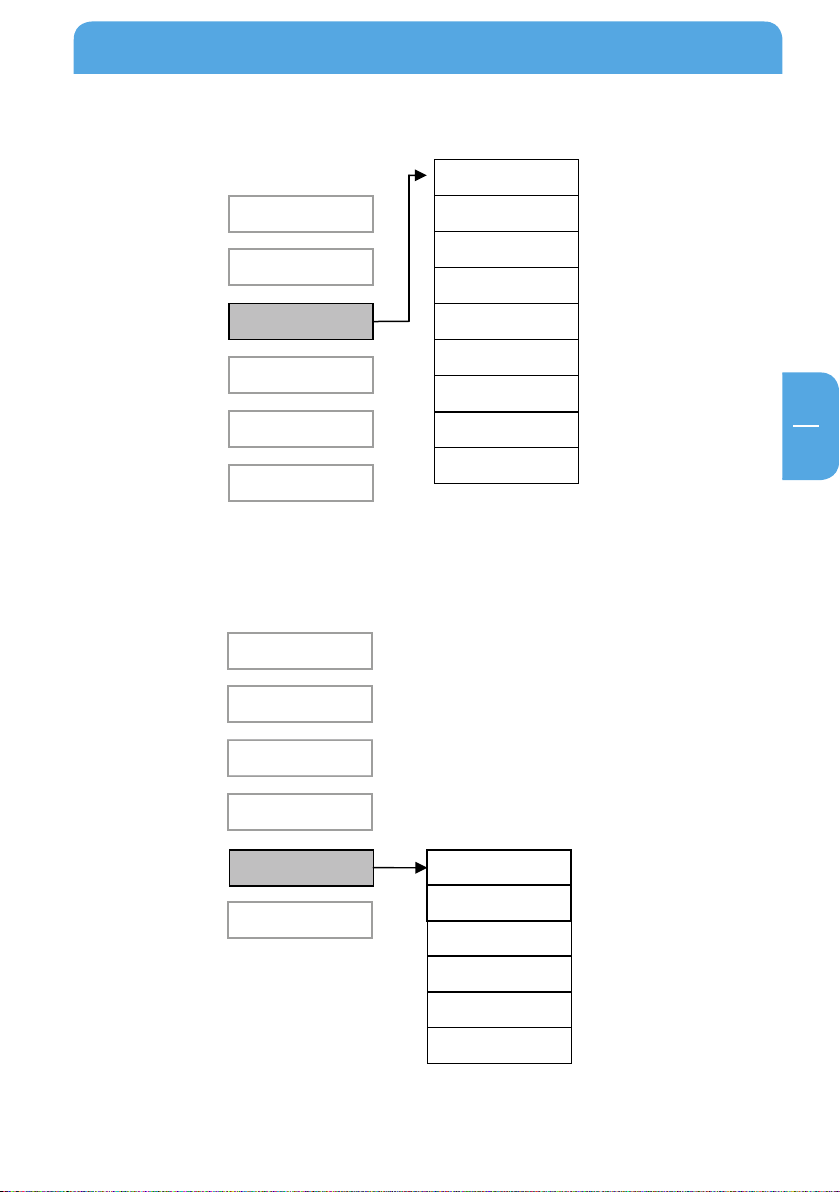
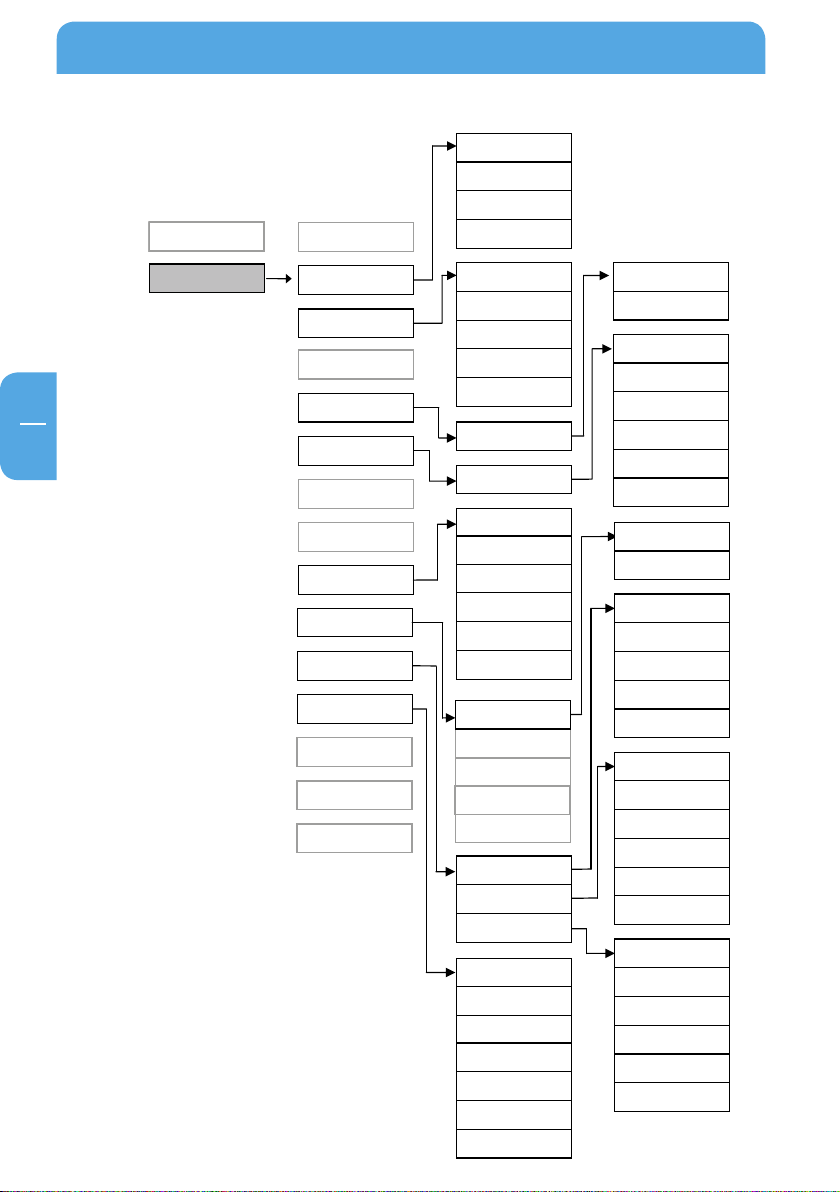
Chapter 3: Freecom MusicPal Functions
Information on operating the device: Turn the right-hand knob to move through
the menus. Confirm your selection by pressing the right-hand knob.
3.1 Overview
Page 17
EN
3
3.1.1 Overview of Internet Radio
Media Server
Favorites
Internet Radio
Extras
Settings
Now Playing
(if enabled)
New Stations
Most Popular Stations
Web Added Stations
e.g. Germany
Genres
Countries
Web-Favorites
Shoutcas
t
Search Stations
Media Server
Favorites
Internet Radio
Settings
Now Playing
(if enabled)
Extras RSS Feeds
Weather
Stock Quotes
World Clock
Calendar
HTML Browser
3.1.2 Overview of Extras
Freecom MusicPal Functions
17
Page 18
EN
3
Settings
Extras
Off
Once
Weekdays
Daily
Set Date & Time
Show Clock Idle Time
RSS Feed
Show Clock
Use ‘Now Playing
’
Wake-Up Timer
Clock
Sleep Timer
Select your region
USA/other
Canada
Europe
France
Spain
Japan
WLAN disabled
your WLAN Poin
t
Select Access Poin
t
RSS Feeds
Weather
Stock Quotes
World Clock
Calendar
WLAN Region
WLAN Access Poin
t
Edit Favorites
LAN IP
WLAN IP
Extras Settings
HTML Browser
20 Percent
40 Percent
80 Percent
60 Percent
20 Percent
40 Percent
80 Percent
60 Percent
Off
Maximum
Maximum
Repea
t
Shuffle
Off
20 Percent
40 Percent
60 Percent
80 Percent
Maximum
Outpu
t
Bass Boos
t
Play Mode
Startup sound
Display
Language
Sound
Information
Name
Check for Updates
Line-out Boost
Brightness Active
Brightness Sleep Timer
Brightness Sleeping
Deutsch
English
Español
Italiano
Français
Nederlands
Dansk
Freecom MusicPal
3.1.3 Overview of Settings
18
Page 19
EN
3
Freecom MusicPal Functions
MusicPal
Now Playing
Internet Radio
Media Server
Extras
Settings
Favorites
Options
Show Details
Next Song
Add to Favorites
Delete Favorite
Show Clock
Next Favorite
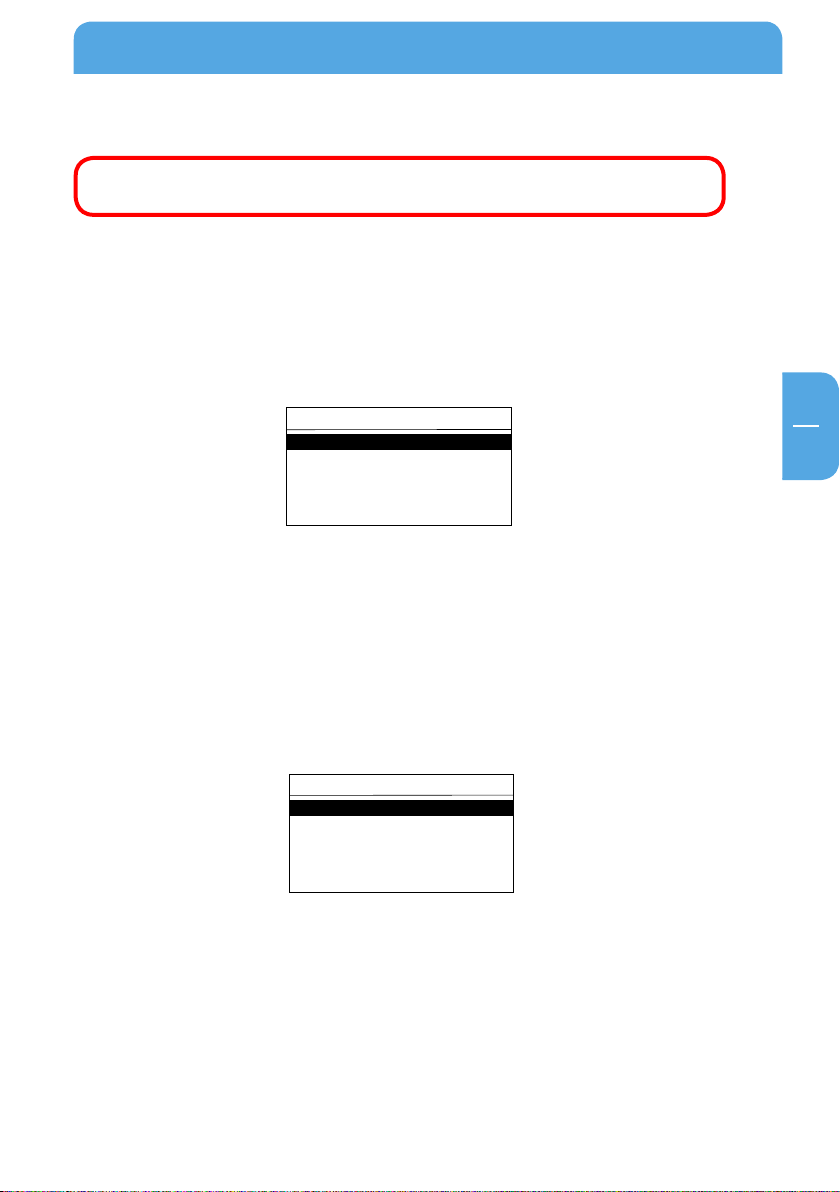
3.2 Now Playing
Note: This menu item is only available while you are playing Internet
Radio or local music files.
This feature enables you to navigate directly to what is currently playing without having
to navigate through the submenus of Internet Radio and Media Player.
Select Internet Radio or Media server (UPnP) in your main menu after having
1.
switched on the Freecom MusicPal and select the Internet Radio programme or a
local music file (you can find further information in Internet Radio and Media server
(UPnP)).
2.
Go back to the Freecom MusicPal main menu. The Now Playing menu item was
automatically added to your main menu.
3.
Select Now Playing to get a display of what is currently playing.
Options
When the ”Navigate“ button is pressed in the ”Now Playing“ menu, the following options
are displayed for selection:
how Details Displays information on the stream currently being played.
• S
ext Favorite Play switches to the next favorite in the favorites list.
• N
ext Song Play switches to the next title.
• N
dd to Favorites Adds the stream currently being played to the favorites list.
• A
19
Page 20
Freecom MusicPal
EN
3
MusicPal
Favorites
Internet Radio
Media Server
Extras
Settings
• Delete Favorite Deletes the currently selected favorite from the favorites
list.
• Show Clock Displays the time in the MusicPal display.
Note: If there are no entries in the favorites list, the menu options “Next
Favorite“ and “Delete Favorite“ are not available.
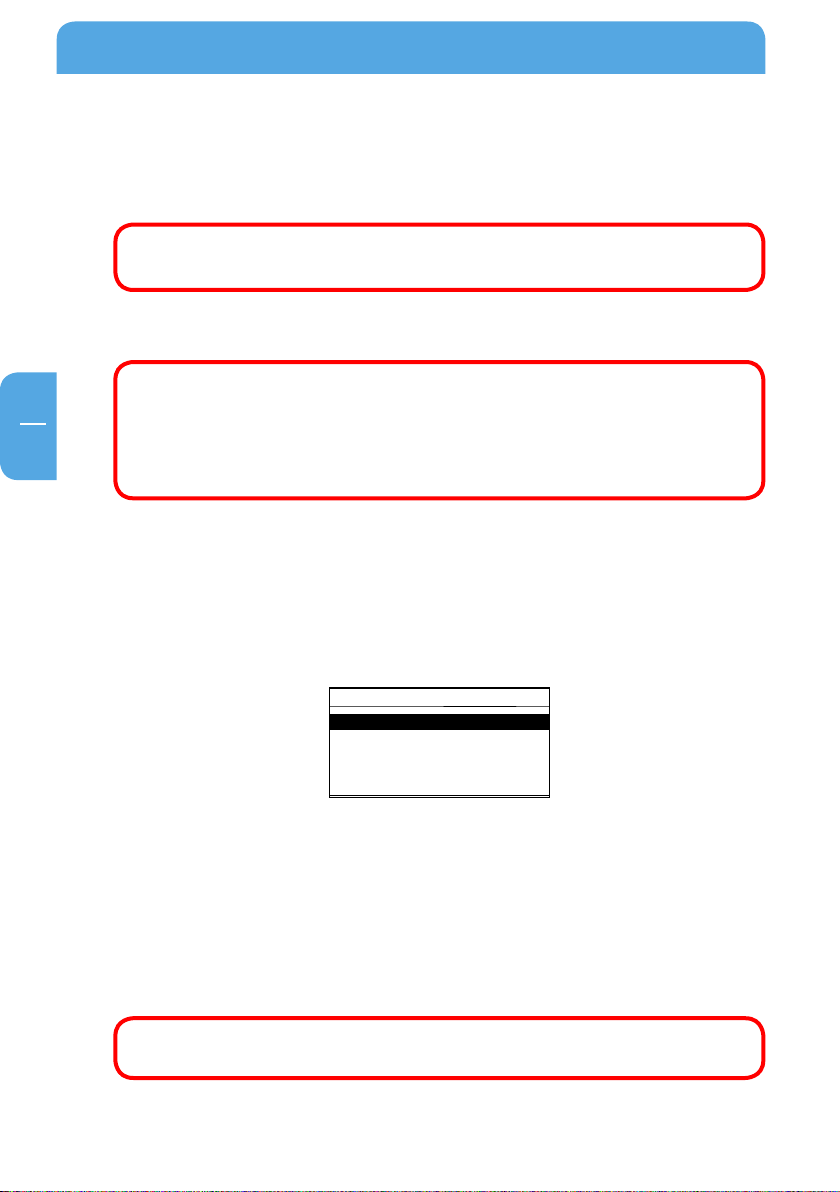
3.3 Favorites
Note: This menu item is only available if an Internet Radio programme
or a local music file was added to the favorites.
If there is only one entry in the Favorites list, then the title of this entry
appears in the menu. Not until several Favorites are in the „Favorites"
list will the menu item „Favorites" be displayed.
This feature enables you quick access to pick your favorite radio programme or local
music files.
Select Internet Radio or Media server (UPnP) in your main menu after having
1.
switched on the Freecom MusicPal and select the Internet Radio programme or a
local music file (you can find further information in Internet Radio and Media server
(UPnP)).
2.
3.
4.
5.
6.
20
While playing an Internet Radio programme or local music file, press the Navigate
rotary knob.
Select Add to favorites.
Go back to the Freecom MusicPal main menu. Favorites was automatically added
to your main menu.
Select Favorites and you are shown a list of your favorites.
Now select the Internet Radio programme you want, or a local music file.
Note: You can change or delete your favorites any time at Settings-> Edit
Favorites. Find out more at Edit Favorites in this guide.
Page 21
EN
3
Freecom MusicPal Functions
MusicPal
Internet Radio
Media Server
Extras
Settings
Internet Radio
Germany
Genres
Countries
New Stations
Most Popular Station
Germany
2deejay´s Radio
BeSonic Pop & Electro
Club on RauteMusik.FM
Darkerradio
Dusterstadl
2deejay´s Radio
64 kbps
Germany
All Stations
Highlighted Stations
Adult Contemporary
Alternative
Ambient
3.4 Internet Radio
This feature enables you to receive and listen to radio programmes from all over the
world.
1. Select Internet Radio in your main menu after you have switched on the Freecom
MusicPal.
2.
Select the category you want.
3. Select the Internet Radio programme you want.
4. After activating the Internet Radio programme you want, the connection to the
required sender is constructed.
21
Page 22

Freecom MusicPal
EN
3
MusicPal
Internet Radio
Media Server
Extras
Settings
Music
Album
All Tracks - Nelly Furtado
Artist
Folder - Nelly Furtado
Genre
Nelly Furtado
Afraid (Feat. Attitude)
0 : 11 - 4 : 02
3.5 Media server (UPnP)
This feature gives you the option of accessing music files on a connected media server
(UPnP), and playing them.
1. Select Media server (UPnP) in your main menu after you have switched on the
Freecom MusicPal.
2.
After being able to view your songs or albums, select the category you want. You can
select from the following categories. The structure of this menu depends on your
UPnP server.
3.
Choose a music file and start playing by pressing the right-hand knob.
22
Page 23

EN
3
Freecom MusicPal Functions
MusicPal
Internet Radio
Media Server
Extras
Settings
3.6 Extras
This function provides the facility of getting faster access to the options RSS Feeds, HTML
Browser, Weather, Stock Quotes, World Clock and Calendar.
Further information on this is available under Extras Settings in this
manual.
1. Select E
sicPal.
xtras in your main menu after you have switched on the Freecom Mu-
23
Page 24

Freecom MusicPal
EN
3
MusicPal
Internet Radio
Media Server
Settings
Extras
Settings
Sleep Timer
Wake - UP Timer
Clock
Edit Favorites
WLAN Access Point
Sleep Timer
Stop playing after specified period
0 : 15
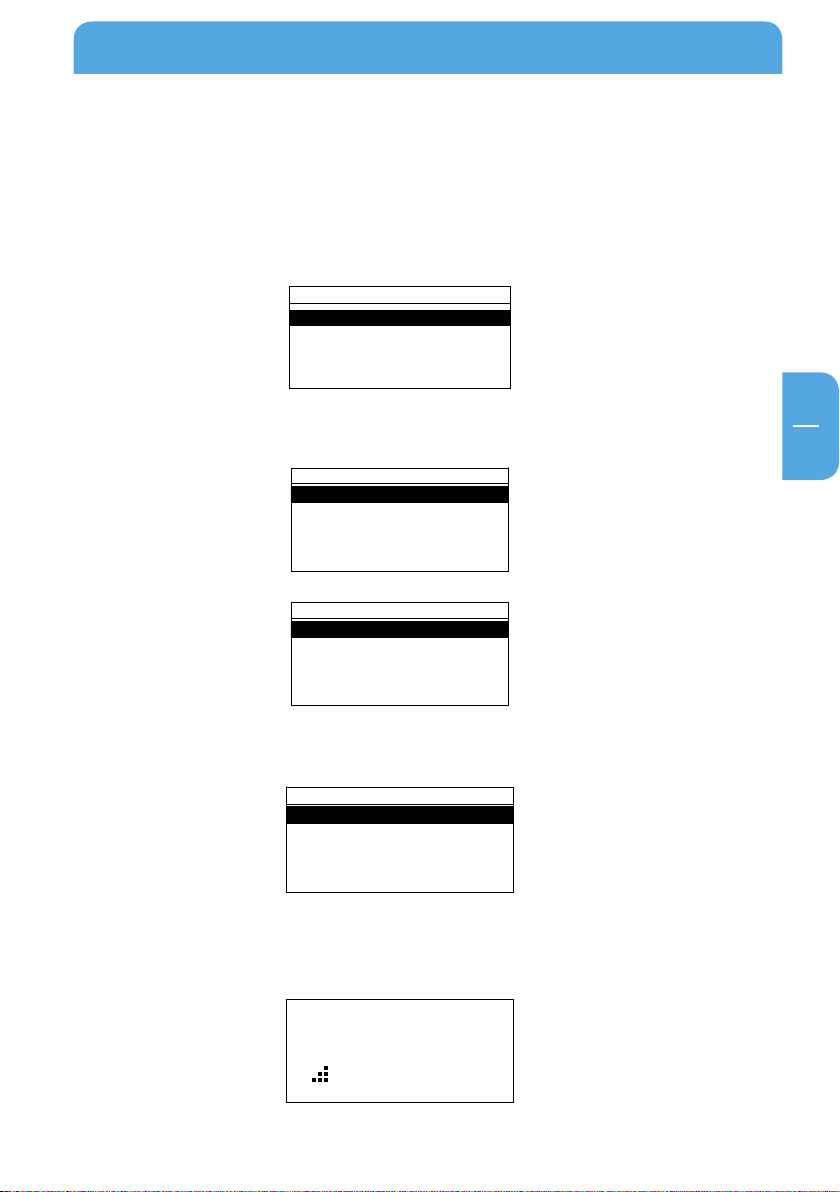
3.7 Settings
3.7.1 Sleep Timer
This feature enables you to end playing Internet Radio programmes and local music files
automatically after a selected period of time.
Select Settings in your main menu after you have switched on the Freecom
1.
MusicPal.
2.
Select the Sleep Timer menu item.
Select Use Sleep Timer? Yes.
3.
4.
You can now change the time by using the Navigate rotary knob. By turning the knob
you can specify after how many hours and minutes the playback should be stopped.
Press the knob to confirm the digit you want and move automatically to the next.
After activating all digits, you automatically move to the Settings menu.
24
Page 25
EN
3
Freecom MusicPal Functions
Wake-Up Timer
Off
Once
Weekdays
Daily
Settings
Sleep Timer
Wake - UP Timer
Clock
Edit Favorites
WLAN Access Point
Wake-Up Timer
9 : 00
MusicPal
Internet Radio
Media Server
Settings
Extras
3.7.2 Wake-Up Timer
Use this feature to activate automatic timed control of the Freecom MusicPal. After
time-controlled activation, the device plays the Internet Radio programmes or music
files from your Favorites folder.
Select Settings in your main menu after you have switched on the Freecom
1.
MusicPal.
2.
Select the Wake-Up Timer menu item.
3.
Select between the following options:
• Off
• Once
• Weekdays
• Daily
4.
You can now change the time by using the Navigate rotary knob. You can now change
the time by turning the knob. Press the knob to confirm the digit you want and move
automatically to the next. After activating all digits, you automatically move to the
Settings menu.
25
Page 26
Freecom MusicPal
EN
3
Settings
Sleep Timer
Wake - Up Timer
WLAN Access Point
Edit Favorites
Clock
MusicPal
Internet Radio
Media Server
Settings
Extras
Clock
Set Date & Time
Show Clock Idle Time
RSS Feed
Use Now Playing
Show Clock
Select NTP Server
ntp.tuxfamily.net
time.nist.gov
clock.isc.org
clock.via.net
ntp-cup.external.hp.com
Snooze Timer (snooze function)
When the alarm of the MusicPal sounds at the time that has been set, you can either stop
the alarm or pause it for 10 minutes (snooze function).
Stopping the alarm Press one of the two small buttons of the MusicPal.
(MENU or FAV)
Pausing the sounding
of the alarm for 10 minutes
3.7.3 C
lock
1. Set Date & Time
Using an NTP server
Select Settings in your main menu after you have switched on the Freecom
1.
MusicPal.
2.
Select the Clock menu item.
Press one of the two large buttons of the MusicPal.
(VOLUME or NAVIGATE)
3.
4.
5.
Select which NTP server you wish to use.
26
Select the Set Date & Time menu item.
Select Use NTP-Server? Yes.
Page 27
EN
3
Freecom MusicPal Functions
Select timezone
Africa
Asia
Atlantic
Australia
Europe
MusicPal
Internet Radio
Media Server
Settings
Extras
Clock
Show Clock Idle Time
Set Date & Time
RSS Feed
Use Now Playing
Show Clock
Settings
Sleep Timer
Wake - Up Timer
WLAN Access Point
Edit Favorites
Clock
Select timezone
Amsterdam
Andorra
Athens
Belgrade
Berlin
6. Select which time zone you are in.
7. Select whether you want automatic summer- and winter-time synchronisation and
confirm your selection by pressing the right-hand rotary knob. If all input was successful, you then move back to the Clock menu.
Manual configuration of date and time
Select Settings after you have switched on the Freecom MusicPal.
1.
2.
Select the Clock menu item.
Select the Set Date & Time menu item.
3.
27
Page 28
Freecom MusicPal
EN
3
Set date
4 . 07 . 2007
Select timezone
Africa
Asia
Atlantic
Australia
Europe
Set time
14 : 00
Select timezone
Amsterdam
Andorra
Athens
Belgrade
Berlin
4. Select Use NTP-Server? No.
5. You can now change the date by using the Navigate rotary knob. Turn the knob to
select a digit. Press the knob to confirm the digit you want and move automatically
to the next.
ter confirming all digits you automatically move to the next window, where you
Af
are asked to enter the current time.
6.
Select which time zone you are in.
28
7. Select whether you want automatic summer- and winter-time synchronisation. If all
input was successful, you then move back to the Clock menu.
Page 29
EN
3
Freecom MusicPal Functions
Clock
Set Date & Time
Show Clock Idle Time
RSS Feed
Show Clock
Use Now Playing
MusicPal
Internet Radio
Media Server
Settings
Extras
< 2 minutes >
Show clock
Idle periode:
Settings
Sleep Timer
Wake - Up Timer
Clock
Edit Favorites
WLAN Access Point
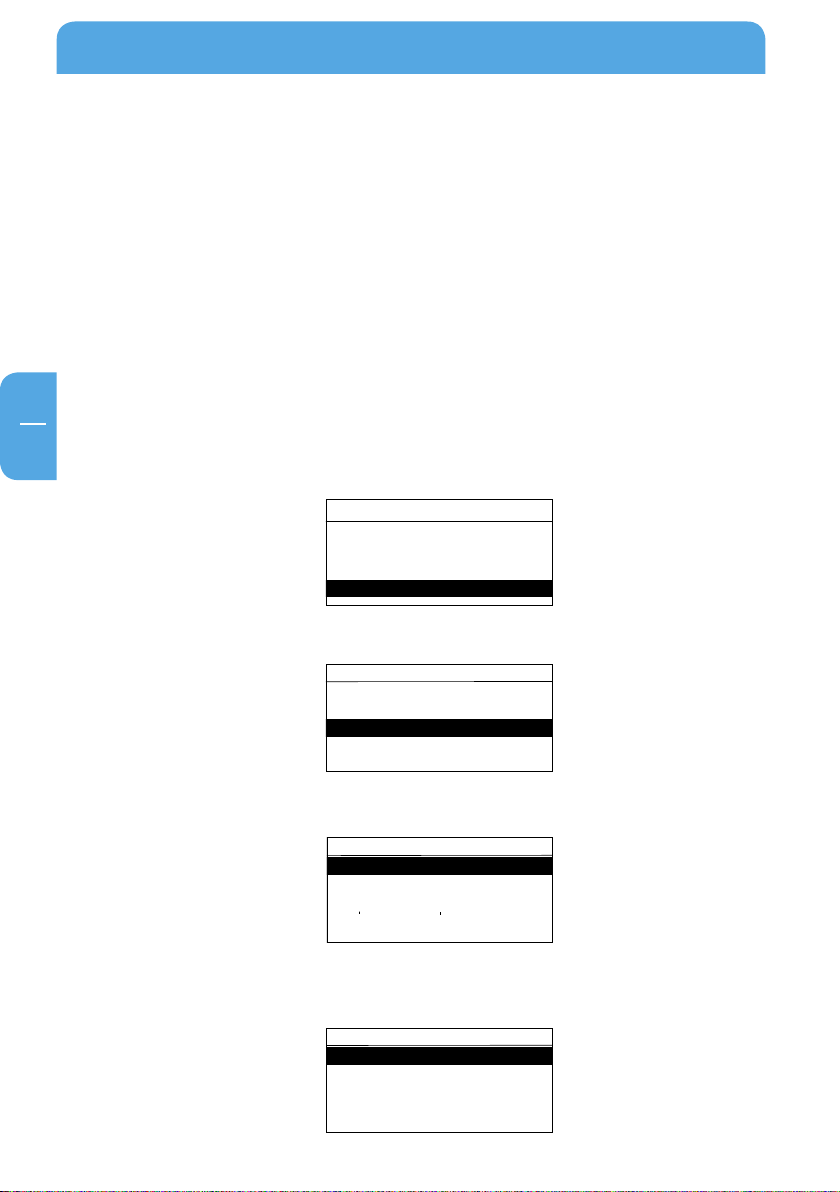
2. Show Clock Idle Time
This feature enables you to set the period which is to elapse until the time is displayed
in full-screen mode, if no control elements are being used.
Select Settings after you have switched on the Freecom MusicPal.
1.
2.
Select the Clock menu item.
3.
Select the Show Clock Idle Time menu item.
4.
Select how many minutes should elapse until the time is shown in full-screen mode.
You can choose from the following options:
•
2 minutes
• 5 minutes
• 15 minutes
• 30 minutes
• 60 minutes
• 120 minutes
• Never
5.
After activating the time you want, you automatically move back to the Clock
menu.
29
Page 30

Freecom MusicPal
EN
3
Use RSS feed in clock?
Yes No
Clock
Set Date & Time
Show Clock Idle Time
RSS Feed
Show Clock
Use Now Playing
MusicPal
Internet Radio
Media Server
Settings
Extras
Settings
Sleep Timer
Wake - Up Timer
Clock
Edit Favorites
WLAN Access Point
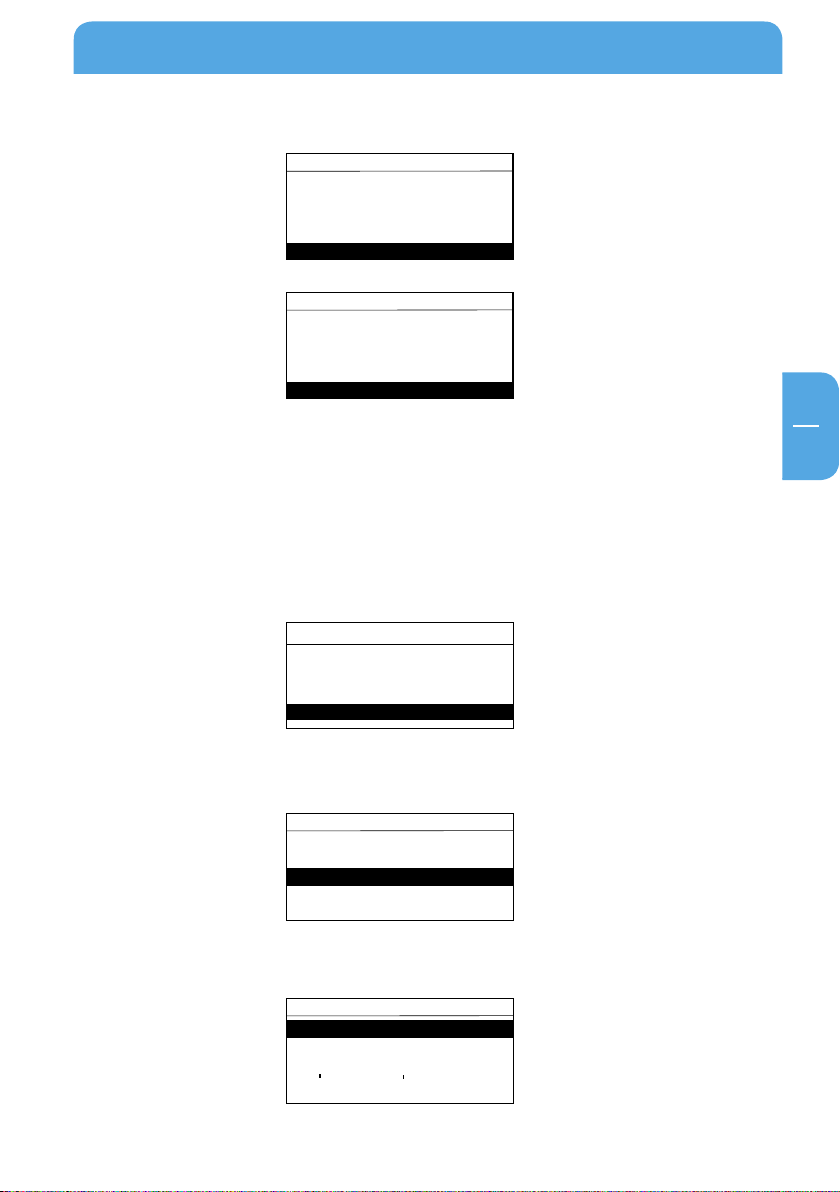
3. RSS Feed
This feature enables you to activate a news ticker in your Freecom MusicPal. Besides this,
you have the option of entering the URL address of a news ticker you want.
Select Settings after you have switched on the Freecom MusicPal.
1.
2.
Select the Clock menu item.
3.
Select the RSS Feed menu item.
4.
Note: No deactivates the RSS feed.
5.
6. After confirming your entry, you move automatically to the Clock menu.
30
Select between Use RSS feed in clock? Yes or No.
Select Use RSS feed in clock? Yes.You can now change the URL address of the RSS
feed by using the Navigate rotary knob. Turn the knob to select a letter, a digit or a
special character. Confirm the character you want by pressing the Navigate knob; the
input marker jumps automatically to the next character. Confirm the URL address by
turning the rotary knob until you see the sign "
".
Page 31

EN
3
Freecom MusicPal Functions
MusicPal
Internet Radio
Media Server
Settings
Extras
Settings
Sleep Timer
Wake - Up Timer
Clock
Edit Favorites
WLAN Access Point
Clock
Set Date & Time
Show Clock Idle Time
RSS Feed
Show Clock
Use Now Playing
Use Now Playing in clock?
Yes No
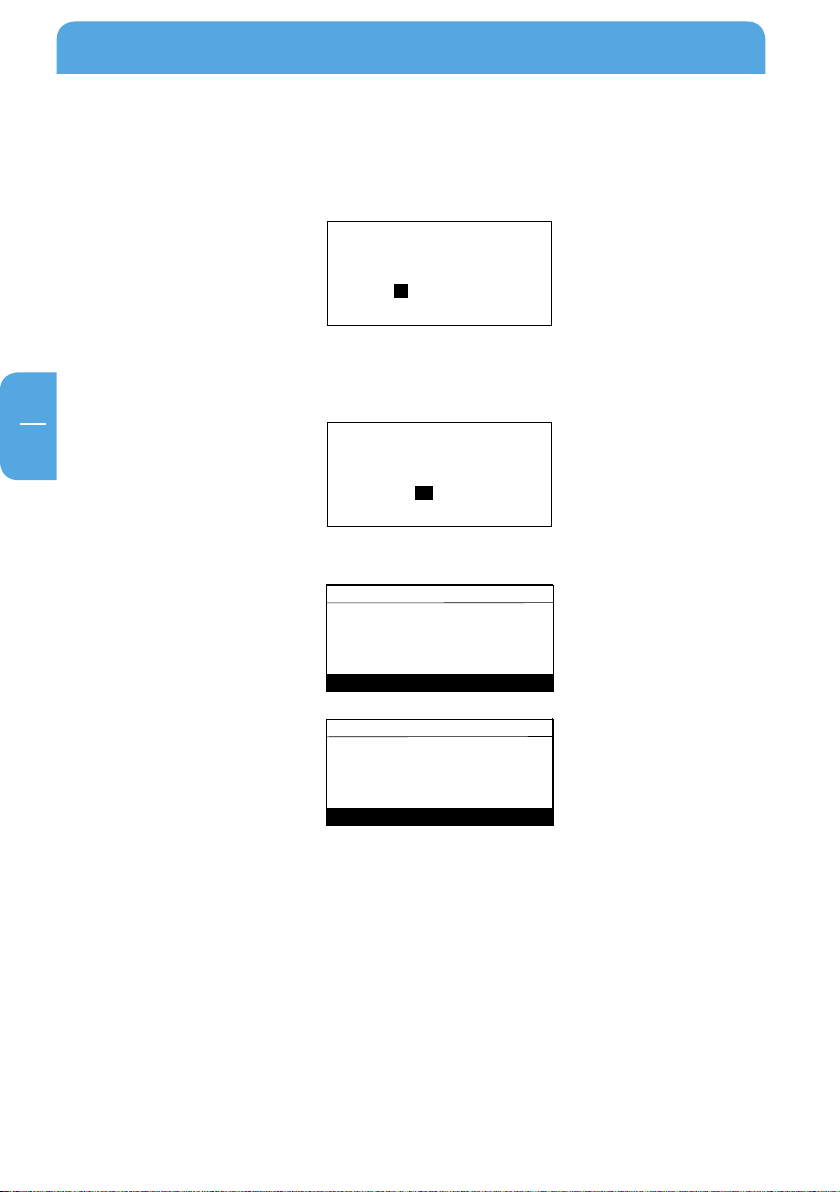
4. Use ´Now Playing´
This function gives you the facility to have the title currently being played in the MusicPal
display shown below the time.
Select Settings after you have switched on the Freecom MusicPal.
1.
2.
Select the Clock menu item.
Select the Use ‘Now Playing’ menu item.
3.
Select between Use ‘Now Playing’ in clock? Yes or No.
4.
5.
After confirming your entry, you move automatically to the Clock menu.
31
Page 32

Freecom MusicPal
EN
3
Clock
Set Date & Time
Show Clock Idle Time
RSS Feed
Show Clock
Use Now Playing
MusicPal
Internet Radio
Media Server
Settings
Extras
Settings
Sleep Timer
Wake - Up Timer
Clock
Edit Favorites
WLAN Access Point
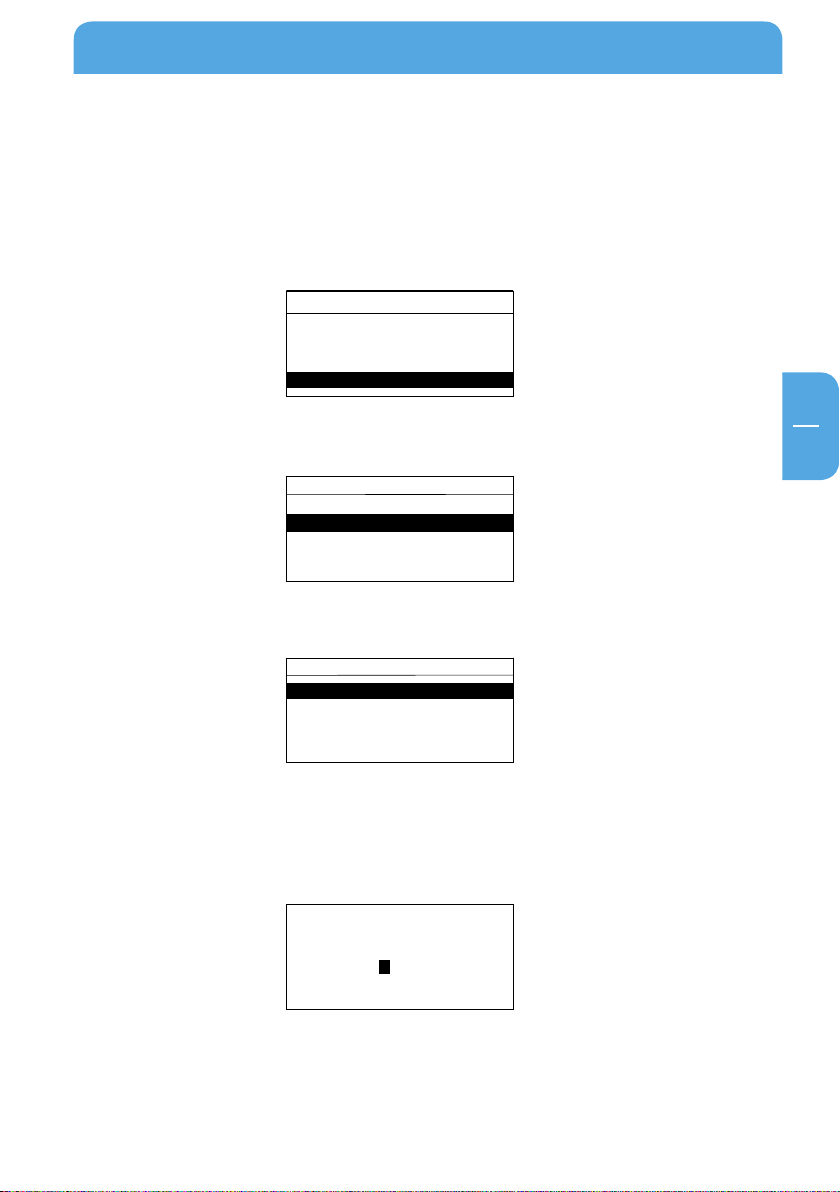
5. Show Clock
This feature enables you to display your system clock time and date in full-screen
mode.
Select Settings after you have switched on the Freecom MusicPal.
1.
2.
Select the Clock menu item.
3.
Select the Show Clock menu item.
4. You can now see the current system time and system date and the RSS feed (if pro-
32
vided) in full-screen mode on your Freecom MusicPal display.
Page 33

EN
3
Freecom MusicPal Functions
Options
Move down
Move up
Delete Favorite
Edit name
MusicPal
Internet Radio
Media Server
Settings
Extras
Edit Favorites
Nelly Furtado
Settings
Sleep Timer
Wake - Up Timer
Clock
Edit Favorites
WLAN Access Point
3.7.4 Edit Favorites
The feature enables you to edit your Favorites list or delete entries in the Favorites list.
Select Settings in your main menu after you have switched on the Freecom
1.
MusicPal.
2.
Select the Edit Favorites menu item.
A lis
t of your current favorites is set up.
3. Press the Navigate rotary knob to select the radio programme or local music file you
wish to edit or delete.
Select between the following options:
4.
• Move down
• Move up
• Delete Favorite
• Edit name
5.
After changing one of the available options, you move automatically to your
Favorites list.
33
Page 34

Freecom MusicPal
EN
3
MusicPal
Internet Radio
Media Server
Settings
Extras
Settings
Clock
Edit Favorites
WLAN Access Point
WLAN IP
WLAN Region
Select Access Point
my_fsg
WLAN disabled
my_access_point
Hidden Access Point
3.7.5 WLAN Access Point
1. Select Settings in your main menu after you have switched on the Freecom
MusicPal.
Select the WLAN Access Point menu item.
2.
3.
After selecting the WLAN Access Point menu item, the accessible access points now
appear in your environment.
4.
34
Select the WLAN Access Point you want to connect to it. In case your Wireless Access
Point is encrypted by WPA/WEP you will be prompted to enter a password.
Note: Select „WLAN disabled" to deactivate the WLAN connection.
Page 35

EN
3
Freecom MusicPal Functions
Select Access Point
my_fsg
WLAN disabled
my_access_point
Hidden Access Point
Hidden Access Point
< Name >
Encryption
WEP
None
Hidden Access Point
WPA
WPA 2
Connecting with hidden WLAN Access Points
Many WLAN-routers support the function of suppressing the display of the network name
(ESSID). To connect to a hidden network, follow the procedure outlined below:
In the menu Select Access Point, select Hidden Access Point.
1.
2.
By means of the ”Navigate“ button, enter the exact name (ESSID) of the hidden net-
work.
3.
Select the encryption method used by the selected WLAN network:
- None (no encryption, not recommended)
- WEP
- WPA
- WPA2
4. If your WLAN Access Point uses encryption, please enter the password with the help
of the “Navigate“ button.
35
Page 36

Freecom MusicPal
EN
3
MusicPal
Internet Radio
Media Server
Settings
Extras
Settings
Clock
Edit Favorites
WLAN Access Point
WLAN IP
WLAN Region
Select your region
USA / other
Canada
Europe
France
Spain
3.7.6 WLAN Region
1. Select Settings in the main menu after you have switched on the Freecom
sicPal.
Mu
2. Select WLAN Region.
3.
Select the continent or country you are in.
36
Page 37

EN
3
Freecom MusicPal Functions
MusicPal
Internet Radio
Media Server
Settings
Extras
Settings
Edit Favorites
WLAN Access Point
WLAN Region
LAN IP
WLAN IP
3.7.7 LAN IP/WLAN IP
This feature enables you to assign an IP address to the Freecom MusicPal, so as to be able
to use the Internet Radio and Media server (UPnP) features.
1. Using DHCP
1.
Select Settings in your main menu after you have switched on the Freecom
MusicPal.
2.
Select the LAN IP or WLAN IP menu item.
3.
Select Use DHCP? Yes.
4.
The connected router or media server (UPnP) now automatically assigns an IP address
to your MusicPal. You then move to the Settings submenu.
37
Page 38

Freecom MusicPal
EN
3
MusicPal
Internet Radio
Media Server
Settings
Extras
Settings
WLAN Access Point
WLAN Region
LAN IP
WLAN IP
Extras Settings
Extras Settings
RSS Feeds
Stock Quotes
Weather
HTML Browser
World Clock
RSS Feeds
New RSS Feed
SPIEGEL ONLINE
BBC News
Show RSS Feeds in Extras menu?
Yes No
3.7.8 Extras Settings
1. RSS Feeds
This function gives you the facility to have another menu option called Extras in the
main menu.
You can have individual news stories displayed under this new menu option.
Select Settings in the main menu after you have switched on the Freecom
1.
Mu
sicPal.
2. Select Extras Settings.
3 . S
elect RSS Feeds to add a new feed.
4.
Select Show RSS Feeds in Extras menu? Yes to have the RSS Feeds displayed in the
menu Extras.
Select New RSS Feed to add new feeds.
5.
38
Page 39

EN
3
Calling an RSS Feed:
MusicPal
Internet Radio
Media Server
Settings
Extras
Extras
Stock Quotes
Weather
RSS Feeds
HTML Browser
World Clock
RSS Feeds
SPIEGEL ONLINE
BBC News
1. Select Extras in your main menu.
Select RSS Feeds.
2.
Select the desired provider that you have inserted.
3.
Freecom MusicPal Functions
4. Select the desired headline to have the complete story displayed.
39
Page 40

Freecom MusicPal
EN
3
MusicPal
Internet Radio
Media Server
Settings
Extras
Settings
WLAN Access Point
WLAN Region
LAN IP
WLAN IP
Extras Settings
Extras Settings
RSS Feeds
Stock Quotes
Weather
World Clock
HTML Browser
HTML Browser
cnnmobile.com
SPIEGEL MOBIL
New Website
Show HTML Browser in Extras menu?
Yes No
2. HTML Browser
This function provides the facility to have HTML pages displayed.
Select Settings in the main menu after you have switched on the Freecom
1.
Mu
sicPal.
2. Select Extras Settings.
3 . S
elect HTML Browser to add a new feed.
4.
Select Show HTML Browser in Extras menu? Yes to have the HTML Browser dis-
played in the menu Extras.
Select New Website, to add new feeds.
5.
40
Page 41

EN
3
Calling an HTML Browser:
MusicPal
Internet Radio
Media Server
Settings
Extras
Extras
Stock Quotes
Weather
RSS Feeds
World Clock
HTML Browser
HTML Browser
cnnmobile.com
SPIEGEL MOBIL
1. Select Extras in your main menu.
Select HTML Browser.
2.
Select the desired provider that you have inserted.
3.
Freecom MusicPal Functions
4. Select the desired headline to have the complete story displayed.
41
Page 42

Freecom MusicPal
EN
3
MusicPal
Internet Radio
Media Server
Settings
Extras
Settings
WLAN Access Point
WLAN Region
LAN IP
WLAN IP
Extras Settings
Extras Settings
RSS Feeds
Stock Quotes
Weather
HTML Browser
World Clock
Show Weather in Extras menu?
Yes No
3. Weather
This function provides the facility to have a weather forecast displayed for different
countries or cities.
Note: This function can only be set via the Web interface.
1. Select Settings in the main menu after you have switched on the Freecom
sicPal.
Mu
2. Select Extras Settings.
3 . S
elect Weather to add a new feed.
4.
Select Show Weather in Extras menu? Yes, to have the weather details displayed
in the Extras menu.
42
Page 43

EN
3
Calling the Weather:
Extras
Stock Quotes
Weather
RSS Feeds
HTML Browser
World Clock
MusicPal
Internet Radio
Media Server
Settings
Extras
Berlin
www.weather.com
Sat 7°/1°C
Tonight 2°C
Mon 5°/-1°C
Sun 4°/-1°C
1. Select Extras in your main menu.
Select Weather.
2.
Freecom MusicPal Functions
43
Page 44

Freecom MusicPal
EN
3
MusicPal
Internet Radio
Media Server
Settings
Extras
Settings
WLAN Access Point
WLAN Region
LAN IP
WLAN IP
Extras Settings
Extras Settings
RSS Feeds
Stock Quotes
Weather
HTML Browser
World Clock
Show Stock Quotes in Extras menu?
Yes No
4. Stock Quotes
This function provides the facility to have the desired stock quotes displayed.
Note: This function can only be set via the Web interface.
1. Select Settings in the main menu after you have switched on the Freecom
sicPal.
Mu
2. Select Extras Settings.
3 . S
elect Stock Quotes to add a new feed.
4.
Select Show Stock Quotes in Extras menu? Yes, to have the stock quotes displayed
in the menu Extras.
44
Page 45

EN
3
Calling for Stock Quotes:
Extras
Stock Quotes
Weather
RSS Feeds
HTML Browser
World Clock
MusicPal
Internet Radio
Media Server
Settings
Extras
Quotes provided by ...
DAX 6919.37
+78.73 (+1.13%)
1. Select Extras in your main menu.
Select Stock Quotes.
2.
Freecom MusicPal Functions
45
Page 46

Freecom MusicPal
EN
3
Show World Clock in Extras menu?
Yes No
MusicPal
Internet Radio
Media Server
Settings
Extras
Settings
WLAN Access Point
WLAN Region
LAN IP
WLAN IP
Extras Settings
Extras Settings
RSS Feeds
Stock Quotes
Weather
HTML Browser
World Clock
5. World Clock
This function makes it possible to have the time in different countries or cities displayed.
Select Settings in the main menu after you have switched on the Freecom
1.
sicPal.
Mu
2. Select Extras Settings.
3 . S
elect World Clock to add a new feed.
Select Show World Clock in Extras menu? Yes, to have the world clock displayed
4.
in the Extras menu.
By using the„“Navigate“ button, first select the continent and confirm the selection
5.
by pressing the “Navigate“ button.
Then, with the ”Navigate“ button, select the desired city and confirm the selection
6.
by pressing the “Navigate“ button.
46
Page 47

EN
3
Calling the World Clock:
Extras
Stock Quotes
Weather
RSS Feeds
HTML Browser
World Clock
MusicPal
Internet Radio
Media Server
Settings
Extras
World Clock
6:15 11.1.2008
North America +
San Francisco
17:15 11.1.2008
Local Time
1. Select Extras in your main menu.
Select World Clock.
2.
Freecom MusicPal Functions
47
Page 48

Freecom MusicPal
EN
3
MusicPal
Internet Radio
Media Server
Settings
Extras
Settings
WLAN Access Point
WLAN Region
LAN IP
WLAN IP
Extras Settings
Extras Settings
HTML Browser
Stock Quotes
Weather
Calendar
World Clock
Show Calendar in Extras menu?
Yes No
6. Calendar
This function provides the facility to have the calendar displayed.
Select Settings in the main menu after you have switched on the Freecom
1.
sicPal.
Mu
2. Select Extras Settings.
3 . S
elect Calendar to add a new feed.
4.
Select Show Calendar in Extras menu? Yes, to have the calendar displayed in the
Extras menu.
48
Page 49

EN
3
Calling the Calendar:
Extras
Stock Quotes
Weather
HTML Browser
Calendar
World Clock
MusicPal
Internet Radio
Media Server
Settings
Extras
January 2008
1 2 3 4 5 6
7 8 9 10 11 12 13
14 15 16 17 18 19 20
21 22 23 24 25 26 27
28 29 30 31
1. Select Extras in your main menu.
Select Calendar.
2.
Freecom MusicPal Functions
49
Page 50

Freecom MusicPal
EN
3
MusicPal
Internet Radio
Media Server
Settings
Extras
Settings
Clock
Edit Favorites
WLAN Access Point
WLAN IP
WLAN Region
IP Address
192 . 168 . 1. 23
Manual configuration of the IP address (LAN IP/WLAN IP)
1. Select Settings in your main menu after you have switched on the Freecom
MusicPal.
2.
Select the LAN IP or WLAN IP menu item.
3.
Select Use DHCP? No.
4.
You can now change the digits by turning the Navigate rotary knob. Press the knob
to confirm the digit you want and move automatically to the next. After confirming
all digits you move automatically to the next window, where you are asked to enter
the subnet mask.
50
Configure the subnet mask, the gateway and the DNS server just the way you did
5.
the IP address. Here, too, you have to confirm all digits every time before moving to
the next window. You can find further information on networks and network basics
in the Appendix.
Page 51

EN
3
Freecom MusicPal Functions
MusicPal
Internet Radio
Media Server
Settings
Extras
Settings
WLAN Region
LAN IP
WLAN IP
Extra Settings
Sound
Sound
Play Mode
Output
Bass Boost
Startup sound
< Repeat >
Select Play Mode
3.7.9 Sound
1. Play Mode
This function makes it possible for you to make settings for the Play mode.
Select Settings in your main menu after you have switched on the Freecom
1.
MusicPal.
2.
Select the Sound menu item.
3.
Select the Play Mode menu item.
You can now make settings for the Play mode.
4.
Note: Repeat
Shuffle stands for “Random playing of a title“
stands for “Repeat title“
51
Page 52

Freecom MusicPal
EN
3
Sound
Bass Boost
Output
Startup Sound
Play Mode
Line-out Boost
MusicPal
Internet Radio
Media Server
Settings
Extras
Use bass boost?
Yes No
2. Bass Boost
Use this function to boost the bass sound of your Freecom MusicPal.
Select Settings after you have switched on the Freecom MusicPal.
1.
2.
Select Sound.
3.
Select the Bass Boost menu item.
52
4.
Select Use bass boost? Yes to activate the bass boost. If you don‘t want to boost
the bass tones, select Use bass boost? No. After selecting the option you want, you
automatically move to the Sound menu.
Page 53

EN
3
Freecom MusicPal Functions
MusicPal
Internet Radio
Media Server
Settings
Extras
Sound
Bass Boost
Output
Startup Sound
Play Mode
Line-out Boost
Use line - out?
Yes No
Settings
WLAN Region
LAN IP
WLAN IP
Extra Settings
Sound
3. Output
This feature enables you to activate or deactivate the loudspeaker output.
Select Settings after you have switched on the Freecom MusicPal.
1.
2.
Select Sound.
3.
Select the Output menu item.
4.
Select Use line-out? Yes to activate Line-Out and to deactivate the internal loud-
speaker, otherwise select Use line-out? No. After selecting the option you want, you
automatically move to the Sound menu.
53
Page 54

Freecom MusicPal
EN
3
MusicPal
Internet Radio
Media Server
Settings
Extras
Settings
WLAN Region
LAN IP
WLAN IP
Extra Settings
Sound
Sound
Bass Boost
Output
Startup Sound
Play Mode
Line-out Boost
Use line-out Boost?
Yes No
4. Line-out Boost
This function makes it possible to boost the loudness at the Line Out output.
Select Settings in your main menu after you have switched on the Freecom
1.
MusicPal.
2.
Select the Sound menu item.
Select the Line-out Boost menu item.
3.
54
4.
Select Use line-out Boost? Yes to boost the loudness at the Line-Out output. Upon
selecting the desired option, you will automatically be taken to the Sound menu.
Page 55

EN
3
Freecom MusicPal Functions
MusicPal
Internet Radio
Media Server
Settings
Extras
Sound
Bass Boost
Output
Startup Sound
Play Mode
Line-out Boost
Play startup sound?
Yes No
Settings
WLAN Region
LAN IP
WLAN IP
Extra Settings
Sound
5. Startup Sound
This feature enables you to play a melody when you start the Freecom MusicPal.
Select Settings in your main menu after you have switched on the Freecom
1.
MusicPal.
2.
Select the Sound menu item.
3. Select the Startup Sound menu item.
4. Select Play startup sound? Yes to activate Startup Sound, otherwise select Play
startup sound? No. After selecting the option you want, you automatically move
to the Sound menu.
55
Page 56

Freecom MusicPal
EN
3
MusicPal
Internet Radio
Media Server
Settings
Extras
Settings
LAN IP
WLAN IP
Extra Settings
Sound
Display
Display
Brightness Sleep Timer
Brightness Active
Brightness Sleeping
Brightness Active
40 Percent
Maximum
80 Percent
60 Percent
20 Percent
3.7.10 Display
1. Brightness Active
This function gives you the facility to regulate the brightness of the display when there
is activity.
Select Settings in your main menu after you have switched on the Freecom
1.
MusicPal.
2.
Select the Display menu item.
Select the menu option Brightness Active to regulate the brightness when active.
3.
You can now regulate the brightness.
4.
• 20 percent
• 40 percent
• 60 percent
• 80 percent
• Maximum
After confirming your entry, you move automatically to the Display menu.
5.
56
Page 57

EN
3
Freecom MusicPal Functions
MusicPal
Internet Radio
Media Server
Settings
Extras
Settings
LAN IP
WLAN IP
Extra Settings
Sound
Display
Brightness Sleep Timer
Display
Brightness Sleeping
Brightness Active
Brightness Sleeptime
40 Percent
Maximum
80 Percent
60 Percent
20 Percent
Off
2. Brightness Sleep Timer
This function provides you the option to regulate the brightness of the display after a
certain time.
Select Settings in your main menu after you have switched on the Freecom
1.
MusicPal.
2.
Select the Display menu item.
3.
Select Brightness Sleep Timer to regulate the brightness in the Sleep Time.
4.
You can now regulate the brightness.
• Off
• 20 percent
• 40 percent
• 60 percent
• 80 percent
• Maximum
After confirming your entry, you move automatically to the Display menu.
5.
57
Page 58

Freecom MusicPal
EN
3
MusicPal
Internet Radio
Media Server
Settings
Extras
Settings
LAN IP
WLAN IP
Extra Settings
Sound
Display
Display
Brightness Sleeping
Brightness Active
Brightness Sleep Timer
Brightness Sleeping
40 Percent
Maximum
80 Percent
60 Percent
20 Percent
Off
3. Brightness Sleeping
This function can be used to regulate the brightness of the display while sleeping.
Select Settings in your main menu after you have switched on the Freecom
1.
MusicPal.
2.
Select the Display menu item.
3.
Select Brightness Sleeping to regulate the brightness in the Sleeping mode.
4.
You can now regulate the brightness.
• Off
• 20 percent
• 40 percent
• 60 percent
• 80 percent
• Maximum
After confirming your entry, you move automatically to the Display menu.
5.
58
Page 59

EN
3
Freecom MusicPal Functions
Settings
LAN IP
Extra Settings
Sound
Display
Language
MusicPal
Internet Radio
Media Server
Settings
Extras
3.7.11 Language
This feature enables you to change the system language.
Select Settings in your main menu after you have switched on the Freecom
1.
MusicPal.
2.
Select the Language menu item.
Select the system language you want. After selecting the system language you want,
3.
you automatically move to the Settings menu.
59
Page 60

Freecom MusicPal
EN
3
Settings
Display
Language
Name
Check for Updates
Sound
Change the name
< MusicPal >
MmNnOoPpQqRrSsTtUuVvWw
MusicPal
Internet Radio
Media Server
Settings
Extras
3.7.12 Name
This feature enables you to change the device name of the Freecom MusicPal.
Select Settings in your main menu after you have switched on the Freecom
1.
MusicPal.
2.
Select the "Name" menu item.
3.
You can now change the device name by using the Navigate rotary knob. Turn the
knob to select a letter, a digit or a special character. Confirm the character you want
by pressing the Navigate knob; the input marker jumps automatically to the next
character. Confirm the device name you want by turning the right Navigate knob
until you see this sign "
".
4. After confirming the device name the MusicPal restarts and opens the main menu.
60
Page 61

EN
3
Freecom MusicPal Functions
MusicPal
Internet Radio
Media Server
Settings
Extras
Settings
Display
Language
Name
Check for Updates
Sound
3.7.13 Check for Updates
This function can be used for adding updates and patches related to your MusicPal free
of cost to the latest software version.
Note: To be able to carry out this function, the Freecom MusicPal must
be connected to the Internet.
1. Select S
ettings in your main menu after you have switched on the Freecom
MusicPal.
2. Select the Check for Updates menu item.
Select Check New to update your software version.
3.
Information: This process can take a few minutes. Do not switch off the
device during this time.
61
Page 62

Freecom MusicPal
EN
3
Settings
Display
Language
Name
Check for Updates
Information
MusicPal
Internet Radio
Media Server
Settings
Extras
Freecom MusicPal
Version
1.30
IP Address
LAN
3.7.14 Information
This feature gives you an overview of the firmware currently being used and also network
information, such as the LAN IP address being used, the subnet mask, and so on. Proceed
by selecting the Information menu item in the Settings submenu.
Select Settings in your main menu after you have switched on the Freecom
1.
MusicPal.
2.
Select the Information menu item.
3.
After selecting Information, the system information is shown on your screen.
62
Page 63

EN
4
The Freecom Network Storage Assistant (PC/Mac)
Chapter 4: The Freecom Network Storage Assistant (PC/Mac)
The Freecom Network Storage Assistant helps you to locate each MusicPal in your network.
When started, it displays all MusicPals available in your network and helps you configure
the MusicPal. You can also configure the basic settings and quickly find the configuration
website using the Freecom Network Storage Assistant. You may also perform any of the
functions of the Freecom Network Storage Assistant manually.
4.1 Features of the Freecom Network Storage Assistant (PC)
The default password and login name for the MusicPal are:
Login Name: admin
Password: admin
.1 Configure basic settings of your Freecom MusicPal
4.1
In this screen, you can set an IP address, subnet mask, device name and workgroup name
for your MusicPal. With this information, it is easy to locate your MusicPal in the network
without the wizard. To change the settings, you have to first enter the administrator
password.
63
Page 64

Freecom MusicPal
EN
4
4.1.2 Accessing your MusicPal web interface
When you click this menu item, the web interface of your MusicPal opens in your default
browser.
.3 Start recovery procedure
4.1
This procedure can reset and repair an MusicPal to factory default settings if you cannot
access your MusicPal anymore. Your user data will not be deleted!
To restore your settings, please proceed as follows:
a)
Enable the Recovery mode by clicking 'Start the recovery procedure' in the Freecom
Network Storage Assistant.
Unplug the MusicPal's AC power pack.
b)
c) Keep the 'Menu' button pressed down and reattach the AC power supply.
d) Release the 'Menu' button after 1 second.
e) When a message appears on the Freecom Network Storage Assistant telling you that
the recovery is finished, click on „OK".
64
Page 65

EN
4
The Freecom Network Storage Assistant (PC/Mac)
4.1.4 Repeat search for available Freecom MusicPal
Click here to repeat the search for your MusicPal if it was not detected during the first
search. Please make sure that your network is configured as described above in this
manual and that all cables are properly attached.
65
Page 66

66
Freecom MusicPal
EN
4
4.2 Features of the Freecom Network Storage Assistant (Mac)
The Freecom Network Storage Assistant helps you to locate each MusicPal in your network.
When started, it displays all MusicPals available in your network and helps you configure
the MusicPal. You can also configure the basic settings and quickly find the configuration
website using the Freecom Network Storage Assistant. You may also perform any of the
functions of the Freecom Network Storage Assistant manually.
The default password and login name for the MusicPal are:
Login Name: admin
Password: admin
Page 67

67
EN
4
The Freecom Network Storage Assistant (PC/Mac)
4.2.1 Configure basic settings of your Freecom MusicPal
In this screen, you can set an IP address, subnet mask, device name and workgroup name
for your MusicPal. With this information, it is easy to locate your MusicPal in the network
without the wizard. To change the settings, you have to first enter the administrator
password.
4.2.2 Web interface of your Freecom Network Storage device
When you click this menu item, the web interface of your MusicPal opens in your default
browser.
4.2.3 Search again for available Freecom Network Storage device
Click here to repeat the search for your MusicPal if it was not detected during the first
search. Please make sure that your network is configured as described above in this
manual and that all cables are properly attached.
Page 68

Freecom MusicPal
EN
5
Chapter 5: Configuring the Freecom MusicPal through the
Web Interface
5.1 Overview
68
Page 69

EN
5
Configuring the Freecom MusicPal through the Web interface
5.2 How do I access the configuration menu?
1. First of all, create the connection between your Freecom MusicPal and the PC.
2. Usually you can access the web configuration of the MusicPal by opening your Explorer and entering the following in the address line: http://192.168.1.23
Now mouse-click the top right corner on Change Settings and log in with the word
3.
admin as your user name and also password. (You can change the password any time
through the web configuration!)
You are now logged into the web configuration of the Freecom MusicPal.
4.
69
Page 70

70
Freecom MusicPal
EN
5
5.3 Now Playing
Use this feature to receive a display of what the Freecom MusicPal is currently playing.
It distinguishes between Internet Radio or a local music file.
1. Log into the web configuration of your Freecom MusicPal.
2. Mouse-click Now Playing in the left-hand menu bar.
3. When you play a music title from a UPnP-Server, you have the following options:
• Loudness control: Regulate the loudness of the playing via the Web-Interface
• Pause/Play: Pause or start the playing
• Next title: Play the next music title
• Title display: displays the title currently being played
• Playing time: displays the time of the current music title
Page 71

EN
5
Configuring the Freecom MusicPal through the Web interface
5.4 Settings
5.4.1 Sleep Timer
This feature enables you to end playing Internet Radio programmes and local music files
automatically after a certain period of time.
Log into the web configuration of your Freecom MusicPal.
1.
2. Mouse-click Sleep Timer in the left-hand menu bar.
3.
Set the time you want.
4. Mouse-click Apply.
Wake-Up Timer
5.4.2
Use this feature to activate automatic timed control of the Freecom MusicPal. After
time-controlled activation, the device plays the Internet Radio programmes or music
files from your Favorites folder.
Log into the web configuration of your Freecom MusicPal.
1.
2. Mouse-click Wake-Up Timer in the left-hand menu bar.
3.
Select the time you want the Freecom MusicPal to be activated. Also select the days
this is to be done. You can choose between the following options:
• Off
• Once
• Weekdays
• Daily
4
Mouse-click Apply.
.
71
Page 72

Freecom MusicPal
EN
5
5.4.3 Clock
Use this feature to configure time and date settings of the Freecom MusicPal.
1. Set Date & Time
Using an NTP server
.
Log into the web configuration of your Freecom MusicPal.
1
2. Mouse-click Set Date & Time in the left-hand menu bar.
72
3.
Click Automatically synchronise with an Internet time server.
4.
Select the NTP server you want and specify the synchronising interval. Mouse-click
Apply.
Page 73

EN
5
Configuring the Freecom MusicPal through the Web interface
Manual configuration of time and date
1. Log into the web configuration of your Freecom MusicPal.
2. Mouse-click Set Date & Time in the left-hand menu bar.
3.
Select the time zone you are in and whether you want automatic synchronisation of
summer- and wintertime.
4.
Use the keypad to enter the current time and date. To prevent incorrect entries, the
current month is specified by means of a drop-down box.
Mouse-click Apply.
5.
2. Show Clock Idle Time
This feature enables you to set the period which is to elapse until the time is displayed
in full-screen mode, if no control elements are being used.
Log into the web configuration of your Freecom MusicPal.
1.
2. Mouse-click Show Clock Idle Time in the left-hand menu bar.
73
Page 74

Freecom MusicPal
EN
5
3. Select how many minutes should elapse until the time is shown in full-screen mode.
You can choose from the following options:
• 2 minutes
• 5 minutes
• 15 minutes
• 30 minutes
• 60 minutes
• 120 minutes
• Never
4.
Mouse-click Apply.
3. RSS Feed
This feature enables you to activate a news ticker in your Freecom MusicPal. Besides this,
you have the option of entering the URL address of a news ticker you want.
Log into the web configuration of your Freecom MusicPal.
1.
2. Mouse-click RSS Feed in the left-hand menu bar.
3.
Select whether you wish to activate an RSS feed, otherwise remove the check in front
of Use RSS feed in clock.
74
Use the keypad to enter the URL address of the RSS feed you want. If you have removed
4.
the check in front of Use RSS feed in clock, you can ignore this entry.
Mouse-click Apply.
5.
Page 75

EN
5
Configuring the Freecom MusicPal through the Web interface
4. Use ´Now Playing´
This function gives you the facility to have the title currently being played in the MusicPal
display shown below the time.
Log into the web configuration of your Freecom MusicPal.
1.
2. Mouse-click Settings in the left-hand menu bar.
3.
Select the Clock menu item.
Select the Use ‘Now Playing’ menu item.
4.
Select Use ‘Now Playing’ in clock? and click on Apply.
5.
5. Show Clock
This feature enables you to display your system clock time and date and the RSS feed
(if provided).
Log into the web configuration of your Freecom MusicPal.
1.
2. Mouse-click Show Clock in the left-hand menu bar.
3.
Click Show Clock again on the right side of the screen.
75
Page 76

Freecom MusicPal
EN
5
5.4.4 Edit Favorites
This feature enables you to add Internet Radio stations as well as local music files to your
bookmarks or to download the Favorites list.
Log into the web configuration of your Freecom MusicPal.
1.
2. Mouse-click Edit Favorites in the left-hand menu bar.
3.
You can download the Favorites list of the Freecom MusicPal as an m3u file. To do
this, click on Download Favorites Playlist.
4.
To upload an own Favorites list, click on Browse and select the new m3u file.
Mouse-click Apply.
5.
The new Favorites list now appears under Favorites in your MusicPal.
6.
76
Page 77

EN
5
Configuring the Freecom MusicPal through the Web interface
5.4.5 WLAN Access Point
Use this feature to search for available WLAN access points in your environment and if
need be to connect up with them.
Log into the web configuration of your Freecom MusicPal.
1.
2. Mouse-click WLAN Access Point in the left-hand menu bar.
3.
In the drop-down box, select the WLAN Access Point you wish to be connected
to.
To connect, enter the password of your WLAN Access Point. If your WLAN Access
4.
Point does not require a passport, leave the WLAN Password box empty.
Mouse-click Apply.
5.
6 WLAN Region
5.4.
1. Log into the web configuration of your Freecom MusicPal.
2. Mouse-click WLAN Region in the left-hand menu bar.
Select the continent or country you are in.
3.
4. Mouse-click Apply.
77
Page 78

Freecom MusicPal
EN
5
5.4.7 LAN IP/WLAN IP
This feature enables you to assign an IP address to the Freecom MusicPal, to be able to
use the Internet Radio and Media server (UPnP) features.
1. Using DHCP
Log into the web configuration of your Freecom MusicPal.
1.
2. Mouse-click LAN IP or WLAN IP in the left-hand menu bar.
3.
Click DHCP Client.
78
4.
Mouse-click Apply.
Page 79

EN
5
Configuring the Freecom MusicPal through the Web interface
2. Manual configuration of the IP address (LAN IP/WLAN IP)
1. Log into the web configuration of your Freecom MusicPal.
2. Mouse-click LAN IP or WLAN IP in the left-hand menu bar.
3.
Click Fixed IP address.
Enter the IP-address, the Subnet Mask, the Gateway and the DNS Server you
4.
want.
5.
Mouse-click Apply.
Extras Settings
5.4.8
1. RSS Feeds
This function gives you the facility to have another menu option called Extras in the
main menu.
You can have individual news stories displayed under this new menu option.
1.
Log into the web configuration of your Freecom MusicPal.
2. Mouse-click Settings in the left-hand menu bar.
3.
Select the Extras Settings menu item.
4 a. Select an RSS feed from the list. Now click on Add (
).
79
Page 80

Freecom MusicPal
EN
5
MusicPal
Internet Radio
Media Server
Settings
Extras
Extras
Stock Quotes
Weather
RSS Feeds
HTML Browser
World Clock
RSS Feeds
SPIEGEL ONLINE
BBC News
4 b. Copy an RSS feed from the desired Website and insert the link in Selected RSS Feeds.
Now click on the icon Save ( ).
5. Mouse-click Apply.
Calling an RSS Feed:
Select Extras in your main menu.
1.
Select RSS Feeds.
2.
3.
Select the desired provider that you have inserted.
80
4. Select the desired headline to have the complete story displayed.
Page 81

EN
5
Configuring the Freecom MusicPal through the Web interface
2. HTML Browser
This function gives you the facility to have another menu option called Extras in the
main menu.
You can have individual news stories displayed under this new menu option.
Log into the web configuration of your Freecom MusicPal.
1.
2. Mouse-click Settings in the left-hand menu bar.
3.
Select the Extras Settings menu item.
4 a. Select an HTML Browser from the list. Now click on Add (
).
4 b. Copy an HTML Browser from the desired Website and insert the link in Selected
Websites. Now click on the icon Save (
5. Mouse-click Apply.
).
81
Page 82

Freecom MusicPal
EN
5
MusicPal
Internet Radio
Media Server
Settings
Extras
Extras
Stock Quotes
Weather
RSS Feeds
World Clock
HTML Browser
HTML Browser
cnnmobile.com
SPIEGEL MOBIL
Calling an HTML Browser:
1. Select Extras in your main menu.
Select HTML Browser.
2.
3.
Select the desired provider that you have inserted.
82
4. Select the desired headline to have the complete story displayed.
Page 83

EN
5
Configuring the Freecom MusicPal through the Web interface
3. Weather
This function provides the facility to have a weather forecast displayed for different
countries or cities.
Log into the web configuration of your Freecom MusicPal.
1.
2. Mouse-click Weather in the left-hand menu bar.
Select a provider and insert the desired city.
3.
4. Mouse-click Apply.
Note: You can have this option displayed in the main menu under Extras.
83
Page 84

Freecom MusicPal
EN
5
Extras
Stock Quotes
Weather
RSS Feeds
HTML Browser
World Clock
MusicPal
Internet Radio
Media Server
Settings
Extras
Berlin
www.weather.com
Sat 7°/1°C
Tonight 2°C
Mon 5°/-1°C
Sun 4°/-1°C
Calling the Weather:
1. Select Extras in your main menu.
Select Weather.
2.
ock Quotes
4. St
This function provides the facility to have the desired stock quotes displayed.
1.
Log into the web configuration of your Freecom MusicPal.
2. Mouse-click Stock Quotes in the left-hand menu bar.
84
Page 85

EN
5
Configuring the Freecom MusicPal through the Web interface
MusicPal
Internet Radio
Media Server
Settings
Extras
Extras
Stock Quotes
Weather
RSS Feeds
HTML Browser
World Clock
Quotes provided by ...
DAX 6919.37
+78.73 (+1.13%)
3. Select a Website and enter an abbreviated code for the desired stock about which
you wish to be informed.
4. Mouse-click Apply.
Note: You can have this option displayed in the main menu under Extras.
Calling for Stock Quotes:
Select Extras in your main menu.
.
1
Select Stock Quotes.
2.
85
Page 86

Freecom MusicPal
EN
5
Extras
Stock Quotes
Weather
RSS Feeds
HTML Browser
World Clock
MusicPal
Internet Radio
Media Server
Settings
Extras
World Clock
6:15 11.1.2008
North America +
San Francisco
17:15 11.1.2008
Local Time
5. World Clock
This function makes it possible to have the time in different countries or cities displayed.
Log into the web configuration of your Freecom MusicPal.
1.
2. Mouse-click World Clock in the left-hand menu bar.
Mouse-click Apply.
3.
Note: You can have this option displayed in the main menu under Extras.
Calling the World Clock:
.
Select Extras in your main menu.
1
86
Select World Clock.
2.
Page 87

EN
5
Configuring the Freecom MusicPal through the Web interface
Extras
Stock Quotes
Weather
HTML Browser
Calendar
World Clock
MusicPal
Internet Radio
Media Server
Settings
Extras
January 2008
1 2 3 4 5 6
7 8 9 10 11 12 13
14 15 16 17 18 19 20
21 22 23 24 25 26 27
28 29 30 31
6. Calendar
This function provides the facility to have the calendar displayed.
Log into the web configuration of your Freecom MusicPal.
1.
2. Mouse-click Calendar in the left-hand menu bar.
Mouse-click Apply.
3.
Note: You can have this option displayed in the main menu under Extras.
Calling the Calendar:
.
Select Extras in your main menu.
1
Select Calendar.
2.
87
Page 88

Freecom MusicPal
EN
5
5.4.9 Sound
1. Play Mode
This function makes it possible for you to make settings for the Play mode.
Log into the web configuration of your Freecom MusicPal.
1.
2. Select the Sound menu item.
3.
Mouse-click Play Mode in the left-hand menu bar.
You can now make settings for the Play mode.
4.
Note: Repeat stands for “Repeat title“
Shuffle stands for “Random playing of a title“
2. Bass Boost
Use this function to boost the bass sound of your Freecom MusicPal.
Log into the web configuration of your Freecom MusicPal.
1.
2. Mouse-click Bass Boost in the left-hand menu bar.
88
3.
If you wish to activate the Bass Boost, place a check in front of Use bass boost,
otherwise remove this check.
Mouse-click Apply.
4.
Page 89

89
EN
5
Configuring the Freecom MusicPal through the Web interface
3. Output
This feature enables you to activate or deactivate the loudspeaker output.
1. Log into the web configuration of your Freecom MusicPal.
2. Mouse-click Output in the left-hand menu bar.
3. If you wish to activate Output and to deactivate the internal loudspeaker, place a
check in front of Use line-out, otherwise remove this check.
4. Mouse-click Apply.
4. Line-out Boost
You can use this function to activate or disable the loudspeaker output.
1. Log into the web configuration of your Freecom MusicPal.
2. Mouse-click Line-out Boost in the left-hand menu bar.
3. If you wish to activate Line-out Boost and increase the loudness at the Line-Out
output, please set a checkmark in front of Use line-out Boost?, otherwise, please
remove the checkmark.
4. Mouse-click Apply.
Page 90

Freecom MusicPal
EN
5
5. Startup Sound
This feature enables you to play a melody when you start the Freecom MusicPal.
Log into the web configuration of your Freecom MusicPal.
1.
2. Mouse-click Startup Sound in the left-hand menu bar.
3.
If you wish to activate Output, place a check in front of Play Startup Sound?,
otherwise remove this check.
Mouse-click Apply.
4.
90
Page 91

EN
5
Configuring the Freecom MusicPal through the Web interface
5.4.10 Display
1. Brightness Active
This function gives you the facility to regulate the brightness of the display when there
is activity.
Log into the web configuration of your Freecom MusicPal.
1.
2. Mouse-click Settings in the left-hand menu bar.
Select the Display menu item.
3.
Select the menu option Brightness Active to regulate the brightness when active.
4.
You can now regulate the brightness.
5.
• 20 percent
• 40 percent
• 60 percent
• 80 percent
• Maximum
6.
Mouse-click Apply.
2. Brightness Sleep Timer
This function provides you the option to regulate the brightness of the display after a
certain time.
1.
Log into the web configuration of your Freecom MusicPal.
2. Mouse-click Settings in the left-hand menu bar.
Select the Display menu item.
3.
Select Brightness Sleep Timer to regulate the brightness in the Sleep Time.
4.
You can now regulate the brightness.
5.
• Off
• 20 percent
• 40 percent
• 60 percent
• 80 percent
• Maximum
6.
Mouse-click Apply.
91
Page 92

Freecom MusicPal
EN
5
3. Brightness Sleeping
This function can be used to regulate the brightness of the display while sleeping.
Log into the web configuration of your Freecom MusicPal.
1.
2. Mouse-click Settings in the left-hand menu bar.
Select the Display menu item.
3.
Select Brightness Sleeping to regulate the brightness in the Sleeping mode.
4.
You can now regulate the brightness.
5.
• Off
• 20 percent
• 40 percent
• 60 percent
• 80 percent
• Maximum
6.
Mouse-click Apply.
92
Page 93

EN
5
Configuring the Freecom MusicPal through the Web interface
5.4.11 Language
This feature enables you to change the system language of the MusicPal.
Log into the web configuration of your Freecom MusicPal.
1.
2. Mouse-click Language in the left-hand menu bar.
3.
Select the language you want.
4. Mouse-click Apply.
5.4.
12 Name
This feature enables you to change the device name of the Freecom MusicPal.
Log into the web configuration of your Freecom MusicPal.
1.
2. Mouse-click Name in the left-hand menu bar.
3. Use the keypad to enter the device name you want.
4. Mouse-click Apply.
93
Page 94

Freecom MusicPal
EN
5
5.4.13 Check for Updates
This function can be used for adding updates and patches related to your MusicPal free
of cost to the latest software version.
Note: To be able to carry out this function, the Freecom MusicPal must
be connected to the Internet.
1. Lo
g into the web configuration of your Freecom MusicPal.
. Mouse-click Settings in the left-hand menu bar.
2
Mouse-click Check for Updates in the left-hand menu bar.
2.
Select Check New to update your software version.
4.
Information: This process can take a few minutes. Do not switch off the
device during this time.
5.4.14
Information
This feature gives you an overview of the firmware currently being used and also network
information, such as the LAN IP address being used, the subnet mask, and so on.
Log into the web configuration of your Freecom MusicPal.
1.
2. Mouse-click Information in the left-hand menu bar.
94
Page 95

EN
5
Configuring the Freecom MusicPal through the Web interface
5.5 Administration
5.5.1 Change password
Use this feature to change the password for access to the web configuration.
Log into the web configuration of your Freecom MusicPal.
1.
2. Mouse-click Change password in the left-hand menu bar.
3.
First enter your old password and then select your new one. Enter it twice to be
sure.
4.
Mouse-click Apply.
5.2 Update Firmware
5.
Use this feature to update the firmware of your Freecom MusicPal, or to install an earlier
firmware.
Note: You can download the latest firmware at http://www.freecom.com/.
Log into the web configuration of your Freecom MusicPal.
1.
2. Mouse-click Update Firmware in the left-hand menu bar.
3.
With Browse, select the backup location of the firmware you wish to install.
4.
Mouse-click Update Firmware and follow the instructions on the monitor.
95
Page 96

Freecom MusicPal
EN
6
online o e fflin
MusicPal
Music (MP3 etc.)
Music
UPnP
Server
(hardware)
UPnP
erServ
(software)
UPnP
MP3 Streamer
Router
MusicPal
Radio
Internet Radio
List
What can my Freecom MusicPal do, and what
do I have to do to be able to play Internet radio
or local music files?
Create a connection between
your DSL modem and your
router.
Your router now has a
connection to the Internet, and
all connected devices
automatically receive a
connection to the Internet.
Your MusicPal now has a
connection to the Internet and
can create all required data for
itself.
Your MusicPal now downloads
the current radio programme
lists and makes a list of them.
Your MusicPal now has the capability of playing
local music files on your PC or server.
This refers to a locally
connected server, e.g. the
Freecom Storage Gateway.
This refers to a locally
connected PC, which works as
server by means of software.
This refers to devices that are
situated in your local network.
Internet
Connection
Chapter 6: Freecom MusicPal in practical usage
6.1 What do I need what for?
96
Page 97

EN
6
Freecom MusicPal in practical usage
MusicPal
Internet Radio
Media Server
Settings
Extras
Settings
Edit Favorites
WLAN Access Point
WLAN Region
LAN IP
WLAN IP
6.2 Media server (UPnP) in connection with the Freecom MusicPal
The following tutorial explains how you can to establish a LAN or WLAN connection to
your media server (UPnP).
6.2.1 LAN
Use a network cable (RJ45) to create a connection between your media server (UPnP)
and the Freecom MusicPal. Start the media server (UPnP) and your Freecom MusicPal.
Configure the LAN IP in the Settings submenu. If configured in your media server
(UPnP), select Use DHCP? Yes. Otherwise select Use DHCP? No and specify your IP address yourself. After you have configured the LAN IP, select the Media server (UPnP)
menu item in the main menu. You can find further information on networks and network
basics in the Appendix.
Select Settings in your main menu after you have switched on the Freecom
1.
MusicPal. Carry out navigation by using the Navigate rotary knob. Turn to right or
left to navigate up or down through the menu. Press the right-hand knob to confirm
your selection.
2.
Select the LAN IP menu item in the main menu.
3.
Decide between Use DHCP? Yes or Use DHCP? No and confirm your selection by
pressing the Navigate rotary knob.
97
Page 98

Freecom MusicPal
EN
6
MusicPal
Internet Radio
Media Server
Settings
Extras
Settings
Clock
Edit Favorites
WLAN Access Point
WLAN IP
WLAN Region
6.2.2 WLAN
Start the Media server (UPnP) and your Freecom MusicPal. Configure the WLAN IP in
the Settings submenu. If configured in your media server (UPnP), select Use DHCP? Yes.
Otherwise select Use DHCP? No and specify your IP address yourself. After you have con-
figured the WLAN IP, select the Media server (UPnP) menu item in the main menu.
Select Settings in your main menu after you have switched on the Freecom
1.
MusicPal. Carry out navigation by using the Navigate rotary knob. Turn to right or
left to navigate up or down through the menu. Press the right-hand knob to confirm
your selection.
2.
Select the WLAN IP menu item with the same navigation as in the main menu.
98
3.
Decide between Use DHCP? Yes or Use DHCP? No and confirm your selection by
pressing the Navigate rotary knob.
Page 99

EN
6
Freecom MusicPal in practical usage
6.3 Using your PC as media server (UPnP) (playing MP3s from your local PC)
To use your PC as media server (UPnP) you need Windows Media Player 11. You can do
this through the "Windows Update" feature, or download directly from www.microsoft.
com.
The following explains how you can connect your Freecom MusicPal by means of a router
or a direct connection to your computer. The computer acts here as a media server
(UPnP), and after a successful configuration you can play released music files from your
computer on the Freecom MusicPal.
1 Connecting the Freecom MusicPal
6.3.
Connect up the Freecom MusicPal correctly before putting it into operation.
1. Direct connection
First of all, create the connection between your Freecom MusicPal and your computer.
To do this, use the delivered network cable. After connecting up the two devices, you
can now connect up the power supply to the Freecom MusicPal. Only use the cable also
included in delivery.
2. Connecting through a router
First of all, create the connection between your Freecom MusicPal and the router. To
do this, use the delivered network cable.
Important: Do not plug the network cable into the WLAN port of your router.
Now connect up your computer with the router using another network cable. If both
devices are successfully connected to the router, you can now connect up the Freecom MusicPalpower supply. Only use the cable included in delivery.
99
Page 100

Freecom MusicPal
EN
6
MusicPal
Internet Radio
Media Server
Settings
Extras
Settings
Clock
Edit Favorites
WLAN Access Point
WLAN IP
WLAN Region
IP Address
192 . 168 . 1. 23
6.3.2 Configuring the Freecom MusicPal
1. Select Settings in your main menu after you have switched on the Freecom
MusicPal.
Select the LAN IP or WLAN IP menu item.
2.
3.
In the menu item select Use DHCP? No. Select Use DHCP? Yes when connecting
through a router.
Attention: If the Freecom MusicPal was connected with the computer
rough a router, steps 4+5 are dispensed with.
th
100
4. You can now change the digits by turning the Navigate rotary knob. Press the knob
o confirm the digit you want and move automatically to the next. After confirming
t
all digits you move automatically to the next window, where you are asked to enter
the subnet mask.
5. Configure the subnet mask, the gateway and the DNS server just the way you did
the IP address. Here, too, you have to confirm all digits every time before moving to
the next window. You can find further information on networks and network basics
in the Appendix.
 Loading...