

Page 1
Freecom ToughDrive
Freecom ToughDrive
Rev. 531
Page 2

Freecom ToughDrive
Warning !
All rights reserved. The products named in this manual are only used for identification purposes and may be trademarks or registered trademarks of the respective
companies. This device was designed for home or office use.
Warning! This device is equipment complying with EN55022 class B.
Freecom cannot be made liable for any damages, loss of data or damage
following thereof -whatsoever (including, without limitation, damages for loss of
business profits, business interruption, loss of business information, or other
pecuniary loss) arising out of the use of or inability to use this Freecom product,
even if Freecom has been advised of the possibility of such damages.
We reserve the right to upgrade our products in keeping with technological
advances.
GB
Dear user!
Thank you for choosing the Freecom ToughDrive external hard drive. For
optimal use and performance we advise you to read this manual carefully before
using this product.
Freecom Technologies • Germany
www.freecom.com
Contents of the box
Please check the contents of the box; the following items should be included:
• external Freecom ToughDrive
• Power-to-USB cable *
• CD-ROM with manual, driver and application software
• Quick Install Guide
• Safety Manual for ToughDrive
* Use the included power-to-USB cable when the power provided by the USB port is not
sufficient, or visit www.freecom.com/support for an optional AC adapter.
2
Page 3

Table of Contents
User manual
General Information ........................................................................... page 4
Precautionary measures ..................................................................... page 5
Freecom ToughDrive .......................................................................... page 6
Chapter 1:
Installation of the Freecom Personal Media Suite Software (PC) ....page 7
Chapter 2:
Hardware installation ......................................................................... page 11
Chapter 3:
Driver installation (PC) ....................................................................... page 12
Chapter 4:
Daily use of the Freecom ToughDrive with
Freecom Personal Media Suite software (PC) ................................... page 15
GB
Chapter 5:
The User Interface of the Freecom Personal Media Suite (PC) ........ page 16
Chapter 6:
Partitioning your Freecom ToughDrive (PC) ..................................... page 31
Chapter 7:
Troubleshooting ................................................................................. page 45
© 2005 Freecom Technologies
3
Page 4

Freecom ToughDrive
GB
General Information
The following hardware and software requirements must be fulfilled to ensure
trouble-free operation.
Hardware Requirements
In order to use the Freecom ToughDrive, following components are needed:
• Intel Pentium III / AMD Duron 700 MHz or higher
• 128 MB RAM or higher
• CD-ROM drive for installing drivers and/or software
• Available USB 2.0 or USB 1.1 port*
• Internet connection for online warranty registration and driver/software
updates and downloads
Software Requirements
• Windows 98 SE
• Windows ME
• Windows 2000
• Windows XP
Mac
• iMac, iBook, Mac G3 or Power Book G3 with USB interface
• Operating system: Mac OS X v10.1 or higher
* USB 2.0 is downwards compatible to USB 1.1. To achieve optimal performance from the Freecom
ToughDrive your PC should be equipped with an USB 2.0 port. USB 2.0 PCI Host Controllers are
separately available at www.freecom.com.
4
Page 5

General Information
Precautionary measures
To ensure that your Freecom ToughDrive functions properly, please take note of
the following precautions. If these are not followed, you may void your warranty
and damage the Freecom ToughDrive.
• Safely remove the Freecom ToughDrive via your operating system (the
"unplug or eject hardware" option in the Windows taskbar) before disconnecting the USB cable or power cable and before switching off the device.
Failing to do so may result in data loss.
• Do not drop the Freecom ToughDrive or expose it to other kinds of sudden
mechanical shocks as this may result in data loss and damage to the hard
drive.
• Do not use the Freecom ToughDrive when the ambient temperature is below
10°C or above 45°C.
• If the Freecom ToughDrive is moved from a cool environment to a warmer
environment, please allow the drive to acclimatize to the ambient temperature before operating the device. Failing to do so may lead to condensation
within the drive enclosure, which in turn may cause the drive to malfunction.
• Do not place liquids or drinks on the Freecom ToughDrive. When liquids are
spilled and get in contact with the electronics within the drive enclosure, it
will damage the drive and will cause the drive to malfunction.
• Do not use the Freecom ToughDrive in a dusty environment. Dust inside the
enclosure may damage the internal electronics and result in drive malfunction.
• Only use the power adapter that was supplied with the ToughDrive.
• Opening the Freecom ToughDrive will void the warranty.
• Since USB 2.0 is backwards compatible with USB 1.1, the Freecom ToughDrive
can be connected to all USB ports. When connected to a USB 1.1 port,
however, the performance (data transfer rate) of the Freecom ToughDrive
will be much lower than when the drive is connected to a USB 2.0 port.
• When using the Freecom SYNC software, please be aware that all files in the
SYNC folder on the ToughDrive are linked to the original files on your PC or
network. If you delete a file in the SYNC folder, its original will be deleted
during the next synchronization, too! To avoid this, you have to ‘Split From
Original’ the file prior to deleting it. Please refer to chapter 5 for further
information on Freecom SYNC and Microsoft Briefcase.
GB
5
Page 6

Freecom ToughDrive
GB
Freecom ToughDrive external hard drive
The hi-speed data transfer through the USB 2.0 interface makes it ideally suitable
for data-storage, file sharing, backup, archiving, audio playback and all applications that need fast file access.
For your convenience, the Freecom ToughDrive has been partitioned (1 partition) and pre-formatted (FAT32 file system). The FAT32 format ensures maximum interchangeability of the Freecom ToughDrive between different computers. Should you choose to format the Freecom ToughDrive in another file system
(e.g. NTFS), please be aware of possible problems when connecting the Freecom
ToughDrive to another computer than the one you used for formatting.
6
Page 7
Installation of the Freecom Personal Media Suite software
Chapter 1: Installation of the Freecom Personal
Media Suite software (PC only)
If you want to use the SYNC function on the Freecom ToughDrive, you need to
install the Freecom Personal Media Suite software first.
Note: To use the functions of the Freecom Personal Media Suite
described in this handbook, your Freecom ToughDrive has to be
connected to your PC.
1.1 Installation of the Freecom Personal Media Suite
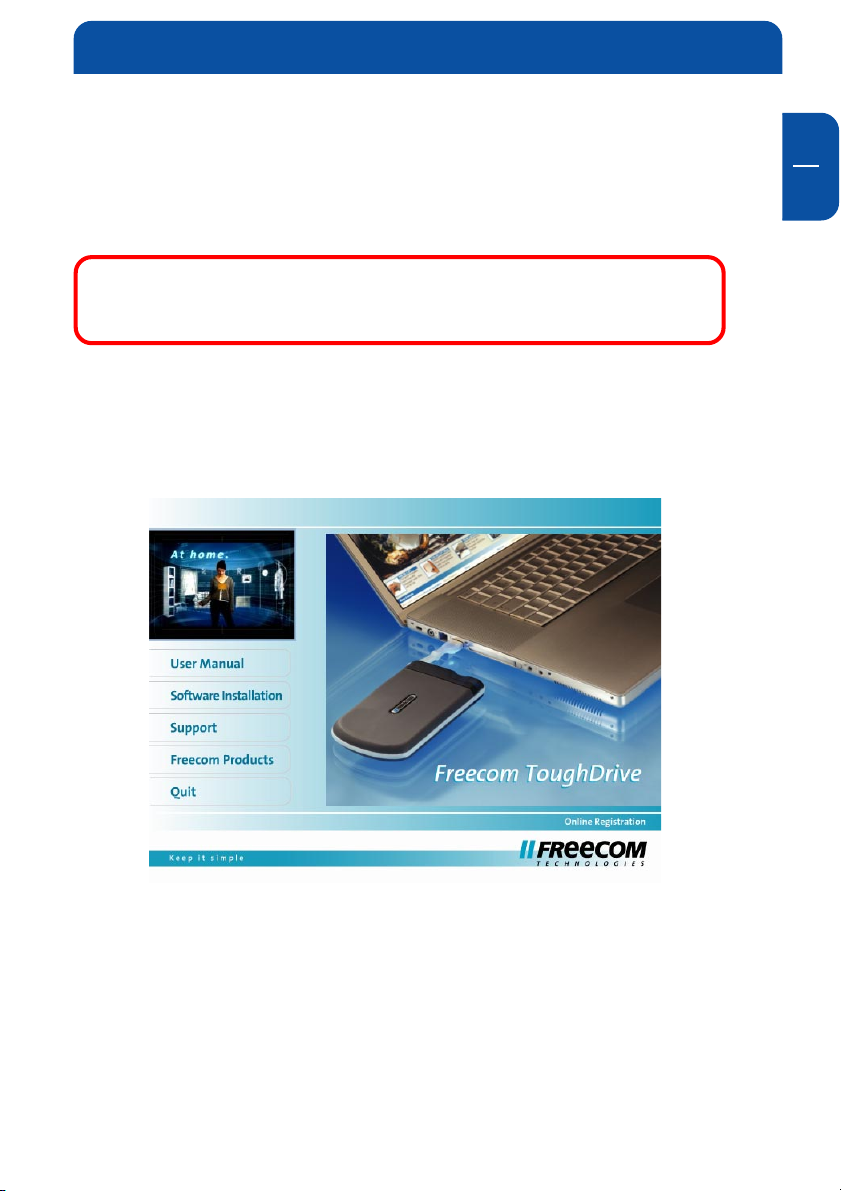
1. Insert the Freecom ToughDrive Software & Manual CD into your CD drive.
The Freecom start menu opens:
GB
1
In case the software does not open automatically, please click on "Start" in
the main directory of the CD.
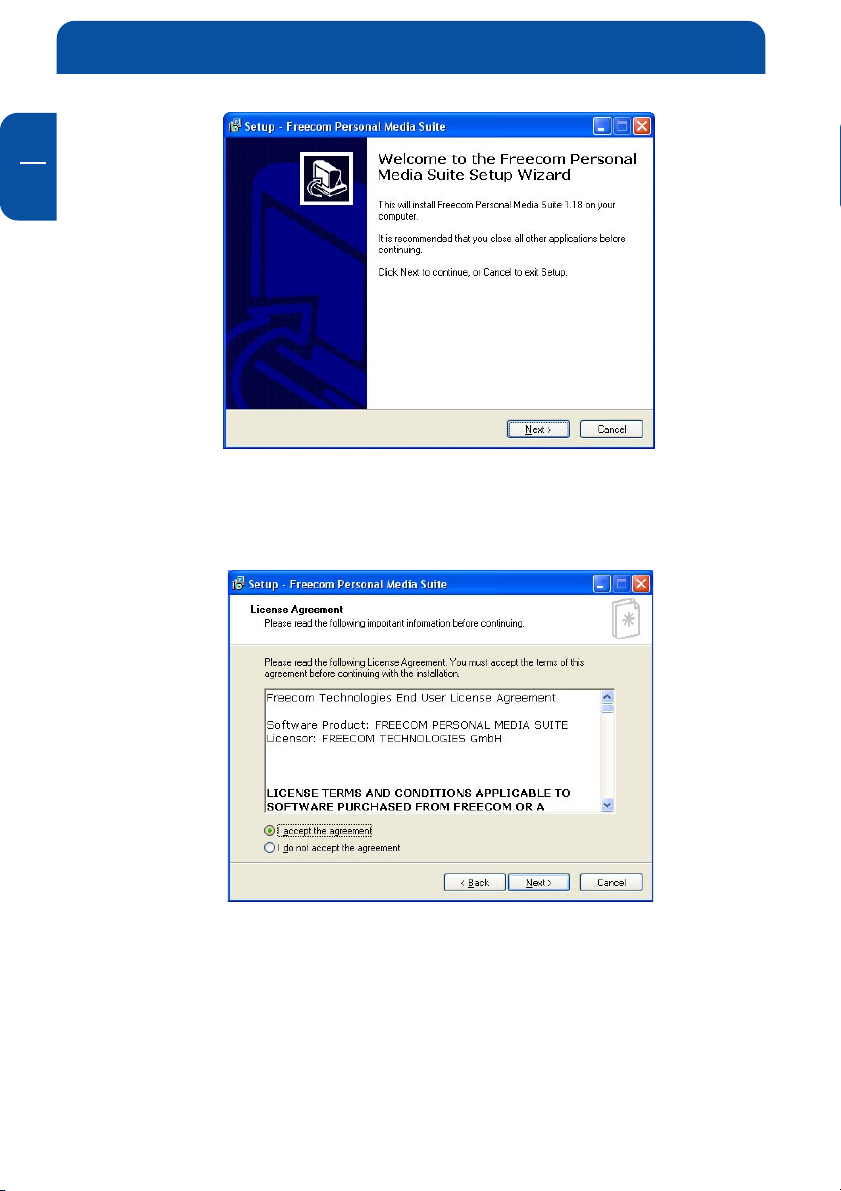
2. Click on "Freecom Personal Media Suite". The installation of the Freecom
Personal Media Suite starts now. Follow the instructions on the screen,
confirm with "Next" in order to continue with the installation.
7
Page 8
GB
1
Freecom ToughDrive
3. Please read the license agreement carefully. To accept the license agreement, confirm with "Yes". Note: Clicking on "No" ends the installation.
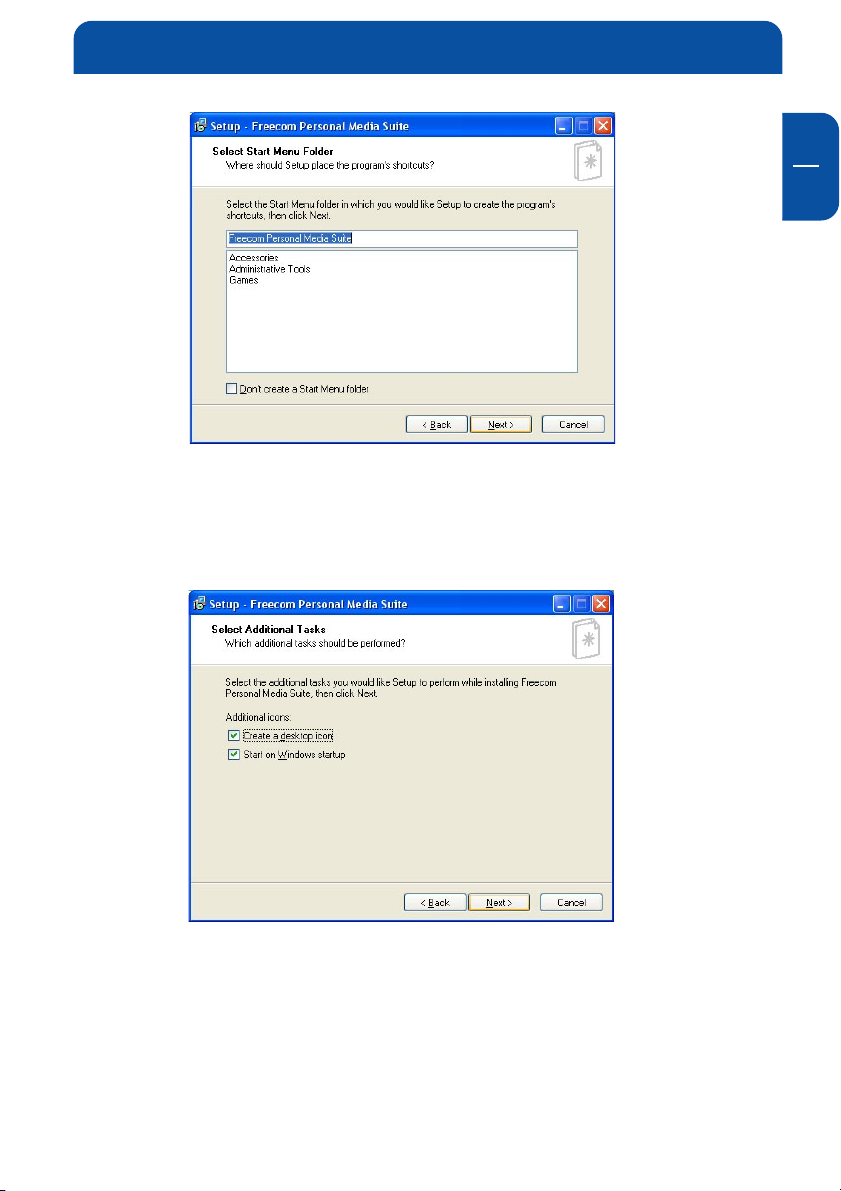
Select the target folder and program folder in the start menu in which the
Freecom Personal Media Suite symbol is to appear.
4. Default target folder is C:\Programs\Freecom Personal Media Suite. You can
select a different target folder for the program files by selecting another
folder on your hard drive.
8
Page 9
Installation of the Freecom Personal Media Suite software
5. In the dialogue "Options" you can select whether to create a link to the
Freecom Personal Media Suite Software on the desktop and whether the
program should be started automatically when starting Windows. It is
recommended to select both options for better operation of the Freecom
Personal Media Suite.
GB
1
6. Click on "Next" to start the installation. All necessary program files are now
written on the hard drive of your computer.
7. In the last window, you will be asked whether you want to start Freecom
Personal Media Suite now. It is recommended to select this option so that you
can configure the software for your Freecom ToughDrive. Please click on
"Finish".
9
Page 10

Freecom ToughDrive
GB
1
1.2 Deinstallation of the Freecom Personal Media Suite
In order to remove the Freecom Personal Media Suite from your computer,
please proceed as follows:
1. In the "Start" menu, please click on "Programs" - "Freecom Personal Media
Suite".
2. Select "Uninstall Freecom Personal Media Suite". The software is now
removed from your computer.
10
Page 11
Hardware Installation
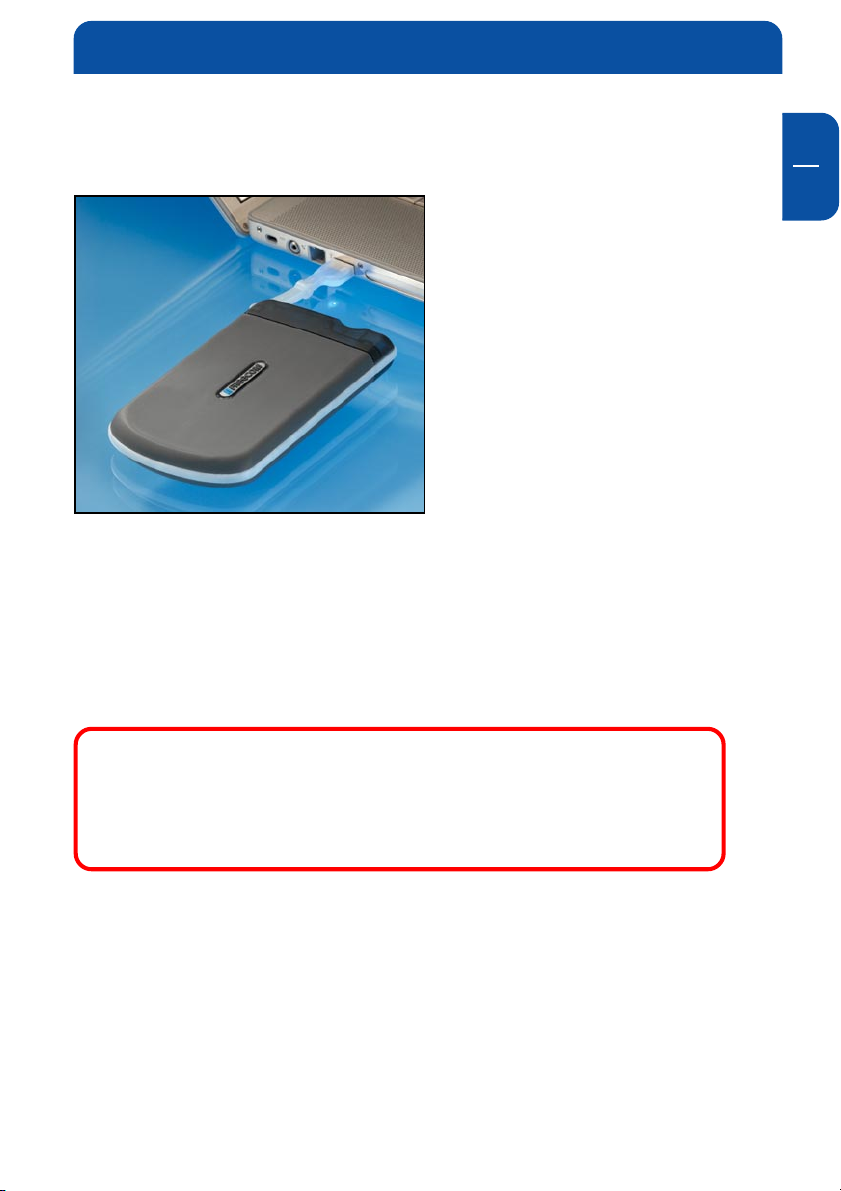
Chapter 2: Hardware Installation
2.
1.
Connect the interface cable to the
Freecom Hard Drive.
GB
2
Since USB 2.0 is backwards compatible with USB 1.1, the Freecom
ToughDrive can be connected to all USB ports. When connected to
a USB 1.1 port, however, the performance (data transfer rate) of
the Freecom ToughDrive will be much lower than when the drive
is connected to a USB 2.0 port.
11
Page 12
Freecom ToughDrive
GB
3
Chapter 3: Driver installation (PC only)
Under Windows ME / 2000 / XP a separate Freecom driver is not required. The
drivers will be installed automatically by the operating system after plugging in
the Freecom ToughDrive into the USB port of the computer.
Driver installation USB under Windows 98 SE
Note: Your Freecom ToughDrive is fully backwards compatible
with USB 1.1. The installation for USB 1.1 is the same as described
below for USB 2.0.
1. Insert the Freecom Manual and driver CD into the CD-ROM drive.
2. Connect your Freecom ToughDrive to the USB connector of your notebook
or computer.
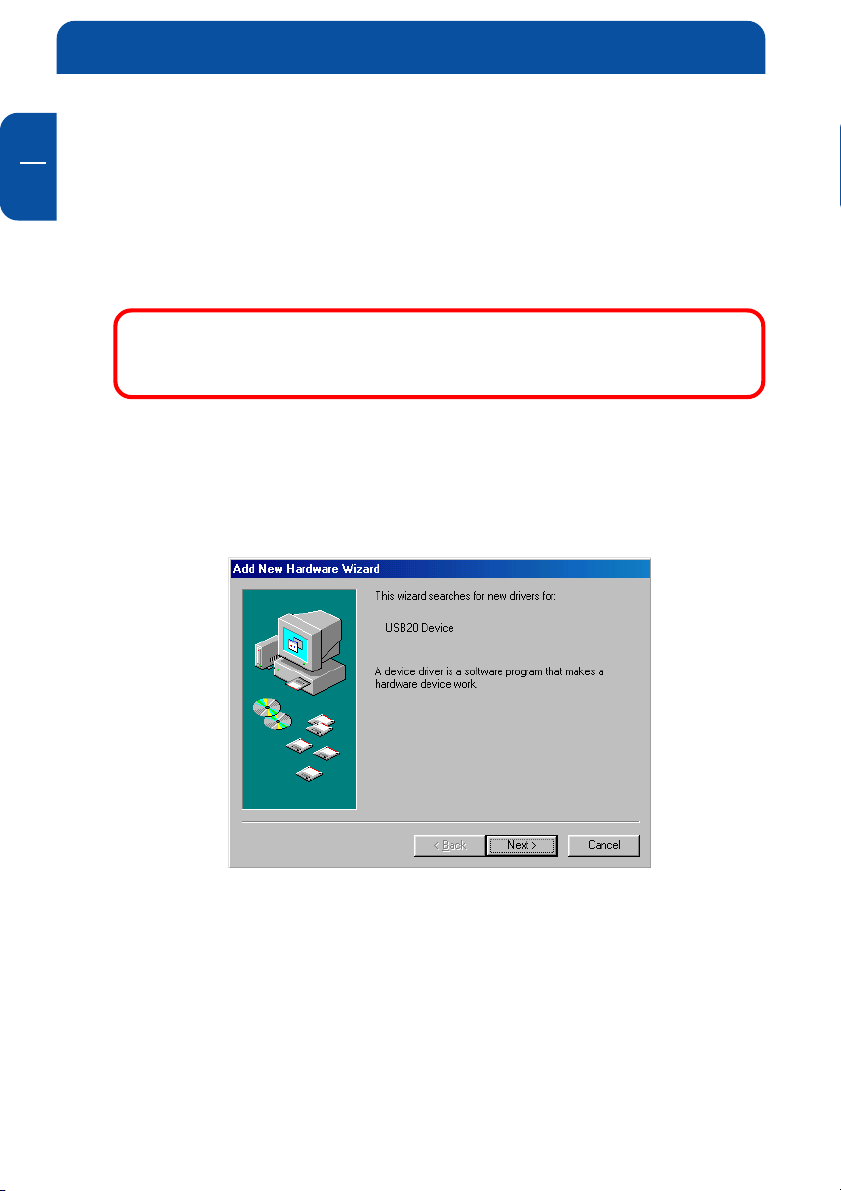
3. The "Add New Hardware Wizard" opens and a "USB 2.0 Device" (USB 2.0) or
a "USB TO IDE" (USB 1.1) is found.
12
Click on "Next".
Page 13
Driver Installation
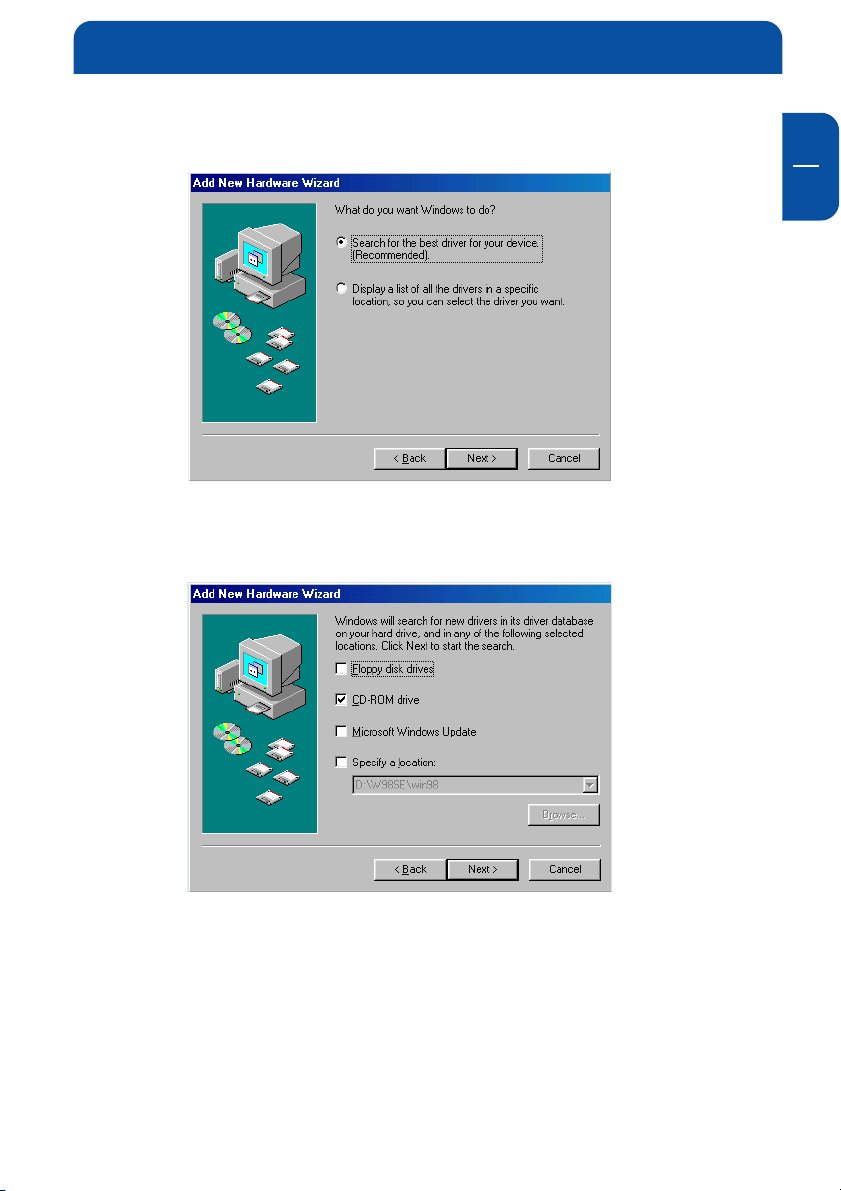
4. In the next window select "Search for the best driver for your device.
(Recommended)". Click on "Next".
5. Make sure that the checkbox "CD-ROM drive" is activated in the next
window.
GB
3
Continue by clicking on "Next".
13
Page 14
Freecom ToughDrive
GB
3
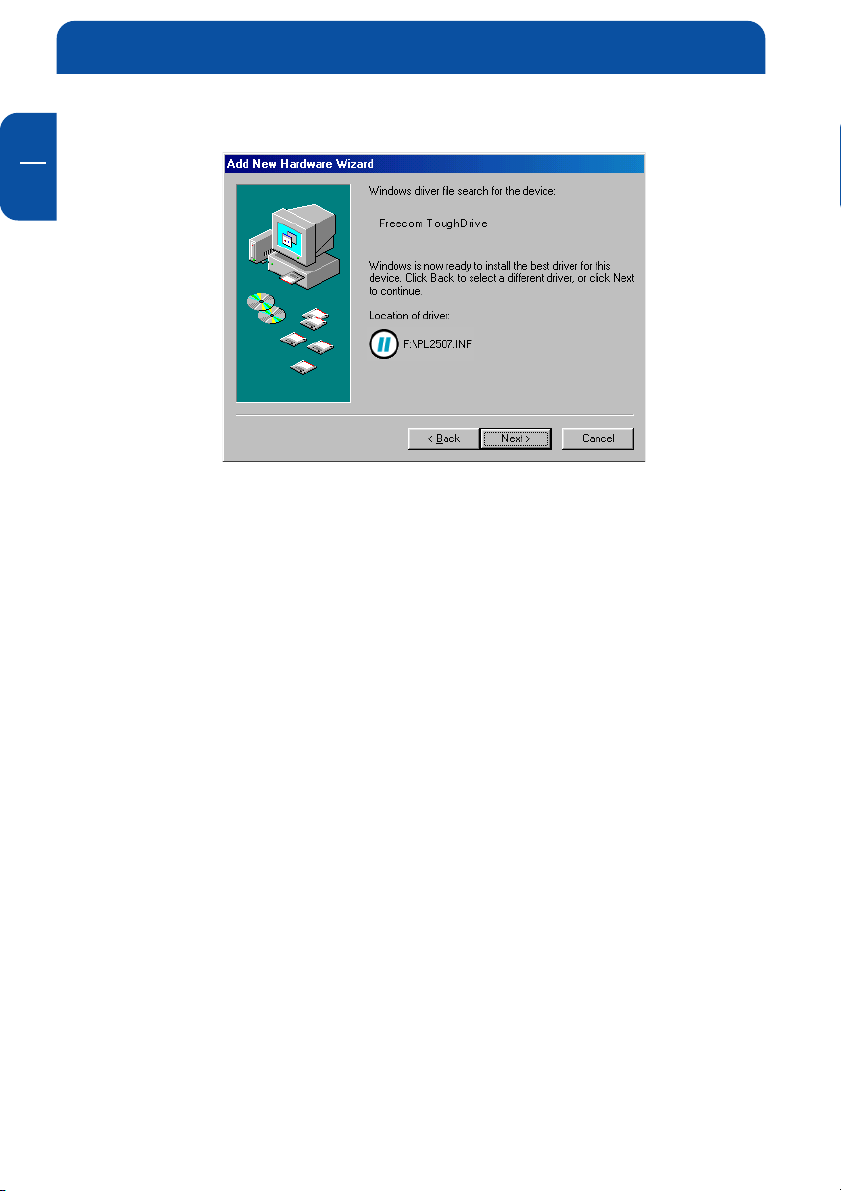
6. The Hardware Wizard finds a "Freecom ToughDrive".
By clicking on "Next" the necessary files will be installed. Afterwards click on
"Finish" to complete the installation. Congratulations! You’ve just finished to
install the Freecom ToughDrive and the external hard drive is almost ready to
use.
14
Page 15

Driver Installation
Chapter 4: Daily use of the Freecom ToughDrive
The hi-speed data transfer through the USB 2.0 interface makes it ideally suitable
for data-storage, file sharing, backup, archiving, audio playback and all applications that need fast file access.
4.1 Daily use of the Freecom ToughDrive with Freecom Per-
sonal Media Suite software (PC only)
Creating a SYNC folder (PC)
After the installation of the Freecom ToughDrive is finished, the Freecom SYNC
folder will be created automatically when Freecom Personal Media Suite was
installed before. If not, please refer to chapter 5.4.2 (Creating a new SYNC
folder).
GB
4
15
Page 16

Freecom ToughDrive
GB
5
Chapter 5: The User Interface of the Freecom
Personal Media Suite (PC only)
1
3
5
6
7
1 Tabs for configuration of the Freecom Personal Media Suite components
- Secure & Compress
- Freecom SYNC
- Autorun
2 Minimizes Freecom Personal Media Suite in the taskbar
3 Input field (also shows the selected folder)
4 User menu
5 Connected Freecom ToughDrive (drive letter + available memory capacity)
6 Link to www.freecom.com. Click on this to access the Freecom homepage.
Here you can find further information about your Freecom ToughDrive.
7 Quick Help for Freecom Personal Media Suite
8 Minimizes Freecom Personal Media Suite in the system tray.
4
8
2
5.1 Configuration
To open the configuration menu, please right-click on the Freecom Personal
Media Suite icon in the system tray and select "Configuration":
1. "Show splash screen": Deactivate this function to prevent the display of the
start screen when starting the program.
2. "Start program on Windows start": Starts the Freecom Personal Media Suite
in the background with every Windows start. You will know this by the icon
of the Freecom Personal Media Suite in the system tray.
16
Page 17

The User Interface of the Freecom Personal Media Suite
Important: We recommend to leave the function "Start program
on Windows start" activated under all circumstances in order to
be able to use all the functions of the Freecom Personal Media
Suite (e.g. "Autorun", "SYNC on Freecom device plug-in")!
5.2 Autorun
The "Autorun" function enables you to open or start documents, files or
programs automatically when your Freecom ToughDrive is connected to your
PC.
Automatically start, for example, the last document you were working on, MP3
play lists, your favourite film and much more. These files do not have to be on
your Freecom ToughDrive for this.
GB
5
5.2.1 Adding files / folders
1. Open the Freecom Personal Media Suite and select the "Autorun" tab.
2. Add files, folders and programs to the Autorun list by either clicking on "Add
file" and selecting the corresponding file or by pulling the files into the
Autorun list field using drag&drop.
3. For folders, please select "Add folders" or pull a folder into the Autorun list
field using drag&drop.
4. Alternatively, you can create a new folder on your Freecom ToughDrive using
the "Add folder" function by clicking on "Create new folder", naming the
folder and selecting it.
17
Page 18

Freecom ToughDrive
GB
5
5.2.2 Removing files / folders from the Autorun list
1. Open the Freecom Personal Media Suite and select the "Autorun" tab.
2. Select the file or the folder to be removed in the Autorun list field.
3. Click on "Remove". The corresponding entry is removed from the list.
5.3 Secure&Compress
The Secure&Compress function serves to compress and encrypt your documents.
Unauthorized access to your personal data is therefore impossible.
5.3.1 Add / Select Folders
1. Open the Freecom Personal Media Suite and select the tab
"Secure&Compress".
2. Click on "Change folder" and select the folder on your Freecom ToughDrive
whose content is to be compressed and encrypted.
3. Alternatively, you can create a new folder to be encrypted on your Freecom
ToughDrive using the "Change folder" function by clicking on "Create new
folder", naming the folder (e.g. "Secure") and selecting it.
In the selected folder, all files - even in sub-directories - are compressed and then
encrypted.
The active Secure&Compress folder is easily recognised on your Freecom
ToughDrive by the "Padlock".
18
Page 19

The User Interface of the Freecom Personal Media Suite
5.3.2 Opening the Secure&Compress folder
1. Open the Freecom Personal Media Suite and select the tab
"Secure&Compress".
2. Click on "Open folder" in order to open the Secure&Compress folder.
3. If the Freecom Personal Media Suite is already open and has started minimised in the taskbar, you can also open the Secure&Compress folder with a
right-click on the taskbar symbol of the Freecom Personal Media Suite:
4. Of course you can also open the Secure&Compress folder over the Windows
Explorer.
5.3.3 Encrypting files and folders
1. Open the Secure&Compress folder.
2. Pull the files or folders to be encrypted in the Secure&Compress folder using
the drag&drop function. Each file is now compressed and then encrypted.
3. The first time you will be requested to enter and confirm a password. Select
"Save password on this computer" if you do not want to be requested to
enter a password again.
4. Alternatively, you can also right-click on the files or folders and select the
Secure&Compress folder in the context menu under "Send to ...".
GB
5
5.3.4 Decrypting files and folders
In order to decrypt files and folders which are in the Secure&Compress folder,
please proceed as follows:
1. Open the Secure&Compress folder.
2. Select the file(s) or folder(s) to be decrypted and pull them into the target
folder (e.g. with the Windows Explorer) using drag&drop.
3. Your files are now decrypted and decompressed. The encrypted original
remains on the Freecom ToughDrive.
19
Page 20

Freecom ToughDrive
GB
5
5.3.5 Deleting the Secure&Compress folder
Click on "Delete folder" in order to delete the selected Secure&Compress folder.
ATTENTION: All files in the folder are irrevocably deleted!
Before the deletion, a security request is carried out whether you really want to
delete the folder:
5.3.6 Changing the password
1. Open the Freecom Personal Media Suite and select the tab
"Secure&Compress".
2. Click on "Change password". The following window opens:
3. Please enter your current password in the top input field. Enter your new
password in the middle input field and confirm it in the bottom input field.
20
Page 21

The User Interface of the Freecom Personal Media Suite
Please note: Your changed password applies to all files and folders encrypted
from the time of the change. For files and folders which were encrypted before,
the password which was used for encryption remains.
Changes of the password do not apply to files and folders already
encrypted!
5.4 Freecom SYNC
5.4.1 What is Freecom SYNC?
The Freecom SYNC integrated in the Freecom Personal Media Suite is a program
for synchronizing files. The computer serves as origin of the data. This data can
be processed on any number of other computers.
Example:
You create a document at work and want to work on it at home (Freecom
Personal Media Suite is installed on your PC at work):
• Copy the document from the PC at work to your Freecom SYNC folder on your
Freecom ToughDrive.
• Open the document at home directly out of the Freecom SYNC folder. Work
on it and save it in the Freecom SYNC folder.
• Connect the Freecom ToughDrive to your PC at work and click "Sync now"
in the Freecom Personal Suite. The document will now be synchronized
between your PC at work and the Freecom ToughDrive. While synchronizing,
only modified files will be replaced by newer files.
GB
5
21
Page 22

GB
5
Freecom ToughDrive
5.4.2 Creating a new SYNC folder
1. Open the Freecom Personal Media Suite and select the tab "Freecom SYNC".
Click on "Change folder" and select a folder on your Freecom ToughDrive.
2. Alternatively, you can create a new SYNC folder on your Freecom ToughDrive
using the "Change folder" function by clicking on "Create new folder",
naming the folder (e.g. "SYNC") and selecting it.
3. Click on "Complete" so that the new folder is created. Then opens the
Freecom SYNC folder.
5.4.3 Opening the SYNC folder
1. Open the Freecom Personal Media Suite and select the tab "Freecom SYNC".
2. Click on "Open folder" in order to open the SYNC folder.
2. If the Freecom Personal Media Suite is already open and has been started
minimised in the taskbar, you can also open the SYNC folder through a rightclick on the taskbar symbol of the Freecom Personal Media Suite.
5.4.4 Adding files into the SYNC folder
1. Open the SYNC folder.
2. Pull the respective files or folders in the SYNC folder using the drag&drop
function.
3. Alternatively, you can also right-click on the file(s) or folder(s) and select the
SYNC folder in the context menu under "Send to ...". Your files/folders are
now copied into the SYNC folder.
22
Page 23

The User Interface of the Freecom Personal Media Suite
5.4.5 Synchronisation of files and folders
There are two possibilities for the synchronization of your files:
1. Click "Sync now" in the Freecom Personal Suite. Your data is now synchronized.
2. Synchronisation of the data when your Freecom ToughDrive is connected to
your computer.
For this, please proceed as follows:
a) Open the Freecom Personal Media Suite and click on the tab "Freecom
SYNC".
b) Select a SYNC folder if you have not yet done so.
c) Activate the function "SYNC on Freecom USB device plug-in" in the tab
"Freecom SYNC":
GB
5
Your files are now synchronized each time when you connect your Freecom
ToughDrive to your computer (Freecom Personal Media Suite has to be started).
This function is activated as standard when a SYNC folder is
created!
3. Starting the synchronization manually
a) Open the Freecom Personal Media Suite and click on the tab "Freecom
SYNC".
b) Select a SYNC folder if you have not yet done so.
c) Click on "Synchronize now" to start the data synchronization.
d) Alternatively, right-click on the system tray icon of the Freecom Personal
Media Suite and select "Start synchronization" there.
23
Page 24

Freecom ToughDrive
GB
5
5.4.6 Changing the SYNC folder
a) Open the Freecom Personal Media Suite and click on the tab "Freecom
SYNC".
b) Click on "Change folder" to select a new folder for data synchronization.
c) Important:
5.4.7 Deleting the SYNC folder
a) Open the Freecom Personal Media Suite and click on the tab "Freecom
SYNC".
b) Click on "Delete folder" in order to delete the active SYNC folder.
ATTENTION: All files in the folder are irrevocably deleted!
Before the deletion, a security request is carried out whether you really want to
delete the folder:
The selected folder may not contain any files or folders! The selected folder may not contain any files or folders!
The selected folder may not contain any files or folders!
The selected folder may not contain any files or folders! The selected folder may not contain any files or folders!
5.4.8 Every day use
After you have installed all software, created the SYNC folder and configured
the software and Freecom ToughDrive you can start using Freecom SYNC to
synchronize all your data with the Freecom ToughDrive. You can use the SYNC
function for instance to make backups of important files, to take files from work
to your home or on the road.
Usage of the SYNC folder with other computers
Please follow these instructions if you want to use the SYNC folder with another
(second) computer.
All files you want to work with on another computer have to be opened directly
out of the Freecom SYNC folder! You should not copy them to another hard disk,
as this might cause a later synchronization to perform incorrectly.
24
Page 25

The User Interface of the Freecom Personal Media Suite
Synchronization of new or changed files
This example shows how you can synchronize files which were changed or
created on the Freecom ToughDrive, with the original files on the primary
computer.
1. Connect the Freecom ToughDrive with the primary computer.
2. Open the context menu on the SYNC icon in the taskbar and click on "Start
synchronization".
3. A status window appears. Please select "Update" if you wish to synchronize
the file or otherwise select "Cancel". If you choose not to synchronize the file
(Cancel) you will be able to synchronize this file during the next synchronization.
GB
5
25
Page 26

Freecom ToughDrive
GB
5
5.5 Skip files during synchronization
If you want to skip just one file out of many, please click on this file with the right
mouse button and select "Skip". The green arrow next to the selected file
changes to a blue one, indicating that this file will not be synchronized. You will
be able to synchronize this file during the next synchronization.
5.5.1 Handling deleted files
Deleting files on either the primary computer or the SYNC folder on the Freecom
ToughDrive results in a red X next to the file during the next synchronization.
This indicates that the file has been deleted and that its counterpart will be
deleted, too. Please select "Update" to proceed.
26
Page 27

The User Interface of the Freecom Personal Media Suite
If you wish to keep the file, please click with the right mouse button on the file
and select "Don’t Delete". The file will not be deleted and will be disregarded
during the next synchronization.
If you want to delete a file on either the primary computer or in the SYNC folder
and do not want to affect its counterpart, it is necessary to "Split From Original"
the files. Please follow the instructions:
1. Select the file or folder you want to delete.
2. Choose "Properties" in the context menu.
3. Select "Update" and "Split From Original".
GB
5
4. Select "Yes".
27
Page 28

GB
5
Freecom ToughDrive
5.5.2 Office use
Have you ever had doubts storing your data on the network of your company
only? Sure, there is always a backup of the server but do you really feel good with
this ‘remote’ backup? The Freecom ToughDrive is ideal for making a local
backup, which stores your data independently from your network or local
computer. Simply ‘send to’ your important files and directories to the SYNC
folder on the Freecom ToughDrive and update your backup from time to time
click "Sync now". This is extremely easy and very fast, because the SYNC tool only
backups changed files via the fast USB 2.0 connection.
The best thing is, even when your network or local computer is not working, you
can take your Freecom ToughDrive to any other computer (equipped with an
USB port) and continue. Even at your home-office, where you can be close to the
people you love and still having all your business data available. Simply click
"Sync now" before you leave the office and you are always up to date and can
work with the data on the Freecom ToughDrive.
The Freecom ToughDrive provides a vast amount of memory – more than most
computers are equipped with. It is ideal for storing large graphics or videos. The
files can be edited directly from the Freecom ToughDrive, as its USB 2.0
connection is fast enough by far.
28
Page 29

The User Interface of the Freecom Personal Media Suite
This is what you have to do:
Follow the instruction in the manual to install the Freecom ToughDrive and the
SYNC folder. Mark the files and folders you want to copy to the SYNC folder. Click
with the right mouse button on the files and folders and select 'Send to SYNC
folder...'
Done.
Now all your valuable data has been copied to the Freecom ToughDrive. Every
time you click "Sync now", all changed or added / deleted files and folders from
the selected folders will be synchronized with the data on the Freecom
ToughDrive.
GB
5
5.5.3 Home use
At the office, there is always a backup of your important business data. But how
about your data at home? All the memories stored in digital photo’s made
during your last holiday? Or the first pictures and movies of your children! You
do not want to loose those! The Freecom ToughDrive is ideal for making a safety
backup, which stores your data independently from your computer. Simply 'send
to' your important files and directories to the SYNC folder on the Freecom
ToughDrive and update your backup from time to time click "Sync now". This
is extremely easy and very fast, because the SYNC tool only backups changed files
via the fast USB 2.0 connection. And all your memories are safe.
29
Page 30

Freecom ToughDrive
GB
5
This is what you have to do:
Follow the instruction in the manual to install the Freecom ToughDrive and the
SYNC folder. Mark the files and folders you want to copy to the SYNC folder. Click
with the right mouse button on the files and folders, which contain the pictures
or videos you want to be in a safe place and select 'Send to SYNC folder...'
Done.
Now all your valuable data has been copied to the Freecom ToughDrive. Every
time click "Sync now", all changed or added / deleted files and folders from the
selected folders will be synchronized with the data on the Freecom ToughDrive.
30
Page 31

Partitioning your Freecom ToughDrive (PC only)
Chapter 6: Partitioning your Freecom ToughDrive
(PC only)
6.1 General information
Your Freecom ToughDrive was partitioned and formatted to provide you with
the maximum available capacity and compatibility. FAT32 was chosen as file
system to assure that you will be able to read your files on any PC. It is
recommended not to change the current configuration of your Freecom
ToughDrive.
For some users another file system might fit better for their needs. This manual
describes current limitations of most common file systems and Instructions to
enable you to adapt the Freecom ToughDrive to your needs.
6.2 File System features
Please refer to the tables below for an overview:
File systems supported by different operating systems
Operating system
File system
Windows 98SE yes yes not supported
Windows ME yes yes not supported
Windows 2000 yes yes yes
Windows XP yes yes yes
FAT FAT32 NTFS
GB
6
Maximum size of a partition
Operating system
File system
Windows 98SE 2 GB 60 GB
Windows ME 2 GB 2 TB
Windows 2000 4 GB
Windows XP 4 GB
*1
: A patch for Windows 98SE is required for hard disk larger than 60 GB. The maximum partition size
can never exceed the capacity of your HDD.
*2
: Hard disk capacity will not be displayed correctly by fdisk!
*3
: FAT partitions larger than 2 GB can only be administrated by Windows 2000/XP.
FAT FAT32 NTFS
*1,2
n.a.
*2
*3
*3
32 GB 16 TB
32 GB 16 TB
n.a.
31
Page 32

Freecom ToughDrive
GB
6
Example for different partitions with different file systems on one
Freecom ToughDrive
Total size
of Freecom HD
80 GB 60 GB 20 GB
The example above is a good solution for Windows 2000/XP users who sometimes exchange data with Windows 98SE/ME PCs.
For storing the data under Windows 2000/XP both partitions can be used. As the
NTFS file system is not recognized by Windows 98SE/ME data to be used on these
operating systems must be stored on the FAT32 partition.
Please follow the steps below to adapt the Freecom ToughDrive for your needs.
File system
NTFS FAT32
6.3 Partitioning your Freecom ToughDrive under Windows
98SE / Windows ME
- Windows 98SE only: The fdisk version which is installed together with your
operating system does not recognize the correct size of hard disks larger than
64 GB.
- Windows 98SE/ME: For large partitions fdisk will not display the partion size
correctly! Please ignore this as the partitioning results will still be OK.
Further information and an update to fix this problem can be found in article
263044 of the "Microsoft Knowledge Base"on the Microsoft Website under
http://support.microsoft.com.
32
Page 33

Partitioning your Freecom ToughDrive (PC only)
6.3.1 Deleting a partition on the Freecom ToughDrive under Windows
98SE / ME
The following steps will explain how to delete a partition on your Freecom
ToughDrive.
1. Click on the "Start" button.
2. Select "Run".
3. Enter "fdisk" and confirm with "OK".
4. fdisk will be started. Answer the question "Do you wish to enable large disk
support?" by pressing the 'Return' key. FAT32 is now activated.
5. Choose Option 5 "(Change current fixed disk drive)" by pressing '5' and
'Return'.
6. Select the hard disk to be deleted by its number. ATTENTION: Please make
sure that the correct drive is selected. Selecting the wrong drive will lead to
a loss of your data!
7. Choose Option "3 (Delete partition or Logical DOS Drive)" by pressing '3' and
'Return'.
8. Your Freecom ToughDrive comes formatted as primary partition. Select
option 1 "Delete Primary DOS Partition" by pressing '1' and 'Return'.
9. Select the partition to be deleted by pressing its number and 'Return'.
10. Enter the drive label and press 'Return'.
11. Confirm with 'Y' and 'Return' to delete the partition.
12. Press the 'ESC' key to return to the fdisk options.
13. Press 'ESC' to exit fdisk. Stop your hard disk by using the hot unplug icon in
the lower right corner of your screen and remove the USB cable from your
hard disk. Afterwards connect your hard disk again with your computer. The
hard disk will now be recognized by Windows.
GB
6
6.3.2 Creating a partition on the Freecom ToughDrive under Windows
98 SE / ME
The following steps will guide you the process of creating partitions on your
Freecom ToughDrive under Windows 98SE/ME. After this procedure your Freecom
ToughDrive will be ready for use and it will be allocated a drive letter.
33
Page 34

Freecom ToughDrive
GB
6
1. Click on the "Start" button.
2. Select "Run".
3. Enter "fdisk" and confirm with "OK".
4. Answer the question "Do you wish to enable large disk support?" by pressing
the 'Return' key. FAT32 is now activated.
5. Choose Option "5 (Change current fixed disk drive)" by pressing '5' and
'Return'.
6. Select the hard disk by its number where the "Usage" contains no value but
only a percent symbol. Select the number of the corresponding hard disk and
confirm by pressing the "Return" key.
Now your hard disk is activated and ready to be partitioned.
34
Page 35

Partitioning your Freecom ToughDrive
Note: Partition size of large hard disks will not be displayed
correctly! However partitioning results will be OK.
7. Select Option 1 "(Create DOS partition or Logical DOS drive)" by pressing '1'
and confirm with 'Return'.
8. Select Option 1 "(Create primary DOS partition)" by pressing '1' and confirm
with 'Return'.
Wait until drive integrity is completely checked.
GB
6
9. If only one partition is required then answer "Y" to the question: "Do you
wish to use the maximumavailable size for a Primary DOS partition?" If more
than on partition is required go to the next section "Create two or more
partitions on the Freecom ToughDrive under Windows 98 / Windows ME".
Now the whole disk will be partitioned as one primary partition. Wait until
the drive integrity check is completed.
10. Press the 'ESC' key to return to the fdisk options.
11. Now press the 'ESC' key to close the "fdisk window".
partitioned.
Your hard disk is now
35
Page 36

Freecom ToughDrive
GB
6
12. Stop your hard disk by using the hot unplug icon in the lower right corner of
your screen and remove the USB cable from your hard disk. Afterwards
connect your hard disk again with your computer. The hard disk will now be
recognized by Windows.
As Windows tries to access your hard disk an error message will appear. This
happens, because your hard disk is not yet formatted.
6.3.3 Creating two or more partitions on the Freecom ToughDrive un-
der Windows 98SE / ME
1. Repeat steps 1 to 7 from the previous chapter (Create one partition on the
Freecom ToughDrive under Windows 98SE/Windows ME).
2. Answer the question "Do you wish to use the maximum available size for a
primary DOS partition?" with "N".
3. Enter either the size or a percentage value for the partition size. Press
'Return' and wait until the drive integrity check is completed.
4. Press the 'ESC' key to return to the fdisk options.
5. Select Option 1 "(Create DOS partition or Logical DOS drive)" by pressing '1'
and confirm with 'Return'.
6. Select Option 2 "(Create Extended DOS Partition)" by pressing '2' and
confirm with 'Return'. Wait until the drive integrity check is completed.
7. Enter either the size or a percentage value for the partition size or press
'Return' to accept the default value.
8. Press 'ESC' to return and wait until the drive integrity check is completed.
9. A logical drive needs to be defined now. Enter the size of the logical drive and
press 'Return' or accept the default value by pressing 'Return'.
10. Press 'ESC' to return to the fdisk options.
11. Now press the 'ESC' key to close the "fdisk window".
partitioned.
12. Stop your hard disk by using the hot unplug icon in the lower right corner of
your screen and remove the USB cable from your hard disk. Afterwards
connect your hard disk again with your computer. The hard disk will now be
recognized by Windows.
Your hard disk is now
As Windows tries to access your hard disk an error message will appear. This
happens because your hard disk is not yet formatted.
36
Page 37

Partitioning your Freecom ToughDrive
6.3.4 Formatting partitions on the Freecom ToughDrive under Windows 98SE / ME
1. Double-click on the "My Computer" icon on your desktop.
2. Click with the right mouse button on the drive symbol of your Freecom
ToughDrive. Now a menu will appear where you can choose the option
"Format".
3. Please perform a complete formatting of your drive.
name to your drive here.
4. After you have completed your selection, click on "Start".
Attention: Selecting the wrong drive will lead to a loss of your
data. Please ensure that the correct drive is selected!
5. Confirm the next message with "OK".
6. After formatting is finished you can perform a disk scan. To do so, follow the
instructions of the Windows Help system. If you don't want to scan your disk,
just close the message window.
Repeat these steps for each partition if more than one partition was created.
Now your Freecom ToughDrive is ready for use. You can use it like an internal
hard disk for storing your data.
You can also assign a
GB
6
37
Page 38

Freecom ToughDrive
GB
6
6.4 Partitioning your Freecom ToughDrive under Windows XP /
2000
6.4.1 Deleting a partition on the Freecom ToughDrive under Windows
XP / 2000
1. Click with the right mouse button on the "My Computer" icon on your
desktop.
2. Select the option "Manage".
3. Select the option "Storage" -> "Disk Management".
4. Choose your external hard drive and right-click on the partition.
5. Select "Delete Partition" and confirm by clicking on "Yes". The partition will
be deleted now.
6.4.2 Creating a partition on the Freecom ToughDrive under Windows
XP / 2000
The following steps will guide you through the process of creating partitions on
your Freecom ToughDrive. After this procedure your Freecom ToughDrive will
be ready for use and it will be allocated a drive letter.
1. Click with the right mouse button on the "My Computer" icon on your
desktop.
2. Select the option "Manage".
3. Select the option "Storage" -> "Disk Management".
4. Choose the hard disk, which is "unallocated".
"unallocated".
Ensure that the entire drive is
38
Page 39

Partitioning your Freecom ToughDrive
5. Click with the right mouse button on the "unallocated" area and select the
option "New Partition" (Windows 2000: "Create Partition Wizard"). The
"New Partition Wizard" opens. Click on "Next".
6. Select "Primary partition" and click on "Next".
GB
6
39
Page 40

Freecom ToughDrive
GB
6
7. Now you can adjust the size of your partition. Click on "Next" if only one
partition is to be created. See next chapter (Creating two or more partitions
on the Freecom ToughDrive under Windows XP/2000) how to create more
than one partition.
8. Assign a drive letter to your hard disk. Normally you can use the default
options. Click on "Next".
9. Select the formatting option. Choose either "FAT32" or "NTFS", the "Allocation Unit Size" should remain on "Default". Finally select "Perform Quick
Format" and click on "Next".
40
Page 41

Partitioning your Freecom ToughDrive
10. Click on "Finish" to complete the partitioning of your Freecom ToughDrive.
Your Freecom ToughDrive will be formatted now and is ready-to-use afterwards.
GB
6
41
Page 42

Freecom ToughDrive
GB
6
6.4.3 Creating two or more partitions on the Freecom ToughDrive under Windows XP / 2000
1. Repeat the steps from the previous chapter (Creating a partition on the
Freecom ToughDrive under Windows XP/2000) for creating the first partition.
2. Click with the right mouse button on the "My Computer" icon on your
desktop.
3. Select the option "Manage".
4. Select the option "Storage" -> "Disk Management".
5. Right-click on the unallocated space of your Freecom ToughDrive and select
the option "New partition" (Windows 2000: "Create partition"). The "New
Partition Wizard" (Windows 2000: "Create Partition Wizard") opens. Click
on "Next".
6. Select "Extended partition" and click on "Next".
7. Now you can adjust the size of your partition. Enter the size and click on
"Next".
42
Page 43

Partitioning your Freecom ToughDrive
8. Click on "Finish" to create the "Extended partition". The unallocated space
now changed to "Free space".
GB
6
43
Page 44

Freecom ToughDrive
GB
6
9. Right-click on "Free Space" and select "New Logical Drive" (Windows 2000:
"Create Logical Drive"). The "New Partition Wizard" (Windows 2000: "Create Partition Wizard") opens. Click on "Next".
10. "Logical drive" is already selected. Click on "Next".
11. Specify the partition size and click on "Next".
12. Assign a drive letter and click on "Next".
13. Select the formatting option. Choose either "FAT32" or "NTFS", the "Allocation Unit Size" should remain on "Default". Finally select "Perform Quick
Format" and click on "Next".
14. Click on "Finish" to complete partitioning. Your partition will be formatted
now and is ready-to-use.
44
Page 45

Troubleshooting
Chapter 7: Troubleshooting
Issue
After I connected the Freecom
ToughDrive to my computer for the
first time no Freecom SYNC folder has
been created automatically.
After installation of Freecom Personal
Media Suite, the message "No Freecom
device found." appears.
Files deleted in the SYNC folder, are
still appearing during the synchronization.
An empty folder is not synchronized.
If you are working with the program
"Total Commander" and are using the
"send to" dialog to add items to the
SYNC folder, the message "The briefcase is in use on another computer"
could appear.
GB
Solution
7
• Install the Freecom Personal Media
Suite software and safely remove and
reconnect the Freecom ToughDrive
• Follow the instructions on chapter 5.4.2
Creating a new SYNC folder.
• Connect the Freecom ToughDrive to
your computer.
• Check all connections between the
Freecom ToughDrive and the computer.
• Safely remove and reconnect the
Freecom ToughDrive.
You have to "Split From Original" the
files from their counterparts before
you may delete them. Please refer to
chapter 5.5.1 Handling deleted files.
Empty folders are not taken into account during synchronization.
The SYNC folder is opened by another
program. Please close all applications,
which are using the SYNC folder.
You cannot create a SYNC folder with
a name you used for another, deleted,
SYNC folder.
Not enough memory on the target
drive (Freecom ToughDrive) during
creation of SYNC folder.
Not enough memory on the target
drive (Freecom ToughDrive) during
synchronization.
This happens only under Windows 98.
Please restart Windows 98. After restart, you can create the new SYNC
folder.
Delete files on the target drive (Freecom
ToughDrive) or select less files.
Delete files on the target drive
(Freecom ToughDrive).
45
Page 46

WARRANTY (valid in Europe/Turkey only):
We thank you for purchasing this Freecom product and hope you will enjoy using it.
In order to avoid unnecessary inconvenience on your part, we suggest reading the quick install guide,
instruction manual and any additional electronic and or printed manuals. When problems occur we
have a database with Frequently Asked Questions (FAQ) on our Freecom website (www.freecom.com),
please check this site before you contact the helpdesk.
Your Guarantee
All Freecom products come with unlimited technical phone and web support. By this Guarantee, Freecom
warrants their products to be free from defects in material and workmanship for a period listed below
from the date of its original purchase. If during this period of guarantee the product proves defective
due to improper materials or workmanship, Freecom will, without charge for labour or parts, at its
sole discretion, repair or replace the product or its defective parts upon the terms and conditions set
out below.
Conditions
This guarantee will be granted only when the original invoice or sales receipt (indicating the date of
purchase, product and serial number) is presented together with the defective product and a Freecom
RMA number received from the Freecom Website or given by a Freecom Service Center. Freecom
reserves the right to refuse the free-of-charge guarantee services when the date of purchase of the
product cannot be proven. This guarantee will not apply if the RMA number is missing, the serial
number on the product has been altered, removed or made illegible.
This guarantee covers only the hardware components packaged with the product. This guarantee
covers none of the following: (a) any consumable supplied with the product, such as media or batteries; (b) damage to or loss of any software programs, data or removable storage media; (c) any damage
resulting from adaptations, changes or adjustments, which may have been made to the product,
without the prior written consent of Freecom; (d) attempted repair by any party other than authorized by Freecom and (e) accidents, lightning, water, fire or any other such cause beyond the reasonable control of Freecom.
With respect to all services provided, Freecom is not responsible for any damage to or loss of any
programs, data or other information stored on any media or any part of any product serviced. Freecom
is not liable for the consequence of business loss in case of system failure. Be sure to exclude all parts
not covered by this guarantee prior to returning the product to Freecom. Freecom is not liable for any
loss or damage to these items. If during the repair of the product the contents of the hard drive are
altered, deleted or in any way modified, Freecom is not liable whatsoever.
Repair parts and replacement products will be provided on an exchange basis and will be either new,
equivalent to new or reconditioned. All replaced parts and products become the property of Freecom
The period of guarantee for any product or part repaired or replaced in warranty shall be the balance
of the original guarantee. Repairs or replacements on product or parts out of warranty carry
months guarantee.
6 (six)6 (six)
6 (six)
6 (six)6 (six)
All Freecom products come with unlimited free technical phone and web support.
Freecom Product Warranty period
Classic & Internal Series 1 year (Two years in Europe)
FS & FX Series 1 year (Two years in Europe)
FHD Series 1 year (Two years in Europe)
FSG-xxx 1 year (Two years in Europe)
MediaPlayer-xxx 1 year (Two years in Europe)
DVB-T / USB Stick 1 year (Two years in Europe)
USB Floppy Disk Drive 1 year (Two years in Europe)
USBCard (Pro) 1 year (Two years in Europe)
USB 2.0 CardReader 1 year (Two years in Europe)
DAT & LTO Drives (retail) 3 years
DAT-S Kits 2 years
(GB)
 Loading...