

Fredenstein Bento 10D User Manual

Bento 10D
Module Carrier
Operating Manual
Fredenstein Bento 10D Module Carrier
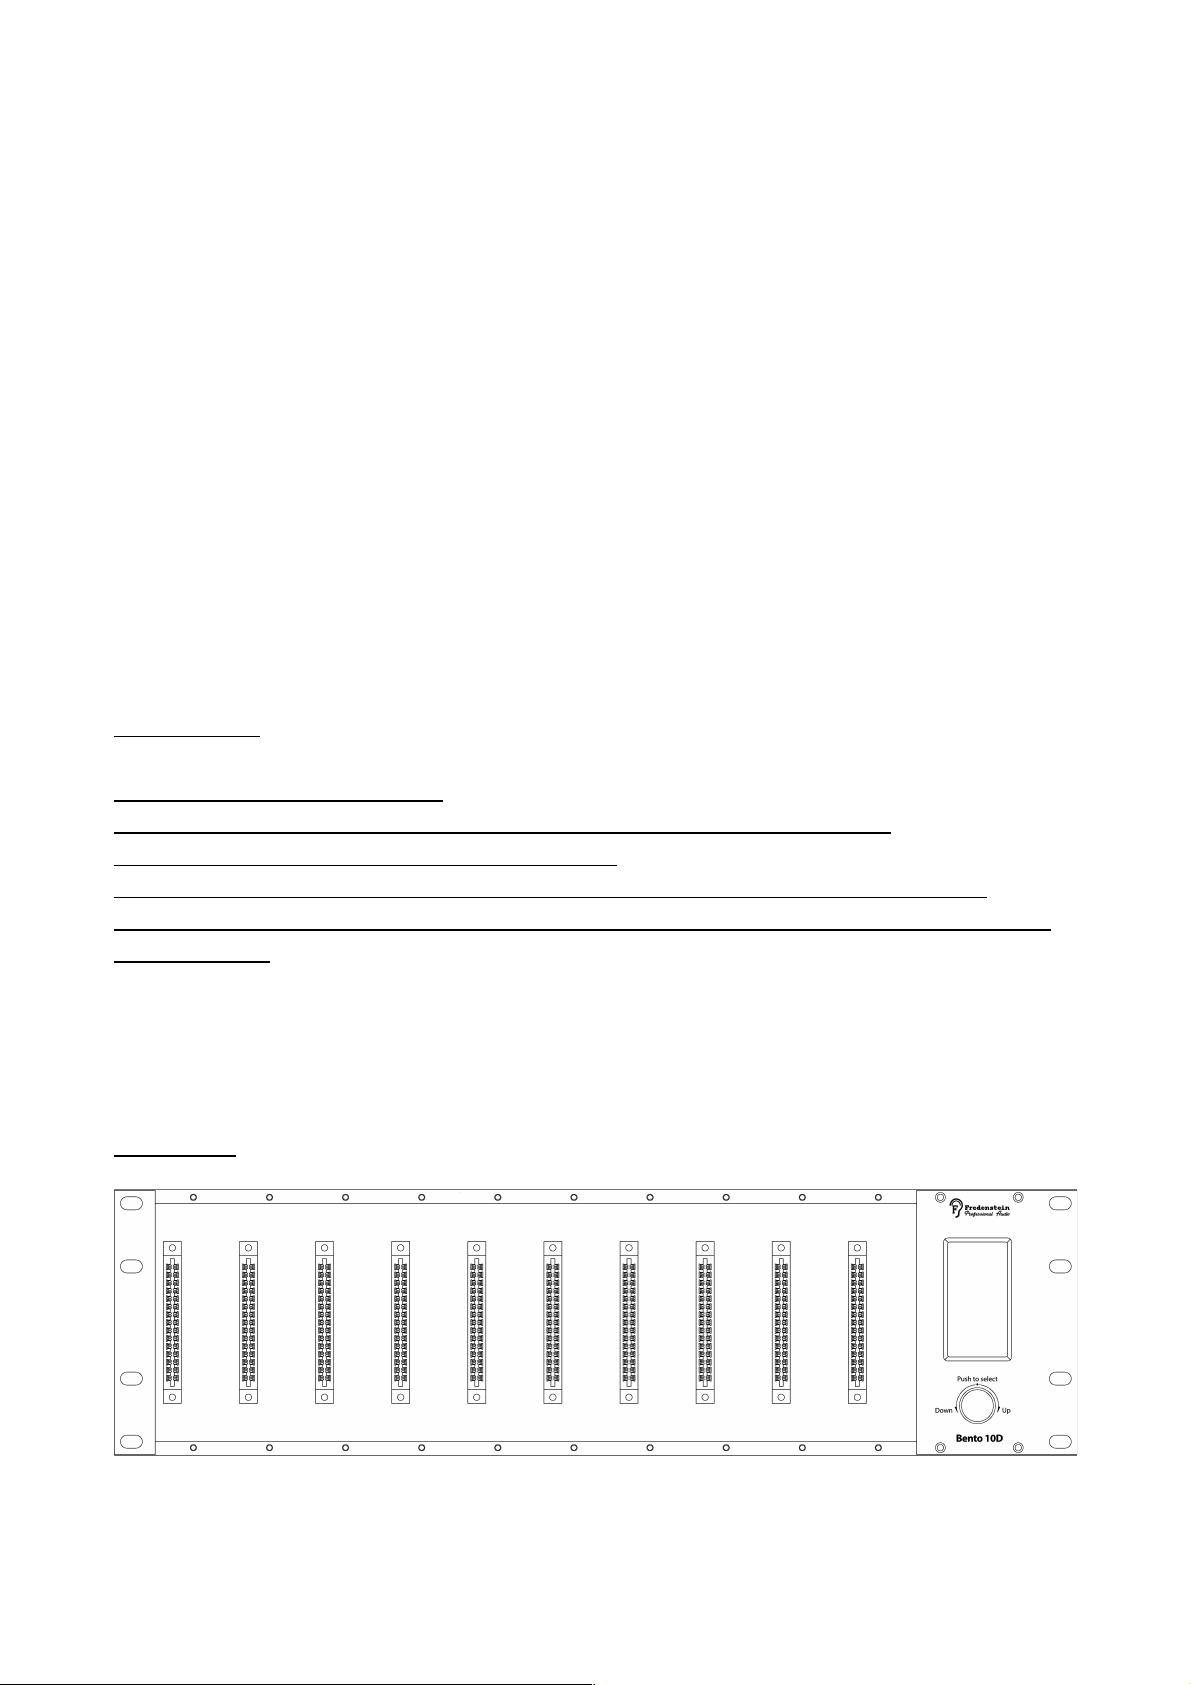
The Fredenstein Bento 10D is a high performance module carrier for Fredenstein Series 600
modules or API-500 compatible plug-in cards in 3U 19 inch rack format. The unit accepts a
maximum of 10 modules. The Bento 10D features several important upgrades compared with third
party products:
A LCD Display and a rotary encoder: To set routing and other parameters with non-volatile storage.
In addition, if certain Fredenstein modules are used, like F600A, F601A, F602, F603A/B, F604, and
the F607, all operating parameters of theses modules are displayed as well.
Universal power supply: accepting mains voltages from 90V AC to 240V AC, 50 to 60 Hz.
Increased output currents: 6.4A or 640 mA per slot and +48V DC 0.3A
Auxiliary Audio Inputs and Outputs
Built-in Audio Routing: Modules can be daisy-chained by simply using the menu driven user
interface on the LCD.
Compressor buss linking: Compressor modules can be linked simply using the menu driven user
interface on the LCD as well.
Multilayer back-plane: Increased signal integrity and lower noise floor.
Ground-lift switching: In case of ground loops, the audio ground and the protective ground can be
disconnected. Please use only if absolutely necessary.
Installation:
Electrical Safety Warnings:
Do not open the enclosure, hazardous voltages are present inside!
There are no user serviceable parts inside.
Always disconnect the mains cord before installing or removing modules!
If you need to replace the mains fuse, make sure the replacement has the same
rating (2AT).
Please disconnect the mains from your Bento 10D before installing or removing modules. Make
sure each installed module is well seated in the receiving connector and the module is secured by
fasten the two mounting screws (size: M3).
Front View:
Fredenstein Bento 10D Manual V2.0 September 24, 2014 Page 1
Fredenstein Bento 10D Module Carrier
Operation:
After installation of the modules, connect the mains cord to the Bento 10D IEC socket located on
the back-panel and than connect the mains cable to a grounded outlet. Now turn the Bento 10 on by
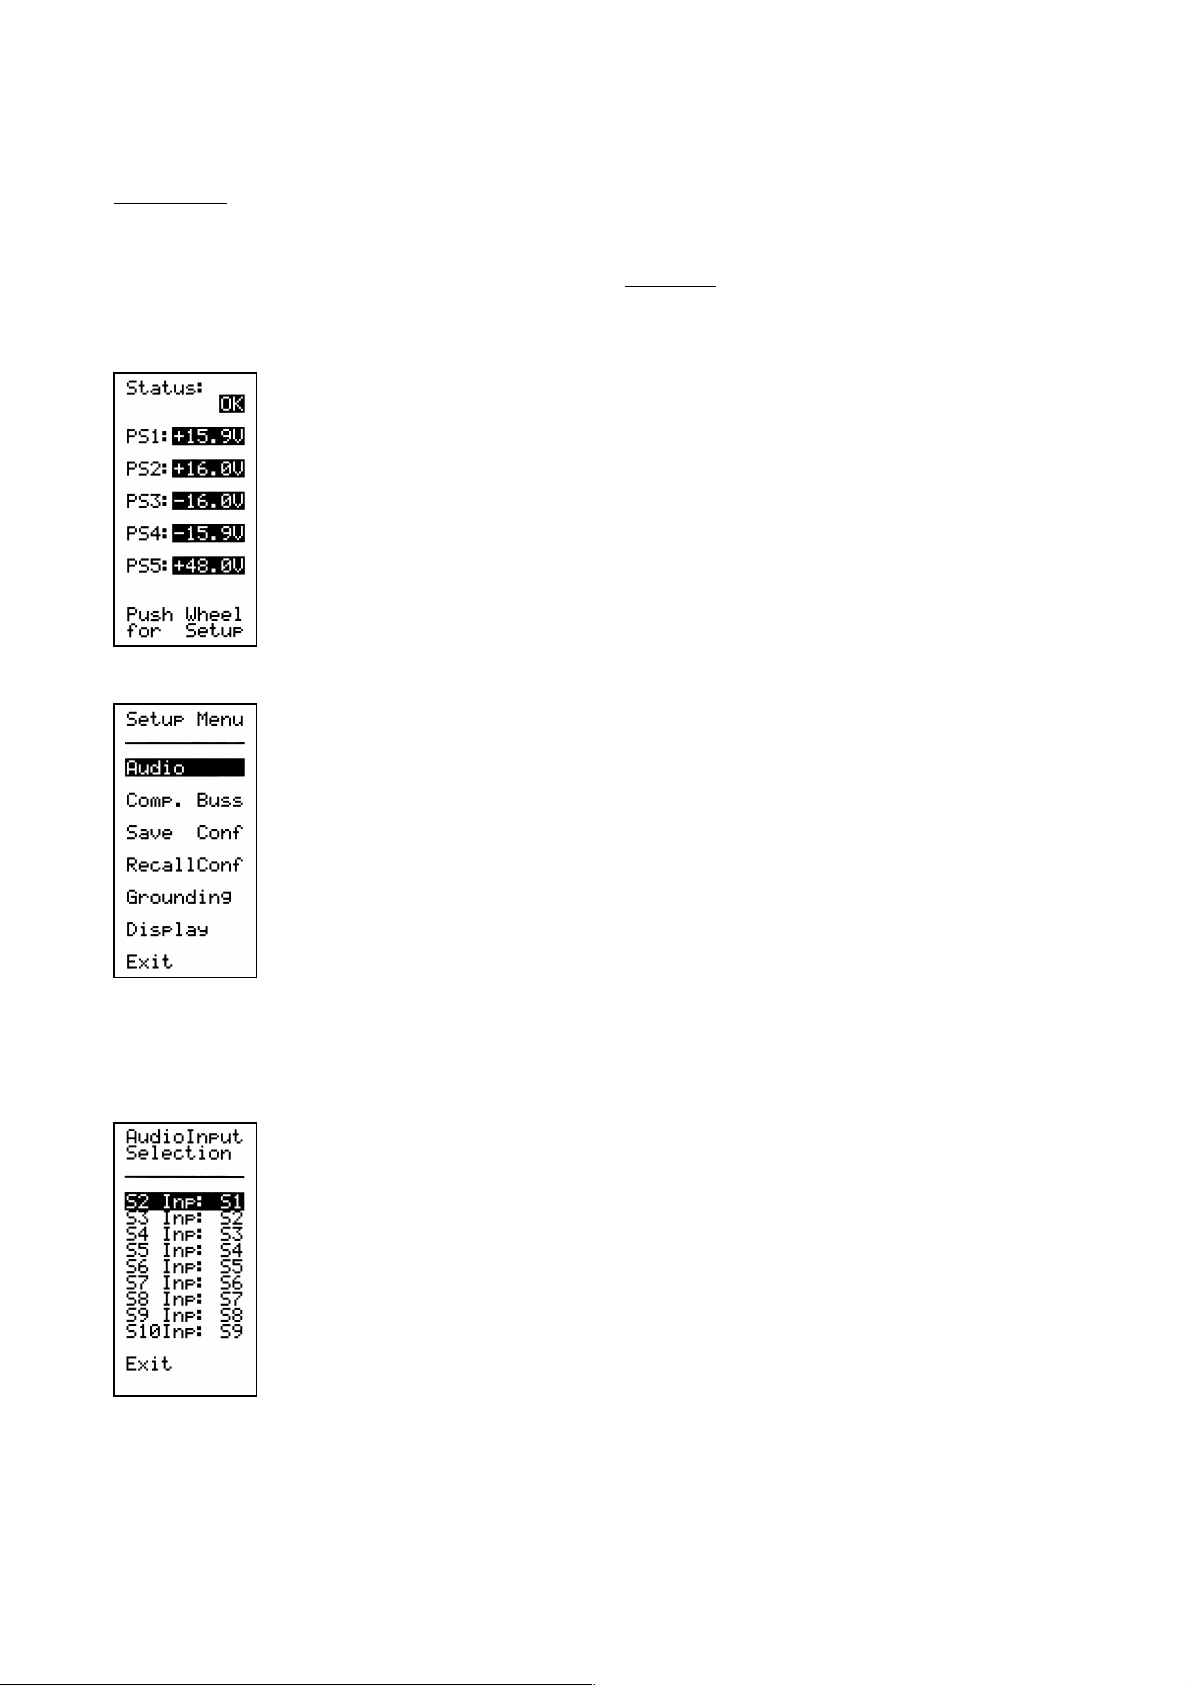
operating the I/O switch (also part of the IEC socket on the back). The following screen will be
displayed indicating the status and power-supply voltages.
Now the Bento 10D is ready and will display any request from certain
Fredenstein modules.
To enter the setup menu, please push the wheel and the setup menu will
appear.
Configuration of audio linking
Configuration of compressor buss linking
Save Configuration
Recall Configuration
Enable/disable ground lift
Set display brightness and dimming
Exit menu system
Turning the wheel left or right to scroll from one menu point to the next, the highlighted menu point
will get selected when the wheel is pushed. Selecting Exit and pushing the wheel will show the
Status screen again.
In the audio menu the input signal for slots 2 to 10 can be selected. (Slot 1 always gets its input
signal for the XLR connector located on the back-panel). By turning the wheel the desired slot can
be selected and by pushing the wheel the value toggles between XLR for the slots input XLR
connector or the output of the slot to its left. Selecting Exit will show the Setup Menu again.
Fredenstein Bento 10D Manual V2.0 September 24, 2014 Page 2
 Loading...