


â
BOOKMANâ
EXPANDABLE ELECTRONIC BOOK
â
USER’S GUIDE
SDK-763 • SDK-765

License Agreement
READ THIS LICENSE AGREEMENT BEFORE USING ANY BOOKMAN ELECTRONIC BOOK.
YOUR USE OF THE BOOKMAN ELECTRONIC BOOK DEEMS THAT YOU ACCEPT THE TERMS OF THIS LICENSE. IF YOU DO NOT AGREE WITH THESE TERMS, YOU MAY RETURN THIS PACKAGE WITH PURCHASE RECEIPT TO THE DEALER FROM WHICH YOU PURCHASED THE BOOKMAN ELECTRONIC BOOK AND YOUR PURCHASE PRICE WILL BE REFUNDED. BOOKMAN ELECTRONIC BOOK means the software product, hardware, and documentation found in this package and FRANKLIN means Franklin Electronic Publishers, Inc.
LIMITED USE LICENSE
All rights in the BOOKMAN ELECTRONIC BOOK remain the property of FRANKLIN. Through your purchase, FRANKLIN grants you a personal and nonexclusive license to use the BOOKMAN ELECTRONIC BOOK on a single FRANKLIN BOOKMAN at a time. You may not make any copies of the BOOKMAN ELECTRONIC BOOK or of the preprogrammed data stored therein, whether in electronic or print format. Such copying would be in violation of applicable copyright laws. Further, you may not modify, adapt, disassemble, decompile, translate, create derivative works of, or in any way reverse engineer the BOOKMAN ELECTRONIC BOOK. You may not export or reexport, directly or indirectly, the BOOKMAN ELECTRONIC BOOK without compliance with appropriate governmental regulations. The BOOKMAN ELECTRONIC BOOK contains Franklin’s confidential and propriety information which you agree to take adequate steps to protect from unauthorized disclosure or use. This license is effective until terminated. This license terminates immediately without notice from FRANKLIN if you fail to comply with any provision of this license.
1

Contents
Key Guide .......................... |
4 |
Special BOOKMAN Features 6 |
|
Getting Started |
|
Installing Batteries ................... |
8 |
Installing Book Cards............... |
8 |
Selecting a Book ...................... |
9 |
Using the Color Keys ............... |
9 |
Viewing the Demonstration .... |
10 |
Changing the Settings ........... |
10 |
Selecting a Topic ................... |
11 |
Typing Characters .................. |
12 |
Using a Password .................. |
13 |
Gauging the Memory ............. |
14 |
Using the Clocks |
|
Setting the Home Clock ......... |
16 |
Setting the World Clock ......... |
17 |
Using the Daily Alarm ............ |
17 |
Changing the |
|
Time/Date Format .................. |
18 |
Swapping the Clocks ............. |
19 |
Using the Calendar |
|
Creating Calendar Entries ...... |
21 |
Duplicating a Calendar Entry . 22 |
|
Using the Daily View ............. |
23 |
Using the Weekly View .......... |
24 |
Using the Monthly View ......... |
25 |
Editing Calendar Entries ........ |
26 |
Searching for |
|
Calendar Entries .................... |
26 |
Trimming the Schedule .......... |
27 |
Using Cardfiles |
|
Creating a Cardfile ................ |
29 |
Adding Cards ......................... |
30 |
Duplicating a Card ................. |
31 |
Viewing Cardfiles and Cards .. |
31 |
Editing Cards ......................... |
32 |
Searching for Cards ............... |
33 |
Using Notes |
|
Creating a Note Folder .......... |
36 |
Adding Notes ......................... |
37 |
2

Contents
Duplicating a Note ................. |
38 |
Viewing Note Folders |
|
and Notes .............................. |
38 |
Editing Notes ......................... |
39 |
Searching for Notes ............... |
40 |
Using Expenses |
|
Creating Expense Entries ....... |
43 |
Viewing Expense Entries ........ |
44 |
Editing Expense Entries ......... |
44 |
Computing Expense Sums ..... |
45 |
Using the Calculator |
|
Making Calculations .............. |
47 |
Saving and Retrieving |
|
Calculations .......................... |
48 |
Using the Connectivity |
|
Software |
|
The Equipment You Need ....... |
50 |
Connecting the Serial Cable .. |
50 |
Installing the |
|
Connectivity Software ............ |
51 |
Starting the |
|
Connectivity Software ............ |
52 |
Testing Your Connection ........ |
53 |
Linking Files .......................... |
54 |
Merging All Linked Files ........ |
57 |
Advanced Transfers |
|
and Merging .......................... |
60 |
Recovering Files .................... |
62 |
Backing up and |
|
Restoring Files ....................... |
63 |
Solutions to Common |
|
Problems ............................... |
64 |
Doing a Factory Reset ...... |
67 |
Resetting Your BOOKMAN 67 |
|
Specifications .................. |
68 |
Copyrights and Patents ...... |
68 |
Limited Warranty ............... |
69 |
Index ................................ |
70 |
Note: This User’s Guide is intended for use with BOOKMAN Sidekick models SDK-763 and SDK-765. For information about your specific BOOKMAN Sidekick, read “Specifications.”
3
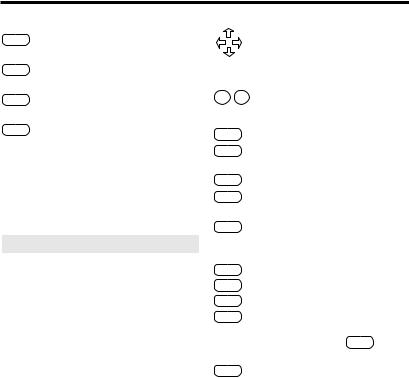
Key Guide
|
Color Keys |
FILES |
(red) Cycles through the |
|
cardfiles. |
CALEND |
(green) Cycles through the |
|
calendar views. |
NOTES |
(yellow) Cycles through the |
|
note folders. |
EDIT |
(blue) Displays entry, search, |
|
edit, delete and other options. |
Understanding the Color Keys
The color keys (red, green, yellow, and blue) perform the functions listed above only for the book described in this User’s Guide.
Other BOOKMAN books have their own color key functions, which are labeled on their keyboards or book cards. To learn more, read “Using the Color Keys.”
Direction Keys
Moves through text or menus, or moves the cursor. In the Calculator, types basic math symbols (i.e., +, x, -, ÷).
DN UP Pages down or up.
|
Other Keys |
BACK |
Erases a letter, or backs up. |
CAP |
Shifts a key to type capital |
|
letters or punctuation marks. |
CARD |
Exits the book you are reading. |
CLEAR |
Clears to the main screen of |
|
the current topic. |
ENTER |
Selects a menu item, or enters |
|
search words. In the Calculator, |
|
performs a selected math function. |
HELP |
Displays help messages. |
MENU |
Displays the main menus. |
ON/OFF |
Turns your BOOKMAN on or off. |
? |
Types a question mark. At |
|
menus, displays the full title of |
|
a menu item. With CAP , types |
|
an asterisk. |
SPACE |
Types a space or pages down. |
4
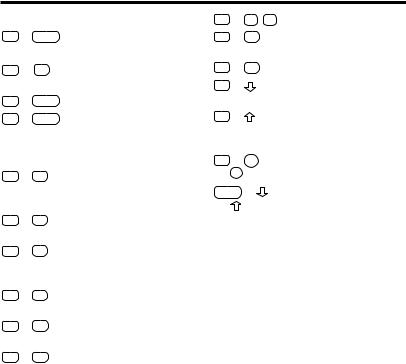
Key Guide
|
|
Key Combinations* |
|
|
+ |
BACK |
Exits a new or edited |
|
|
|
entry without saving. |
+ |
C |
Toggles between the |
|
|
|
|
Home and World clock. |
|
+ |
EDIT |
Opens an entry to edit. |
|
+ |
ENTER |
Saves an entry. In the |
|
|
|
Calendar Daily view, |
|
|
|
checks or unchecks To |
|
|
|
Do items and Calls. |
|
+ |
H |
In the Calculator, con- |
|
|
|
verts a number to a |
|
|
|
percentage. |
|
+ |
J |
In the Calculator, |
|
|
|
squares a number. |
|
+ |
K |
In the Calculator, calcu- |
|
|
|
lates the square root of |
|
|
|
a number. |
|
+ |
L |
In the Calculator, calcu- |
|
|
|
lates a reciprocal. |
|
+ |
M |
Selects the Calculator |
|
|
|
(math). |
|
+ |
N |
Locks and unlocks the |
|
|
|
numbered keys. |
+ Q - P |
Types numbers. |
||
|
+ |
S |
Displays the special |
|
|
|
characters you can type. |
|
+ |
X |
Selects Expenses. |
|
+ |
|
At a field or entry |
|
|
|
screen, types a hyphen. |
|
+ |
|
At a field or entry |
|
|
|
screen, accents a typed |
|
|
|
letter. |
|
+ DN |
Goes to the next or pre- |
|
or |
UP |
|
vious entry or match. |
CAP |
+ |
Goes to the bottom or |
|
or |
|
|
top of a list, menu, or |
|
|
|
entry. |
*Hold the first key while pressing the other key.
5

Special BOOKMAN Features
PC
Headphone Jack 
SerialPorPort
Volume Control
Your BOOKMAN 770 is equipped with several special features that many, but not all, BOOKMAN books use. To learn if you can use the special features with a particular BOOKMAN book, read its User’s Guide.
Headphone Jack: The headphone jack is designed for 3.5 mm, 35 ohm impedance stereo headphones. Caution: Monophonic headphones will not work with this BOOKMAN model.
Volume Control: The dial located under the headphone jack controls the volume of the speaker or headphones.
Serial Port: The serial port allows certain BOOKMAN books, when Franklin’s BOOKMAN PC-Connect serial cable is connected to your BOOKMAN, to transfer data to a personal computer (PC).
Warning: Using a serial cable other than the one obtained from Franklin may damage your BOOKMAN and/or PC. Franklin’s serial cable is specifically designed for the transfer of data between BOOKMAN and a PC.
Speaker: The speaker is located on the back of your BOOKMAN near the serial port. For best results, do not cover the speaker with your hand.
6

Getting Started
If you are using your BOOKMAN Sidekick for the first time, read this section.
It explains how to start using your BOOKMAN Sidekick, as well as how
to perform basic and important operations.
Installing Batteries ......................................................... |
8 |
Installing Book Cards ..................................................... |
8 |
Selecting a Book ............................................................ |
9 |
Using the Color Keys...................................................... |
9 |
Viewing the Demonstration .......................................... |
10 |
Changing the Settings .................................................. |
10 |
Selecting a Topic .......................................................... |
11 |
Typing Characters ........................................................ |
12 |
Using a Password......................................................... |
13 |
Gauging the Memory .................................................... |
14 |
7

Installing Batteries |
Installing Book Cards |
|
|
|
|
Your BOOKMAN model is powered by two AAA, 1.5-volt batteries. Here is how to install or replace them.
1.Turn your BOOKMAN over.
2.Remove the battery cover on the back of your BOOKMAN by compressing its tab with your finger and then lifting the cover.
3.Install the batteries as shown on the diagram in the battery compartment.
4.Replace the battery cover.
When the Batteries Are Low
An on-screen warning message will appear when the batteries in your BOOKMAN Sidekick are low on power. This message does not mean that any of the information entered in your BOOKMAN Sidekick is in danger of being lost or erased. However, you may not be able to create new entries until fresh batteries are installed.
Warning: Never install or remove a book card when your BOOKMAN is turned on. If you do, information that you entered in any installed book cards may be erased. However, information saved in your BOOKMAN Sidekick will not be erased.
1.Turn your BOOKMAN off.
2.Turn your BOOKMAN over.
3.Align the book card tabs with the notches in a card slot.
4.Press the book card until it snaps into place.
Removing Book Cards
Warning: When you remove most book cards, information that you entered is not saved in the book cards. If you change the batteries or reset your BOOKMAN, that information will be erased.
8

Selecting a Book
Once you have installed a book card in your BOOKMAN, you can select which book to use.
1.Turn your BOOKMAN on.
2.Press CARD.
These are sample books.
3.Press  or
or  to highlight the book you want to use.
4.Press ENTER to select it.
About the Screen Illustrations
Some screen illustrations in this User’s Guide may differ slightly from what you see on screen. This does not mean that your BOOKMAN is malfunctioning.
Using the Color Keys
The red, green, yellow, and blue keys on your BOOKMAN change their functions according to which book you are using.
When you are using the built-in book, the color keys function as labelled on the BOOKMAN keyboard. When you are using a book card, the color keys function as labelled on that book card.
â
Remember, the color keys for book cards function as labelled on their cards, not as labelled on the BOOKMAN keyboard.
9
Viewing the Demonstration Changing the Settings
Before you start using your BOOKMAN Sidekick, you may want to see a brief demonstration of what it can do.
When a book card is not installed in your BOOKMAN, the demonstration automatically appears after you turn on your BOOKMAN. To stop the demonstration, press CLEAR. To disable it, press MENU and then select Disable Demo from the Setup menu. To re-enable it, select
Enable Demo.
When a book card is installed in your BOOKMAN, select View Demo from the Setup menu to see the demonstration.
Help is Always at Hand
At virtually any screen, you can view a help message by pressing HELP.
Use  or DN to read it. To exit help, press BACK.
To read a tutorial about this book, select Tutorial from the Setup menu.
You change the language of the help messages, tutorial, and demonstration. To learn how, read “Changing the Settings.”
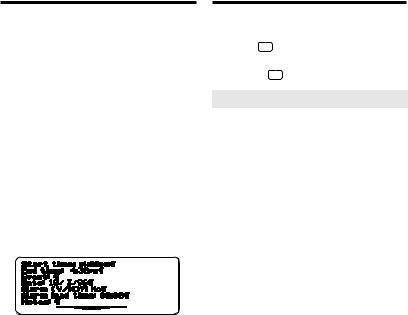
You can adjust the screen contrast, automatic shutoff time, the help message language, and the time/date format of the clocks and calendars of your BOOKMAN Sidekick.
The automatic shutoff time is how long your BOOKMAN stays on if you forget to turn it off. The help message language is the language of the help messages, tutorial, and demonstration.
1.Press MENU until the main menus appear.
2.Use the arrow keys to highlight Time/Date Format, Set Language, Set Shutoff, Set Contrast on the Setup menu.
3.Press ENTER.
4.Use  or
or  to change the setting.
Or press BACK to leave it unchanged.
5.Press ENTER to select it.
10

Selecting a Topic
Your BOOKMAN Sidekick has seven main functions, or topics: Cardfiles, (Home) Clock, World Clock, Expenses, Calculator, Calendar, and Notes. Here is how to change the selected topic.
1.Press MENU until the main menus appear.
2.Use the arrow keys to highlight the Topics menu.
3.Highlight a topic.
4.Press ENTER to select it.
A Quick Way to Select Topics
You can also select topics using these keys:
To go to... |
Press... |
|
Cardfiles |
FILES (red) |
|
Home or |
|
+ C |
World Clock |
|
|
Expenses |
|
+ X |
Calculator |
|
+ M |
Calendar |
CALEND (green) |
|
Notes |
NOTES (yellow) |
|
Selecting a Topic
If You Forget to Save Your Changes
If you try to select a topic while creating a new entry or editing an existing entry, or if you press CLEAR while creating an entry, a message appears asking if you want to save your changes.
To save your changes, press S. To exit the entry without saving, press X. To go back to the entry, press any other key except CLEAR, ON/OFF, CAP, or .
Follow the Arrows
The flashing arrows at the right of the screen show which arrow keys you can use to view more text, and highlight menus and menu items.
Note: At some menus, you can also highlight menu items by typing the first few letters of their titles.
11
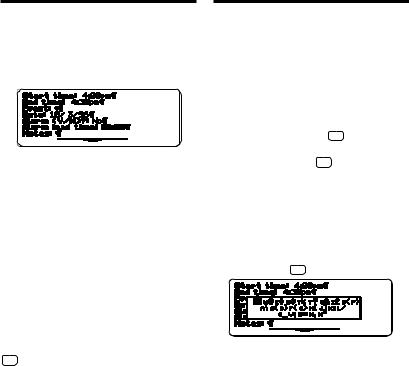
Typing Characters
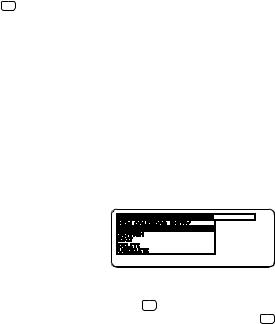
Many of the topics in your BOOKMAN Sidekick let you type and save entries that consist of fields, or items of information. For example, below are fields in a single-day appointment.
To Type Letters and Accents
At fields that normally require letters, such as names and descriptions, the cursor appears as a flashing triangle. At such fields, simply press the letter keys to type letters.
The first letter in letter fields automatically types as a capital. To type a lowercase letter as the first letter in a letter field, hold CAP and press a letter key. To type subsequent capitals, hold CAP and press the letter keys.
To accent a letter, type it and then holdand press  until the desired accent appears.
Typing Characters
To Type Numbers
At fields that require numbers, such as dates and times, simply press the numbered keys.
At other fields that often use numbers, such as ZIP codes, the number lock is turned on by default. At such fields, you can type letters from the top row (Q, W, E, R, T, Y, etc.) by holding and pressing the appropriate key. To unlock or relock the numbered keys, hold and press N.
Fields that require or normally use numbers are indicated by a flashing box cursor.
To Type Special Characters
At many fields, you can type a variety of special characters, such as monetary symbols and punctuation marks, by first holding and pressing S.
Then type the letter to the left of the symbol. Or use the arrow keys to highlight a symbol and then press ENTER.
12
Using a Password
To limit access to your BOOKMAN Sidekick, you can assign a password that will be required whenever you or anyone else turns on your BOOKMAN Sidekick.
Caution: If you lose or forget your password, you will need to send your BOOKMAN Sidekick to Franklin Electronic Publishers to regain access.
To Set Your Password
1.Press MENU until the main menus appear.
2.On the Setup menu, highlight Set Password and then press ENTER.
3.Type all the requested information, including a password.
4.Record your password in a separate location, not on your BOOKMAN.
5.Hold and press ENTER.
Or hold and press BACK to exit without setting the password.
6.Press C to set the password.
7.Turn off your BOOKMAN.
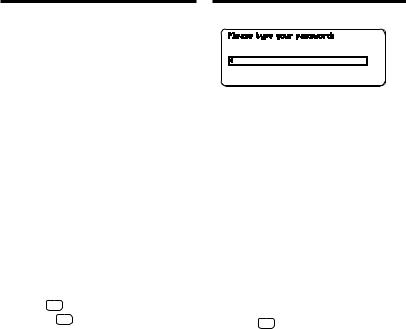
Using a Password
8.Turn on your BOOKMAN.
9.Type your password and then press ENTER.
The password you type must exactly match the password you set.
To Change or Delete Your Password
1.On the Setup menu, highlight Set Password and then press ENTER.
2.To change the password, scroll down to it and retype it.
3.To delete the password, move the cursor to the end of the password, and then use BACK to erase it.
4.Hold and press ENTER to save your changes.
If you delete the password, it will not be requested when your BOOKMAN Sidekick is turned on.
13
Using a Password
If You Lose or Forget Your Password
If you misplace your password, you can regain access to your BOOKMAN Sidekick by contacting Franklin Electronic Publishers, Inc.
In the U.S., first call 1-800-BOOK- MAN to obtain a return authorization code. Then mail your BOOKMAN Sidekick, with your return authorization code, to Franklin Electronic Publishers, Inc., One Franklin Plaza, Burlington, NJ 08016.
In the U.K., send your carefully packaged BOOKMAN Sidekick to Franklin Electronic Publishers Ltd., Unit 5, West Surrey Estate, Spelthorne Lane, Ashford, Middlesex, TW18 1UH. Remember to enclose a note explaining your need to regain access through having lost or forgotten your password and make sure your full name and address is included.
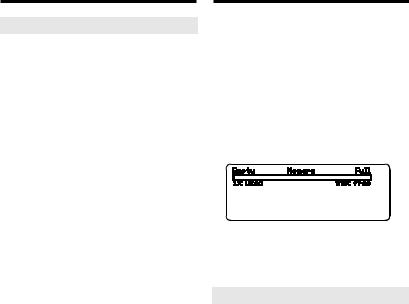
Gauging the Memory
The amount of memory in your BOOKMAN Sidekick varies according to the model. As you enter and transfer information into your BOOKMAN Sidekick, you will occasionally need to check how much memory is available for more entries.
1.Press MENU.
2.On the Setup menu, highlight
Memory Gauge.
3.Press ENTER.
4.Press MENU to return to the main menus.
Resuming Where You Left Off
You can turn off your BOOKMAN Sidekick at any screen. When you turn your BOOKMAN Sidekick on again, the screen that you most recently viewed appears.
14

Using the Clocks
Your BOOKMAN Sidekick has two clocks that keep time simultaneously:
a Home Clock and a World Clock.
You can set either clock
to any time zone around the world and then swap the clocks as you travel.
You can also set a daily alarm that works even when
your BOOKMAN Sidekick is turned off.
Setting the Home Clock................................................ |
16 |
Setting the World Clock ............................................... |
17 |
Using the Daily Alarm .................................................. |
17 |
Changing the Time/Date Format .................................. |
18 |
Swapping the Clocks ................................................... |
19 |
15
Setting the Home Clock |
Setting the Home Clock |
|
|
|
|
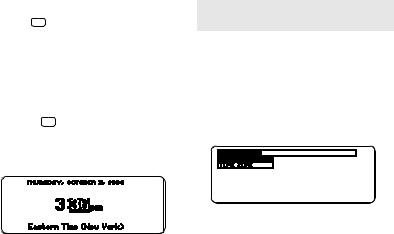
The first time that you use your BOOKMAN Sidekick, you should set the Home Clock to the date and time in your time zone.
1.Hold and press C until the
Home Clock appears.
HOME or a home icon indicates the Home Clock.
2.Press EDIT (blue).
3.Press ENTER to select Set Date and Time.
Or hold and press EDIT when the Home Clock is on screen.
4.Use  or
or  to highlight a part of the date or time.
5.Use  or
or  to change it.
6.Use the arrow keys to highlight and change other parts of the date and time.
7.Press ENTER when finished.
Or press BACK to exit without changing the date or time.
Setting the Home Clock by Location or Time Zone
You can also set the Home Clock to the time and date of any of dozens of locations around the world or to any of 24 world time zones.
When the Home Clock is on screen, press EDIT (blue) and then select Set Home Time Zone from the Clock Edit menu.
Next, select Location Name or Time Zone. If you select Location Name, start typing a city, country or other location name until it is highlighted and then press ENTER to set the Home Clock to its time. If you select Time Zone, highlight a time zone and press ENTER.
16
Setting the World Clock |
Using the Daily Alarm |
After you have set the Home Clock, you can set the World Clock by selecting a time zone or one of dozens locations around the world.
1.Hold and press C until the
World Clock appears.
A world icon indicates the World Clock.
2.Press EDIT (blue).
3.Highlight Set World Time Zone and then press ENTER to select it.
4.Select Location Name or Time Zone.
5.Start typing a location name until it is highlighted or highlight a time zone.
6.Press ENTER to set the World Clock to that time.
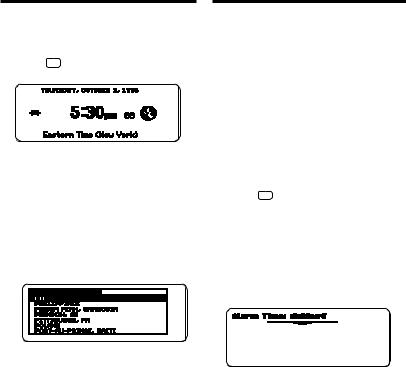
The Home Clock has an alarm that you can set for waking up and other once- a-day uses. This single, daily alarm makes a series of quick beeps that stops after about 10 seconds.
The daily alarm works even when your BOOKMAN Sidekick is turned off. When the daily alarm sounds, your BOOKMAN Sidekick is automatically turned on and the daily alarm time is displayed.
To Set or Change the Daily Alarm
1.Hold and press C until the
Home Clock appears.
2.Press EDIT (blue).
3.Highlight Set Alarm Time and then press ENTER to select it.
4.Select Set Alarm Time again.
5.Type an hour, minutes, and an a or p (for a.m. or p.m.).
17
Using the Daily Alarm
6.Press ENTER when finished.
A bell icon on the Home Clock indicates the daily alarm is enabled and set.
7.When the daily alarm sounds, press any key except or
CAP to turn it off and clear the daily alarm time display.
To Disable the Daily Alarm
1.Hold and press C until the
Home Clock appears.
2.Press EDIT (blue).
3.Highlight Set Alarm Time and then press ENTER.
4.Highlight Disable Alarm and then press ENTER.
The bell icon disappears from the Home Clock.
5.To re-enable the daily alarm without changing its time, select Enable Alarm from the Alarm Control menu.
Changing the
Time/Date Format
You may want to change the format of the time and date on the clocks and in the Calendar. The formats you can use are 12or 24-hour and month/day/year (U.S.) or day/month/year (European).
1.Press MENU to see the main menus.
2.On the Setup menu, highlight
Time/Date Format.
3.Press ENTER.
A check marks the current format.
4.Highlight another format and then press ENTER.
Or press BACK to exit without changing the format.
Selecting Daylight Savings or Standard Time
By default, standard or daylight savings time is automatically set for U.S. time zones. To manually set either option for the Home or World Clock, first press EDIT (blue) when a clock is on screen. Then select Daylight Savings or World Daylight Savings and either Standard (Winter) Time or Daylight (Summer) Time.
18
Swapping the Clocks
Once you have set both the Home and World Clocks, you can swap their times and dates. Swapping the clocks is a useful feature if you frequently travel between time zones.
1.Hold and press C until the
Home Clock appears.
2.Press EDIT (blue).
3.On the Clock Edit menu, highlight Swap Home & World Time.
4.Press ENTER.
Understanding Clock Swapping
When you swap your Home and World Clocks, your daily alarm setting, appointment times and their alarms, and any other time-sensitive calendar entries do not change.
For example, if your daily alarm was originally set for 6:30 a.m. New York time, after swapping the clocks
Swapping the Clocks
it will sound at 6:30 a.m. in your new Home Clock time zone. And if you had an appointment scheduled at 9:00 a.m. New York time, after swapping it will be scheduled at 9:00 a.m. in the new time zone.
Resetting the Clock
When you remove the batteries from your BOOKMAN Sidekick, or if they lose all power, you may need to reset the Home and World Clocks.
After replacing the batteries, a message may appear asking you to check the Home Clock time. If its time is correct, simply press ENTER.
If the time is incorrect, use the arrow keys to change it. To learn how, read “Setting the Home Clock.” To learn how to reset the World Clock, read “Setting the World Clock.”
19
Using the Calendar
The Calendar is a powerful tool |
|
to help you organize your activities. |
|
You can use the Calendar to schedule |
|
appointments, multiple-day events, |
|
to do lists, phone calls, and |
|
special days such as birthdays and anniversaries. |
|
You can see your Calendar |
|
in Daily, Weekly, and Monthly views. |
|
And you can even search your Calendar |
|
for entries containing any word(s). |
|
Creating Calendar Entries ............................................ |
21 |
Duplicating a Calendar Entry ....................................... |
22 |
Using the Daily View .................................................... |
23 |
Using the Weekly View ................................................. |
24 |
Using the Monthly View ............................................... |
25 |
Editing Calendar Entries ............................................... |
26 |
Searching for Calendar Entries .................................... |
26 |
Trimming the Schedule ................................................. |
27 |
20
Creating Calendar Entries
Your calendar entries can be appointments (single-day and recurring), To Do items, calls, multi-day events, or special days. You can create new calendar entries from the Daily, Weekly, or Monthly calendar view.
1.Press CALEND (green).
2.Press EDIT (blue).
3.Press ENTER to select New Calendar Entry.
4.Highlight an entry type and then press ENTER to select it. For example, select Appointment.
5.If you selected an appointment, select an appointment type (for example, Single Day Appointment).
6.Type information.
To erase, use BACK. To learn more, read “Typing Characters.”
7.Press ENTER to go to the next
Creating Calendar Entries
field. Or use the arrow keys to move the cursor.
8.Hold and press ENTER to save your entry.
Or hold and press BACK to exit.
Understanding Calendar Entries
Appointments can be for a single day, can recur once a week, or can recur once a month. You can create up to three appointments overlapping any single, 15-minute time span. But you cannot create a single-day appointment that spans two days (for example 11:00 p.m. to 2:00 a.m.). Instead, create a multi-day event.
Every appointment must have a starting time, an ending time, and an event or title description.
You can also set appointment alarms to sound either at an appointment’s starting time or with a lead time of up to 23 hours and 59 minutes. Appointment alarms work even when your BOOKMAN Sidekick is turned off. When an appointment alarm sounds,
21
Creating Calendar Entries |
Duplicating a Calendar Entry |
|
|
|
|
press any key except or CAP to turn it off and clear the display.
To Do items must have a title and can have a due date. To Do items appear on the Calendar Daily view on the day they are entered. They carry over to subsequent days until you check them off as completed. On their due dates, To Do items appear bolded on the Daily view. To learn how to check off completed To Do items, read “Using the Daily View.”
Calls must have a title. They carry over to subsequent days until you check them off as completed. To learn how to check off completed calls, read “Using the Daily View.”
Multi-day Events must have event descriptions and number of days.
Special Days can be annually recurring, such as birthdays, or a singleday occurrence. If you type N, for no, in the Annual field, that special day entry will not recur.
A quick way to create a new calendar entry is to duplicate an existing entry. When you duplicate an entry, a new entry is opened with the same information as an existing entry. To save the new entry, you must change at least one field of information.
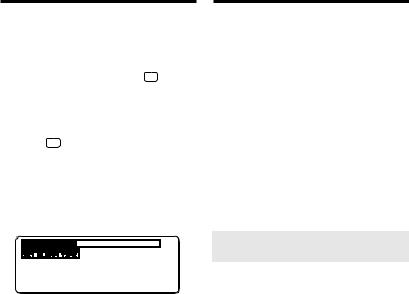
1.Press CALEND (green) until the Daily view appears.
This is a sample Daily view.
2.Highlight the calendar entry that you want to duplicate.
3.Press EDIT (blue).
4.Highlight Duplicate Calendar Entry and then press ENTER.
5.Edit at least one field. Use the arrow keys to move around.
6.Hold and press ENTER to save your entry. Or hold and press BACK to exit without saving.
22
Using the Daily View |
Using the Daily View |
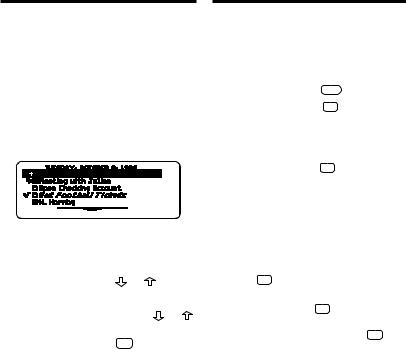
Once you have created calendar entries, you can view or edit them directly from the Daily view of the Calendar.
From top to bottom, the Daily view lists special days, multi-day events, appointments (by time), To Do items, and calls. You probably will want to use the Daily view as your basic scheduling tool.
1.Press CALEND (green) until the Daily view appears.
This is a sample Daily view.
2.Highlight an entry.
To... |
Press... |
scroll down or up |
or |
page down or up |
DN or UP |
go to the bottom |
CAP + or |
or top entry
go to the next or + DN or UP previous day
go to the top of |
CLEAR |
the current Daily |
|
view |
|
3. Perform one of these functions:
To... |
Press... |
|
view a full title |
? |
|
check/uncheck |
|
+ ENTER |
a completed To |
|
|
Do item or call |
|
|
view an entry |
ENTER |
|
edit an entry |
|
+ EDIT (blue) |
Note: When you check off a completed To Do item or call, its title is italicized and checkmarked on the Daily view.
4.If you pressed ENTER to view an entry, you can scroll down, press BACK to exit, or hold and press EDIT to edit the entry.
5.If you pressed + EDIT
(blue), you can type your changes and then hold and press ENTER to save them.
23
 Loading...