

Page 1

Mobipocket
Reader
User ’s Guide
Page 2

Contents
License Agreement ...............................................................................2
Introduction ...........................................................................................3
Opening and Closing Documents .......................................................5
Understanding the Library ...................................................................7
Viewing a Document ...........................................................................11
Using the Menus .................................................................................13
Changing the Settings ........................................................................15
Moving around within a Document ...................................................17
Finding a Definition .............................................................................18
Searching a Document .......................................................................19
Using an Index .....................................................................................20
Using Bookmarks ................................................................................21
Navigating Large Tables or Images ...................................................23
Getting Help .........................................................................................25
Using the Mobipocket Web Companion ...........................................26
Notes ....................................................................................................29
Copyrights and Trademarks ...............................................................30
Page 1
Page 3

License Agreement
READ THIS LICENSE AGREEMENT BEFORE USING THIS PRODUCT.
YOUR USE OF THIS PRODUCT DEEMS THAT YOU ACCEPT THE
TERMS OF THIS LICENSE. The PRODUCT means the FRANKLIN
software product, any related hardware, any content read by this product, and documentation found in this package and FRANKLIN means
Franklin Electronic Publishers, Inc.
LIMITED USE LICENSE
All rights in the product remain the property of FRANKLIN and/or the
owner of any content read using the FRANKLIN software product.
Through your purchase, FRANKLIN grants you a personal and nonexclusive license to use the PRODUCT. You may not make or distribute to
others any copies of the PRODUCT or of the preprogrammed data
stored therein, whether in electronic or print format. Such copying would
be in violation of applicable copyright laws. Further, you may not modify,
adapt, disassemble, decompile, translate, create derivative works of, or
in any way reverse engineer the PRODUCT. You may not export or reexport, directly or indirectly, the PRODUCT without compliance with
appropriate governmental regulations. The PRODUCT contains
Franklin’s and/or other content owner’s confidential and proprietary
information which you agree to take adequate steps to protect from
unauthorized disclosure or use. This license is effective until terminated.
This license terminates immediately without notice from FRANKLIN if
you fail to comply with any provision of this license.
Page 2
Page 4

Introduction
Welcome to the Mobipocket Reader, a program that lets you read,
search, and bookmark electronic books (eBooks), electronic newspaper
articles (eNewspapers) and other electronic documents (eDocuments).
To run this version, you must have the necessary software to install the
program and database files in your PDA. Please read this User’s Guide
to learn how to:
• open and close content
• use the Library
• view content
• change settings
• use bookmarks
• search a document
• get online help
• exit
Mobipocket Reader
Before using this progam, you must download and install documents
formatted for the Mobipocket Reader.
System Requirements
• A PDA--PalmTMIII, IIIx, IIIe, IIIc, V, Vx, Ve,
M100/105/125/500/505/515, Handspring
TM
(Visor), TRGpro, Sony
CLIÉTM--running Palm OS®3.X, 4.X
or
• A PDA--Palm-size PC, Handheld PC, HPC Pro (HP, Compaq,
Casio...); Casio BE-300; Pocket PC 2000/2002 (HP, Compaq,
Casio)--running Windows
®
CE 2.X, 3.0 or Pocket PC®3.X
• 4 MB of main memory recommended
Note: Some eBooks may require additional memory.
MobipocketCommonImages.prc, MobipocketCommonRez.prc and
mobibook.prc are the application files for the
Mobipocket Reader program. These files must be installed before you can view the eBooks.
mobihelp.prc contains the online helptext. The remaining .prc file or files
are the main files that contain your eBook.
Note: Pictures of screens are samples and may appear differently in the
actual product. When pictures of screens are included in text,
Palm OS®screens appear on the left hand side, and Windows
®
CE screens appear on the right.
Page 3
Page 5
Installation Notes
Note: If you are using a Springboard™Module, slip the module into the
external expansion slot of the PDA. The Visor automatically
launches both the Mobipocket Reader and the eBook.
If you are using the
Mobipocket Reader from a PalmPak®card,
MultiMediaCard or SD card, slip the card into the slot of the PDA.
When you download an eBook, any .prc files and other eBook specific
files are placed in their own designated directory unless you specified
another location during installation. The number of .prc files depends on
the eBook that you download.
Please refer to your PDA documentation for instructions on installing
software and expansion cards on your PDA, selecting the destination of
software during a HotSync or ActiveSync and moving software from
RAM to an expansion card.
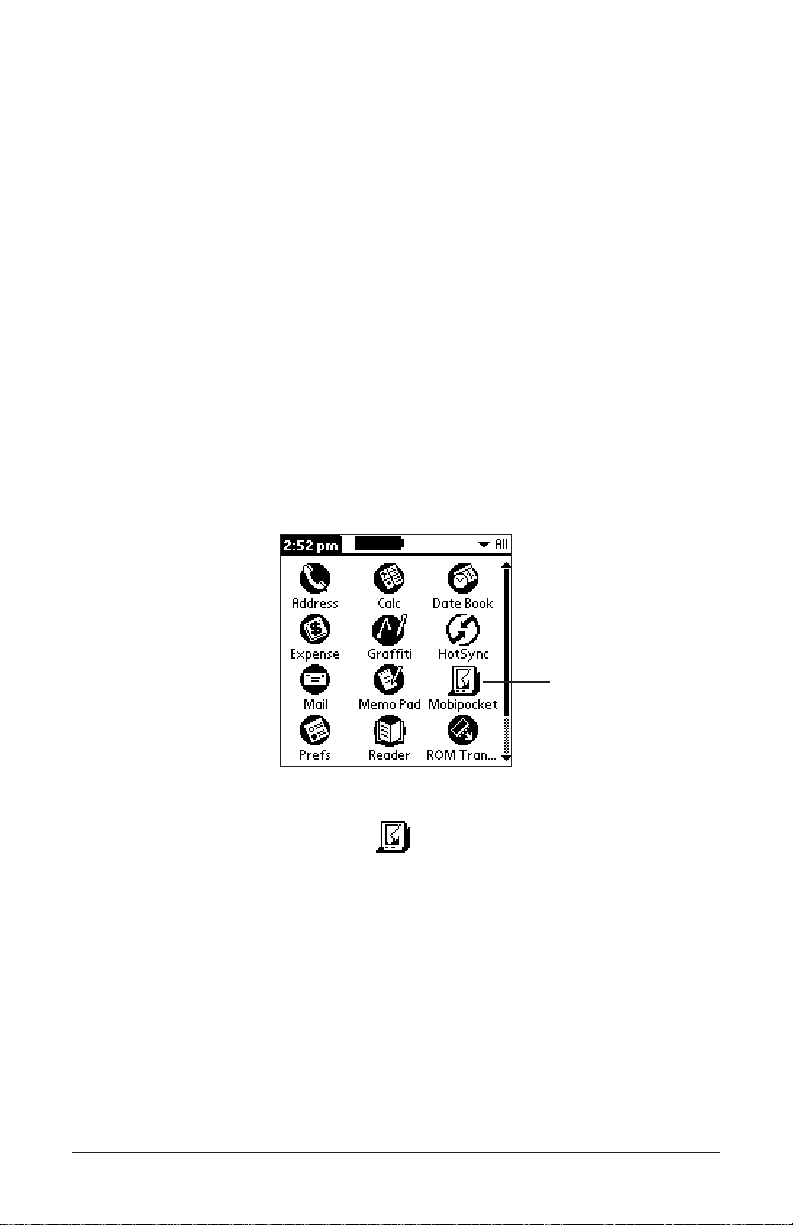
After a successful HotSync or ActiveSync, or inserting an expansion
card, the
Mobipocket icon and any installed eBook icons should appear.
View the contents of the expansion card as instructed in your PDA manual.
For PDAs running Palm OS®, tap to access the Mobipocket
Reader Library or the last eBook you were viewing. Tap any available
eBook icon to begin viewing that eBook.
For PDAs running Windows
®
CE, tap Start | Programs | MobiPocket to
access the Mobipocket Reader Library or the last eBook you were viewing.
Page 4
Mobipocket icon
Palm OS®Launcher screen
Page 6
Opening and Closing Documents
Y ou can open documents from Mobipocket Readeror from the Applications
Launcher (Palm OS®). To open a document from the Applications Launcher, tap its
icon, if available. To open a document from Mobipocket Reader, follow these steps.
1. Tap (Palm OS
®
) or Start | Programs | MobiPocket (Windows
®
CE) to open Mobipocket Reader.
Note: When the Mobipocket Reader or content resides on a PalmPak
®
card, MultiMediaCard or SD card, view the contents of the expansion card as instructed in your PDA manual.
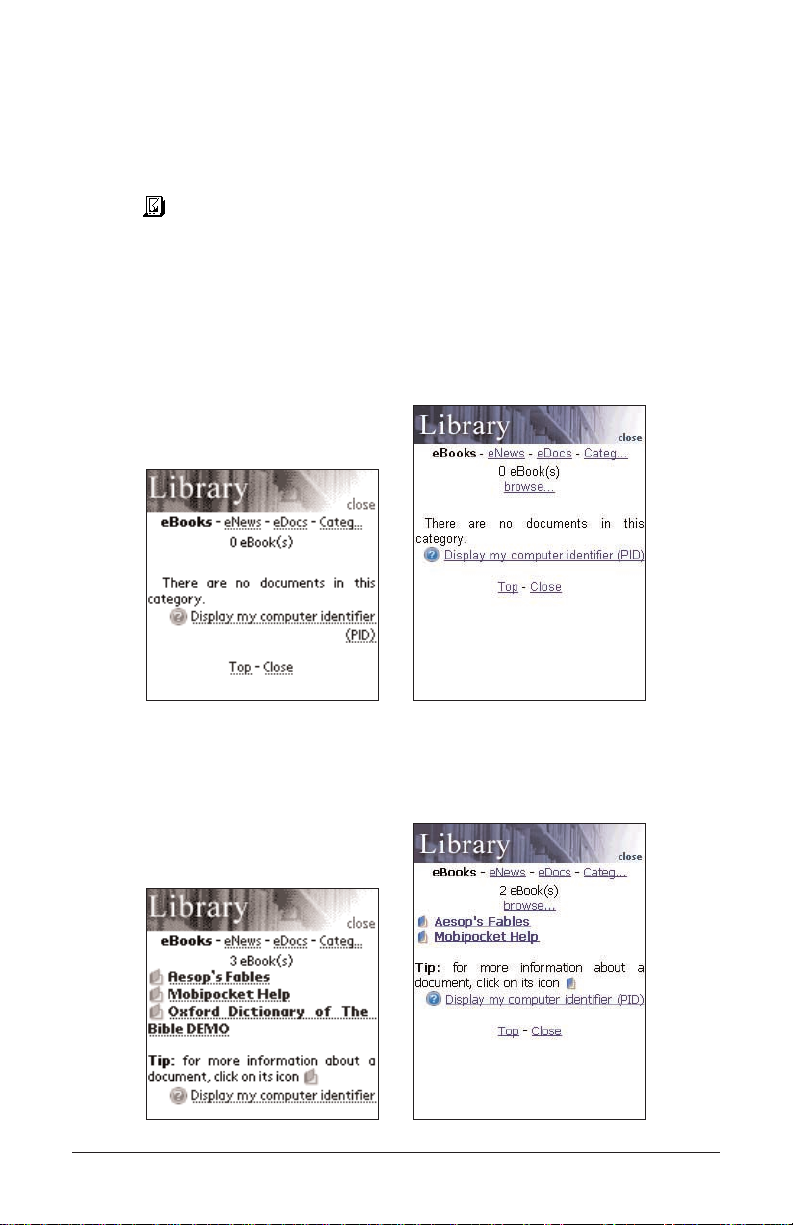
The screen that appears varies based on available content and
whether or not documents were opened previously.
• If no documents are available, you go to an empty Library screen.
• If electronic documents are available and no documents have
been opened, you see the Library screen, with the installed documents sorted by their file type.
Page 5
Empty Library screen
List of eBooks in the Library
Page 7
The Library contains the list of eBooks, eNews and eDocs that you
have downloaded into your PDA. The documents are categorized by
type. You can also create your own categories and assign documents to those categories.
• If a document had been opened previously,
Mobipocket Reader
displays the last viewed screen of the document.
Note: By default, the Mobipocket Reader opens to the last-viewed
screen. You can change the default at the Settings screen. For
more information, please see “Changing the Settings” on page
15.
To exit the Library and return to the previously opened document,
tap
Close.
2. Tap the category you want.
3. Tap a document to open it.
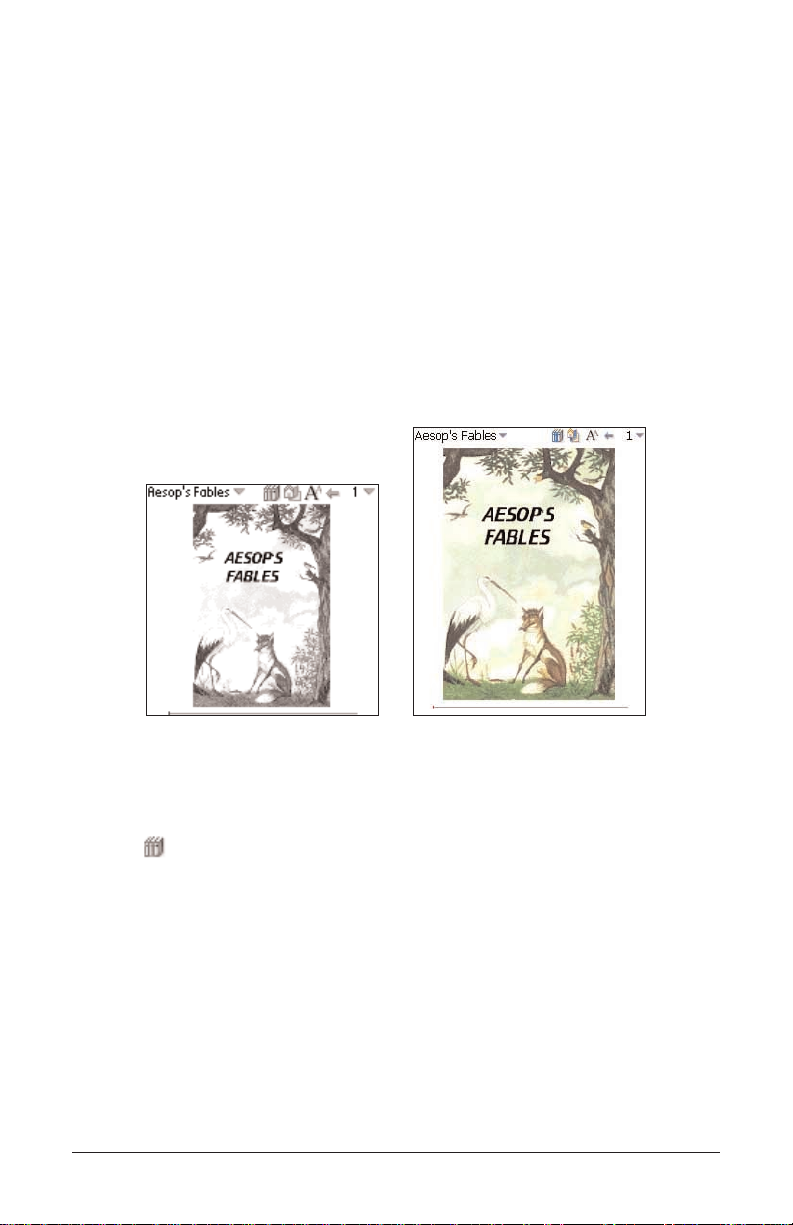
The first time you open a document, you see page 1. Upon subsequent
readings, the document opens where you left it the last time you were
reading.
4. Tap to go to the Library and select another document.
Page 6
Opened document
Page 8

Understanding the Library
The Library in Mobipocket Reader is the place you go to open a different document or manage your documents. The Library consists of a
header, a list of file types, a list of documents, a tip, and footer. From a
document, access the Library by tapping .
Header
The Header indicates that you are in the Library. You can tap this area of
the screen to close the Library and return to the previously opened document.
File Types
There are three default file types in the Library: eBooks, eNews and
eDocs.
•
eBooks lists all electronic book formats such as .prc, palm pilot
doc files and so forth.
•
eNews lists all .prc files for eNewspaper subscriptions. These
documents are formatted and synchronized using the Mobipocket
Web Companion
(version 4 and above).
•
eDocs lists all documents (.txt or .html files). This includes .html
and .txt files produced with the Publish function of the Mobipocket
Web Companion.
See also: For more information about the Publish function of the Web
Companion, see “Formatting eDocs” on page 27.
Tap
eBooks, eNews or eDocs to see the available documents in these
file types.
You see a list of available documents in the current file category. The
active file type appears bolded and has no underline. There is also a
Categories option that enables you to file your documents by category.
Page 7
File types
List of
documents
Tip
Footer
Header
Page 9
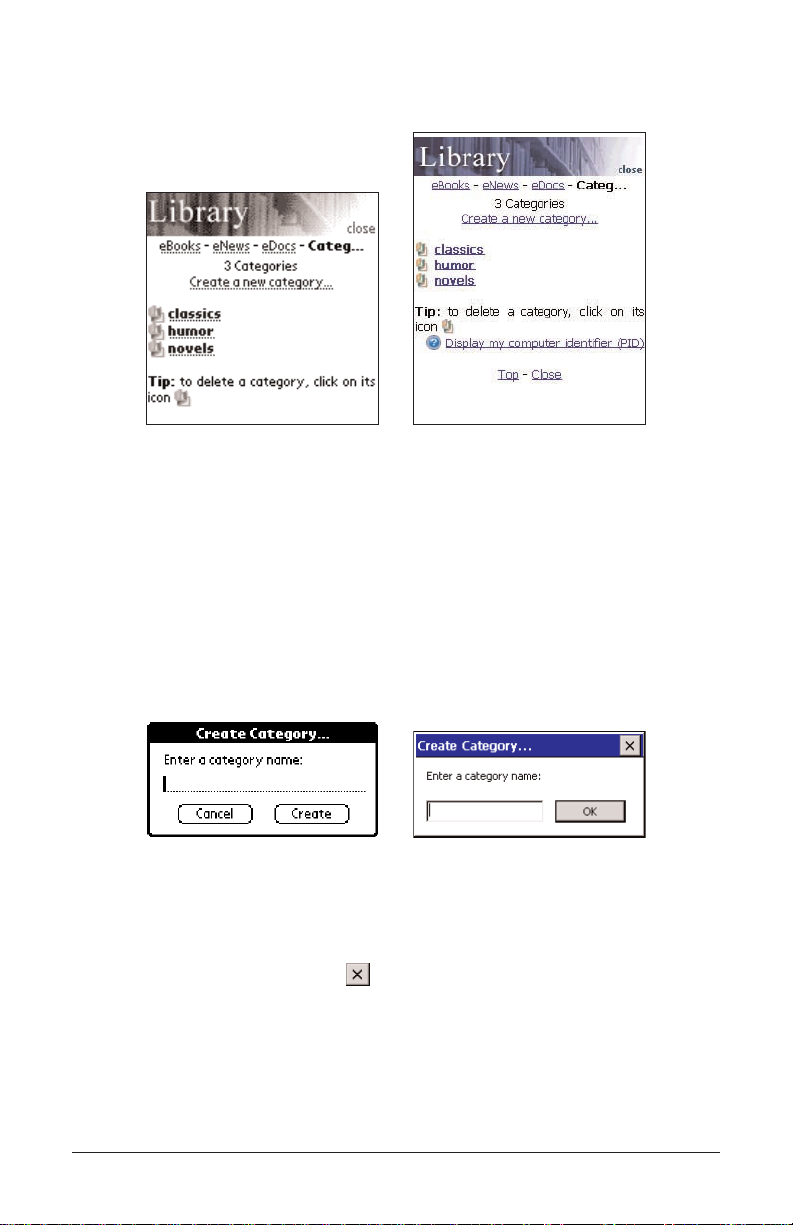
Categories
1. Tap Categ.
You see a list of previously created categories, if any.
2. To see the list of documents assigned to a particular category, tap
the category.
Tap a document, to open it.
Tap
Close to exit the Library and return to the document you were
previously viewing.
Tap
Back or Categ to return to the list of categories.
3. Tap
Create a new category to add a category.
You see the Create Category dialog box.
4. Write the name of your category.
5. Tap
Create (Palm OS®) or OK (Windows®CE) to accept the new cat-
egory.
Tap
Cancel (Palm OS®) or (Windows®CE) to exit without saving
the category.
Note: You can assign a document to a category only from the Book
Details dialog box.
Page 8
Category list
Create Category dialog box
Page 10
6. Tap to delete a category.
You must confirm the deletion. Tap
OK (Palm OS®) or Yes
(Windows®CE) to confirm. Tap Cancel (Palm OS®) or No (Windows
®
CE) to exit the dialog box without deleting the category.
Note: Any files assigned to a deleted category revert to being unassigned.
List of Documents
Each file type and category name contains a list of documents.
The list of documents consists of three parts: the number indicator, the
document title and an icon. The number indicates the number of documents in the current folder. The document title or category name is
underlined, indicating that it is a hyperlink. Tap the title to open the document. Tap the icon to access the Book Details dialog box and view the
size of the document, assign the document to a category or delete the
document. Tap
browse... (Windows®CE) to open the Open dialog box
and find a file on your PDA that you want to read in Mobipocket Reader.
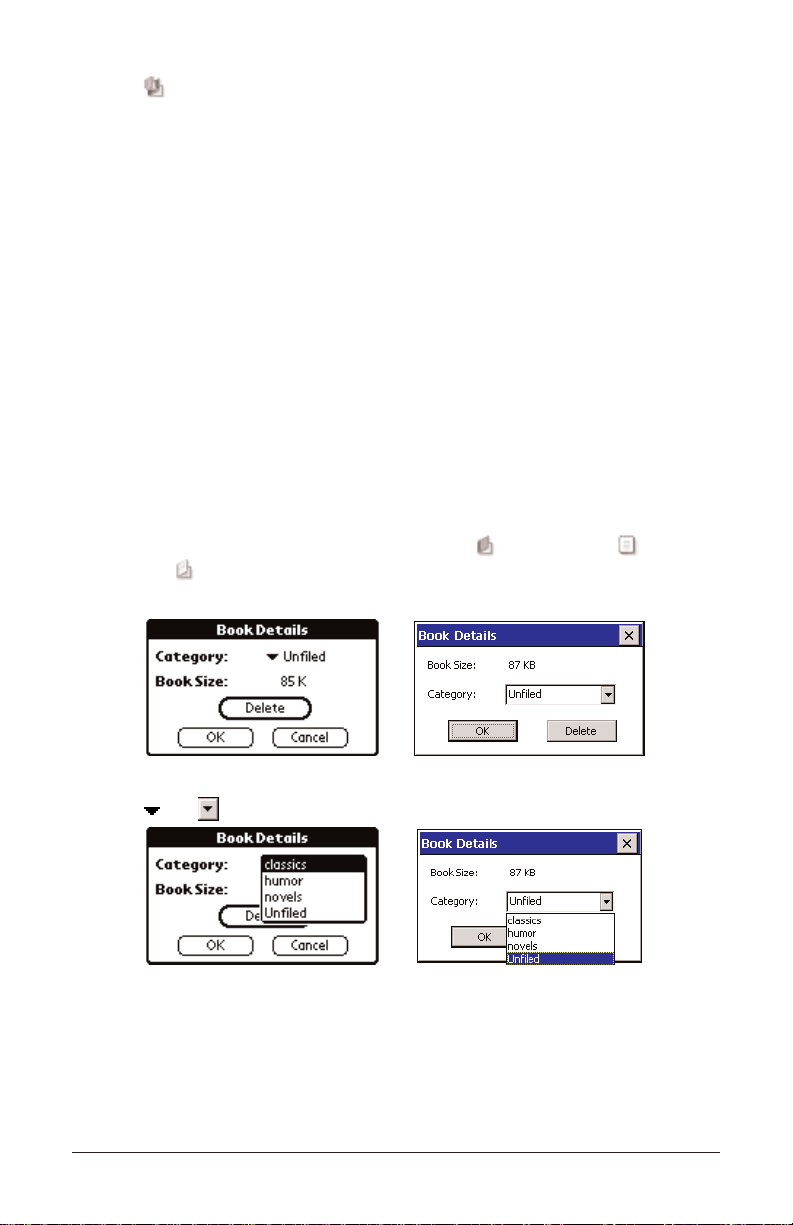
Book Details
1. To see a document’s details, tap its icon ( for eBooks; for
eDocs; for eNews).
You see the Book Details dialog box.
2. Tap or next to Category to see the drop-down list.
Previously created categories appear as options on this list.
3. Tap the category you want the title assigned to.
Page 9
Book Details dialog box
Category drop-down list
Page 11

4. Tap OK.
Tap
Cancel (Palm OS®) or (Windows®CE) to exit the Book
Details dialog box without saving your changes.
Tap
Delete to remove the document from your PDA. You must con-
firm the deletion (Palm OS®).
Warning: Windows®CE users will not be asked to confirm the dele-
tion; the document will just be removed.
Tap
OK to confirm. Tap Cancel to exit the dialog box without deleting
the document.
Note: When you delete the last-visited document from your PDA,
Mobipocket Reader automatically opens to the Library the next
time you open Mobipocket Reader.
Tips
For each Library screen, a tip is displayed near the bottom of the
screen. This tip is a reminder about the status of the screen (“There are
no documents in this category.”) or a helpful hint about learning more
about a particular document (“For more information about a document,
click on its icon.”).
Footer
The very bottom of each Library screen contains additional hyperlinks.
Top Returns to the top of the current list of docu-
ments. If you have more documents than can
fit on one screen, move down to see the other
items. Then tap Top to return to the top of the
list.
Close Closes the Library and returns to the previous-
ly open document, if any. If there is no previously open document or that document has
since been removed from your PDA, this link
does not go anywhere.
Display my computer Displays the version number and copyright
information of Mobipocket Reader. Your
Personal ID or PID is displayed here. The PID
uniquely identifies the Mobipocket Reader on
your PDA. You are required to enter this number when purchasing eBooks, to secure the
transaction.
Page 10
identifier (PID)
Page 12

Viewing a Document
The Text view is where you read the content of a document. Text view
consists of a tool bar, document text and a progress bar.
Tool Bar
The tool bar displays the title of the document and the current page
number with accompanying menus.
Tap the document title to access the main menu. Tap the page number
to access the page menu. Tap the menu item you want.
The tool bar also displays icons that enable you to move around in a
document and access other locations in
Mobipocket Reader. The follow-
ing icons are available.
Goes to the table of contents, if any, or to the first page if
there is no table of contents.
Returns to your previous location.
Cycles through the available font sizes.
Goes to the Library.
Page 11
Tool bar
Progress bar
Text area
Page 13

Text Area
The Text area of the screen contains the text of the document. This
area can include a title page, graphics, table of contents and hyperlinks.
You can adjust the display of the text by changing your settings. For
more information, please see “Changing the Settings” on page 15.
Another way to change the display of text, is to switch to full-screen
view. Press the jog wheel, if available, to toggle to full-screen view,
which removes the tool bar across the top of the screen and the
progress bar at the bottom. Press the jog wheel again to re-display the
tool bar and progress bar. If your PDA does not have a jog wheel, double tap the stylus in the Graffiti/handwriting area of your PDA to toggle
full-screen view on and off.
Progress Bar
The progress bar indicates your location in the text of a document.
As you move through the document, a highlight moves across the bar.
You can tap anywhere on the progress bar to move to a different location within a document.
If you have saved any bookmarks, a small notch is placed on the
progress bar indicating the location of the bookmark in a document.
and appear to the left and right of the bar when a document has
bookmarks. Tap and to move to the previous or next bookmark
position.
Page 12
Page 14

Using the Menus
There are two menus in Mobipocket Reader, a main menu and a page
menu. Tap the document title in the tool bar to see the main menu. Tap
the page number to see the page menu. To select a menu item, tap the
menu you want, then tap the menu item you want.
Main Menu
Use the main menu to change settings, search a document, view the
bookmark list, go to the Library, view information about Mobipocket
Reader and exit the program. PDAs running Palm OS®can also access
main menu items using Command Letters. These are indicated next to
the menu item in the list below.
About Displays the version number and copyright infor-
mation of Mobipocket Reader. Your Personal ID
or PID is displayed here. The PID uniquely identifies the Mobipocket Reader on your PDA. You
are required to enter this number when purchasing eBooks, to secure the transaction.
Bookmark List Displays the list of entered bookmarks for the cur-
rent book.
Exit Exits Mobipocket Reader.
Find Goes to the Find in text dialog box.
Help Displays online help.
Library Goes to the Library.
Send via IR Beams the Mobipocket Reader to another PDA.
Note: Secured titles cannot be beamed.
Settings Enables you to set the font size, display margins,
open the Library each time you open Mobipocket
Reader and use full justification for text. Color
devices provide settings for foreground and background colors.
Page 13
or Annotations
Main menu
Page 15
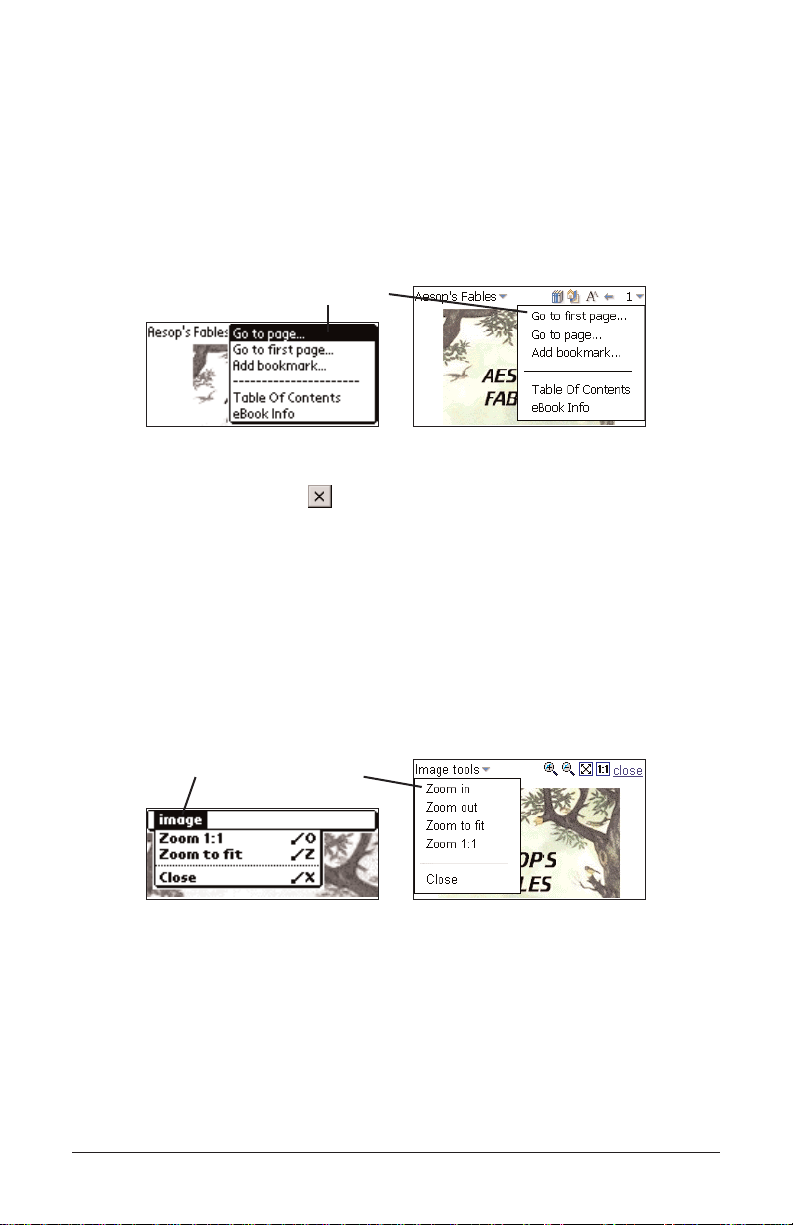
Page Menu
Use the page menu to go to the first page, go to any page you want or
add a bookmark. In addition, this menu may contain several other items
which are part of the guide specified by the Open eBook standard.
These could include the Biography of the author, the Foreward, a
Table of Contents, any included Indexes, and eBook Info or About
this book. eBook Info or About this book display specific information
about the current eBook, for example, the author, title and date.
Go to page Goes to the Go to Page dialog box. Enter a number
within the range listed. Tap Go to. Tap Cancel (Palm
OS®) or (Windows®CE) to exit without moving.
Go to first page Goes to the first page of the document.
Add bookmark Adds a bookmark to the current page with a short
description label.
Image Tools Menu
Use the Image tools menu to zoom an image to fit the screen, enlarge it
or close image mode. This menu is only available when in image mode.
For information on image mode, please see “Navigating Large Tables
and Images” on page 23.
Zoom in Enlarges the image by an increment.
Zoom out Reduces the image by an increment.
Zoom 1:1 Enlarges the image.
Zoom to fit Sizes the image to fit on the screen.
Close Closes image mode.
Page 14
Page menu
Image tools menu
Page 16

Changing the Settings
The Settings dialog box allows you to adjust the display options of
Mobipocket Reader. You can change the font size, display margins, choose
to go to the Library when you open the Reader, or change text justification.
Color devices allow you to adjust the foreground and background colors. To
change the settings, tap your PDA’s menu icon (if available) or tap the doc-
ument title in the tool bar and then tap Settings. You see the Settings dialog box. Tap >> to see additional settings, if neccessary.
Note: Tap an empty check box ( or ) to activate a setting ( or ).
Background Color Tap the color box. Tap the color square you
want in the provided palette.
Dictionary Select the preferred dictionary for instant
lookup.
Display margins Tap the check box to place a small margin
on the left and right side of the screen for
less dense text presentation. Unchecked,
the text will fill the entire screen.
Font Size Sets the font size of all documents opened
by Mobipocket Reader. Palm OS®: Tap the
“A” representing the size you want.
Windows®CE: Tap to see the drop-
down list. Tap the size you want: Smallest,
Small, Normal, Large or Largest. For all
PDAs, you can also change the font size
by tapping while reading a document.
Font Family Available in PDAs running Windows®CE,
Tap to see the drop-down list of available fonts. Tap the font you want.
Page 15
Settings dialog box
Page 17

Foreground Color Tap the color box. Tap the color square you
want in the provided palette.
Full justification Tap the check box to present the text of a
document aligned with the left and right
sides of the screen. Unchecked, the format
defaults to left-aligned text.
Open Library at startup Tap the check box to display the Library
each time you open Mobipocket Reader.
Unchecked, the Reader opens the last document you were reading, at the location
you stopped.
Touch screen turn page Tap the check box to enable turning pages
by tapping the sides of the touch screen.
Page 16
Page 18

Moving around within a Document
Page up and down through the document in the following ways.
• Tap the right side of the screen (when Touch screen turn page is
enabled) to move to the next page.
• Tap the left side of the screen (when Touch screen turn page is
enabled) to move back a page.
• As you move through a document, the progress bar at the bottom
of the screen indicates your current position in the document. Tap
any part of the progress bar to move to another position in the
document. Tap to return to your previous location.
• Underlined text indicates a hyperlink. Tap the underlined text to
go to the linked section of text. Tap to return to your previous
location.
Note: Methods for scrolling and moving around vary depending on your
PDA. Please refer to your PDA’s documentation for information
about using a jog wheel, buttons and so forth for scrolling.
Page 17
Page 19

Finding a Definition
You can find a definition for any word in text by tapping on the highlighted word. To highlight a word, drag the stylus over the word. Tap the
highlighted word.
The following dialog box appears.
Add bookmark... Adds the word or words to the Bookmark List.
Defintion Enables you to search for the definition or translation
of the word or words in the designated reference
book. Note: A dictionary needs to be installed to use
this feature.
Copy Copies the highlighted word or words to the clipboard.
In copyrighted books, only the first three words are
copied.
Page 18
Page 20

Searching a Document
You can find information you want using the Find in text dialog box. The
Find in text dialog box enables you to enter a string of characters and
search for that string throughout the text of the current document.
1. Tap the document title in the tool bar and then tap
Find.
You see the Find in text dialog box.
2. Enter the word or phrase you want to find.
3. Tap a check box to restrict your search by either or both of the following parameters.
Match case attempts to find your word or words exactly as you entered
them, matching capital and lowercase letters. Leave this unchecked if you
want to see matches of your word or words ignoring the case of the letters.
Whole word attempts to find only the word you entered. Leave this
unchecked if you want to see matches of your search word as a part
of another word.
4. Tap
Find to start your search.
Note: Each search begins at your position in text where you accessed
the Find in text dialog box.
Tap or to exit without searching.
PDAs running Palm OS
®
display a Search in progress dialog box,
indicating the page number currently being searched. Tap Cancel to
stop the search at any time. Tap OK to return to the document.
When a match is found, it appears on the top line of the screen. The
Find in text dialog box stays on the screen.
If no matches are found, you see a dialog box indicating this. Tap
OK. PDAs running Palm OS®return to the document. PDAs running
Windows®CE return to the Find in text dialog box. Tap to return
to the document.
5. To go to the next match, tap
Find again.
To remain at this match and stop searching, tap or .
In text, tap to return to your previous location.
Page 19
Find in text dialog box
Page 21

Using an Index
Some books contain indexes that you can use to search books by subjects,
words and other criteria. Any available indexes appear in the Page menu.
1. Tap the page number.
You see the Page menu.
2. Tap an available index.
You see an Index screen.
Entries in an Index are arranged alphabetically.
3. Enter letters of the word you want to search for.
As you enter letters, the list will move to the next matching entry of
the Index. When you enter letters that exactly match an entry, that
entry is highlighted. If you enter a word that does not match any
index entry, you go to the next available entry, with nothing bolded.
4. Tap the entry you want.
You may see sub lists.
5. Tap the entries you want until you reach text.
Page 20
Index screen
Searching an Index
Page 22

Using Bookmarks
You can enter a bookmark in any location in text.
Note: Bookmarks are assigned to particular pages, so if the font size
changes, the bookmark will exist at the same page number in the
new font size, not necessarily the same location in text.
To add a bookmark, follow these steps.
1. From any location in text, tap the page number, then tap
Add book-
mark.
You see the Add Bookmark dialog box.
2. Enter a short label describing the bookmark.
3. Tap
Add to add the bookmark.
appears at the top right corner of the page where the bookmark
was added.
A small notch is placed on the progress bar indicating the location of
the bookmark in a document. and appear to the left and right
of the bar when a document has bookmarks. Tap and to
move to the previous or next bookmark position.
4. Tap to display the bookmark label.
Page 21
Bookmark notch
Bookmark label
Bookmark marker
Add Bookmark dialog box
Page 23

5. Tap anywhere to close the label.
You can view a list of all bookmarks stored for the current document.
Each bookmark in the list contains a page number label and the label
that was entered when the bookmark was created.
To view or edit the bookmark list, follow these steps.
1. Tap the document title in the tool bar and then tap
Bookmark List.
The list is organized by page number. The bookmark label appears
next to the page number where the bookmark was added.
If you have more bookmarks than can fit on one screen, scroll down
to move to the next page.
Scroll up to move back a page.
Tap
Top to go to the top of the list.
2. Tap
page # to go to this location in text.
Tap to return to your previous location in text.
3. Tap to delete a bookmark.
You must confirm the deletion. Tap
OK to confirm. Tap Cancel to exit
the dialog box without deleting the bookmark.
4. Tap
Close to return to your previous location in the document.
Page 22
Bookmark list
Page 24

Navigating Large Tables or Images
Large Tables
Where possible, tables that are too large for the screen continue on the following page. If it is not possible, a mode called "Large tables " is activated.
In this mode, icons appear around the table to enable you to navigate
the information. Tap to move the table in the designated direction.
Tap to enable dragging.
Page 23
Large table mode
Page 25

Images
By default, images are scaled to fit the size of the screen. You can
zoom images to see them in greater detail.
1. Hold the stylus on an image to highlight it.
You see the following dialog box.
2. Tap
Image mode.
The image zooms to fit the screen.
3. Tap .
4. Drag the stylus anywhere on the image and the image moves in that
direction.
Tap or to zoom in or out by an increment.
Tap or to resize the image.
5. Tap
close to exit image mode.
Page 24
Image mode
Page 26

Getting Help
Mobipocket Reader comes with online help. The online help is installed as its own
eBook. If you have deleted the document “Mobipocket Help” (mobihep.prc) from
your PDA, you will have to reinstate it before you can access the online help.
To view this help at any time, do the following:
1. Tap the document title in the tool bar and then tap
Help.
2. Tap the section you want to read.
3. Tap to return to the document you were previously viewing.
You can also access the help from the Library.
1. Tap to go to the Library.
2. Tap
eBooks if you are not already at the eBooks list.
3. Tap
Mobipocket Help.
4. Tap the section you want to read.
5. Tap to return to the Library.
6. Tap the title of the document you were previously viewing.
Page 25
eBooks list at the Library
Mobipocket Help Table of Contents
Page 27
Page 26
Using the Mobipocket Web Companion
The Mobipocket Web Companion is a PC program that enables you to
download eBooks and subscribe to and update eNewspapers which you
can then send to and read on your PDA.
The Web Companion also provides access to Mobipocket and Franklin
Web sites and includes a Publish feature that formats text (*
.txt) files
and Web pages (*.htm or *.html files) for Mobipocket Reader.
The Web Companion is installed on your PC when you download the
Mobipocket Reader.
To access the Web Companion click
Start | Programs |
MobiPocket.com | MobiPocket Web Companion.
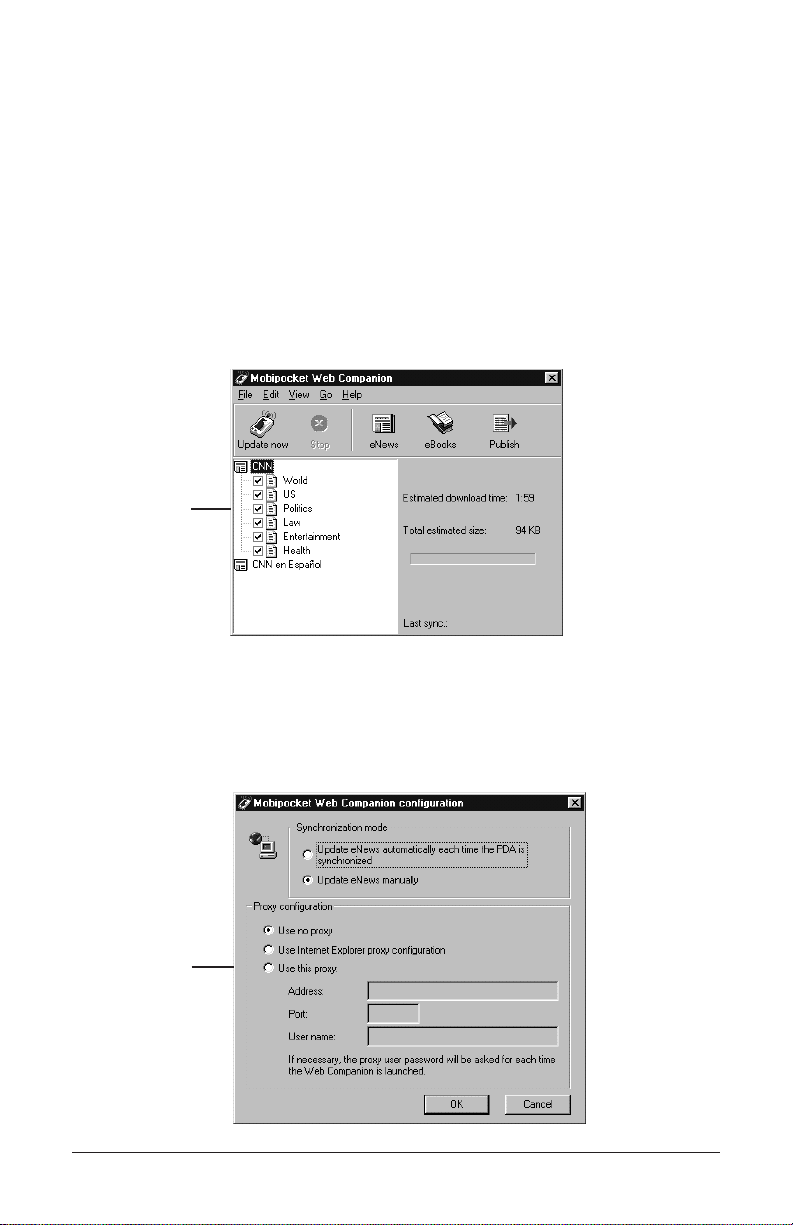
Configuring the Web Companion
Y ou can choose to manually update your eNews selections or have the program
do this for you automatically . To configure the Web Companion, follow these steps.
1. Click
Edit | Configuration.
You see the
Mobipocket Web Companion configuration dialog box.
Mobipocket
Web
Companion
Mobipocket
Web
Companion
configuration
dialog box
Page 28

2. Click the check box for the Synchronization mode you want.
The automatic update enables your computer to update your eNews
periodically as updates become available.
The manual update enables you to control when your eNews is
updated. The Web Companion only updates eNews when you click
(Update now).
3. Click the check box for the proxy configuration you want.
The
Internet Explorer proxy is the default configuration.
If you are an AOL user, select
Use no proxy.
If you access the Internet through a firewall where authentication is
required, select
Use this proxy and enter the necessary data in the
Address, Port and User name fields.
Click
Cancel to exit without saving configuration changes.
4. Click
OK to save the configuration.
Getting eNews
A list of default eNewspaper subscriptions are installed with the Web
Companion but you can add to this list at any time. To download
eNews, follow these steps.
1. Subscribe to the eNewspaper you want.
a. Click (eNews).
Your default browser is launched and you go to the Mobipocket
Web site that lists the available electronic newspapers.
b. Browse the page and site and find the eNewspaper you want.
c. Click
Add News.
You will be prompted to log on to the Web site. Enter a User
name and password and then click
OK.
The file automatically downloads to its proper destination and you
see a confirmation dialog box.
d. Click
OK.
e. Repeat these steps for each eNewspaper you want.
2. Select the sections you want in each eNewspaper.
a. Click next to an eNewspaper in your list to see the available
sections.
b. Click the check box next to the sections you want.
c. Repeat the process for every eNewspaper you want to download.
3. Click (Update now).
Page 27
Page 29

Page 28
To unsubscribe, click next to the eNewspaper you want and then
either click File | Unsubscribe or right-click the eNewspaper and click
Unsubscribe from the context menu.
Getting eBooks
The Web Companion does not display a list of eBooks, but it does provide easy access to a Web site where you can purchase and download
them.
1. Click (eBooks).
Your default browser is launched and you go to Franklin's or
Mobipocket’s eStore.
2. Browse the page and site to find the eBook you want.
Formatting eDocs
You can read web pages (*.htm and *.html files) and text (*.txt) files in
Mobipocket Reader but you need to format them first using the Publish
feature in Mobipocket Web Companion.
1. Click (Publish).
2. Click the first .
The Open dialog box appears.
3. Find the file you want to publish and click
Open.
The file must be a text file (with a .txt extension) or a .htm or .html
file.
4. Click the second .
The Save As dialog box appears.
5. Find the location you want the published file saved in.
6. Type a name for the file in the File Name field.
7. Click
Save.
8. Click
Publish to start the conversion.
Click
Cancel to exit without converting.
Please refer to your PDA documentation for instructions on installing
software during a HotSync or ActiveSync. For more information on
the
Mobipocket Web Companion, please refer to the online help.
Page 30

Notes
The following notes explain how the Mobipocket Reader functions differently when viewing an eBook sold on PalmPak®, MultiMediaCard or SD
card.
• These eBooks cannot be beamed.
• You cannot delete these eBooks.
• View the contents of the expansion card as instructed in your PDA
manual.
Page 29
Page 31

Copyrights and Trademarks
Product name: Mobipocket Reader
© 2002 Franklin Electronic Publishers, Inc., Burlington, N.J. 08016-4907
U.S.A. All rights reserved, worldwide.
Copyright 1999-2001 Mobipocket.com. All rights reserved.
Palm, Palm Computing and HotSync are registered trademarks of Palm
Computing, Inc., 3Com Corporation & its subsidiaries.
Handspring, Visor, and Springboard are trademarks or registered trade-
marks of Handspring, Inc. Franklin is not affiliated with, endorsed or
sponsored by Handspring, Inc. All rights reserved.
WIndows is a registered trademark of Microsoft Corporation.
Aesop’s Fables is a Public Domain eBook from the Project Gutenberg
Web site.
© Oxford University Press 1996, 2002.
Published by Oxford University Press, Great Clarendon Street, Oxford
OX2 6DP. Oxford is a registered trademark of Oxford University Press.
All rights reserved.
© 1999 by Merck & Co., Inc. All rights reserved.
Other trademarks and company names are the property of their respec-
tive owners.
Page 30
Page 32

www.franklin.com
Electronic Publishers
 Loading...