

Page 1

Electronic Publishers
For Use with the Franklin
Digital Book System
IC-150
F
DIGITAL BOOK
User’s Manual
Page 2

License Agreement
READ THIS LICENSE AGREEMENT BEFORE USING THE
DIGITAL BOOK. YOUR USE OF THE DIGITAL BOOK DEEMS
THAT YOU ACCEPT THE TERMS OF THIS LICENSE. IF YOU
DO NOT AGREE WITH THESE TERMS, YOU MAY RETURN
THIS PACKAGE WITH PURCHASE RECEIPT TO THE
DEALER FROM WHICH YOU PURCHASED THE DIGITAL
BOOK AND YOUR PURCHASE PRICE WILL BE REFUNDED.
DIGITAL BOOK means the software product and documentation found in this package. FRANKLIN means Franklin Electronic Publishers, Inc.
LIMITED USE LICENSE
All rights in the DIGITAL BOOK remain the property of FRANKLIN. Through your purchase, FRANKLIN grants you a personal and nonexclusive license to use the DIGITAL BOOK on
a single FRANKLIN Digital Book System at a time. You may not
make any copies of the DIGITAL BOOK or of the data stored
therein, whether in electronic or print format. Such copying
would be in violation of applicable copyright laws. Further, you
may not modify, adapt, disassemble, decompile, translate,
create derivative works of, or in any way reverse engineer the
DIGITAL BOOK. You may not export or re-export, directly or
indirectly, the DIGITAL BOOK without compliance with appropriate governmental regulations. The DIGITAL BOOK contains
Franklin’s confidential and propriety information which you
agree to take adequate steps to protect from unauthorized
disclosure or use. This license is effective until terminated. This
license terminates immediately without notice from FRANKLIN
if you fail to comply with any provision of this license. The
American Medical Association requires that this DIGITAL BOOK
not be used in a public computer-based information system and
with FRANKLIN disclaims liability for the sequence, accuracy,
and completeness of the information herein.
1
Page 3

Notices
Disclaimers
Any five-digit numeric Physician’s Current Procedural Terminology, Fourth Edition (CPT) codes, service descriptions, instructions and/or guidelines are Copyright 1994 American Medical
Association (or such other date of publication of CPT as defined
in the federal copyright laws). All rights reserved.
CPT is a listing of descriptive terms and five-digit numeric identifying codes and modifiers for reporting medical services performed by physicians. This presentation includes only CPT
descriptive terms, numeric identifying codes and modifiers for
reporting medical services and procedures that were selected by
Franklin Electronic Publishers, Inc., for inclusion in this product.
No fee schedules, basic unit values, relative value guides, guidelines, conversion factors or scales are included in CPT . Neither
Franklin nor AMA assumes responsibility for the consequences
attributable to or related to any use or interpretation of any information contained in or not contained in this product.
Neither Franklin nor AMA directly or indirectly practices medicine
or dispenses medical services.
Copyrights, Trademarks, Patents, ISBN
© 1995 Franklin Electronic Publishers, Inc., Mt. Holly, N.J., 08060
U.S.A. All rights reserved.
Coder’s Choice
© 1994 by Medicode Inc. See Restricted Rights Notice in this
Product. Use of CPT is subject to the license contained herein. All
rights reserved.
HCPCS 1995; Cross-Coding; Coding Commentary; © 1994
by Medicode Inc. All rights reserved.
Digital Book System and SMARTCODER are registered trademarks of Franklin.
Patents: 4,490,811; 4,830,618; 5,113,340; 5,218,536;
5,249,965; DES 348,439; DES 349,281;
Euro. Pat. 0 136 379. Patents Pending.
ISBN 1-56712-182-9.
®
1995, PMIC.
2
Page 4

Contents
Key Guide.................................................. 5
Getting Started .............................................7
Installing the Digital Book ........................... 8
Viewing a Demonstration ........................... 9
Changing Settings...................................... 10
Finding Codes ............................................11
Using the Indexes ...................................... 12
Using Word Searches ................................ 14
Narrowing Your Searches .......................... 17
Using the Outlines...................................... 18
Viewing Codes and Notes .........................20
Viewing Descriptions.................................. 21
Viewing Guidelines .................................... 23
Using Crosswalks ...................................... 24
Viewing Instructions ................................... 25
Viewing Figures and References................ 27
Using Your Own Notes ............................... 28
Appendixes.................................................30
Looking Up Words in Other Books ............. 31
Using the Digital Book System®.................. 32
Limited Warranty (U.S. only) ...................... 34
Index ......................................................... 35
3
Page 5

Introduction
Congratulations! This SMARTCODER™ digital book
provides you with a revolutionary new way to code
medical procedures and diagnoses for health insurance and Medicare forms in less time and with less effort. SMARTCODER
references you use most often:
Physicians’ Current Procedural Terminology
• 1995
4th Edition (CPT);
International Classification of Diseases
• 1995
vision,
Clinical Modification
• 1995
Health Care Financing Administration Common
Procedure Coding System
Using SMARTCODER
cate CPT, ICD-9, and HCPCS codes simply by entering the words and topics that you find in the medical
chart and other medical records. Once you’ve identified a CPT code, powerful Crosswalks help you find
the ICD-9 and HCPCS codes most frequently related
to that code. Easy-to-view notes help you pinpoint the
correct codes when multiple options apply. And, for
quick reference, you can even place your own notes at
the codes you use again and again.
✓ About the Screen Illustrations
Some screen illustrations in this User’s Manual
may vary slightly from what you see on screen.
These variations do not mean that this digital book
or your Digital Book System is malfunctioning.
™
combines the three coding
, 4th Edition (ICD-9-CM);
, 7th Edition (HCPCS).
™
, you’ll be able to quickly lo-
,
, 9th Re-
4
Page 6
Key Guide
Function Keys
CLEAR
MENU
GAMES
MORE
LIST
SPEC
CARD
ON/OFF
DN/UP Page down or up.
1
+ At menus, go to the first or last item.
1
+ DN/UP At descriptions, go to the next or previous
BACK
ENTER
HELP
SHIFT
1
The gold key at the bottom left of the keyboard.
Clears to the Default State.
Displays the main menus.
Has no function in this digital book.
Finds more matches after a word search.
Displays your note list from descriptions.
Displays the outline and goes up outline
levels from descriptions.
Exits the digital book.
Turns the Digital Book System on or off.
Direction Keys
Scroll, or move the cursor or highlight.
At descriptions, go to the next or
previous code.
code. After word searches, display the next
or previous outline location of a match.
Other Keys
Erases a typed letter, or displays the
previous screen.
Selects a menu item, enters search word(s),
or starts the highlight at descriptions.
Displays an appropriate help message.
Shifts keys to type capitals .
5
Page 7

Key Guide
Getting Started
Other Keys (cont’d.)
SPACE
? *
SHIFT
+
+
+
+
+ Q etc. On the DBS-1 or DBS-2, types numbers.
A
D
E
G
H
I
2
Hold the gold key while pressing the other key.
3
Quick Keys can be used only when codes and their descrip-
tions are on screen.
Types a space or pages down.
At menus, displays a highlighted item.
At descriptions, displays Outline location.
+
Types an asterisk to stand for unknown
? *
letters in a search word.
Gold Key Combinations
BACK
At an outline level or index entry, go to
the Outline or Index menu.
CARD
Sends a word between installed
digital books in order to look it up.
At any outline level, goes to codes and
ENTER
descriptions. At codes and descriptions,
highlights the top note symbol.
Places a note at codes and descriptions.
N
Quick Keys
Displays all the instructions for a code.
Displays a Crosswalk to ICD-9 codes.
Displays an Exclude instruction.
Displays a Guideline.
Displays a Crosswalk to HCPCS codes.
Displays an Include instruction.
3
2
6
Page 8

Getting Started
If you’re using this digital book
for the first time,
read this section.
You’ll learn how to get started
and become acquainted
with its main features.
7
Page 9
Installing the Digital Book
You must install this digital book in your Digital Book
System before you can use it.
WARNING: Never install a digital book when the Digital Book System is on. If you do, information that you
entered in any other installed digital book may be
erased.
1. Turn off the Digital Book System.
2. Install the digital book into a slot on the back.
3. Press
4. If needed, turn the wheel on the side of the Digi-
5. Press
6. Press
ON/OFF
.
tal Book System to adjust the screen contrast.
If the screen is still blank, check the batteries.
CARD
.
or to highlight the appropriate icon.
7. Press
ENTER
to select it.
✓ Resuming Where You Left Off
Should you forget to turn off the Digital Book System while using this digital book, the Digital Book
System will shut off automatically after a few minutes. When you turn the Digital Book System on
again, the screen that you last viewed appears.
8
Page 10
Viewing a Demonstration
Before you start using this digital book, you may want
to view a demonstration of what it can do.
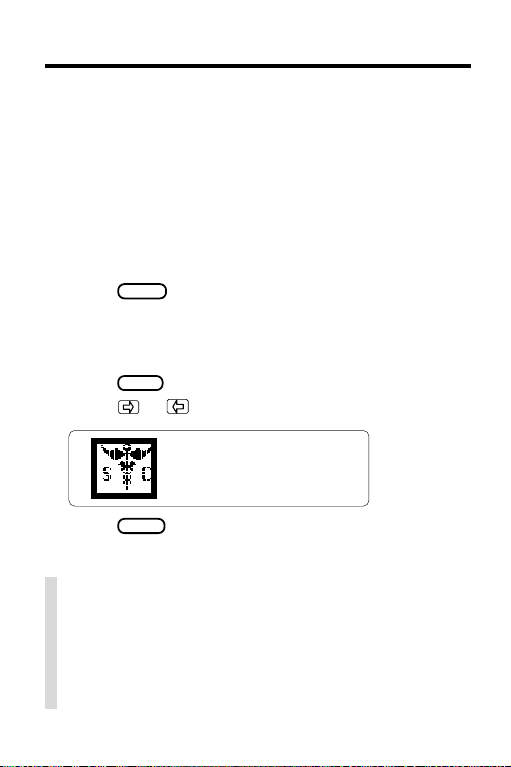
1. Press
2. Press
3. Press the arrow keys to highlight
CLEAR
MENU
View Demo
.
.
on the Other menu.
4. Press
ENTER
to start the demonstration.
5. If you want to stop the demonstration,
CLEAR
press
.
✓ Using the Menus
• The flashing arrows at the bottom right of the
screen show which arrow keys you can press to
move through menus or text.
• Slanted arrows to the right of menu items indicate
that submenus exist.
• To view the full text of a menu item that is only partially visible, highlight the item and then press
✓ Help is Always at Hand
You can view an appropriate help message at virtually any screen by pressing
or the DN key to read it. Press
HELP
. Then press
BACK
to exit help.
? *
.
9
Page 11
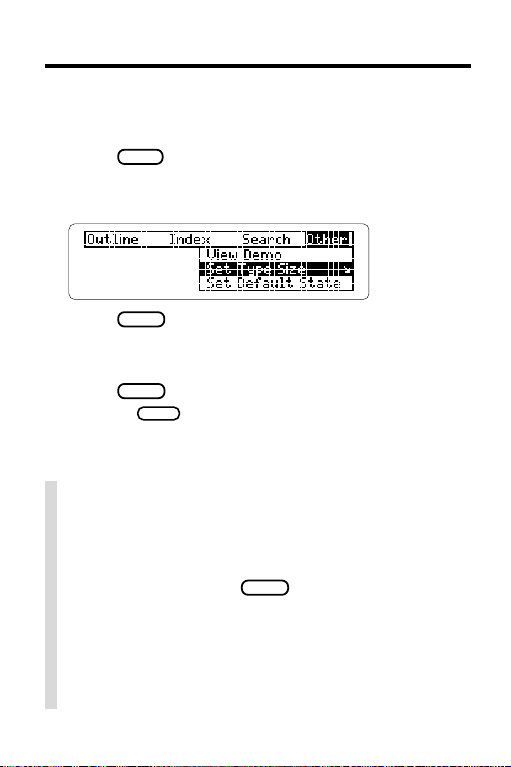
Changing Settings
You can change the Type Size, Default State, and
Shutoff T ime of this digital book.
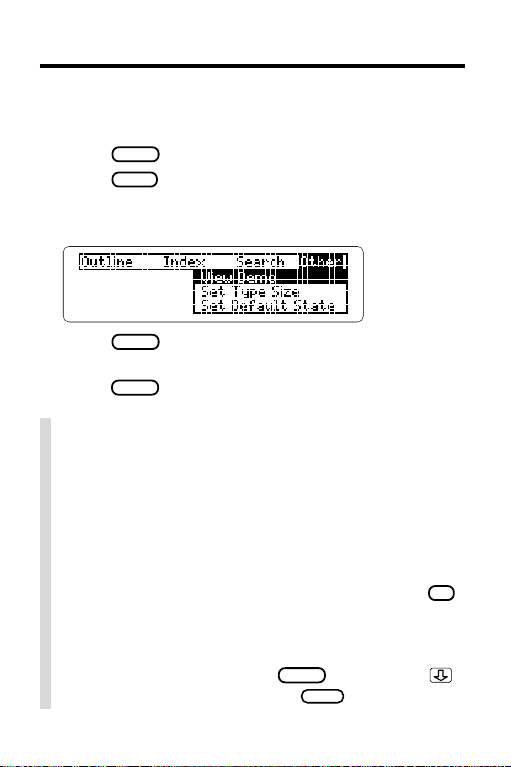
MENU
1. Press
2. Press the arrow keys to highlight
Default State
.
, or
Set Shutoff
Set Type Size, Set
on the Other menu.
3. Press
ENTER
to view the settings.
A check marks the current setting.
4. Highlight a setting.
5. Press
Or press
ENTER
to select it.
BACK
to keep the current setting.
✓ Understanding Settings
• The
T ype Size
characters appear on screen.
• The
Default State
whenever you press
Search
appears. If you select
menu,
• The
Shutoff Time
System stays on if you forget to turn it off.
10
sets how large letters and other
sets the screen that appears
CLEAR
. If you select
as the Default State, the search screen
Outline menu
that menu is highlighted.
sets how long the Digital Book
or
Word
Index
Page 12

Finding Codes
This section explains
how to locate
CPT, ICD-9, and HCPCS codes
using the indexes,
word searches, and the outlines.
To fine-tune your coding,
refer to the next section,
“Viewing Codes and Notes.”
11
Page 13

Using the Indexes
The fastest way to find codes is to use the indexes.
Entering T opics
▲
If you want to find a code for a procedure, condition, or
topic, enter the word at an index. Try this example.
1. Press
2
. Highlight a book on the Index menu (e.g.,
3. Press
4. Start typing a topic (e.g.,
MENU
ENTER
.
CPT
).
.
X-Ray
).
5. When the topic is highlighted, press
6. Highlight a subtopic (e.g.,
and then press
ENTER
Chest
.
ENTER
)
To highlight it, scroll down or type the subtopic.
7. Highlight a sub-subtopic (e.g.,
and then press
ENTER
.
71010-71022
To view the Outline location of the top code on screen,
press
8. Press
? *
. Then press
CLEAR
when done.
BACK
to go back to the code.
12
.
)
Page 14

Using the Indexes
▲
Entering Codes
If you already know a code number and want to view
its description, use the list of codes at the top of each
index. Here is an example.
1. Press
2. Press the arrow keys to highlight a book
on the Index menu (e.g.,
3. Press
MENU
ENTER
.
ICD-9
).
.
4. Press
5. Type a code (e.g.,
ENTER
to select
465
List of ICD-9 Codes
).
If you’re using a DBS-1 or DBS-2 model Digital
Book System, hold
and press the numbered
keys to type numbers.
6. When the code is highlighted, press
To go back to the list of codes, press
7. Press
CLEAR
when done.
BACK
ENTER
.
.
.
13
Page 15

Using Word Searches
You can also find codes by searching for words in their
descriptions. Word searches are useful when you’re
not sure of the full name of a procedure or condition.
After a word search, only outline menu items and index
entries with matches (i.e., occurrences of the search
words) are listed on the menus. The numbers in the
menu titles show how many matches are in each menu.
Note also that you can’t type numbers in a word
search. To learn how to find codes by entering their
numbers, read the “Using the Indexes” chapter.
1. Press
2. Press the arrow keys to highlight
on the Search menu.
3. Press
4. Type one or more words (e.g.,
You don’t need to type capitals. To erase a letter,
press
MENU
.
Word Search
ENTER
.
amniocentesis
BACK
. To move the cursor, press or .
).
5. Press
ENTER
to search for matches.
This is the location of the first match.
14
Page 16

Using Word Searches
After you enter a word search, matches in the outlines are displayed first.
6. Hold and press the DN key repeatedly to view
the locations of other matches in the outlines.
You can view the match in a code description by
pressing
ENTER
.
To view a menu item that is only partially visible (i.e.,
is followed by ellipses), press
7. When
Remaining Matches in Index
MENU
to view the matches on the Index menu.
? *
.
appears, press
8. Press the arrow keys to highlight an Index entry .
ENTER
9. Press
repeatedly to view the item,
subitems, and codes.
MENU
To return to the menus, press
10. Press
CLEAR
to clear your search.
.
15
Page 17

Using Word Searches
✓ If You Misspell a Search Word
Don’t worry. A list of corrections automatically appears after you enter the word. Simply highlight a
correction and then press
ENTER
to search for it.
✓ Searching for Completions
If you’re not sure which form of a word to search for,
type an asterisk in place of a series of letters (e.g.,
bacter
press
Press
✻
). To type an asterisk, hold
? *
.
ENTER
to view its completions. Then select a
SHIFT
and
completion to search for its matches.
✓ Highlighting Search Words
When codes and descriptions are on screen, you
can also search for words by highlighting them.
First, press
the arrow keys to highlight the word for which you
want to search.
ENTER
to start the highlight. Then press
Then press
16
ENTER
to search for its matches.
Page 18

Narrowing Y our Searches
If your word search finds too many matches, it’s easy
to narrow your search by adding more search words.
Try this example.
1. Press
2. Press the arrow keys to highlight
on the Search menu and then p
3. Enter a word (e.g.,
This search finds too many matches to read.
4. Press
Or press
under
5. Type a space and another word (e.g.,
MENU
BACK
.
MENU
Search,
.
kidney
, highlight
and then press
Word Search
ENTER
ress
.
).
Change Search Query
ENTER
.
dialysis
)
6. Press
ENTER
to search for the phrase.
This search finds only one match.
7. Press
ENTER
repeatedly to view it.
✓ Expanding Your Searches
You can also expand your word searches by press-
MORE
ing
pears). Each time that you press
previous matches are discarded and new matches
of synonyms and similar words are found.
up to five times (or until
No more
MORE
, the
ap-
17
Page 19

Using the Outlines
The Outline menu lists the tables of contents (i.e., outlines) for the CPT, ICD-9, HCPCS. If you know which
chapter contains a code that you want, you can use
the outlines to find it.
1. Press
2. Press
3. Press the arrow keys to highlight a book
CLEAR
.
MENU
.
on the Outline menu (e.g.,
HCPCS
).
4. Press
5. Highlight a chapter (e.g.,
Orally
ENTER
.
) and then press
11 Drugs Administered
ENTER
.
To highlight a chapter, scroll down to it or type its
number (e.g.,
hold
11
). To go to the last or first chapter ,
and press or . To go directly a chap-
ter title to codes and descriptions, hold and
ENTER
press
6. Highlight a section (e.g.,
) and then press
tic
.
Non-Chemotherapeu-
ENTER
.
7. To back up through outline levels, press
8. Press
CLEAR
when done.
18
BACK
.
Page 20

Using the Outlines
✓ Viewing CPT Modifiers
CPT modifiers are listed as the last item on the CPT
outline. T o view them, first highlight
Outline menu and then press
(for modifiers) and
M
Modifiers
ENTER
. Then highlight a modifier and press
to view it.
ENTER
CPT
ENTER
. Then press
to select
on the
M CPT
✓ Viewing ICD-9 V Codes
The codes for Supplementary Classification of Factors Influencing Health Status and Contact with
Health Services (V01-V82) are listed as the last
item on the ICD-9 outline. To view them, select
ICD-9
on the Outline menu and then press
V
(for V codes). Then highlight a V code and press
ENTER
to view it.
✓ Viewing Complete Menu Items
To view the full text of a menu item that is only partially visible, highlight the item and then press
? *
.
19
Page 21

Viewing Codes and Notes
This section shows you how
to fine-tune your coding
to determine the correct code.
You’ll learn how to scan
codes and their descriptions,
use Crosswalks
to quickly find related codes,
and view instructions
and other notes that provide
important information
about the codes.
20
Page 22

Viewing Descriptions
Once codes and their descriptions are on screen, it’s
easy to scan and read them.
1. Find a code and its description
(e.g., CPT code 59400 (
Use the Outline menu or the Index menu to find it.
To learn how, read “Finding Codes.”
2. Use these Direction Keys to view adjacent
codes and descriptions:
T o. . . Press. . .
Scroll down or up
Page down or up the UP or DN key
Page down
View the next or previous + UP or DN
code and description
Routine obstetric care
or
SPACE
+ or
).
3. Press
CLEAR
when done.
21
Page 23

Viewing Descriptions
✓ Where in the Book Are You?
Whenever a code and its description is on screen,
you can view its location in the outline of the appropriate book by pressing
? *
.
To go back to the codes and descriptions, press
BACK
.
Please note that when you press
? *
, you do not
go to the Outline menu itself but to a snapshot of
your current location in the outline of the appropriate book. To learn how to use the outlines to
change locations when you’re viewing codes and
descriptions, read the note below.
✓ Changing Your Outline Location
You can change the Outline location when codes
and descriptions are in view by pressing
Then you can press
SPEC
repeatedly to move up
through the levels of the outline to select another
code.
SPEC
.
22
Page 24

Viewing Guidelines
Many CPT , ICD-9, and HCPCS codes have Guidelines
that provide useful coding information. Try this example.
1. Find CPT code 63012 (
To learn how, read “Finding Codes.”
The in the description indicates a Guideline.
2. Press
to view the Guideline.
G
To learn how to view the cross-references in Guidelines, read “Viewing Figures and References.”
3. Press
BACK
to go back to the code.
✓ Another Way to View Guidelines
As shown above, one way to view a Guideline is to
press
at the top of the screen.
To view a Guideline for a code not at the top of the
screen, press
highlight
its Guideline.
when the code that you’re interested in is
G
ENTER
on screen. Then press
G
Laminectomy
).
and then the arrow keys to
ENTER
to view
23
Page 25

Using Crosswalks
As shown in the example below, Crosswalks are
cross-references that take you directly from CPT
codes to related ICD-9 or HCPCS codes. Each Crosswalk lists up to 15 ICD-9 or HCPCS codes.
Please note that Crosswalks are based upon studies
showing which ICD-9 and HCPCS codes are used
most often with various CPT codes. Crosswalks don’t
provide a complete list of related codes, so you may
need to find another code to meet your needs.
1. Find CPT code 10040 (
To learn how, read “Finding Codes.”
The and the indicate Crosswalks.
2. Press H for HCPCS codes or D for ICD-9 codes.
These ICD-9 codes are related to CPT code 10040.
3. Press to highlight a code and then press
ENTER
to view it.
4. To go back to the Crosswalks, press
5. To go back to the CPT code, press
Acne Surgery
).
BACK
BACK
again.
.
24
Page 26

Viewing Instructions
Many ICD-9 codes have special instructions that you
should view before coding a disease or injury.
• Fourth-and-Fifth-Digit ( ) instructions tell you
when an ICD-9 code needs a fourth or fifth digit.
• Exclude (
that cannot be included in an ICD-9 code.
• Include ( ) instructions tell you about conditions
that may be included in an ICD-9 code.
Try this example.
1. Find ICD-9 code 685 (
To learn how, read “Finding Codes.”
2. Press F to view the Fourth-and-Fifth-Digit,
the Exclude, or I the Include instructions.
E
Or press
an icon. Then press
) instructions tell you about conditions
Pilonidal cyst
ENTER
and then the arrow keys to highlight
ENTER
again.
).
This is the Exclude instruction.
3. Press to scroll down.
4. Press
BACK
to go back to the code.
25
Page 27

Viewing Instructions
✓ Viewing All the Instructions
Rather than viewing the instructions, Guidelines,
and other notes for a code one at time, you can
view them all at once by scrolling down until the desired code is at the top of the screen and then
pressing
The instructions appear as a single message, with
their various titles in boldface type. Scroll down to
read them and then press
code and its description.
(for all instructions).
A
BACK
to go back to the
26
Page 28

Viewing Figures and References
Many codes, Guidelines, and instructions have additional notes such as bibliographic references (
ures (
references (
), general footnotes ( ), and cross-
). You view these notes by highlighting
and selecting their symbols, as shown below.
1. Find the Exclude instruction for ICD-9 code 001
(
Cholera
).
To learn how, read “Finding Codes” and “Viewing Instructions.”
2. Hold
and press
ENTER
.
Notice that the is highlighted. You could have
also highlighted it by pressing
ENTER
and then the
arrow keys.
3. Press
ENTER
to view the cross-reference.
Cross-references take you directly to the relevant
code or note.
4. Press the Direction Keys to read.
5. T o go back to the highlighted symbol, press
6. To turn off the highlight, press
BACK
), fig-
BACK
.
.
27
Page 29

Using Your Own Notes
You can place your own notes at codes and their descriptions. Then you can use your notes as bookmarks
to quickly find the codes that you use most often.
▲
Placing Notes
The number of notes you can place depends upon the
number of characters entered in each note.
1. When codes and their descriptions
are on screen, press
LIST
.
2. Press
ENTER
to select
Add note
.
3. Type a note of your own and then press
Or press
The
ENTER
to add the note already typed.
marks the placement of the note.
▲
Finding and Removing Notes
To view or remove a note, you must first find it.
1. At any codes and descriptions, press
2. Press
28
to highlight a note.
LIST
ENTER
.
.
Page 30

Using Y our Own Notes
Type its first few letters or scroll to it.
3. Press
ENTER
to view the placement of the note.
You can view the note itself now by holding
pressing
ENTER
and then pressing
back to the codes and descriptions, press
4. To remove the note, press
ENTER
press
to select
Remove note
LIST
ENTER
. T o go
and then
.
BACK
✓ A Quick Way to Place Notes
You can quickly place a note at a code and its description by holding
ther press
ENTER
and pressing N. Then ei-
to place the pre-typed note or
enter your own note.
✓ Removing All Your Notes
You can remove all your notes at one time by resetting the Digital Book System when this digital book
is installed. To learn how to reset the Digital Book
System, read “Using the Digital Book System.”
WARNING: Resetting the Digital Book System
erases information that you have entered in any installed digital books. So remove other digital books
before resetting your Digital Book System.
and
.
29
Page 31

Appendixes
This section reviews
general functions
of the Digital Book System
and digital books.
30
Page 32

Looking Up Words in Other Books
You can send words between this digital book and certain other installed digital books in order to look up the
words. For example, you might see a condition listed
in the
Pocket PDR
in the
SMARTCODER
In order to look up words from or in another installed
digital book, both books must be able to send and receive words. To learn if they can, read their User’s
Manuals.
1. Install both books in your Digital Book System.
2. Press
CARD
3. Highlight a word in the sending digital book.
To learn how, read the appropriate section of its
User’s Manual.
4. Hold
5. Select the receiving digital book.
The word that you highlighted appears in the
initial screen of the receiving digital book.
6. Press
ENTER
If a match is found for the word, you can view text
using the Direction Keys.
7. To return to the sending digital book,
CARD
press
™
(IC-151) that you want to look up
™.
and select the sending digital book.
and press
CARD
.
to search for the word.
and then select its symbol.
31
Page 33

Using the Digital Book System
▲
Resetting the Digital Book System
To reset the Digital Book System, hold
pressing
ON/OFF
. Or press the recessed reset button on
the back of the Digital Book System. (Read its Basic
Operating Guide for details.)
WARNING: Resetting the Digital Book System may
permanently erase information, such as notes, that
you have entered in the installed digital books.
If the keyboard fails to respond or if the screen performs erratically , you can press
ON/OFF
rather than resetting the Digital Book System. If
nothing happens, then reset.
▲
Protecting and Cleaning
• Do not bring statically charged objects in touch with
the metal contacts on the back of digital books or the
rubber contacts on the Digital Book System. Statically charged objects may erase information that you
entered in the digital books.
• Do not put excessive weight on digital books or the
Digital Book System or expose them to extreme or
prolonged heat, cold, or other adverse conditions.
• To clean digital books, apply isopropyl alcohol with a
cotton swab. To clean the Digital Book System,
apply a mild household cleaner with a soft cloth.
CAUTION: Spraying liquids on digital books or the
Digital Book System may damage them.
CLEAR
CLEAR
and then press
while
®
32
Page 34

Using the Digital Book System
▲
Replacing the Batteries
The DBS-1 and DBS-2 use four 3-volt, CR2032 lithium
batteries. The DBS-2D uses four 1.5-volt, AA batteries.
1. Have new batteries ready.
2. Turn the Digital Book System off.
3. Slide the battery cover off the back.
4. Remove all the batteries.
5. Place new batteries in the cavities,
with their pluses oriented correctly.
In the DBS-1 and DBS-2 the pluses should face you.
6. Replace the battery cover.
✓ Battery Precautions
When you replace batteries, follow these precautions to avoid erasing information in any installed
digital books.
• Replace the batteries before they lose all power.
• Never remove the batteries while the Digital Book
System is on.
• Once the batteries have been removed,
install new ones within two minutes.
• Never mix old and new batteries.
33
Page 35

Limited Warranty (U.S. only)
FRANKLIN warrants to you that the DIGITAL BOOK will be free from defects in materials and
workmanship for one year from purchase. In the case of such a defect in your DIGITAL
BOOK, FRANKLIN will repair or replace it without charge on return, with purchase receipt,
to the dealer from which you made your purchase or Franklin Electronic Publishers, Inc., 122
Burrs Road, Mt. Holly, NJ 08060, within one year of purchase. Alternatively, FRANKLIN may,
at its option, refund your purchase price.
Data contained in the DIGITAL BOOK may be provided under license to FRANKLIN.
FRANKLIN makes no warranty with respect to the accuracy of data in the DIGITAL BOOK.
No warranty is made that the DIGITAL BOOK will run uninterrupted or error free. You assume
all risk of any damage or loss from your use of the DIGITAL BOOK.
This warranty does not apply if, in the sole discretion of FRANKLIN, the DIGITAL BOOK has
been tampered with, damaged by accident, abuse, misuse, or misapplication, or as a result
of service or modification by any party, including any dealer, other than FRANKLIN. This
warranty applies only to products manufactured by or for FRANKLIN. Batteries, corrosion or
battery contacts and any damage caused by batteries are not covered by this warranty. NO
FRANKLIN DEALER, AGENT, OR EMPLOYEE IS AUTHORIZED TO MAKE ANY
ADDITIONAL WARRANTY IN THIS REGARD OR TO MAKE ANY MODIFICATION OR
EXTENSION OF THIS EXPRESS WARRANTY.
THE FOREGOING WARRANTY IS EXCLUSIVE AND IS IN LIEU OF ALL OTHER EXPRESS
OR IMPLIED WARRANTIES, WRITTEN OR ORAL, INCLUDING, BUT NOT LIMITED TO,
WARRANTIES OF MERCHANTABILITY OR FITNESS FOR A PARTICULAR PURPOSE.
YOUR SOLE AND EXCLUSIVE REMEDY SHALL BE FRANKLIN’S OBLIGATION TO
REPLACE OR REFUND AS SET FORTH ABOVE IN THIS WARRANTY. Some States do
not allow the exclusion of implied warranties, or limitations on how long a warranty lasts. This
warranty gives you specific rights; you may also have additional rights which vary from State
to State. This warranty shall not be applicable to the extent that enforcement of any provision
may be prohibited by applicable law.
FRANKLIN SHALL IN NO EVENT BE LIABLE TO YOU OR TO ANY OTHER PERSON FOR
ANY SPECIAL, INCIDENTAL, OR CONSEQUENTIAL DAMAGES, OR ANY OTHER
INDIRECT LOSS OR DAMAGE, ARISING OUT OF YOUR PURCHASE, THE
MANUFACTURE OR SALE OF THE DIGITAL BOOK, THIS LICENSE, OR ANY
OBLIGATION RESULTING THEREFROM OR THE USE OR PERFORMANCE OF THE
DIGITAL BOOK UNDER ANY LEGAL THEORY, WHETHER BREACH OF CONTRACT,
TORT, STRICT LIABILITY OR ANY OTHER CAUSE OF ACTION OR PROCEEDING,
WHICH DAMAGES SHALL INCLUDE, BUT NOT BE LIMITED TO, LOST PROFITS,
DAMAGES TO PROPERTY, OR PERSONAL INJURY (BUT ONLY TO THE EXTENT
PERMITTED BY LAW). FRANKLIN’S ENTIRE LIABILITY FOR ANY CLAIM OR LOSS,
DAMAGE, OR EXPENSE FROM ANY SUCH CAUSE SHALL IN NO EVENT EXCEED THE
PRICE PAID FOR THE DIGITAL BOOK. THIS CLAUSE SHALL SURVIVE FAILURE OF AN
EXCLUSIVE REMEDY.
This license and warranty is governed by the laws of the United States and the State of New
Jersey.
Customer Service
If you have a problem with this digital book, refer to the limited warranty information. If you purchased this digital book outside the United States, contact the
place of purchase to obtain warranty or repair information.
34
Page 36

Index
? key 9, 12, 15, 16, 22
A key 26
Add Note 28
Arrows
flashing on screen 9
slanted in menus 9
Auto-resume feature 8
Batteries
precautions 33
replacing 33
(BIB) Bibliographic references
27
Changing
settings 10
Code descriptions 21
Completions 16
Copyrights 2
Correcting misspellings 16
CPT modifiers 19
Cross-references 27
Crosswalks
defined 24
using 24
Customer service 34
D key 24
Default state 10
Demonstration, viewing 9
Descriptions (of codes) 21
Digital Book System
protecting and cleaning 32
resetting 32
Direction keys 5, 21
E key 25
Erasing letters 14
Exclude instructions 25
F key 25
(FIG) Figures 27
Finding notes 28
(FOOT) Footnotes 27
Fourth-and-fifth digit instruc-
tions 25
Function keys 5
G key 23
Gold key combinations 6
Guidelines 23
H key 24
Help messages 9
Highlighting
digital book symbols 8
menus and menu items 9
I key 25
Include instructions 25
Index
entering codes 13
entering topics 12
Instructions, general use
of 25
Key Guide 5-6
LIST key 28
Menus
highlighting items 9
Index 13
Other 9-10
Outline 18
Search 14
using 9
viewing 9
MORE key 17
N key 29
NOTE symbol 28
35
Page 37

Index
Notes
finding 28
placing 28
using GOLD + N 29
using LIST 28
removing
all at once 29
individually 28
Other menu 9-10
Outline location 12, 22
Outline, using 18
Patents 2
Placing notes
using GOLD + N 29
using LIST 28
Quick keys 6
Removing notes
all at once 29
individually 28
Resetting the Digital Book
System 32
Resuming 8
Searching for words
between digital books 31
by entering them 14
by highlighting them 16
completions 16
expanding searches 17
narrowing searches 17
spelling correction 16
Set Default State 10
Set Type Size 10
Settings
changing 10
FCR-28076-00 Printed in U.S.
P/N 7201761 Rev. A
understanding 10
Shutoff time 10
SPEC key 22
Spelling correction 16
Submenus 9
Text Search 10
Trademarks 2
Type size 10
Typing
asterisks 16
capitals 14
numbers 13, 14
V codes (ICD-9) 19
Viewing
code descriptions 21
complete menu
items 15, 19
CPT modifiers 19
demonstration 9
full menu items 9
Guidelines 23
help messages 9
instructions 25
instructions for a code
all at once 26
instructions of a code
individually 25
main menus 9
Outline location 22
Outline locations of
codes 12
V codes (ICD-9) 19
Warranty 34
XREF (cross-references) 27
36
Page 38

Electronic Publishers
 Loading...