

Page 1

Electronic Publishers
For Use with the Franklin
Digital Book System
®
IC-142
DIGITAL BOOK
SCHEDULE
JUNE
9
7
8
6
4 5
1 2
3
X
0
÷
=
ORGAN
ORGAN
12
12
9
9
6
6
i
Z-IT
i
Z-IT
™
F
3
3
™
User’s Manual
Page 2

License Agreement
READ THIS LICENSE AGREEMENT BEFORE USING THE DIGITAL
BOOK. YOUR USE OF THE DIGITAL BOOK DEEMS THAT
YOU ACCEPT THE TERMS OF THIS LICENSE. IF YOU DO
NOT AGREE WITH THESE TERMS, YOU MAY RETURN
THIS PACKAGE WITH PURCHASE RECEIPT TO THE
DEALER FROM WHICH YOU PURCHASED THE DIGITAL
BOOK AND YOUR PURCHASE PRICE WILL BE
REFUNDED. DIGITAL BOOK means the software product
and documentation found in this package and FRANKLIN
means Franklin Electronic Publishers, Inc.
LIMITED USE LICENSE
All rights in the DIGITAL BOOK remain the property of
FRANKLIN. Through your purchase, FRANKLIN grants you
a personal and nonexclusive license to use the DIGITAL
BOOK on a single FRANKLIN Digital Book System at a time.
You may not make any copies of the DIGITAL BOOK or of the
data stored therein, whether in electronic or print format.
Such copying would be in violation of applicable copyright
laws. Further, you may not modify, adapt, disassemble,
decompile, translate, create derivative works of, or in any
way reverse engineer the DIGITAL BOOK. You may not
export or re-export, directly or indirectly, the DIGITAL BOOK
without compliance with appropriate governmental
regulations. The DIGITAL BOOK contains Franklin’s
confidential and propriety information which you agree to
take adequate steps to protect from unauthorized disclosure
or use. This license is effective until terminated. This license
terminates immediately without notice from FRANKLIN if you
fail to comply with any provision of this license.
1
Page 3

Contents
Key Guide ........................................................ 4
Introduction ...................................................... 6
Getting Started.......................................... 7
Installing the Organiz-It ................................... 8
Selecting T opics ............................................... 9
Tips for Beginners .......................................... 10
Viewing Help .................................................. 12
Clock .......................................................... 13
Setting the Date and Time.............................. 14
Schedule .................................................... 16
Making Schedule Entries ............................... 17
Finding Schedule Entries ............................... 18
Changing Schedule Entries............................ 20
Viewing the Next Appointment ....................... 21
Calendar..................................................... 22
Viewing Calendars ......................................... 23
Viewing Schedule Entries .............................. 24
Scheduling from the Calendar........................ 25
Phone Books ............................................. 26
Making Phone Book Entries........................... 27
Finding Phone Book Entries........................... 28
Using the Locate Menu .................................. 30
Changing Phone Book Entries ....................... 31
2
Page 4

Contents
World Time................................................. 32
Finding Locations ........................................... 33
Scanning the Menu ........................................ 34
Entering Locations ......................................... 35
Changing Locations ....................................... 36
Calculator................................................... 37
Making Calculations ....................................... 38
Using Previous Results .................................. 39
To Do .......................................................... 41
Making a To Do List........................................ 42
Finding & Changing To Do Entries ................. 43
$
Expenses ................................................... 44
Making Expense Entries ................................ 45
Finding & Changing Expenses....................... 46
Calculating Expenses..................................... 47
Protecting Information.............................. 48
Assigning a Password.................................... 49
Gauging the Memory...................................... 50
Copying an Organiz-It .................................... 51
Copying to and from PCs ............................... 52
Appendix.................................................... 55
®
Digital Book System
..................................... 56
Limited Warranty ............................................ 58
Index .............................................................. 59
3
Page 5

Key Guide
Function Keys
CLEAR
MENU
GAMES
MORE
SPEC
CARD
BACK
ENTER
ON/OFF
SHIFT
SPACE
? *
DN or UP Page down or up. (In Calculator, scroll.)
4
Clears to the main screen of a topic.
Shows the main menus.
No function.
Shows special characters to type.
LIST
Locks top row of letters to type numbers
(DBS-1 & -2 only).
Shows special menus.
Exits the Organiz-It.
Other Keys
Backs up (e.g., erases typed characters).
Makes an entry or selects a menu item.
HELP
Shows a help message.
Turns the Digital Book System on or off.
Shifts keys to type punctuation, capitals, etc.
Types a space.
Shows a complete menu item.
Direction Keys
Scroll or move the cursor.
+ Jump to the top or bottom of a menu or
entry.
+ DN/UP Show the next or previous entry or
match.
Page 6

Key Guide
Gold Key Combinations*
A
+
+
+
+
+
+
+
+
+
+
+
+
+
+
M
N
S
X
CARD
Selects the Personal Phone Book.
B
Selects the Business Phone Book.
C
Selects the Clock.
D
Selects the Calendar (dates).
F
Selects World Time (foreign).
G
Selects To Do (goals).
Selects the Calculator (math).
Shows the next appointment.
Selects the Schedule.
Selects the Expenses.
BACK
Exits an entry without saving changes.
Sends search word to another digital book.
ENTER
Saves an entry or changes.
SHIFT
Types special characters when pressed
with letter keys.
Calculator Only Keys
+
+
+
+
SHIFT
+
* Hold the Gold key while pressing the other key.
Calculates a percentage (%).
H
Squares a number (n2).
J
K
Calculates a square root (√n).
L
Calculates a reciprocal (1/n).
, -
Types a negative number (–n).
5
Page 7

Introduction
Y our Organiz-It
organizer that works in your Digital Book System
™
is a powerful and portable personal
®
.
This unique organizer has nine main functions, or
topics: Business Phone, Schedule, World Time,
Clock, Calendar, Calculator, Personal Phone, T o Do,
and Expenses.
The Organiz-It can also communicate with personal
computers via the serial port on certain Digital Book
System models. This feature lets you copy information to and from personal computers for backup or
editing.
Y our information is also protected by a built-in battery, which saves your information when the OrganizIt is not installed in the Digital Book System. A
user-designated password provides additional safety.
The Organiz-It also features powerful Schedule and
Phone Book searching, multiple-day Schedule entries, Schedule notes, and more World Time locations.
✓ About Screen Illustrations
Some screen illustrations in this User’s Manual may
vary slightly from what you see on screen. These
variations do not mean that the Organiz-It or your
Digital Book System is malfunctioning.
6
Page 8

Getting Started
If you’re using the
Organiz-It for the first time,
read this section.
It explains basic
terms and tasks
that you need to know.
7
Page 9
Installing the Organiz-It
You must install the Organiz-It digital book in the
Digital Book System before you can use it.
WARNING: Never install a digital book when the
Digital Book System is on. If you do, information entered in it or any other installed digital book(s) may
be permanently erased.
1. Turn off the Digital Book System.
2. Install the digital book into a slot on the back.
3. Press
4. Adjust the screen contrast, if needed.
5. Press
6. Press
ON/OFF
.
If the screen is still blank, check the batteries.
CARD
.
or to highlight the appropriate digi-
tal book symbol.
7. Press
ENTER
.
✓ Resuming Where You Left Off
While using this digital book, you can turn off the
Digital Book System at any time. When you turn
the Digital Book System on again, you return to
the screen that you last viewed.
8
Page 10
Selecting Topics
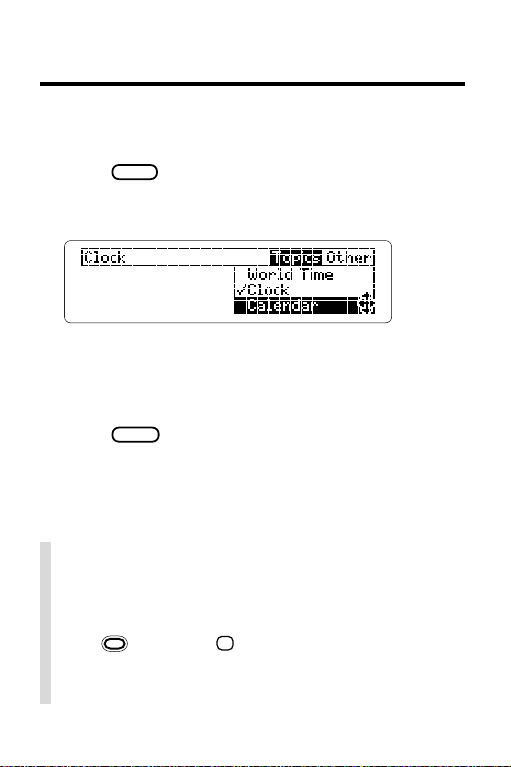
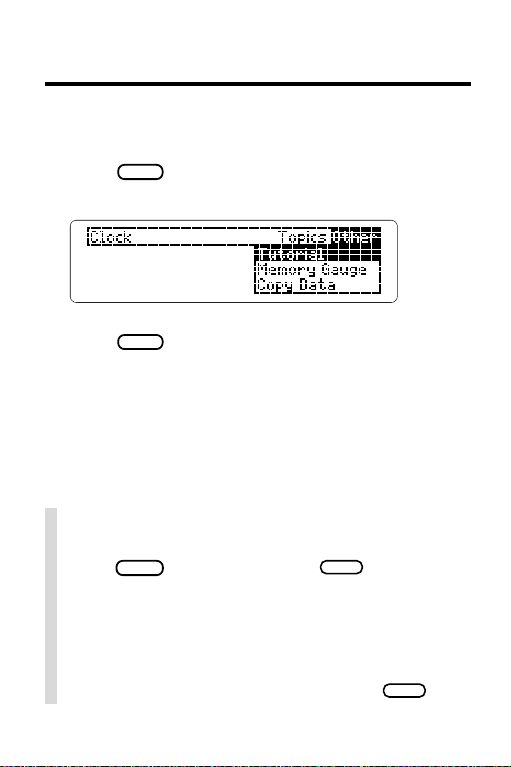
Before you can use one of the main functions, or topics, of the Organiz-It, you must select that topic.
1. Press
2. Press the arrow keys to highlight a topic
3. Press
4. To select another topic, repeat these steps.
MENU
to view the main menus.
on the T opics menu.
A check marks the currently selected topic.
The flashing arrows at the bottom of the screen
show which arrow keys you can press to move
around the screen.
ENTER
to select the topic.
✓ A Quicker Way to Select Topics
Rather than selecting topics from the Topics
menu, you can select them using Gold key combinations. To select the Schedule topic, for example,
hold
Gold key combinations are listed in the Key Guide
and on the Quick Reference Card.
and press S.
9
Page 11
Tips for Beginners
These tips apply to all or most of the topics in the
Organiz-It.
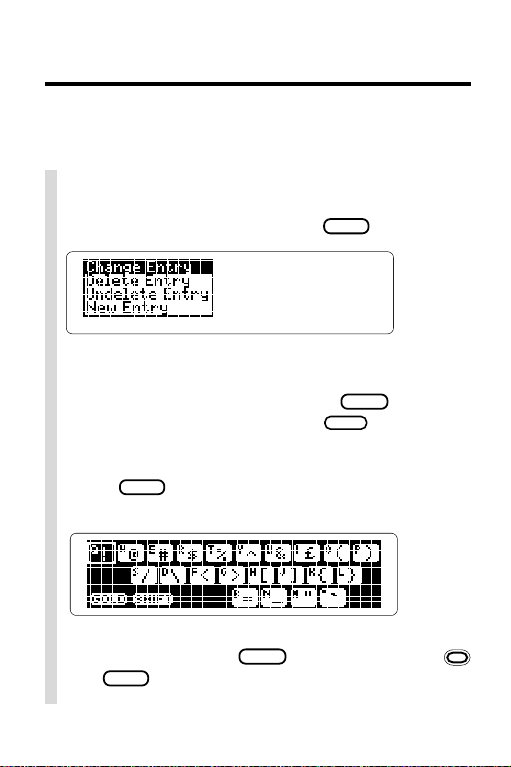
✓ Using Special Menus
Many tasks require you to use special menus. To
view a special menu, you press
This is a special menu.
To select an item on the menu, press the arrow
keys to highlight it and then press
without selecting an item, press
✓ Typing Special Characters
MORE
Press
to view the special characters you
can type at entry and search screens.
SPEC
BACK
ENTER
.
. To exit
.
To type a special character, press the arrow keys
highlight it and press
SHIFT
and
while pressing a letter key to type
ENTER
. You can also hold
these characters.
10
Page 12
Tips for Beginners
✓ Typing and Locking Numbers
If you are using a Digital Book System without
separate number keys, you normally type numbers by holding
and pressing one of the top
row of letters. When using an Organiz-It in these
models, you can lock the top row of letters to type
again.
LIST
. To unlock the
numbers only by pressing
numbers, press
LIST
At some entry lines, such as those requesting
telephone numbers or numeric calculations, the
Organiz-It automatically switches the top-row letter keys to type numbers. If you hold
and
press a top-row letter key in these lines, you can
type letters. However, you cannot use
LIST
to
type letters at these lines.
✓ Viewing Complete Menu Items
Menu items too long to fit on one line are followed
by ellipses. To view the complete item, highlight it
and press
? *
.
Then press
BACK
to back up.
11
Page 13
Viewing Help
Y ou can view a tutorial that explains the basic functions of the Organiz-It.
1. Press
2. Select
3. Scroll down to read.
4. Press
MENU
.
Tutorial
from the Other menu.
MENU
to return to the main menus.
✓ Help is Always at Hand
To view a help message at virtually any screen,
HELP
press
. To exit help, press
BACK
.
✓ Changing the Shutoff Time
The shutoff time is how long the Digital Book System stays on if you forget to turn it off. To change
the shutoff time, select
menu. Then select a new time or press
Set Shutoff
from the Other
BACK
.
12
Page 14

Clock
The Clock can be set
to any time or time zone.
You can also set the Clock to
standard or daylight savings time
and display 12- or 24-hour times.
13
Page 15
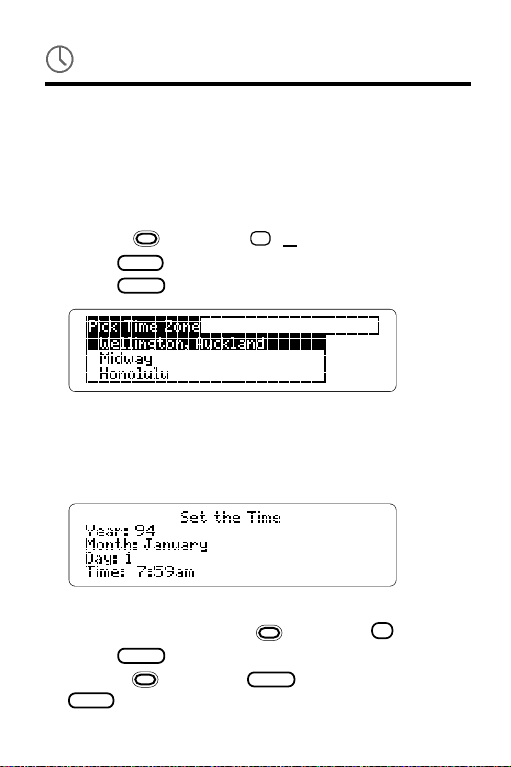
Setting the Date and Time
You should set the Clock the first time that you use the
Organiz-It. You can reset it at any time. The OrganizIt’s built-in battery powers the Clock when the OrganizIt is removed from the Digital Book System.
1. Select
2. Press
3. Press
Or hold
Clock
from the T opics menu.
and press C (Clock).
SPEC
.
ENTER
to select
Set Time Zone
4. Select a time zone.
5. Select
6. Select
7. Select
Daylight Savings
Standard Time
or
Set Date and Time
.
Daylight Time
.
8. Enter a year, month, day, and time.
p
for
p.m
To type
9. Press
ENTER
Or hold and press
SPEC
and select
., hold and press P.
at the last line to save the entry.
ENTER
at any line. Or press
Save Changes
14
.
.
.
Page 16

Setting the Date and Time
✓ Setting the Hour Display
The Clock can display 12- or 24-hour times. To
change the display , press
selected. Then select
play 12 hour Clock
.
SPEC
when the clock is
Display 24 hour Clock
or
Dis-
✓ Setting the Clock to World Times
Y ou can also set the Clock to the time zone of any
World T ime location. Read the World T ime section
of this manual to learn how to find a World Time
location.
With a World Time location in view, press
and then select
Set Clock To This Time Zone
SPEC
.
15
Page 17

Schedule
The Schedule is an
electronic date book.
In it, you can
enter meetings,
annual events,
and notes.
16
Page 18
Making Schedule Entries
Y ou can schedule appointments, meetings, etc.
1. Select
2. Press
3. Press
4. Enter a year, month, day, and time.
5. Enter an event, number of days, and a note.
6. Press
7. Press
Schedule
from the T opics menu.
Or hold and press S (Schedule).
MENU
.
ENTER
To type
p
for
to select
p.m
New Entry
.
., hold and press P.
You must enter an event. The note is optional. If
you leave
Number of days
blank, the entry will be
for one day . However, if you enter a number and
want to change it to one day , you must type a
ENTER
at the last line to save the entry.
Or hold
and press
without saving the entry, hold
MENU
to return to the Schedule menu.
ENTER
at any line. To exit
and press
Your Schedule entry is listed by date and time.
✓ Scheduling Annual Events
To schedule birthdays, anniversaries, and other annual events, select the Schedule and press
Then press
SPEC
and select
New Annual Entry
1
BACK
CLEAR
.
.
.
.
17
Page 19
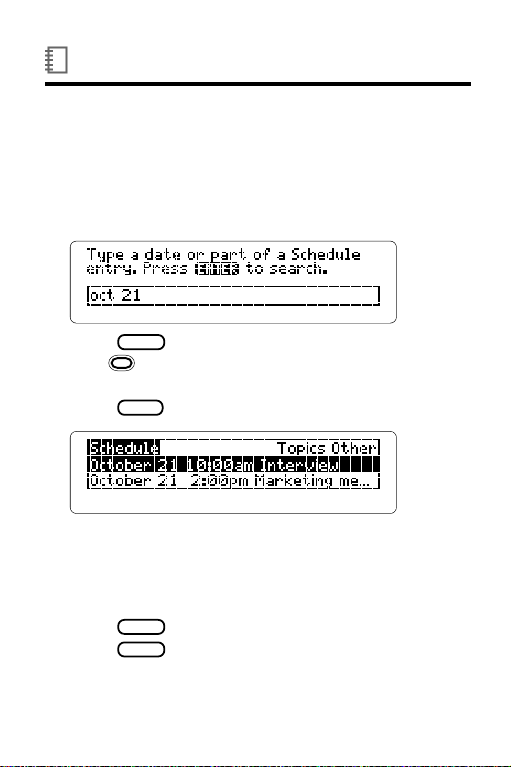
Finding Schedule Entries
You can search for Schedule entries by date or by
words in their event and notes. Read the next page for
all your options.
1. Select the Schedule topic.
2. Type a date or other Schedule search.
3. Press
4. Hold
ENTER
to view the first matching entry .
and press the DN key to view more
matches.
5. Press
MENU
to view all the matches.
After a search, only matching Schedule entries are
listed on the Schedule menu.
6. Highlight a Schedule entry.
Type the entry or scroll to it.
7. Press
8. Press
18
ENTER
to view the entry .
CLEAR
to clear your search.
.
Page 20

Finding Schedule Entries
✓ More Ways to Search the Schedule
Search by. . . For Example. . .
month only
year only
month and year
generic day
jan, feb, mar
1995 or 95
jan 1995
today, yesterday,
tomorrow
generic time period
words in events
and notes
dates followed by
words in events/notes
last week, this month,
next
or
previous year
lunch, ski trip
feb 95 ski trip
✓ Understanding Searches
Search words are case insensitive. If you search
for
john
, you will find
Incomplete words find whole words. If you search
for
market
, you will find entries containing
markets, marketing
Multiple-word searches find only entries containing all the search words. If you search for
meeting
will not be found.
, entries containing only
John
, etc.
.
market
sales
sales
or
meeting
,
19
Page 21
Changing Schedule Entries
Y ou can easily change or delete Schedule entries.
1. Find any Schedule entry.
2. Press
3. Press
4. Enter your changes.
5. Hold and press
6. Press
SPEC
.
ENTER
to select
Or select
Delete Entry
To exit without changing, hold
BACK
. Or press
Changes
Or press
.
SPEC
MENU
to return to the Schedule menu.
Change Entry
and go to Step 6.
SPEC
and select
ENTER
and select
.
and press
Discard
to save the changes.
Save Changes
.
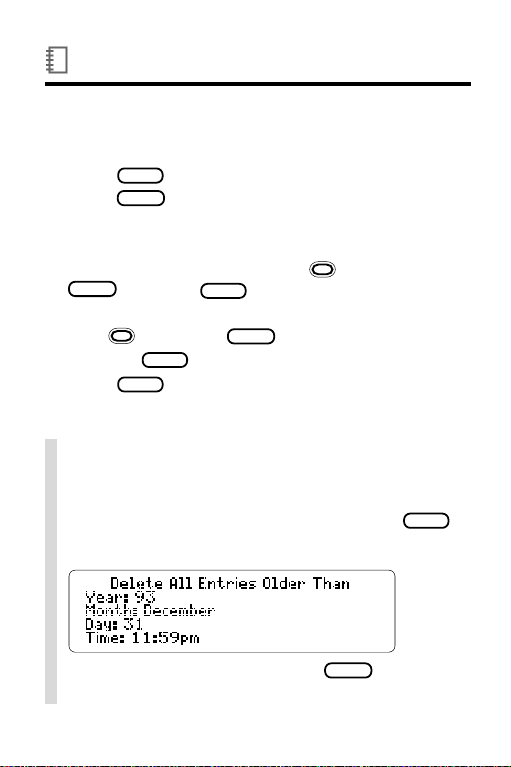
✓ Deleting Entries Older Than a Date
You can delete all your Schedule entries before a
specified date rather than deleting them one at a
time. First, select the Schedule and press
Then select
Delete All Older Than.
SPEC
.
Enter a date and time. Or press
without deleting entries.
20
CLEAR
to exit
Page 22
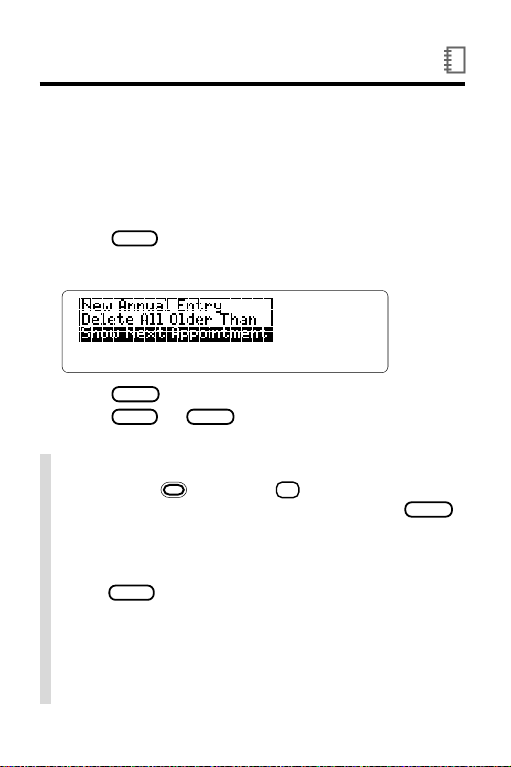
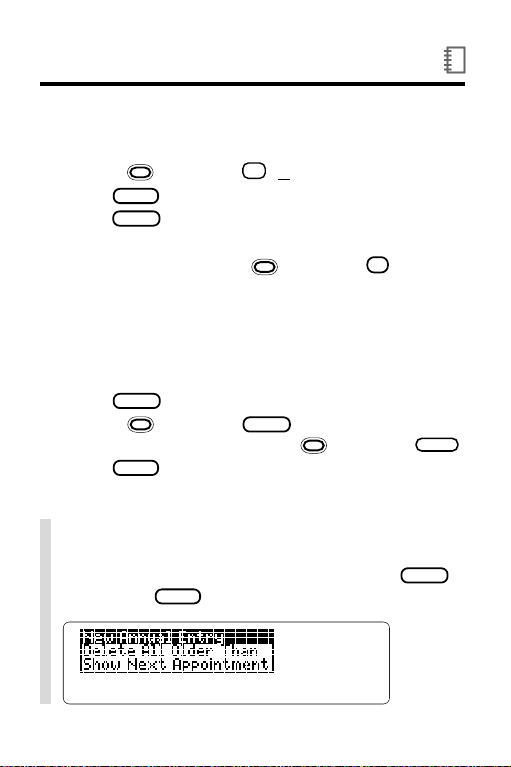
Viewing the Next Appointment
You can view your next appointment without selecting or searching the Schedule. Your next appointment is the Schedule entry most closely following the
current time on the Clock.
1. Select the Schedule topic.
2. Press
3. Highlight
SPEC
.
Show Next Appointment
.
4. Press
5. Press
ENTER
MENU
to view it.
CLEAR
or
.
✓ A Quicker Way to the Next Appointment
Simply hold and press N at any screen except a menu or help message. Then press
to go back to the previous screen.
✓ Other Schedule Options
SPEC
Press
•
Undelete Entry
cently deleted from the selected topic during
your current session.
•
New Entry
at a Schedule entry to view these options:
restores the entry most re-
lets you enter a new entry .
BACK
21
Page 23

Calendar
The Calendar lets you view
months and years.
You can also go directly
from a calendar
to the Schedule
to view Schedule entries.
22
Page 24

Viewing Calendars
When you select the Calendar, the current month appears. You can then scan other months and years.
1. Select
2. Press the arrow keys to move the highlight.
3. Press the DN or UP key to view the next or
4. Hold and press the DN or UP key to view
5. Press
Calendar
Or hold
previous month.
the next or previous year.
CLEAR
from the T opics menu.
and press D (dates).
to return to the current calendar.
23
Page 25

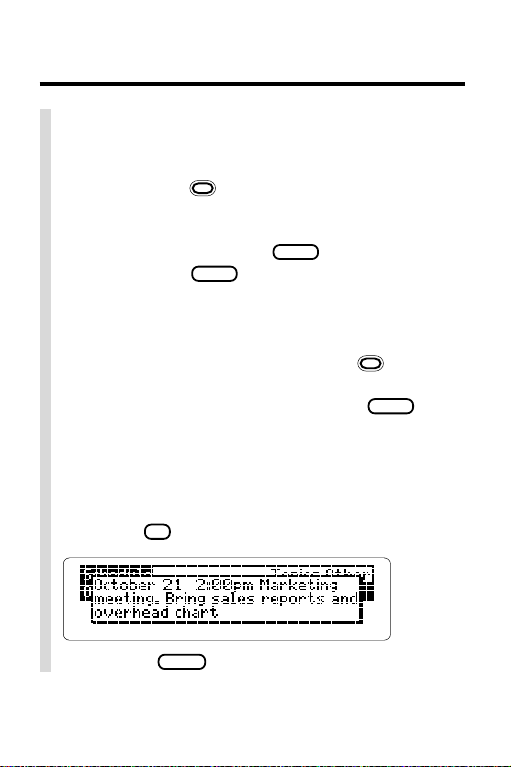
Viewing Schedule Entries
Y ou can view your Schedule entries by selecting
their dates from calendars. Dates with Schedule entries are marked with a dot.
1. Find any calendar.
2. Press the arrow keys to highlight a date marked
with a dot.
3. Press
ENTER
to view the entry .
This is a sample entry.
4. Hold and press the DN key repeatedly to
view the next entries for that date, if any .
5. Press
24
BACK
to go back to the calendar.
✓ Another Way to View Schedule Entries
You can also view the Schedule from a calendar
by pressing
Schedule
lighted day appears.
SPEC
and then selecting
. The first Schedule entry for the high-
View
Page 26

Scheduling from the Calendar
You can also make new Schedule entries directly
from any calendar.
1. Highlight a date on any calendar.
2. Press
3. Highlight
SPEC
.
New Schedule Entry
..
.
..
4. Press
ENTER
.
5. Enter a Schedule entry.
To learn how, read “Making Schedule Entries.”
Y ou can make an entry for the current or any other
date.
6. Press
BACK
to go back to the calendar.
25
Page 27

Phone Books
In the Business and Personal
Phone Books,
you can save
names, addresses,
phone numbers, and notes.
26
Page 28

Making Phone Book Entries
Phone Book entries are listed by last name, so you
must enter a last name in each entry. The other
items in the entry are optional.
1. Select
Business Phone
or
Personal Phone
the Topics menu.
Or hold
and press A (Personal Phone) or hold
and press B (Business Phone).
MENU
ENTER
.
to select
New Entry
.
2. Press
3. Press
4. Enter names, address, numbers, and notes.
Notes can contain up to 300 characters.
5. Press
Or hold and press
ENTER
at the last line to save the entry.
ENTER
at any line. To exit
without saving the entry, hold and press
6. Press
MENU
to return to the menus.
from
BACK
.
27
Page 29

Finding Phone Book Entries
You can search for Phone book entries by names,
addresses, numbers, or words in their notes. Read
the next page for all your options.
1. Select the Business Phone or Personal Phone.
2. Press
3. Type a name or other Phone Book search.
CLEAR
.
4. Press
ENTER
to view the first matching entry .
This is a sample entry.
5. Hold and press the DN key to view more
matches.
6. Press
MENU
to view all the matches.
After a search, only matching Phone Book entries
are listed on the Phone Book menu.
7. Highlight a Phone book entry.
Y ou can type the entry or scroll to it.
8. Press
9. Press
ENTER
to view the entry .
CLEAR
to clear your search.
28
Page 30

Finding Phone Book Entries
✓ More Ways to Search the Phone Books
Search by. . . For Example. . .
name
company
city
state
country
area code
full phone number
words in notes
bill, smith, brown
XYZ co
anytown
pa, wi
us
212, 804
999-999-9999
relative, active account,
sales rep
✓ Understanding Searches
Search words are case insensitive. If you search
for
johnson
Incomplete words find whole words. If you search
for
johnson
johnsonville
Multiple-word searches find only entries containing all the search words. If you search for
johnson
not be found.
, you will find
, you will find entries containing
as well as
, entries containing only
Johnson
johnson
.
.
bill
or
johnson
bill
will
29
Page 31

Using the Locate Menu
You can find Phone Book entries by selecting one or
more categories from the Locate menu.
1. Select the Business Phone or Personal Phone.
2. Press
3. Highlight a category on the Locate menu.
MENU
.
4. Press
ENTER
to select it.
5. Select an entry from the category menu.
To deselect the entry, highlight it and press
6. To select an entry from another category,
press
7. Press to view the matching items.
8. Select an entry to view.
9. Press
30
BACK
, select a category and then an entry.
Bullets mark the selected categories. Asterisks mark
entries not occurring in the selected categories.
After making selections, only matching entries are
listed on the Phone Book menu.
CLEAR
to clear your selections.
ENTER
.
Page 32

Changing Phone Book Entries
You can easily change or delete your Phone Book
entries.
1. Find any Business or Personal Phone Book entry .
2. Press
3. Press
Or select
4. Enter your changes.
To discard your changes, hold
Charges
5. Hold and press
Or press
6. Press
SPEC
.
ENTER
to select
Delete Entry
Change Entry
.
and go to Step 6.
and press
BACK
. Or press
SPEC
and select
Discard
.
ENTER
to save the changes.
SPEC
and select
MENU
to return to the menus.
Save Changes
✓ Other Phone Book Options
Press
options:
•
•
SPEC
at a Phone Book entry to view these
Undelete Entry
restores the entry most recently deleted from the selected topic during
your current session.
New Entry
lets you enter a new entry.
.
31
Page 33

World Time
World Time lists
the time and day of the week
for cities and countries
around the world.
You can also add
your own World Time locations.
32
Page 34

Finding Locations
You can find the current time and day in World Time
locations by searching for cities and countries.
NOTE: The Clock must be set to the correct local
time and date for the World Time times and days to
be accurate.
1. Select
World Time
from the T opics menu.
Or press plus F (foreign).
2. Type a location (e.g., city or country).
3. Press
ENTER
.
4. Hold and press the DN key to view more
matching locations, if any .
5. Press
6. Press
MENU
to view a listing of all the matches.
CLEAR
to clear the search.
33
Page 35

Scanning the Menu
You can also find locations by scanning the World
Time menu. Usually, you need to type only the first few
letters to find a location on the menu.
1. Select the
2. Press
World Time
MENU
.
topic.
3. Type a location (e.g., city or country).
4. Press
ENTER
at the highlighted location to view
its time and day.
5. Hold
and press the DN or UP key to view
the next or previous location on the World Time
menu.
6. Press
MENU
to return to the World Time menu.
✓ More Ways to Scan the Menu
Use these keys to scan the World Time menu:
To. . . Press. . .
scroll up or down or
page up or down UP or DN key
jump to the top or + or
bottom of the menu
34
Page 36

Entering Locations
You can add your own locations to the World Time
topic. Their times must be set relative to the international date line.
1. Select the
2. Press
3. Press
World Time
MENU
.
ENTER
to select
topic
.
New Entry
.
4. Enter a location (e.g., city or country).
To move the cursor, press the arrow keys.
5. Enter minutes and hours after the international
date line.
6. Type Y or N and press
The new location appears.
MENU
7. Press
when done.
✓ About the International Date Line
The international date line is an imaginary line at
the 180
ers add or subtract a day when they cross it. In
many atlases, the 24 world time zones are calculated relative to the international date line.
o
meridian where, by convention, travel-
ENTER
.
35
Page 37

Changing Locations
Y ou can change or delete any location that you have
added to the World Time topic. You cannot change or
delete pre-entered locations.
1. Find a World Time location that you entered.
2. Press
3. Press
4. Enter your changes.
5. Hold and press
6. Press
✓ Changing Time Zones
SPEC
.
ENTER
to select
Or select
Delete Entry
To discard your changes, hold
BACK
. Or press
Changes
Or press
.
SPEC
MENU
when done.
Change Entry
and go to Step 6.
SPEC
and select
ENTER
to save the changes.
and then select
.
and press
Discard
Save Changes
There is a quick way to set the Clock to your current time and day when you are travelling across
time zones.
First, find a World T ime location in your new time
zone. With the location in view, press
select
Set Clock T o This T ime Zone
SPEC
. Then
from the spe-
cial menu.
.
36
Page 38

Calculator
The Calculator adds, subtracts,
multiplies, divides, and
performs other math operations.
You can also save your results
and use them
in later calculations.
37
Page 39

Making Calculations
1. Select
Or hold
Calculator
from the Topics menu.
and press M (math).
2. Type a number.
To type a negative number, hold
SHIFT
and press the
hyphen key. T o type decimals, use the period key.
3. Press a math function key (+, -, x, or ÷).
4. Type another number.
ENTER
5. Press
to calculate.
To repeat the previous operation, press
6. Do more calculations, if you like.
T o scroll up or down, press
7. Press
CLEAR
to clear the calculations.
the UP or DN key.
✓ Making Advanced Calculations
Use these Gold key combinations:
To. . . Press. . .
calculate a percentage
square a number +
calculate a square root +
calculate a reciprocal +
ENTER
+
.
H
J
K
L
38
Page 40

Using Previous Results
Y ou can save your calculations and use them later .
1. Make a calculation.
2. Press
3. Select
4. Type a name of up to 10 characters.
SPEC
.
Save this Result
.
To exit without saving, press
5. Press
ENTER
to save the result.
BACK
.
6. Make another calculation.
7. Press
8. Select
SPEC
.
Use Previous Result
.
9. Select a result to use.
10. Press a math key and complete the calculation.
✓ Deleting Previous Results
To delete a saved result, first press
Calculator. Then select
Delete Previous Result
and select a result.
SPEC
at the
39
Page 41

Using Previous Results
✓ A Quicker Way to Use Previous Results
Rather than selecting a previous result from a
menu, you can type its name at the Calculator line.
For example, if you had saved a result named
calc1
, type
calc1
at the Calculator line. (Read the
note below to learn how.)
Then press
ENTER
to use it in your calculations.
✓ Typing Letters in the Calculator
If you are using a Digital Book System without
separate number keys, in the Calculator you can
type a letter from the top row of letter keys by
holding
Your result names can contain numbers, as
shown above, but they cannot begin with a number. When you type a number first in the Calculator, the top row of letter keys types numbers only
and cannot be overridden.
Note, also, that in the Calculator pressing
does not let you type letters. To type a letter from
the top row of keys, you must hold
a letter.
40
and pressing the appropriate key.
and press
LIST
Page 42

To Do
The To Do topic
lists your important tasks.
You can prioritize,
change, and delete
your things to do.
41
Page 43

Making a To Do List
1. Select
To Do
from the Topics menu.
Or hold and press G (goals).
2. Press
ENTER
to select
New Entry
.
3. Type a thing to do.
You can type up to 300 characters.
ENTER
4. Press
To exit without saving your entry, hold
press
5. Press
✓ Prioritizing Your T o Do List
To list your things to do in order of priority or importance, type appropriate letters or numbers at
the start of each To Do entry (e.g.,
2., 3.
To Do entries that begin with letters are listed alphabetically on the To Do menu. Numbered entries are listed before alphabetical entries.
to save it.
BACK
.
MENU
to return to the To Do menu.
).
A
., B., C. or 1.,
and
42
Page 44

Finding & Changing T o Do Entries
Once you have To Do entries, you can find them by
scanning the To Do menu. Then you can change or
delete them.
1. Select the To Do topic.
2. Highlight an entry on the To Do menu.
Y ou can type the entry or scroll to it.
ENTER
3. Press
to view the entry .
4. Press
5. Select
If you select
SPEC
.
Change Entry
Change Entry
or
Delete Entry
, edit lines by moving
the cursor and retyping.
To save your changes, hold and press
Or press
6. Press
SPEC
MENU
when done.
and then select
Save Changes
.
ENTER
.
.
43
Page 45

Expenses
The Expenses topic
keeps track of
your expenses
for any time period.
You can also calculate
your expenses
by category or
by payment method.
44
Page 46

Making Expense Entries
You can record expenses by date, item, category,
payment method, and amount.
$
1. Select
2. Press
Or hold
Expenses
from the Topics menu.
and press X (Expenses).
ENTER
to select
New Entry
.
3. Enter the requested information.
To change a line, press
4. Press
Or hold
5. Press
ENTER
at the last line to save the entry.
and press
MENU
to return to the Expenses menu.
✓ Understanding Expense Entries
Expense entries are listed on the Expenses menu
by item, and total expenses are calculated by adding amounts. So you must include an
Amount
Since you can calculate expense sums by
by
formation about them in each Expense entry, too.
in each Expense entry.
Payment Method
, you probably want to include in-
and then retype it.
ENTER
at any line.
Item
and an
Category
or
45
Page 47

$
Finding & Changing Expenses
Y our expense entries are listed on the Expenses
menu in the order that you entered them. Here is how
to find, change, or delete them.
1. Select the Expenses topic.
2. Highlight an entry on the Expenses menu.
Y ou can type the entry or scroll down to it.
3. Press
ENTER
to view it.
4. Press
5. Select
If you select
SPEC
.
Change Entry
Change Entry
or
Delete Entry
, edit lines by moving
the cursor and retyping.
To save your changes, hold and press
Or press
6. Press
SPEC
and then select
MENU
to return to the Expenses menu.
Save Changes
46
.
ENTER
.
.
Page 48

Calculating Expenses
You can calculate your total expenses by category
or by payment method.
1. Select an entry from the Expenses menu.
2. Press
3. Highlight
Compute Payment Method Sums.
SPEC
.
Compute Category Sums
or
$
4. Press
ENTER
.
This is a sample list.
5. Press
BACK
to go back to the entry .
47
Page 49

Protecting Information
The Organiz-It provides
password-only access
and can copy
information to and from
other Organiz-Its
and personal computers.
It also has a built-in battery
to protect your information
when the Organiz-It
is removed from the
Digital Book System.
48
Page 50

Assigning a Password
CAUTION: After you assign a password, you cannot
start using your Organiz-It without it. So write down
and save your password in a separate location.
1. Select
Name this Card
2. Enter all the requested information.
Y our password is case sensitive (e.g.,
differently than
and press
3. Press
ENTER
A
BACK
.
4. If this is the first password assigned, press C.
5. Press
ON/OFF
twice.
6. Enter your password exactly as before.
To type special characters, hold and
press the appropriate letter key (see p. 10).
✓ Password Changes and Problems
To change or erase your password during a session, select
and press
word, call the Customer Support Department at
Franklin Electronic Publishers, Inc., toll-free, at
800-762-5382.
Name this Card
ENTER
from the Other menu.
a
is treated
). To exit without saving, hold
.
SHIFT
and
, edit the password,
. If you forget or lose your pass-
49
Page 51

Gauging the Memory
Y ou can check how much of the Organiz-It’ s memory
is in use.
1. Select
Memory Gauge
from the Other menu.
2. Press
BACK
to go back to the menus.
✓ Understanding the Memory
The Organiz-It has 128 kilobytes of random-access memory (RAM). This memory is dynamically
allocated, so the amount of information that you
can save in a topic depends on the total memory
available. For example, if only one topic has entries, nearly 128 kilobytes of information can be
saved in it.
✓ Resetting the Organiz-It
WARNING: Resetting an Organiz-It permanently
erases all the information entered in it. Perform this
operation only if you want to erase all your entries.
To reset an Organiz-It to its original factory settings
(e.g., shutoff time, no password, no entries)
Factory Reset
to erase or press any other key to cancel.
50
from the Other menu. Then press
,
select
F
Page 52

Copying an Organiz-It
Y ou can copy information from one installed
Organiz-It, or the Franklin Personal Organizer (IC-
107), to another Organiz-It.
CAUTION: When you copy from an organizer digital
book, all the information in the sending organizer is
merged with that of the receiving organizer. Exact
duplicate records will be overwritten, but any information exceeding the memory capacity of the receiving organizer will not be copied. Check the memory
gauges of both organizers before you copy.
1. Install a second Organiz-It, or the Franklin Personal Organizer (IC-107), into the Digital Book
System.
2. Select
Copy Data
from the Other menu.
3. Select
4. Press C to continue.
Copy from Card
To exit without copying, press any other letter key.
.
51
Page 53

Copying to and from PCs
Y ou can copy information to and from an Organiz-It
to a personal computer (PC) using the serial port
found on certain Digital Book System models. Your
PC must be MS-DOS
stalled communications program.
NOTE: The steps in this section assume you are using the T erminal communications program included
with Windows
tions program, refer to its user’s manual.
Preparing to Copy
▼
1. Connect the serial cable from the port on the
Organiz-It to a serial port on your computer.
Make sure the cable’s plug is inserted into the
Digital Book System with its wider side facing up.
2. Double-click the Main icon in the Program
Manager window.
3. Double-click the Terminal icon in the Main window.
4. Select
5. Select a serial port (COM1, COM2, etc.), if needed.
6. Select these communication settings:
• 2400 baud rate
• 8 data bits
• 1 stop bit
• parity none
• flow control Xon/Xoff.
7. Click
®
Communications
OK
.
52
®
-compatible and have an in-
.
If you are using another communica-
from the Settings menu.
Page 54

Copying to and from PCs
Copying to a PC
▼
1. In the Organiz-It, select
Copy Data
from the
Other menu.
2. Select
3. Highlight and press
4. On your PC, select
Copy to PC
Have
ASCII Format
rent topic
in view.
.
SPACE
to view the options.
and either
All T opics
Receive Text File
or
from the
Transfers menu in the Terminal program.
5. Enter a file name in which to receive data.
Type the suf fix
6. Press
7. Press
ENTER
CLEAR
Copying from a PC
▼
1. In the Organiz-It, select
2. Select
Copy from PC
3. Highlight and press
Have
ASCII Format, All T opics
and
Merge with current data
data
in view.
4. Press
ENTER
5. On your PC, select
.txt
in the file name (e.g.,
org.txt
on the Digital Book System to copy .
when done.
Copy Data
under
.
SPACE
to view the options.
or
Current topic
or
Overwrite current
.
Send Text File
from the
Transfers menu in the Terminal program.
6. Enter the file name you want to send.
7. Press
CLEAR
on the Digital Book System when done.
Cur-
).
Other
,
.
53
Page 55

Copying to and from PCs
✓ About IntelliLink
®
IntelliLink is a Windows®-based program that copies information between hand-held organizers and
PC-installed organizers such as Lotus Organizer
If you use IntelliLink, you must select
Format
as an option when copying to or from the
IntelliLink
®
Organiz-It.
To learn about or order IntelliLink, contact:
IntelliLink Corp., One Tara Blvd., Suite 210,
Nashua, NH 03062, (603) 888-0666 (ph), (603)
888-9817 (fax).
✓ Replacing the Organiz-It’s Battery
The 3-volt, CR1220 lithium battery built into the
Organiz-It uses little power, so you will rarely if
ever need to change it. When the battery runs low
on power, a warning appears on screen.
WARNING: Never remove the built-in battery
when an Organiz-It is removed from the Digital
Book System. If you do, all the information entered in the Organiz-It will be permanently erased.
To replace the built-in battery, first install the
Organiz-It into the Digital Book System. Then unscrew the battery cover on the back of Organiz-It.
Install a new battery , with its plus sign facing you,
and replace the battery cover.
.
54
Page 56

Appendix
These pages review
how to use
the Digital Book System.
55
Page 57

Digital Book System
®
Resetting the Digital Book System
To reset the Digital Book System, hold
pressing
ON/OFF
. Or press the recessed reset button
on the back of the Digital Book System. (Read its
Basic Operating Guide for details.)
WARNING: Resetting the Digital Book System may
permanently erase information, such as notes, that
you have entered in the installed digital books.
If the keyboard fails to respond or the screen performs erratically, you can press
ON/OFF
press
rather than resetting the Digital Book
CLEAR
System. If nothing happens, then reset.
CLEAR
and then
while
Protecting and Cleaning
• Do not touch the metal contacts on the back of digi-
tal books or the rubber contacts on the Digital Book
System with statically charged objects. Statically
charged objects may erase information that you entered in the digital books.
• Do not put excessive weight on digital books or the
Digital Book System or expose them to extreme or
prolonged heat, cold, or other adverse conditions.
• To clean digital books, apply isopropyl alcohol with
a cotton swab. To clean the Digital Book System,
apply a mild household cleaner with a soft cloth.
CAUTION: Spraying liquids on digital books or the
Digital Book System may damage them.
56
Page 58

Digital Book System
Replacing the Batteries
The DBS-1 and DBS-2 use four 3-volt, CR2032 lithium batteries. The DBS-2D uses four 1.5-volt, AA batteries. Y ou
should replace the batteries before they lose all power.
Have new batteries ready before you start. Then turn off
the Digital Book System. WARNING: If you remove batteries when the Digital Book System is on, information entered in any installed digital books may be permanently
erased.
Slide the battery cover off the back and install the new batteries with their plus signs oriented as shown on the unit.
Never mix old and new batteries in the Digital Book System.
Copyrights, Trademarks, Patents
© 1994 Franklin Electronic Publishers, Inc.
All rights reserved. Digital Book System is a registered
trademark of Franklin. Organiz-It is a trademark of Franklin.
MS-DOS and Windows are registered trademarks of Microsoft Corporation.
IntelliLink is a registered trademark of IntelliLink Corporation.
Lotus Organizer is a registered trademark of Lotus Development Corporation
Patents Pending.
ISBN 1-56712-109-8
57
Page 59

Limited Warranty (U.S. only)
FRANKLIN warrants to you that the DIGITAL BOOK will be free from defects in
materials and workmanship for one year from purchase. In the case of such a defect
in your DIGITAL BOOK, FRANKLIN will repair or replace it without charge on return,
with purchase receipt, to the dealer from which you made your purchase or Franklin
Electronic Publishers, Inc., 122 Burrs Road, Mt. Holly, NJ 08060, within one year of
purchase. Alternatively, FRANKLIN may, at its option, refund your purchase price.
Data contained in the DIGITAL BOOK may be provided under license to FRANKLIN.
FRANKLIN makes no warranty with respect to the accuracy of data in the DIGITAL
BOOK. No warranty is made that the DIGITAL BOOK will run uninterrupted or error
free. You assume all risk of any damage or loss from your use of the DIGITAL BOOK.
This warranty does not apply if, in the sole discretion of FRANKLIN, the DIGITAL
BOOK has been tampered with, damaged by accident, abuse, misuse, or misapplication,
or as a result of service or modification by any party, including any dealer, other than
FRANKLIN. This warranty applies only to products manufactured by or for FRANKLIN.
Batteries, corrosion or battery contacts and any damage caused by batteries are not
covered by this warranty. NO FRANKLIN DEALER, AGENT, OR EMPLOYEE IS
AUTHORIZED TO MAKE ANY ADDITIONAL WARRANTY IN THIS REGARD OR TO
MAKE ANY MODIFICATION OR EXTENSION OF THIS EXPRESS WARRANTY.
THE FOREGOING WARRANTY IS EXCLUSIVE AND IS IN LIEU OF ALL OTHER
EXPRESS OR IMPLIED WARRANTIES, WRITTEN OR ORAL, INCLUDING, BUT
NOT LIMITED TO, WARRANTIES OF MERCHANTABILITY OR FITNESS FOR A
PARTICULAR PURPOSE. YOUR SOLE AND EXCLUSIVE REMEDY SHALL BE
FRANKLIN’S OBLIGATION TO REPLACE OR REFUND AS SET FORTH ABOVE IN
THIS WARRANTY. Some States do not allow the exclusion of implied warranties, or
limitations on how long a warranty lasts. This warranty gives you specific rights; you
may also have additional rights which vary from State to State. This warranty shall not
be applicable to the extent that enforcement of any provision may be prohibited by
applicable law.
FRANKLIN SHALL IN NO EVENT BE LIABLE TO YOU OR TO ANY OTHER
PERSON FOR ANY SPECIAL, INCIDENTAL, OR CONSEQUENTIAL DAMAGES,
OR ANY OTHER INDIRECT LOSS OR DAMAGE, ARISING OUT OF YOUR
PURCHASE, THE MANUFACTURE OR SALE OF THE DIGITAL BOOK, THIS
LICENSE, OR ANY OBLIGATION RESULTING THEREFROM OR THE USE OR
PERFORMANCE OF THE DIGITAL BOOK UNDER ANY LEGAL THEORY,
WHETHER BREACH OF CONTRACT, TORT, STRICT LIABILITY OR ANY OTHER
CAUSE OF ACTION OR PROCEEDING, WHICH DAMAGES SHALL INCLUDE, BUT
NOT BE LIMITED TO, LOST PROFITS, DAMAGES TO PROPERTY, OR PERSONAL
INJURY (BUT ONLY TO THE EXTENT PERMITTED BY LAW). FRANKLIN’S
ENTIRE LIABILITY FOR ANY CLAIM OR LOSS, DAMAGE, OR EXPENSE FROM
ANY SUCH CAUSE SHALL IN NO EVENT EXCEED THE PRICE PAID FOR THE
DIGITAL BOOK. THIS CLAUSE SHALL SURVIVE FAILURE OF AN EXCLUSIVE
REMEDY. This license and warranty is governed by the laws of the United States and
the State of New Jersey.
58
Page 60

Index
? key 11
12 or 24 hour Clock 15
Annual events 17
Arrow keys 9
ASCII Format 53
Auto-resume feature 8
Batteries
Digital Book System 57
Organiz-It 14, 54
Baud rate setting 52
Calculating
expense totals 47
math equations 38
Calculator
clearing calculations 38
deleting previous results 39
typing
decimals 38
negative numbers 38
using previous results 39
Calendar
making Schedule entries
from 25
scanning months and
years 23
viewing Schedule entries
from 24
Case
in passwords 49
in searches 19, 29
Changing
Clock date and time 14
Clock to World Time
zones 36
expense entries 46
passwords 49
Phone Book entries 31
Schedule entries 20
shutoff time 12
To Do entries 43
World Time locations 36
Check marks, in menus 9
Clock
selecting 14
setting
12 or 24 hour display 15
date and time 14
to World Time zones 15
typing
p.m
.14
COM port settings 52
Copying
communication settings re-
quired 52
from Organiz-It's and IC-
107 cards 51
to and from personal com-
puters 52, 53
Data bits and stop bit set-
tings 52
Decimals, typing 38
Deleting
expense entries 46
Phone Book entries 31
previous calculations 39
Schedule entries 20
Schedule entries older than
a date 20
To Do entries 43
World Time locations 36
59
Page 61

Index
Digital Book System
protecting and cleaning 56
resetting 56
resuming 8
Digital books
installing 8
Direction keys 4, 34
Ellipses in menus 11
Ellipses, in menus 11
Entering
calculations 38
expense entries 45
Phone Book entries 27
Schedule entries 17
To Do entries 42
World Time locations 35
Expenses
calculating totals 47
changing entries 46
deleting/undeleting en-
tries 46
making entries 45
scanning entries 46
Factory Reset 50
Finding
calendars 23
expense entries 46
Phone Books entries 28
previous Calculator re-
sults 39
Schedule entries 18
To Do entries 43
Finding information
World Time locations 33
Flow control setting 52
Franklin Personal Orga-
nizer (IC-107) 51
Function keys 4
Gold key combinations
in Calculator 5
in general 5
Help messages, view-
ing 12
Highlighting
digital book symbols 8
IC-107, copying from 51
Installing the Organiz-It 8
IntelliLink® program 52, 54
International date line 35
Key Guide 4
Locate menu 30
Locations, World
Time 33, 35, 36
Locking numbers 11, 40
Lost passwords 49
Math calculations 38
Math keys 38
Memory
capacity 50
gauging 50
resetting 50
understanding 50
Memory Gauge 50
Menus
ellipses in 11
Locate 30
main 9
special menus 10
60
Page 62

Index
viewing complete items 11
Multiple-day Schedule
entries 17
Multiple-word
searches 19, 29
Negative numbers 38
New appointment 21
Number of days
17
Organiz-It
copying
to and from personal
computers 52, 53
to other Organiz-Its 51
resetting 50
P.M., typing 14, 17
Parity setting 52
Passwords
assigning 49
changing 49
Percentages 38
Phone Book
changing entries 31
deleting/undeleting en-
tries 31
finding entries 28
making entries 27
selecting 27
Previous Calculator
results 40
Punctuation marks 10
Reciprocals 38
Replacing Organiz-It's bat-
tery 54
Resetting an Organiz-It 50
Resuming 8
Saving
Calculator results 39
Expense entries 45
Phone Book changes 31
Phone Book entries 27
Schedule changes 20
Schedule entries 17
To Do changes 43
World Time changes 36
Scanning
calculations 38
calendars 23
To Do entries 43
World Time locations 34
Schedule
annual entries 17
changing entries 20
deleting entries 20
deleting/undeleting en-
tries 21
entering annual events 17
finding entries 18, 19
making entries
from Calendar 25
from Schedule 17
multiple-day entries 17
undeleting entries 21
viewing from calendars 24
viewing next appoint-
ment 21
Searching
in Phone Books 28, 29
in Schedule 19
in World Time 33
61
Page 63

Index
multiple words 19, 29
Schedule entries 18
Selecting
topics
using Gold key combinations 9
using menus 9
Serial port 52
Setting
Clock to World Time
zones 15
hour display 15
time and date 14
Shutoff time 12
Special characters 10
Special menus 10
Square of numbers 38
Square roots 38
Terminal program 52
To Do
changing entries 43
deleting/undeleting en-
tries 43
making entries 42
prioritizing entries in list 42
scanning entries 43
Tutorial 12
Typing
decimals 38
letters in Calculator 40
letters in the Calculator 40
negative numbers 38
numbers 11
passwords 49
p.m.
14, 17
punctuation marks 10
special characters
in passwords 49
in topics 10
Undeleting
Phone Book entries 31
Schedule entries 21
Viewing
calendars 23
complete menu items 11
help messages 12
main menus 9
next appointment 21
Schedule entries
from Calendar 24
from Schedule 18
special characters 10
tutorial 12
Windows® 52
World Time
changing locations 36
entering locations 35
finding locations 33
scanning locations 34
FCR-28055-00 Printed in China
P/N 7201769 Rev. B
62
Page 64

Electronic Publishers
Mt. Holly , NJ 08060
Page 65

Important Update
Connecting the Cable to your Digital Book
▼
System (DBS)
When connecting the IntelliLink cable, make sure the
plug is oriented with the wider metal edge on top and
the narrower metal edge on the bottom, as shown
below.
Top
=
Bottom
If the cable is not plugged in properly, when you
attempt to transfer data, your PC will display the
message
correct the problem, remove the plug and reinsert it
the correct way. Then close IntelliLink, reopen it and
start the Import/Export operation again.
Closing IntelliLink Between Operations
▼
IntelliLink can complete only one data transfer
operation per session. To make an additional transfer,
you must close and then reopen the IntelliLink
program. (Minimizing the IntelliLink icon on your
Windows desktop is not sufficient; the program must
be completely closed.)
Unable to connect to handheld device
. To
-1-
Page 66

Important Update
Getting On-line Help
▼
There are two ways to get to IntelliLink’s help information. First open the IntelliLink program and then either:
Double-click the yellow question mark icon.
-or-
Click the yellow help button on the toolbar.
On-line help includes sections on
do I?, Supported Systems
We recommend that you check
for specific information on the PC software you plan
to use with your Organiz-it! card.
Formats Compatible with Organiz-it!
▼
• ACT for Windows 1.0
• ASCII-Text Delimited
• Lotus Organizer 1.1
• Microsoft Word 6.0 and up
• PackRat 4.0 & 4.1
• WordPerfect 6.0A and up
NOTE: Version numbers shown here supersede
those appearing in the on-line help message. ASCIIText Delimited is a format compatible with many PC
programs not listed here.
Getting Started, How
, and
Glossary
Supported Systems
.
-2-
Page 67

Important Update
Important Information about Importing
▼
Updated Data
An entry revised in your PC file (for instance, a
changed phone number) will be recorded as a
separate new entry when you transfer the file to the
Organiz-it! card in your Digital Book System and will
be listed along with the older information.
To completely replace older Organiz-it! topics with
modified PC files, you must first delete the existing
Organiz-it! information by choosing
from the Other menu. This will erase ALL information
in ALL TOPICS. You can then restore each topic with
information from your PC.
Remember, even if only one topic is to be replaced,
all four must be restored from your PC. Make certain
that you have copied all your Organiz-it! topics
(
business phone, personal phone, to do
ule
) to your PC before conducting a “Factory Reset.”
Factory Reset
, and
sched-
-3-
Page 68

Important Update
Copying Data from Your Digital Book
▼
System to Your PC (Export)
Each Export/Import operation transfers only one
Organiz-it! topic from your Digital Book System to your
PC–the last topic selected. To transfer additional topics
properly, you must completely close and then reopen
IntelliLink between each operation.
NOTE: If you are using WordPerfect, you can transfer
the data in table format by clicking the
in Table
Form File
STEP ONE (PC):
1. Double-click the
2. Double-click the IntelliLink
3. From the IntelliLink toolbar, select
4. Click
5. Click the
6. In the
7. On the same screen, enter the name of the
option or in mail-merge format by clicking the
option on the
icon on the Windows screen.
within that program group.
Export
then
(
WordPerfect, Lotus Organizer
topic (
schedule
destination file in the
and then the target application
OK
.
General
From Franklin Organizer
business phone, personal phone, to do
) to be transferred.
Options
Import/Export
Import/Export
tab.
File Name
Place Records
screen.
program group
icon
Transfer
, etc.).
space, select the
space.
and
, or
-4-
Page 69

Important Update
8. Click the
On this screen, the
Options
tab.
Option Category
space should
show the target application.
9. Click the
Export
button.
STEP TWO (Digital Book System):
1. Press
MENU
.
2. Select the Other menu and then press
3. Select
4. Select
Copy Data
Copy to PC
IntelliLink Form
and then press
and then press
at should appear on the screen.
• If the screen shows
ASCII Format
once to switch formats. Then press
ENTER
ENTER
, press
ENTER
select it.
• If the connection is made, the DBS screen will
display the message
Connecting to Ilwin
STEP THREE (PC):
1. Click
OK
, once the connection is established, to
begin the transfer.
ENTER
.
.
SPACE
to
.
.
-5-
Page 70

Important Update
Copying Data from Your PC to Your Digital
▼
Book System (Import)
Each Export/Import operation transfers only one
Organiz-it! topic from your PC to your Digital Book
System–the last topic selected. To transfer additional
topics properly, you must completely close and then
reopen IntelliLink between each operation.
You must use Organiz-it!’s Merge with Current Data
option when importing data from your PC. However, an
entry revised in your PC file (for instance, a changed
phone number) will be recorded as a separate new entry
when you transfer the file to the Organiz-it! card in your
Digital Book System, and will be listed along with the
older information. To completely replace older Organiz-it!
topics with modified PC files, you must do a “Factory
Reset” on your Digital Book System.
WARNING: This will erase ALL information in ALL
TOPICS. Make certain that you have copied all your
Organiz-it! topics (
, and
do
“Factory Reset.” You can then restore each topic with
information from your PC.
STEP ONE (PC):
1. Double-click the
2. Double-click the IntelliLink
3. From the IntelliLink toolbar, select
schedule
icon on the Windows screen.
within that program group.
business phone, personal phone, to
) to your PC before conducting a
Import/Export
program group
Import/Export
icon
Transfer
and
-6-
Page 71

Important Update
then
Import
WordPerfect, Lotus Organizer
(
4. Click
5. On the
transferred.
6. In the
topic to which the data should be transferred.
7. Click the
On this screen, make sure that
appears in the
correct Com Port is listed (for most users it is COM 1).
8. Select
9. Click the
STEP TWO (Digital Book System):
1. Press
2. Select
3. Select
4. Select
IntelliLink Form
• If the screen shows
SPACE
with Current Data
• If the connection is made, the DBS screen will display the message
STEP THREE (PC):
1. Click
begin the transfer.
and then the source application
, etc.).
OK
.
General
From Franklin Organizer
screen, select the data to be
Options
tab.
blank, select the
Franklin Organizer
Option Category
Update
in the
Import
MENU
.
Other
and then press
Copy Data
Copy to PC
Merge Option
button.
and then press
and then press
space and that the
space.
ENTER
.
ENTER
ENTER
at should appear on the screen.
ASCII Format
instead, press
once to switch formats. Next, highlight
and then press
Connecting to Ilwin
OK
, once the connection is established, to
ENTER
.
.
-7-
.
.
Merge
Page 72

Important Update
FEP-28916-00
P/N 7202769 Rev A
-8-
 Loading...