

Page 1
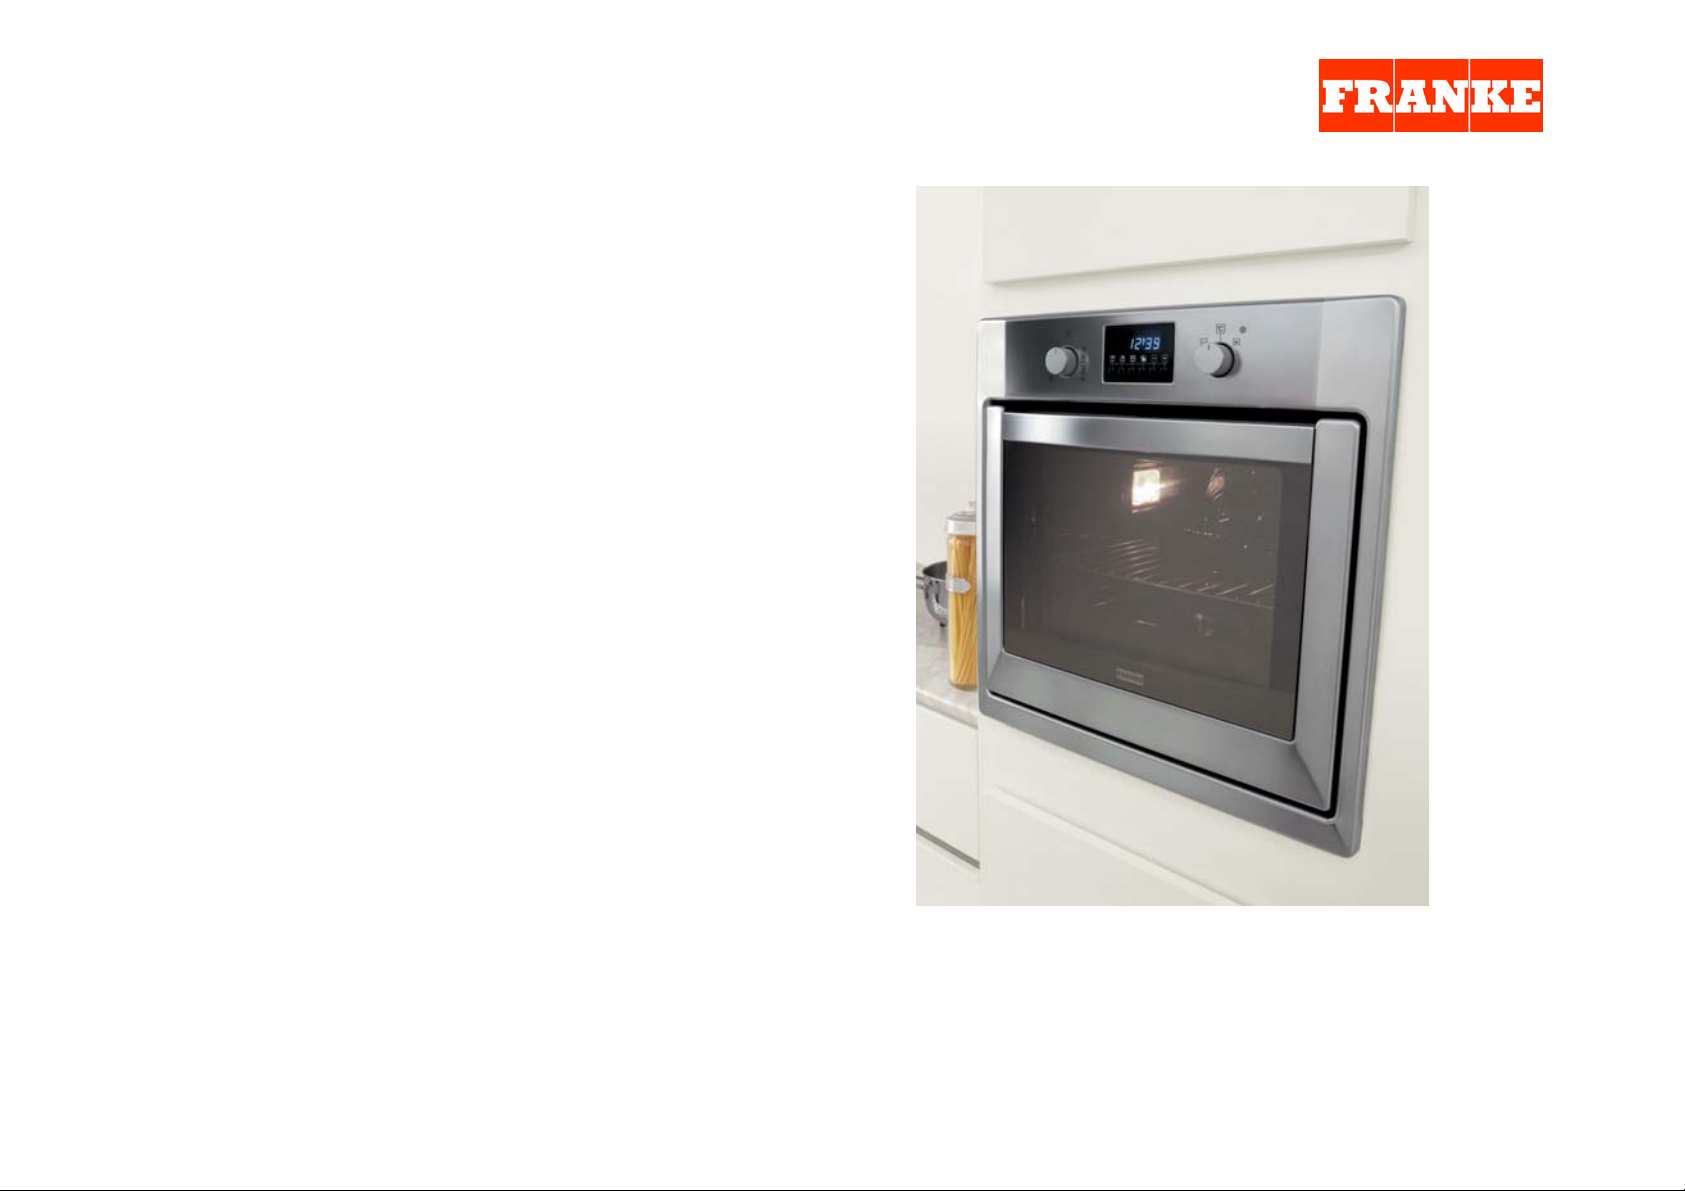
HANDBOOK OVEN DESIGN METAL
UPDATED MARCH 2006
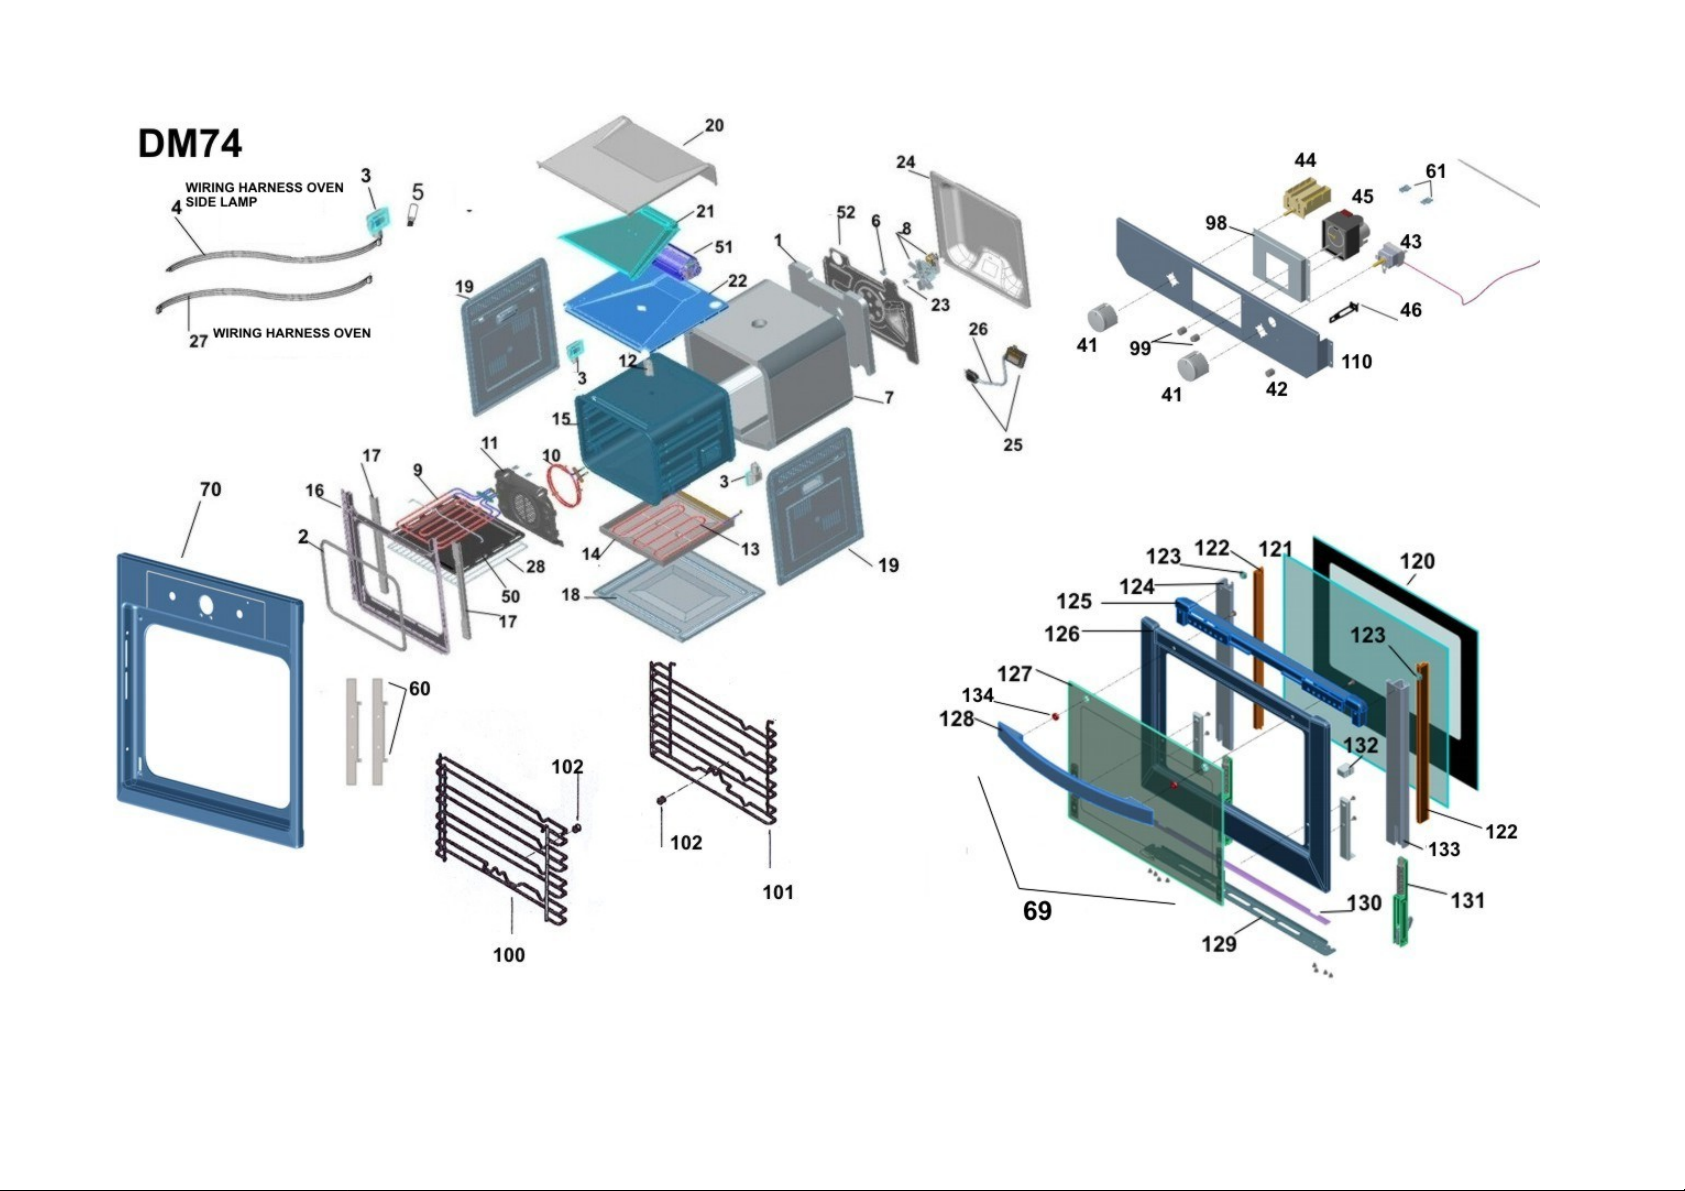
LIST SPARE PARTS DM74MXS
5600114
ESPLODED VIEW
WIRING DIAGRAM
LIST SPARE PARTS DM97MXA 5600116
ESPLODED VIEW
WIRING DIAGRAM
CLOSE-UP VIEW
7 COOKING MODES
9 COOKING MODES
ELECTRONIC COOKING PROGRAMMER
THE END COOKING TIME RUSTIC CLOCK
DISMOUNTING THE OVEN DOOR
AFTER SALE SERVICE LABEL SERIAL NUMBER
INSTALLATION
1
Page 2
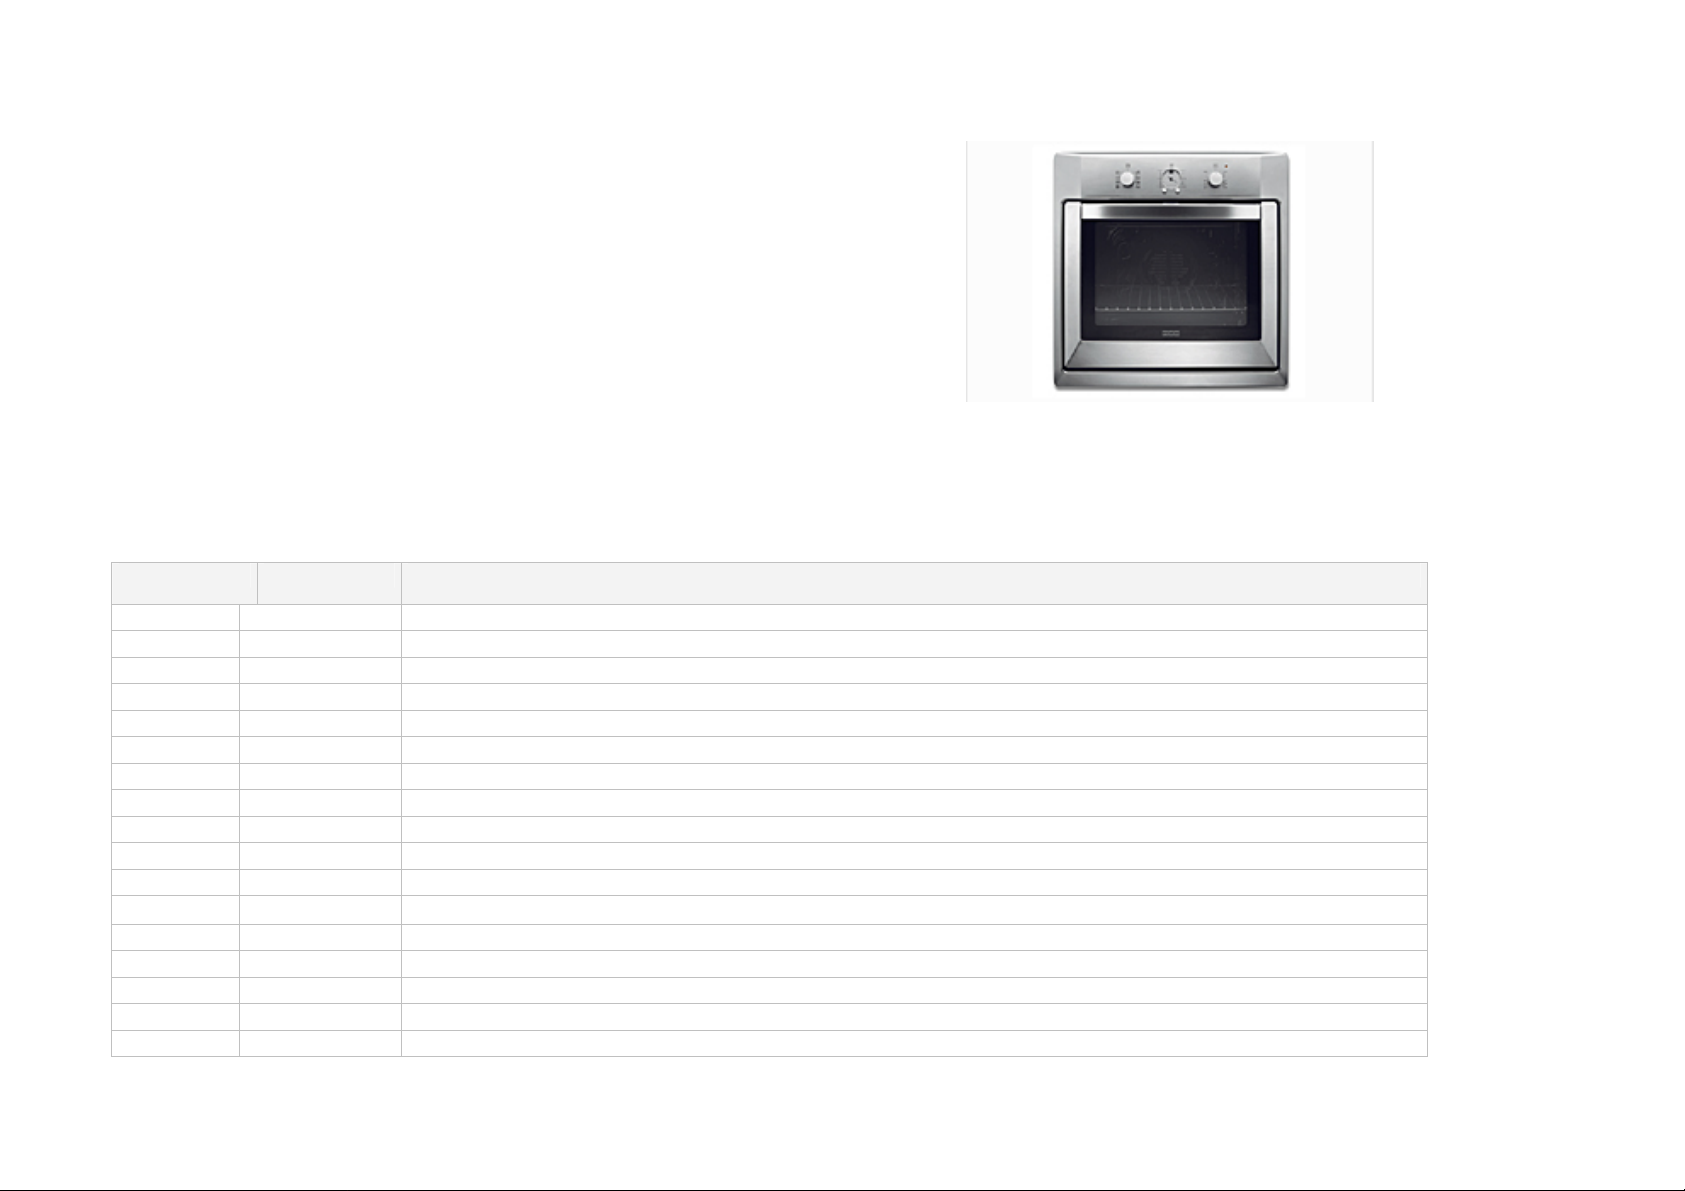
DM74MXS 5600114
-7 COOKING MODES
-ANALOGIC CLOCK WITH
END COOKING TIMER 180’
- 3 GLASSES DOOR
- 2 OVEN RACKS
nr 01 drip try
3 GLASSES DOOR / Energy class A
Inner dimensions of the oven :
width mm440 depth mm 415 height mm
312
Inner volume of the oven: 57 litres
Consumption (convenction mode) :
to reach 175° C: 0.32 kwh
To maintain 175° 0,62 kwh
Total consumption 0,94 kwh
Voltage 230v-50 hz
Total power: 2875 kw 10a
HEATING ELEMENT POWER:
TOP W 1000
BOTTOM W 1250
GRILL W 2250 CIRCULAR W 2000
fan motor w 25
oven lamp w 15x2
coolin fan 20 w
CODE POSITION DESCRIPTION SPARE PARTS
Consumption (ventilated mode) :
to reach 200° C: 0.31 kwh
To maintain 200° 0,81wh
Total consumption 1,12 kwh
1992018
1992063
1992064
1992065
1992066
1992067
1992068
1992069
1992070
1992071
1992124
1992093
1992005
1992094
1992095
1992096
1992007
1 BACK GLASS REAR INSULATOR
2
3
4
5
6
SCREWS PCS 10 TSP M5X20 FIXING CASING
SCREWS PCS 10 TCB CRO ZIG AUT 4,2X12 FIXING HEATING ELEMENT
SCREWS PCS 10 ,2X6,5 SP FIXING INTERNAL OVEN CHIMNEY
SCREWS PCS 10 TSP CROCE M5X20 FIXING OVEN FRONT
SCREWS PCS 10 TCB AUTOF 2,9X6,5 ZNB FIXING THERMOSTAT SAFETY
SCREWS PCS 10 TRILOB M4X10 UNI FIXING POST DOOR
SCREWS PCS 10 TCB CRO 4,8 M5X16 FIXING HANDLE
SCREWS 10 PCS VITE 3.5PX15 FIXING TERMINAL BLOCK
SCREWS PCS 10 TCB CRO ZIG AUTOF 4,2X12 NICH FIXING ASSEMBLY SURROUND OVEN
SCREWS PCS 10 TCB RIDOTTA M4X5 FIXING SELECTOR,THERMOSTAT, END COOKING
BOOKLET/INSTRUCTION /KIT INSTALLATION
GASKET
OVEN LAMP /RECTANGULAR LAMP HOLDER
WIRING HARNESS OVEN SIDE LAMP
OVEN LAMP 15 W
THERMOSTAT SAFETY TY 280° 16°
2
Page 3
CODE POSITION DESCRIPTION SPARE PARTS
1992097
1992009
1992010
1992011
1992012
1992013
1992014
1992015
1992099
1992021
1992022
1992023
1992024
1992025
1992029
1992027
1992028
1992026
1992045
1992112
1992119
1992055
1992111
1992046
1992051
1992052
1992054
1992061
1992056
1992059
1992060
1992057
1992050
1992127
7
8
9
10
11
12
13
14
15
16
17
18
19
20
21
22
23
24
25
26
27
28
41
42
43
44
45
46
50
51
52
60
61
69
INSULATION CASING LAMP SIDE
MOTOR FAN/FAN AND NUT
GRILL+TOP ELEMENT 2250+556 W
CIRCULAR FAN ELEMENT 2000W
FAN DIFFUSER
INTERNAL OVEN CHIMNEY
OVEN LOW HEATING ELEMENT 1250 W 230V
LOWER PANEL
OVEN CUBE LAMP SIDE
OVEN FRONT
SUPPORT HINGE OVEN DOOR
TOP BULKHEAD CASING
SIDE PANEL RIGHT/LEFT
OUTER CASING
AIR CONVEYOR
OUTER CASING
THERMOSTAT SAFETY 100-90° TANGENTIAL FAN
REAR CASING
CABLE+TERMINAL BLOCK
CABLE 15° THREE POLE 130 MM
WIRING HARNESS OVEN 7F +L RUSTIC
OVEN RACK
KNOB DESIGN METAL
NEON LIGHT COVER
THERMOSTAT 1 BULB
SELECTOR 12C 9P F7+L
RUSTIC PROGRAMMER END COOKING
PILOT LAMP
DRIP TRAY .
FAN TANGENTIAL 1 SPEED 14 W
OVEN BACK PANEL
BRACKET FIXING FORNITURE .
PROBE HOLDER THERMOSTAT
ASSEMBLY OVEN DOOR DMXS
3
Page 4
CODE POSITION DESCRIPTION SPARE PARTS
1992115
1992121
1992047
1992016
1992019
1992017
1992125
1992035
1992036
1992034
1992030
1992100
1992103
1992105
1992250
1992110
1992102
1992104
1992037
1992031
1992101
1992075
70
98
99
100
101
102
110
120
121
122
123
124
125
126
127
128
129
130
131
132
133
134
ASSEMBLY SURROUND OVEN DM 74MXS
RUSTIC PROGRAMMER SUPPORT DM 74
KNOB PEAP ST.STEEL
WIRE RACKS SIDE LEFT
WIRE RACKS SIDE RIGHT
SUPPORT WIRE RACKS SIDE
SUPPORT CONTROL PANEL DG/DM/GA 74
GLASS INSIDE
VETRO INTERMEDIO THERMOVIT NEUTRO
DOOR GASKET 3V L 390
OVEN DOOR PLUG
POST DOOR GLASS OVEN LEFT
HANDLE HONNER
OVEN DOOR FRAME XS
GLASS DOOR + BRACKET
HANDLE ST.STEEL OVEN DESIGN METAL
OVEN DOOR LOWER TRIM/OVEN DESIGN METAL
OVEN DOOR LOWER TRIM GASKET
HINGE OVEN DOOR
OVEN DOOR GLASS SPACER
POST DOOR OVEN GLASS RIGHT
RUBBER WASHER 10 PCS
4
Page 5
5
Page 6
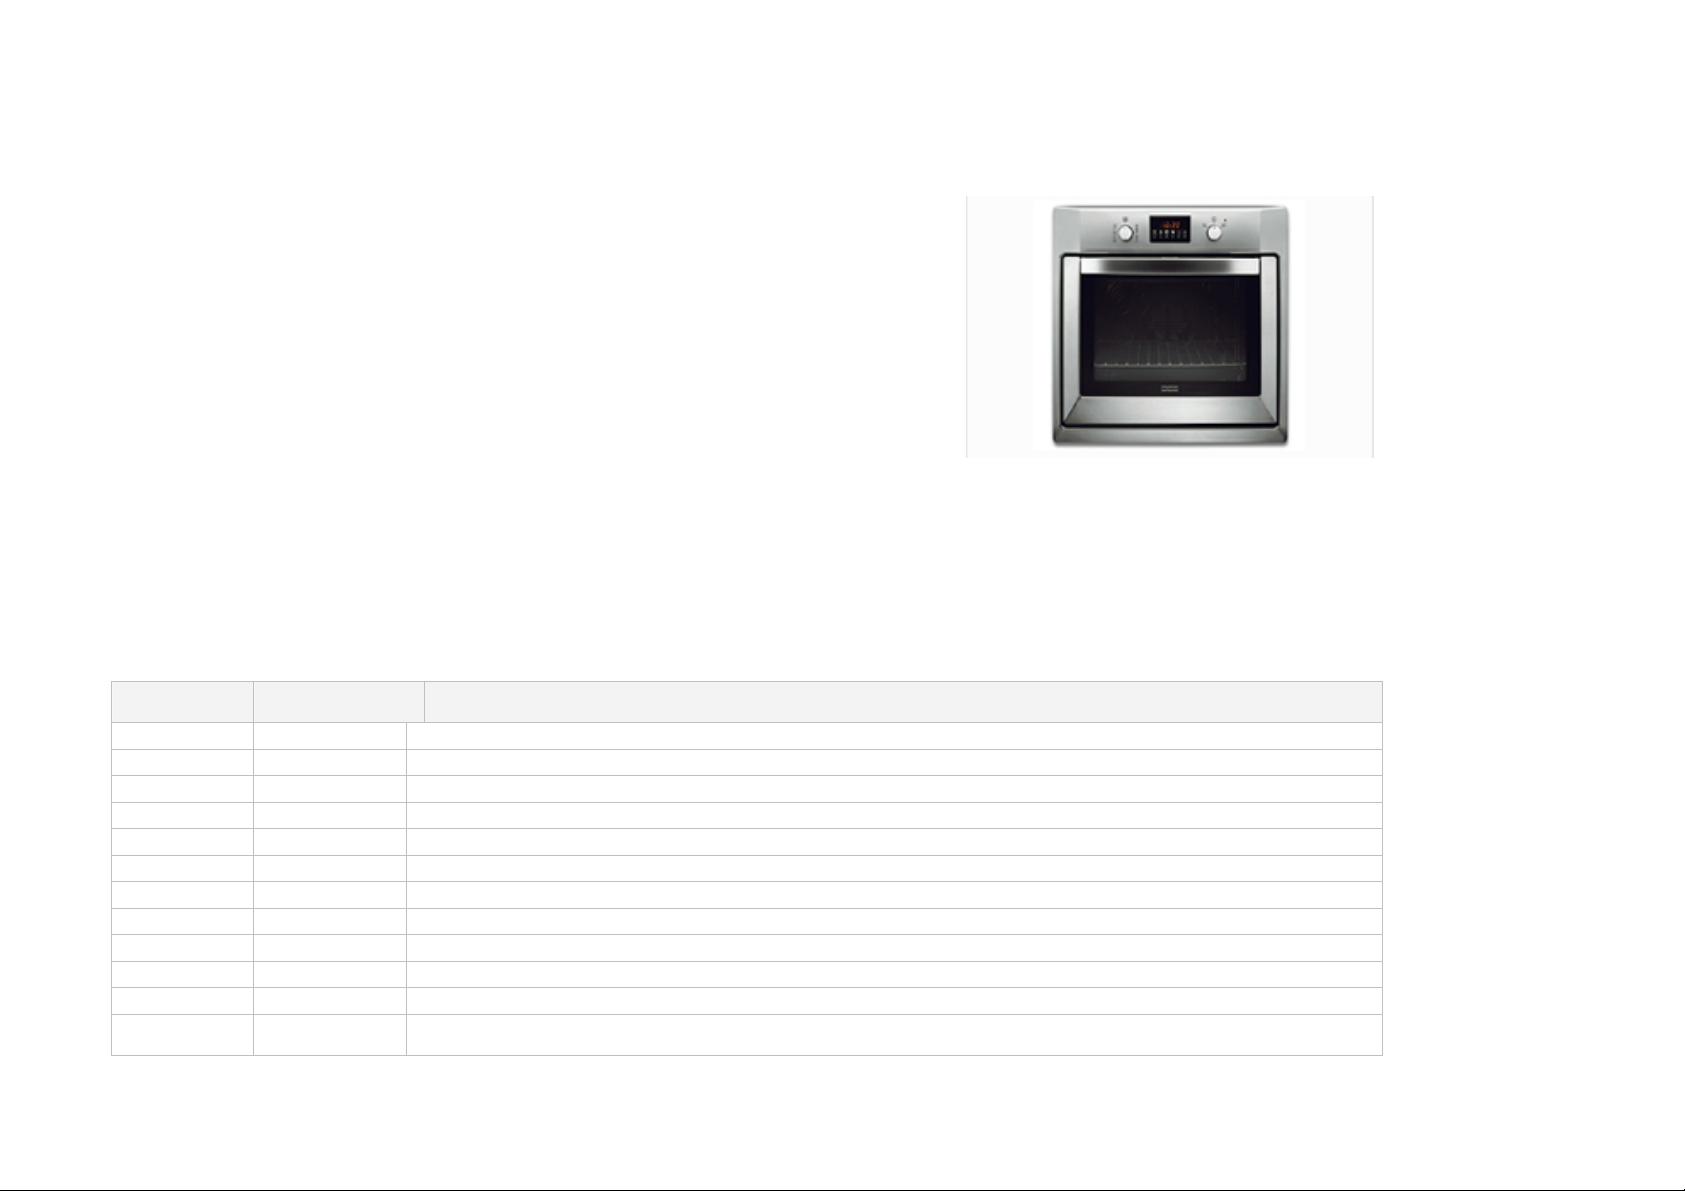
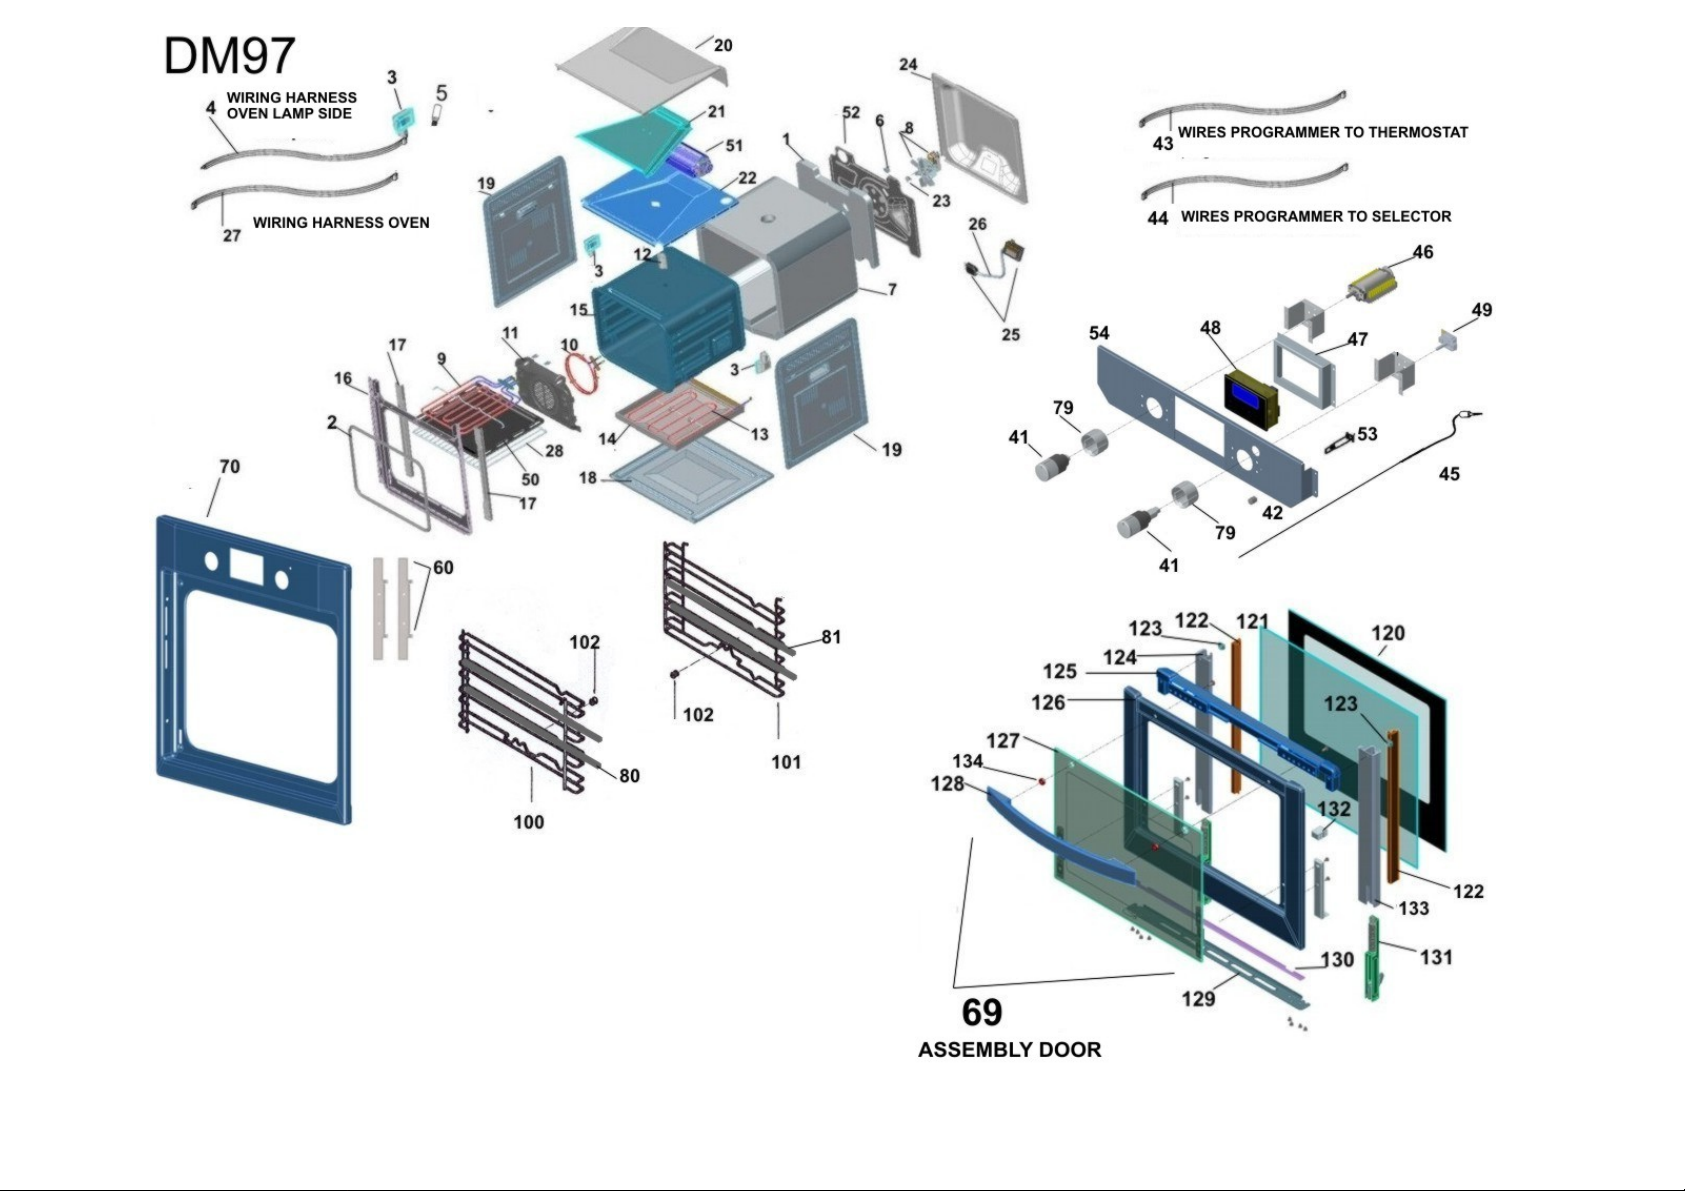
DM97MXA 5600116
-9 COOKING MODES
-ADVANCED ELECTRONIC
PROGRAMMER
- 3 GLASSES DOOR
- 2 OVEN RACKS
ENERGY CLASS A
KIT TELESCOPIC ARMS
NR 01 DRIP TRY
3 GLASSES DOOR / Energy class A
Inner dimensions of the oven :
width mm440 depth mm 415 height mm
312
Inner volume of the oven: 57 litres
Consumption (convenction mode) :
to reach 175° C: 0.32 kwh
To maintain 175° 0,62 kwh
Total consumption 0,94 kwh
Voltage 230v-50 hz
Total power: 2875 kw 10a
HEATING ELEMENT POWER:
TOP W 1000
BOTTOM W 1250
GRILL W 2250
CIRCULAR W 2000
fan motor w 25
oven lamp w 15x2
coolin fan 20 w
ELECTRONIC PROGRAMMER EVOLUTE
kit telescopic arms
Code POSITION DESCRIPTION SPARE PARTS
Consumption (ventilated mode) :
to reach 200° C: 0.31 kwh
To maintain 200° 0,81wh
Total consumption 1,12 kwh
1992018
1992063
1992064
1992065
1992066
1992067
1992068
1992069
1992070
1992071
1992148
1992093
1
SCREWS PCS 10 TSP M5X20 FIXING CASING
SCREWS PCS 10 TCB CRO ZIG AUT 4,2X12 FIXING HEATING ELEMENT
SCREWS PCS 10 ,2X6,5 SP FIXING INTERNAL OVEN CHIMNEY
SCREWS PCS 10 TSP CROCE M5X20 FIXING OVEN FRONT
SCREWS PCS 10 TCB AUTOF 2,9X6,5 ZNB FIXING THERMOSTAT SAFETY
SCREWS PCS 10 TRILOB M4X10 UNI FIXING POST DOOR
SCREWS PCS 10 TCB CRO 4,8 M5X16 FIXING HANDLE
SCREWS 10 PCS VITE 3.5PX15 FIXING TERMINAL BLOCK
SCREWS PCS 10 TCB CRO ZIG AUTOF 4,2X12 NICH FIXING ASSEMBLY SURROUND OVEN
SCREWS PCS 10 TCB RIDOTTA M4X5 FIXING SELECTOR,THERMOSTAT, END COOKING
BOOKLET/INSTRUCTION/KIT INSTALLATION
BACK GLASS REAR INSULATION
6
Page 7

1992005
1992094
1992095
1992096
1992007
1992097
1992009
1992010
1992011
1992012
1992013
1992014
1992015
1992099
1992021
1992022
1992023
1992024
1992025
1992029
1992027
1992028
1992026
1992045
1992112
1992136
1992055
1992134
1992046
1992138
1992139
1992140
1992141
1992142
1992143
1992242
2
3
4
5
6
7
8
9
10
11
12
13
14
15
16
17
18
19
20
21
22
23
24
25
26
27
28
41
42
43
44
45
46
47
48
49
GASKET
OVEN LAMP/ RECTANGULAR LAMP HOLDER DM74
WIRING HARNESS DM74 OVEN SIDE LAMP
LAMP 15 W
THERMOSTAT SAFETY TY 280° 16°
INSULATION CASING LAMP SIDE
MOTOR FAN/FAN/NUT
GRILL+TOP ELEMENT 2250+556W
CIRCULAR FAN ELEMENT 2000W
FAN DIFFUSER
INTERNAL OVEN CHIMNEY
OVEN LOW HEATING ELEMENT 1250 W
LOWER PANEL
OVEN CUBE LAMP SIDE
OVEN FRONT
SUPPORT INGE OVEN DOOR
TOP BULKHEAD CASING
SIDE PANEL RIGHT/LEFT
OUTER CASING
AIR CONVEYOR
OUTER CASING
THERMOSTAT SAFETY 100-90 TANGENTIAL FAN
REAR CASING
CABLE+ TERMINAL BLOCK
CABLE 15 THREE POLE 130 MM
OVEN WIRES 9F+L PROGRAMMER ELECTRONIC
OVEN RACK
KNOB PUSH PULL DESIGN METAL
NEON LIGHT COVER
WIRES PROGRAMMER
WIRES PROGRAMMER/SELECTOR
SOUND PT1000 500°
SELECTOR 12C 11P+ENCODER .
PROGRAMMER BRACKET
ELECTRONIC PROGRAMMER ADVANCED TEMPERATURE CONTROL
THERMOSTAT / BOARD RESISTOR SELECTOR
7
Page 8

1992056
1992059
1992060
1992061
1992149
1992057
1992150
1992135
1992243
1992144
1992145
1992146
1992147
1992017
1992018
1992035
1992132
1992034
1992030
1992100
1992103
1992133
1992250
1992110
1992102
1992104
1992037
1992031
1992101
1992075
50
51
52
53
54
60
69
70
79
80
81
100
101
102
102
120
121
122
123
124
125
126
127
128
129
130
131
132
133
134
DRIP TRAY
TANGENTIAL FAN 1 SPEED 14 W
OVEN BACK PANEL
PILOT LAMP
SUPPORT CONTROL PANEL DM97M
BRACKET FIXING FORNITURE
DOOR ASSEMBLY DM97MXA
ASSEMBLY SURROUND OVEN DM97MXA
KNOB SUPPORT
TELESCOPIC ARMS LEFT
TELESCOPIC ARMS RIGHT
WIRE RACKS SIDE LEFT / INSERT)
WIRE RACKS SIDE RIGHT ( 2 INSERT)
SUPPORT WIRE RACKS SIDE
SCREWS 10 PCS TSP M5X20
GLASS INSIDE
MIDDLING GLASS
DOOR GASKET 3V L 390
OVEN DOOR PLUG
POST DOOR GLASS LEFT
HANDLE HONNER INNER OVEN DM
OVEN DOOR FRAME XA
DOOR GLASS+ BRACKET
HANDLE ST. STEEL OVEN DESIGN METAL
OVEN DOOR LOWER TRIM/OVEN DM
OVEN DOOR LOWER TRIM GASKET
HINGE OVEN DOOR
OVEN DOOR GLASS SPACER
POST DOOR GLASS RIGHT
RUBBER WASHER 10 PCS
8
Page 9
9
Page 10

Introduction
Congratulations on choosing a Franke appliance. Before using your new appliance, we recommend you read the instructions and advice provided in this manual.
This should facilitate your understanding of the appliance use and also extend its life. Always keep this owner’s manual close to han d since you may need to
refer to it in future.
First use
The first time you use the oven, we recommend that you set the temperature control knob to the highest setting and leave the ov en on for at least 40 minutes with
nothing in it, with the oven door open and the room properly ventilated. The odour that is often detected during this initial use is due to the evaporation of
products used to protect the oven during storage and until it is installed. Once this initial step has been taken, the oven is ready for use.
Advice
A good habit to get into immediately is to pre-heat the oven to the desired temperature before placing your dishes inside it. During cooking, never place pans or
cookware directly onto the bottom of your oven. These should be placed on the grids or oven trays provided, inserted at one of the 5 rack heights available;
failure to observe this particular piece of advice could damage the enamel coating on the oven interior. Never line the oven interior with tin foil, especially the
oven bottom. All repairs should be carried out by specialised authorised staff. Contact your nearest after-sales service centre and request the use of original
spare parts only. Your Franke oven is coated with a special enamel layer, which is easy to clean. Another good habit to get into is to clean it often and to avoid
reheating caked on grease spots and food residue from previous uses. All self-cleaning panels (if the oven is fitted with them) should be cleaned with soapy water
(see cleaning instructions). N.B.: - before you turn your oven on, read the instructions on using the timer (see page 16).
-if the oven is fitted with an automatic cooking programmer or end cooking timer, you will have to select the “manual” option identified by the symbol
to use the oven manually.
Close-up view
Control Panel
Selector knob
Use this knob to select the oven operating mode depending on the type of cooking required. Set the knob onto any of the cooking modes and the light
inside the oven will turn on to indicate that the appliance is on.
Timer/Programmer
The Franke range of ovens includes various different cooking time control and management systems; page 16 provides detailed instructions for each one; just
identify the type of control fitted on your oven and read the relevant section for the correct use of this feature
Thermostat indicator light
Indicated by the symbol
turned back on every time the oven is in a heating phase. It is a useful aid to check that the correct temperature has been reached before you place a dish in the
oven.
Temperature control knob (Thermostat)
, it informs you that the oven heating elements are in operation. The light turns off when the temperature set has been reached, and is
10
Page 11

This knob allows you to select the right temperature for the dish you wish to cook, keeping it constant during the entire cooking process. To select the desired
temperature, turn the knob clockwise until the reference mark coincides with the corresponding number. The maximum temperature is
approximately 260°C.
Oven rack guides
These are designed to help in the correct positioning of the grids and oven trays in the 5 rack heights available (from 1 to 5 from the bottom
up); the suggested cooking table (on page 19) provides a suggestion for the ideal position of these acce ssories depending on the dish and
cooking mode.
Oven tray
It is usually used to catch any fat and/or grease dripping from food placed directly on the grid or to cook food directly; when not in use, the
oven tray should be removed from the oven for cooking. The oven tray is made of type “AA” enamelled steel for use with food products.
Grids
These are used as a support for your cake tins, terrine dishes and any cookware other than the oven tray provided, or when cooking in the grill
or ventilated grill modes to grill meat and fish or to toast bread and the like.
How to use your appliance
This oven combines the advantages of traditional convection ovens with those of the more modern fan assisted models. It is a
highly versatile appliance that allows you to choose easily and safely between 5 different cooking modes. Use knobs (B) and (E)
on the control panel to pick one of the cooking modes available and to set the desired temperature. We recommend you consult
the suggested cooking table on page 19 for the best use of your new oven.
Cooling fan
In order to cool down the door, control panel and sides of the appliance, this Franke oven is fitted with a cooling fan which turns
on automatically when the oven is hot. When the fan is on, a normal flow of air can be heard exiting between the oven door and
the control panel. Special attention has been paid to ensure the speed of the air flow does not disturb you while cooking and to
make sure it is as silent as possible.
To protect the surrounding furniture cabinets, when cooking is complete, the fan stays on until the oven has cooled down
sufficiently.
11
Page 12

7 Cooking modes
Convection mode
The thermostat knob (E) should be set to between 50°C and Max (260°C).
The oven is heated both from above (top heating element) and from below (bottom heating element). This is the traditional cooking
mode that allows food to be cooked uniformly, using one rack height only.
Fan assisted mode
The thermostat knob (E) should be set to between 50°C and Max (260°C).
The top and bottom heating elements are turned on, as well as the fan inside the oven. Compared with the previous cooking mode
(convection), an even more uniform distribution of heat is obtained thanks to the fan, and 2 different rack heights can be used at the
same time.
Ventilated mode
The thermostat knob (E) should be set to between 50°C and Max (260°C).
The circular heating element and the fan are turned on. The constant uniform heat cooks and browns food uniformly
over its entire surface. With this mode, you can also cook various dishes at the same time, as long as their
respective cooking temperatures are the same. This is the most delicate of the ventilated modes available in this Franke oven, and is
ideal for baking cakes and pastries in general, as it allows you to cook on three different rack heights simultaneously.
Multy power ventilated mode
The thermostat knob (E) should be set to between 50°C and Max (260°C).
The circular heating element is turned on, accompanied by the partial action of the top and bottom heating elements and the fan.
Compared with the previous cooking mode, it is more powerful and quicker to reach the desired temperature; this, together with the
uniform distribution of the heat, makes it ideal for cooking meat roasts and fish as well as pasta bakes, using up to 3 different rack
heights.
Quick cooking pizza mode
The thermostat knob (E) should be set to between 50°C and Max (260°C).
The circular heating element, along with the top and bottom heating elements and the fan are turned on. This is the most powerful
cooking mode available in your Franke oven, and the heat distribution was especially designed to perform a prevalent action towards
12
Page 13

the bottom; this makes it ideal for the preparation of pizzas and for cooking frozen food quickly. It can be used to reach the desired
temperature quickly, and then select any of the other cooking modes available.
Grill mode
The thermostat knob (E) should normally be set to the Max setting (260°C), however you can choose a lower setting, in which cased
the grilling would be slower.
In this cooking mode, the top heating element is turned on at a power setting that allows for the perfect grilling of food,
such as meat and fish. In this case, the quick browning of the surface via infrared rays keeps the inside of the meat soft and tender;
the grill mode can also be used to toast up to 9 slices of bread very quickly. Your Franke oven is perfectly safe, and has been
designed for grilling food with the oven door completely shut. However, during cooking, the oven door can be kept either fully open or
ajar, using the half-open position. Warning: the grill heating element becomes extremely hot during operation; try to avoid touching it
inadvertently when handling the food to be grilled; however, Franke has designed a special shape of the oven front to protect the
user’s hands as much as possible.
Ventilated grill mode
The thermostat knob (E) should normally be set to the Max setting (260°C), however you can choose
a lower setting, in which cased the grilling would be slower.
The grill heating element situated at the top of the oven is tuned on, along with the fan. This combination of features increases the
effectiveness of the unidirectional thermal radiation of the heating elements through forced circulation of the air throughout the oven.
This helps prevent food from burning on the surface, allowing the heat to penetrate right into it. Excellent results are achieved with
kebabs made with meat and vegetables, sausages, ribs, lamb chops, spicy chicken, quails, pork chops, etc.
Cooking modes Defrosting
Set the knob to the symbol ( ) to enable the defrosting mode. In this mode, the air circulated by the motor action throughout
the interior of the oven affects the food and speeds up the natural thawing process.
13
Page 14

9 Cooking modes
Defrosting
speeds up the natural thawing process.
Convection mode
The thermostat knob (E) should be set to between 50°C and Max (260°Q.
The oven is heated both from above (top heating element) and from below (bottom heating element). This is the traditional cooking mode
that allows food to be cooked evenly, using one rack height only.
Fan assisted mode
The thermostat knob (E) should be set to between 50°C and Max (260°C).
The top and bottom heating elements are turned on, as well as the fan inside the oven. Compared with the previous cooking mode
(convection), an even more even distribution of heat is obtained thanks to the fan, and 2 different rack heights can be used at the same time.
Ventilated mode
The thermostat knob (E) should be set to between 50°C and Max (260°C).
The circular heating element and the fan are turned on. The constant even heat cooks and browns food uniformly over its entire surface.
With this mode, you can also cook various dishes at the same time, as long as their respective cooking temperatures are the same. This is
the most delicate of the ventilated modes available in this Franke oven, and is ideal for baking cakes and pastries in general, as it allows you
to cook on three different rack heights simultaneously.
Multi power" ventilated mode
The thermostat knob (E) should be set to between 50°C and Max (260°C).
The circular heating element is turned on, accompanied by the partial action of the top and bottom heating elements and the fan. Compared
with the previous cooking mode, it is more powerful and quicker to reach the desired temperature; this, together with the uniform distribution
of the heat, makes it ideal for cooking meat roasts and fish as well as pasta bakes, using up to 3 different rack heights.
Set the knob to the symbol (j^[) to enable the defrosting mode.
In this mode, the air circulated by the motor action throughout the interior of the oven affects the food and
Quick cooking" pizza mode
The thermostat knob (E) should be set to between 50°C and Max (260°C).
The circular heating element, along with the top and bottom heating elements and the fan are turned on This is the most powerful cooking
mode available in your Franke oven, and the heat distribution was especially designed to perform a prevalent action towards the bottom; this
makes it ideal for the preparation of pizza;
and for cooking frozen food quickly. It can be used to reach the desired temperature quickly, and then selecl any of the other cooking modes
14
Page 15

available.
Oven ceiling fan" cooking
The thermostat knob (E) should be set to between 50°C and max (260°C).
The top heating element (ceiling) and the fan will start up. The low power and the fan action enable a delica te and even cooking
process,which is ideal for baking cakes and for some types of baked pasta.
Grill mode
The thermostat knob (E) should normally be set to the Max setting (260°C), however you can choose a lower setting, in which
cased the grilling would be slower.
The grill heating element situated at the top of the oven is tuned on. In this case, the quick browning of th( surface via infrared rays keeps the
inside of the meat soft and tender; the grill mode can also be used tc toast up to 9 slices of bread very quickly. Your Franke oven is perfectly
safe, and has been designed fo grilling food with the oven door completely shut. However, during cooking, the oven door can be kept eithe
fully open or ajar, using the half-open position.
Warning: the grill heating element becomes extremely hot during operation; try to avoid touching i inadvertently when handling the
food to be grilled; however, Franke has designed a special shape of the oven front to protect the user's hands as much as
possible.
Ventilated grill mode
The thermostat knob (E) should normally be set to the Max setting (260°C), however you can choose a lower setting, in which cased the
grilling would be slower.
The grill heating element situated at the top of the oven is tuned on, along with the fan. This combination o features increases the
effectiveness of the unidirectional thermal radiation of the heating elements througr forced circulation of the airthroughout the oven. This
helps prevent food from burning on the surface, allowins the heat to penetrate right into it. Excellent results are achieved with kebabs made
with meat and vegetables sausages, ribs, lamb chops, spicy chicken, quails, pork chops, etc.
15
Page 16

The end cooking time clock rustic
The figure illustrates the programmer controls; knobs 1 (L/H) and 2 (R/ H) allow for all the necessary adjustments to
be made.
Knob 1
Use this knob to set the correct time. To do this, pull and turn the knob clockwise until the correct time is displayed.
Knob 2
Use this knob to set the cooking time or to programme the oven for manual use. To do this, turn the knob clockwise.
Manual operation of the oven
The oven can also be used manually, i.e. without any programming. In this case, turn knob 2 of the programmer
Semi-automatic operation of the oven
Normal cooking start with programmed cooking end:
prepare your dish; turn knob 2 clockwise and set the expected minutes forthe end cooking time on the dial (Q); turn the selector knob to the
chosen setting and the thermostat knob to the desired temperature. The oven starts immediately. When the set amount of time is up, in
addition to the timer ringing, the oven is automatically turned off. To silence the buzzer, turn the clock back to "0" or manual mode by turning
knob 2. N.B.Straight after it is turned off, and for a prolonged period of time, the interior of the oven maintains a temperature close to that set
for cooking; so, to avoid overcooking or burning food, we recommend you remove it from the oven as soon as cooking is complete.
Minute minder
The clock may be used as a minute minder only if the oven is not in operation. To operate the minute minder, turn knob 2 clockwise until the
desired time is displayed on the dial (Q). The maximum amount of time that can be set is 180 minutes. To silence the buzzer, turn knob 2
clockwise until the symbol In this case, turn knob 2 "0" corresponds with the marker
Important
To use the oven in manual mode, (i.e. without any programming), the following steps are necessary:
• Turn knob 2 of the programmer clockwise until the symbol
clockwise until the symbol
corresponds with the marker on the control knob.
on the control knob.
corresponds with the marker on the control knob.
16
Page 17

Electronic oven temperature control for model DM97MXS
This feature allows you to program the oven or the grill as follows:
• delayed start for a specific length of time;
• immediate start for a specific length of time;
• minute minder. Button Functions:
minute minder with hours and minutes
cooking time
end cooking time
switch to manual mode
set cooking time -backward;
set cooking time-forward.
How to set the digital clock
After the appliance has been connected to the power supply, or when the power has gone out, the clock display will automatically reset to
0:00 and begin to blink. 0.00
• Press the
Button + sets the time forward.
Button - sets the time backward.
Whenever the time needs to be reset, follow this same procedure:
Manual operation of the oven
Once the correct time has been set, the programmer automatically switches to manual mode. Note: To reset the manual mode after
each "Automatic" cooking, press the
Manual operation of the oven
button and then set the correct time (within four seconds) using the [—] and [+]buttons.
and buttons.
17
Page 18

When a cooking mode is selected, the oven immediately starts the heating process, shown by the symbol of a hot pan on the display. For each cooking
mode, the display suggests a recommended cooking
temperature (SEE: Suggested cooking table); this temperature may be changed by the user using the
C°knob: turn it anti-clockwise to decrease the temperature
and clockwise to increase it. The symbol
reached the desired temperature yet. When the oven reaches the desired temperature, a "beep" will sound for two seconds and the symbol
will stay on permanently, to indicate the cooking stage has begun.
Immediate start with set cooking time
Let us suppose you want to cook at 200°C for 30 minutes.
1. Turn the selector knob, the display will suggest the recommended cooking temperature; use the temperature control knob
2. Press the hot pan key
Release the key, the hot pan signal will start flashing after 4 seconds to indicate the oven is pre-heating. The countdown, however, will only start once the de sired
temperature has been reached (except when the grill modes are on, in which case the countdown starts immediately, see B). The information displayed is as
follows:
A - pre-heating stage
(you can check the time set using the hot pan key
a "beep" will sound fort wo seconds and the symbol
B - cooking stage
and then press the [+| and [-] keys to set the desired cooking time, in this case 30 minutes.
of a hot pan flashing on the display indicates that the oven is in the pre-heating stage, which means it has not
of the hot pan
C° to change it if necessary.
and the temperature set using the [+]and [-] keys). When the oven reaches the desired temperature,
of the hot pan will stay on permanently, to indicate the cooking stage has begun.
(remaining cooking time / temperature set - alternating)
C-end of cooking
18
Page 19

You will be informed that cooking has ended by an intermittent beeping (**) lasting one minute, which can be silenced by pressing the [+] key (or even the hot pan
and stop , and the display will indicate. I
The oven suspends heating automatically, the fans will stay on to avoid any heat accumulation and the oven light will stay on so you can check cooking.
However, the temperature inside the oven will remain high for several minutes. Should you wish to continue cooking manually, press the
the heating process. The word AUTO will disappear and the hot pan symbol
selector knob back to 0. The display will indicate the following for 3 seconds.
After which the display will go back to indicating the time of day (if you want to turn off the display when the oven is off, press the timer and hot
pan keys simultaneously
then use the [+] and [—] keys to set this parameter to:
is emitted and for future beeping by pressing the
Delayed start with set cooking time
The cooking time as well as the time at which the cooking ends must be set. Let us suppose that it is 8:00 a.m. and that you wish to cook
something for 30 minutes that will end atl p.m..
and the display will indicate:
the display will be turned off and will only come back on when the oven is on). (**): the intensity of the beeping can be mo dified while it
key.
, will reappear. If on the other hand you wish to stop altogether, set the
button to re-start
19
Page 20

1. Turn the selector knob c°, the display will suggest the recommended cooking temperature; use the temperature co ntrol knob ^c\ to change
it if necessary.
2. Press the hot pan key
3. Press the "stop" key
cookingto end, in this case 13:00. The display indicates:
AUTO
The oven is set, and on stand-by.
If you want to check the cooking time set, press the hot pan key
To check the temperature set, press the [+] or [-] key, turn knob
Cooking stage:
when it is time for cooking to start, the oven will operate as from point B in the paragraph above, except for the cooking time countdown, which starts immediately
and not when the desired temperature has been reached. This is because logically speakingyoLi wo uld have placed the dish in the oven when you set it. The
pre-heatingtime is included in the cooking time.
and then press the [+] and [-] keys to set the desired cooking time, in this case 30 minutes.
and within 4 seconds use the [+] and [—] keys to select the time you want
; use the [+] and [-] keys to change it.
C°to change it.
20
Page 21

DM74 MXS DM74MXT DM74MOA DM74MGF
21
Page 22

DM97MXA
22
Page 23

Dismounting the oven door
To facilitate your task in cleaning the oven, the door can be dismounted at the hinges as follows:
- The hinges (A) are fitted with two mobile U-bolts (B). Raise the U-bolt (B) to release the hinge from its seat.
- Then lift the door upwards and pull it out; to do this, hold the door on either side beside the hinges.
- To reposition the door, first insert the hinges into the special grooves.
- Then, before shutting the oven door, remember to turn the mobile U-bolts (B) used to hook the two hinges in place.
After-Sales Service
In the event of a malfunction, please contact your nearest After-Sales Service Centre, as included in the list
enclosed. Never contact unauthorised technical servicemen.
Notify us of:- The type of problem;- The appliance model (Mod.);The serial number (S/N);
This information can be found on the appliance data plate, which can be seen with the appliance door open in the middle of the
bottom part of the door.
LABEL THE SERIAL NUMBER(S/N)
23
Page 24

A: PRODUCT CODE 5600110
B : SN SERIAL NUMBER :
I = ITALY F= OVEN
03=PRODUCTION 2003 L=month
of production
0000001= OVEN NUMBER
C: OVEN MODEL CM72MXS
24
Page 25

Assembly instructions
Measure the width of the back panel (S) of the cabinet, which should usually be 16,18 or 20 mm. 16 mm back panel: place 2 tabs (T)
indicating the number 16 on each fastening bracket (F). 18mm back panel: place 2 tabs (T) indicating the number 18 on each
fastening bracket (F). 20 mm back panel: no tabs are necessary for the 20 mm thick back panel. Position the brackets (F), resting
them onto the cabinet back panel and at the bottom on the oven supporting plane.
Secure the brackets (F) in place using the screws (V). Fit the oven inside the cabinet, open the oven door completely and secure it to
the brackets (F) using the 4 screws (v) and the 4 plastic spacers (D).
25
Page 26

26
Page 27

27
Page 28

28
 Loading...