

Page 1
T225 Dual Tab Driver
Operators Manual
Framers Corner, Cedar Court, Walker Road, Bardon, Leicestershire, LE67 1TU, England
www.framerscorner.co.uk
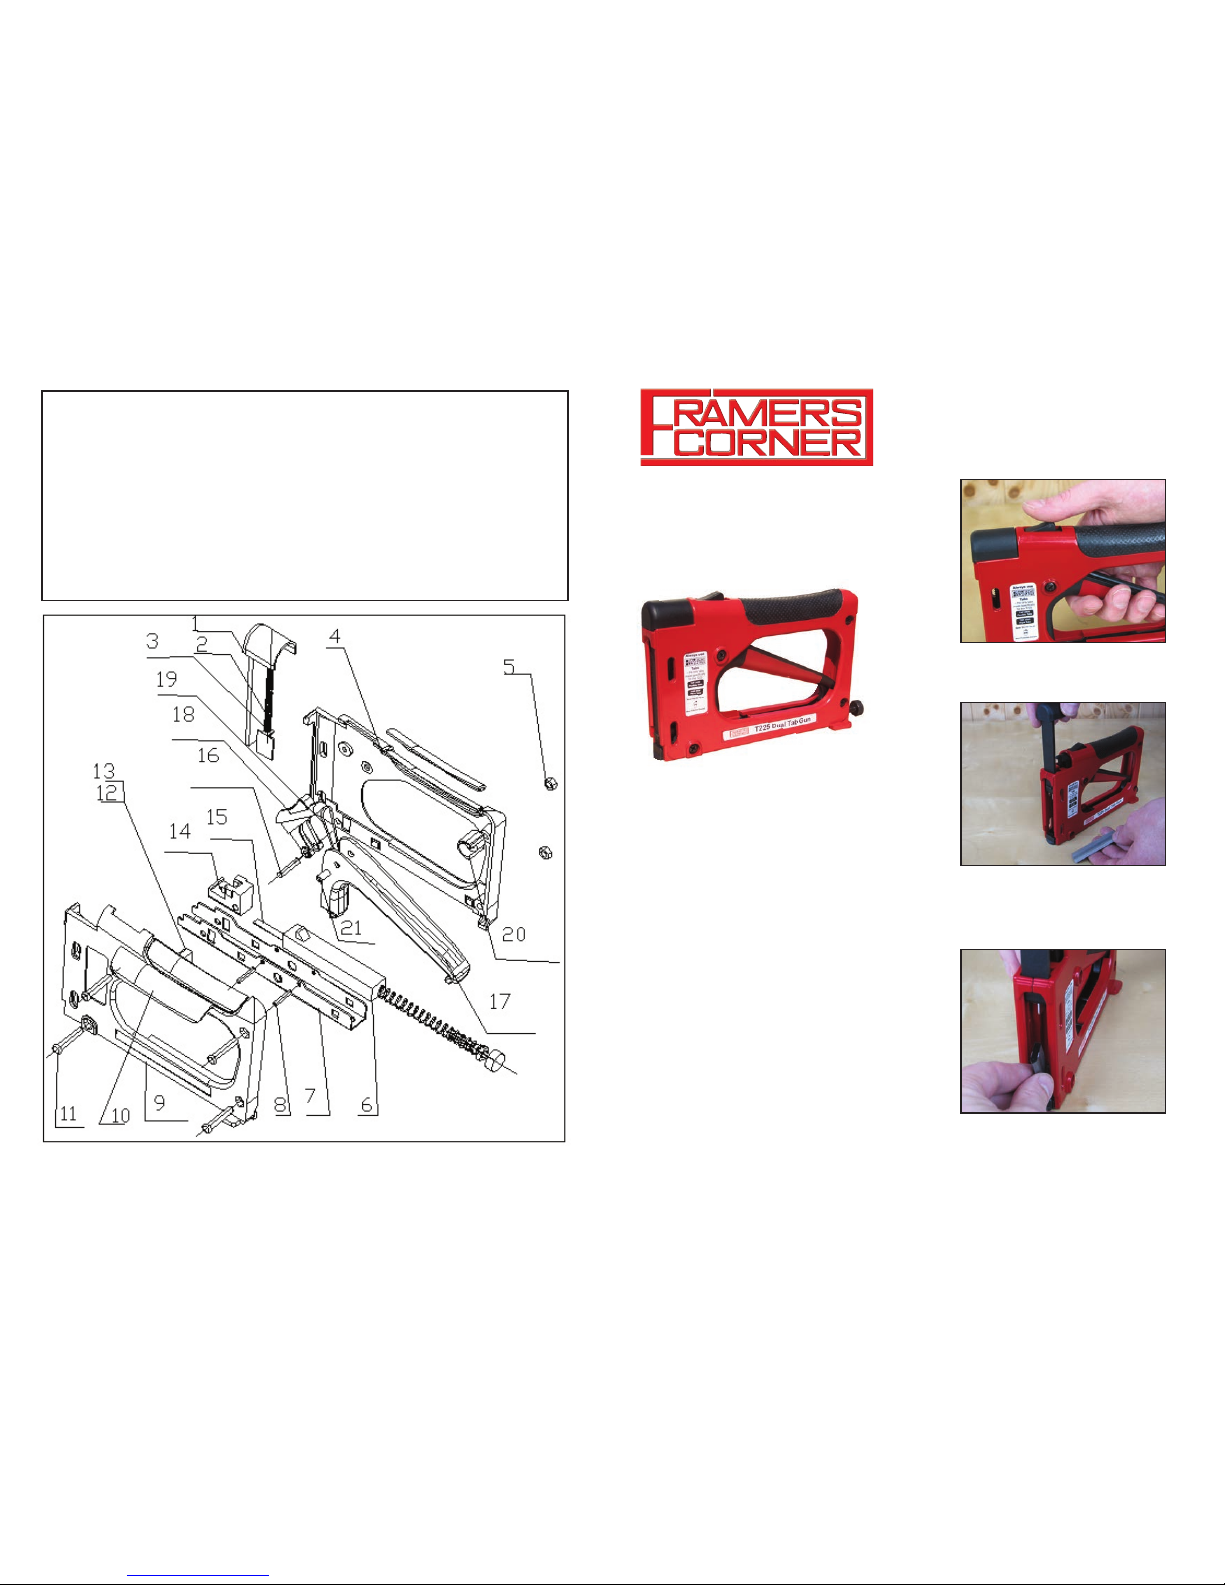
1. Slider Knob
2. Spring Loaded Top Pressure Unit
3. Pusher
4. Right Hand Body
5. M4 Nut (4 off)
6. Driver Holder Unit
7. Base
8. 22mm x 2.5mm Diameter Pins
9. Left Hand Body
10. Handle Grip
11. M4 x 22mm Screw (4 off)
12. Cushion Plate
13. Cushion
14. Nosepiece
15. Driver
16. Spacer Bush
17. Handle
18. Release Knob
19. Spring
20. Dampener
21. Trigger Spindle
LOADING TABS
Press the magazine cover release
Pull the magazine cover up to reveal
the loading slot
Load a strip of T4F or T4R tabs into
the magazine with pointed end
forwards
Firmly press the magazine cover
back down until it clicks
SAFETY INSTRUCTIONS
l Always wear eye protection
l Never pull the trigger unless the
nose is pressed firmly against
the wood
l Place the frame to be assembled
on a flat stable surface
l Small frames will need securing
before inserting tabs
Thank you for purchasing the Framers
Corner T225 Dual Tab Driver.
This tool is intended to be used for
picture frame assembly, to hold the
glass, artwork and backing board
securely into a wooden picture
frame.
Page 2
5) Move to the next position and
repeat the process.
6) For frames up to 300mm x 300mm
we recommend using 2 tabs on each
side ( Total 8 ). Larger frames may
require more tabs.
7) When working with softwood the
tab will be inserted to a depth of
around 7mm. If you are working with
hardwood it may be necessary to
increase the spring tension to
maintain this depth of insert. Turn the
tensioning screw clockwise to
increase the spring tension. It is
advisable to lower the spring tension
again afterwards as it also adds
resistance to the trigger, causing
operator fatigue.
MAINTENANCE
In the event of a tab jamming in the
driver, it can most often be pulled out
with a pair of pliers.
INSERTING TABS
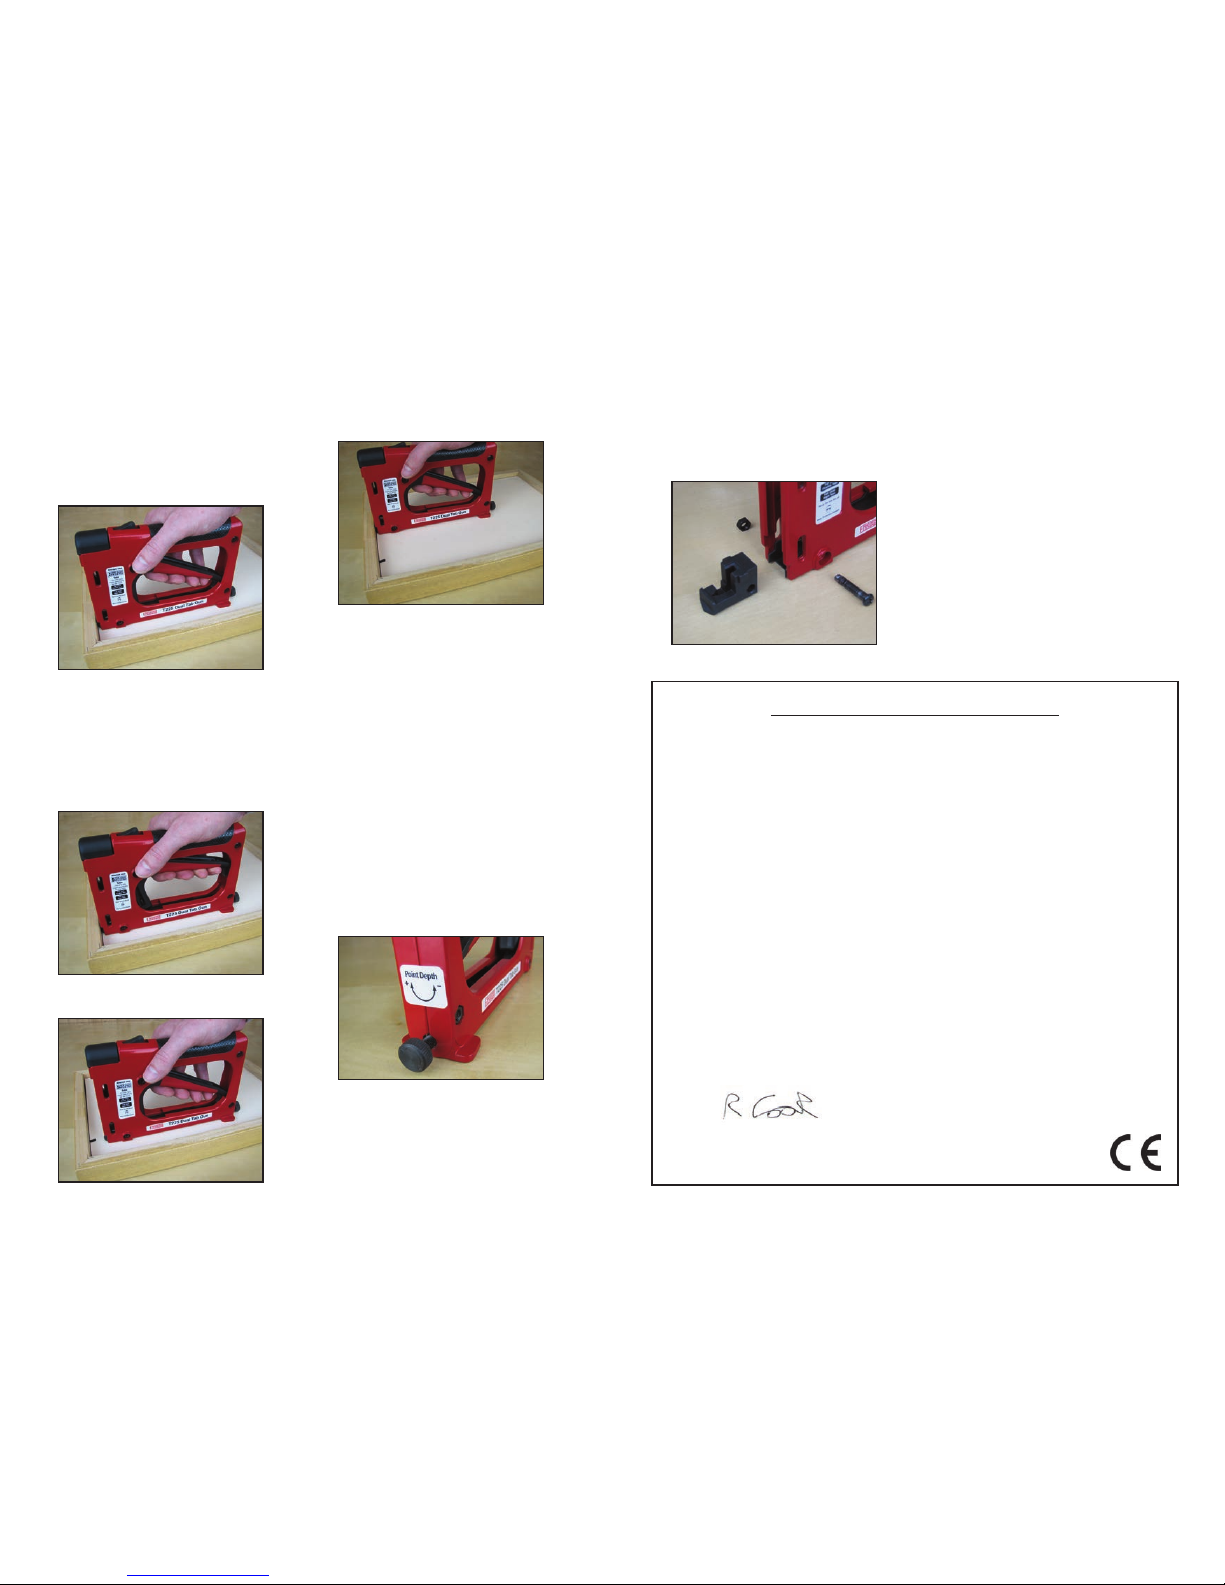
1) Press the nose of the tab driver
firmly against the back of the frame
in the position you want to insert the
tab.
2) Ensure the frame is held securely
so it will not move as the tab is
inserted.
3) Squeeze the trigger until it
releases the spring and inserts the
tab.
4) Release the trigger.
Declaration of Conformity for CE Marking
Framers Corner
Cedar Court, Walker Road, Bardon Hill, Leicestershire, LE67 1TU, England
Declare that Picture Frame Fixing Tool
Models T120, T220, T225 and T240
Conforms with the following Directives:
Machinery Directive 2006/42/EC
And further conforms with the following EU harmonized standard;
EN ISO 12100:2010
I hereby declare that equipment named above has been tested and found to
comply with the relevant sections of the above referenced specifications.
The machinery complies with all essential requirements of the directive.
Signed: ____________ Dated: 04/05/2012 Location: Leicestershire
Richard Cook
Director
If this is not possible remove the
nosepiece by undoing the securing
screw and removing the bolt. The
nose piece will then pull out.
When new, the tab drive is lubricated.
Over time it may be necesary to
reapply lubrication. It is not
recommended you undo all the
screws holding the driver together as
there are several springs contained
inside, and they are difficult to
reassemble.
As required, remove the nose and
apply lubricant between the Base
and Driver Holder Unit, Parts 6 & 7.
Use authentic Framers Corner Tabs:
T4F Flexible Type or T4R Rigid Type.
Size: 15mm length x 4.3mm width x
0.4mm thickness.
 Loading...