

Frakco Travelsoft RV 2400HD, Travelsoft RV 1200HD, Travelsoft RV 3200HD Operation Instructions Manual
Travelsoft Operating Instructions
TOLL FREE 800-967-1762 • D IRECT 507-283-4416
FAX 507-283-4417
TRAVELSOFT HD
1
Specifications:
RV
1200HDRV2400HDRV3200HD
Capacity
Tank Size 8" x 17" 10" x 30" 10" x 40"
Overall
Height
Resin
Capacity
Inlet &
Outlet
Weight
(empty of
water)
10,000
grains
.33 cu.
¾” G.H. ¾” G.H. ¾” G.H.
31 lbs. 55 lbs. 70 lbs.
24,000
grains
20¼” 37” 47”
.75 cu. ft. 1.0 cu. ft.
ft.
32,000
grains
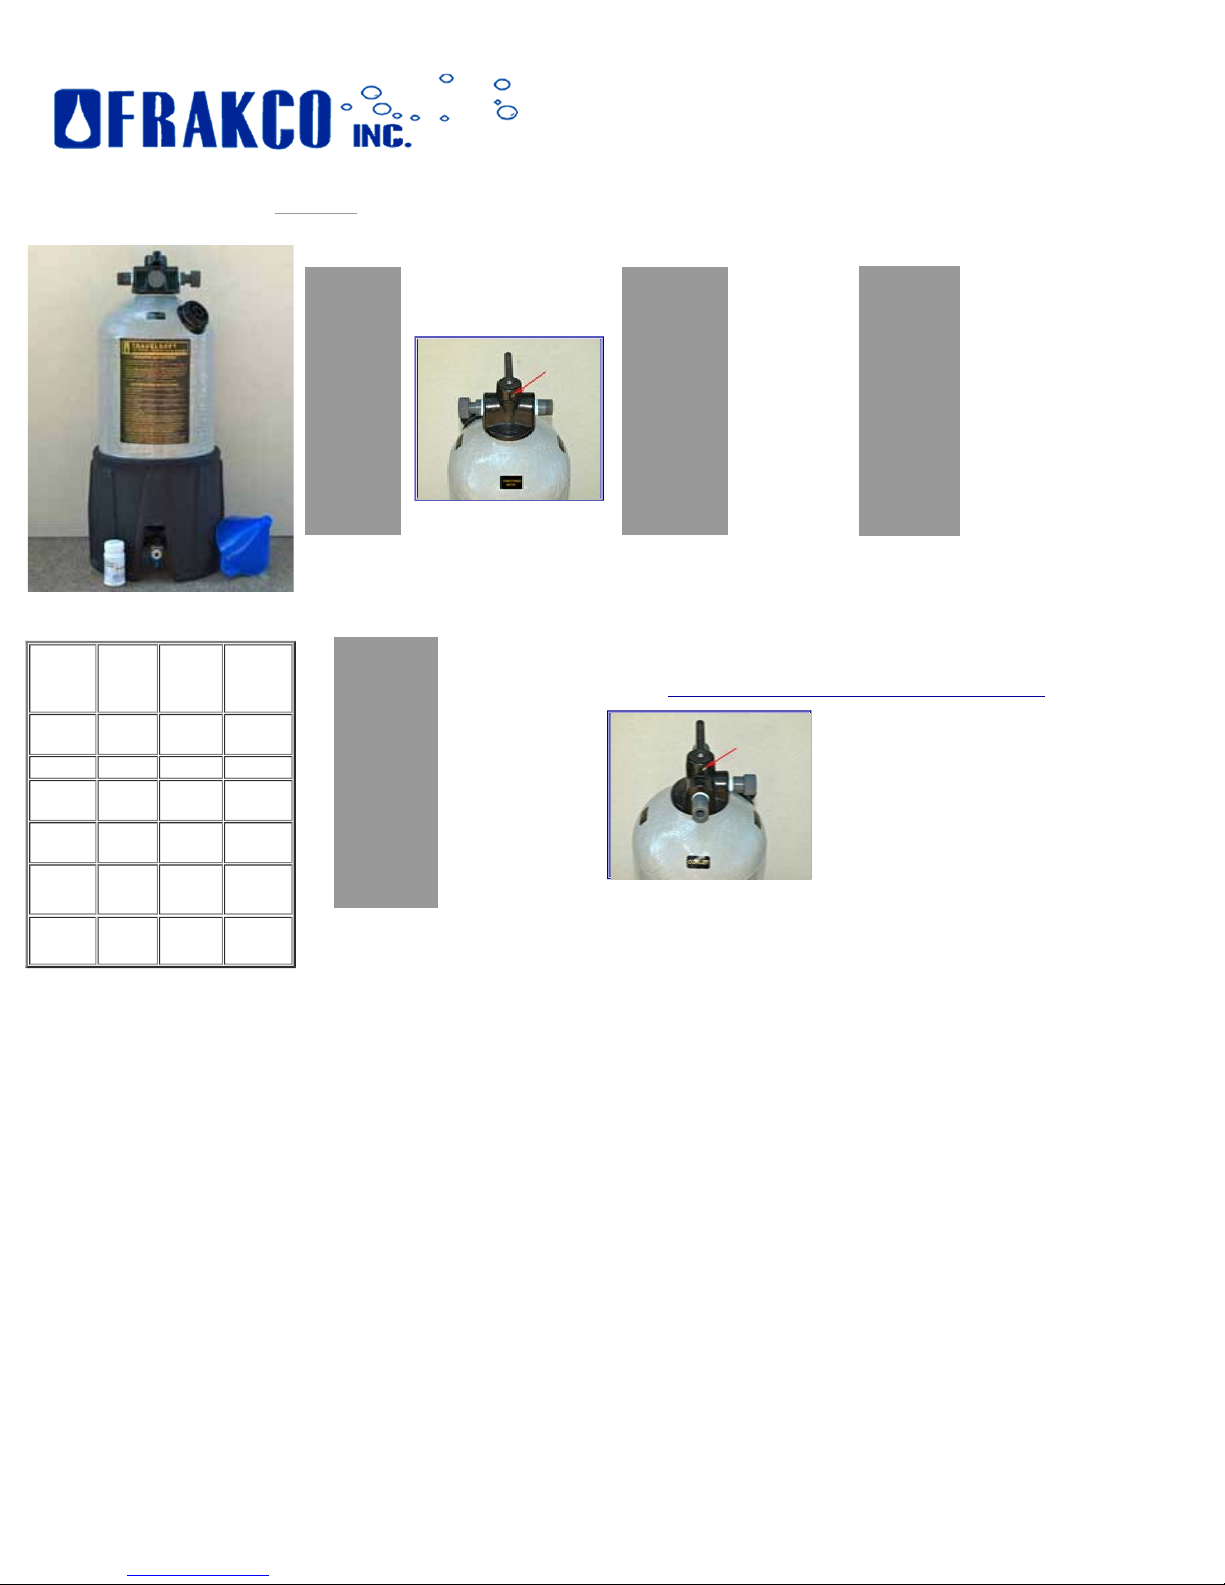
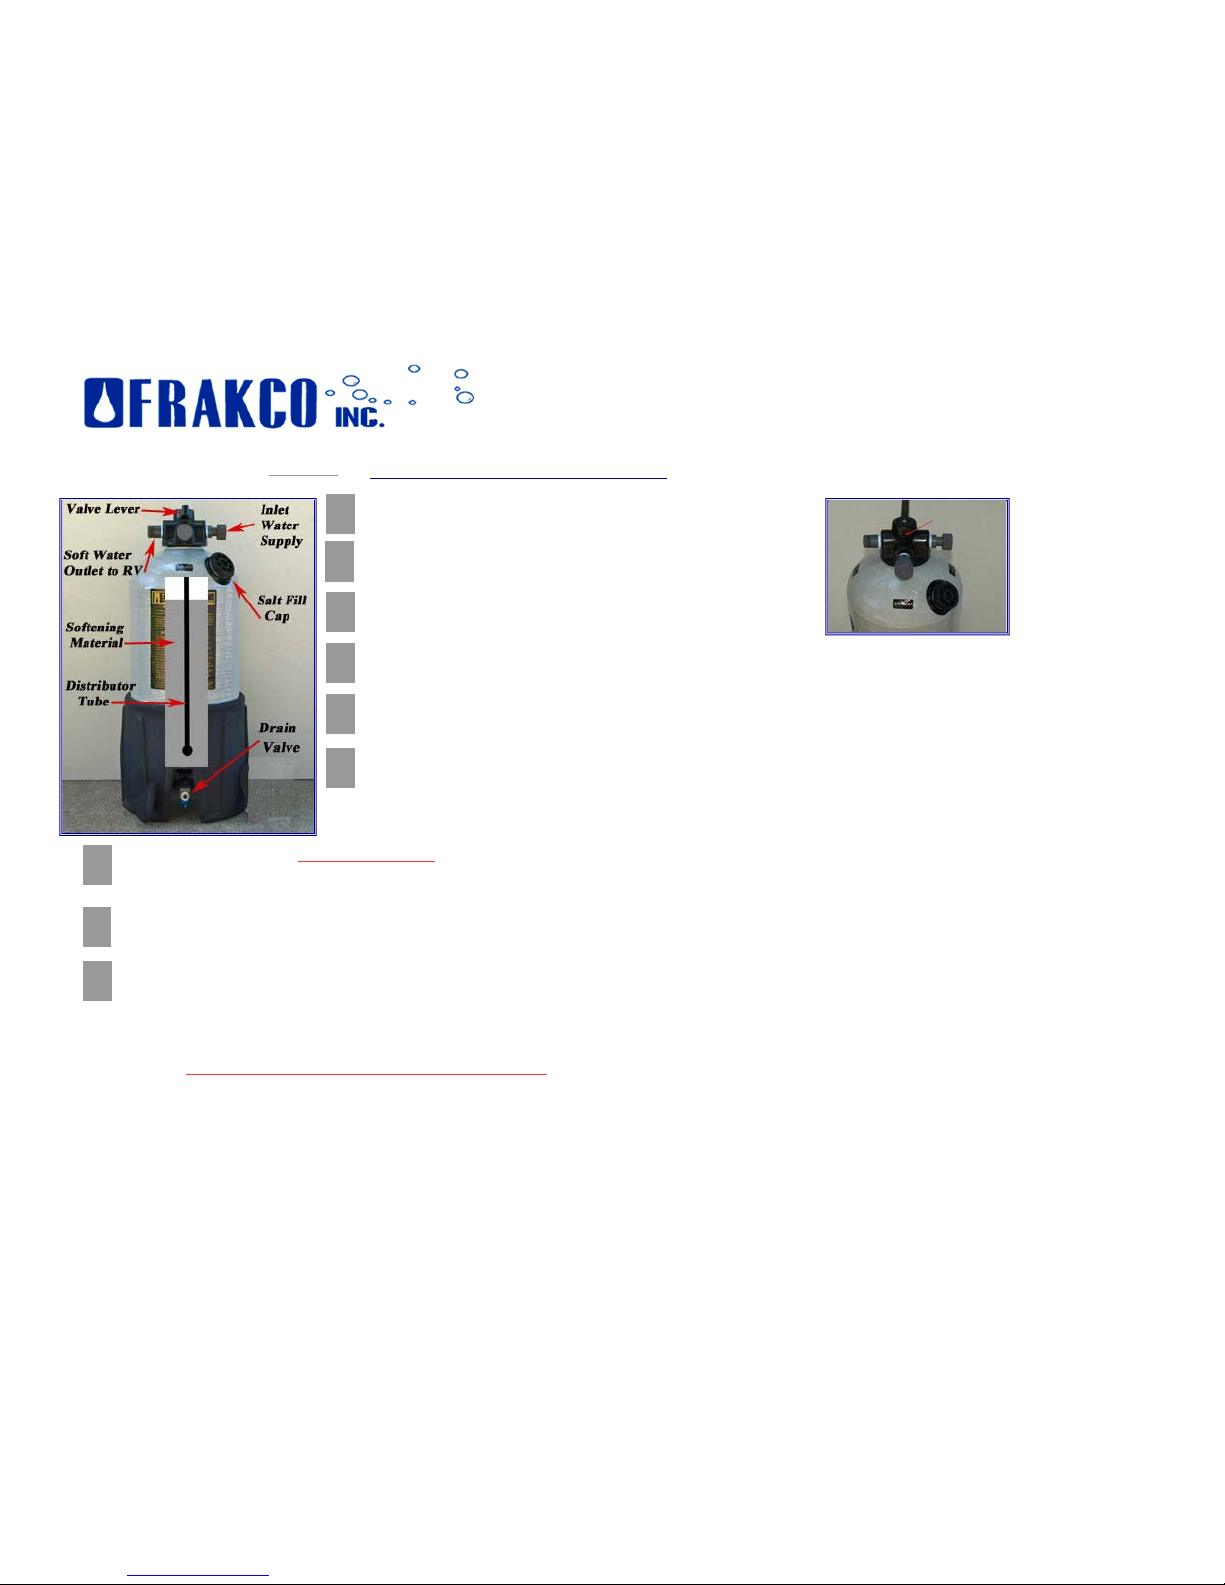
Turn valve lever to
conditioned water
position (Figure #1)
Fig #1
4
OPERATION INSTRUCTIONS (MODEL RV 1200)
Arrow to
Conditioned
water
Open water supply
and enjoy all the
benefits of soft
water. *Turn handle
to the bypass
position (figure #2)
to have nonsoftened water. For
example, when you
water the lawn, you
do not want to waste
softened water.
Connect
garden hose
from water
supply to
inlet of RV
2
Water
Softener.
3
When to Regenerate RV Softener...
Fig #2
Hard Water
Bypass Position
Check water inside your RV or at the outlet side of
the RV Softener with the test strips supplied. If
water tests more than 3 grains hard (50ppm) it is
time to regenerate the RV Softener following the
instructions on the next page, download the PDF,
or watch the Regeneration video.
Connect garden hose from
outlet of RV Water Softener to
your RV city water connection
or portable water tank. (On
initial installation softener is
ready for use and does not
need to be regenerated. Allow
water to run into a drain for a
few minutes as there may be
some color throw from the new
softening material in your new
softener.)
file:///Applications/MAMP/htdocs/Frakco/TravelsoftInstructionsHDWITHOUTpgs.html[4/23/13 9:12:23 AM]
file:///Applications/MAMP/htdocs/Frakco/TravelsoftREGENwoslidesHD.html[4/23/13 9:12:25 AM]
TOLL FREE 800-967-1762 • DIRECT 507-283-4416
FAX 507 -283-4417
REGENERATION INSTRUCTIONS (MODEL RV 1200 HD)
TRAVELSOFT HD
1
Turn off water supply. (Relieve pressure from system by opening bottom
drain valve.)
2
Close bottom drain valve and turn valve lever counter clockwise to
backwash position. (Figure #1)
Fig #1
3
Remove plastic cap from backwash connection, attach garden hose and
run to drain.
4
Turn off water supply and let softener backwash for 5 minutes or until water runs clear.
5
Turn off water supply, remove garden hose from backwash connection and replace plastic cap.
6
Remove salt fill cap, turn valve lever clockwise back to conditioned water position, open bottom
drain valve and drain water from softener, close drain valve. (This is done to make room for salt in
step # 7.)
7
Add 6 lbs. solar or rock salt NOT PELLET TYPE (approximately 10 cups), softener may have to be tipped slightly and gently shaken to get
all the salt in. Clean salt fill cap threads and replace salt fill cap.
DO NOT OVERTIGHTEN - CAP HAS 0- RING SEAL!!
8
Connect garden hose from outlet of softener and run to drain.
9
Turn on water supply slowly (approximately 1.5 gpm) for 15 minutes or until water is no longer salty. Turn off water supply. Connect garden
hose to RV and turn on water supply. Softener is now ready for service.
Open drain valve to drain water before storage - keep it from freezing.
The RV 1200 HD may be stored horizontally or vertically (must be vertical when in use).
Never remove the softening material from inside the tank.
If softener is stored for a long period of time, a capfull of bleach may be added with the salt in step #7 to sanitize the softener.
Arrow in Backwash
Position
 Loading...