

TO BE USED WITH FRACINO USER MANUAL AND INSTALLATION MANUAL
V1.1
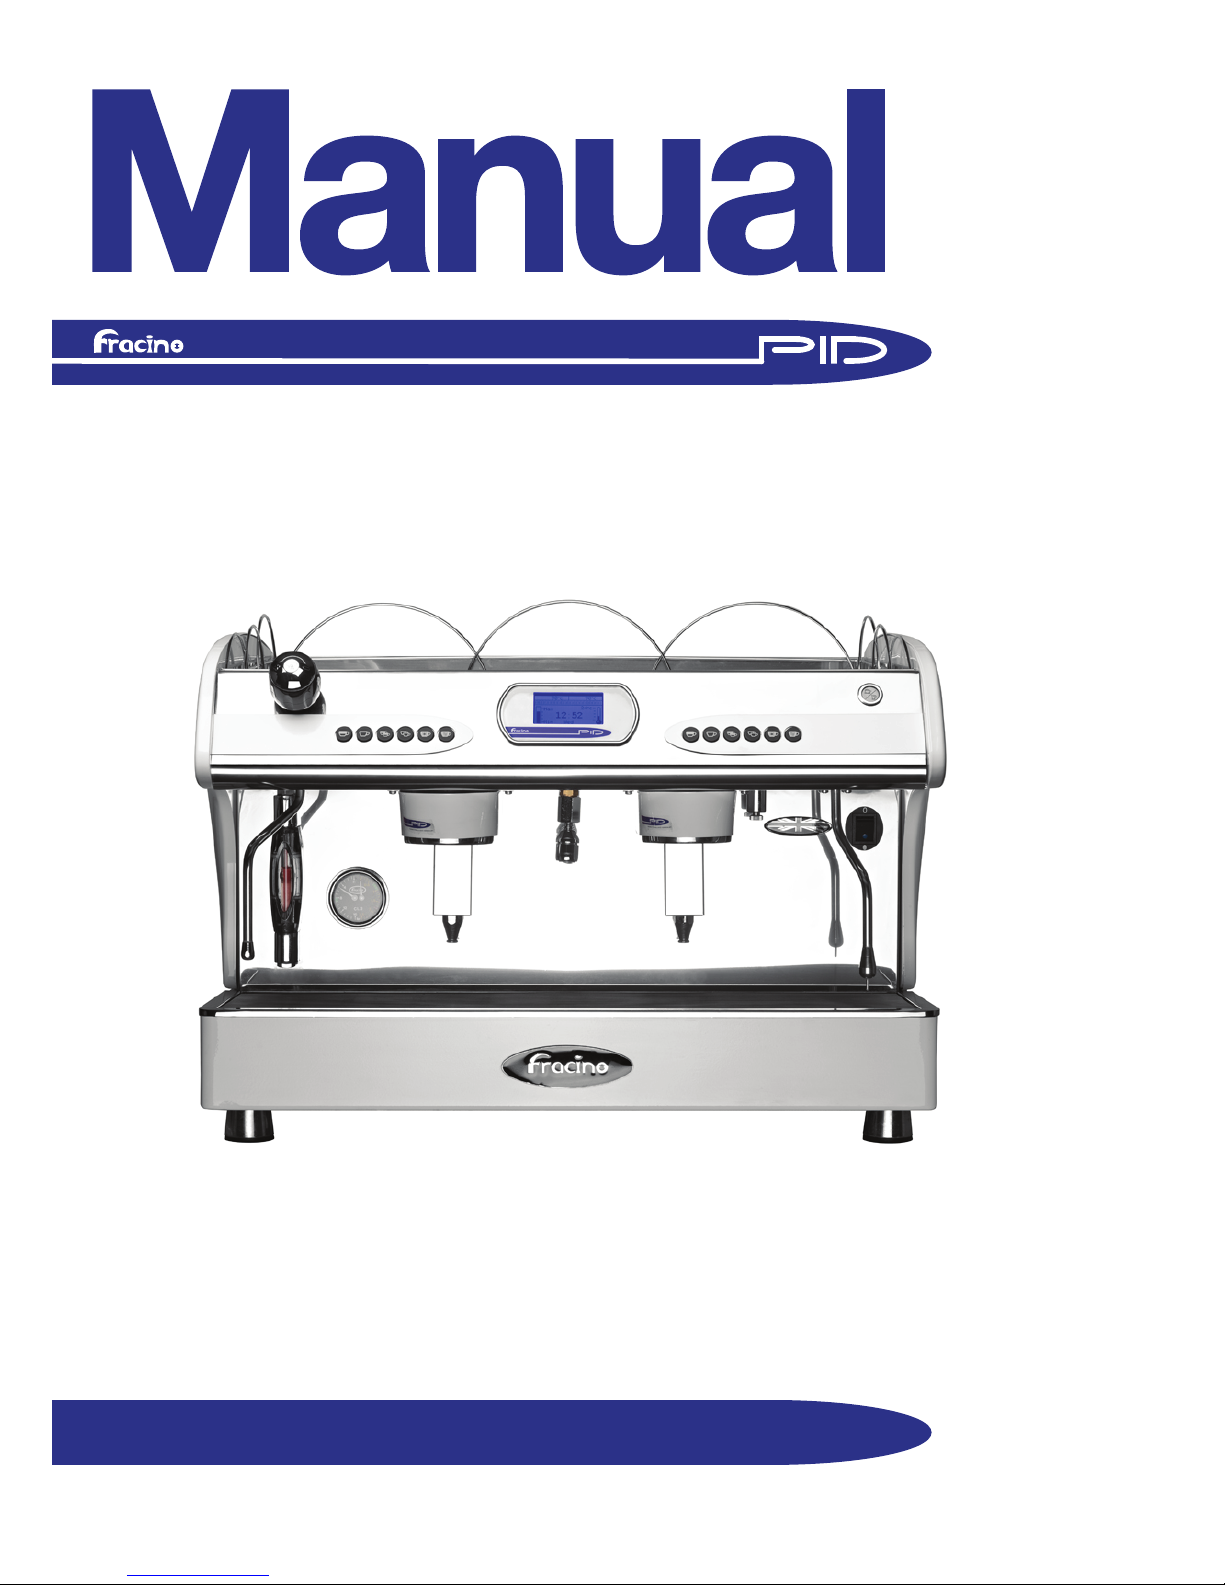
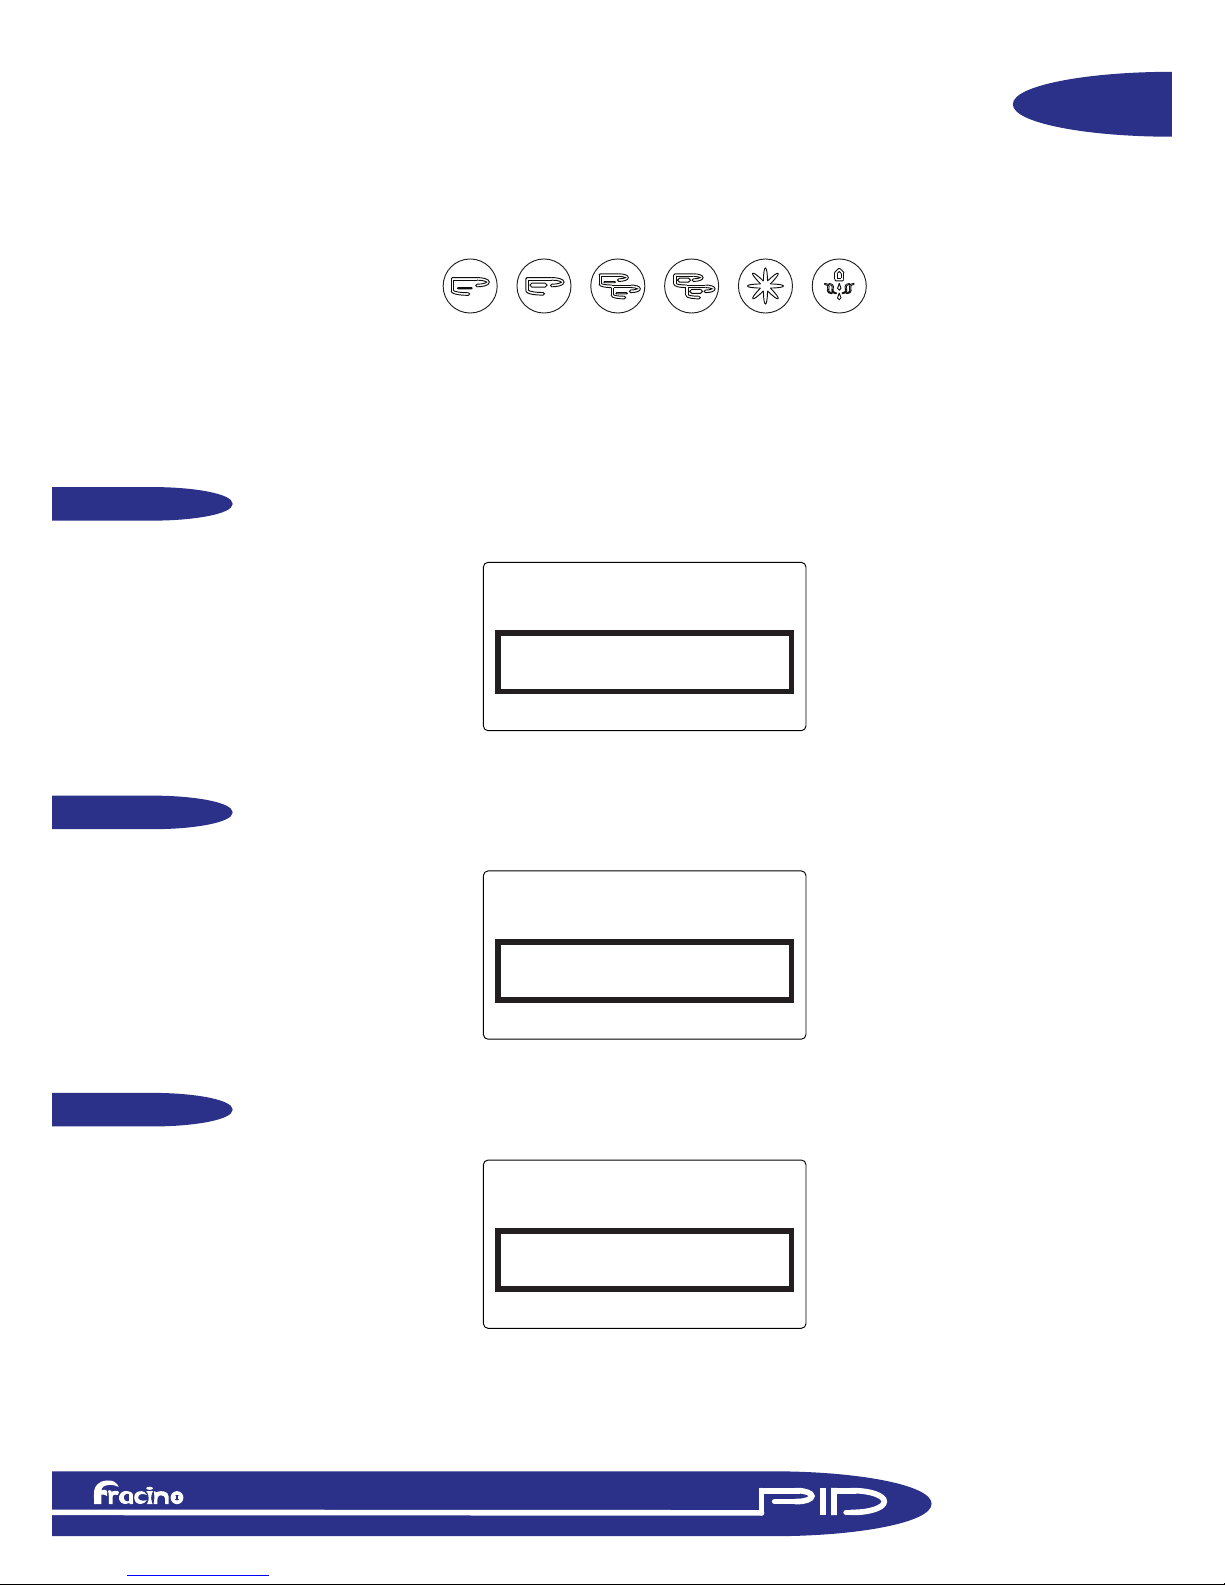
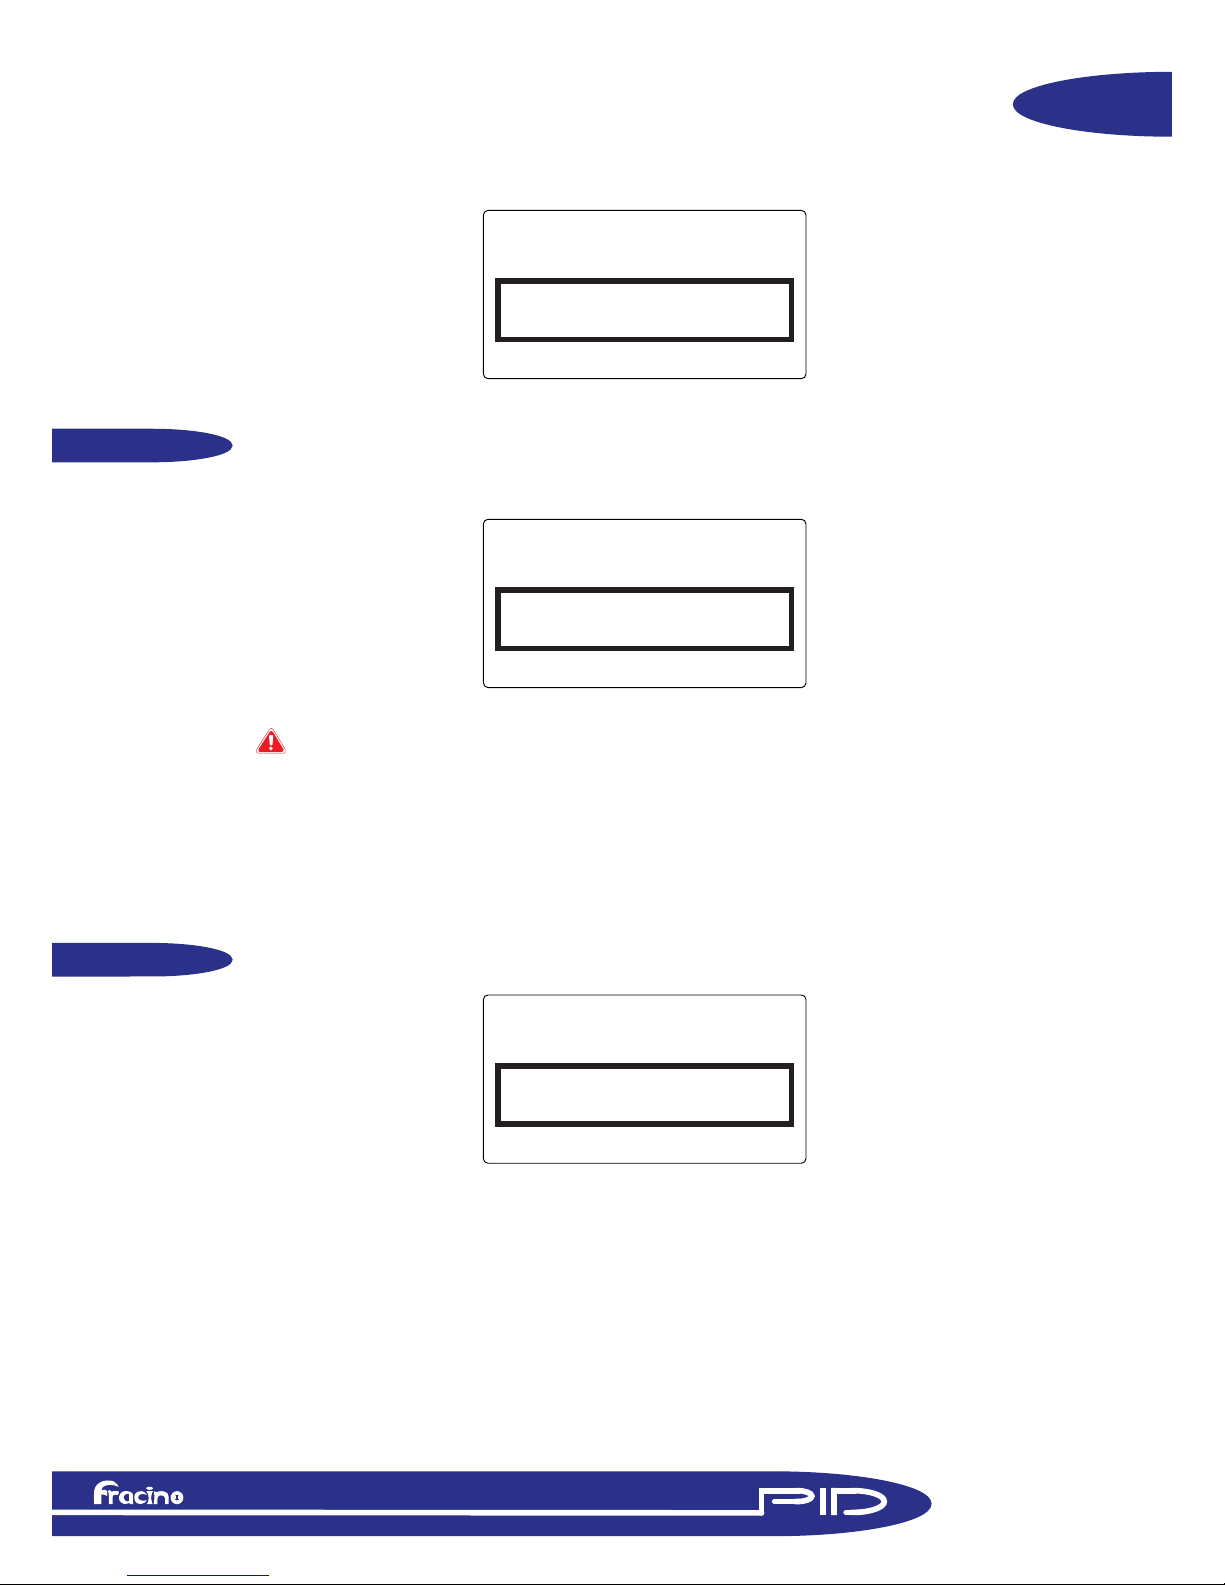
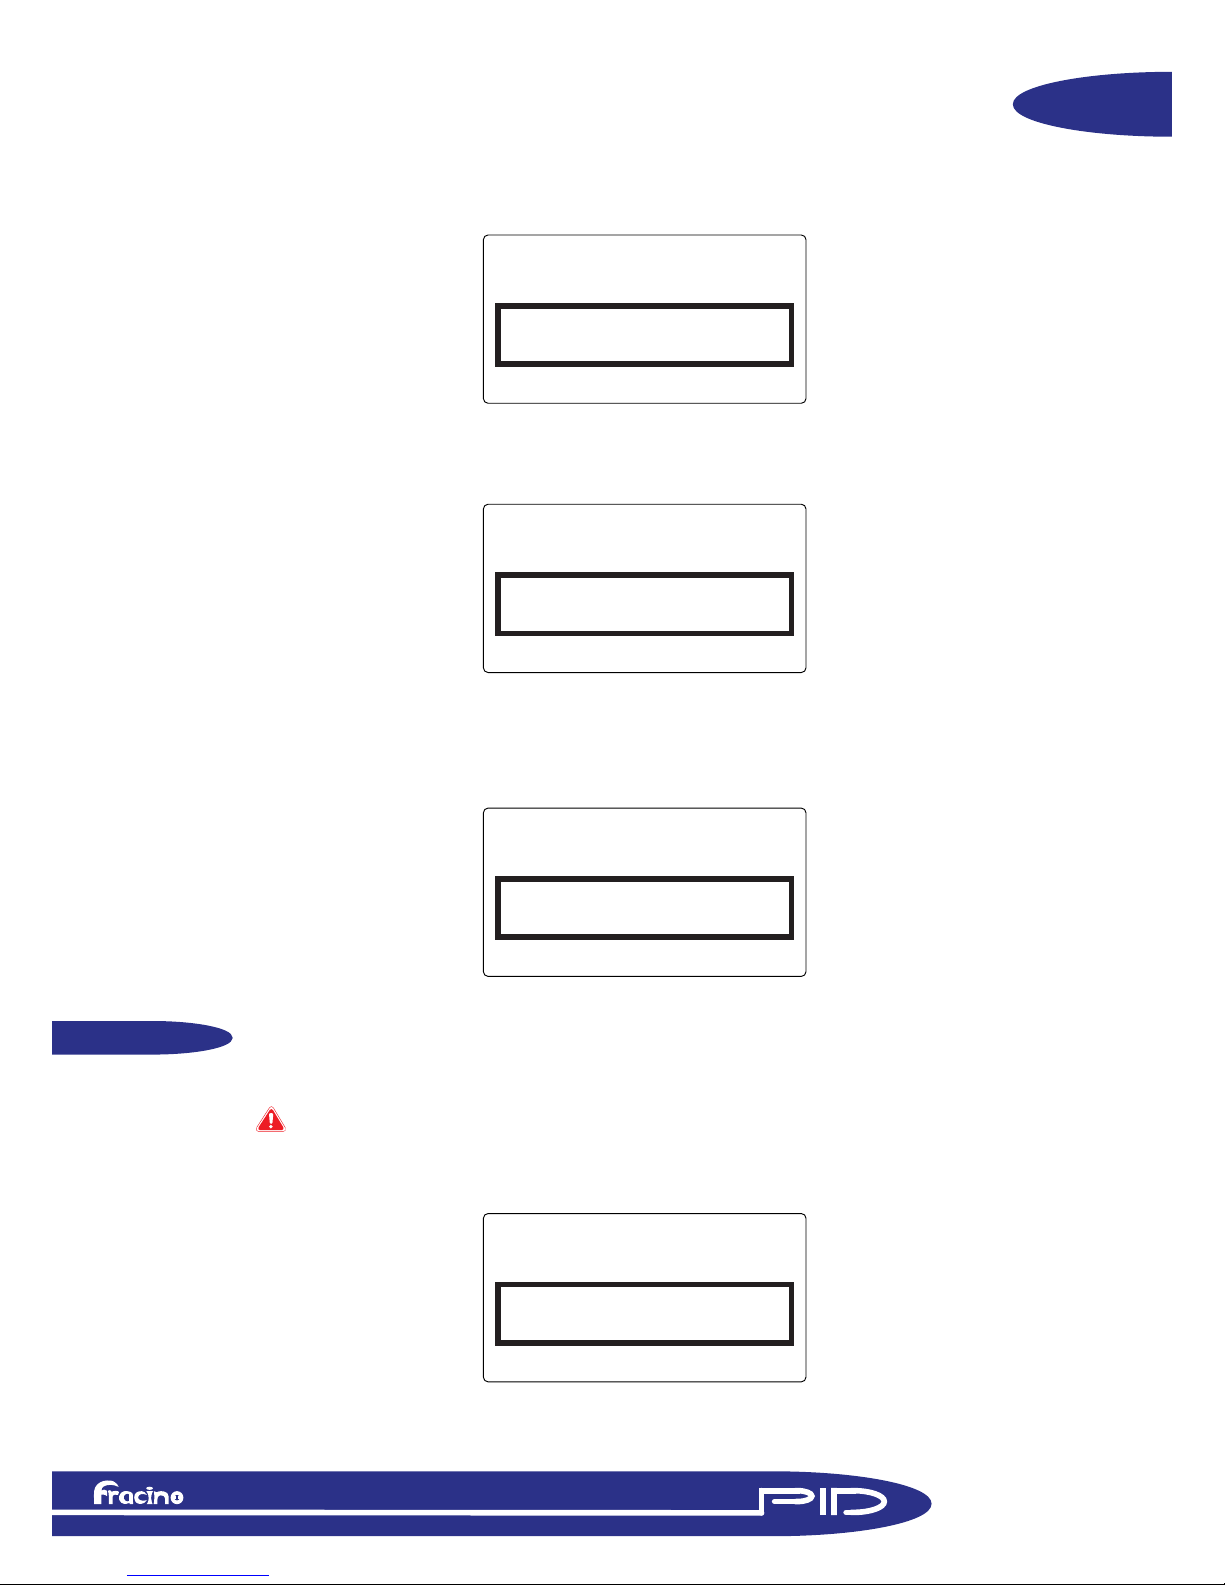
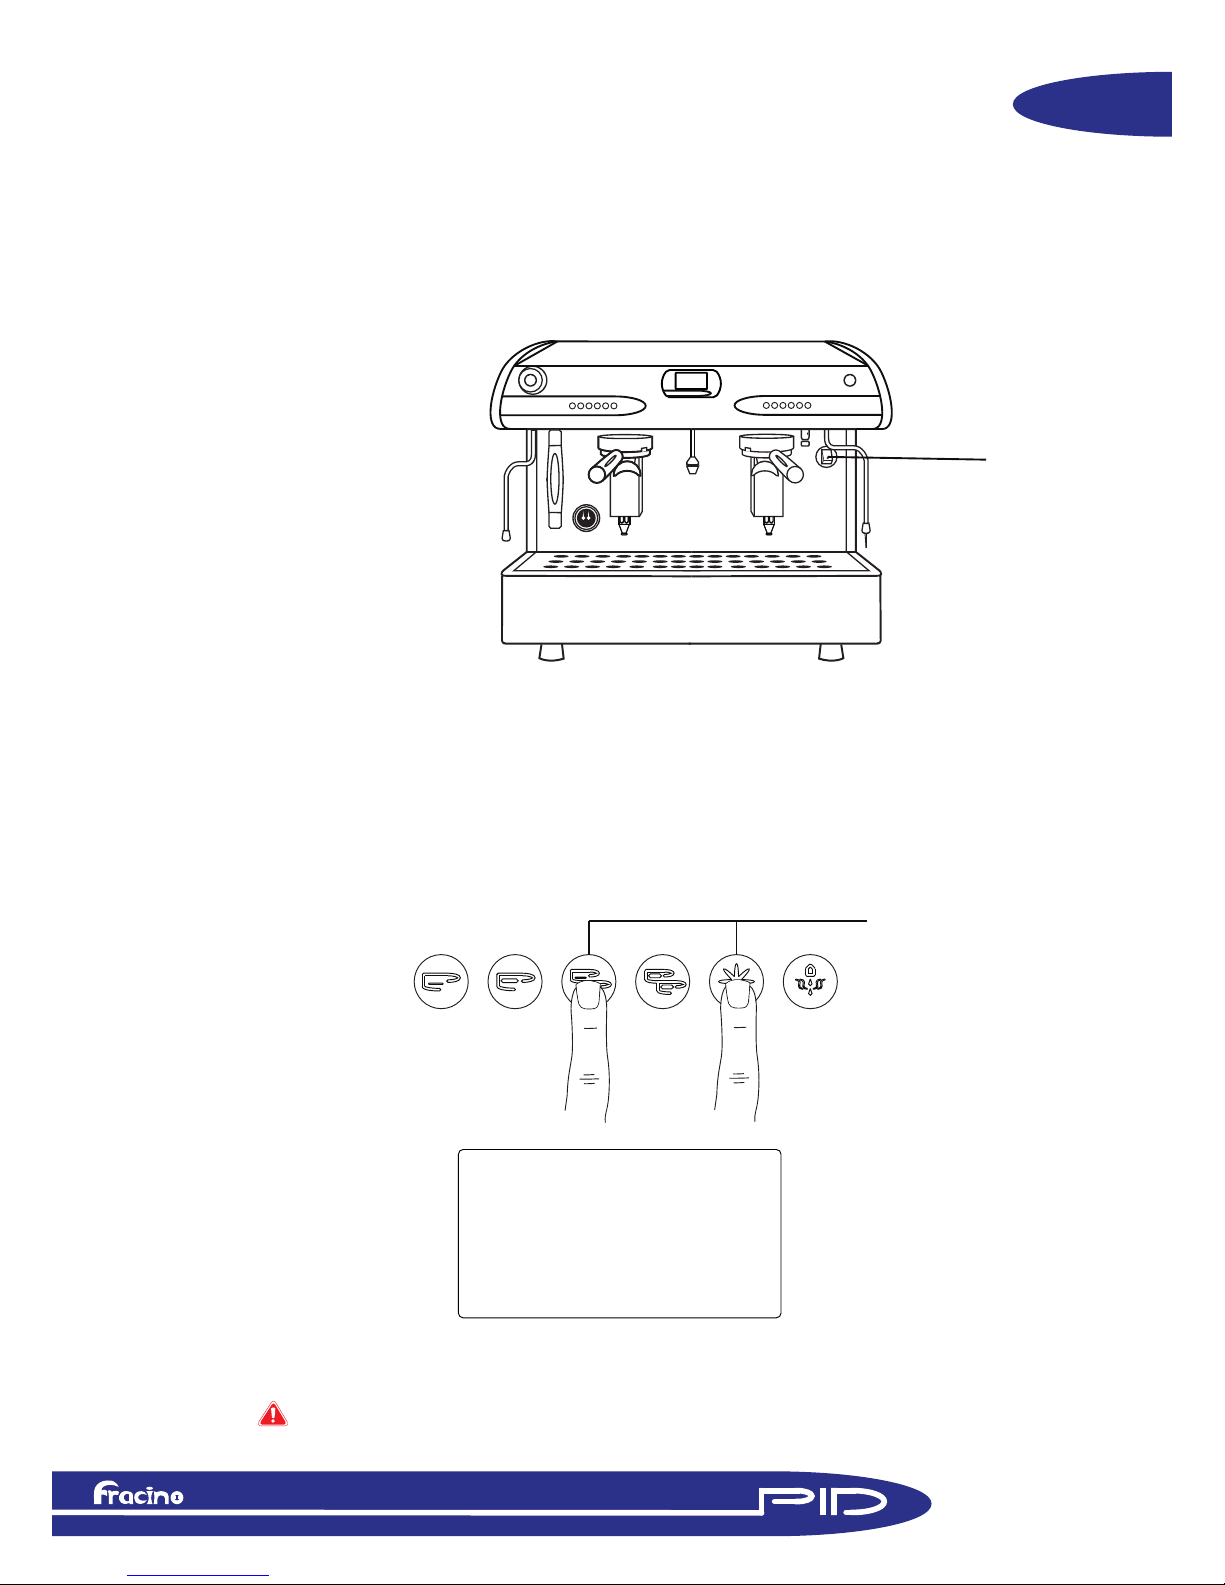
DISPLAY AND KEYPAD
OVERVIEW
T
o
GR1 T
o
GR2 T
o
GR3
FRACINO ROMANO
MAX
MIN
HH:MM
DAY
ToBOILER
1
2
3
7
4
8
5
6
Display
Normal Operation
1. Group 1 Temperature oC
2. Group 2 Temperature oC
3. Group 3 Temperature oC
4. Steam Boiler Temperature oC
5. Time
6. Day
7. Steam boiler water level indicator
8. Scrolling menu bar
Keypad
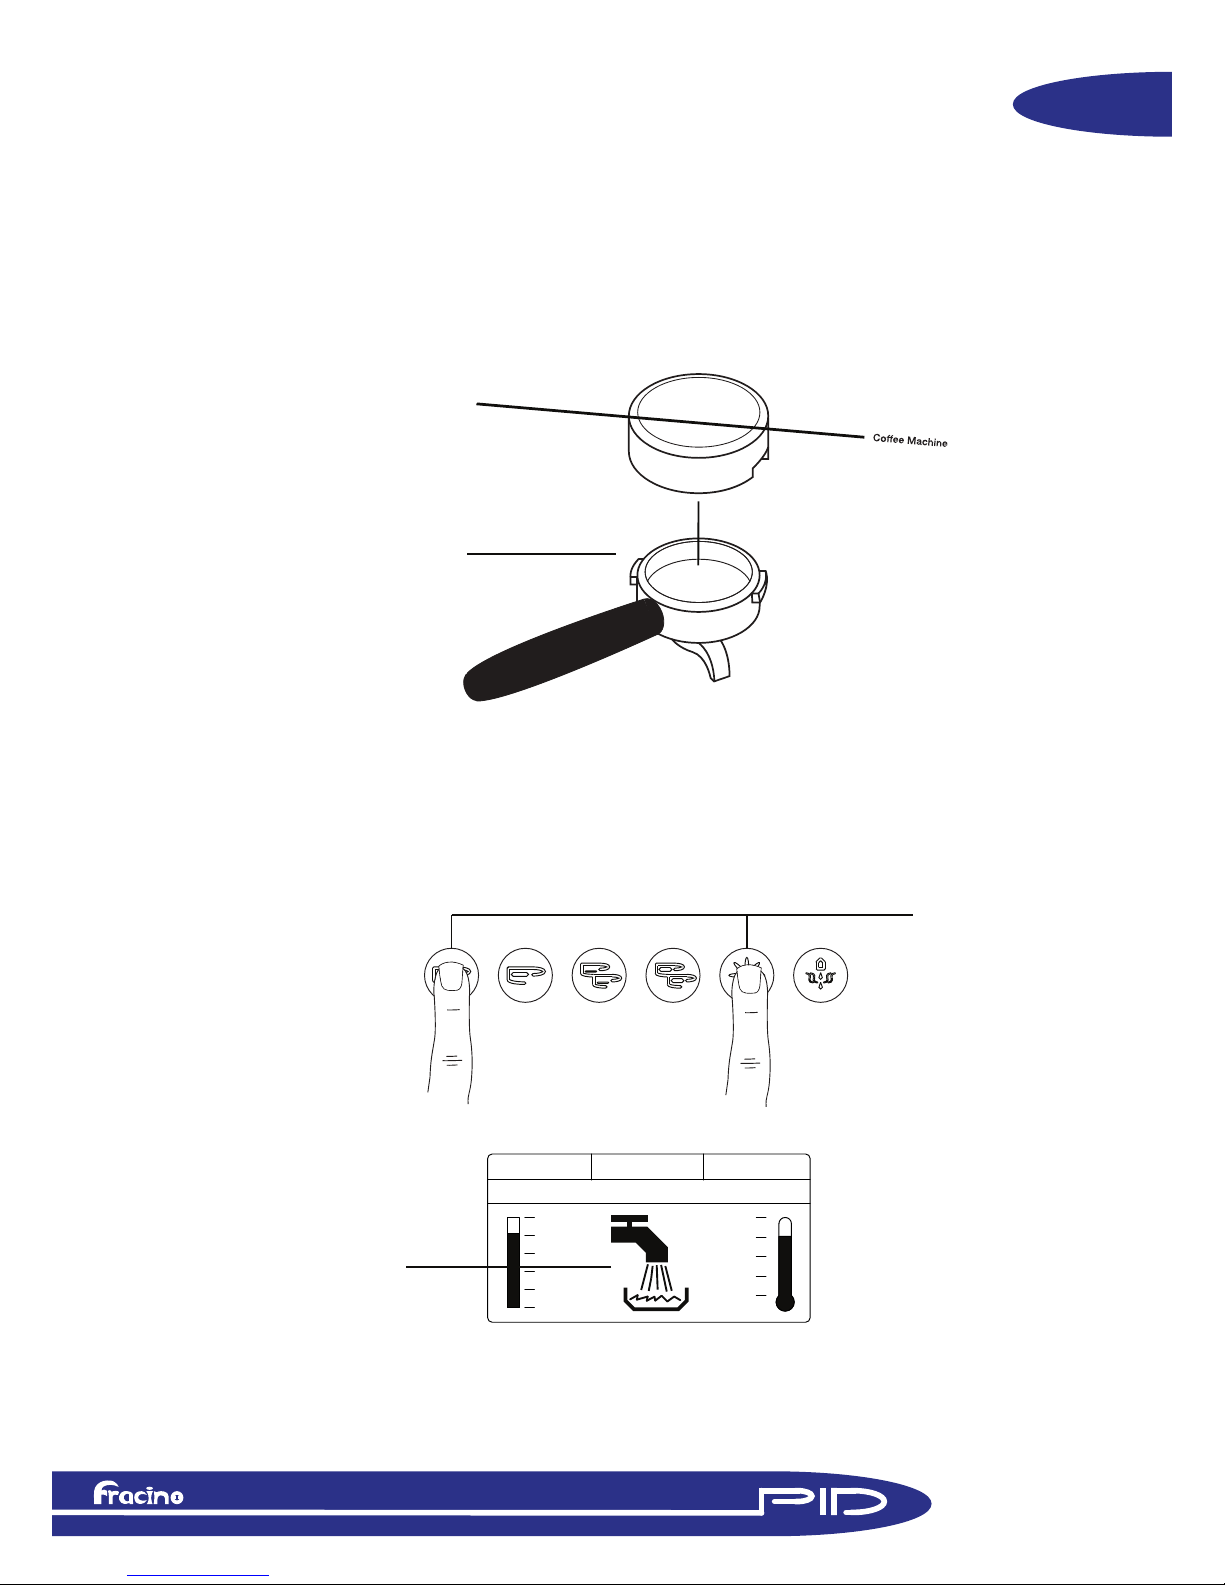
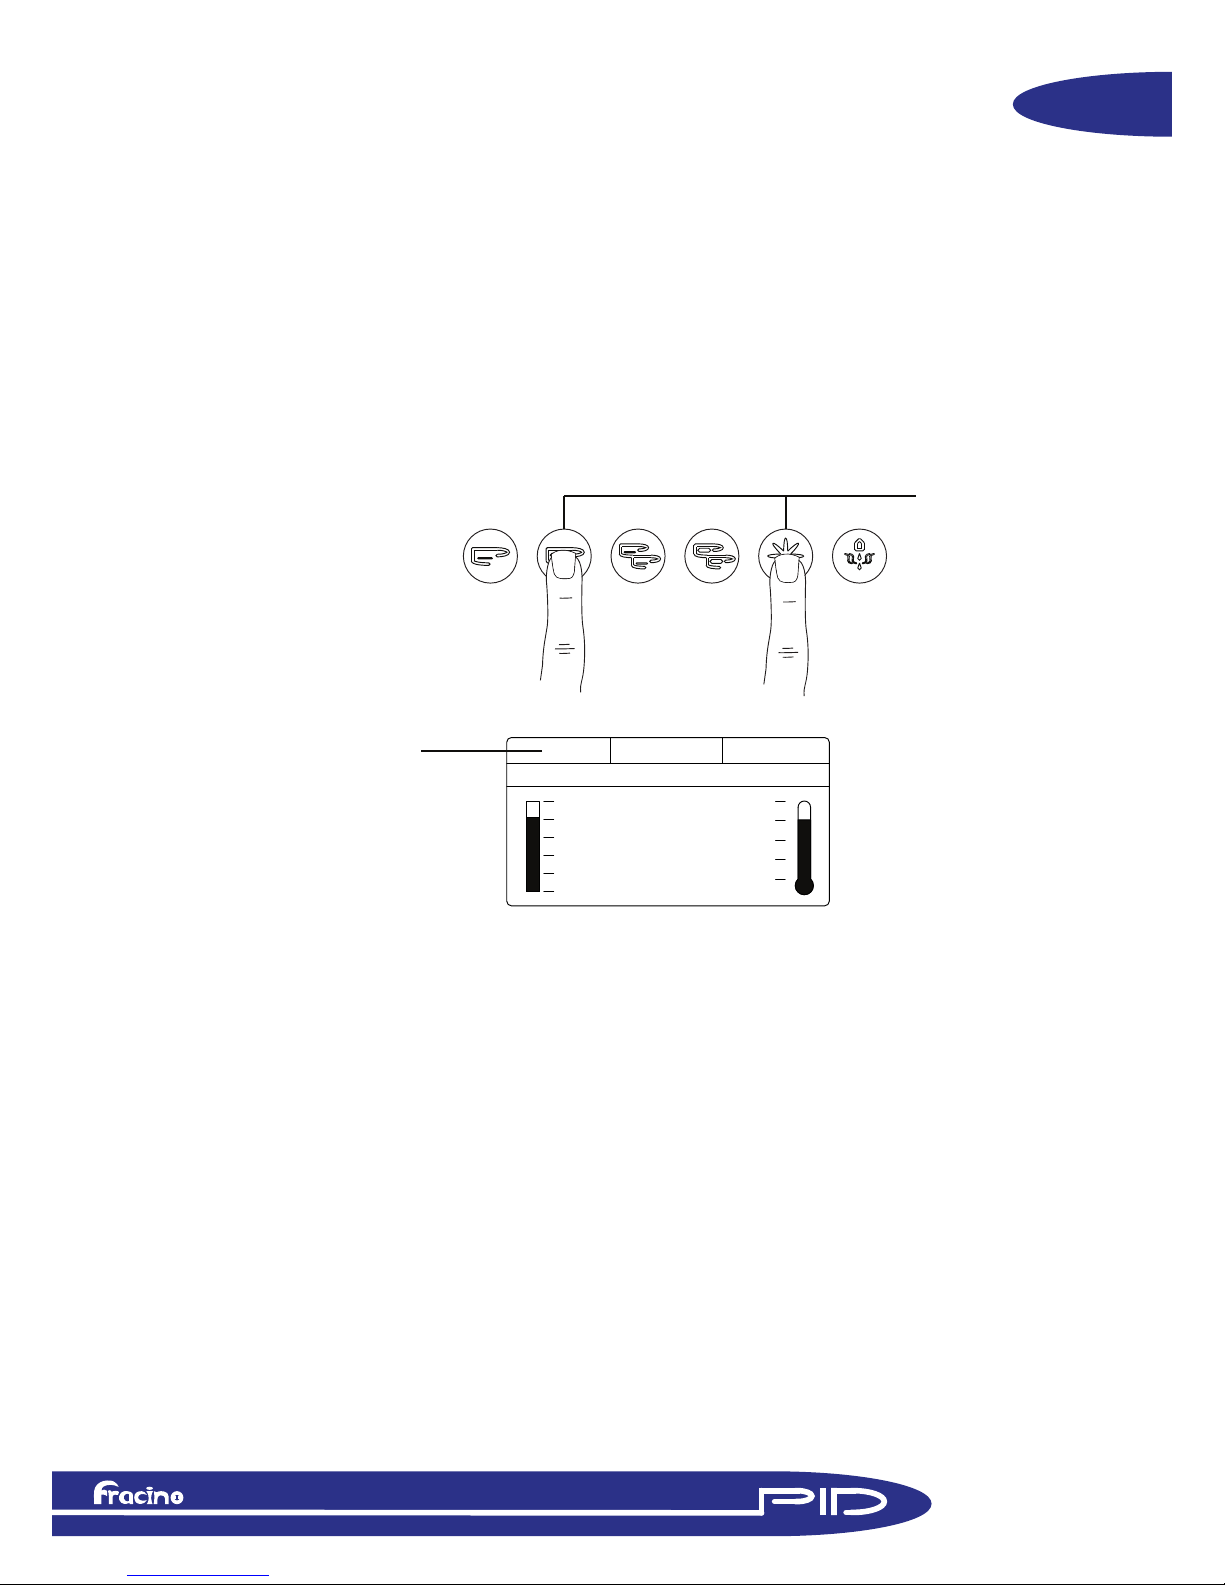
Group 1
K1GR1 K2GR1
K3GR1 K4GR1
K5GR1 K6GR1
K1GR1
K2GR1
K3GR1
K4GR1
K5GR1
K6GR1
PRIMARY FUNCTION SECONDARY FUNCTION
Single Espresso
Single Cappuccino
Double Espresso
Double Cappuccino
Manual Override
Hot Water Dispense
Scroll up when in program menu or technical menu
Scroll down when in program menu or technical menu
Select/enter when in program menu or technical menu
Enter program menu or techincal menu
1

Keypad
Group 2
K1GR2 K2GR2
K3GR2 K4GR2
K5GR2 K6GR2
K1GR2
K2GR2
K3GR2
K4GR2
K5GR2
K6GR2
PRIMARY FUNCTION SECONDARY FUNCTION
Single Espresso
Single Cappuccino
Double Espresso
Double Cappuccino
Manual Override
Steam Dispense*
Scroll up when in program menu
Scroll down when in program menu
Select/enter when in program menu
Enter program menu
*2 Group only, on a 3 group machines this is for hot water
Keypad
Group 3
K1GR3 K2GR3
K3GR3 K4GR3
K5GR3 K6GR3
K1GR3
K2GR3
K3GR3
K4GR3
K5GR3
K6GR3
PRIMARY FUNCTION SECONDARY FUNCTION
Single Espresso
Single Cappuccino
Double Espresso
Double Cappuccino
Manual Override
Steam Dispense
Scroll up when in program menu
Scroll down when in program menu
Select/enter when in program menu
Enter program menu
DISPLAY AND KEYPAD
OVERVIEW
2
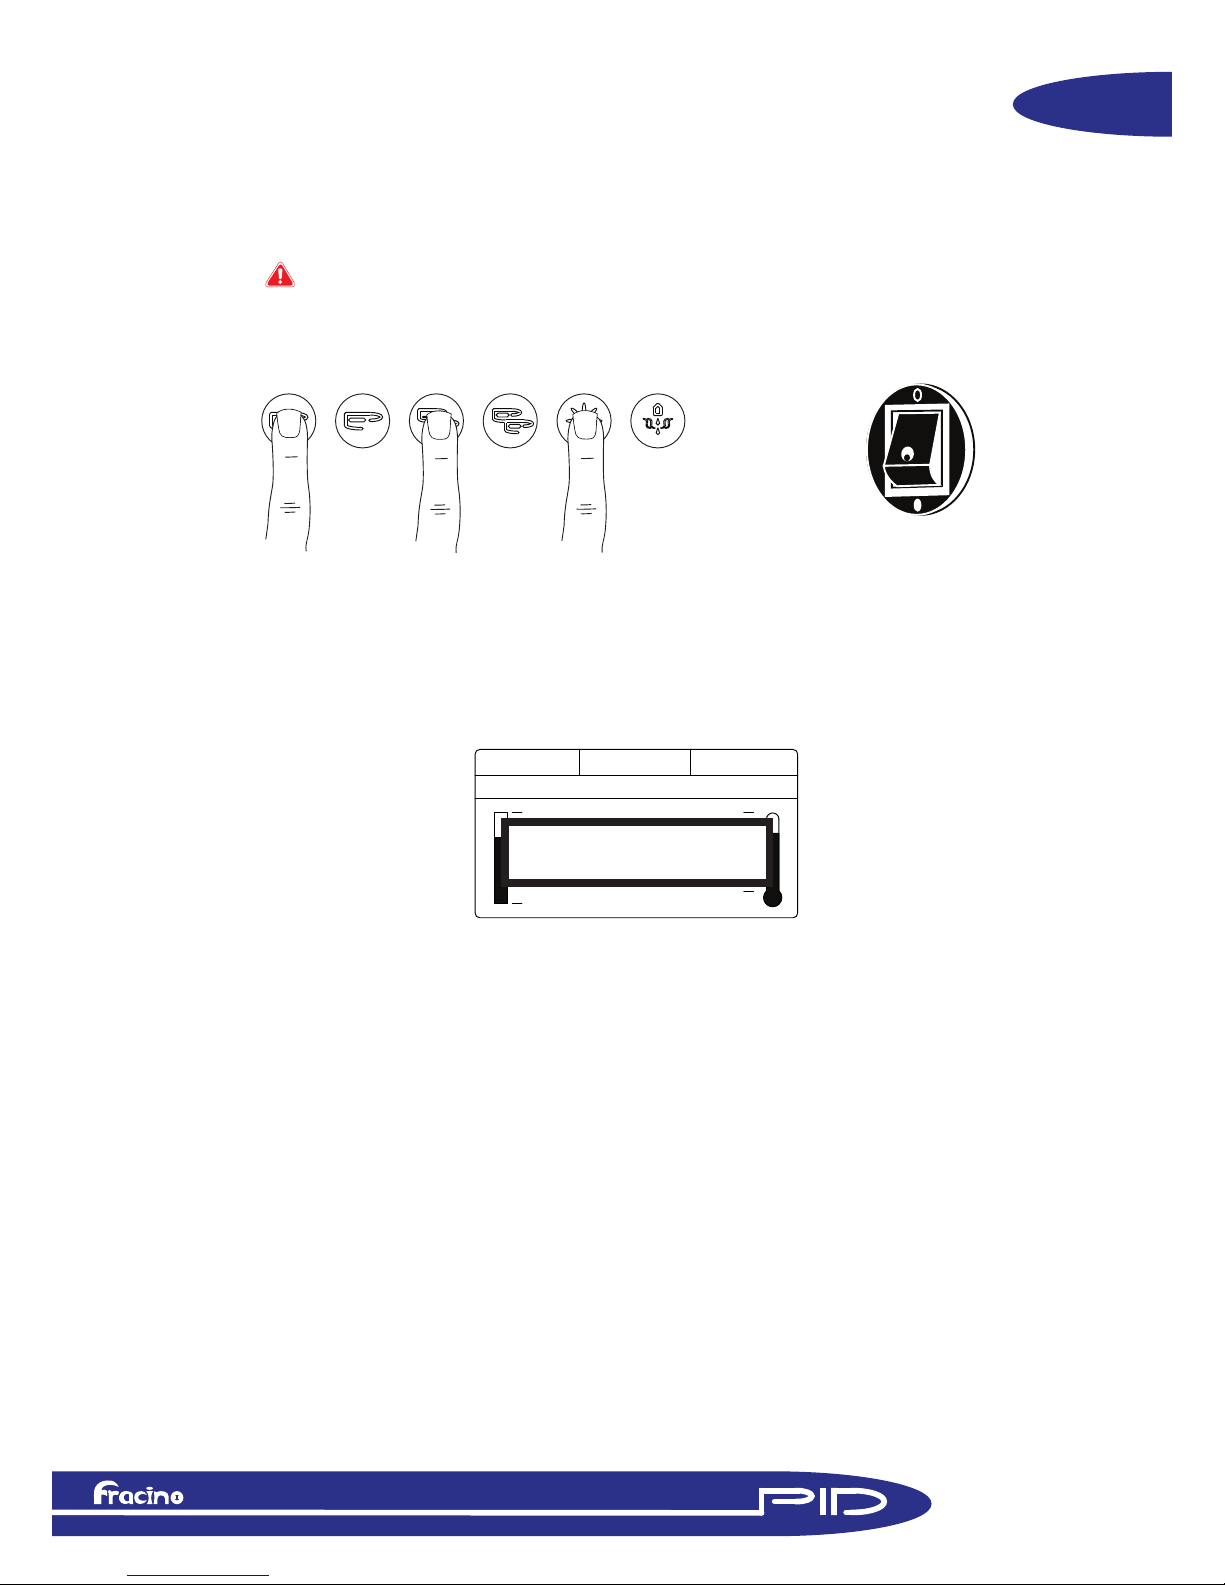
START UP
Initial start up
1
1. On the initial start-up, immediatly after installation, turn the machine on using the
black rocker switch on the fornt panel behind the right hand steam tube, the blue light
should illuminate indicating the power is on. The display and keypads should illuminate.
20oC 20oC 20oC
FRACINO PID
MAX
MIN
09:00
MONDAY
20oC
2. After a second or two the boiler will begin to fill, this is indicated on the boiler water level
indicator on the display, the water level can also be observed on the sight glass on the left
hand side of the machine, it may take several minutes for the boiler to fill.
2
2
NOTE: The machine may time out during the filling, this will be indicated by a buzzer
and a “!” symbol on the display, turn the machine off using the mains on/off rocker switch,
wait 5seconds and turn on again - the machine will continue of fill.
NOTE: For installation instructions, refer to the Installation Manual supplied
with the machine
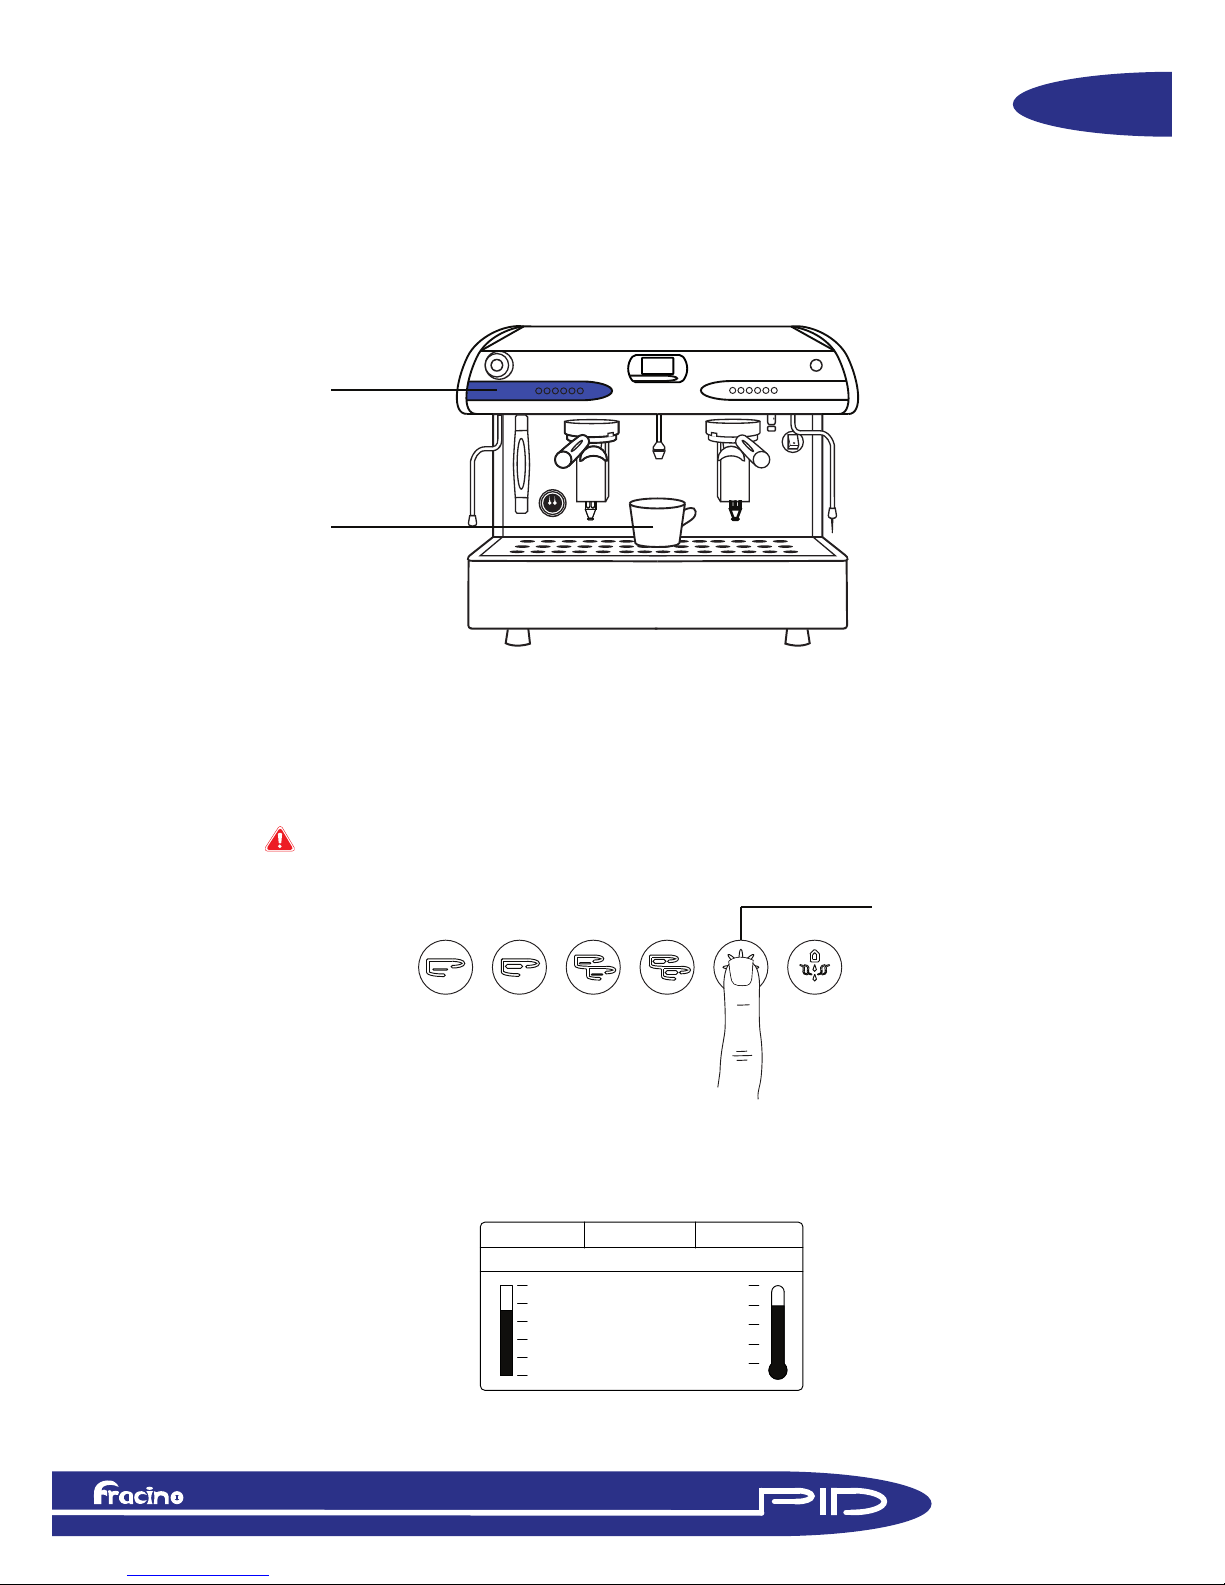
3
START UP
3. Immediatly after the boiler has filled press the star button on each group until water appears
from the bottom of the groups - this is to ensure the heat exchangers and group boilers are
full of water.
40oC 40oC 40oC
FRACINO ROMANO
MAX
MIN
09:00
MONDAY
35oC
4. After filling the boilers will start to heat, this is indicated on the groups by the heating element
symbol, which appears on the group temperature readout this symbol will appear when the group
heating element is on, as the group approaches its set temperature it will begin to pulse until the set
point is reached, it will then pulse to maintane the set point temperature.
3
4
5
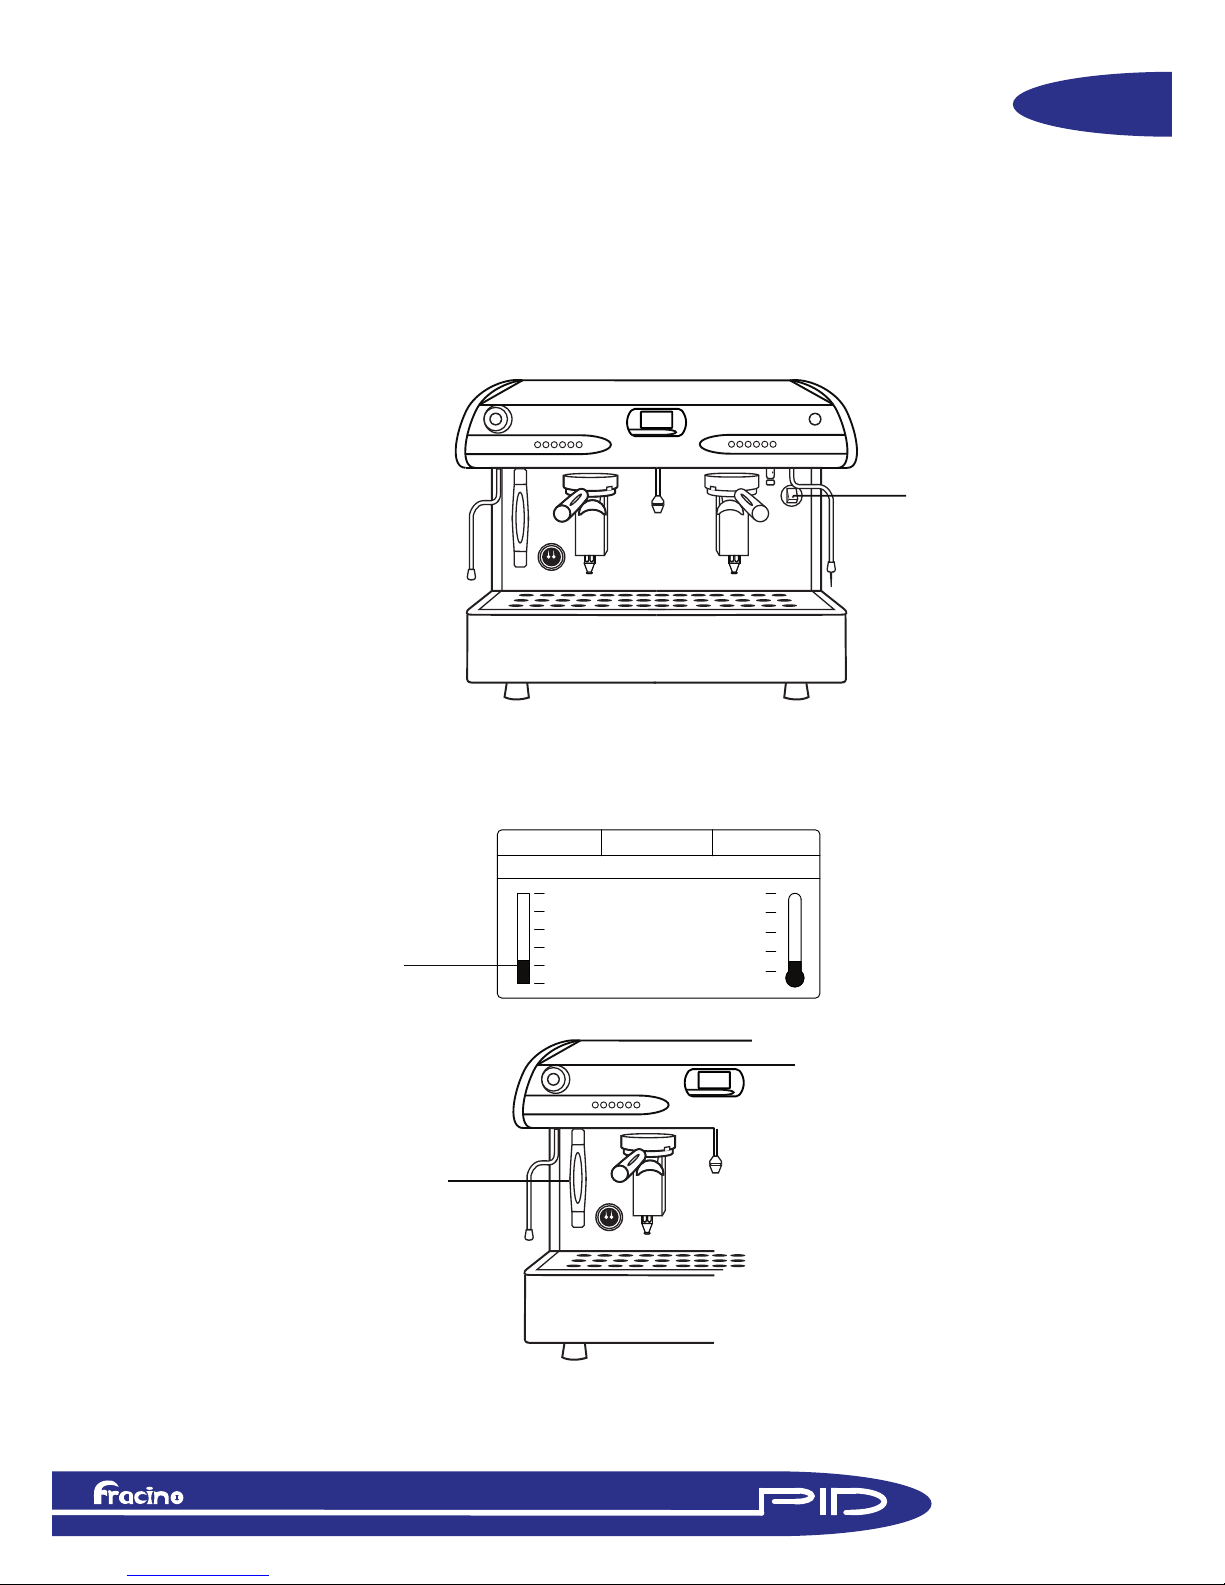
5. The steam boiler temperature is indicated on the right hand side of the display. It is good practice
to open the steam valve by turning clockwise when the steam boiler is heating, this can be closed
when steam starts to appear from the steam tube. The steam pressure will build until it
reaches 1-1.2Bar.
5
6. It is advisable to leave the machine with the filer holders inserted in the groups for 10-15 minutes
to allow the groups to get hot and stabilize their temperature.
4
CLOCK AND
AUTO ON/OFF
Changing Clock
T
o
GR1 T
o
GR2 T
o
GR3
FRACINO PID
MAX
MIN
ToBOILER
5 Seconds
1. To change the time on the clock, press and hold the star button for 5seconds to enter
the programming mode, remove finger from star button then press the star button for a
further 2 seconds, to enter the secondary programing mode, the display will show
“clock adjust”, as shown below
2 Seconds
1
clock adjust
1
2. Press the double espresso button to edit the time, the time and day should appear
with the hour flashing, use the single espresso (+) or single cappuccino (-) to
increase/decrease the hour respectively, press the double espresso button to scroll to
the minute adjust as required, press the double espress button to scoll to the day,
adjust as required
T
o
GR1 T
o
GR2 T
o
GR3
FRACINO PID
MAX
MIN
ToBOILER
clock adjust
HH:MM DAY
2
+ -
Enter
3. Press the double espresso button to move to the Auto ON/OFF setting menu
5
CLOCK AND
AUTO ON/OFF
Auto ON/OFF
T
o
GR1 T
o
GR2 T
o
GR3
FRACINO PID
MAX
MIN
ToBOILER
1. Press the double espresso button the hour should be flashing, use the espresso (+)
and Cappuccino (-) button to change to the require time, press the double espresso
button to scroll to the minute and adjust as required.
Auto ON/OFF
On : HH:MM
1
2. Press the double espresso to move to the OFF set time, set time as required using
the same proceedure as above.
+ -
Enter
T
o
GR1 T
o
GR2 T
o
GR3
FRACINO PID
MAX
MIN
ToBOILER
Auto ON/OFF
Off : HH:MM
2
NOTE: When using the Auto on/off the machine will go into stand-by mode and will not
isolate power from the machine.
T
o
GR1 T
o
GR2 T
o
GR3
FRACINO PID
MAX
MIN
ToBOILER
Closed on
day
3
3. The auto on/off can be programmed to skip a day in the week, i.e if Sunday is
selected the machine will turn off on Saturday, stay off on Sunday and turn back on
Monday. Use the single espresso and single Cappuccino to cycle through the days,
“-----------------” denotes that no day is selected.
6
PROGRAMMING
COFFEE MEASURES
Programming
Coffee Measures
T
o
GR1 T
o
GR2 T
o
GR3
DOSES SETTING SEL......
MAX
MIN
HH:MM
DAY
ToBOILER
1. The coffee measures are programmed from the left hand keypad, when complete the
settings are stored on all groups. If required each group can be programmed individually
by using the same proceedure using the corresponding group and keypad.
1
2. Put a single shot of coffee (7-8grams) in to a single filter, insert filter in to the the left
hand group and place a shot pot or espresso cup under the group.
5 Seconds
3. Press and hold the star button for 5seconds until the scroll menu reads:
“doses setting select with in 30sec”
3
7

PROGRAMING
COFFEE MEASURES
4. Press the single espresso button to start the brewing cycle, when the required
volume (approx. 30mL for a single espresso) has been dispensed press the single
espresso button to stop the brewing cycle.
5. Repeat the process to program the other buttons, using a single or double filter
as required, the programming must be done with in 30sec of each other, otherwise
it will timeout, if this happens press and hold the star button for 5 seconds as before
and continue from where you left off.
6. To exit the program you can either wait 30sec for the timeout or press and hold the
star button for 5seconds then press the star button to scroll through the menu until
the main display appears.
4 6
8
PROGRAMING
HOT WATER MEASURES
Programming
Hot Water Measures
T
o
GR1 T
o
GR2 T
o
GR3
DOSES SETTING SEL......
MAX
MIN
HH:MM
DAY
ToBOILER
1. The duration of the hot water dispensing can be adjusted using the left hand key pad
1
2. Place a cup, teapot or measuring jug on the drip tray grid under the hot water
nozzle
5 Seconds
3. Press and hold the star button for 5seconds until the scroll menu reads:
“doses setting select with in 30sec”
2
WARNING: Do not hold the cup, teapot or measuring jug, the water from the hot
water nozzle is extremely hot which presents a risk of scalding.
3
9
PROGRAMING
HOT WATER MEASURES
4. Press the Hot water button, Hot water will be dispensed from the nozzle
5. When the required amount of water has been dispensed press the hot water
button again to stop, the measure is now programmed press and hold the star button
for 5seconds then press the star button to cycle through the menu options until you
are out of the programing mode, alternitively wait 30seconds.
WARNING: Do not hold the cup, teapot or measuring jug, the water from the hot
water nozzle is extremely hot which presents a risk of scalding.
4
5
10
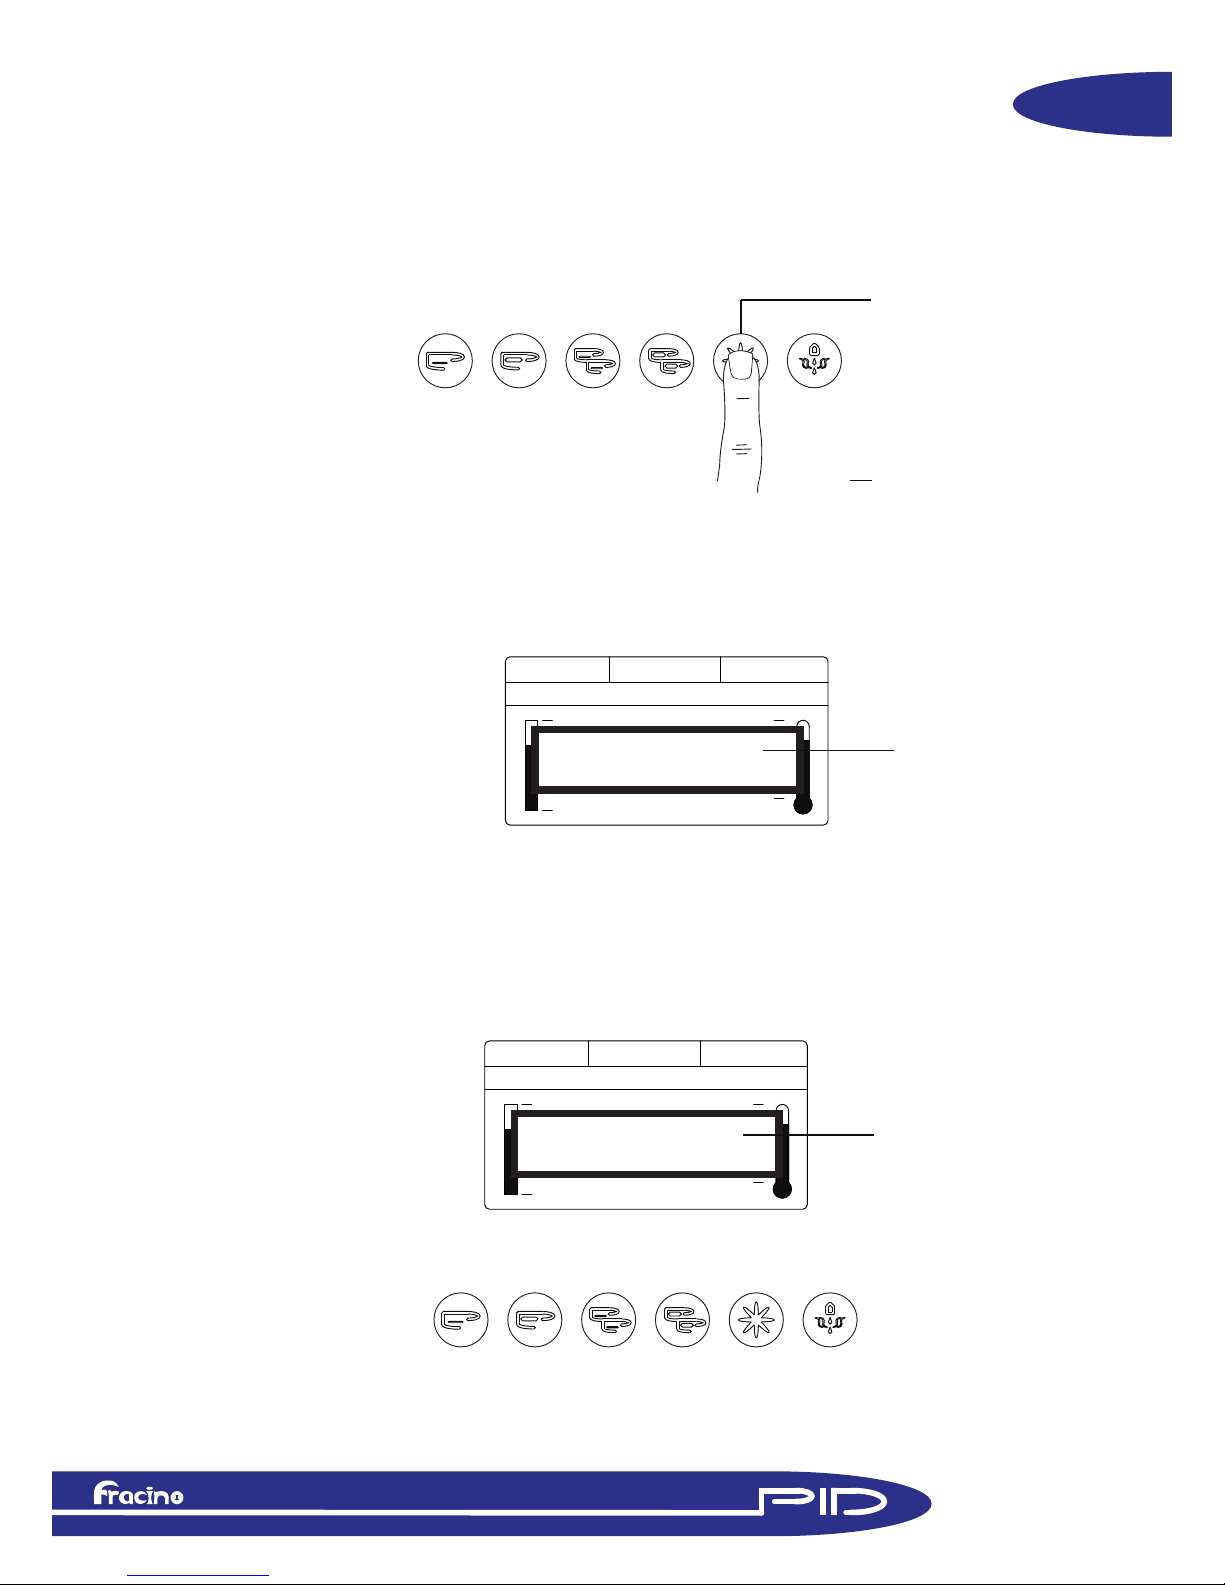
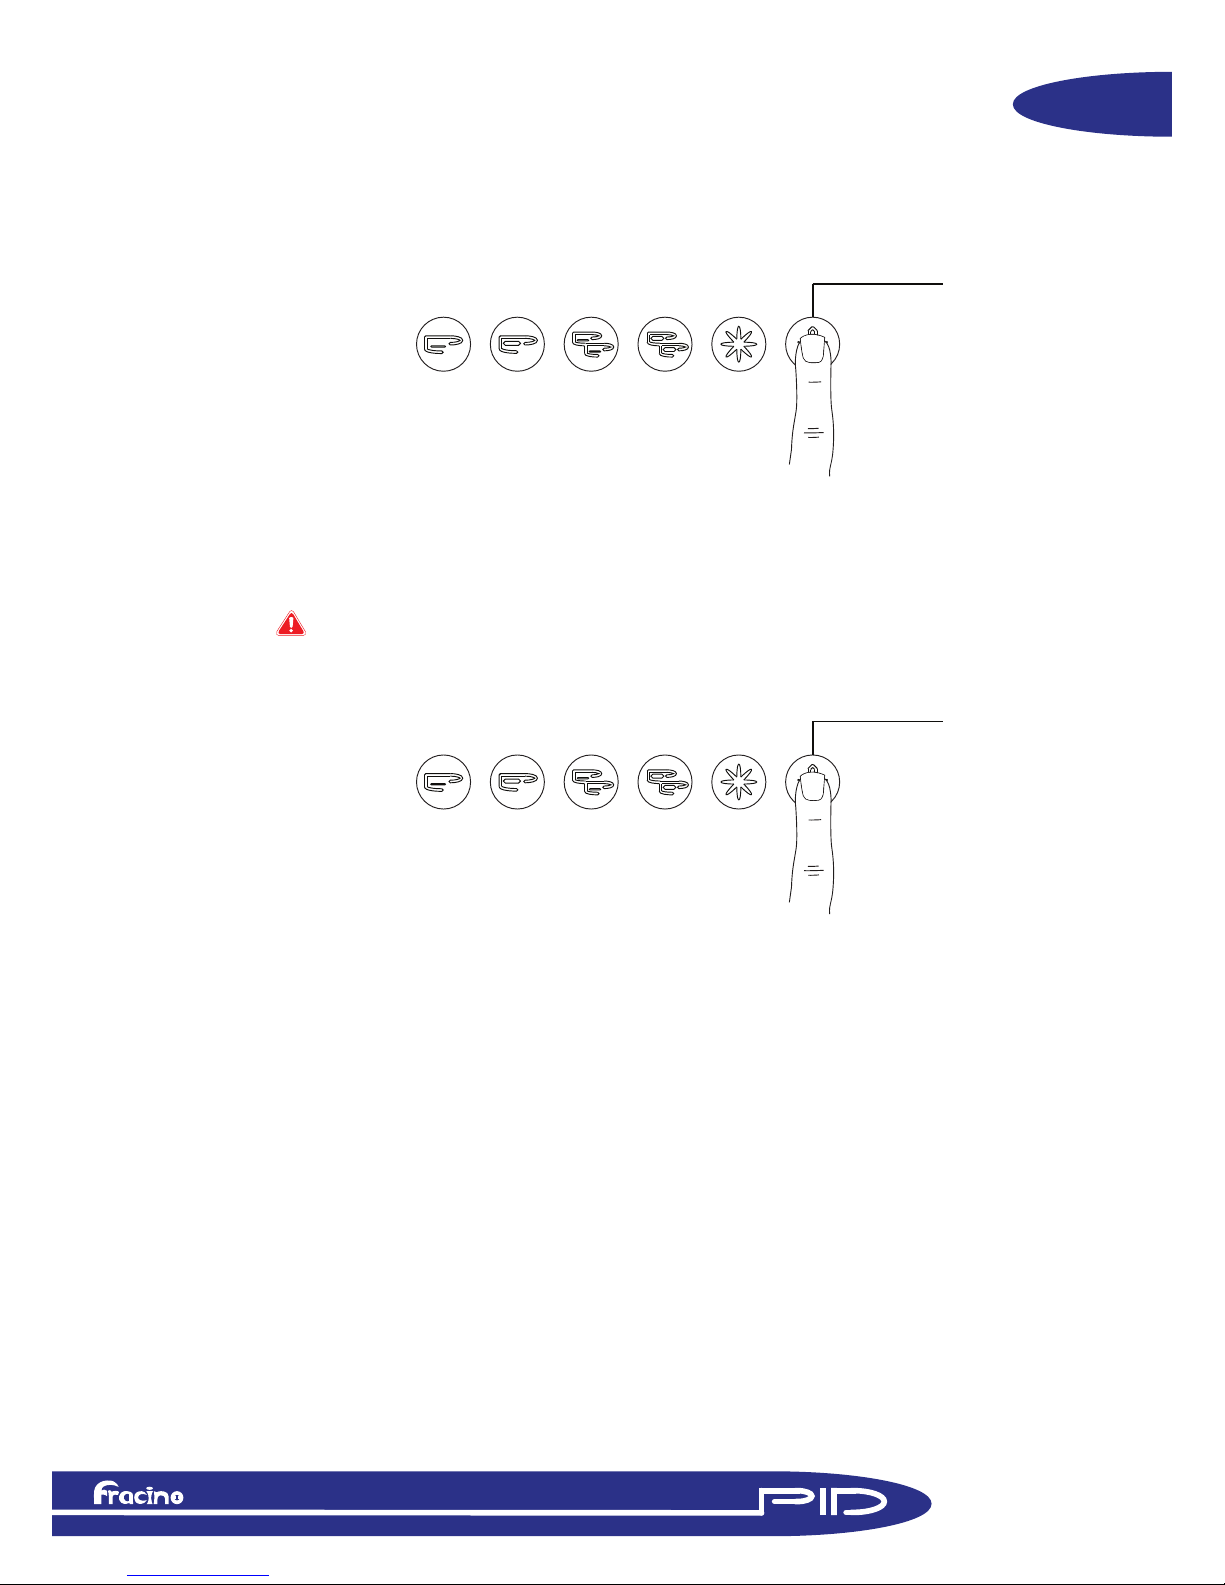
SECONDARY PROGRAMMING
MENU OVERVIEW
Entering
Secondary
Program menu
T
o
GR1 T
o
GR2 T
o
GR3
FRACINO PID
MAX
MIN
ToBOILER
clock adjust
2
5 Seconds
1. To enter the secondary programming mode press and hold the star button on group
1 for 5seconds to enter the programming measures mode, remove finger from star
button then press the star button for a further 2 seconds, to enter the secondary
programing mode, the display will show “clock adjust”, as shown below, pressing the
star button will scroll through the menus, pressing the double espresso will allow you to
enter the menu and adjust if available.
2 Seconds
1
2. Clock Adjust, allows the user to adjust the time and day that is shown on the display,
see “Clock and Auto on/off” section for more details
T
o
GR1 T
o
GR2 T
o
GR3
FRACINO PID
MAX
MIN
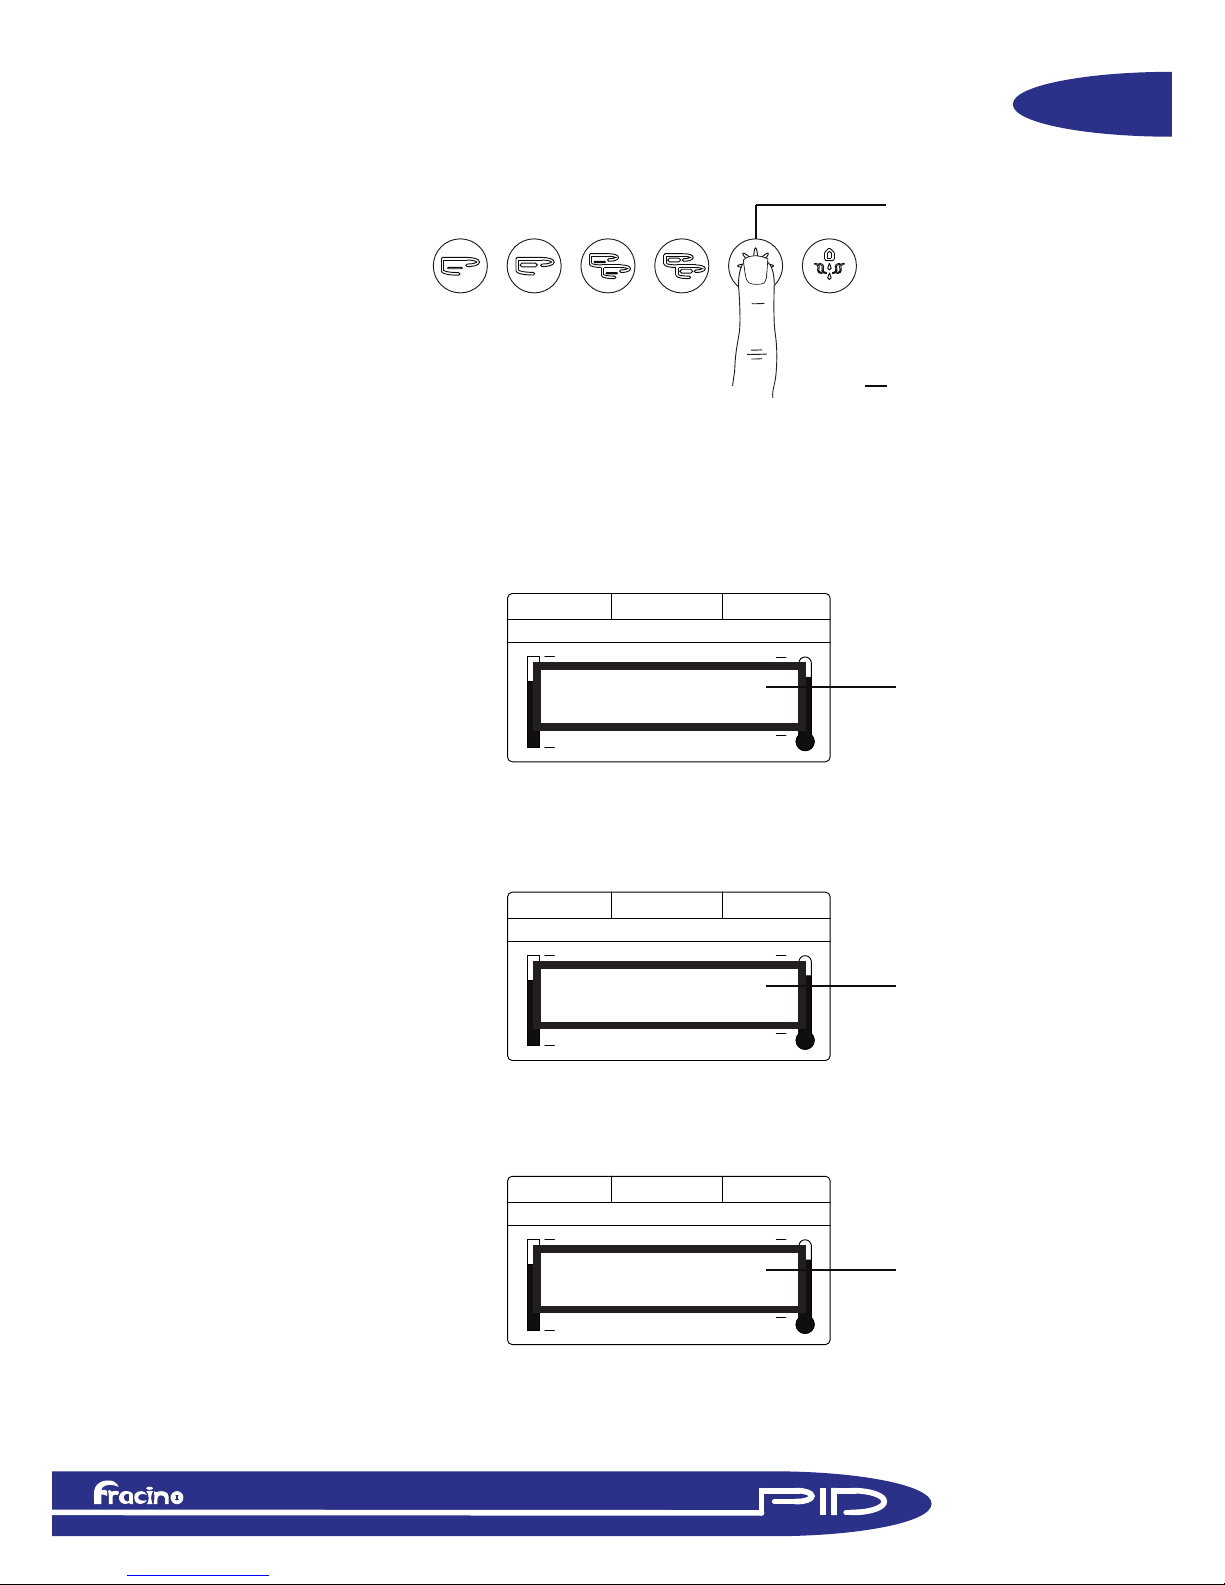
ToBOILER
auto on/off
3
3. Auto on/off, the machine can be programmed to go in to stand-by mode and come
back on at predetermined times, the times can be adjusted with this menu, see “Clock
and Auto on/off” section for more details.
T
o
GR1 T
o
GR2 T
o
GR3
FRACINO PID
MAX
MIN
ToBOILER
Counters
4
4. Counters, pressing the double espresso button will allow the user to scroll through
the various counters, such as the volume of water used, number of espressos
dispensed etc... see below for more details.
11

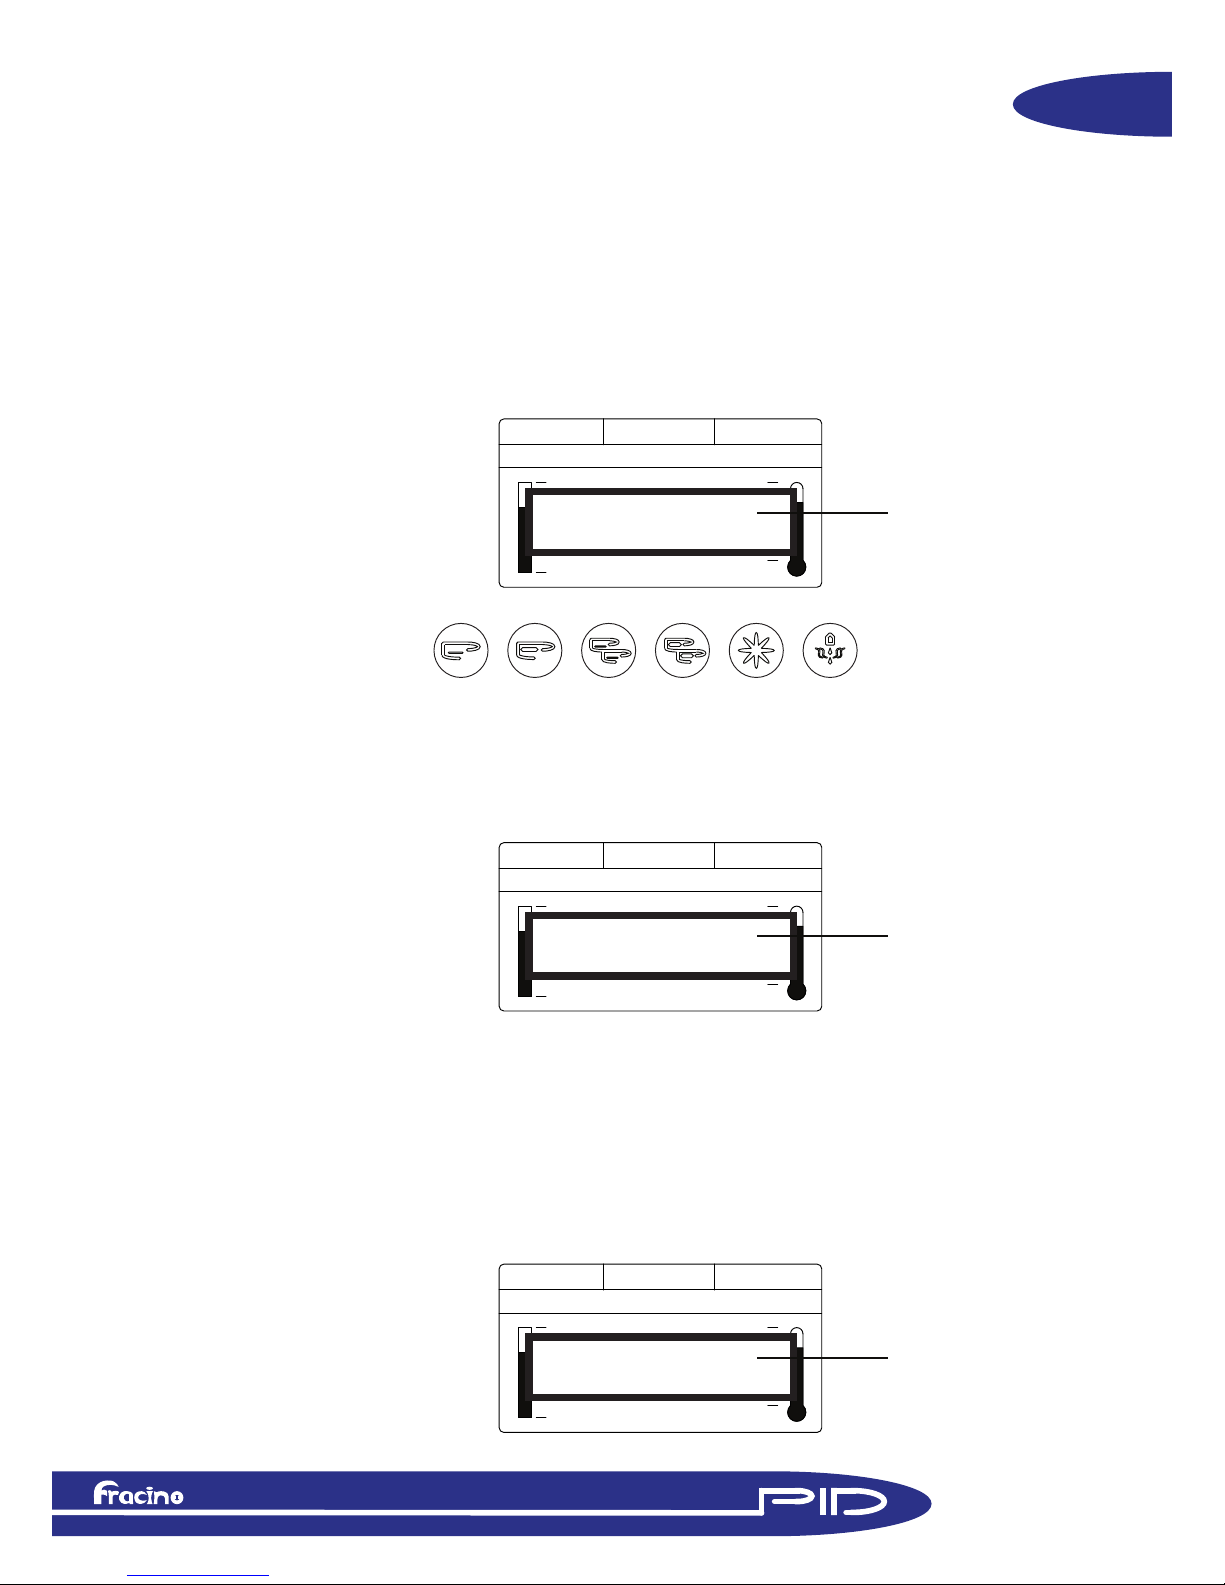
SECONDARY PROGRAMMING
MENU OVERVIEW
T
o
GR1 T
o
GR2 T
o
GR3
FRACINO PID
MAX
MIN
ToBOILER
litres
5
5.Litres, allows the user to see the volume of water that has passed through the
machine.
6. Coffees total, allows the user to see the total number of coffees dispensed.
T
o
GR1 T
o
GR2 T
o
GR3
FRACINO PID
MAX
MIN
ToBOILER
coffees total
6
7. Detailed drinks counter, allows the user to view the type and quantity of coffees
dispensed from each group, press the double espresso button to cycle through each
type and group.
T
o
GR1 T
o
GR2 T
o
GR3
FRACINO PID
MAX
MIN
ToBOILER
zzzzz GRP:y
XXX
7
Coffee type
Quantity
Group number
To re-set the counters, see Service Alarm section.
12

SECONDARY PROGRAMMING
MENU OVERVIEW
T
o
GR1 T
o
GR2 T
o
GR3
FRACINO PID
MAX
MIN
ToBOILER
Service
8
8. Service, allows the user to see the recommended number of drinks that can be
dispensed until the next service.
WARNING: The service counter is only an indication of when the next service is due,
services may be required more often depending on usage, water hardness etc. It is
also a legal requirement under the HSE PSSR Act of 2002 to have the boiler inspected
and tested annually, contact Fracino or authorised service agent for further information
or to have your boiler tested, a Written Scheme of Examination is available in the
supplied installation manual. THIS SERVICE COUNTER IS NOT AN INDICATION OF
WHEN THE BOILER IS DUE FOR INSPECTION OR TESTING
13

SERVICE ALARMS
Water Filter
Alarm
ToGR1 ToGR2 ToGR3
ChangeWaterFilter
MAX
MIN
ToBOILER
ToGR1 ToGR2 ToGR3
FRACINO PID
MAX
MIN
ToBOILER
If the spanner symbol appears with the “Change Water Filter” in the Scroll menu the
water filter needs to be replaced, contact Fracino or your local service agent to have
the filter replaced.
To change the volume of water that can pass through the machine before the water
filter alarm comes on, see 36 in the “Technical” section.
The water filter counter alarm is re-set by turning the machine off using the mains on/off
switch pressing and holding the double espresso and double coffee, then turning the
machine on again using the mains on/off switch whilst keeping the double espresso
and double coffee buttons pressed for 2 seconds - the alarm and counter should be re-set
WARNING: The water filter counter should only be re-set when the filter has been
replaced and should only be re-set by trained personnel.
14
Press and hold
Turn off Turn on
SERVICE ALARMS
Service
Alarm
ToGR1 ToGR2 ToGR3
Service 0121 328 5757
MAX
MIN
ToBOILER
ToGR1 ToGR2 ToGR3
FRACINO ROMANO
MAX
MIN
ToBOILER
If the spanner symbol appears with the “Service” in the Scroll menu the machine
requires a routine service, contact Fracino or a local service agent to have the machine
serviced.
To change the number of cycles required before the service alarm soundes, see
section 25 in the Technical section.
WARNING: The service counter should only be re-set when the machine has been
serviced.
15
Press and hold
Turn on
Turn off
The service counter alarm is re-set by turning the machine off using the mains on/off
switch pressing and holding the espresso and coffee buttons, then turning the
machine on again using the mains on/off switch whilst keeping the espresso
and coffee buttons pressed for 2 seconds - the alarm and counter should be re-set

SHOT TIMER
1. When dispensing coffee the group temperature readout will show a shot timer,
shown in seconds, and dispensing symbol.
1
1
1
25 90oC 95oC
FRACINO PID
MAX
MIN
115oC
1
1
The shot timer can be used as a guide to the coarseness of the grind and tamping
pressure, ideally a double shot (60mL) should take between 20-30seconds.
16
TECHNICAL MENU
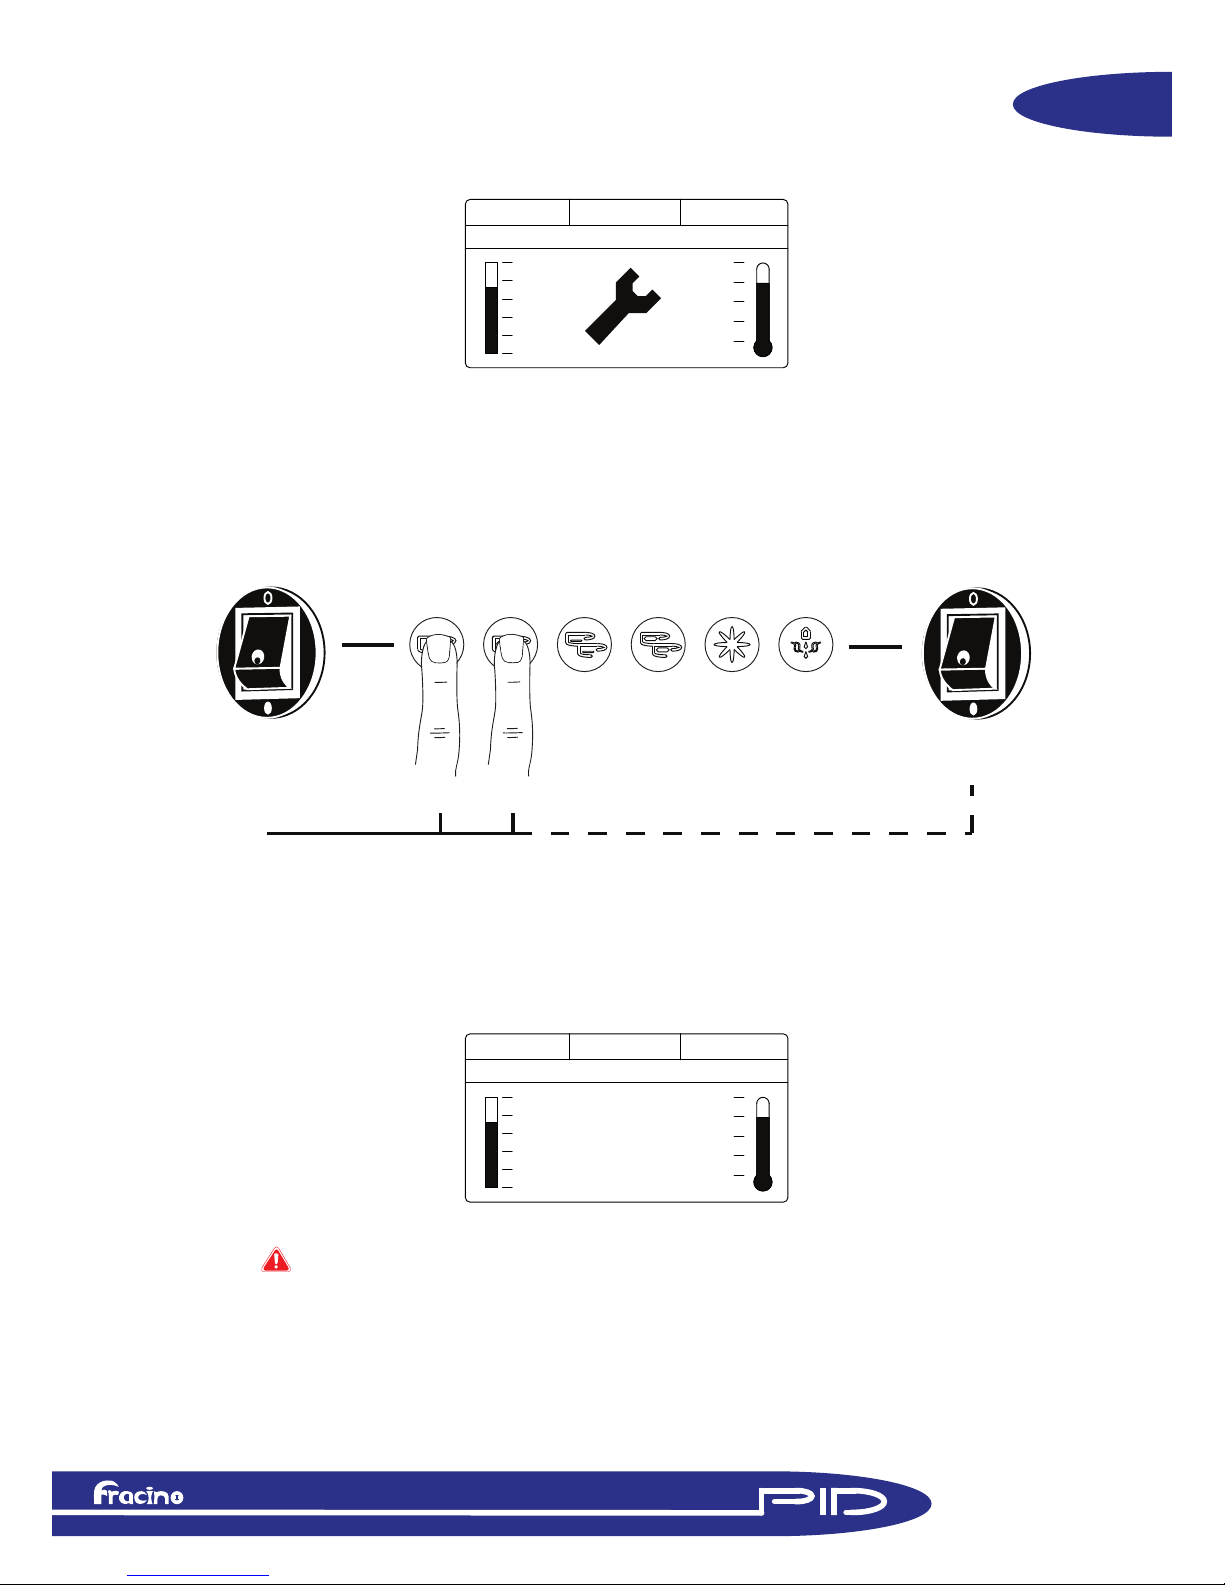
Entering
Technical
Menu
WARNING: Modifing the settings in the Technical Menu can may cause temperature
instability in the groups and/or cause the machine to function incorrectly, settings must
only be modified by trained persons. Service callouts to reset/reprogram settings maybe
fully charge-able.
OFF
DAY
1
HH:MM
1. To enter the technical menu, first turn the machine to stand-by mode, by pressing the
star and double espresso buttons on group 1 simultaneously.
2. Press and hold the star button for 10 seconds until the Technical Menu appears.
2
10 Seconds
OFF
DISPLAY MODE
reverse
USER
The “USER” symbol in this section denotes the features/settings that can
be changed by the user.
17
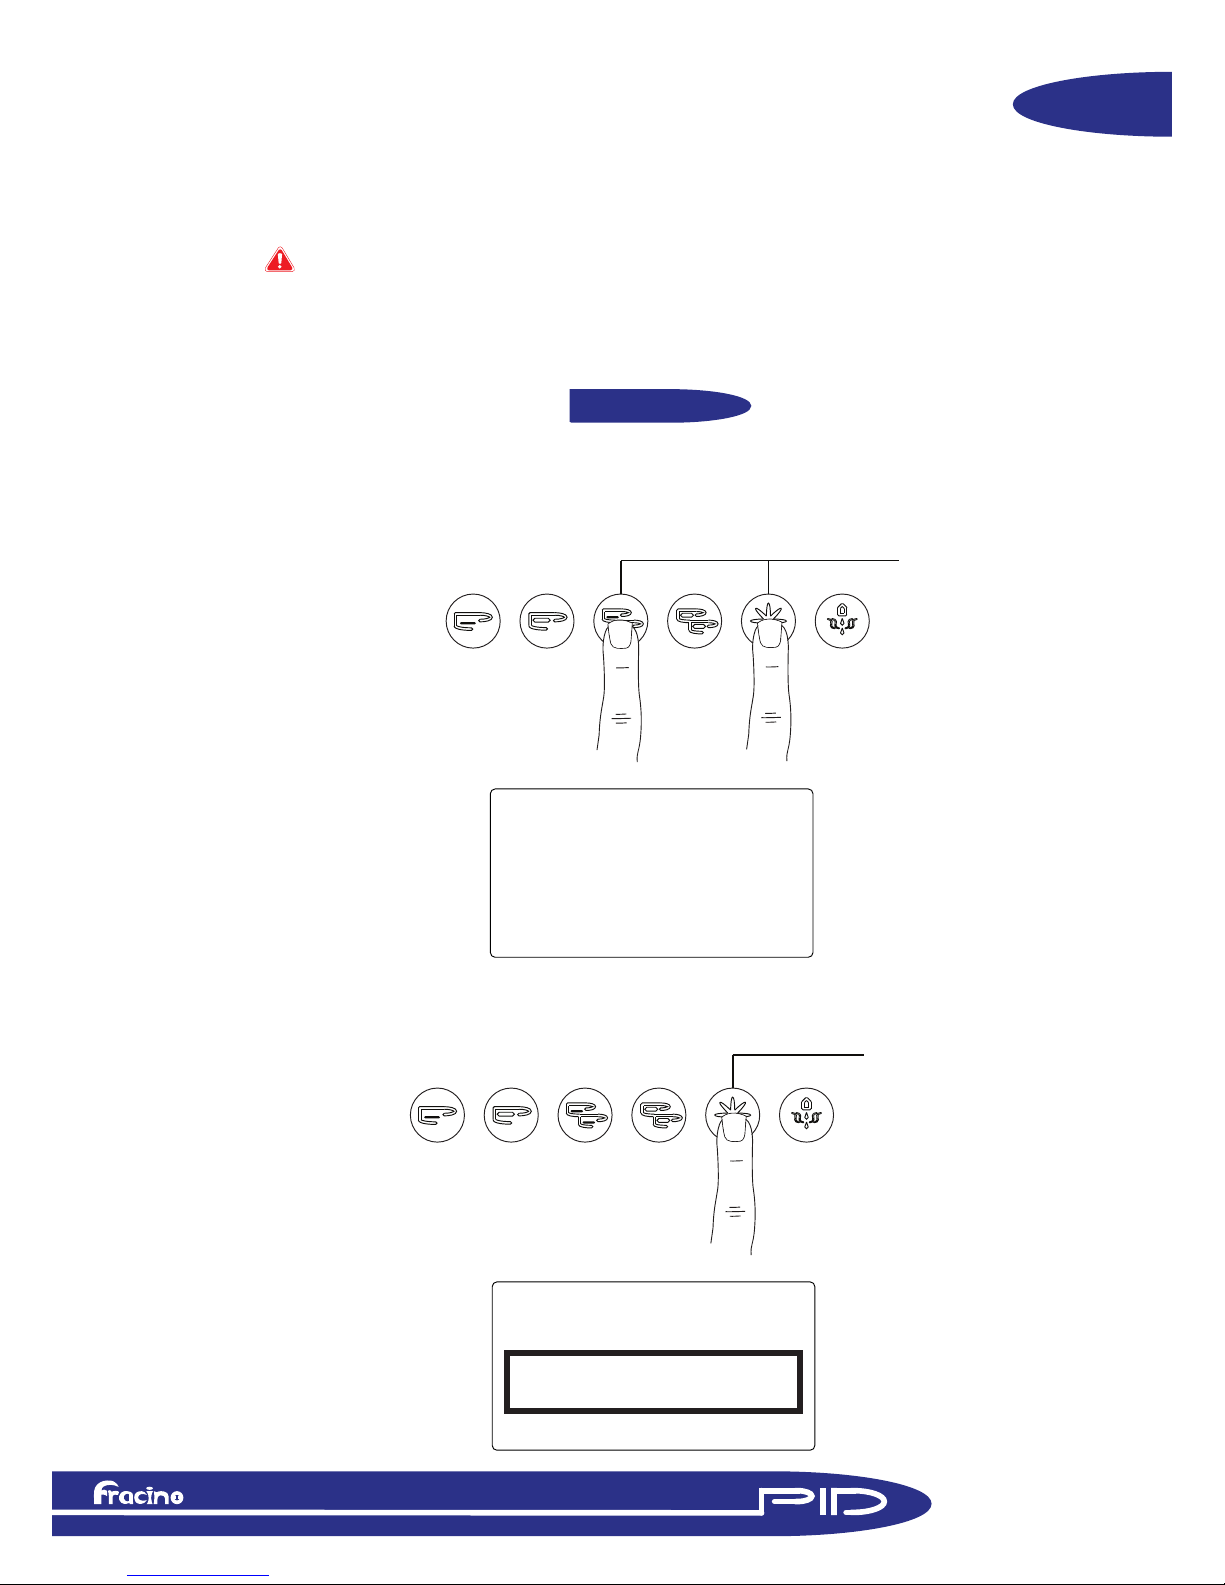
TECHNICAL MENU
4. DISPLAY MODE: Changes the display from dark lettering on a light background to
light lettering on a dark background. Use the + and - to switch between “reverse” and
“normal”.
6. COLOUR STATE ON: Changes the colour of the display, use + and - to cycle through
options.
OFF
DISPLAY MODE
normal
5. CONTRAST: Increases or Decreases the contrast between the lettering and background, use + and - to increase decrease value.
OFF
Contrast
50
+ -
SELECT
3. When in the Technical Menu the following secondary button functions are used.
“+” and “-” used to change settings
“SELECT” used to save setting and move to the next menu option
“ENTER” used to select a value
OFF
Color State ON
NOTE: The values shown in this chapter are the recommended values that should be
used for optimum performance.
USER
USER
USER
ENTER
18

TECHNICAL MENU
7. LANGUAGE: Changes the langauge of the display and menus, options are English,
Italian, German and Spanish, use + and - to cycle through.
9. SERVICE PHONE: Gives the phone number of Fracino or Fracino Service Agent,
use + and - to change numbers and Enter to select number, Press Select to cycle to
next menu.
OFF
Language
english
8. NAME: Allows the scroll menu on the main display to be customized, use + and - to
change character and Enter to select character, press Select to cycle to next menu. Up
to 14 Characters can be selected.
OFF
NAME
FRACINO PID
OFF
Service Phone
0121 328 5757
BLANK ! “ # $ % & ‘ ( ) * + , - . / 0 1 2 3 4 5 6 7 8 9 : ; < = > ? @ A B C
D E F G H I J K L M N O P Q R S T U V W X Y Z [ ] ^ _ ` a b c d e f
g h i j k l m n o p q r s t u v w x y z
10. KEYBOARD TYPE: Selects the type and layout of the keypad.
OFF
Keyboard
Esp Caf 2Es 2Caf
USER
19
TECHNICAL MENU
11. CONTINUOUS KEY: Allows the Star button to operate as a semi-automatic overide,
i.e. when the star button is pressed dispensing will start and will continue until it is
pressed again.
13. MIX TEA WATER: Allows cold water to be pumped in to the hot water system, when
dispensing hot water, to reduce the temperature of the water.
OFF
Continuous
Enabled
12. FIFTH TEA KEY: Allows the Star button to be used to turn the hot water valve on
and off, this MUST be kept “Disabled”
OFF
Fifth Tea Key
Disabled
OFF
Mixed Tea Water
yes
14. BUZZER: Enables or disables the buzzer to sound when pressing buttons or when
an alarm is detected.
OFF
Buzzer
enabled
USER
20
TECHNICAL MENU
15. STEAM BOILER GROUP: Selects which keypad controls the FAST Steam wand.
for a 2 group machine “2” should be selected, for a 3 group “3” should be selected, “0”
will disable the system.
17. PRE-BREW ON: The following will only appear if the pre-brew is selected, see above.
Use + and - to increase or decrease the time when the group solenoid will close after
starting the brewing process. Each type of coffee can have it’s own pre-brew times.
Use the Select button to scroll to the next type of coffee, the Pre-brew times will apply
to all of the groups.
OFF
Steam boiler group
2
16. PRE-BREW: Enables or Disables the Pre-brew system. The Pre-brew will close the
group solenoid after a pre-determined amount of time then stay closed for a predetermined amount of time before commencing with the main programmed measure.
OFF
PreBrewing
Enabled
OFF
PreBrew ON sec
Esp 1.0 Sec
Type of coffee
Time ON
17. PRE-BREW OFF: The following will only appear if the pre-brew is selected, see above.
Use + and - to increase or decrease the time when the group solenoid will open. Use
the Select button to scroll to the next type of coffee.
OFF
PreBrew OFF sec
Esp 1.0 Sec
Type of coffee
Time OFF
USER
USER
USER
21
TECHNICAL MENU
19. PROBE SENSITIVITY: Selects the sensitivity of the level probes use the +
and - buttons to select between “LOW”, “MED” and “HIGH”
21. NUMBER OF GROUPS: Selects the number of groups are on the machine, selecting “0” will disable all of the groups.
OFF
ProbeSensitivity
HIGH
20. LED IDLE: When Enabled the buttons will not be illuminated until selected, when
disabled all the buttons will be illuminated until selected, when selected the selected
button will flash.
OFF
LED idle
disable
OFF
Crono Grp
2
22. STEAM BOILER HEAT.: Selects the method of controlling the steam boiler pressure, selecting “Disabled” will prevent the steam boiler heating, “byPressureSwitch”
MUST be selected to function correctly
OFF
SteamBoilerHeat.
byPressureSwitch
USER
22
TECHNICAL MENU
24. SEQUENTIAL HEATING: Must be kept disabled
26. TEMPERATURE: Changes the temperature mode to Centigrade of Fahrenheit.
OFF
Sequent.Heating
Disabled
25. SERVICE CYCLES: Selects the number of dispensing cycles before the machine
should be serviced.
OFF
Service Cycles
50000
OFF
Temperature
o
C
27. BOILER TEMP.: This feature is disabled on the Fracino Romano PID
WARNING: The service counter is only an indication of when the next service is due,
services may be required more often depending on usage, water hardness etc. It is
also a legal requirement under the HSE PSSR Act of 2002 to have the boiler inspected
and tested annually, contact Fracino or authorised service agent for further information
or to have your boiler tested, a Written Scheme of Examination is available in the
supplied installation manual. THIS SERVICE COUNTER IS NOT AN INDICATION OF
WHEN THE BOILER IS DUE FOR INSPECTION OR TESTING
USER
USER
23
TECHNICAL MENU
28. STEAM BOILER PID PARAMETERS: These settings are redundant on the Fracino
Romano PID.
30. HEATING GROUP: This is to allow the same temperature to be set on all groups,
for example setting to 1 on a 2 group machine will only allow one group temperature
to be set.
OFF
kP kI kD
0.0 0.0 0.0
29. STEAM BOILER PID SETTING: This setting is redundent on the Romano PID.
OFF
PID settings
0oC
OFF
Heating Group
2
31. GROUP TEMPERATURE: Used to set the set point temperature for each individual
group. The temperature range for the set point temperature is 85 - 125oC in steps of
1oC.
WARNING: The maximum set point temperature for the groups must never be above
115oC - The Romano PID groups are fitted with high limit safety thermostats(HLS) which can
trip if the temperature is set too high, requiring the thermostats to be reset, service callouts
to re-set HLS, where the temperature has been set too high, may be fully charge-able.
OFF
Group Temperature 1
88oC
USER
24

TECHNICAL MENU
32. OFFSET TEMPERATURE: The group temperature is measured by a temperature
probe in the group boiler, this temperature is displayed in the main display and corresponds to the group temperature set point. When dispensing the water flows from the
group boiler, through the group solenoid which can reduce the temperature of the
coffee in the filter, the Off Set temperature compensates for this cooling effect.
33. GROUP BOILER PID SETTINGS: Changes the kP, kI and KD parameters on the
PID system
OFF
Offs Tset Coffee
6oC
OFF
kP kI kD
1.2 0.0 4.0
34. PID SETTING: Adjusts the temperature range for the PID system
OFF
PID Setting
20oC
WARNING: These settings have been optimised for the Fracino PID, changing the
values, from the values below may cause temperature instability in the groups
WARNING: These settings have been optimised for the Fracino PID, changing the
values, from the values below may cause temperature instability in the groups
25

TECHNICAL MENU
35. FILLING TIME OUT: Sets the time, in minutes, before the time out allarm will sound
when the steam boiler is filling, the time out can be set between 10-250 seconds.
OFF
FillingUp T-Out
240
36. WATER FILTER: Sets the volume of water in Litres before the water filter needs
replaced, the volume can be set between 0 and 5000 Litres.
WARNING: The hardness of the water supply and usage of the machine will determine
frequency of replacing the water filter, failure to replace the water filter at the correct
time my void the warranty.
OFF
Water Filter
5000
USER
USER
26

TROUBLESHOOTING
Steam Boiler
Filling
Time-Out
T
o
GR1 T
o
GR2 T
o
GR3
FillingUp Time-out
MAX
MIN
ToBOILER
CAUSE: The water in the steam boiler has not reached the level probe in the set
refilling time, ofter this will occur during initial start up, when the boiler is filling up from
empty.
SOLUTION: Turn the machine off using the main on/off switch, wait 2 seconds then
turn back on the machine should resume filling.
!
If a fault is detected then all the keypads will flash, the alarm will sound and the display
will give an error code in the scrolling menu and an error icon.
WARNING: The alarm will not sound if the buzzer has been disabled in the technical
menu, see section 14 of the Technical section
+
OTHER POSSIBLE CAUSES: The water supply to the machine has been turned off
SOLUTION: Check the water supply has been turned on.
WARNING: Failure to ensure the water supply is on will damage the high pressure
pump and will invalidate the warranty on the pump.
Boiler Over
Temperature
T
o
GR1 T
o
GR2 T
o
GR3
Alarm Boiler Temp.
MAX
MIN
ToBOILER
CAUSE: The temperature in the steam boiler has reached 140o C, and the heating
element has been deactivated. To get to this temperature there is likely to be a fault
with the Pressure switch and high limit thermostat.
SOLUTION: Contact Fracino or local service agent.
!
27

TROUBLESHOOTING
Steam Boiler
Temperature
Probe
Disconnected
ToGR1 ToGR2 ToGR3
SteamBoilerT.probeUnconn
MAX
MIN
ToBOILER
CAUSE: The steam boiler temperature probe has been disconnected or has developed
a fault.
SOLUTION: Ensure all connections on the temperature probe wire are correctly
connected and the probe is correctly connecting to the control box, if the fault still
remains contact Fracino or local service agent.
!
Flow Meter
Alarm
ToGR1 ToGR2 ToGR3
MAX
MIN
ToBOILER
CAUSE: Blank filter left in filter group handle
SOLUTION: Check filter handles and remove blank filter.
CAUSE: Coffee ground to finely
SOLUTION: Adjust grinder to increase the coarsness of the grinds
CAUSE: Groups blocked or group solenoid not working.
SOLUTION: Remove, inspect and clean group jet if required, inspect and replace group
solenoid if required.
CAUSE: Wire off or poor connection to the flowmeter.
SOLUTION: Check connections on the flowmeter, check polarity on flowmeters, check
connections on PCB.
FRACINO ROMANO
x
“x” Denotes group number
28

TROUBLESHOOTING
Over Temperature
on a Group
Boiler
ToGR1 ToGR2 ToGR3
Alarm Temper. Group X
MAX
MIN
ToBOILER
CAUSE: The temperature in group “X” has risen above 140oC, possibly caused by a
fault in the group temperature probe and/or a fault with the group high limit thermostat.
SOLUTION: Contact Fracino or a local service agent.
!
Temperature
Probe on
Group Boiler
Disconnected
ToGR1 ToGR2 ToGR3
ProbeUnconnectGroup X
MAX
MIN
ToBOILER
!
CAUSE: The temperature probe on group “X” has been disconnected or has developed
a fault.
SOLUTION: Ensure all connections on the temperature probe wire are correctly
connected and the probe is correctly connecting to the control box, if the fault still
remains contact Fracino or local service agent.
29

CLEANING
1. Wipe the outer case of the machine with a soft damp cloth (do not use a scouring pad).
Use a shower plate brush to dislodge dried coffee particles in the group and around the filter
holder washer to prevent build up of coffee. Brushes can be obtained from Fracino, part no.
FC54.
1
Daily Cleaning
2
1
2. Press the star button and allow water to flow water from the group for 10seconds,
to rinse away any coffee particles, repeat on each group
2
30
CLEANING
1. The group must be backwashed every day to clear the solenoids this is done by doing
the following proceedure. Insert a blank filter in to the filter and put in to group.
2
90oC 95oC
FRACINO ROMANO
MAX
MIN
115oC
2
Daily Cleaning
Backwashing
2. Press the single espresso button and the star button simultaneously to start the
automatic cleaning cycle. The cleaning cycle will last approximately 60seconds,
during which time it will pulse the pump several times after each pulse water
will be expelled out the group exhaust. The display will show the cleaning symbol,
when this disappears the cleaning cycle is complete and the filter can be removed.
1
88oC
3. Repeat the above in each group
31

CLEANING
1. Every day the backwashing process must be repeated using Fracino liquid quartz
detergent to reduce the build up of coffee in the groups and solenoid valves. Fracino
liquid quartz can be purchased through your dealer or from fracino direct, part no.
DET/LIQUID.
Daily Cleaning
Backwashing
with liquid
quartz
2. Pour 1/2 a cap full of the liquid quartz in to a blank filter and follow the backwashing proceedure as described in the previous section.
3. After the cleaning cycle with the quartz it is vital that the filter is removed from the
group and empied, reinsert the filter and repeat the backwashing proceedure without
any quartz to rinse the groups and solenoids to prevent blockages and preventing the
detergent tainting the taste of the coffee.
NOTE: After performing the backwashing proceedures as stated above the water in
the filter and the water coming out of the group exhaust should be clear.
32
TURNING OFF
GROUPS
2
Turning off
individual groups
1. Individual groups can be turned of to save energy and prolong the life of the
elements when they are not in use.
Note that the groups will require at least 10minutes to heat up.
2. To turn the a group off use the corresponding keypad, press the star button and
cappuccino button simultaneously. The display will show “OFF” in the group temperature
readout.
2. The group can be turned on by pressing the star and double cappuccino
single cappuccino button simultaneously, the “OFF” will disappear and
show the group temperature.
OFF 20oC 20oC
FRACINO PID
MAX
MIN
09:00
MONDAY
115oC
2
33
TURNING OFF
OFF
DAY
1. The machine can be put in to a stand-by mode which will cut power to the heating
elements and disable the buttons. To put the machine in stand-by press the star and
double espresso buttons on group 1 simultaneously, the display will show “OFF”
together with the time and day.
1
Turning off
1. The machine can be turned off by simply using the black rocker switch on the
front panel.
1
Turning off
stand by
HH:MM
2. To come out of stand-by mode press the double espresso button on group 1
WARNING: The stand-by mode does not fully isolate power from the machine and
must not be used for maintenance.
34

SERVICE ALARMS
Re-setting
Counters
ToGR1 ToGR2 ToGR3
FRACINO ROMANO
MAX
MIN
ToBOILER
Coffee Total
The coffee counter can be re-set if required by preforming the following proceedures
Press and hold the double espresso and cappucino buttons and hold for
3 seconds, until the display reads:
Enter the secondary programming menu as described in section XXx, and cycle
through to Coffee Total section
ToGR1 ToGR2 ToGR3
FRACINO ROMANO
MAX
MIN
ToBOILER
Coffee Total
Total Reset
35
FULL FACTORY RE-SET
ToGR1 ToGR2 ToGR3
MAX
MIN
ToBOILER
Preset valori
completato
Ensure the machine is turned off at the mains power switch press and hold the
single espresso, double espresso and star button on the group 1 keypad then
turn the power switch on whilst still holding the 3 keypad buttons, keep them
pressed for 3 seconds until the display read the following
Turn the mains switch off, wait 3 seconds then turn the machine back on, the
machine will start up in its default mode, to function correctly all setting will
need to be re-entered.
WARNING: Performing the procedures below will re-set all settings to a default
state, in order for the machine to function correctly after the full re-set, all settings
will have to be re-entered which should only be performed by trained personel.
+
36
 Loading...