

F&P Optiflow junior OPT312, Optiflow junior OPT314, Optiflow junior OPT316, Optiflow junior OPT318 Application Manual
Page 1
Nasal CaNNula FittiNg guiDE
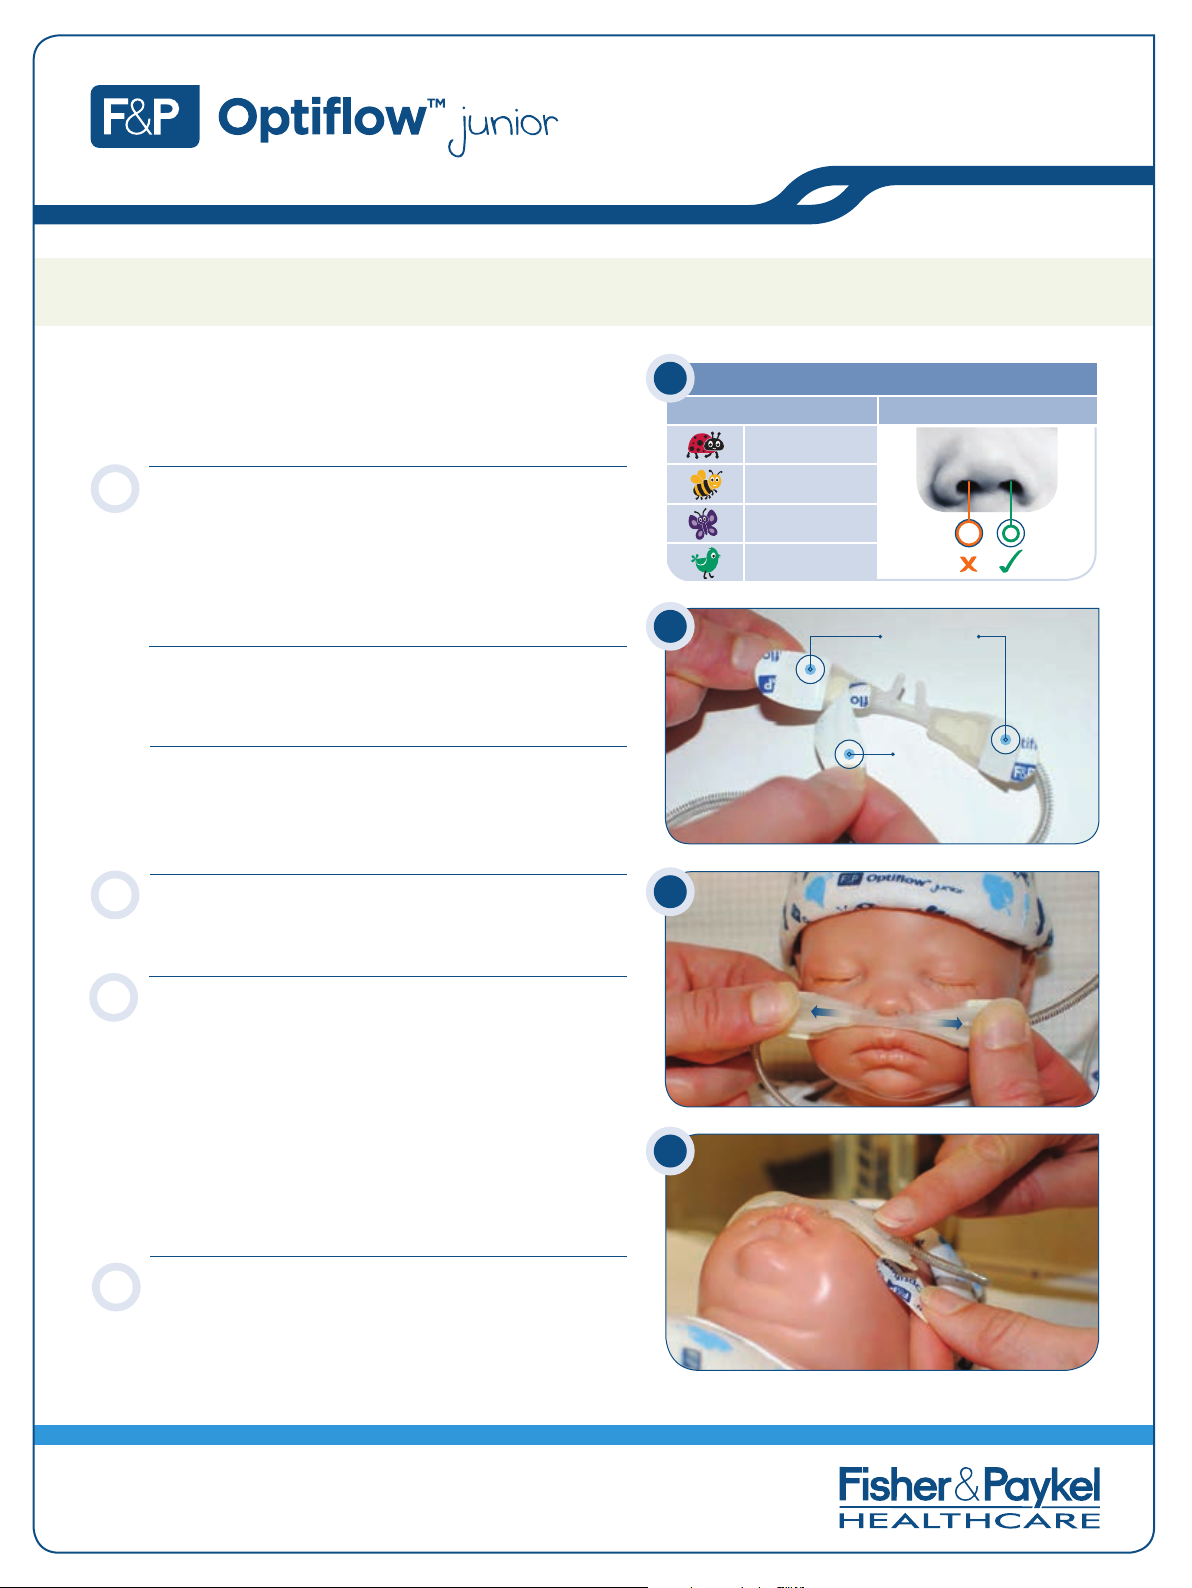
SELECT CANNULA SIZE
SIZe rANGe eNSUre GAP ArOUND PrONGS
Premature Size
Neonatal Size
Infant Size
Pediatric Size
THE FOLLOWING IS A SUGGESTED PROCEDURE FOR APPLYING THE
OPTIFLOW JUNIOR NASAL CANNULA (OPT312, OPT314, OPT316, OPT318):
FITTING
Setup
1
Set up the gas supply, humidifier and breathing circuit.
Select Cannula Size
2
• Prongs should not fill the nares and a clear gap should
be visible around each prong.
• The sizing chart on the following page can be used as
a guide.
• If the infant can fit two sizes, select the smaller size.
Prepare Skin
3
Ensure infant’s face is clean and dry. Follow your hospital’s
protocol for skin preparation.
Connect to Gas Source
4
Connect the cannula to the gas source.
Tip: Place hand close to nasal prongs to ensure that there is
gas flow exiting the prongs.
Remove First Wigglepad Tabs
5
Without touching the adhesive, remove the first backing tabs
from Wigglepads, leaving the second backing tabs in place.
2
5
6
Second
backing tabs
First
backing
tabs
Place Cannula
6
• Once applied, the cannula bridge may move away from
the septum as the cheeks relax. Refer to Placement
Checks for correct positioning during use.
• Hold the ends of the pads and apply slight tension to
the cannula.
• Position the prongs as far into the nares as possible such
that the cannula bridge rests just underneath the septum.
• Position horizontally across the face and stick Wigglepads
onto the cheeks.
Secure Cannula
7
Remove the second backing tabs and stick the Wigglepads
onto the infant’s cheeks. Ensure the Wigglepads are well
adhered to the face.
185048033 rev B © 2013 Fisher & Paykel Healthcare Limited
www.fphcare.com
7
Page 2
Nasal CaNNula FittiNg guiDE
F&P OPTIFLOW JUNIOR
OPTIFLOW JUNIOR
NASAL CANNULA
ITEM CODE APPROX WEIGHT (KG) SPARE
WIGGLEPADS
2 4 6 8 10 12 14 16 18 20 22
Premature Size
OPT312 OPT010
Neonatal Size
OPT314
OPT012
Infant Size
OPT316
Pediatric Size
OPT318
PLACEMENT CHECKS
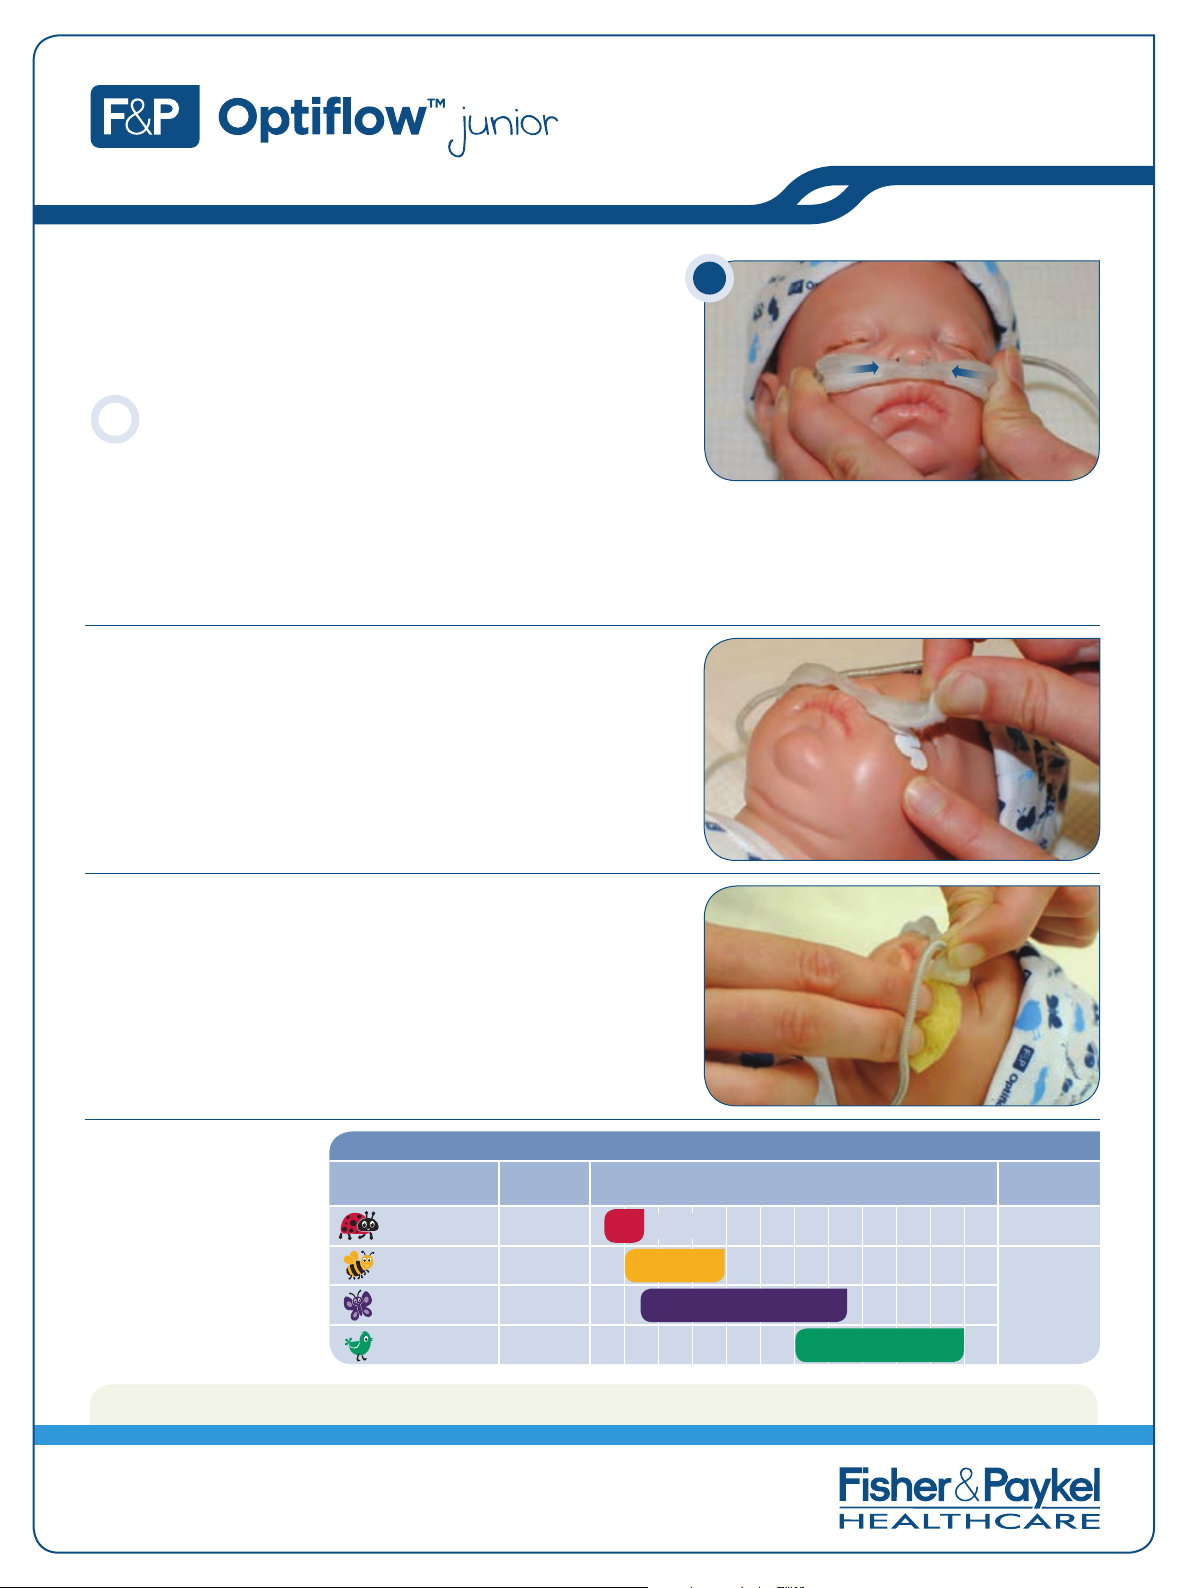
Sensitive Septum
1
Check that the nasal cannula does not apply any pressure to the
infant’s septum. Ensure a slight gap is visible between the cannula
and the septum. Adjust cannula position if required.
Cheeky Check
2
• Gently squish the infant’s cheeks to check the prong placement
in the nares.
• If prongs come out of the nares, adjust cannula further into the
nares according to instructions. Repeat the cheeky check.
Tidy Tubing
3
Ensure that the baby is not lying on the tubing and that the flow
path is maintained.
CANNULA REMOVAL/ADJUSTMENT
Always readjust cannula while patient is supine.
To temporarily remove or adjust the cannula on the Wigglepads:
• Place fingertip on the outside edge of Wigglepad.
• Gently peel the cannula pad away from the Wigglepad starting from
the outside and working in towards the infant’s nose.
• To adjust, reposition prongs into nares and place cannula back
onto Wigglepads.
2
WIGGLEPAD REMOVAL/ REPLACEMENT
Lift edge of the Wigglepad and using a wet cloth wipe the skin and
underside of the Wigglepad while gently peeling Wigglepad from face.
Refer to sizing chart for Wigglepad spares.
Note: Attach spare Wigglepad to cannula prior to applying to face.
SIZING CHART
IMPORTANT: Always refer to the user instructions supplied with the product for full set up instructions, warnings, contraindications and explanations.
Max. flow
8 L/min
Max. flow
8 L/min
Max. flow 20 L/min
Max. flow 25 L/min
www.fphcare.com
 Loading...