

Page 1
Handbook
Version 03-2016
30092016
Page 2
7. Deactivate the HMBox page 13
4. Controlling the activation page 10
6. View measurement values page 12
2. Mounting the HMBox page 4
3. Activating the HMBox page 5 - 9
Contents
5. Manual synchronisation page 11
1. HMBox- case content page 3
8. Remove the HMBox page 14
9. Additional Information page 15
2
Page 3
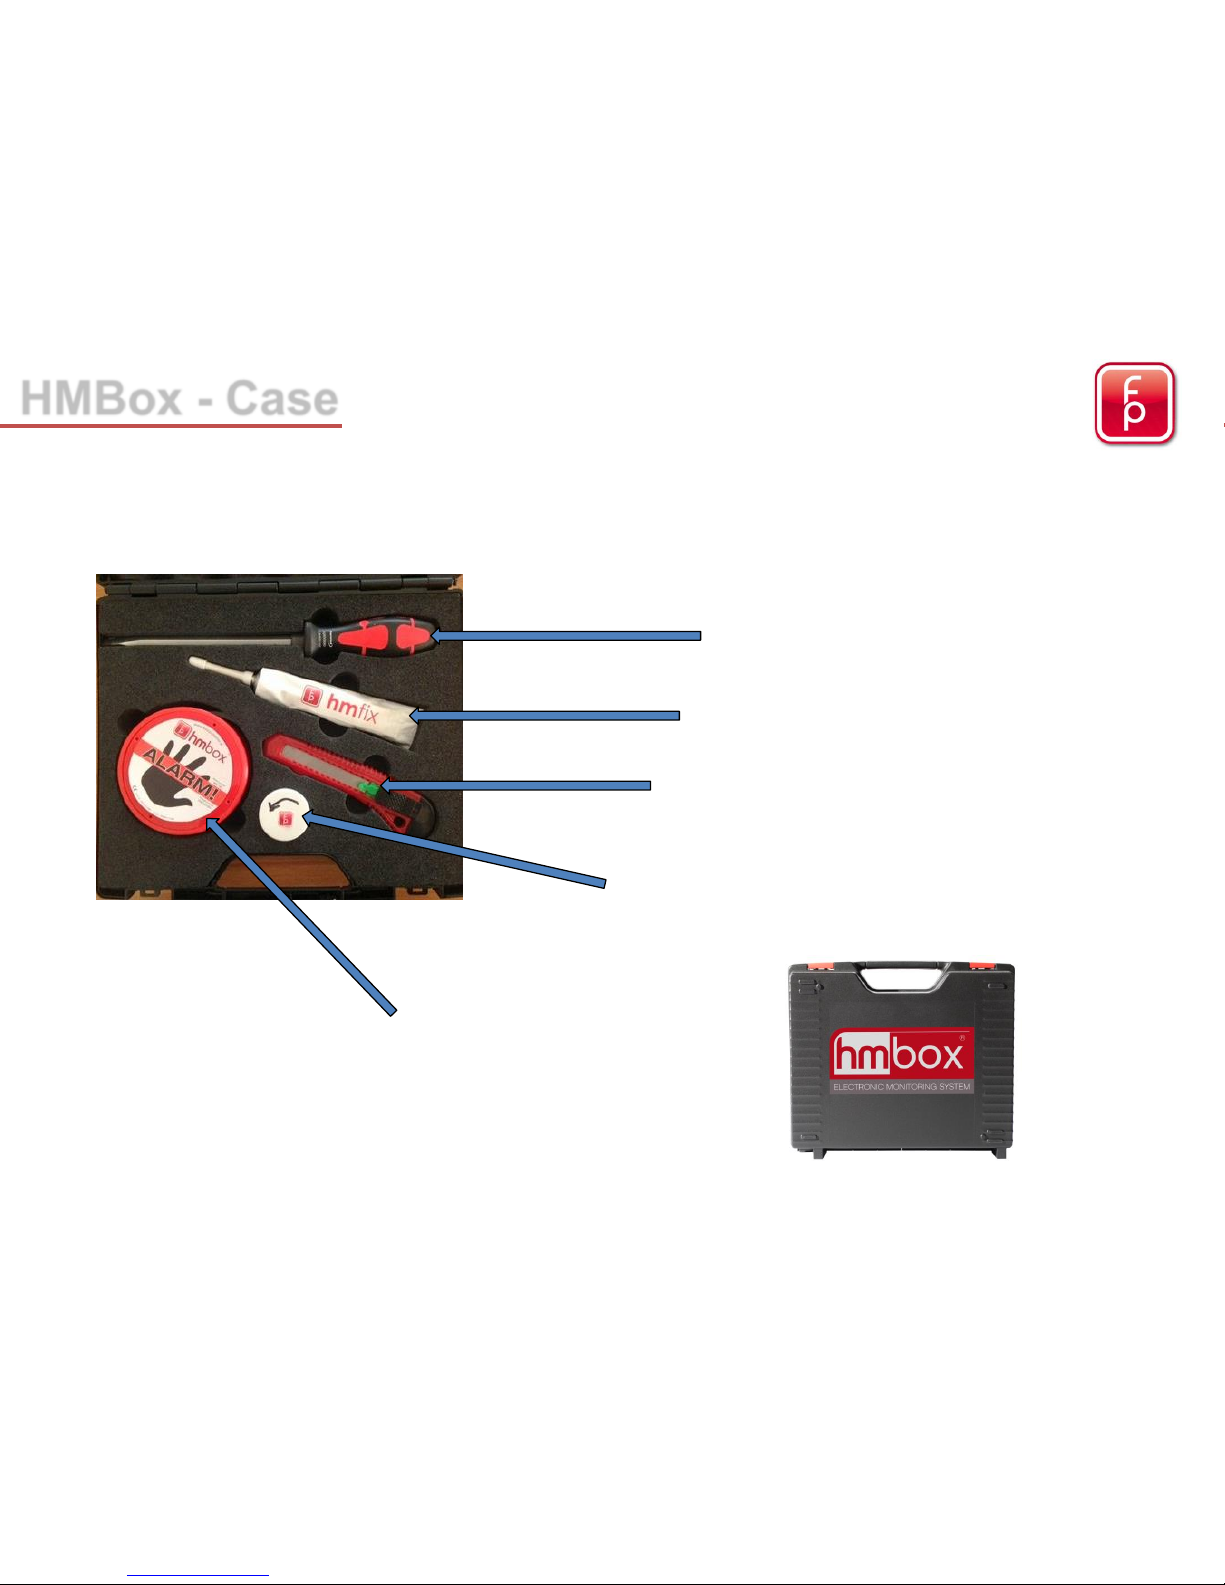
HMBox - Case
HMfix – adhesive for mounting the HMBox
Stanley knife – for removal of remaining HMfix
Screw driver – for uplifting the HMBox
Release agent – for residue free removal of the HMfix
HMBox
3
Page 4
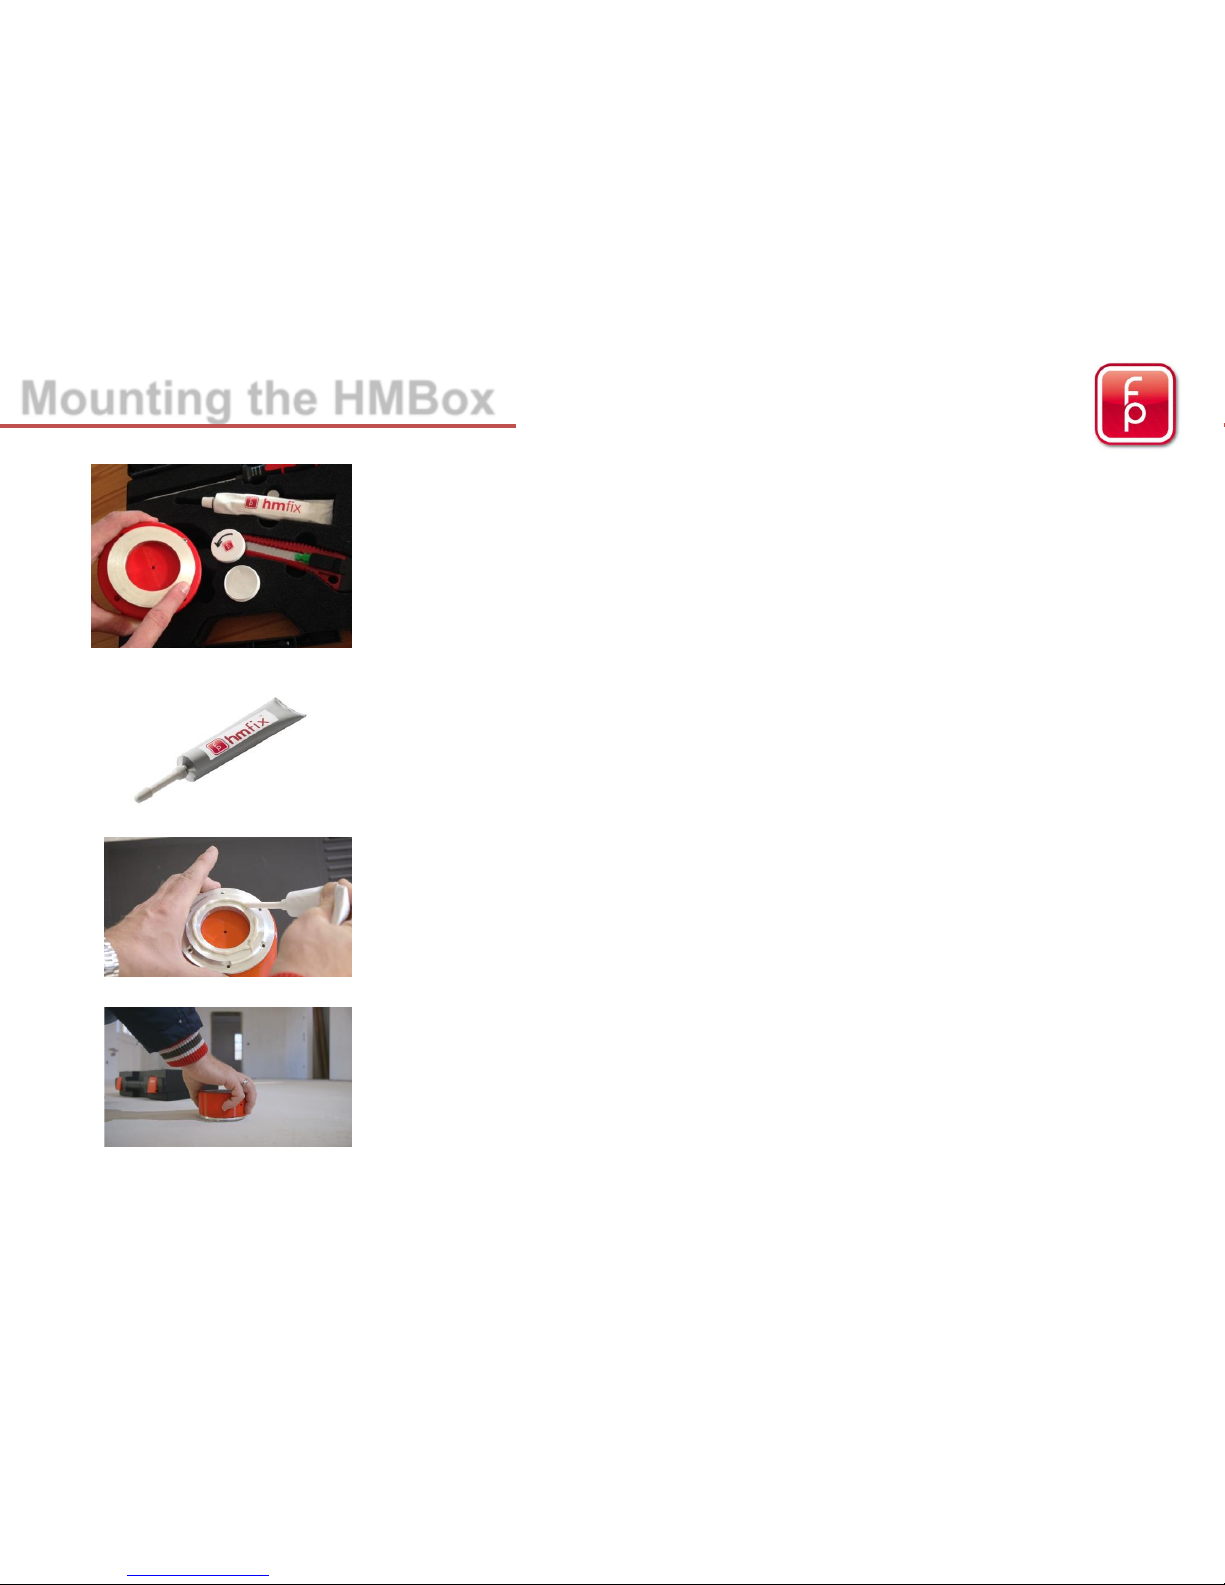
Mounting the HMBox
1. Apply Release Agent
Please left box in the case, turn cover to the left and open it.
Apply agent on Aluring
! ATTENTION: a thin film must be applied before adhesive
application. This simplifies the later removal of the Hmfix
adhesive.
2. Hmfix
Without exception only this special adhesive should be used.
!!! Other adhesives could damage the sensors or cause
falsified measurement results.!!!
3. Hmfix application
apply a closed application around the ring with a thickness of
~ 3mm. The Hmfix requires approximately ½ hour to harden.
4. HMBox bonding
direct to the selected location and just lightly press downward.
4
Page 5
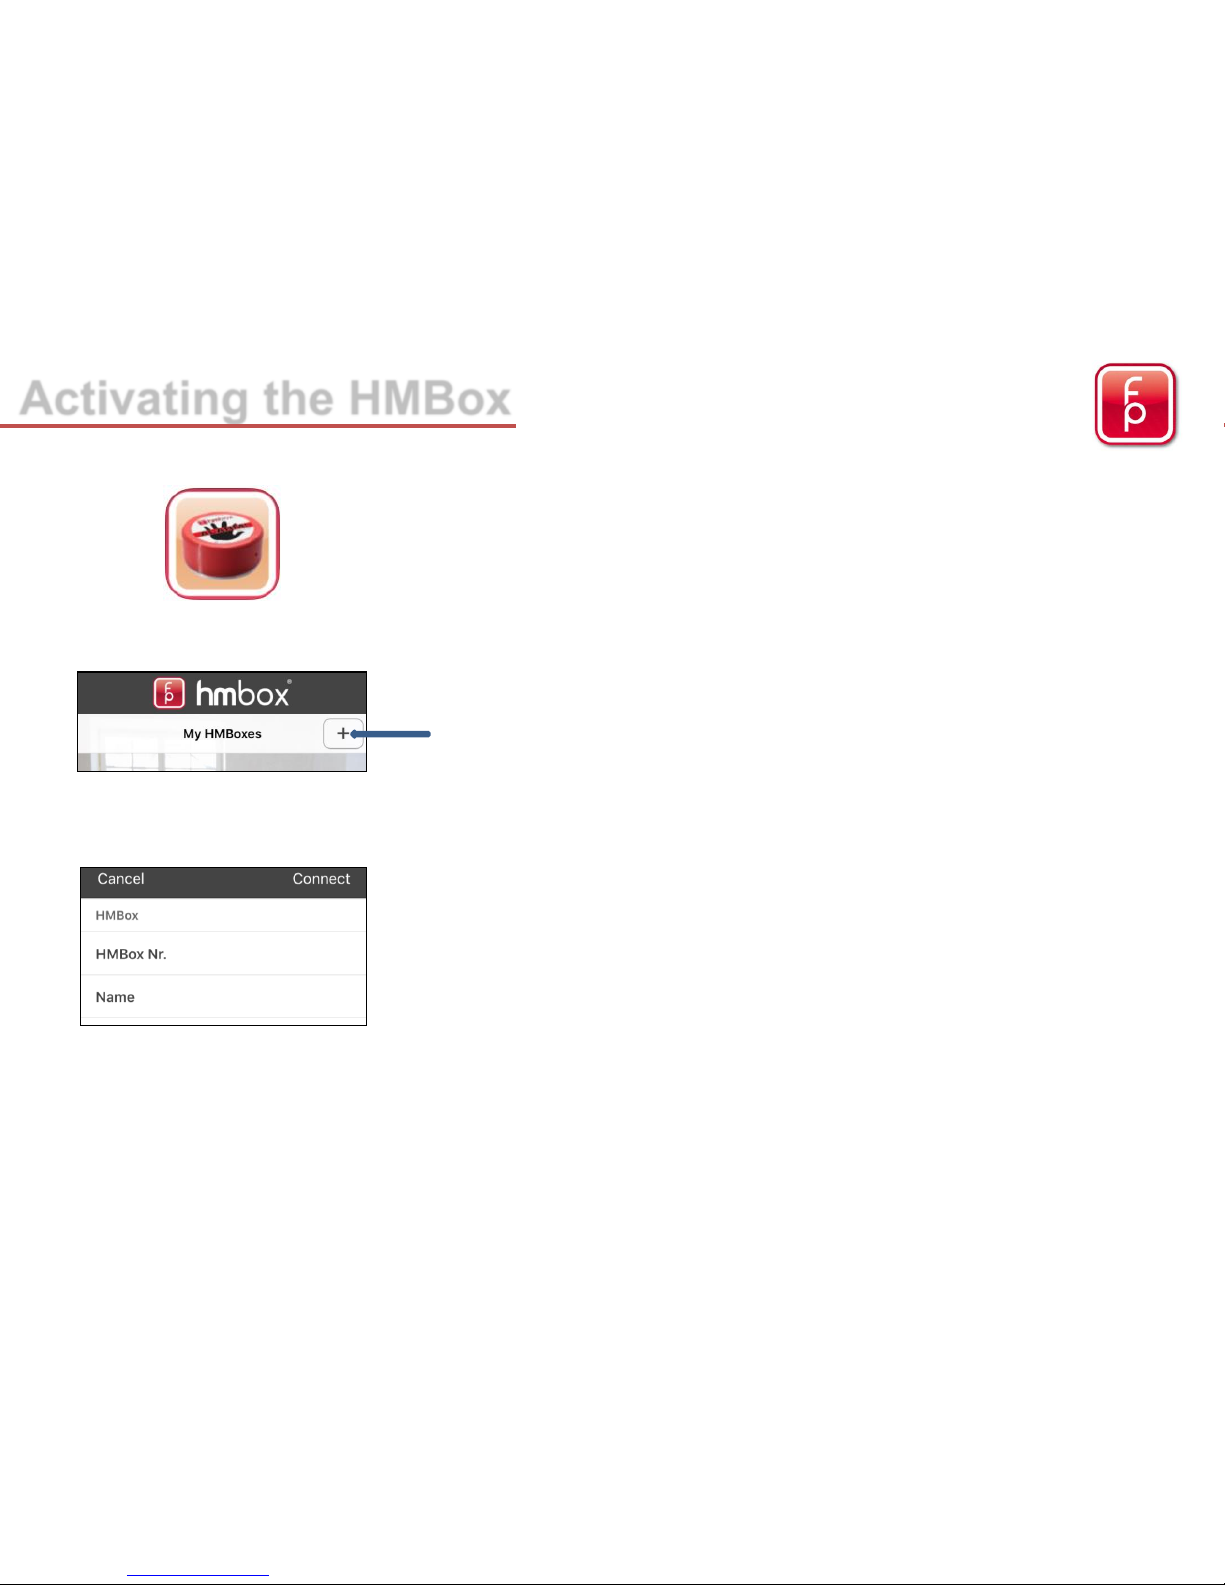
Activating the HMBox
3. Fill in all data and „Connect“
HMBox No.: 6-digit number (starting with 9)
Name: Name of the location on the Project
(e.g. Living room)
2. Under „My HMBoxes“ add a HMBox with “+”
ALWAYS pay attention, that you have an active
Bluetooth-connection as well as an existing network.
1. Start HMBox-APP on Smartphone
and log in with your user account data.
5
Page 6
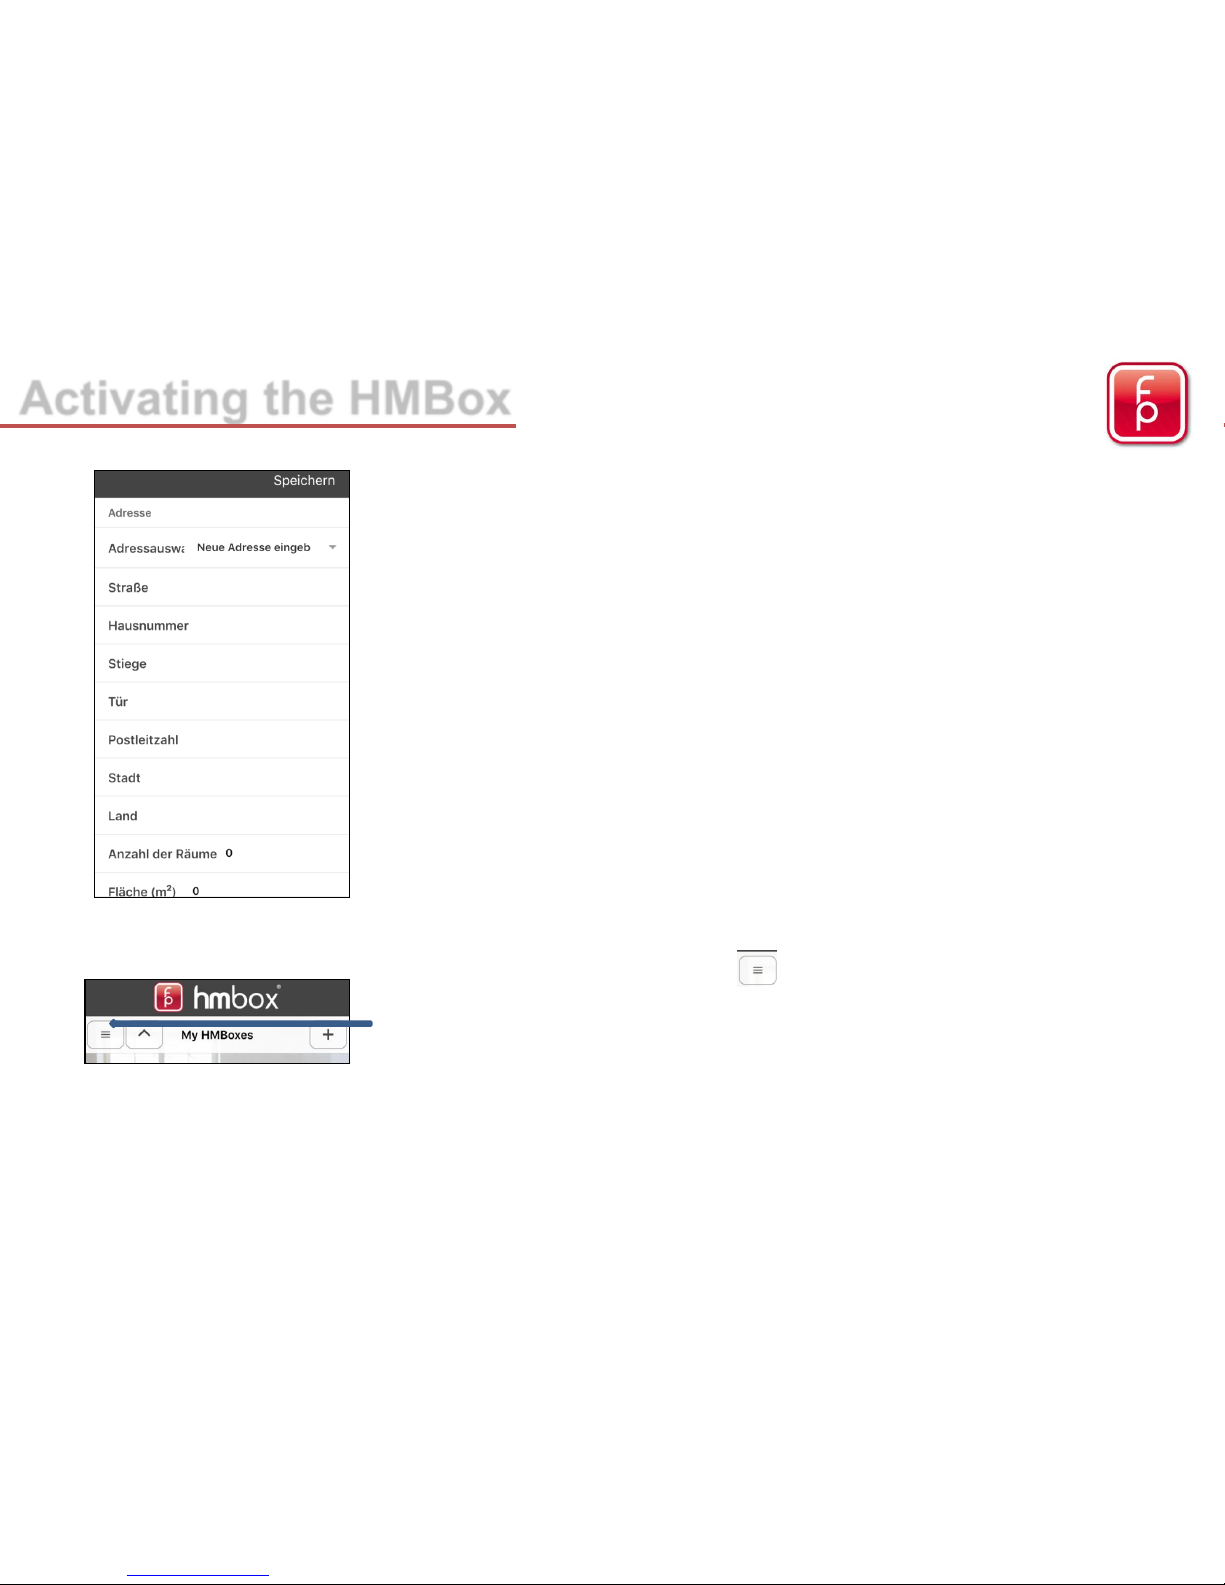
4. Fill out all of the given fields and „Save“
You can choose an existing address or fill in a new address
5. Under “My HMBoxes”
create the desired construction site
(this is only possible before or during the activation)
Activating the HMBox
6
Page 7

Activating the HMBox
6. Under „Add construction site“
you can set up a new project
see below 7.
or you choose an existing site
7
7. Fill out all of the given fields and „Save“
Site name: Name of the project
Street:
House no.:
Postal code: Address of the project
City:
Country:
with “Back”, back to the main menu
Page 8

8. Now the HMBox is shown under „My HMBoxes“
HMBoxes, that are not activated, appear at the top
(have not been assigned to a project)
HMBoxes, that are actually taking measurements
(appear under the assigned project)
9. Select the desired HMBox by clicking on it.
10. Press „Start New Measurement“
Activating the HMBox
8
Page 9

11. Here the previous set up project can be selected and
possibly changed.
(Simplifies the project management later)
Select the desired project
Fill in the exact details of the project
Measurement interval of 1h is pre-set. Interval is adjustable
Reset the battery is only required by battery change
12. Press „Start Measurement“
now the settings on the smartphone will be sent to the HMBox.
This means that the Alarm and GSM have been switched on
and the measurements begin.
Activating the HMBox
Alarm and GSM should always be activated
9
ATTENTION: It is necessary to wait for the activation check!!
Page 10

The transfer of the entered data and the activation of the APP to the HMBox will
take approximately 2 minutes.
The LED-Light on top of the HMBox begins to blink red which means that the
measurement process and the Anti-Theft protection have been started.
A measurement takes place in the background, the GSM reception is tested and at
the same time the data is sent to the server.
Once the activation process is complete, an audible „peep series“ will sound
twice. The signal indicates the reception strength of the GSM reception. (e.g.
5x the peep tone means the best reception. The data has been successfully
sent to the server and you can read the date of the first measurement on your
smartphone after about 5 minutes.
The HMBox now performs a measurement each hour and records them. Every 12
hours the data is transferred to the server via GSM.
The next transmission of the measured data is therefore 12 hours after activation at
the site. From this time forward you can call up the data on your smartphone over
the HMBox-App or from your workstation over the FP Desktop Professional
Software (without having to be on site).
Checking the Activation
10
Page 11

Manual synchronisation
1. A manual synchronisation is only possible on site in the
direct vicinity of the HMBox (~ 8m), Bluetooth connection
must be active and sufficient network connection
Select a HMBox
Box is highlighted in greed
2. “View current measurement“
(here you can also change the project data under
„Edit site data“, if necessary)
3. Press the wheel in the upper left corner
11
Press „OK“
Connection to the HMBox will start
Page 12

View measured data
1. Select HMBox
HMBox is highlighted in green
2. Press „View current measurement “
(here you can also change the project data under
„Edit site data“, if necessary)
12
3. Measured data in different views
Page 13

Deactivating the HMBox
1. Under “My HMBoxes”
Select HMBox you want to deactivate
HMBox is highlighted in green
(Bluetooth connection must be active and
sufficient network connection)
2. „End Measurement“
With this function, the measurement process is stopped and the
GSM and Alarm protection are deactivated.
The HMBox can now be removed.
The measurement data are saved in the project administration and
a measurement protocol can be generated using the
“FP Desktop Professional Software”.
13
i
Page 14

Removal of the HMBox
1. Place the head of the screwdriver that is found in the HMBox-case
carefully underneath the ring on the bottom side of the HMBox and
turn right until the box automatically triggers off the ground.
2. The HMBox will be released from the adhesive „Hmfix“ residue free, when the
release film has been applied before attaching the HMBox to the substrate.
Stubborn residue can be easily removed with the stanley-knife.
14
Page 15

All HMBox units used are set up and saved in the „Project Administration“ under
their project name.
highlighted in green = completed measurements
highlighted in red = active measurements
Should you need more detailed measurement records or reports, we recommend
the (purchasable) FP Desktop Professional Software. With this software you can
easily manage projects and create reports on a Workstation or a mobile laptop.
You can added any number of HMBox units and projects. The data are saved on
the HMBox database for an indefinite period of time.
You can delete the HMBox units with this symbol
CAUTION: All deleted data are irrevocable deleted from the App, the browser
software and the HMBox Database and can not be restored.
Additional Information
15
Page 16

/ FCC / IC proved
FCC:
Changes or modifications not expressly approved by the party responsible for compliance could void the user’s authority to operate the
equipment.
This equipment has been tested and found to comply with the limits for a Class B digital device, pursuant to part 15 of the FCC Rules.
These limits are designed to provide reasonable protection against harmful interference in a residential installation. This equipment
generates, uses and can radiate radio frequency energy and, if not installed and used in accordance with the instructions, may cause
harmful interference to radio communications. However, there is no guarantee that interference will not occur in a particular installation.
If this equipment does cause harmful interference to radio or television reception, which can be determined by turning the equipment off
and on, the user is encouraged to try to correct the interference by one or more of the following measures:
•—Reorient or relocate the receiving antenna.
•—Increase the separation between the equipment and receiver.
•—Connect the equipment into an outlet on a circuit different from that to which the receiver is connected.
•—Consult the dealer or an experienced radio/ TV technician for help.
IC:
This device complies with Part 15 of the FCC Rules and with Industry Canada license-exempt RSS standard(s). Operation is subject to
the following two conditions: (1) this device may not cause harmful interference, and (2) this device must accept any interference
received, including interference that may cause undesired operation.
Le présent appareil est conforme aux CNR d'Industrie Canada applicables aux appareils radio exempts de licence. L'exploitation est
autorisée aux deux conditions suivantes : (1) l'appareil ne doit pas produire de brouillage, et (2) l'utilisateur de l'appareil doit accepter
tout brouillage radioélectrique subi, même si le brouillage est susceptible d'en compromettre le fonctionnement.
ACHTUNG/ATTENTION:
Das Gerät min. 20cm vom Körper entfernt bedienen.
This equipment should be operated with a minimum distance of 20 centimeters between the radiator and your body.
Additional Information
16
Page 17

Technical Information
17
Carrier
2.4 GHz ISM
- Frequency Band (Bluetooth LE)
GSM 850, E
-GSM 900, DCS 1800, PCS 1900
Protocol
Bluetooth LE Standard
HTTP (GSM)
Output power
max. +4
dBm (Bluetooth LE)
max.
2 Watts GSM & GPRS (GSM 850, E-GSM 900)
max. 1 Watts GSM & GPRS (DCS 1800, PCS 1900)
Power supply voltage
4 x
AA Lithium Battery L91
Current consumption
avg. 30 mA
– 5 µA (Standby Bluetooth mode)
max. 1.8A (GPRS communication on GSM 850, E
-GSM 900)
Ambient temperature
0°
C to +55°C
Weight
350
g
Dimensions (W x H x D)
H:
6cm / Diameter: 10,5 cm
Humidity
Accurac
y: up to +/- 2% rH
Res
olution: 0,04% rH
Re
peatability: up to +/- 0,1% rH
Temperature
Accurac
y: up to +/- 0,3°C bei +25°C
Res
olution: 0,01°C
Re
peatability: up to +/- 0,1°C
Page 18

fp floor protector Gmbh
A-2700 Wr. Neustadt
Waldgasse 2
A-2700 Wiener Neustadt
fon: +43-(0)2774 – 29 701
fax: +43-(0)2774 – 29 701 -19
office@floorprotector.at
www.floorprotector.at
18
 Loading...