

Page 1
SYSTEM FUNCTIONS /continued
S
Resetting Sensor
Use this function to reset the smoke detectors after an alarm has occurred. Press and hold
the RESET (2) key for two seconds. The Flame icon will clear from the display when the
Sensor Reset operation is complete and the smoke detectors are reset.
User Codes + [your code] + [user number] + [user code] + [level]
CODE
RESET
2
4
SYSTEM TEST
S
System Test is used to test the battery, alarm belt or siren, and monitoring station
communication. Press and hold the TEST ( ) key for two seconds. The System Test
function begins automatically as soon as you select it.
TEST
Test in Progress (tSt)
The system is currently being tested by an installation or service technician.
The bell sounds for two seconds and then the communication test begins.
USER’S MANUAL
Thinline Series Icon Keypads
TM
This function allows you to Add or Delete user codes. Each user is assigned 3 settings:
User Number: how the system identifies a user
User Code: the four digit number a user enters into the keypad to arm, disarm or to
perform other system operations.
User Level: the user is also assigned a level of authority (Master, Standard,
Limited or Scheduled) to determine the functions the user can access. See below for User
Code authority levels.
Press and hold CODE key (4) until the keypad beeps once, enter your user code.
Enter the user number # (02-15) to add or delete
XRSuper6 = 02-15
XR40 = 02-63
XT30 = 02-30
XT50 = 02-99
Enter four-digit user code to assign to the user number or 0000 to delete an
existing user.
Enter the authority level (1-4)
Level 1: Scheduled User (XR40 only)
The Scheduled authority level performs all the system functions of the Limited level
during a valid schedule with the exception of turning Outputs on or off and System Test.
Disarming is allowed outside of a schedule, but an Unauthorized Entry message is sent to
your monitoring station.
Level 2: Limited User (XR40 only)
The Limited authority level can perform all the system funcitons of the Standard Level
during a valid schedule with the excepton of turning Outputs on or off and System Test.
Disarming is allowed outside of a schedule, but an Unauthorized Entry message is sent to
your monitoring station.
Level 3: Standard User (XRS6/XR20/XR40)
The Standard authority level can perform all system functions except adding or deleting
user codes.
Level 4: Master User (XRS6/XR20/XR40)
The Master authority level can perform all system functions.
ZONE
Zone Status
9
Use this function to display burglary protection zones that are faulted while the system is
disarmed. Any faulted burglary zones are shown in the 3-character display allowing you
to correct the problem before arming.
Transmit Good (tgd)
The communication portion to the system test was successful.
Transmit Failed (tFL)
The communication portion of the system test failed to communicate to the
Central Monitoring Station.
SYSTEM DISPLAYS ( 3-character )
(A) Armed
The system is armed ALL or AWAY
S
(Abt) Alarm not sent
The alarm signal was aborted and not sent to the central station because
a user code was entered to disarm the system or CANCEL was selected.
(ALC) Alarm not cancelled
An alarm signal has just been sent to the central station and cancelled
because a user code was entered after the alarm was sent or CANCEL was
selected.
(H) Home
The system is armed HOME.
(P) Perimeter
The system is armed Perimeter (PERIM).
(S) Sleep
The system is armed SLEEP.
(bSY) System busy
The system is performing other functions at this time.
(rFA) Wireless jammed alarm / (rFJ) Trouble
Your system may be programmed for wireless interference detection and, if
displayed, your wireless receiver has detected an interferring signal.
(rFt) Wireless trouble
Your wireless receiver is unplugged or not operating properly.
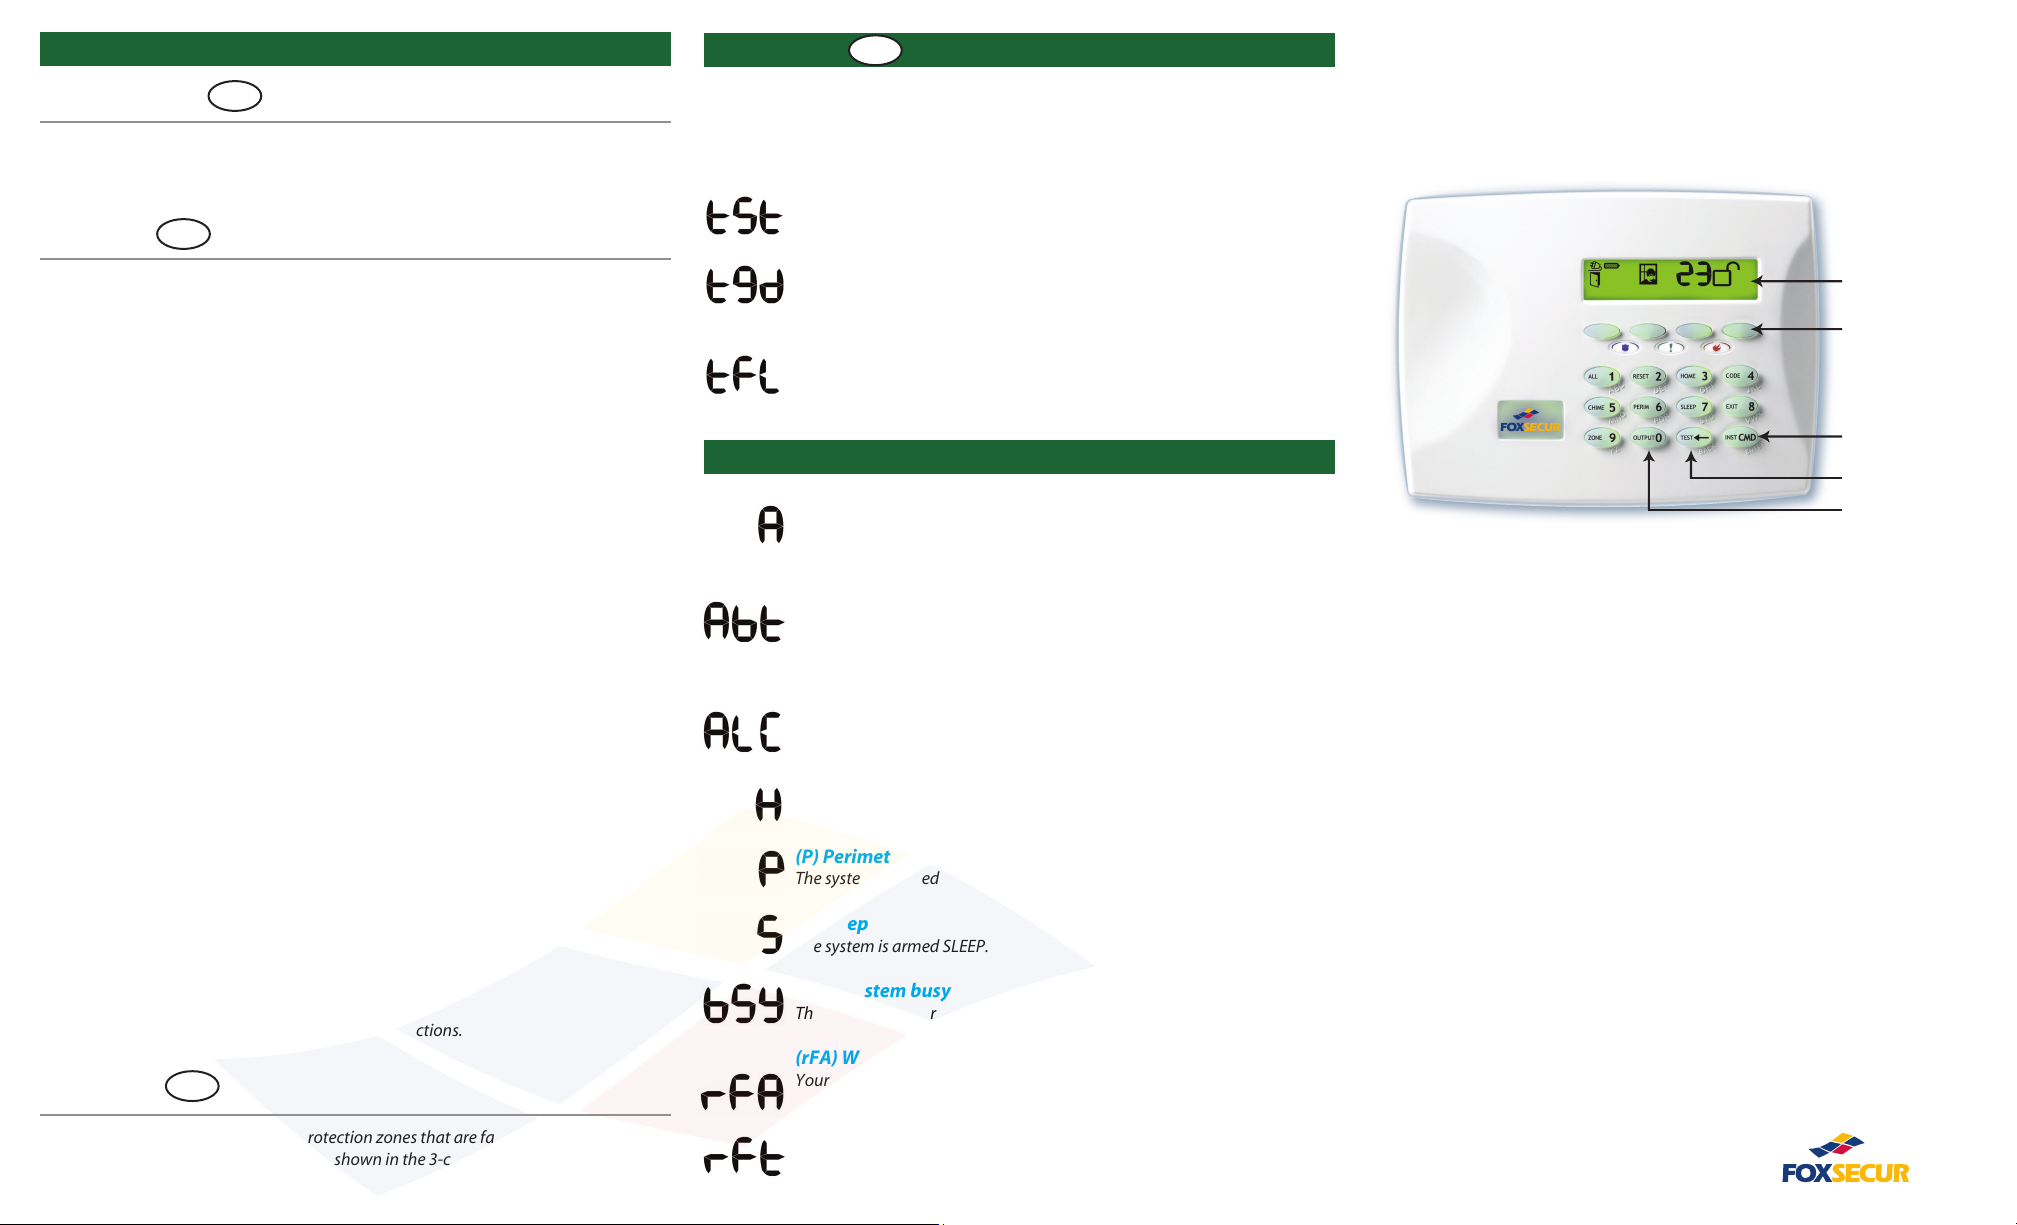
Icon Display
Select keys
COMMAND Key
Back Arrow Key
Shortcut & Digit Keys
SIMPLE TO USE
The easy-to-understand icons, combined with a three-character
display, provides visual feedback enabling simple arming, disarming,
and a variety of other functions.
CODELESS ARMING & DISARMING
The innovative 7363 Thinline Icon Keypad contains a built-in DMP
proximity reader that allows you to simply present a proximity
credential to the keypad to arm or disarm the system without the need
to remember a user code.
USER-FRIENDLY SHORTCUT KEYS
Twelve one-button shortcut keys simplify operation providing access
to a variety of functions. For example, pressing the HOME key for two
seconds arms your system when you’re at home for the evening. The
keys enable users to quickly arm, monitor zones, easy exit, test or reset
the system and a variety of other functions.
PLEASE TAKE A MOMENT
To learn the range of features of your system, please read through this
user’s guide thoroughly. All icons and keypad operations are
completely described.
.com
Page 2
TEST ICONS
S
CANCEL
BYPASS EXTEND VERIFY
ARMING THE SYSTEM
S
ARMING WITH A CODE OR PROXIMITY CREDENTIAL
While the Thumbs Up icon is displaying, enter your user code or present a proximity credential
to begin the exit countdown. Arming is delayed until the end of the countdown. Pressing the
INST key during the exit countdown immediately arms the system and entry/exit delays. An
alarm would immediately occur should an exit door be opened.
ALERT OPERATIONS
Steady Tone A trouble condition on the system. A zone number may be
displayed. Pressing any key silences the steady alert tone.
1 One-Second Beep Indicates the successful completion of a function.
4 Short Beeps When an incorrect key or function is entered.
AC Power
Battery
Armed
Status
Door
Chime
Thumbs
Up
Thumbs
Down
Telephone
Handset
Network
Connection
Burglar
Flame
On Steady AC power is good.
Pulsing AC power is off.
On Steady Battery power is good.
Pulsing Battery power is low.
Open Lock The system is completely disarmed.
Closed Lock Some or all areas are armed.
See System Displays A, H, P or S.
Closed Lock/Instant Some or all areas armed Instant.
See Arming the System.
Door or window perimeter zone(s) are selected for monitor.
See Door Chime.
All burglary protection zones are normal and system is ready
to arm.
System is not ready to arm due to a burglary zone in a faulted
state such as an open door. See Zone Status.
Pulsing A system message being sent to your monitoring
station failed to transmit over the telephone line.
On Steady Your system is programmed for Network
(Internet) communication and functioning properly.
Pulsing Network (Internet) communication interrupted.
A burglary alarm has occurred. The zone number is shown in
the 3-character display.
A fire alarm has occurred. The zone number is shown in the
3-character display.
ARMING WITH SHORTCUT KEYS
While the Thumbs Up icon is displaying, press and hold the ALL, HOME, PERIM or SLEEP
key for two seconds to arm your system.
ALL 1 ALL arms the entire system.
HOME 3 HOME or PERIM
arms the Perimeter zones leaving the Interior disarmed.
PERIM 6
SLEEP 7 SLEEP (optional)
arms the Perimeter and Interior zones leaving the sleeping area disarmed.
S
ARMING WITH FAULTED ZONES (THUMBS DOWN)
BYPASS
burglary zone is faulted while arming the system. The zone number is shown in the
3-character display. If the problem is simply an open door or window, press the Back
Arrow key, correct the problem, and try arming again. If the problem cannot be corrected,
press the Select Key under BYPASS to go ahead and arm the system. A zone remains
bypassed until the system is disarmed. If no selection is made, the system will automatically force arm any faulted burglary zones without bypassing.
DISARMING THE SYSTEM
Thumbs down displays and the keypad sounds four short beeps when a
DISARMING WITH A CODE OF PROXIMITY CREDENTIAL
When the Armed (Lock) icon is displaying, enter your user code or present a proximity
credential to disarm the entire system.
DISARMING DURING AN ALARM
Enter your user code or present a proximity credential to silence the siren leaving the
system armed. After a user code is entered to silence the siren, CANCEL/VERIFY displays
allowing you time to investigate a burglary alarm prior to disarming the system.
CANCEL If a valid alarm has not occurred, choosing CANCEL disarms the system and
sends a Cancel or Abort message to the Central Station.
VERIFY If the alarm is valid, choosing VERIFY sends a Verify message to the Central
Station. The system remains armed to provide continued intrusion detection.
1 Short Beep Each time a key is pressed.
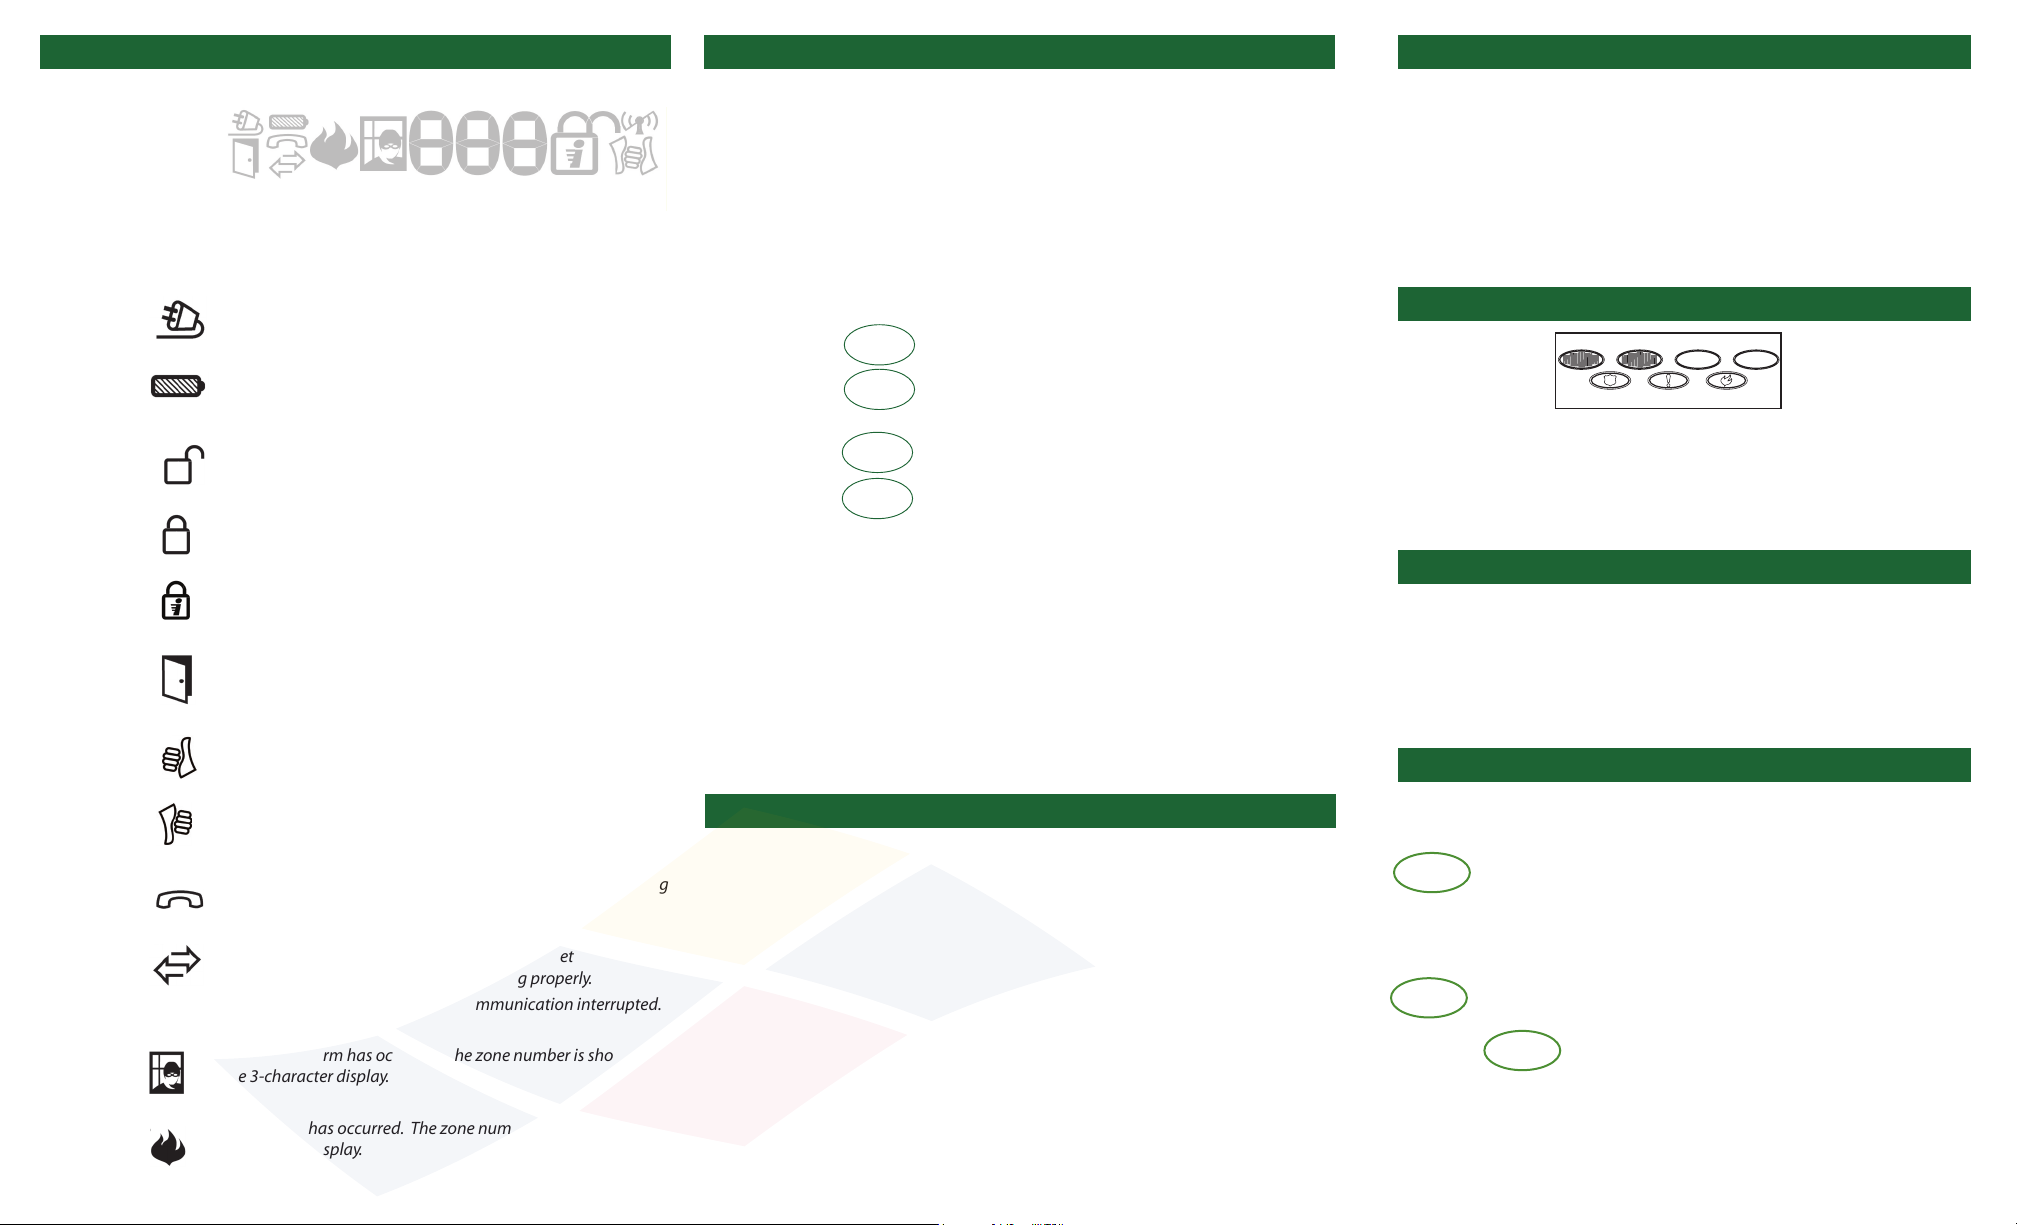
PANIC KEY OPERATION
Top Row Select Keys
Your keypad may be programmed to send a Panic, Emergency, or Fire report to
your monitoring station. If this option is programmed for your keypad, icons
appear below the top row Select keys. Press and hold the two Select keys
adjacent to the desired icon for 2 seconds and a beep from the keypad is heard.
The report is sent to your monitoring station.
Police Emergency
Fire
EXTENDING THE SCHEDULE
EXTEND
authorized disarmed periods. This option displays and a steady tone sounds
when the authorized disarmed period is about to expire. Press the Select key
under EXTEND and enter your user code to extend the schedule for an additional
hour. If more than one hour is needed, after entering a user code, press the
number of hours between one (1) and the maximum nine (9).
Your system may be programmed with a schedule to identify
SYSTEM FUNCTIONS
You can enable monitor for all Perimeter zones in the system to sound
DOOR
a doorbell chime at the keypad anytime a zone is opened. Press and
CHIME
hold the CHIME (5) key for two seconds. The Door icon will display
CHIME 7
and the doorbell chime sounds. Pressing the CHIME key again for two
seconds turns off this function.
This function allows you to exit your home while the system is armed.
EASY
Press and hold the EXIT (8) key until the exit countdown begins to
EXIT
display and then exit. The system automatically arms again after the
EXIT 8
countdown completes.
OUTPUTS
+ [your code] + [output number]
ON/OFF
Your system may have lights or other devices connected to outputs
that you can turn on or off using the keypad. Press and hold the
OUTPUT (0) key until the keypad beeps. Enter your user code and then
the 2-digit number of the output including any leading zero such as
01. This changes the output from off to on or vise versa.
OUTPUT 0
 Loading...