

Foxjet solo series 45, 5780-346FX Operation Manual

Operations
Manual
Handheld Controller
5780-346FX
Revision F
1 Missouri Research Park Drive * St. Charles, MO 63304 * 800-369-5384
Illinois Tool Works Inc. © 2009

Handheld Controller Table of Contents
TABLE OF CONTENTS
Section 1: Introduction ..................................................................................................................................3
Overview....................................................................................................................................................3
Keypad...................................................................................................................................................3
Display Elements...................................................................................................................................4
Section 2: Getting Started.............................................................................................................................6
Select the Unit of Measure ....................................................................................................................6
Adjusting the Display .............................................................................................................................6
The Status Screen.................................................................................................................................7
Configuring the Print Head(s)................................................................................................................8
Setting the Photocell Type, Print Speed, Print Direction, and Ink System............................................8
Synchronizing Multiple Print Heads to the Same Time and Date........................................................11
Section 3: Print Messages ..........................................................................................................................12
The Edit Screen...................................................................................................................................12
Edit Screen Menu Functions................................................................................................................12
Creating a Print Message........................................................................................................................13
Set the Message Properties ................................................................................................................13
Add the Print Fields..............................................................................................................................14
Select a Font........................................................................................................................................15
Set the Field Indent..............................................................................................................................15
Adding a Text Field..............................................................................................................................16
Adding a Date Code.............................................................................................................................17
Adding a Time Code............................................................................................................................18
Adding a Product Count.......................................................................................................................19
Saving, Retrieving, and Deleting Print Messages...................................................................................20
Saving a Message ...............................................................................................................................20
Retrieving a Message..........................................................................................................................20
Deleting a Message............................................................................................................. ................20
Printing a Message..................................................................................................................................21
The Print Screen..................................................................................................................................21
Print Screen Function Keys .................................................................................................................21
Printing a Message from Memory........................................................................................................22
5780-346FX Operations Manual Rev F Page 2 of 22
Handheld Controller Section 1: Introduction
Section 1: Introduction
This manual describes the operation of the Foxjet SoloSeries45 Handheld Controller as used to control
SoloSeries45 Thermal Jet print heads. The Handheld Controller can be used to individually operate from
one to four SoloSeries45 print heads hooked together in a daisy chain configuration: print head
configuration may be set or checked, print head status can be monitored, and print messages can be
created, edited, saved, retrieved and uploaded to the attached print head(s).
SoloSeries45 Thermal Jet print heads can operate stand-alone, so once they are set up and printing their
operation can be secured by disconnecting the Handheld Controller. This feature also allows multiple
SoloSeries45 print stations to be controlled using a single Controller. Simply carry the Handheld
Controller to the print station that needs attention, plug in, perform the desired task, unplug and move on
to the next print station.
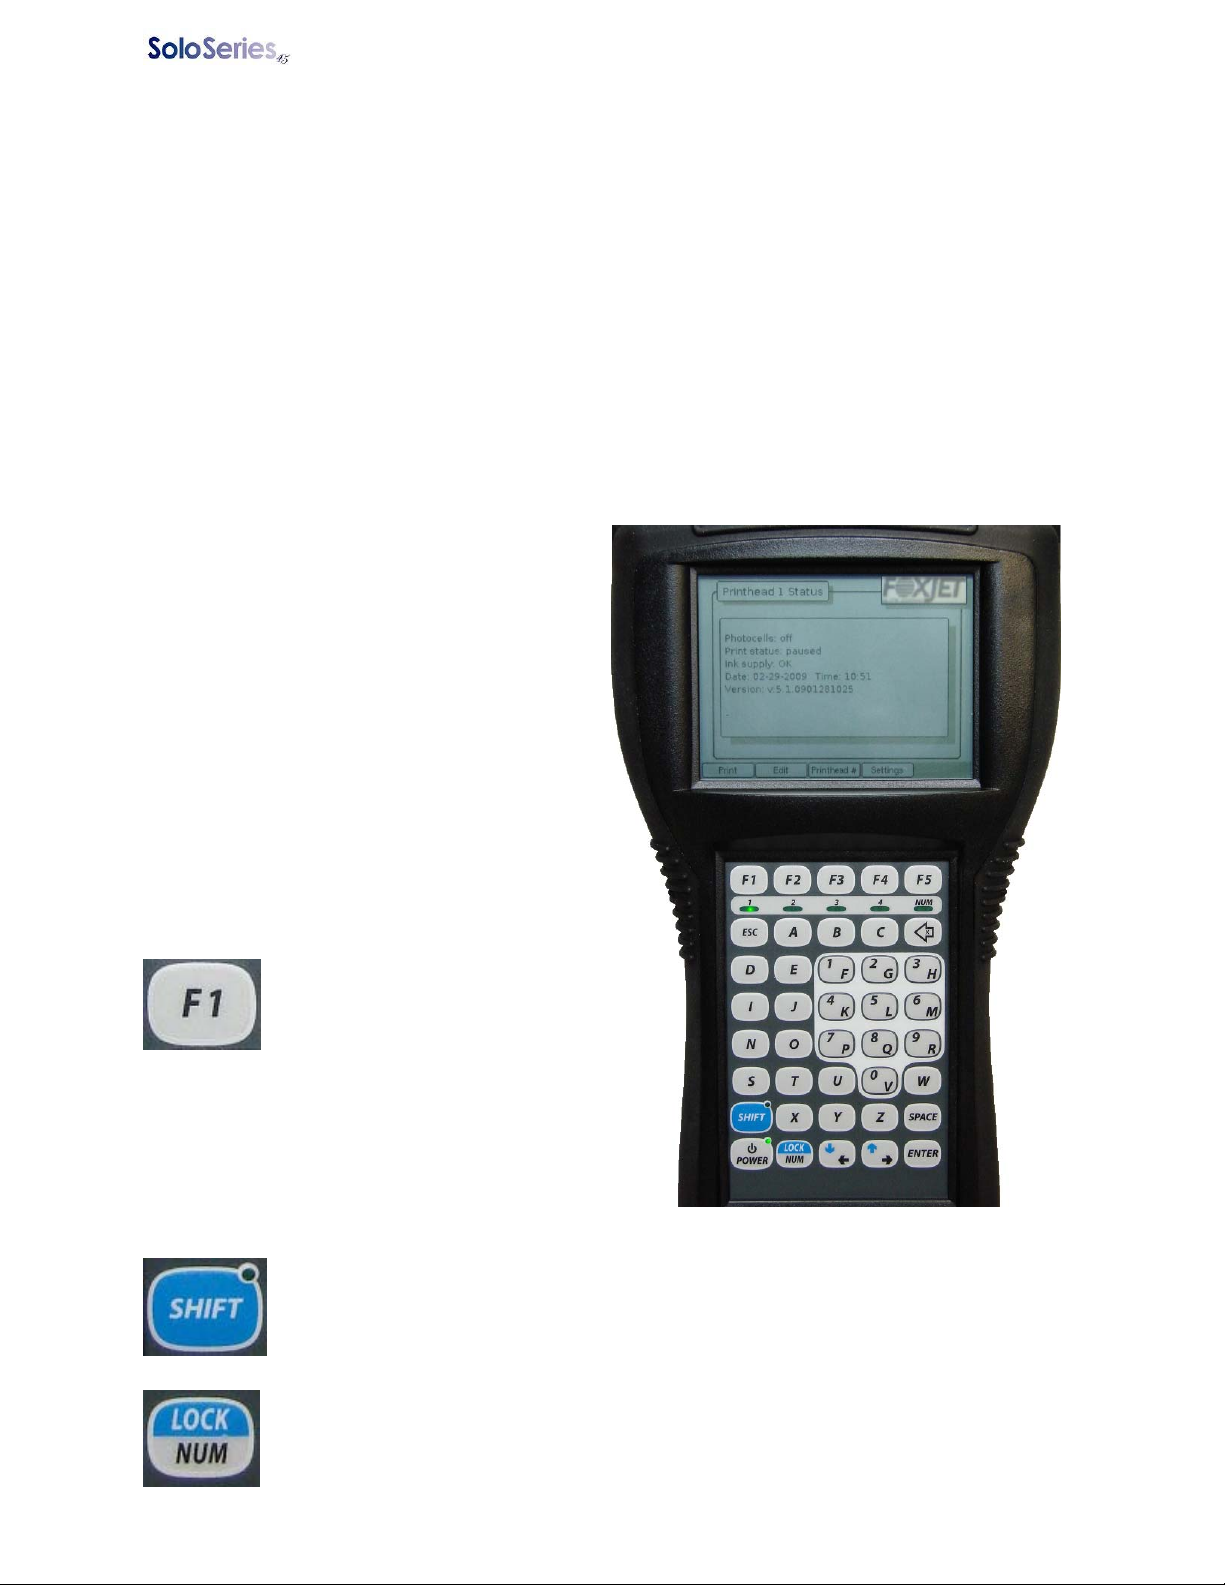
Overview
The SoloSeries45 Handheld Controller has a back
lit, 3.75” (95 mm) diagonal black and white
graphics display and a 40-key keypad (see
illustration, right).
LEDs on the keypad indicate Power On (upper
right corner of the POWER key), Shift Lock
(upper right corner of the SHIFT key), Num Lock
(NUM LED, right side of LED bar just below F5),
and which one of up to four possible print heads is
being addressed (LED bar, LEDs 1 – 4).
A brief summary of the keypad and display
operation follows. More detailed descriptions are
given elsewhere in this manual as required.
Keypad
Function Keys: Use the five
function keys (F1 – F5) at the top
of the keypad to navigate from
screen to screen and to select
options within a screen. Each
key’s function, which changes from screen to
screen, is displayed at the bottom of the screen
just above the key. When a function key has no
function its corresponding spot at the bottom of the
display is blank (see F5, right).
SHIFT Key: Press the SHIFT key for lower case letters; normal (un-shifted) ke ypad
operation produces upper case letters. The SHIFT key operates push on/push off: press
it once for shift mode, enter your lower case letters, then press it again to return to normal
keypad operation. An LED in the upper right corner of the SHIFT key lights when the
keypad is in the shift mode.
NUM LOCK Key: Press the NUM LOCK key to ac cess the numeric keypad. The NUM
LOCK key operates push on/push off: press it once for num lock mode, enter your
numbers, then press it again to return to normal keypad operation. The NUM LED
(located just under the F5 key) lights when the keypad is in the num lock mode.
5780-346FX Operations Manual Rev F Page 3 of 22
Handheld Controller Section 1: Introduction
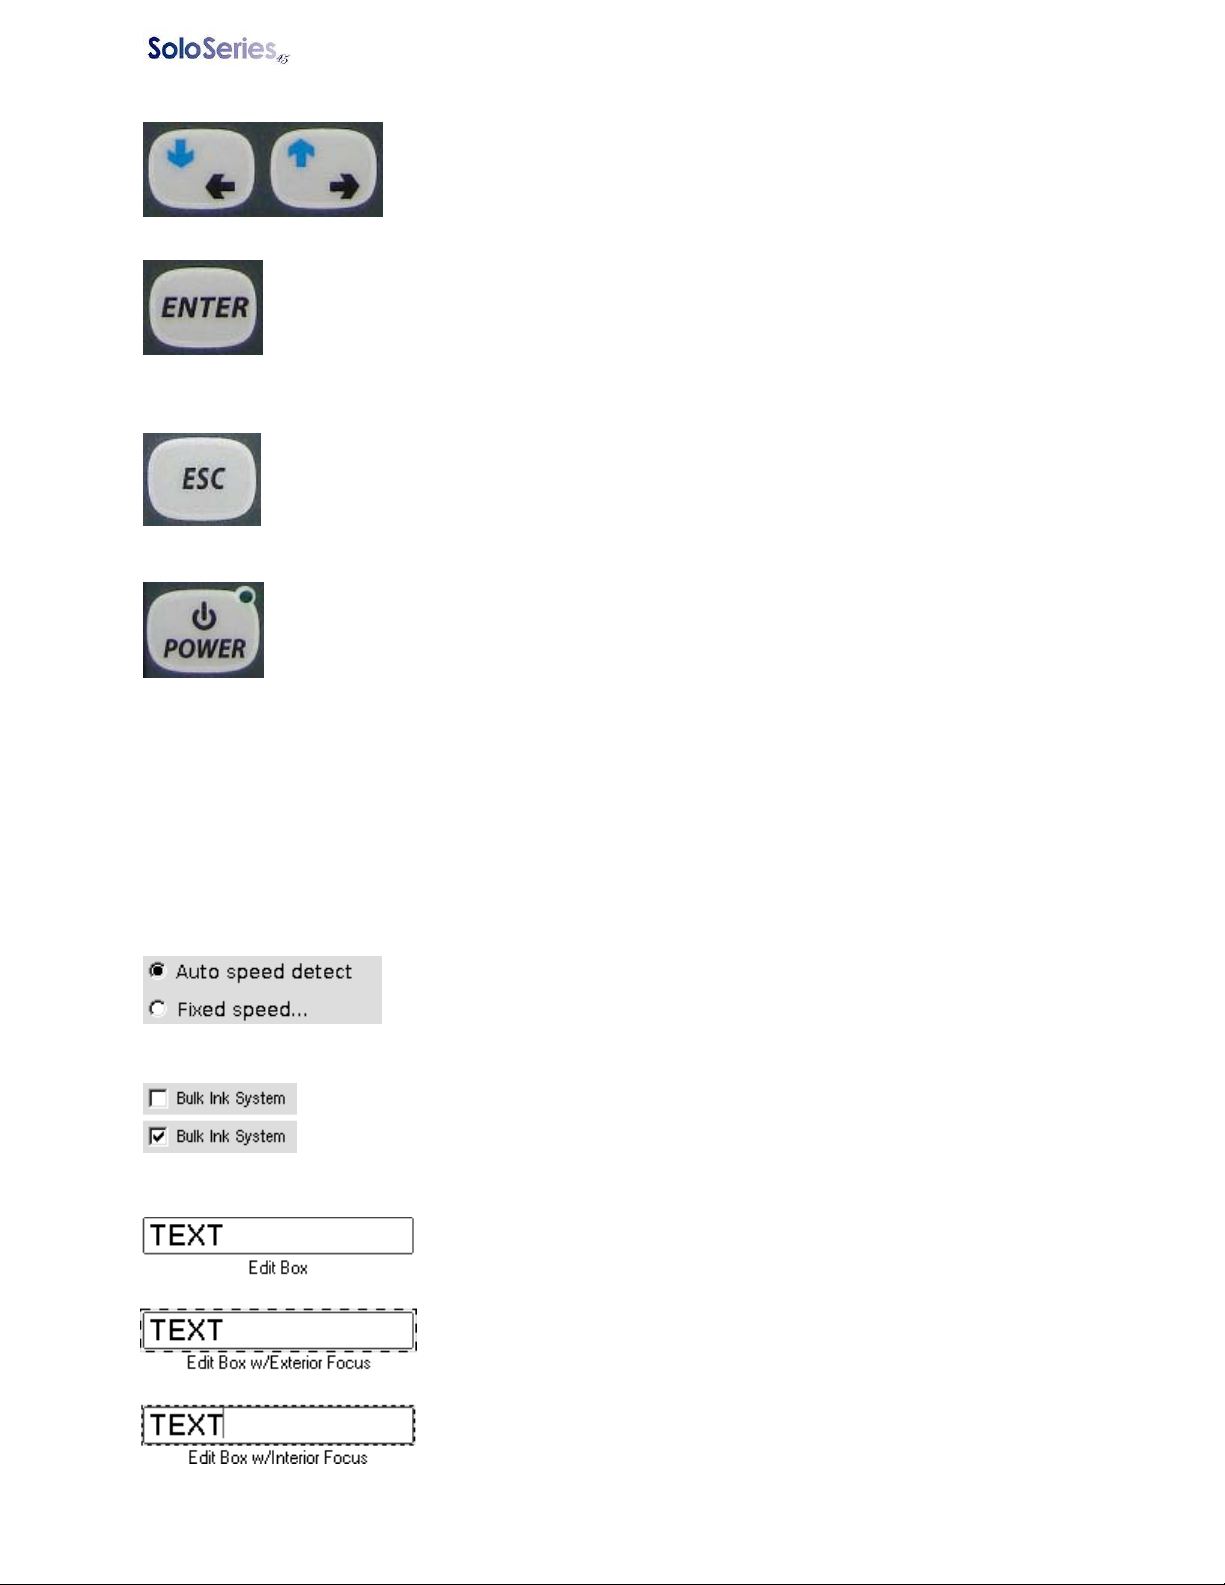
Arrow Keys: Use the arrow keys to move input focus from one screen
element to another, to move about within a screen element, and to move the
cursor while creating or editing a print message. The arrow keys can also
be used to stop from print head to print head on the Print and Status
screens.
ENTER Key: Use the ENTER key to move input focus into and out off a screen element.
For example, a screen has, among other elements, a list box, and using the arrow keys,
the list box is selected. Selecting the list box gives it input focus, but focus is only on the
exterior of the box, and if an arrow key is pressed input focus will move to another screen
element. To move input focus to the interior of the box press ENTER: now use the arrow
keys to select an item in the box. Press ENTER again to return focus to the exterior of the box.
ESC Key: The ESC (Escape) key functions as a limited “undo” key. For any entry box,
text or numeric, press ESC to undo any immediate changes made; for list boxes press
ESC to return to the first item on the list.
POWER Key: Press the POWER key to put the Controller into a low power sleep mode;
press it again to instantly resume operation with no loss of data.
NOTE: If power is removed while the Controller is in the sleep mode any unsaved data
will be lost.
Intelligent Operation: The number keys and the arrow keys feature intelligent operation: on screens
where numeric input is the only possible operation (entering a product count, for example) the keypad
automatically goes to NUM LOCK mode. Similarly, where up/down arrow key operation is the only choice
possible (scrolling through the items in a list box, for example), using the arrow keys un-shifted
automatically gives you up/down operation.
Display Elements
Check Box: Used to enable or disable an option or feature. A checkmark indicates
the option or feature is enabled, white space indicates it is disabled.
Radio Button: Used to indicate which option from a number of options is
the current selection. A black dot indicates the selected option, a white dot
an un-selected option. Auto speed detect is the selected option in the
picture at left.
Edit Box: Used to enter or edit text or numeric data. An edit box must
have input focus in order to enter or edit data.
An edit box has two types of input focus: exterior and interior. A large
dashed line around the box indicates exterior focus. When an edit box
has exterior focus, pressing an arrow key moves focus off the edit box
and onto the next screen element.
A small dashed line around the box indicates interior focus. When an
edit box has interior focus it is in the edit mode: data can be entered and
edited, and pressing the arrow keys moves the cursor left and right
through the data. Press ENTER to switch between exterior and interior
focus.
5780-346FX Operations Manual Rev F Page 4 of 22

Handheld Controller Section 1: Introduction
List Box: Used to select one item from a list of many.
A list box has two types of focus: exterior and interior. A large dashed line (see
Edit Box examples above left) around the box indicates exterior focus. When a
list box has exterior focus, pressing an arrow key moves focus off the list box and
onto the next screen element.
A small dashed line around the box indicates interior focus. When a list box has
interior focus, pressing the arrow keys moves the selection bar up and down
through the list.
Press ENTER to switch between exterior and interior focus.
5780-346FX Operations Manual Rev F Page 5 of 22
Handheld Controller Section 2: Getting Started
Section 2: Getting Started
The Handheld Controller plugs into the left hand connector on the back of the SoloSeries45 pri nt head.
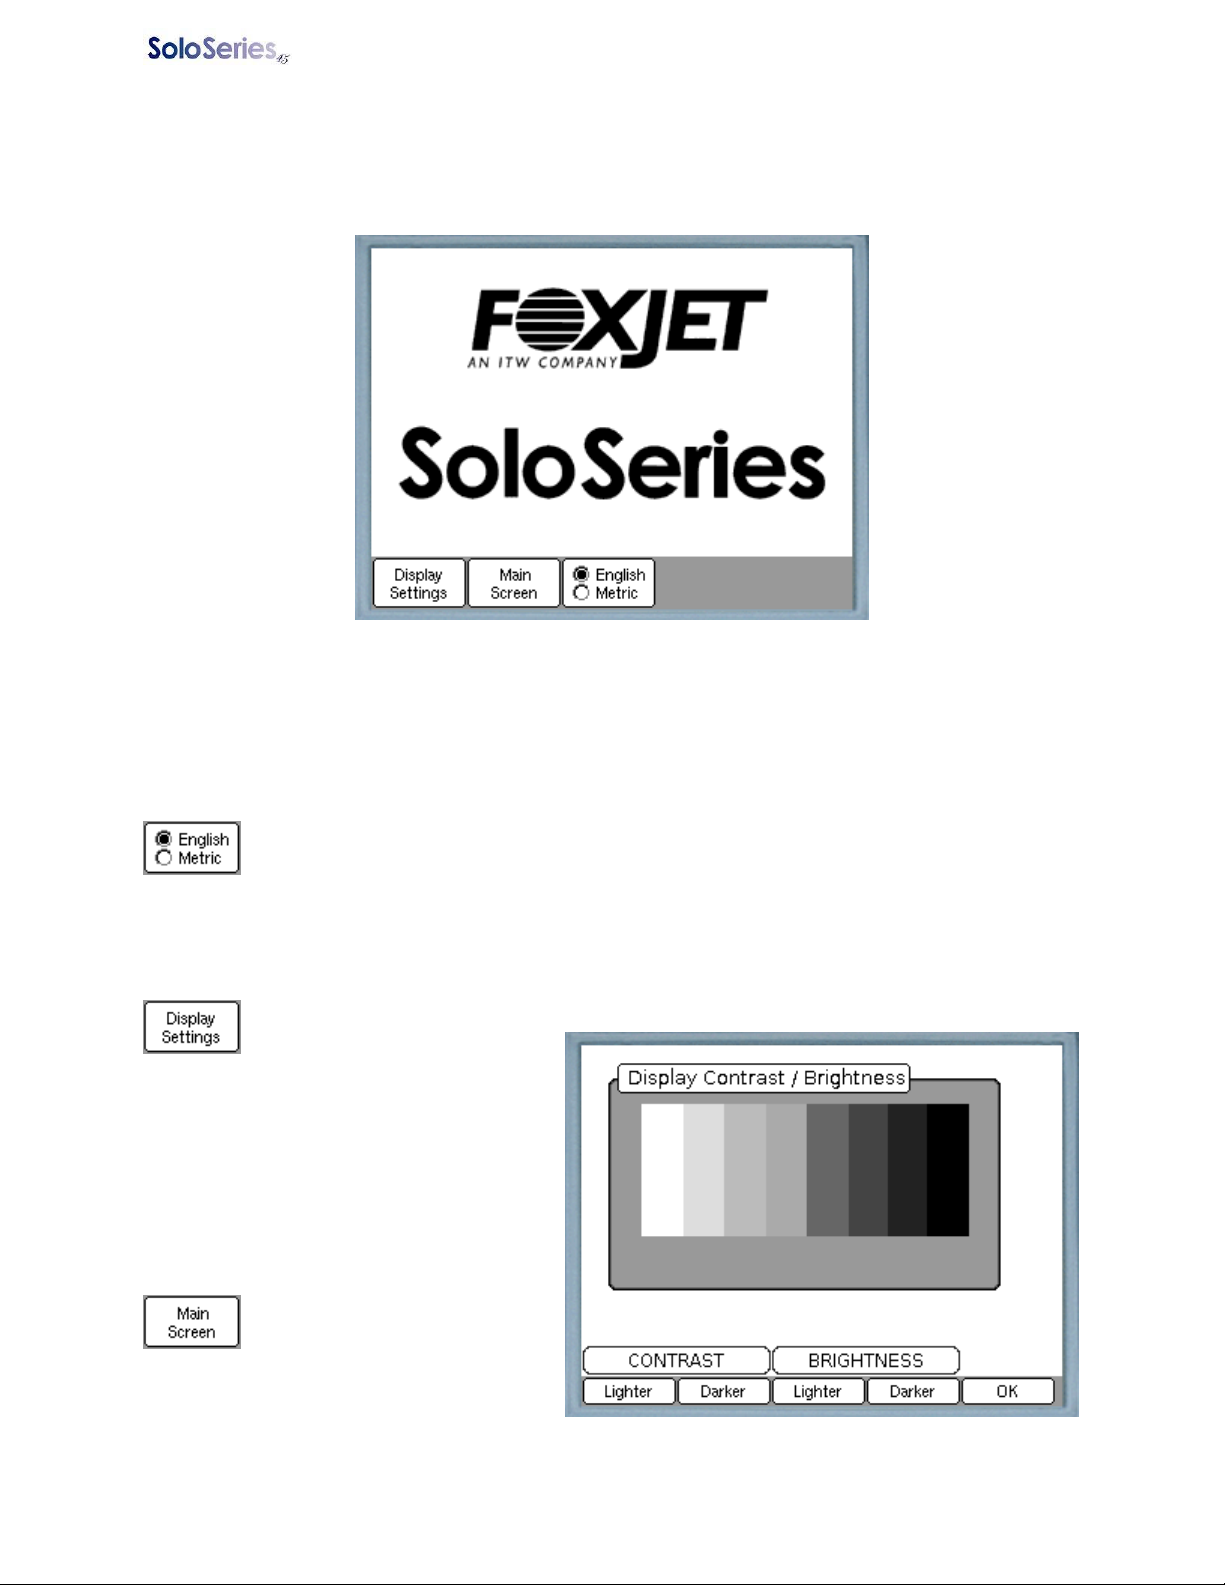
About twelve seconds after being plugged in the Startup Screen appears:
From the Startup Screen you can adjust the display’s contrast and backlight brightness, select the units of
measure used throughout the other screens, or proceed to the main operating screens. Once you exit
the Startup Screen you cannot return except by cycling power to the Handheld Controller.
Select the Unit of Measure
Press English / Metric (F3) to toggle between English (feet & inches) and Metric (meters &
centimeters) units of measure. Radio buttons show the current selection. The selection is
saved while the controller is turned off.
Adjusting the Display
Press LCD Contrast (F1) to
adjust the display’s contrast or
backlight brightness:
Adjust the contrast and brightness as
desired, and then press OK (F5). The
display settings are lost when the controller is
unplugged.
Press Main Screen (F2) to
proceed to the Print Screen.
The Print Screen is one of three
main operating screens; the other two are the
Edit Screen and the Status Screen. Any one
of the main screens is directly accessible
from the others.
5780-346FX Operations Manual Rev F Page 6 of 22
Handheld Controller Section 2: Getting Started
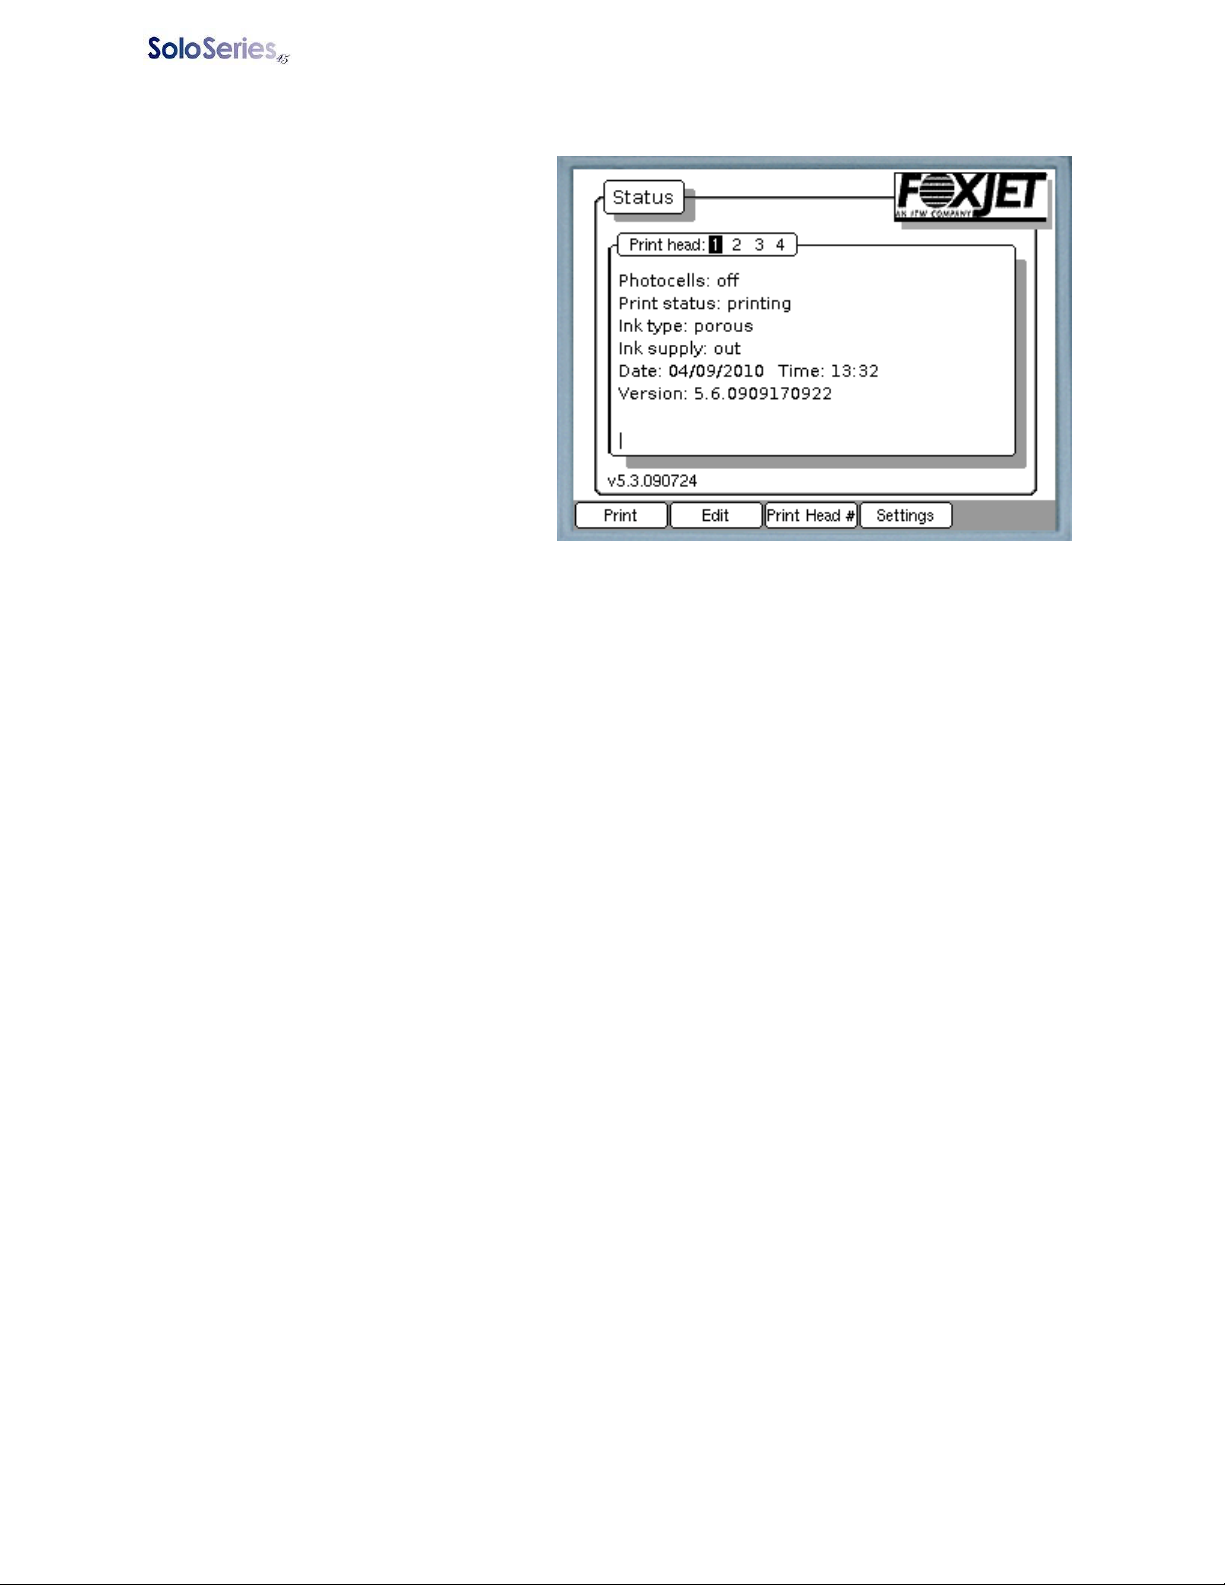
The Status Screen
The Status Screen displays the status of the
currently selected print head, and function
keys provide access to the Print Screen,
Edit Screen, Print Head Selection Screen,
and Print Head Setup Screens.
Print head status includes:
Print head: Indicates the current print head
selection. Use the left/right arrow keys to
sequence through the print heads, or go
directly to a particular print head by pressing
the 1 – 4 keys.
Photocells:
When a print head is configured to use its
internal photocells the status is reported as
- no response – the controller
received no photocell status information.
- off – neither photocell is blocked.
- left – the left photocell is blocked (as seen from the front of the print head).
- right – the right photocell is blocked (as seen from the front of the print head).
- both – both photocells are blocked.
When a print head is configured to use an external photocell the status is reported as
- no response – the controller received no photocell status information.
- off – the photocell is not blocked.
- on – the photocell is blocked.
Print status:
- printing – the print head is active. It will print when the photocell is blocked.
- paused – the print head is inactive. It will not print when the photocell is blocked.
Ink type:
- porous
- non-porous
- unknown – the controller received no ink type information, or the print head has a non-Diagraph
print cartridge.
Ink supply:
- no response – the controller received no ink supply status.
- OK – ink supply is between 100% and 10%
- low – ink supply is between 10% and 2%
- out – cartridge has less than 2% of ink supply remaining.
- stop print – ink supply unknown or print head is in thermal shutdown; printing stops.
Date: 2-digit month, 2-digit date, 4-digit year as reported by the clock in the print head.
Time: Hours and minutes as reported by the clock in the print head.
Version: Print head firmware version number. At the lower left corner of the display, just above the Print
and Edit buttons, is the Handheld Controller’s firmware version number.
5780-346FX Operations Manual Rev F Page 7 of 22
 Loading...