

Foxfury Lighting Solutions TAKER R40 Product Manual
PRODUCT MANUAL
700-331
TAKER R40

2
TABLE OF CONTENTS
INTRODUCTION
Taker R40 Reference Guide 3
Overview 4
Physical Characteristics & Warnings 4
POWER PACK
Charging the Power Pack 5
Reassembling the Taker R40 after Charging 6
Power Pack Life 6
OPERATION
Operational Modes 6
SHIELD INSTALLATION
Removing the Adaptor Shroud 7
Riot Shield Installation with Bolts 8
Riot Shield Installation with 3M Reclosable Fastener 9
Capture Shield Installation 10
Drilling Template 15
MAINTENANCE
Replacing the O-Ring 11
Removing the Guards 11
WARRANTY 12–13
CONTACT FOXFURY 13
3
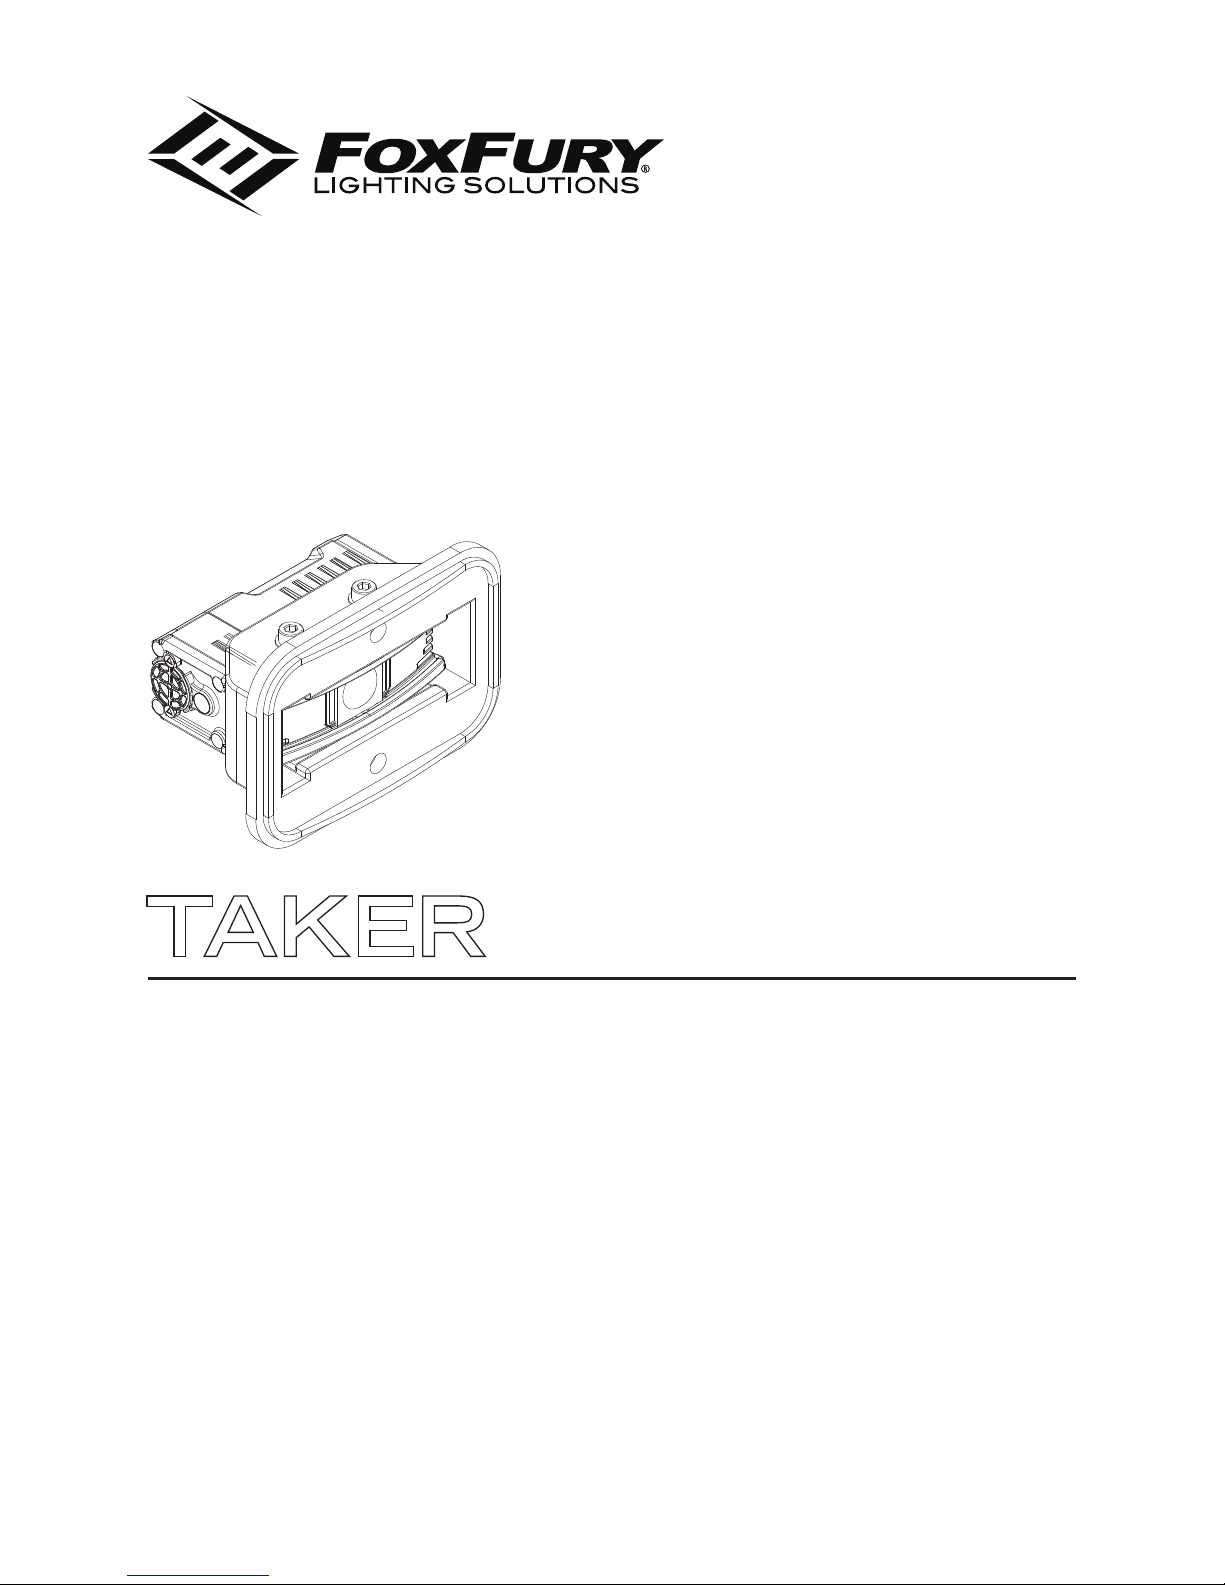
FULL ASSEMBLY
(TOP VIEW—POWER/MODE SWITCH VISIBLE)
DISASSEMBLED
POWER PACK
DISASSEMBLED
LIGHT HEAD
POWER/MODE
SWITCH
ADAPTOR
SHROUD
M6 BOLT
HOLES (2)
POWER PACK
BOLT (2)
CHARGE
INDICATOR
LED
CAPTURE ADAPTOR
POWER CONTACTS
USB
CHARGE
PORT
LOCKING
POST
LED CONTACT
CAVITY (2)
“O”-RING
ACCESS SCREW
LED MODULE
SCREW HOLE (4)
TAKER R40 REFERENCE GUIDE
4
WARNINGS
When used for extended periods of time the R40 will become HOT to the
touch.
Do not stare into the LEDs for long periods of time or from a close range
(less than 2 ft (.06 m)).
FoxFury’s Turbo-Strobe™ is purposely designed to induce disorientation.
Prolonged viewing may produce vertigo or even vomiting.
While using any FoxFury product, please operate at safe speeds.
Be sure to rinse the Taker R40 with fresh water immediately after use if
product has been subjected to chemicals or saltwater.
OVERVIEW
The Taker R40 is a compact and powerful LED Light, the first of its kind,
which has the ability to be fastened to a riot or capture shield, held by
hardware or with industrial-strength Reclosable fasteners. Mounted to the
inside of the shield, it prevents the light from being grabbed by the opposing
force, and gaining control of the shield. Having two different intensities
(650 Lumens on HIGH, and Turbo-Strobe™), makes it a powerful tool for LE,
Corrections, and the Military. A Charge Indicator and Quick Swap™ Power Pack
makes the Taker R40, patents pending, unequaled in the field.
IMPORTANT!
PHYSICAL CHARACTERISTICS
Please read below before using your Taker R40 as it relays beneficial
operating and safety information.
TAKER R40
DIMENSIONS 2.6 x 2.4 x 3.8 in (66 x 60 x 97 mm)
WEIGHT
7.3 oz (206 g) with Power Pack and Light Head
2.4 oz (69 g) Power Pack
!
!
!
!
Please fully charge the Power Pack before using the Taker R40 for the first
time.
5
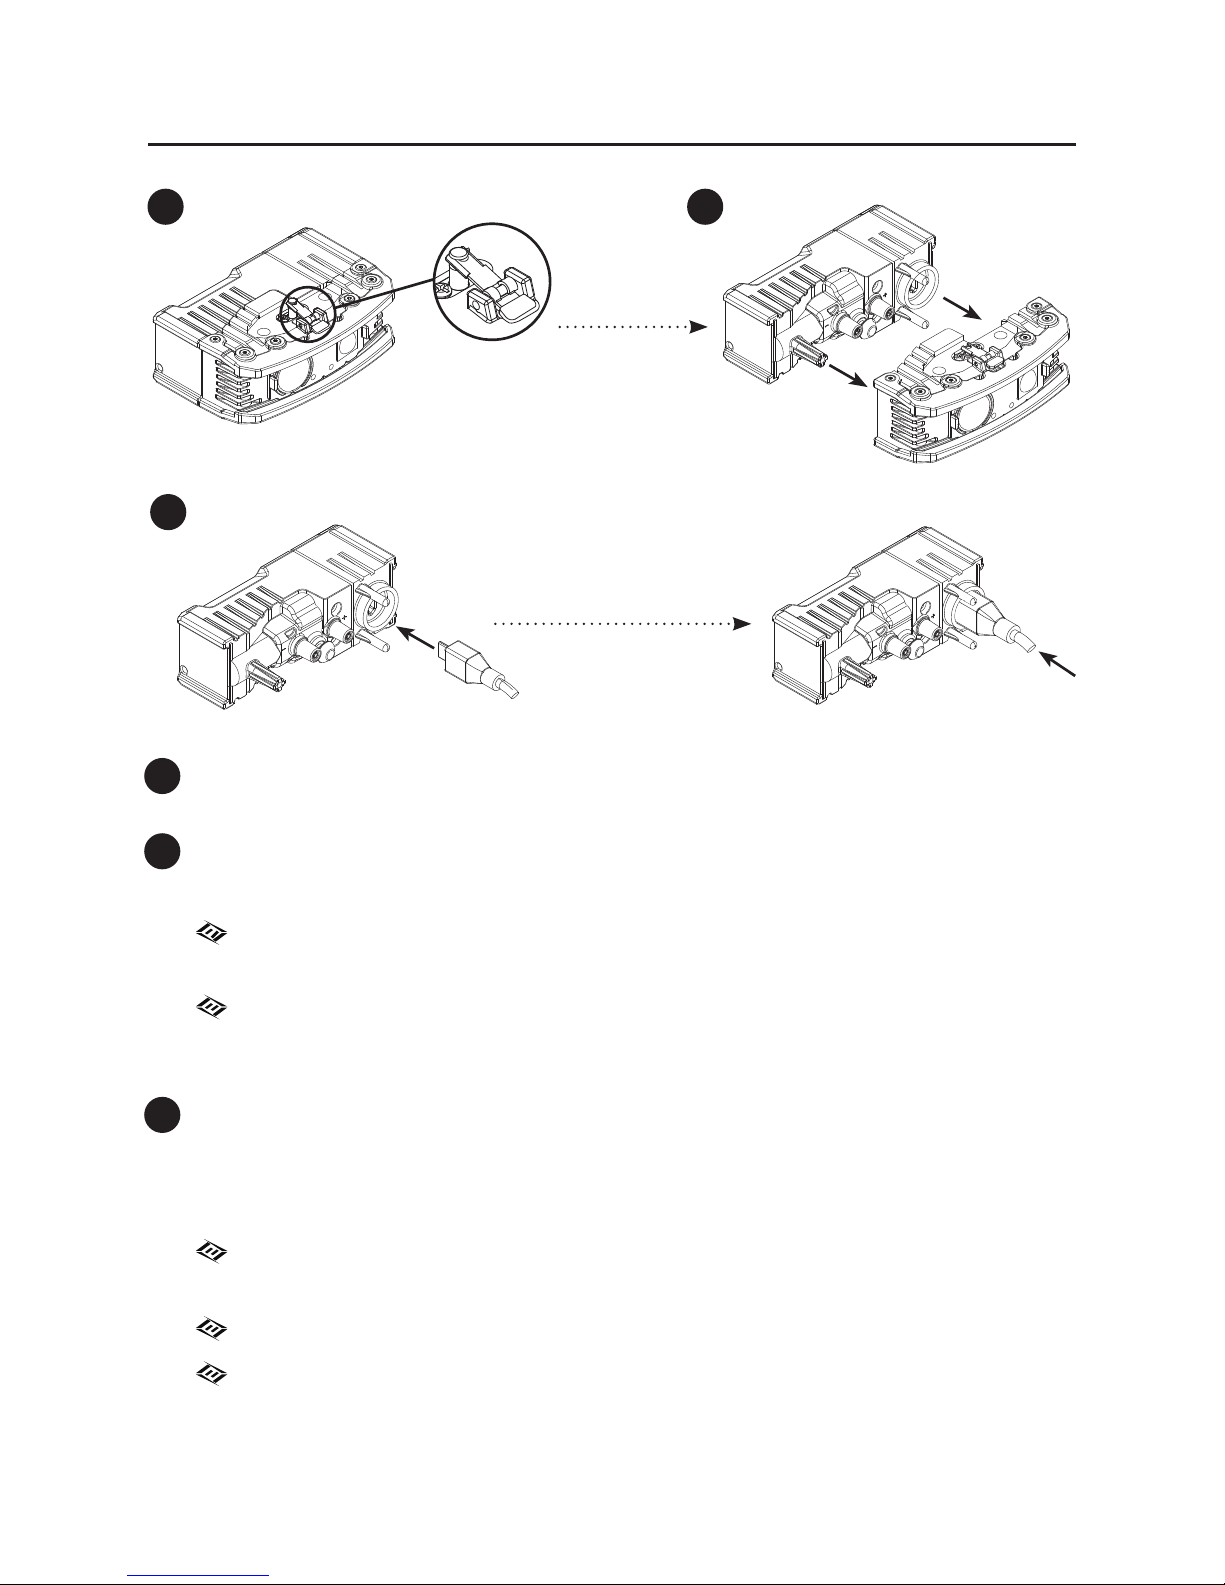
CHARGING THE POWER PACK
1. Press and hold the Power Pack Release Lever located on the Light Head
portion of the Taker R40.
2. While maintaining pressure on the Power Pack Release Lever, pull the Light
Head and the Power Pack apart.
If unable to pull apart easily (due to resistance of the internal rubber
gasket), try moving the Power Pack back and forth while pulling apart.
NOTE: Once apart, be sure to keep both ends dry and away from
water, moisture and dust. While the Power Pack and Light Head are
separated, the unit DOES NOT maintain its waterproof rating.
3. Insert the provided Micro USB Cable into the Power Pack— respect the
orientation/alignment. Then, insert the opposite end, USB (Type A) into a
USB compatible power source or into the included AC/DC Adaptor.
(Input: 100V–240VAC 50/60 Hz, Output: 5V DC 1000mAH).
The Charge Indicator will be solid red while charging. Once fully
charged, it will turn green.
Charging time will be approximately 2.5 hours.
After the Power Pack is charged, disconnect it from USB Cable.
IMPORTANT: The R40 in steps 1–3 is shown without the Adaptor Shroud and
is flipped to show the Power Pack Release Lever. The R40 does NOT need to
be removed from the Adaptor Shroud to change Power Packs.
1
1
2
3
2
3
 Loading...