

Foxfury Lighting Solutions BREAKTHROUGH BT2, BREAKTHROUGH BT4 Product Manual
PRODUCT MANUAL
380-BT2-BL | 380-BT2-YE | 380-BT2P-BL
|
380-BT2P-OR
380-BT4-BL | 380-BT4-BY
BREAKTHROUGH® SERIES
BT2 and BT2+ BT4
2
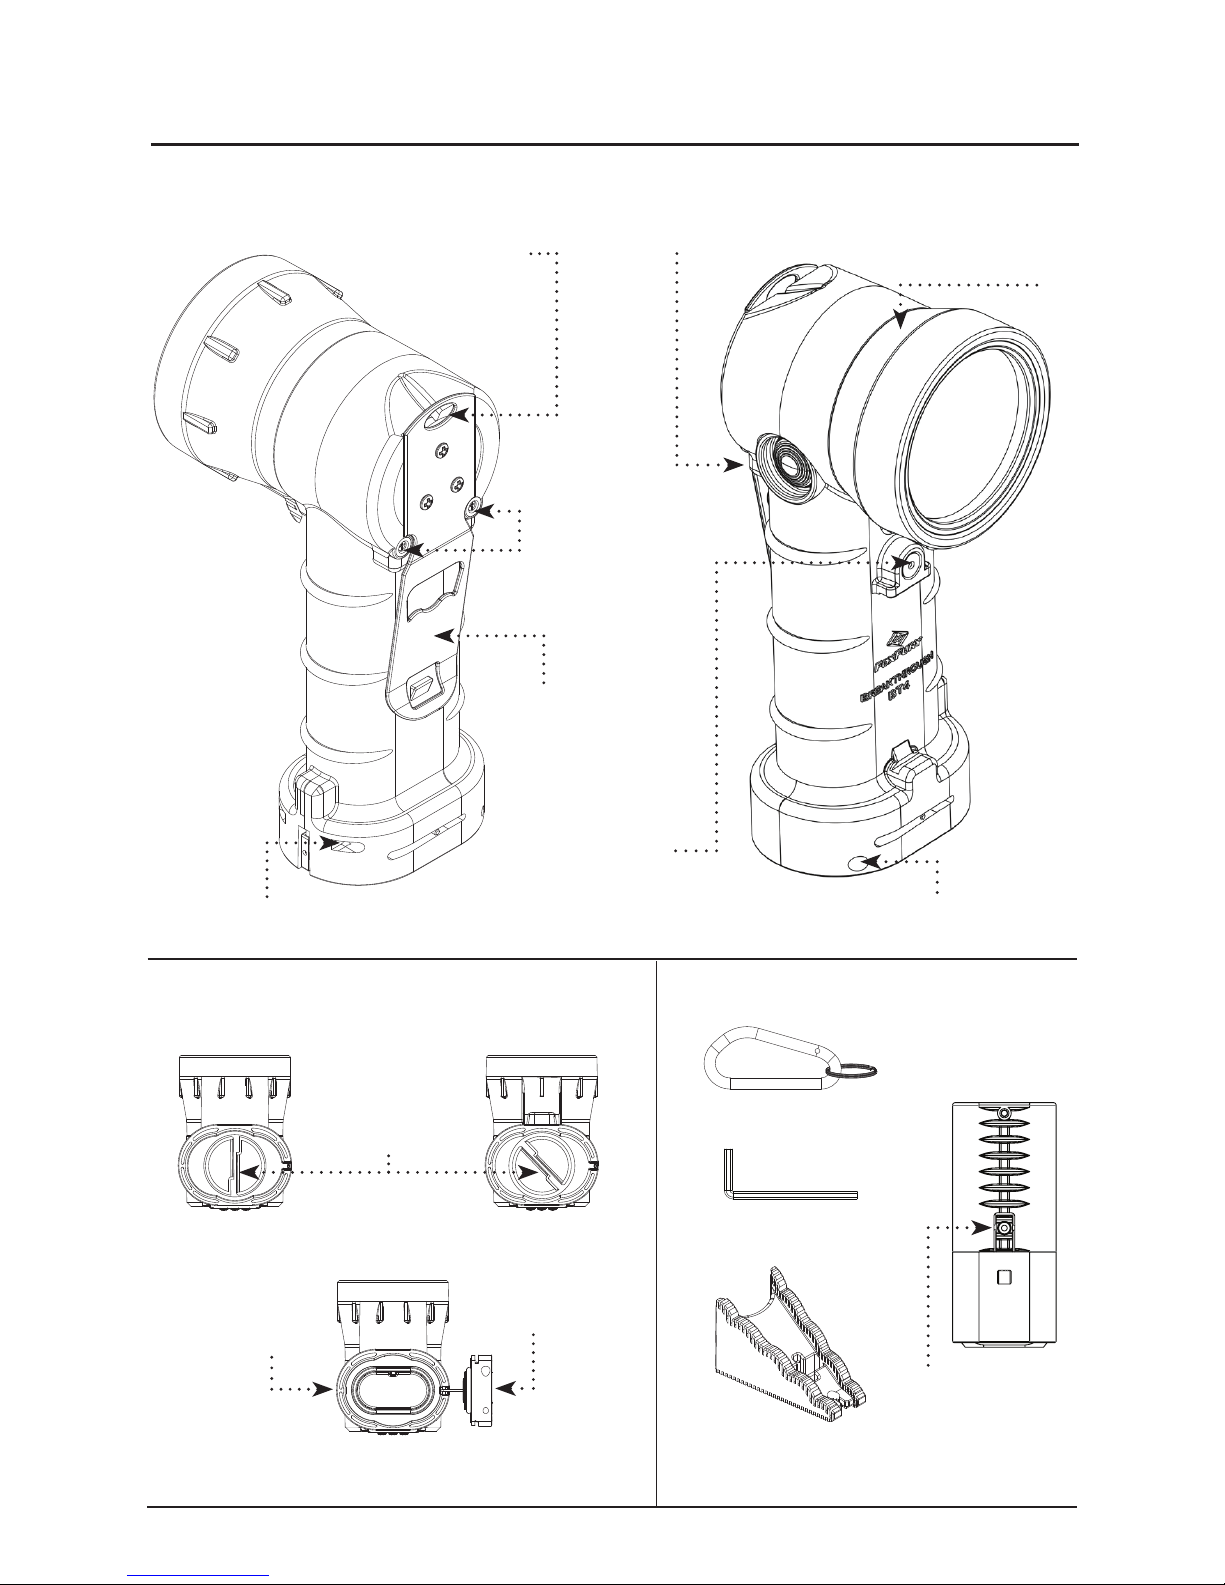
BT REFERENCE GUIDE
POWER/MODE SWITCH
D-RING HOLE
BEZEL
CHARGING
PORT
STAINLESS
STEEL CLIP
CHARGE
INDICATOR
BATTERY DOOR HINGE BATTERY DOOR LOCK HOLE
BATTERY DOOR
(BOTTOM VIEW)
ALSO INCLUDED
D-RING
HEX KEY
WEDGE*
BACK* FRONT
OPEN
BATTERY
HOLDER
BATTERY
DOOR
LOCKED
UNLOCKED
LOCKING
MECHANISM
* Not included with BT4
BATTERY
HOLDER
RELEASE
BUTTON
*BT2 and BT2+ depicted on the left, BT4 on the right.
3.0 x 1.8 x 1.6 in (76 x 46 x 41 mm)
1.6 oz (45 g)
3
PHYSICAL CHARACTERISTICS
Please read below before using your Breakthrough® as it relays beneficial
operating and safety information.
BT2 & BT2
+
DIMENSIONS
2.8 x 3.8 x 7.5 in tall (71 x 97 x 190 mm)
2.8 in Head Diameter (71 mm)
WEIGHT 1.2 lbs (544 g)
OVERVIEW
From illuminating street addresses to long range inspections to locating
persons or property, the Breakthrough Series’ focused beams helps the user
see better and respond faster, whether at a long distance or in close quarters.
These battery powered lights clip to gear via the Stainless Steel Clip or
carabiner for hands-free use.
WARNINGS
When used for extended periods of time the Breakthrough® Stainless
Steel Clip will become HOT to the touch. Please use care when operating.
Do not stare into LEDs for long periods of time or from a close range
(less than 2 ft or 0.6 m).
!
BT4
DIMENSIONS
2.8 x 3.1 x 7.5 in (71 x 79 x 190 mm)
2.8 in Head Diameter (71 mm)
WEIGHT 1.1 lbs (499 g)
4
BATTERIES
The BT Series requires four (4) AA batteries. Acceptable battery types
include: Alkaline, rechargeable NiMH or LiFeS2 (1.2 to 1.6 volts each).
DO NOT use Lithium Ion AA batteries (3V, 3.3V or 3.6V) as they will
damage the unit and VOID the FoxFury warranty.
NOTE: Mixing of new and used, or different brand batteries is not
recommended as this could lead to leakage or explosion.
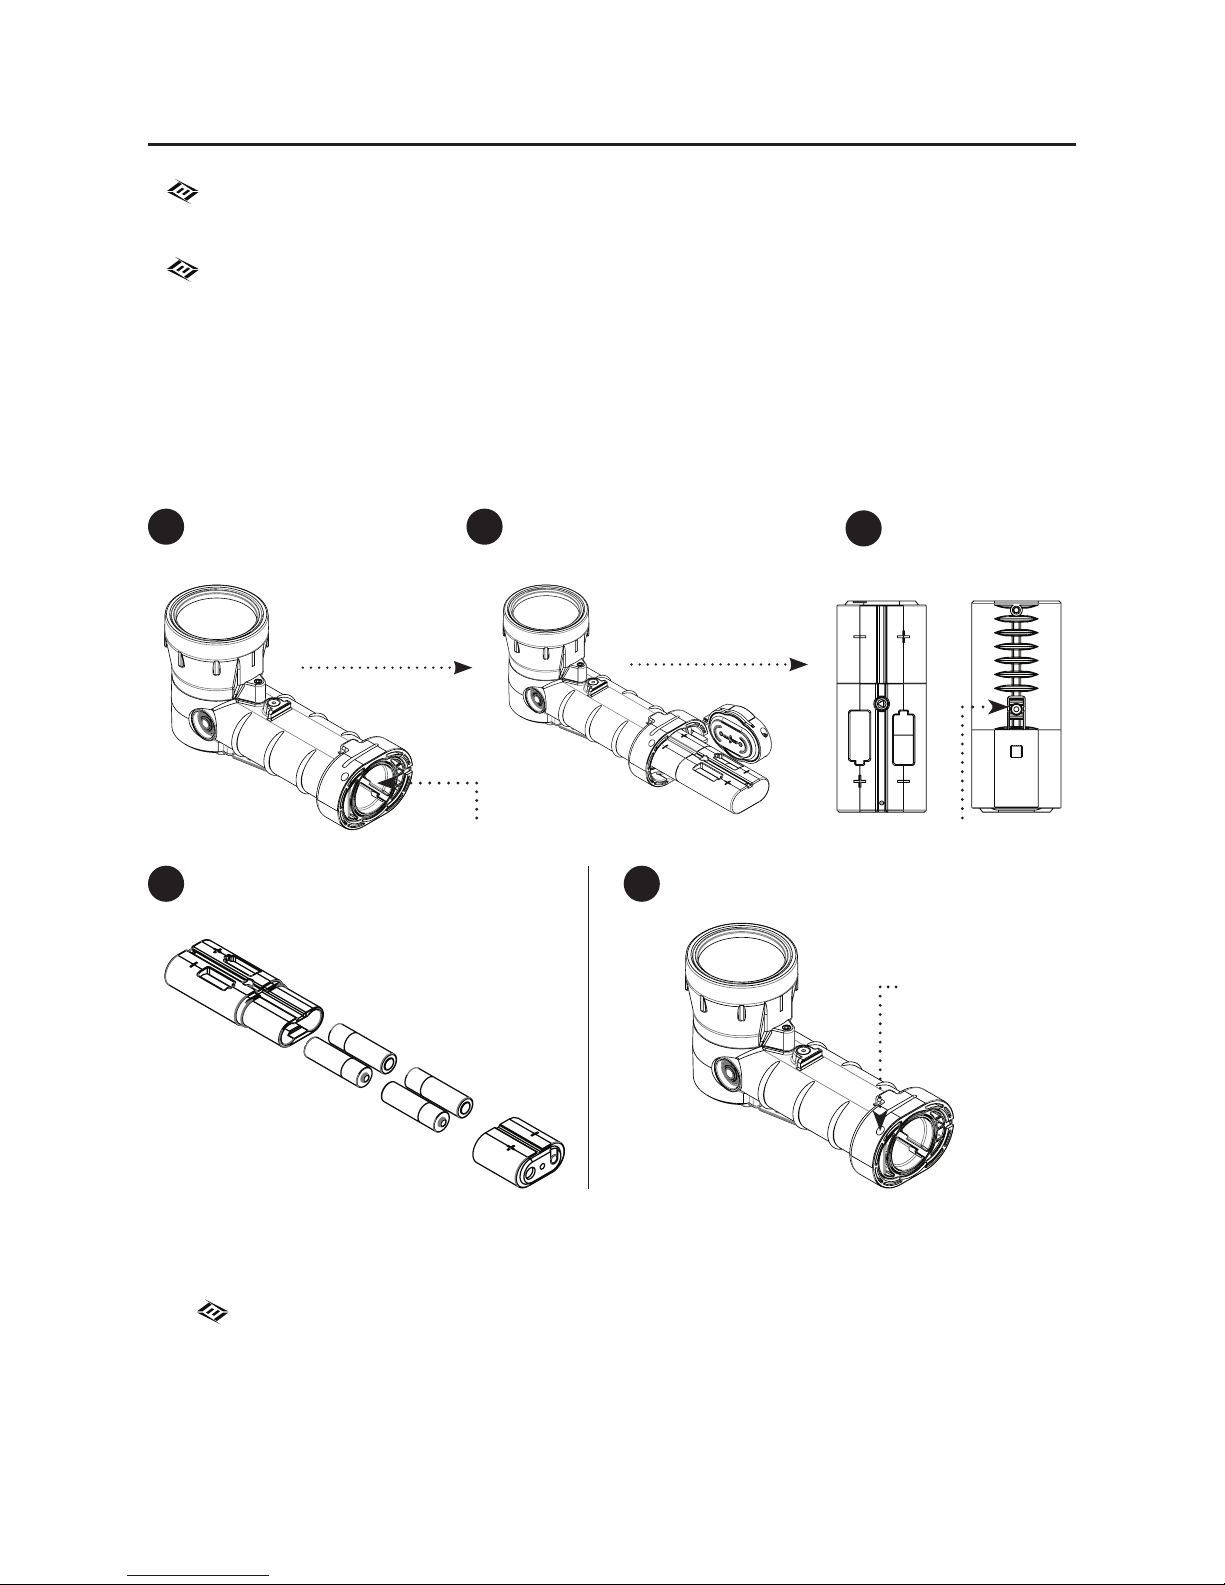
BATTERY INSTALLATION AND REPLACEMENT
1. Turn the Locking Mechanism (located on the Battery Door) counterclockwise. Pull the Battery Door straight out, away from the Light Body.
NOTE: The Battery Door will remain attached to the Light Body.
2. Then, tilt the Light Body up so that the Battery Holder slides out.
3. Once the Battery Holder is out of the Light Body, flip the Battery Holder
over. Press the Battery Holder Release Button to open it.
3
1 2
4
*
FRONT
BACK
BATTERY
HOLDER
RELEASE
BUTTON
LOCKING
MECHANISM
USE HEX KEY
IN BATTERY
DOOR
LOCK HOLE
 Loading...