

FOXEER LEGEND 3 User Manual

USER MANUAL

/ The Basics
5
/ Getting Started
7
11
12
13
/ Camera Status Screen
/ Camera Modes
/ Setting Camera
/ Video Modes
/ Photo Modes
/ Settings Menu
/ Connecting to the FOXEER App
/ Transferring Files to a Computer
15
17
19
33
33
34
37
37
/ Battery
/ Trademarks
/ Customer Support
/Table of Contents
3 4
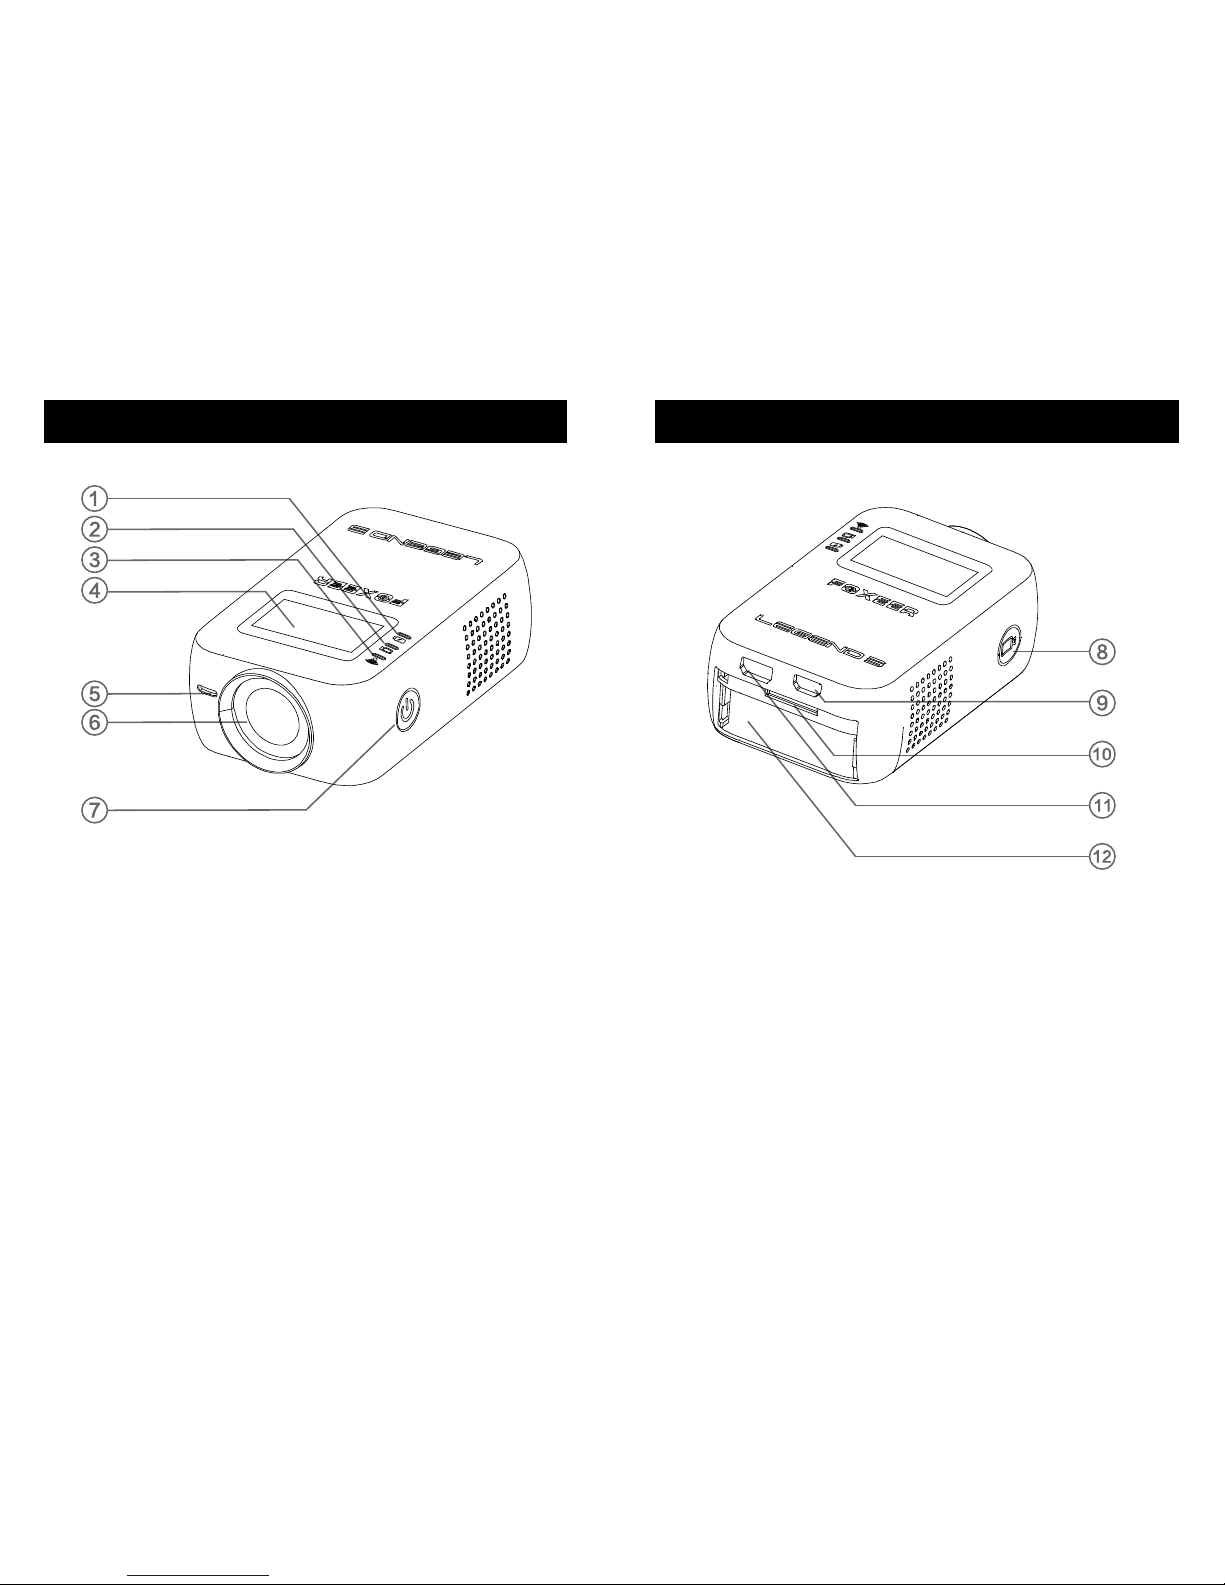
/The Basics /The Basics
1.Charger Light ( red )
2.Mode Light ( Video:blue/Photo:green )
3.Wifi Status Light ( yellow )
4.Camera Status Screen
8.Shutter/Select Button and Status light ( red )
9.micro HDMI Port ( cable not included )
10.microSD Card Slot ( microSD Card not included )
11.micro USB Port
12.Battery5.Microphone
6.Lens
7.Power/Mode Button and Status light( red )
5 6

1. Remove the camera from its package.
2. Remove the camera bottom cover, insert the battery
and microSD card and then close the bottom door. The
card must have a U3 rating and a capacity up to 128GB.
3. Charge the battery by connecting the camera to a
computer or other USB charging adapter using the
included USB cable. The camera charger light turns on
during charging and turns off when charging complete.
*The included lithium-ion battery comes partially
charged. No damage occurs to the camera or battery if
used prior to a full charge.
For more battery information, see Battery.
Camera Default Settings
Video
Photo
Wireless
1080p60 S.Fine
16MP S.Fine
ON
/Getting Started /Getting Started
7 8

Inserting+Removing microSD Cards
To Insert the microSD Card:
Slide the memory card into the card slot with the label
facing the top of the camera. When fully inserted, the
card clicks into place.
To Remove the microSD Card:
Place your fingernail against the edge of the memory
card and lightly press it further into the camera.The card
springs out far enough to be removed.
Powering ON+OFF
To Power On:
Press and hold the Power/Mode button for three
seconds. The camera mode light and status light flash
three times and the sound indicator emits three beeps.
When the camera status screen displays information,
mode light and status light are always on, your camera
is on.
To Power Off:
Press and hold the Power/Mode button for three
seconds. The camera mode light and status light flash
six times and the sound indicator emits six beeps,camera
status screen displays FOXEER, then power off.
NOTICE: Use care when handling memory cards.
Avoid liquids, dust and debris. As a precaution, power off
the camera before inserting or removing the card. Check
manufacturer guidelines regarding use in acceptable
temperature ranges.
/Getting Started /Getting Started
9 10
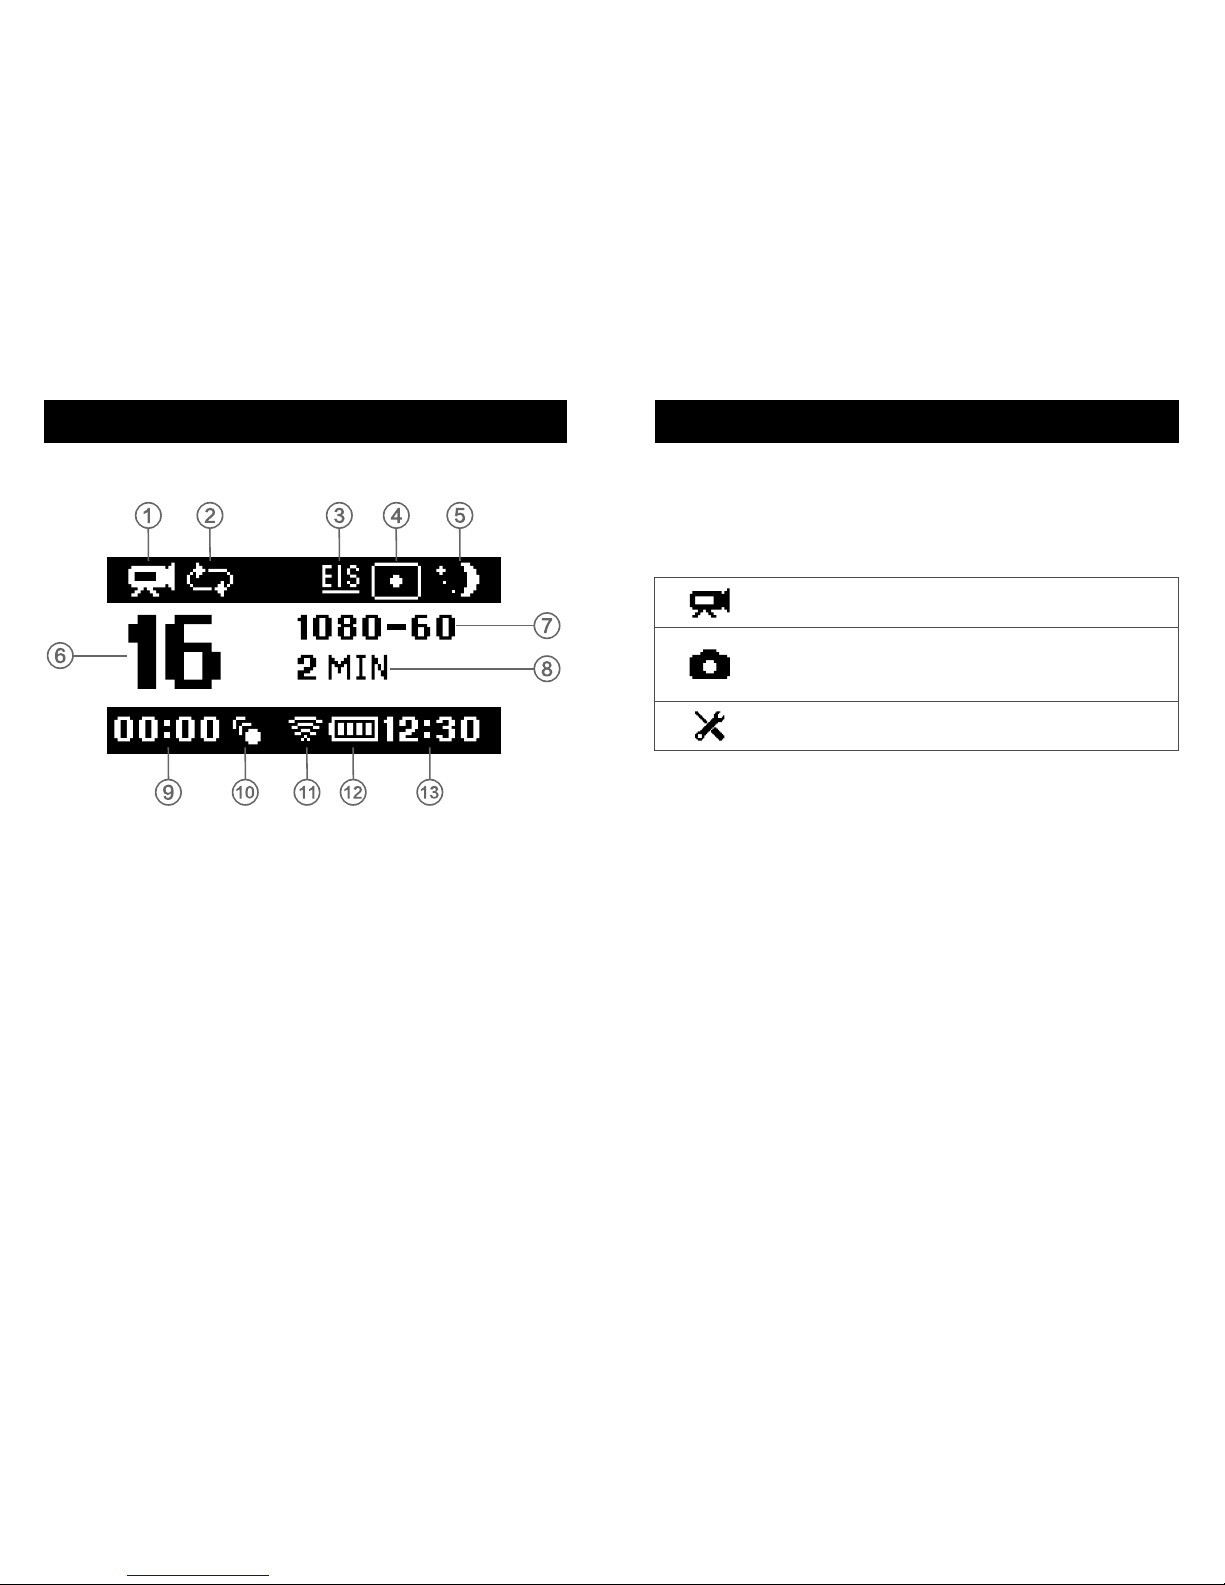
Video
Photo
Setup
Record video or time lapse video
Capture a single photo or a series of
photos (Timing, Auto, Burst)
Adjust general camera settings
The Legend 3 features several camera modes. To cycle
through the modes, press the Power/Mode button
repeatedly:
1.Camera Modes
2.Looping
3.Electronic Image Stabilization
4.Metering
5.Scene
6.Numbers of Files Captured
11.Wireless
12.Battery Life
13.System Time
7.Resolution/fps
8.Interval
9.Storage
10.Motion Detection
/Camera Status Screen /Camera Modes
11 12
 Loading...