

FourStar 11010873 User Manual

Contents
Overview.............................................................................................................................................3
System Requirements........................................................................................................................3
Package Contents..............................................................................................................................4
DV Camcorder Diagram.....................................................................................................................5
Inserting the Battery ...........................................................................................................................6
Inserting an External Memory Card....................................................................................................6
Using the Power Adapter....................................................................................................................7
Attaching and Adjusting the Wrist Strap ...........................................................................................7
Getting Started.................................................................................................................................8-9
Understanding the Screen Icons..................................................................................................10-11
Basic Operations...............................................................................................................................12
Advanced Settings.......................................................................................................................13-16
Advanced Operations.......................................................................................................................17
Copying les to your Computer.........................................................................................................18
Using your camcorder as a Webcam................................................................................................18
Appendix...........................................................................................................................................19
Troubleshooting............................................................................................................................20-22
Specications....................................................................................................................................23
Maintenance ....................................................................................................................................24
Precautions.......................................................................................................................................25
FCC and CE Radiation Norm...........................................................................................................26
Service Procedure............................................................................................................................27
Warranty............................................................................................................................................28

Overview
5-in-1 Digital Camcorder: Digital video camcorder, Digital still camera, Web Cam, Voice
•
recorder, Mass storage.
•
The DV Camcorder supports SD, SDHC, MMC and MMC 2.0 memory cards via the built-in
card reader.
•
720P (1280 x 720 up to 30fps) high denition video quality.
•
Still pictures up to 16 Mega-pixels.
•
Video stabilization.
•
2.4” TFT LCD screen.
•
Support HDTV and standard TV (HDMI out and AV out ports)
•
Support up to 16GB SDHC card
System Requirements
For Mac OS :
•
CPU: 1.8 GHz PowerMac G5 or faster; 1.83 GHz Intel Core Duo or faster.
•
System RAM: 256MB of RAM (or higher).
•
Graphics Card: 64 MB (or higher).
•
CD-ROM: 4X or higher.
•
Software: H.264 decoder (Quick Time Player 7.4.1 or higher)
•
Interface: USB 2.0 High Speed (USB 1.1 Compatible)
For Windows®: :
•
OS: Windows® XP (Service Pack 2 or higher) and Vista™
•
CPU: 2.8 GHz Pentium 4 or higher.
•
System RAM: 512MB of RAM (or higher).
•
Graphics Card: 64 MB (or higher).
•
CD-ROM: 4X or higher.
•
Software: H.264 decoder (Quick Time Player 7.4.1 or higher)
•
Interface: USB 2.0 High Speed (USB 1.1 Compatible)CD-ROM: 4X or higher.
3
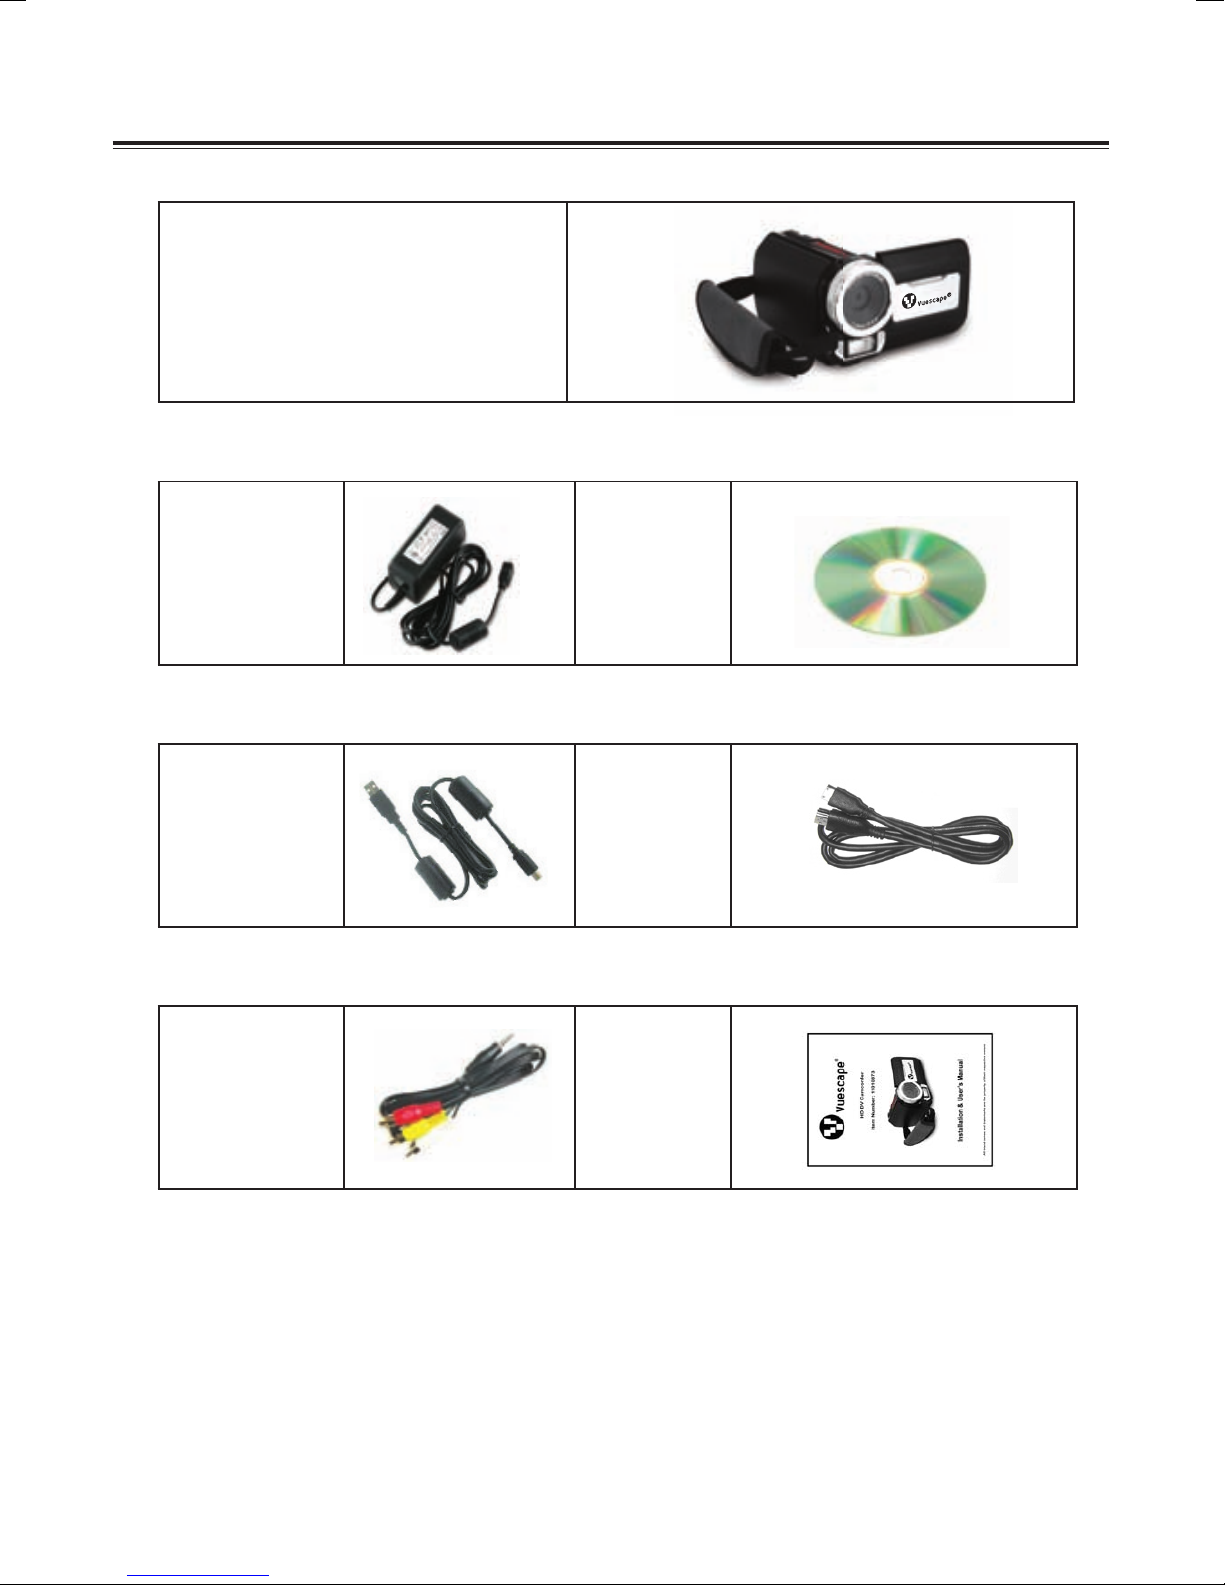
Package Contents
HD DV Camcorder
Power Adapter Software CD
USB Cable HDMI Cable
AV Cable
User’s
Manual
4
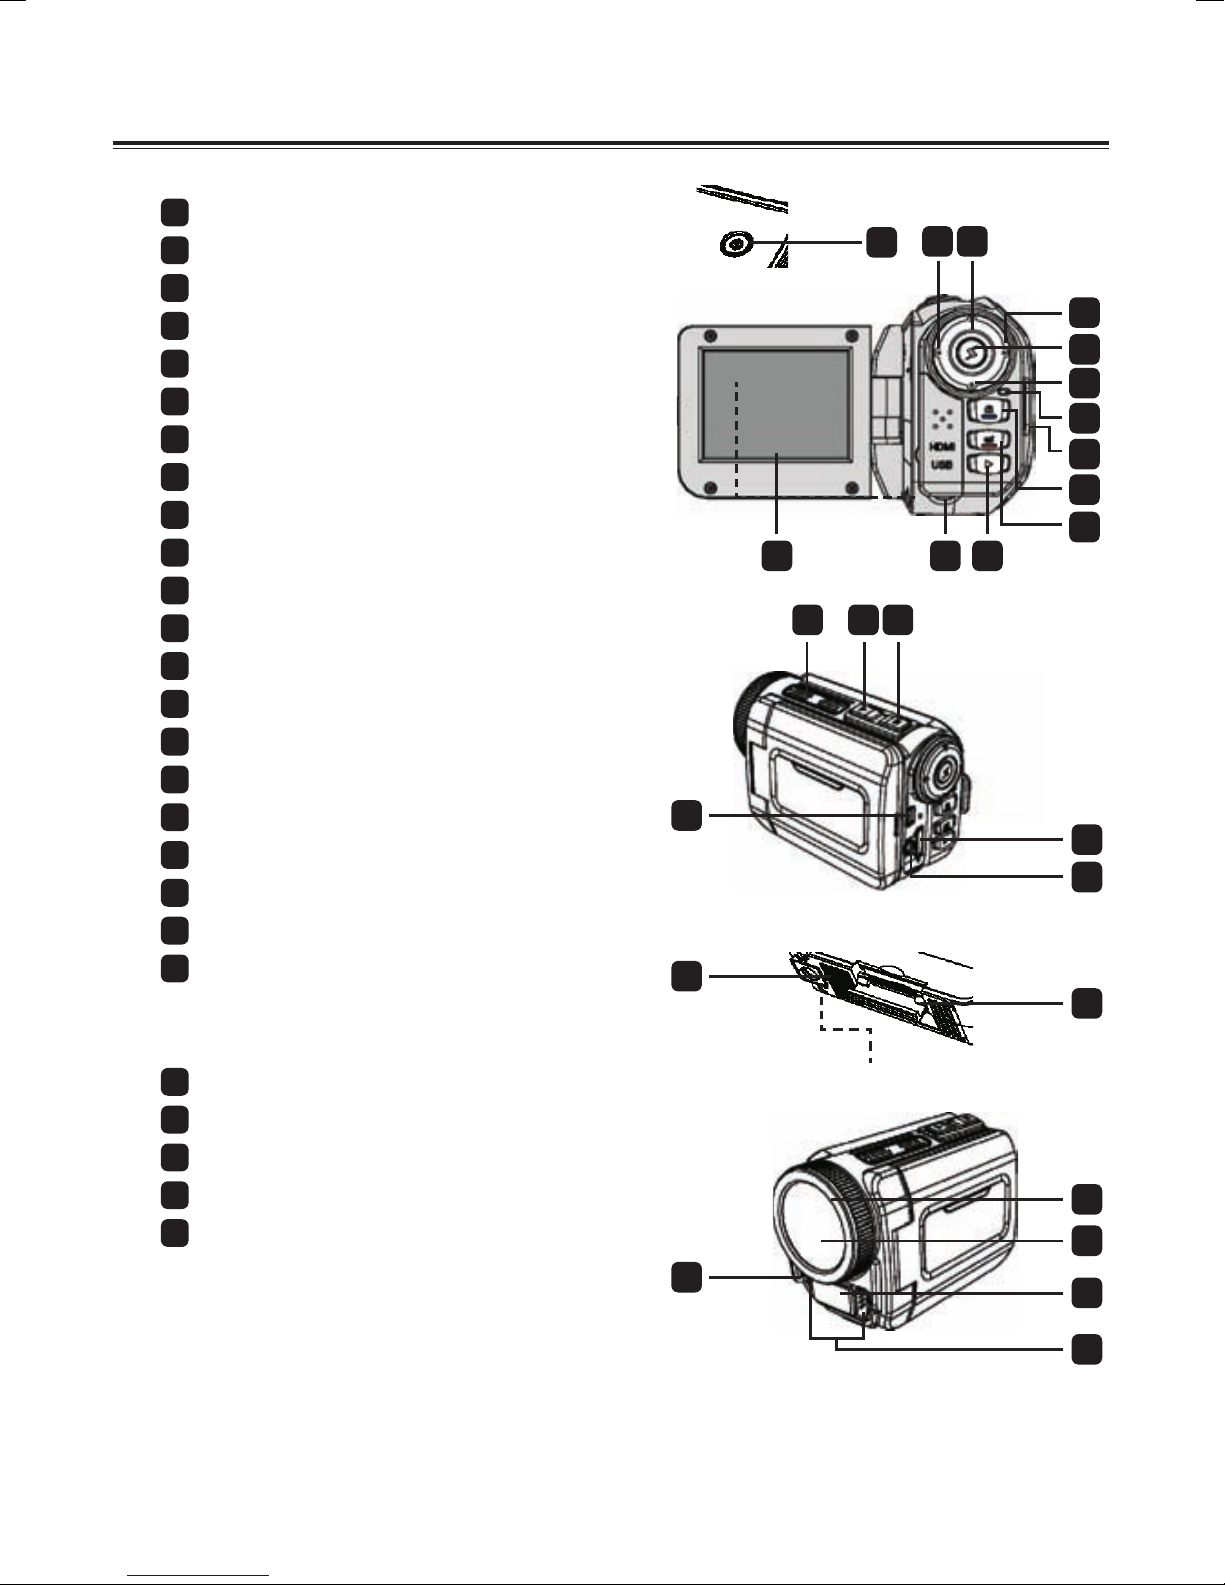
DV Camcorder Diagram
Power button
1
Left/Mode/Exit button
2
Up button/EV comp. hot key
3
Right/Menu/OK button
4
Flashlight hot key
5
Down button/Snap mode hot key
6
Status LED indicator
7
Wrist strap holder (back)
8
Shutter button
9
Record button
10
Playback button
11
Connector cover
12
LCD display
13
1
14 15 16
2
3
4
5
6
7
8
9
10
11
1213
Speaker
14
Zoom in/Volume up button
15
Zoom out/Volume down button
16
HDMI output connector
17
USB port
18
TV-out connector/earphone
19
Tripod socket
20
Memory card cover
21
(SD, SDHC, MMC and MMC 2.0
card slot)
Focus switch
22
Lens
23
Flash strobe
24
Microphone
25
Wrist strap holder (front)
26
* For the battery compartment cover
and the locker, please refer to
section “Inserting the battery”.
19
20
26
17
18
21
22
23
24
25
5
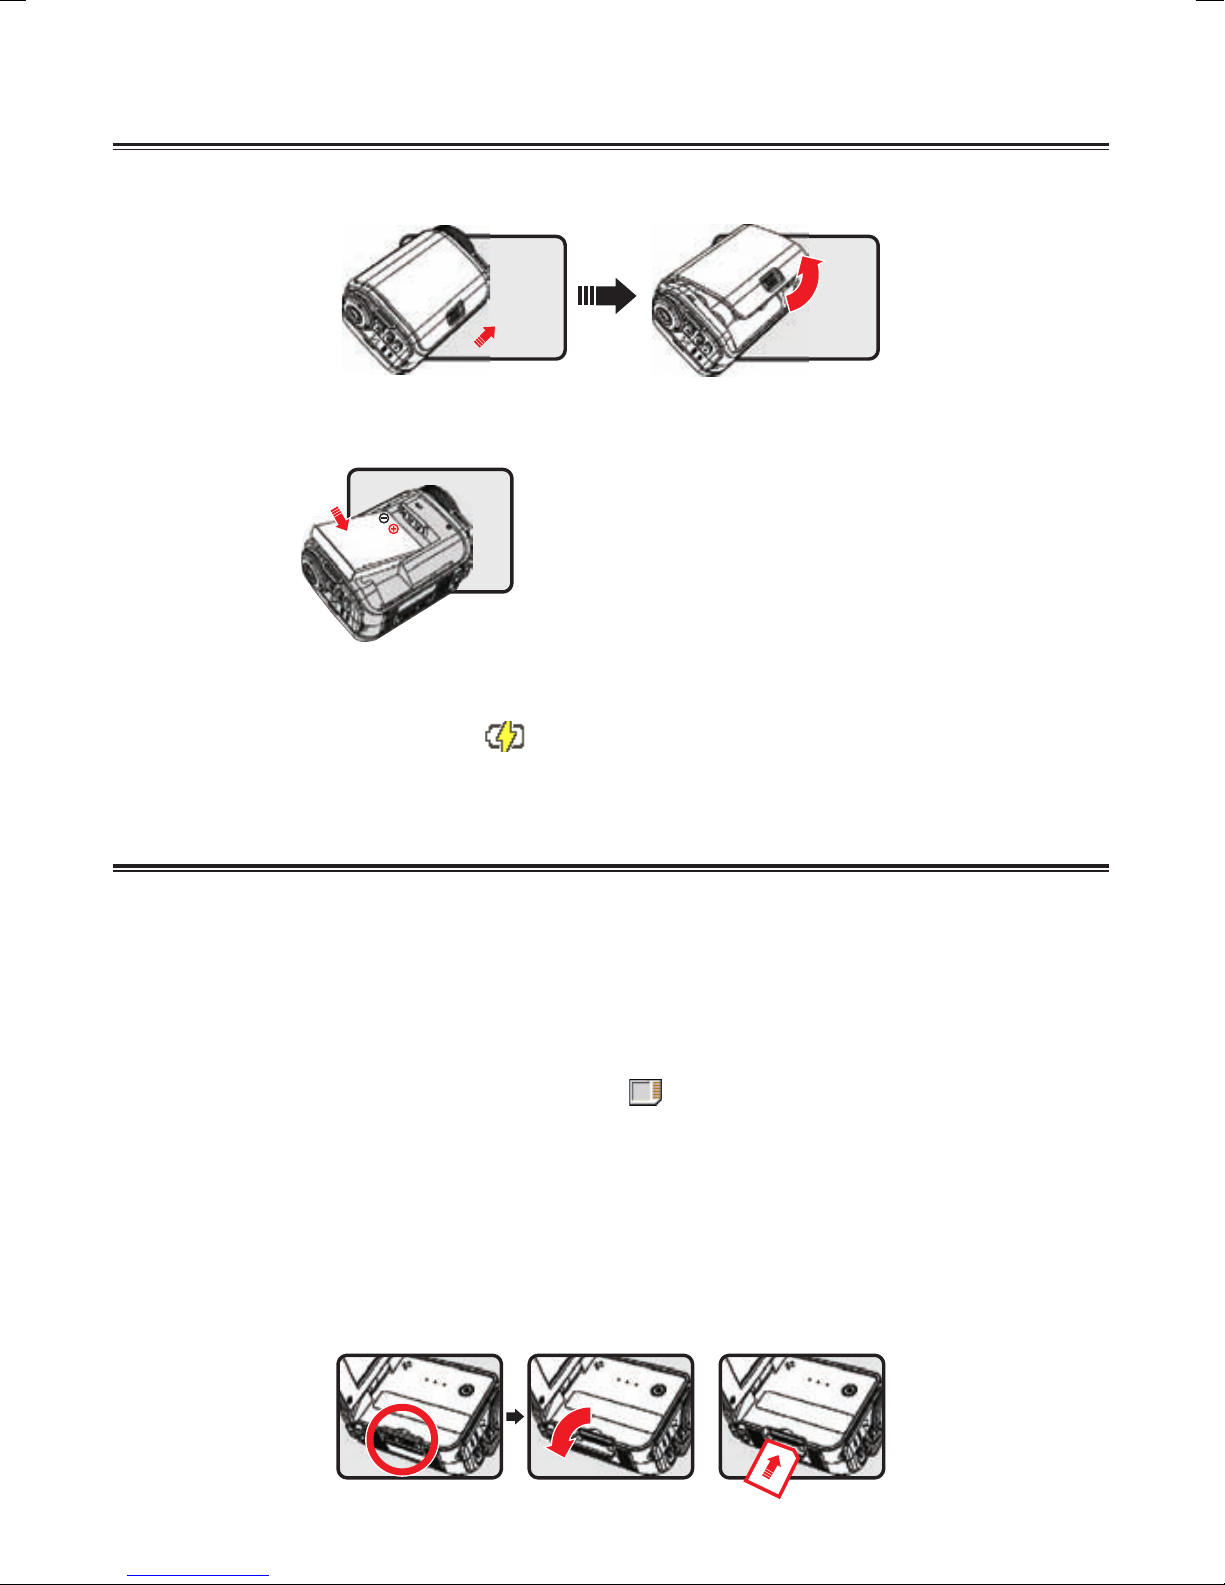
Inserting the Battery
Slide the latch to open and to remove the battery compartment cover.
1.
2.Slide in the connector end of the lithium battery as the direction of the arrow shown and make
sure that the metallic contacts are aligned with the contacts in the compartment.
3.Replace the cover.
* NOTE: The battery life indicator ( ) will keep running until the lithium battery is fully charged.
Inserting an External Memory Card
The DV Camcorder has a built-in internal memory for storage of 32MB NAND –Flash memory
(20MB available for storage), you may also insert a SD, SDHC, MMC and MMC 2.0 memory card
to expand your camcorder’s memory capacity.
Lift the memory card cover as shown.
1.
Insert the card as the direction of indication until it reaches the end of the slot.
2.
When the card is inserted successfully, the icon (
3.
memory will become inaccessible.
Note: To remove the card, push the card to release it and then pull it out gently.
4.
Put the cover back.
* When using a brand new memory card, you are recommended to format the card with the
camcorder or other devices.
* The camcorder will use the inserted memory card as the main storage medium. Only when the
inserted card is removed will the les stored in the built-in memory become accessible.
) will appear on screen and the internal
6
Using the Power Adapter
Plug the USB AC power adapter cord into the USB port located on the back of the
camcorder; then plug the AC end of the power adapter into a standard electrical wall outlet.
When the icon ( ) appears on the upper right hand corner of LCD screen, the device power
is supplied by DC input instead of the battery. You can record and playback continuously for
long periods of time.
The battery life indicator ( ) will keep running until the lithium battery is fully charged.
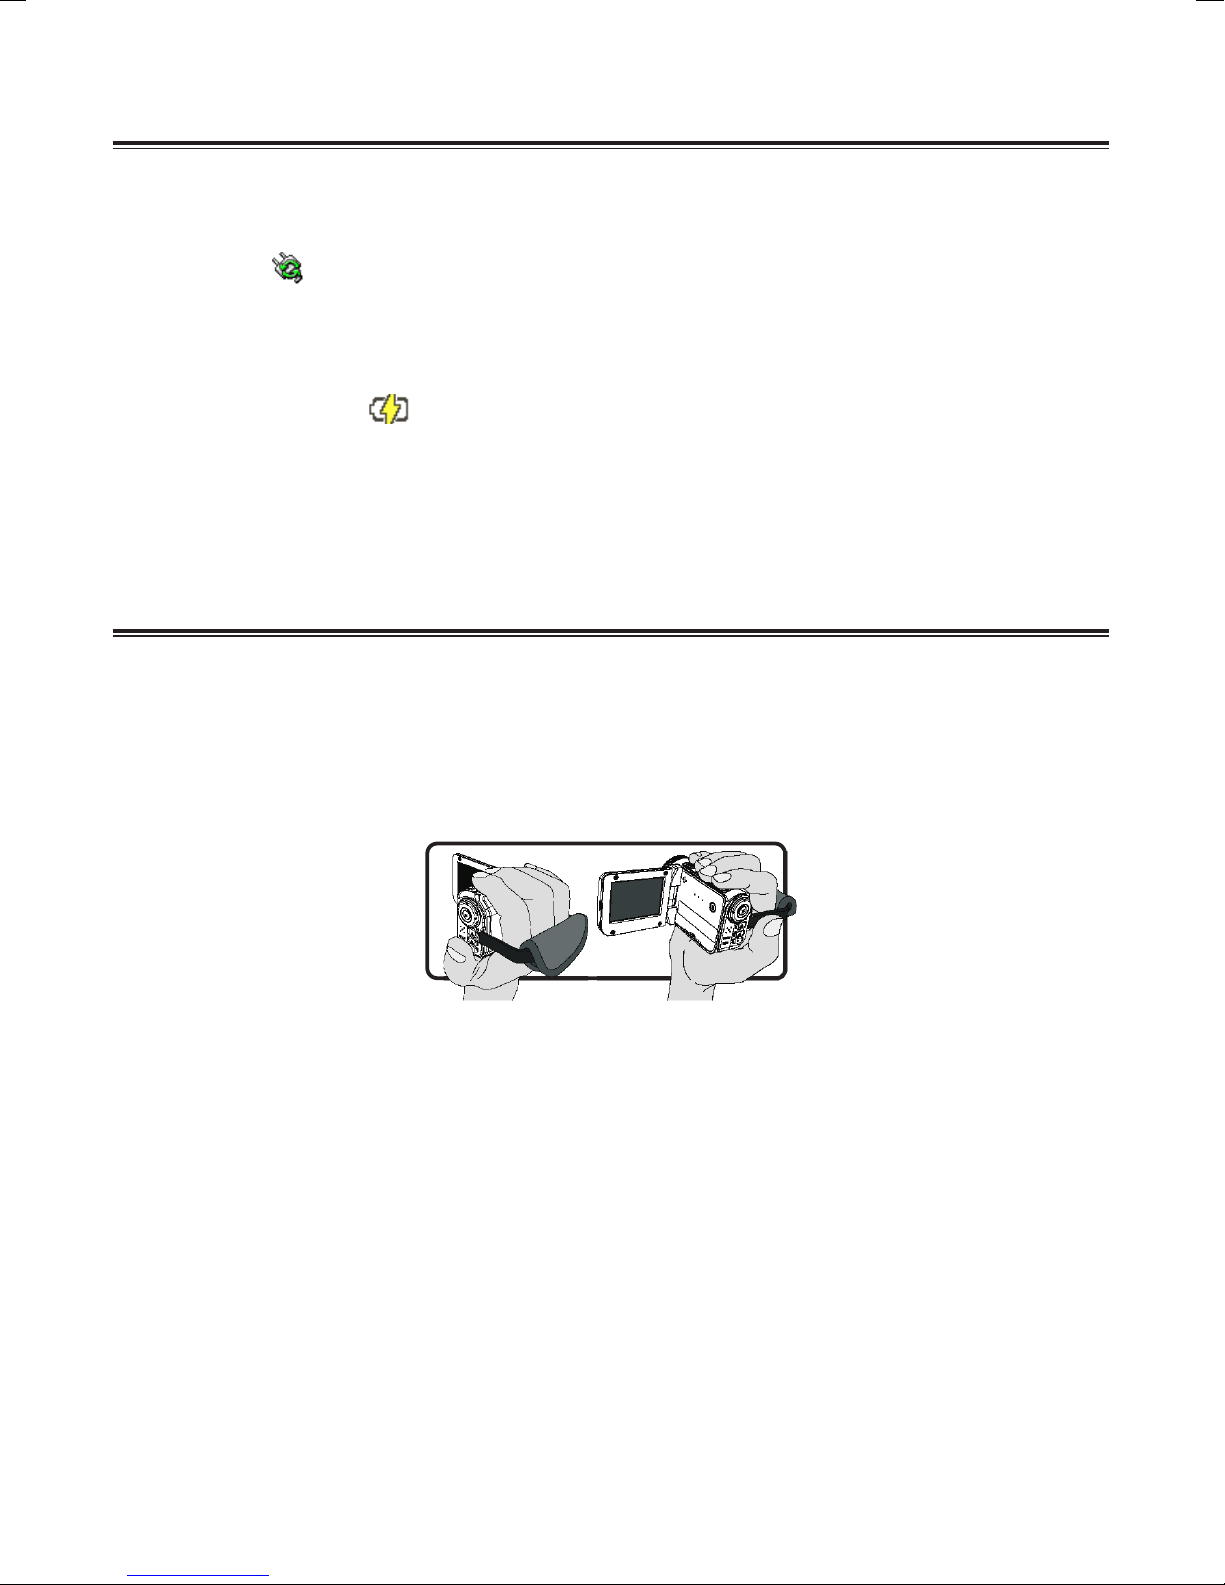
Attaching and adjusting the wrist strap
Attach the strap to the strap holder on the front of the camcorder, then attach the other end to the
strap holder on the back of the camcorder, as shown in the illustration.
Open the cloth of the wrist strap.
1.
Adjust the length of the strap according to your palm size.
2.
Close and afx the cloth of the wrist strap.
3.
7
Getting started
Power on Power off
Power-on → enter Setting mode → select the Clock item → press the Up button or Down button
to select numbers for the YY/MM/DD and HH:MM elds → press the Right button to conrm each
eld → press the Left button to exit.
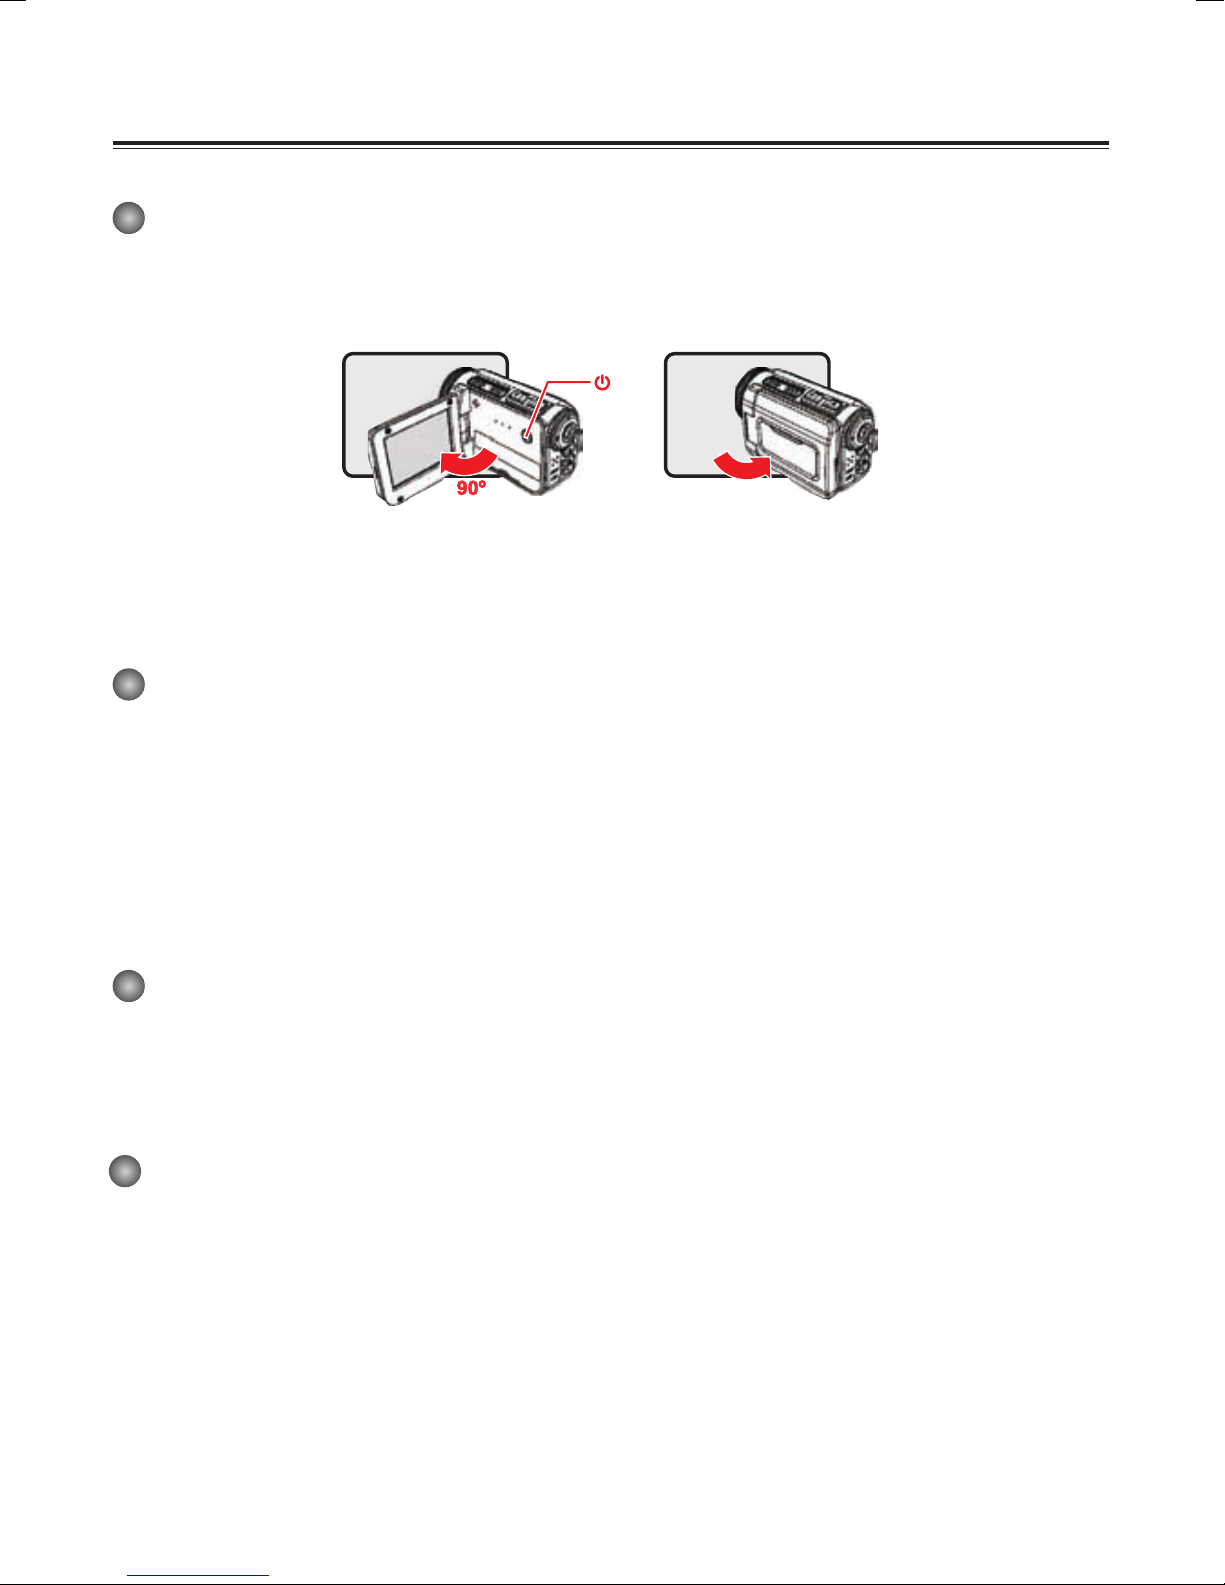
Turning the power on/off
To turn on the camcorder, either open the LCD panel or press the Power button.
To turn off the camcorder, either close the LCD panel or press the Power button.
* If the power is not turned on after you have completed the above procedures, please verify the
battery is inserted properly and that it has enough power.
* The [Auto Off] setting may cause the camcorder to turn off after it is idle for a period of time.
Mode selection
Turn on the camcorder.
1.
2.
Press the Right button to Mode.
3.
Use the Up button or Down button to select the desired item.
4.
Press the Right button to conrm.
5.
Press the Left button to exit.
Choosing the screen language
Power-on → enter Setting mode → select the Language item → press the Up button or Down
button to select the language → press the Right button to conrm.
Setting the Date and Time
8
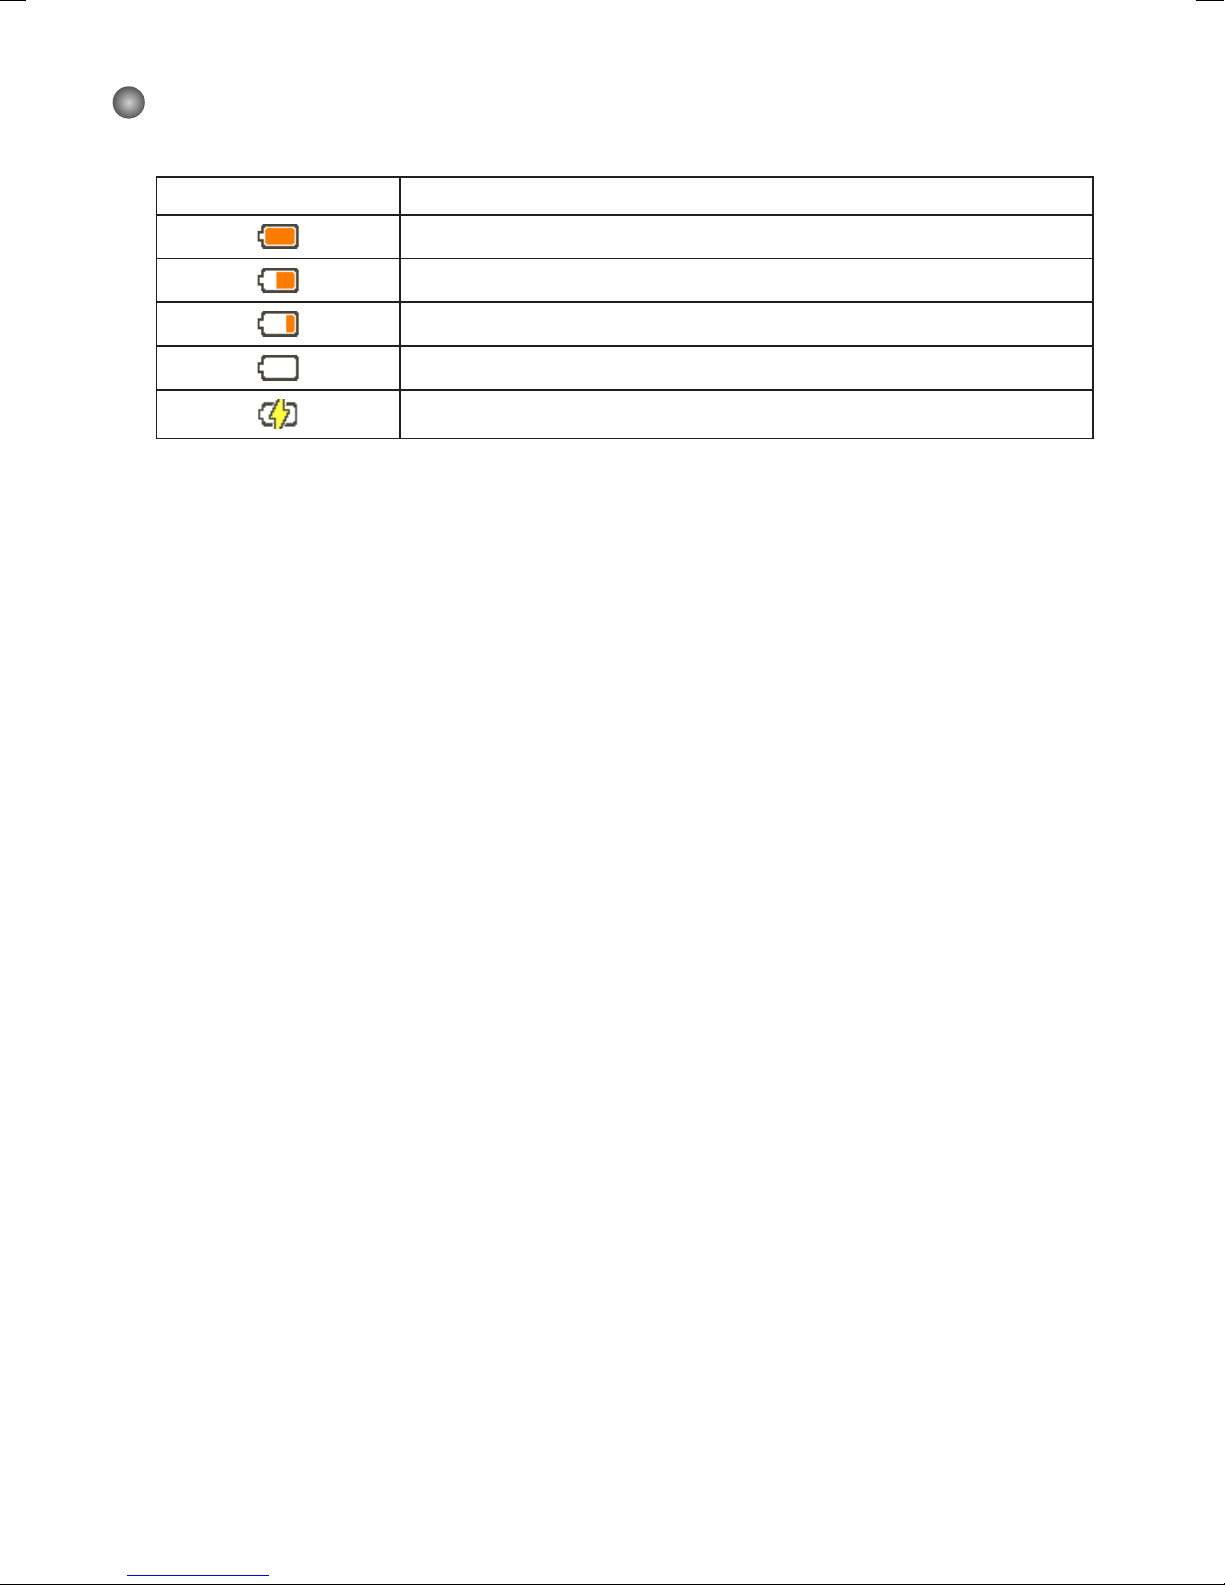
Battery life indicator
Icon Description
Full battery life
Moderate battery life
Low battery life
Empty battery life
Charging battery
Note: To avoid sudden outage of power supply, you are recommended to replace the battery
when the icon indicates low battery life.
9
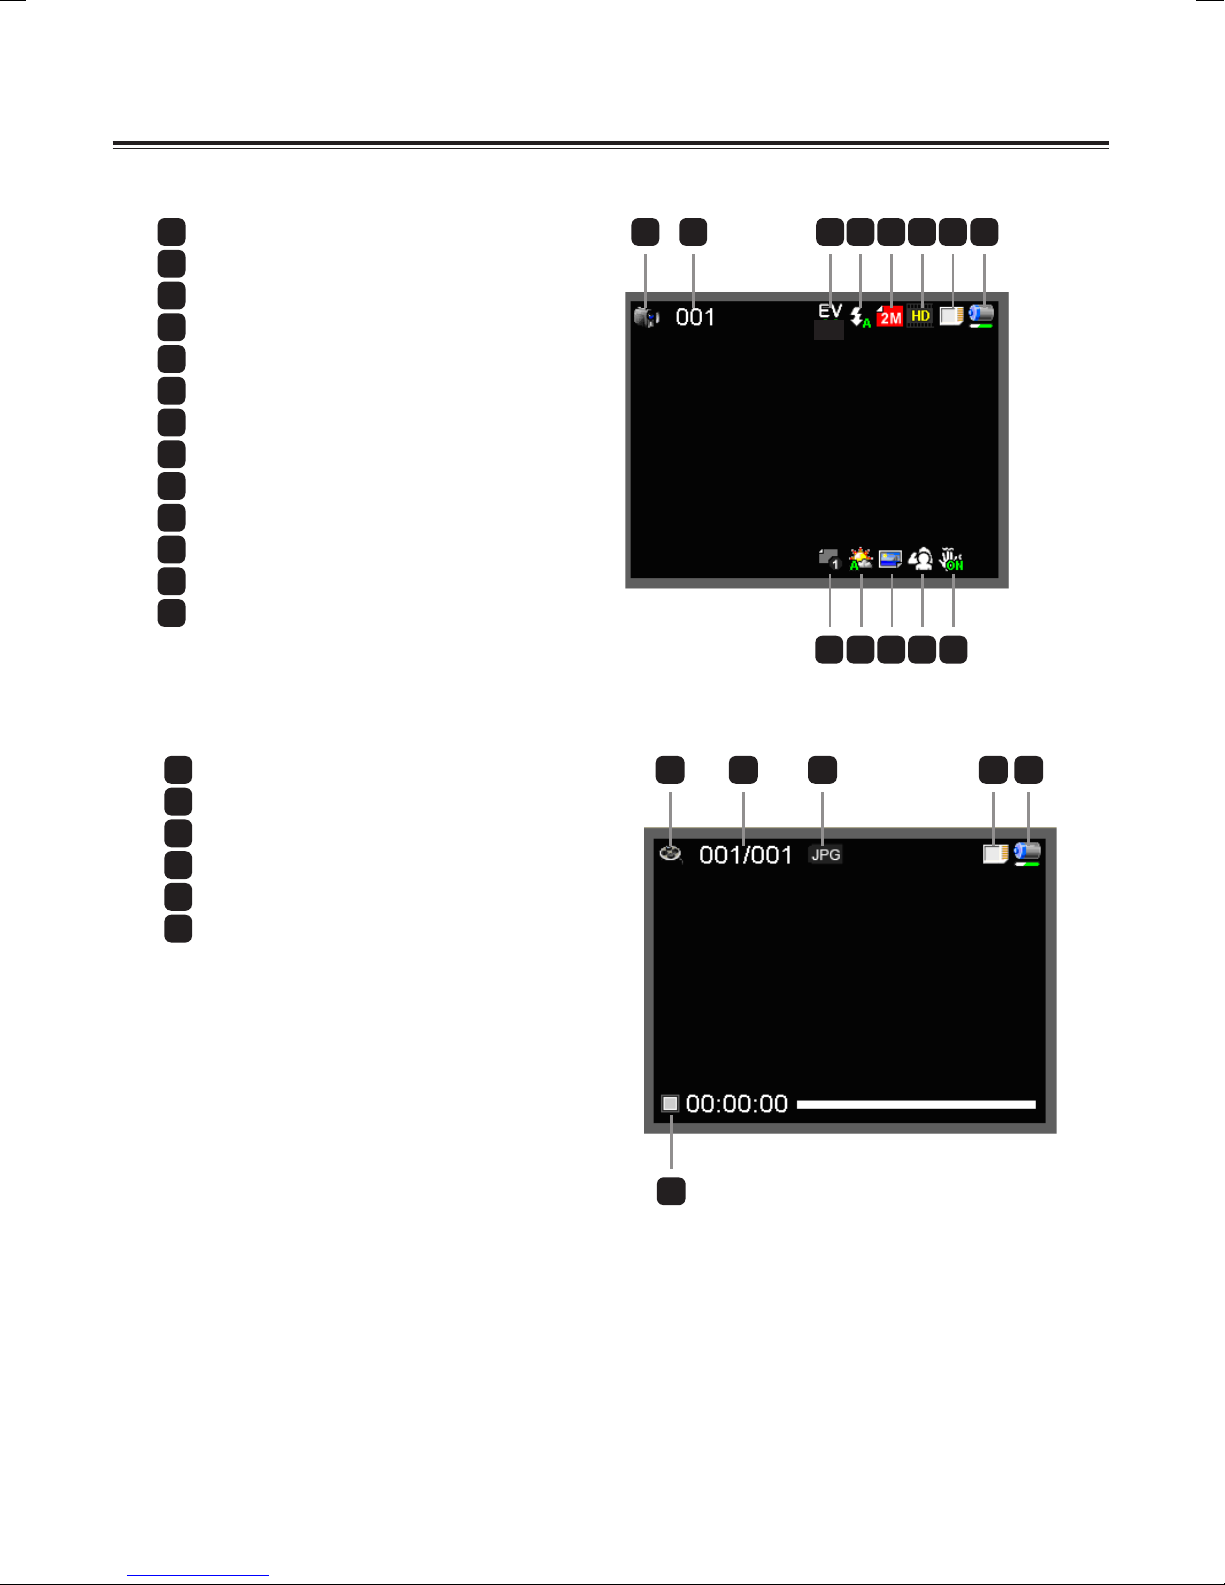
Understanding the Screen Icons
Camera mode:
Mode icon (camera mode)
1
Number of recordings
2
Exposure
3
Flash mode
4
Still resolution
5
Video resolution
6
Memory card inserted
7
Battery life
8
Stabilizer
9
Focus tape
10
Effect
11
White balance
12
Snap mode
13
1 2 3 4 5 6 7 8
-1.0
9
10111213
Playback mode:
Mode icon (play mode)
1
Current / total recordings
2
File format (JPG)
3
Memory card inserted
4
Battery life
5
Recording time
6
1 2 3 4 5
6
10
 Loading...