

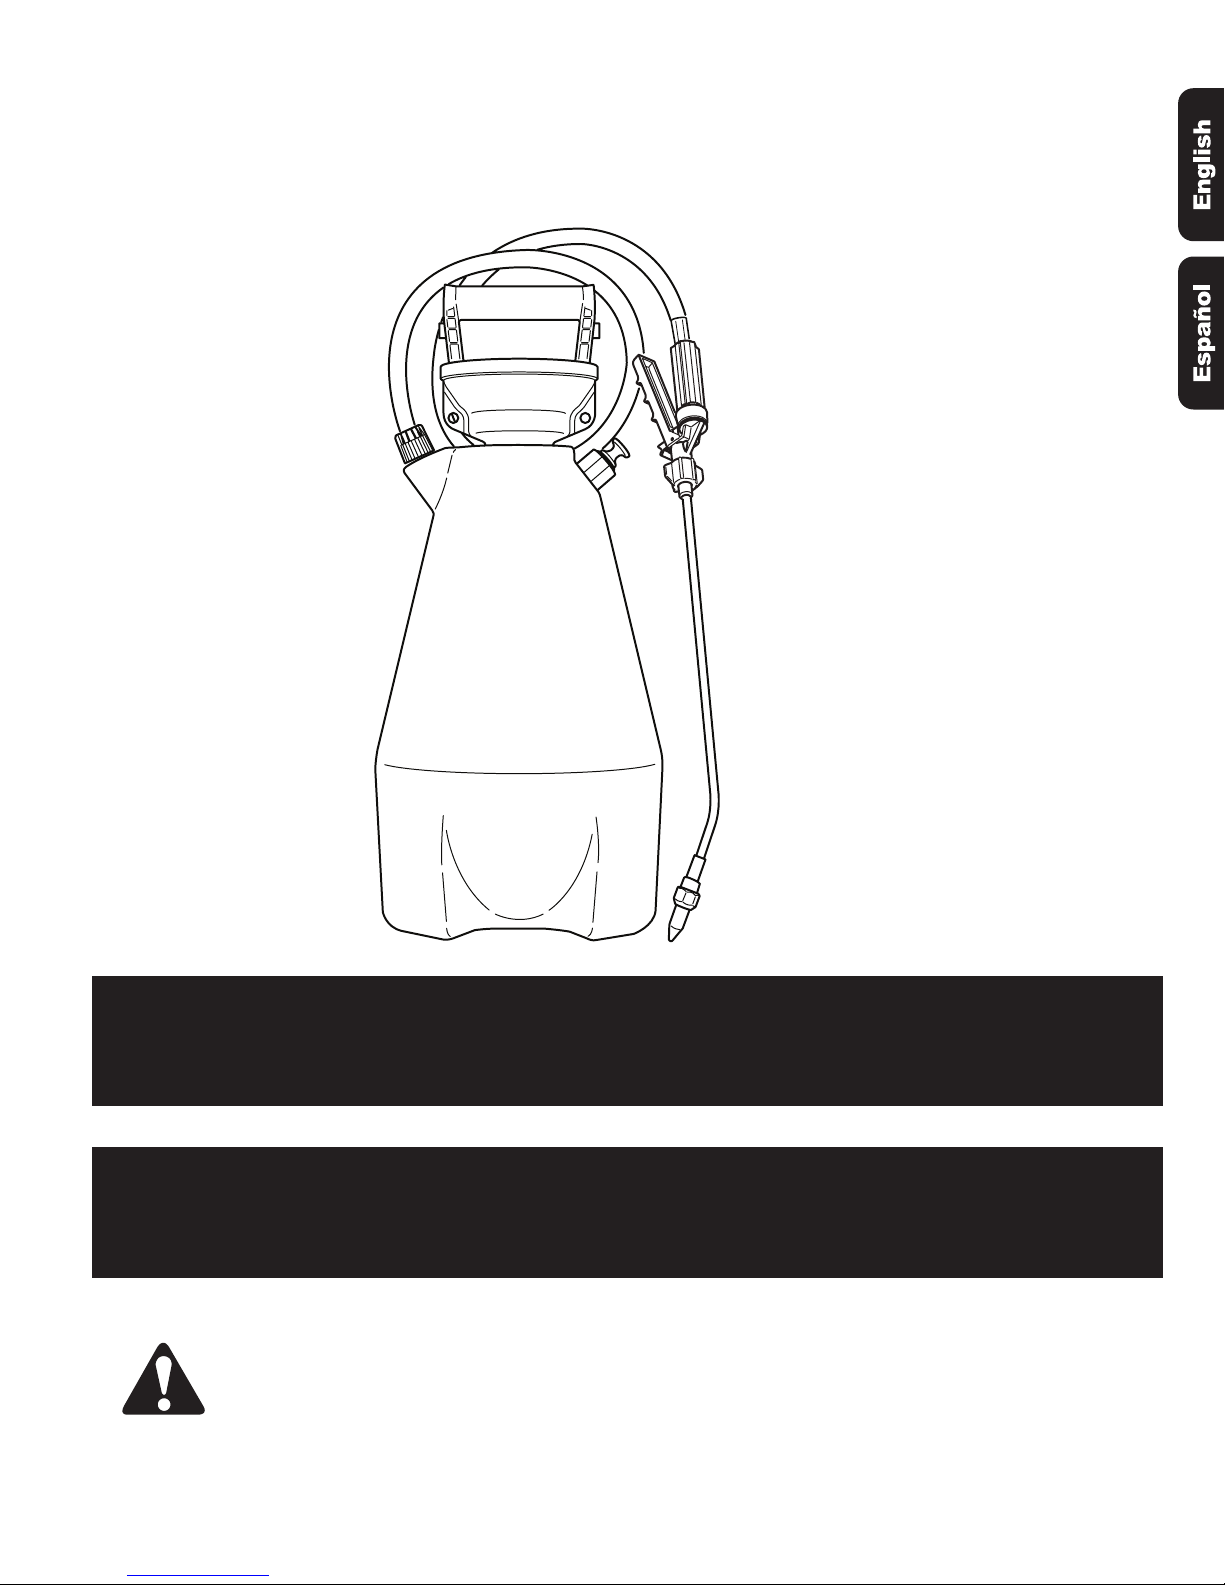
Fountainhead 190197 Owner's Manual
If you have any problems with, or have any questions about your sprayer,
BEFORE YOU RETURN IT TO THE STORE, CALL OUR TOLL FREE CUSTOMER
SERVICE CENTER AT 1-800-311-9903
CAUTION: Read and follow all instructionsCAUTION: Read and follow all instructions
PRECAUCION: Lea y siga todas las instrucciones
Owner’s Manual
Manual del usuario
Models: / Modelos:
Si tiene algún problema o preguntas acerca de su atomizador, ANTES DE
DEVOLVERLO A LA TIENDA, LLAME SIN CARGO A NUESTRO CENTRO DE
SERVICIO AL CLIENTE AL 1-800-311-9903
190197
Manual No. 180974
Revision Date: 7/2006
TP 120-1032-01-RS


1
WARNING
The sprayer is operated with liquid under pressure. Failure to observe caution and to follow
instructions for operating and cleaning can cause tank, hose and other parts to be
weakened and rupture under pressure. This can result in serious injury from high pressure
discharge of liquids or forcible ejection of parts. Do not use flammable materials in this
sprayer. Material could ignite or explode, causing serious injury. For safe use of this
product, you must read and follow all instructions before use. Test sprayer with water
before using any chemicals.
SAFETY PRECAUTIONS
• Read owner’s manual completely before
operating this sprayer.
• Always use goggles, gloves, and protective
clothing when using sprayer.
• Read and follow all instructions and
cautions on label of products used in this
sprayer.
• Never use flammable liquids, caustics,
acids, or hot water in this tank.
• Do not leave sprayer in the sun when not in
use.
• Spray when air is calm to prevent drift of
chemicals.
• Do not use sprayer near open flame or
anything that could cause ignition of the
spray.
• Always inspect hose and all hose
connections before each use. A damaged
hose, or loose hose connection can result
in unintended exposure to the pressurized
chemical, resulting in serious injury or
property damage.
• Do not lift or carry sprayer by the hose,
shutoff valve, or wand extension. Carry by
pump handle only, making sure handle is
properly locked in place before lifting.
• Do not pressurize with any mechanical
device such as an air compressor, since
this can create a dangerous pressure level
and bursting of parts resulting in serious
injury. Only use original pump.
• Do not store chemicals in this tank.
• Always release pressure when sprayer is
not in use and before removing pump from
tank.
• Do not stand with face or body over top of
tank when pumping or loosening pump, to
prevent pump or solution from striking you,
resulting in serious injury.
• Clean and rinse sprayer thoroughly after
each use.
• Never attempt to alter sprayer from original
condition.
• Always use replacement parts from original
manufacturer.
• Keep the sprayer and all chemicals out of
the reach of children.
2
ASSEMBLY INSTRUCTIONS
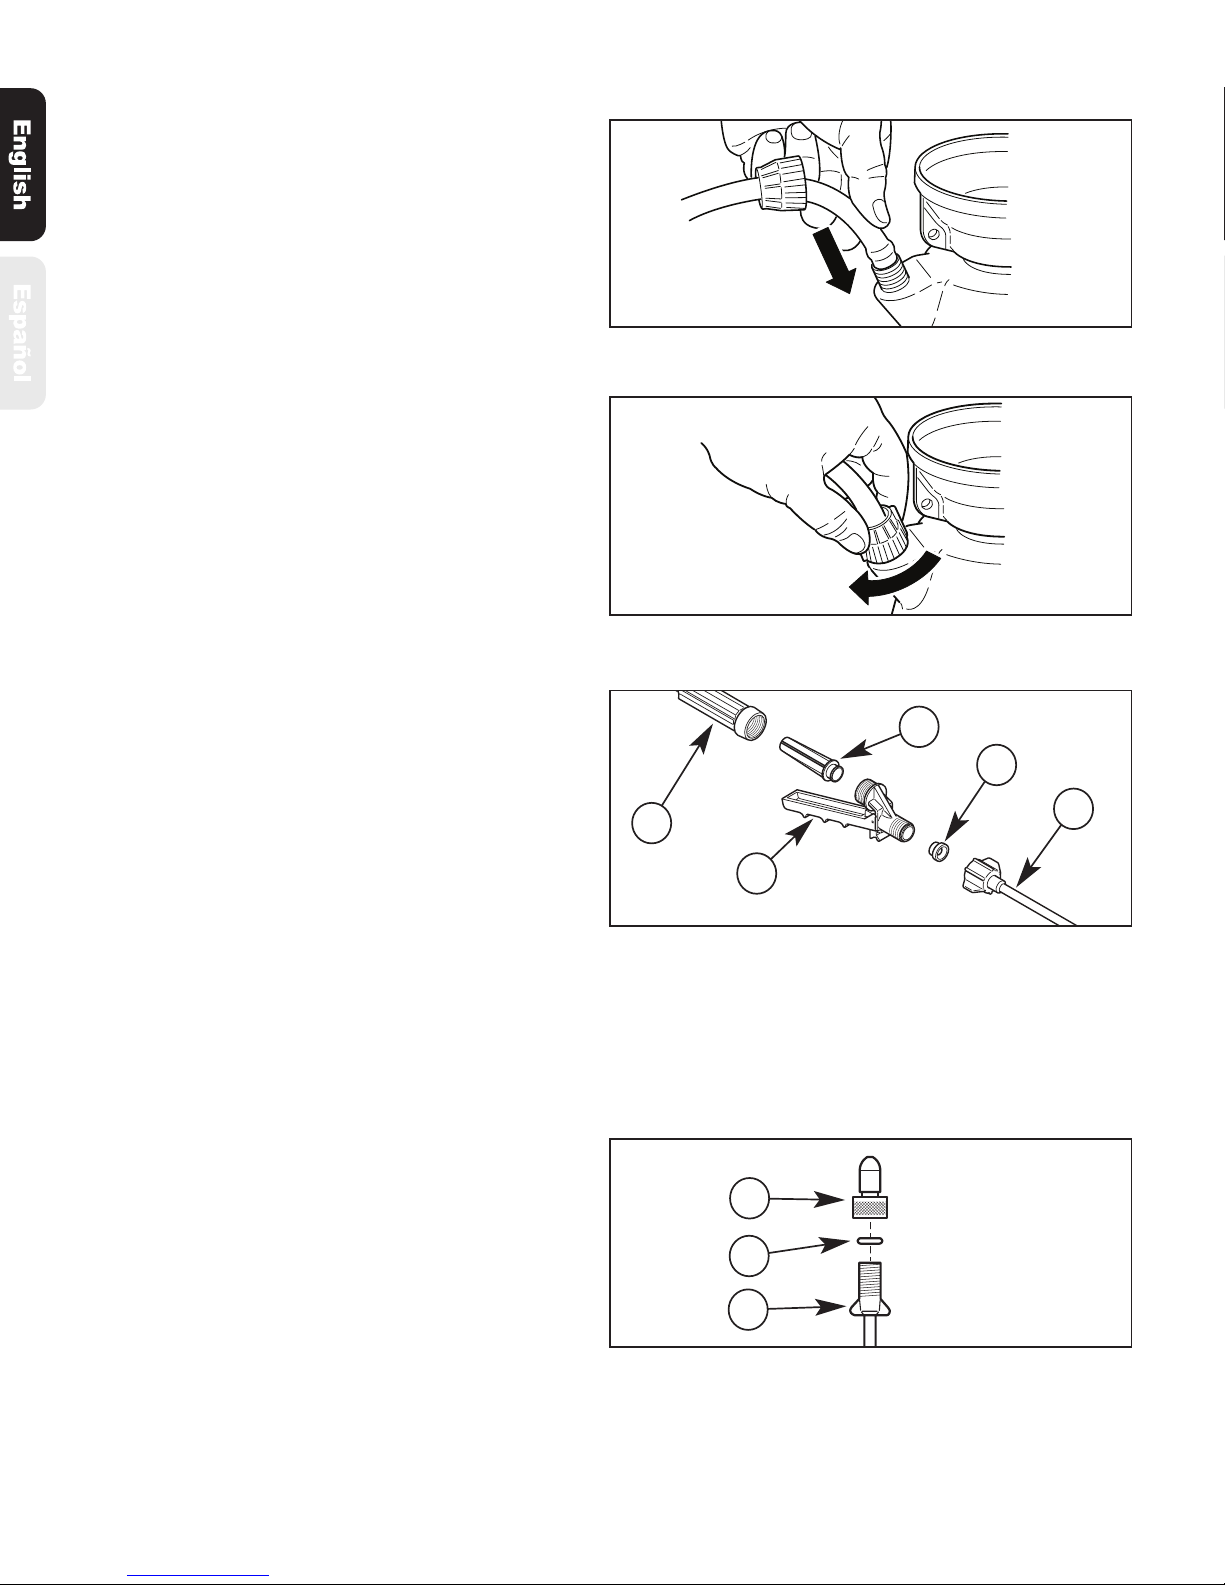
Assemble Hose To Tank:
IMPORTANT: Do not attempt to heat, or
alter hose, hose nut, or barb prior to
assembly.
1. Push the hose barb completely into the
tank. See Figure 1.
2. Slide hose nut along hose and over the
threads on the tank. Turn hose nut
clockwise and tighten securely. See Figure
2.
NOTE: Do not use tools to tighten hose nut.
Assemble Extension to Shut-off:
1. Install the filter (B) into the handle (A). See
Figure 3.
2. Assembly the shut-off assembly (C) to the
handle (A) and tighten securely.
3. Make sure the valve seat (D) is present in
the end of the shut-off assembly (C).
4. Install the extension (E) onto the end of the
shut-off assembly (C). Tighten the nut
securely.
Install the Nozzle:
1. Install the adjustable nozzle onto the end of
the extension and tighten securely. See
Figure 4.
NOTE: Make sure the o-ring (#171089V) is
present on the inside of the nozzle before
installing onto the extension.
Figure 1. Install Hose
Figure 2. Tighten Hose Nut
Figure 3. Assemble Shut-off & Extension
A. Handle
B. Filter
C. Shut-off Assembly
D. Valve Seat
E. Extension
Figure 4. Install the Nozzle
A. Adjustable Nozzle
B. O-Ring (#171089V)
C. Extension
A
B
C
A
C
D
E
B
3
OPERATING THE SPRAYER
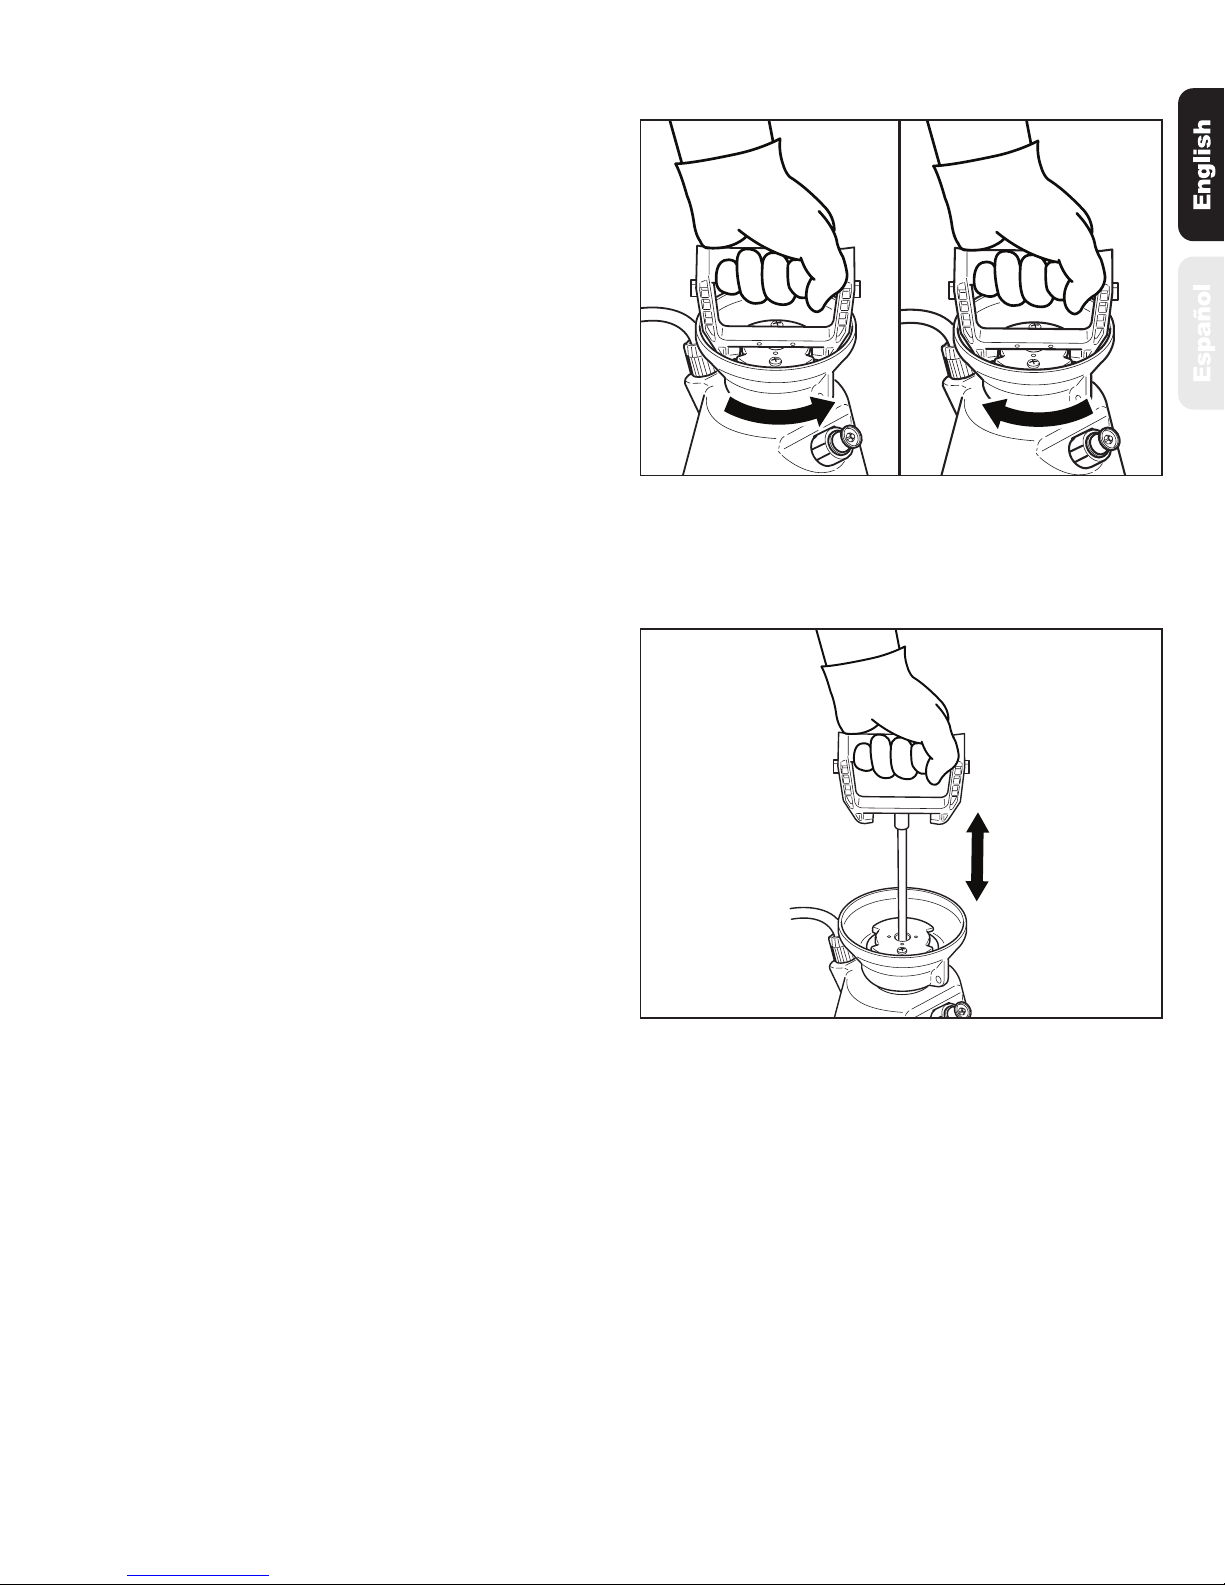
Filling
IMPORTANT: Always make sure the
pressure is released from the tank before
filling or servicing. Pull up on the knob of
the pressure release valve until all the
pressure is released from the tank. Then,
and only then, it is safe to remove pump.
1. Turn the pump handle counterclockwise to
remove the pump. See Figure 5.
2. Fill the tank to the desired level. (Always
refer to chemical manufacturer for proper
mixture).
3. Install the pump into the tank opening and
turn clockwise until tightly sealed against
the tank. See Figure 6.
Pressurizing
1. Make sure shut-off lock is not engaged. (If
shut-off lock is engaged while pressurizing,
the unit will immediately start spraying).
2. Push down on the handle and turn counterclockwise to unlock the handle.
3. Pressurize the sprayer by pumping the
handle in a smooth up and down motion.
See Figure 7.
4. Push down on the handle and turn
clockwise to lock the handle into the pump.
Figure 5.
Remove the Pump
Figure 6.
Install the Pump
Figure 7. Pressurize the Tank
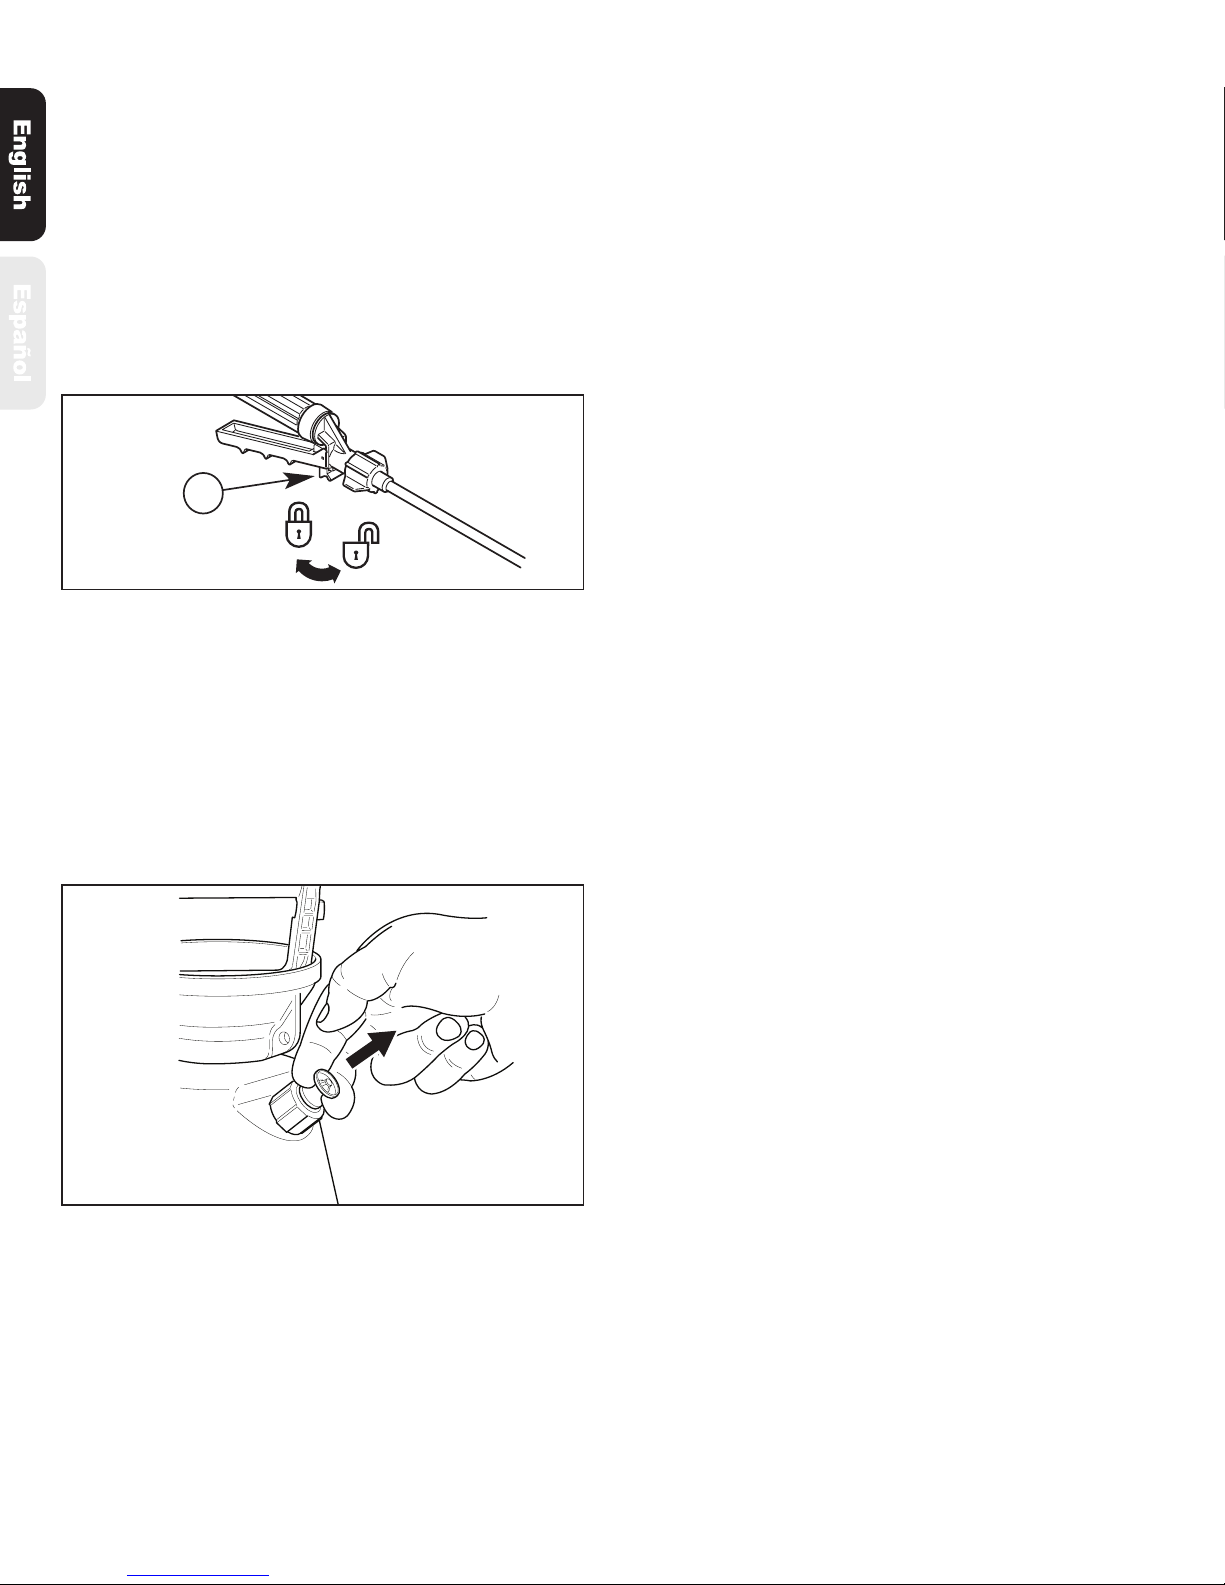
Figure 9. Release Tank Pressure
4
Spraying
1. Direct the nozzle away from you. Squeeze
the shut-off handle to begin spraying.
2. Release the shut-off handle to stop
spraying.
3. For continuous spraying, squeeze the shutoff handle and rotate the lock (A, Figure 8)
towards you. To unlock, rotate the lock
towards the nozzle.
2. Turn the pump handle counterclockwise to
remove the pump.
3. Empty any remaining liquid according to
the product disposal directions.
4. Follow the
Cleaning
instructions.
Cleaning
1. Remove the pump as described in the
Finish
section.
2. Fill the tank with clean tap water. Replace
the pump and tighten securely.
3. Agitate the tank to rinse the chemical from
the tank wall and pump.
4. Remove the pump and empty the contents
into gravel or bare soil.
5. Refill the tank with clean tap water.
6. Make sure the pump is free of dirt or debris
and reinstall into the tank. Tighten securely.
7. Pressurize the tank as described in the
Pressurizing
section.
8. Direct the nozzle away from you and
squeeze the shut-off handle for at least 30
seconds to clean the hose and shut-off.
9. Release pressure as described in the
Finish
section.
10. Remove the pump and empty the contents
into gravel or bare soil.
11. Repeat steps 5 - 10 until thoroughly
cleaned.
Sprayer Storage
1. Sprayer tank should be hung upside down,
with the pump removed.
2. Do not store or leave any solution in the
tank after use.
3. Store in a warm, dry location out of direct
sunlight.
4. Keep the sprayer and all chemicals out of
the reach of children.
Figure 8. Apply and Release Shut-off Lock
A. Shut-off Lock
A
4. Turn the nozzle tip to adjust the spray
pattern.
Finish
1. Pull up on the knob of the pressure release
valve until all the pressure is released from
the tank. See Figure 9.
 Loading...