

Page 1
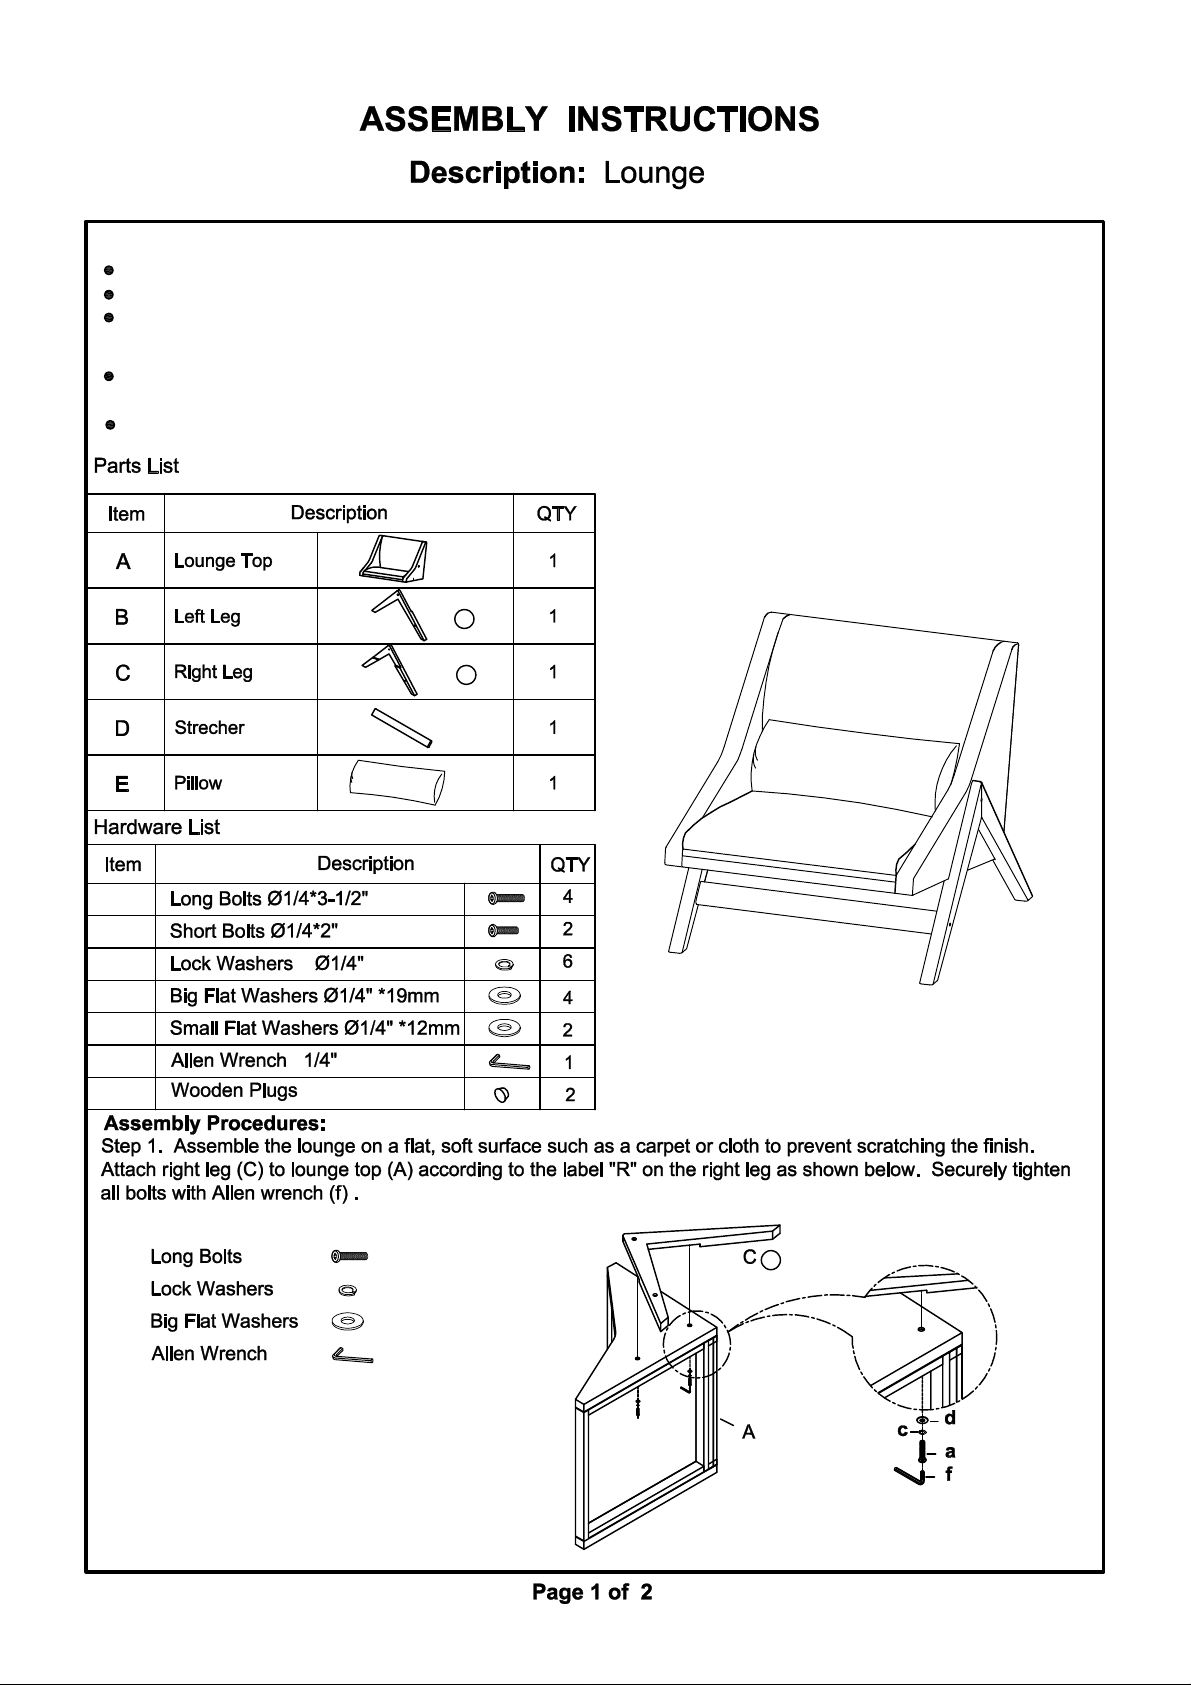
Important safety instructions:
Please carefully read all instructions before assembling the lounge.
For your safety and ease, assembly by two or more adults is recommended.
Keep instructions for future use.
Pre-assembly:
Do not discard any contents until after assembly is complete to avoid accidentally discarding small parts or
hardware.
Remove all parts and hardware from box along with any plastic protective packaging.
L
R
a
b
c
d
e
f
g
(a)x2
(c)x2
(d)x2
(f)x1
R
Page 2
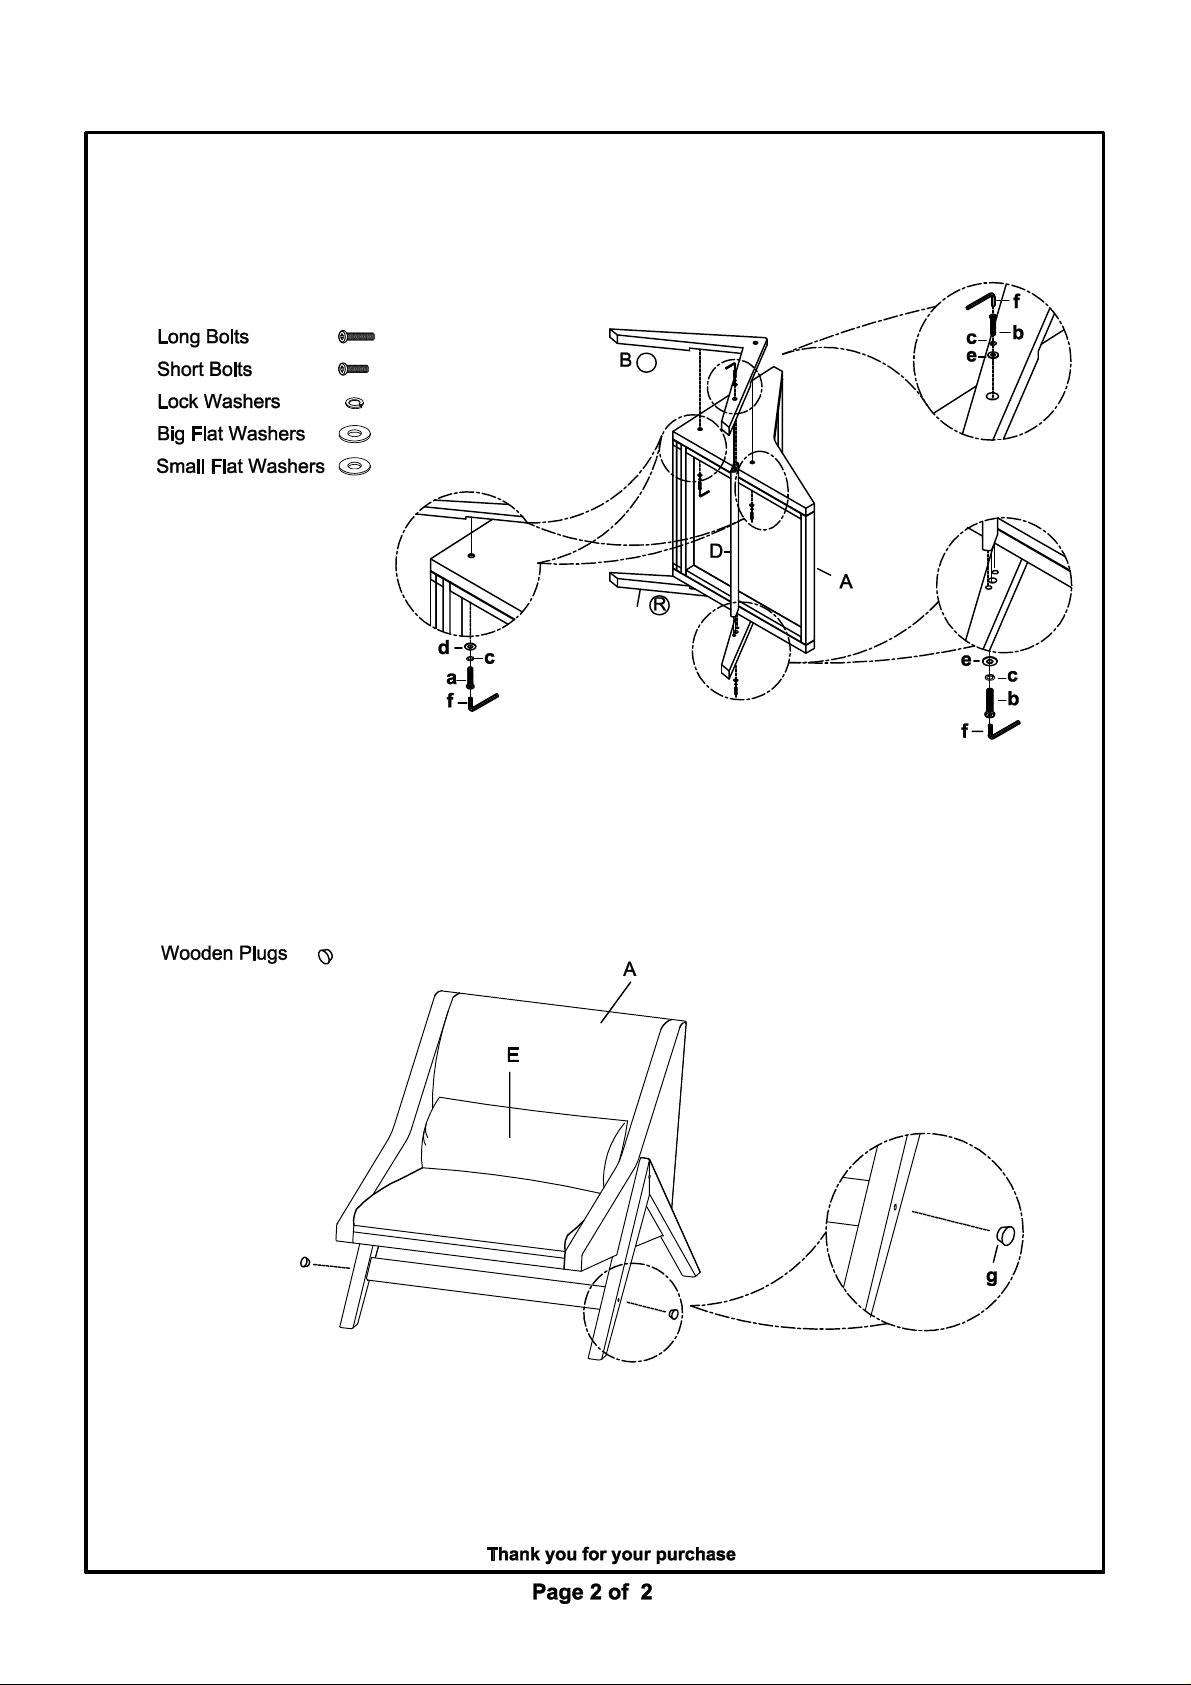
Step 2.
1) Insert stretcher (D) to the right leg (C) according to the label "R" on the right leg.
2) Loosely Attach left leg (B) to lounge top (A) and stretcher (D) according to the label "L" on the left leg (B) as
shown in below. Securely tighten all bolts with Allen wrench (f) .
(a)x2
(b)x2
L
(c)x4
(d)x2
(e)x2
C
Step 3.
1) T
urn the assembled lounge to an upright position.
do not over tighten the bolts.
2) Attach wooden plugs (g) to each bolt hole, tighten with rubber hammer to knock the wooden plug till its tighten.
Note: use a soft cloth between the wooden plug and hammer to prevent damage to wooden plug finish.
3) Assembly is completed. Put the pillow (E) on the assembled lounge.
Securely tighten all the bolts and with Allen wrench (f), but
(g)x2
ADDITIONAL NOTE ABOUT SAFETY: BOLTS MAY LOOSEN DURING NORMAL EVERYDAY USE. THEY SHOULD BE
PERIODICALLY INSPECTED AND RE-TIGHTENED TO PREVENT DAMAGE OR INJURY. ALWAYS CHECK TO BE SURE THAT ALL
HARDWARE IS KEPT TIGHTENED.
 Loading...