

Page 1
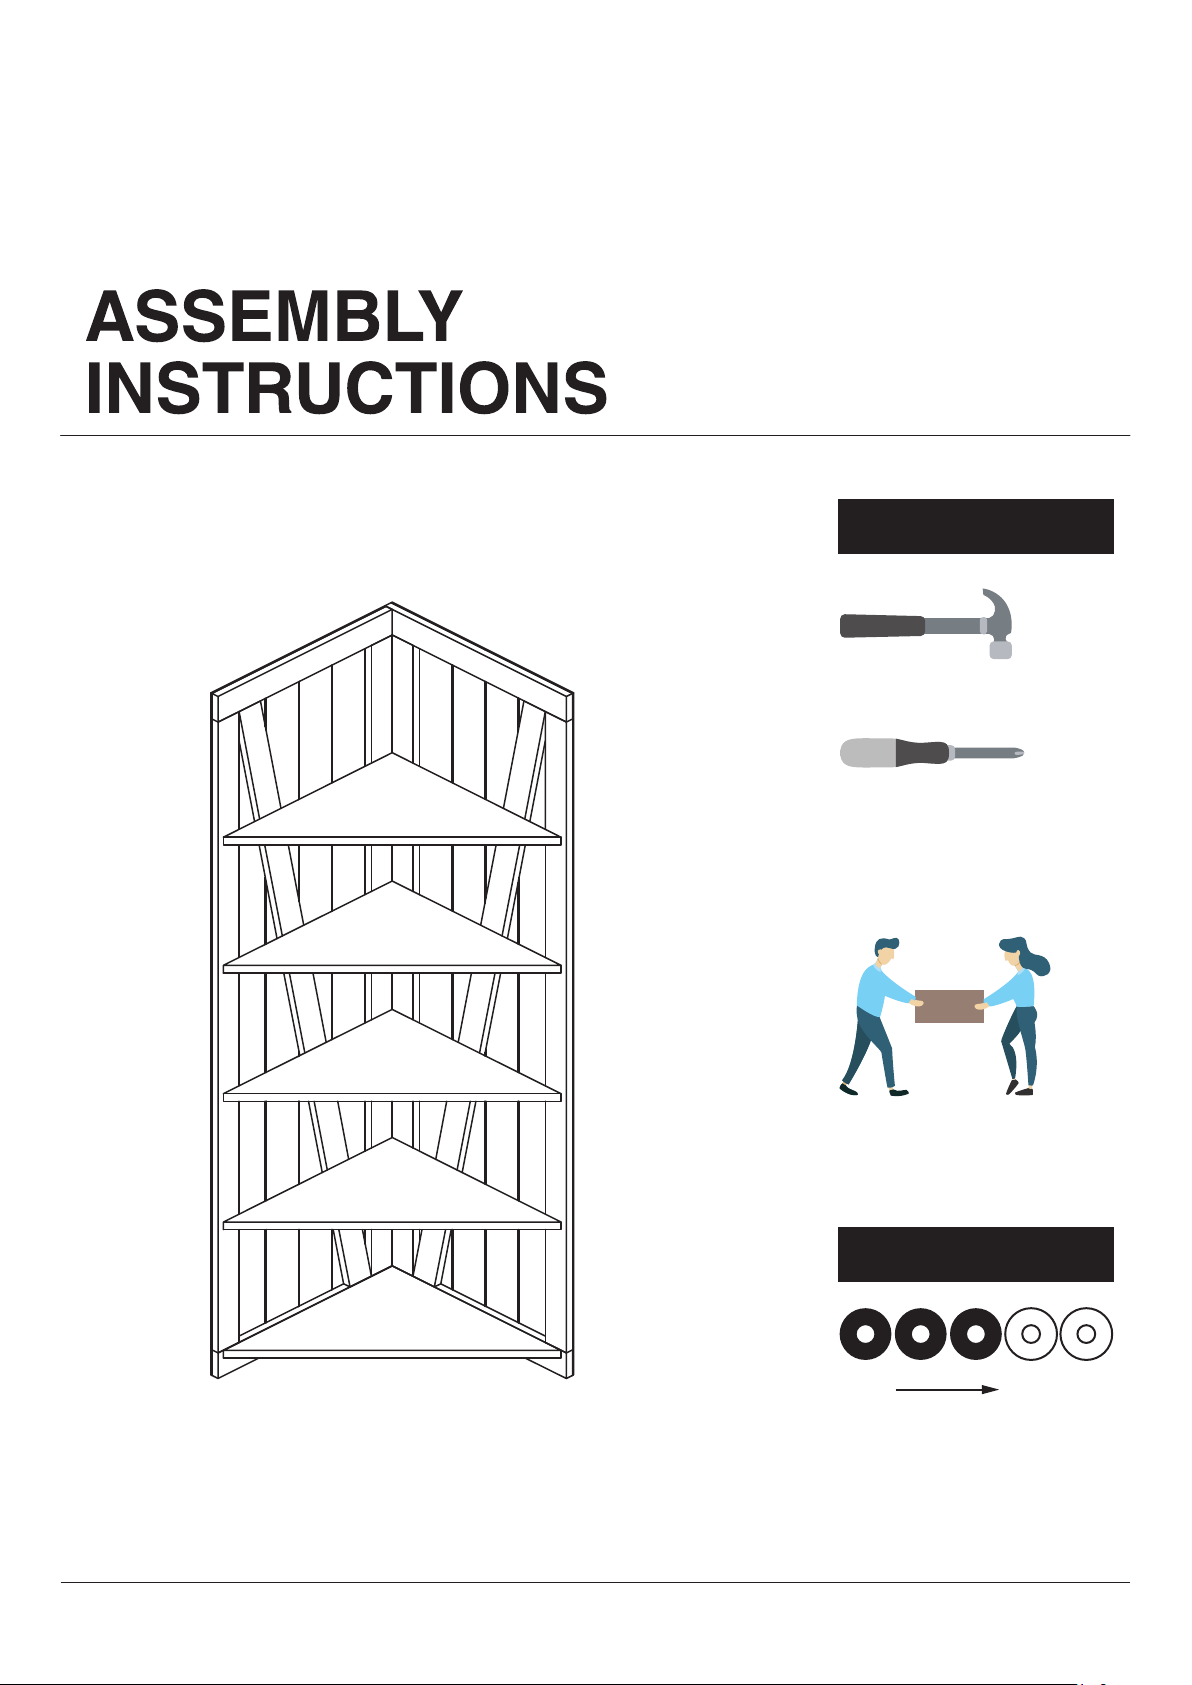
TOOLS REQUIRED
Hammer
(Not Included)
Philips
Screwdriver
(Not Included)
1 / 10
2 - Persons
Recommended
ASSEMBLY RATING
EASY DIFFICULT
The Assembly Rating is a
5-point system showing the
level of effort needed to
assemble a specific product.
Page 2

Thank you for your purchase!
We hope you enjoy this new addition to your home for many years to come.
Our commitment to providing quality products does not simply end when you purchase
our product. We fully stand behind our products from start to finish. To help expedite
our service, please have these assembly instructions readily available, along with your
order receipt.
CHECK
BEFORE STARTING
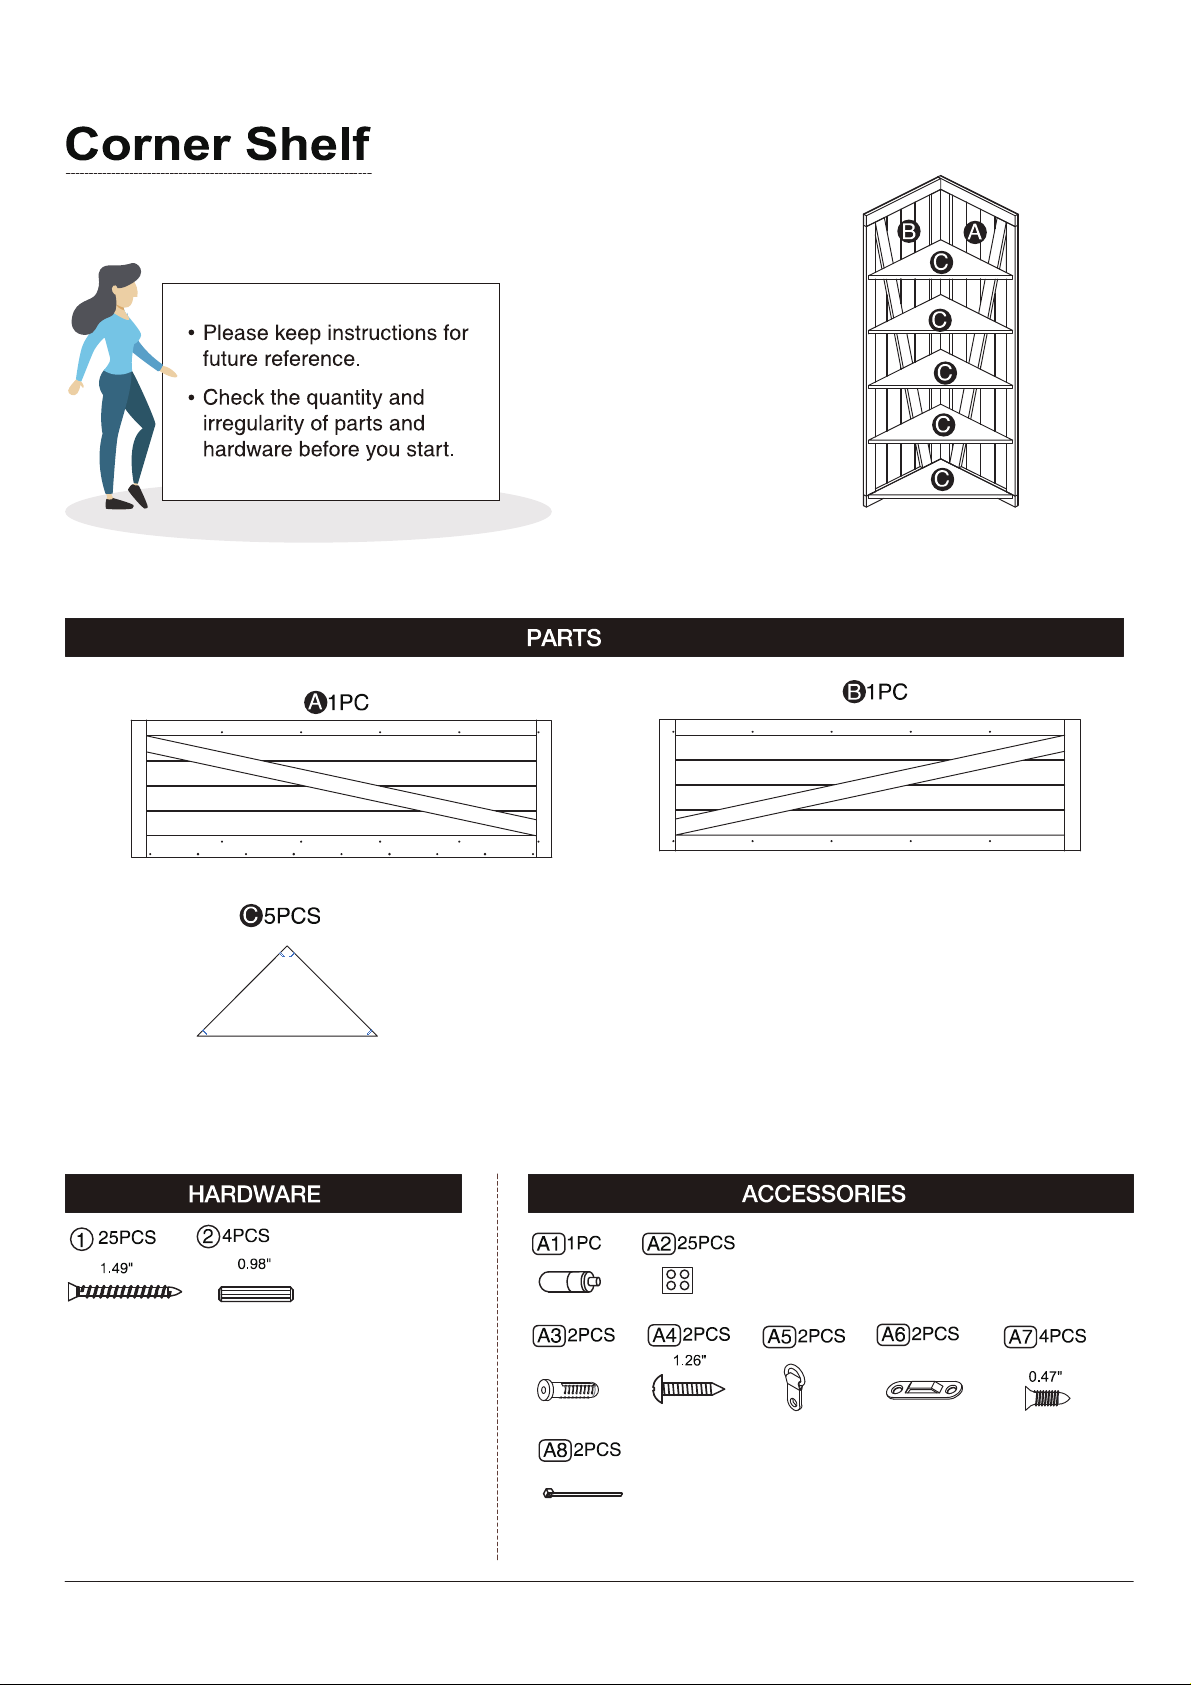
Are you missing anything?
Double-check all parts, hardware and
accessories listed on Page 6 are
accounted for.
Should we send any replacements?
Are there any irregularities or flaws in the
parts? We can send replacements!
Check out our Quick Tips!
We recommend reviewing the pre-assembly
handouts. Even experts need a refresher now and
then!
Prep Time!
Please review the assembly instructions and all
diagrams prior to assembling. Arrange parts as
recommended on Page 7 and group identical
hardware together to make assembling easier.
2 / 10
Page 3
PRE ASSEMBLY
INTRODUCTION
We understand building ready-to-assemble furniture can be a challenging
experience for some. To help avoid confusion, we have provided some helpful
tips that may speed up the process.
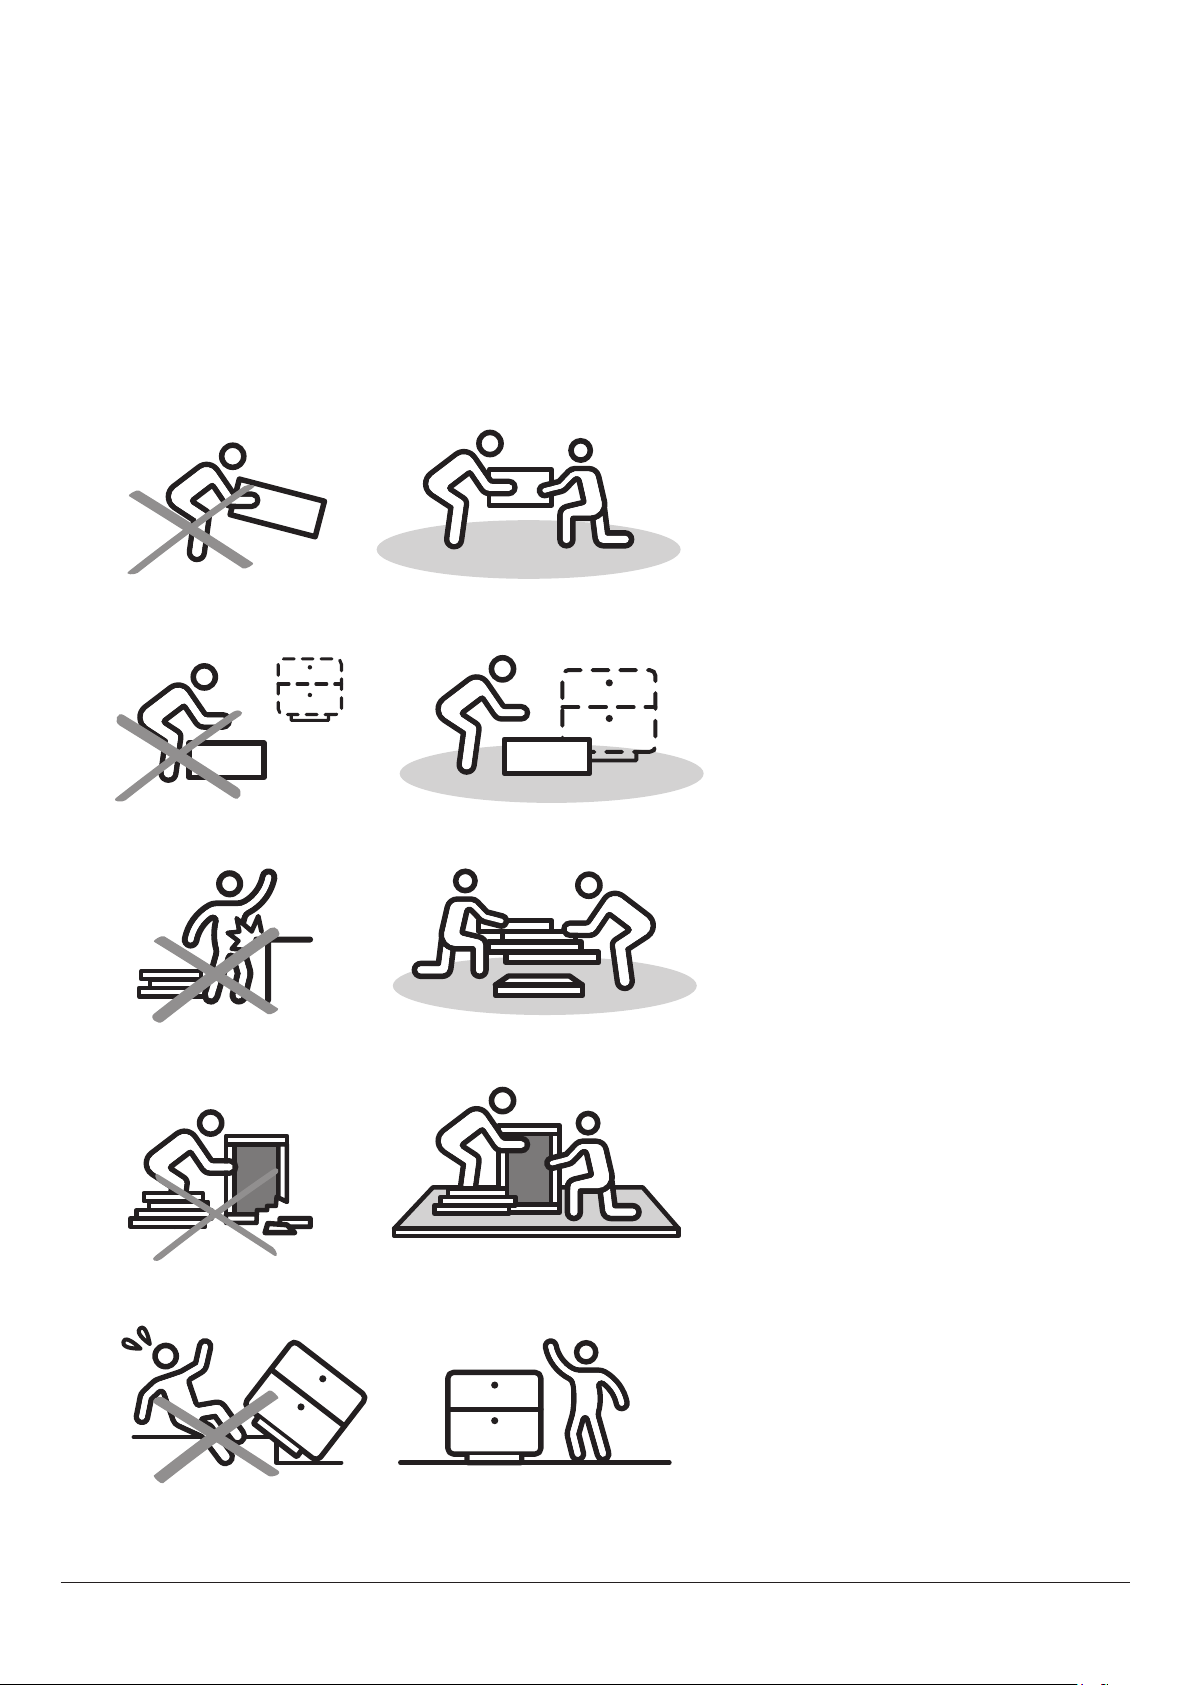
Teamwork
ALWAYS have at least two people
to help with transporting and
assembling the product to avoid
potential injury and/or damage.
Suitable Location
Assembling near the area of the
intended location is highly
recommended.
Sufficient Space
Make sure you have enough
space to move around during the
assembly.
Avoid Scratches
Use cardboard, blankets or a
carpeted area while assembling
furniture to prevent scratches.
3 / 10
Flat Surface
Make sure the furniture rests on
a flat and level surface with each
leg evenly touching the floor.
Page 4
ASSEMBLY
AND
CARE ADVICE
FAILURE TO FOLLOW THE GUIDELINES BELOW MAY
RESULT IN INJURY AND/OR PROPERTY DAMAGE.
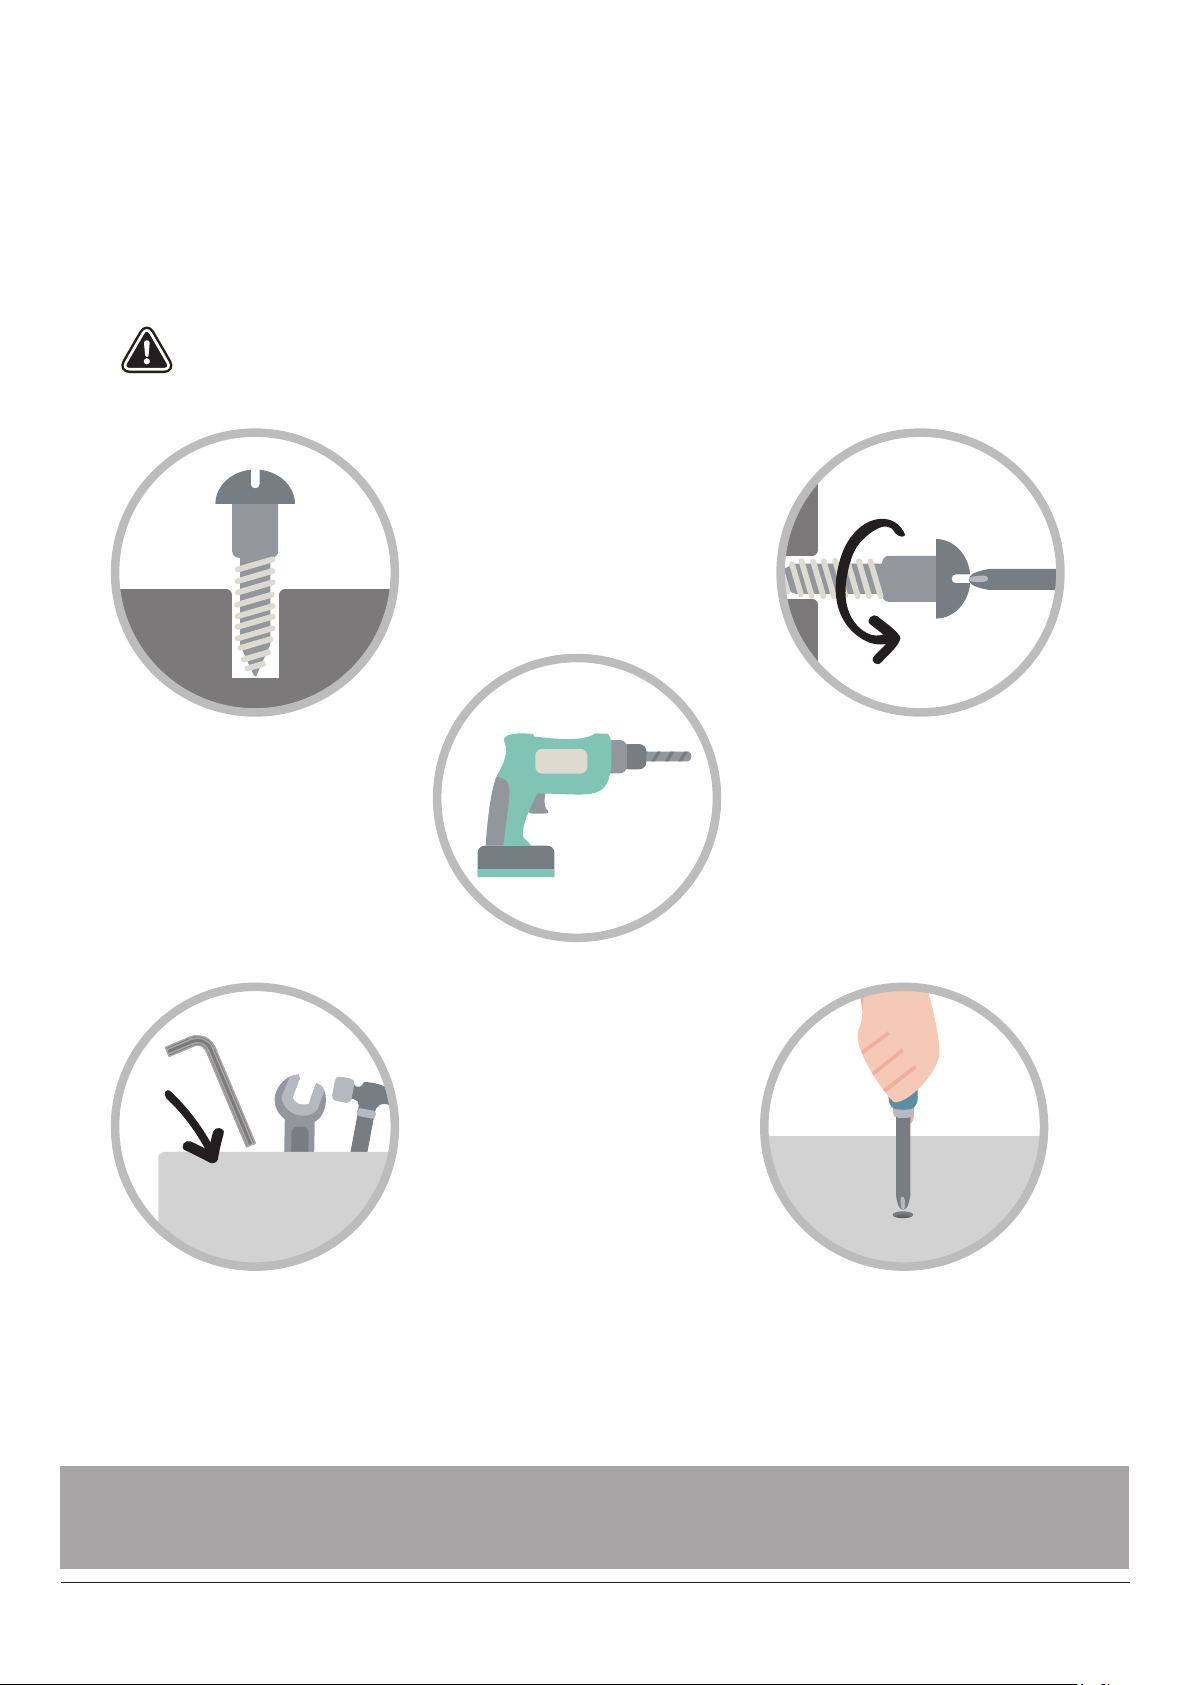
Position each part correctly
and insert screws or bolts into
their respective holes.
Save the instructions and store
any supplied tools for later
maintenance.
Use the appropriate hand tools
or power tools for assembly.
Select steps, such as tightening
screws and/or bolts, m
hand tools to avoid causing
damage during assembly.
ay require
Turn clockwise to tighten and
only tighten when step is
completed or when instructed
to do so.
After two weeks, check and
tighten any loose hardware and
repeat again every six months
thereafter.
IT IS THE USER'S RESPONSIBILITY TO MAINTAIN THE FURNITURE. THE HARDWARE MAY LOOSEN
OVER TIME AND MAY CAUSE THE FURNITURE TO BE WOBBLY AND UNABLE TO SUPPORT ITS
INTENDED WEIGHT CAPACITY. THIS MAY LEAD TO COLLAPSE
4 / 10
AND MAY CAUSE SERIOUS INJURY.
Page 5
CAM LOCK FASTENER
ASSEMBLY
INSTRUCTIONS
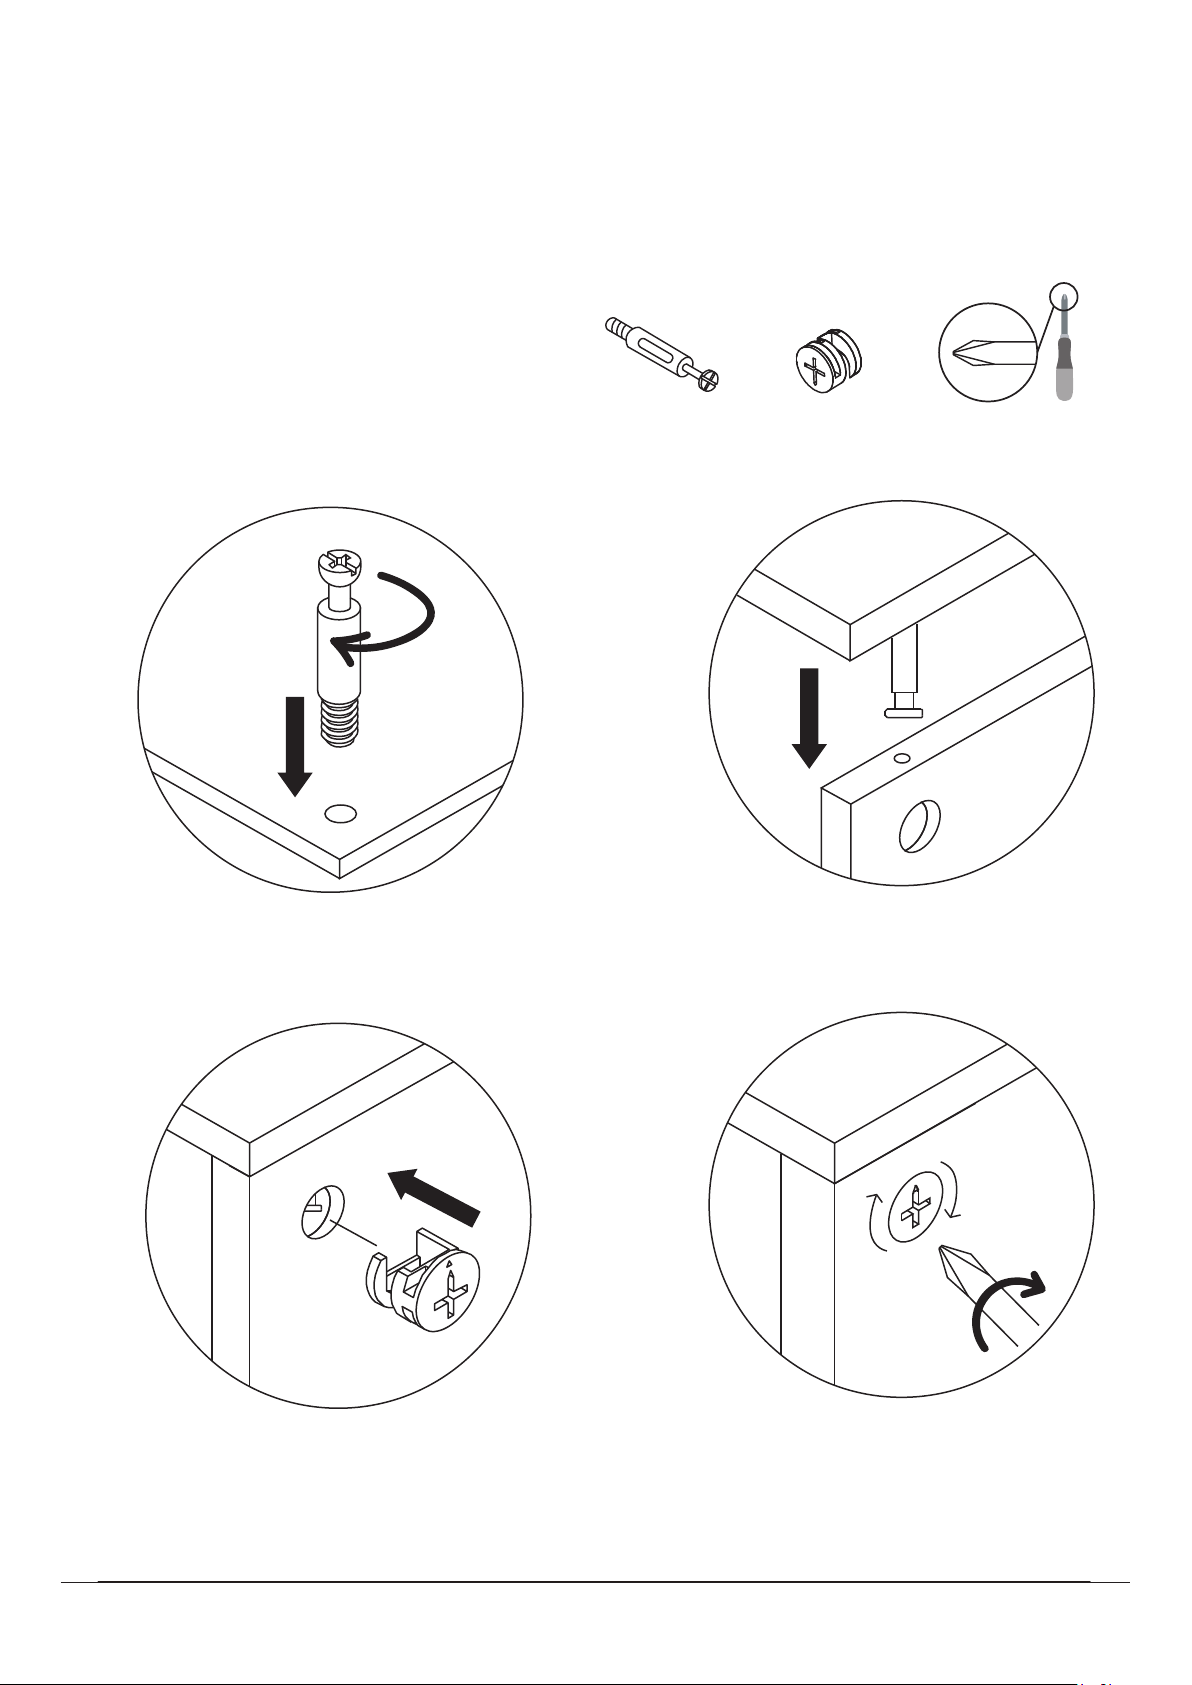
Note :
Every cam lock bolt must have a cam
lock connector in order to fasten the
parts together.
cam bolt
cam lock
screwdriver
1
Screw the cam
bolt into panel.
3
Align the cam lock with its side opening
(or arrow) pointing to cam bolt.
2
Insert the cam bolt into the
bolt hole of joint panel.
4
Turn the cam lock clockwise gently
until it will not turn any more.
5 / 10
Page 6
6 / 10
Page 7
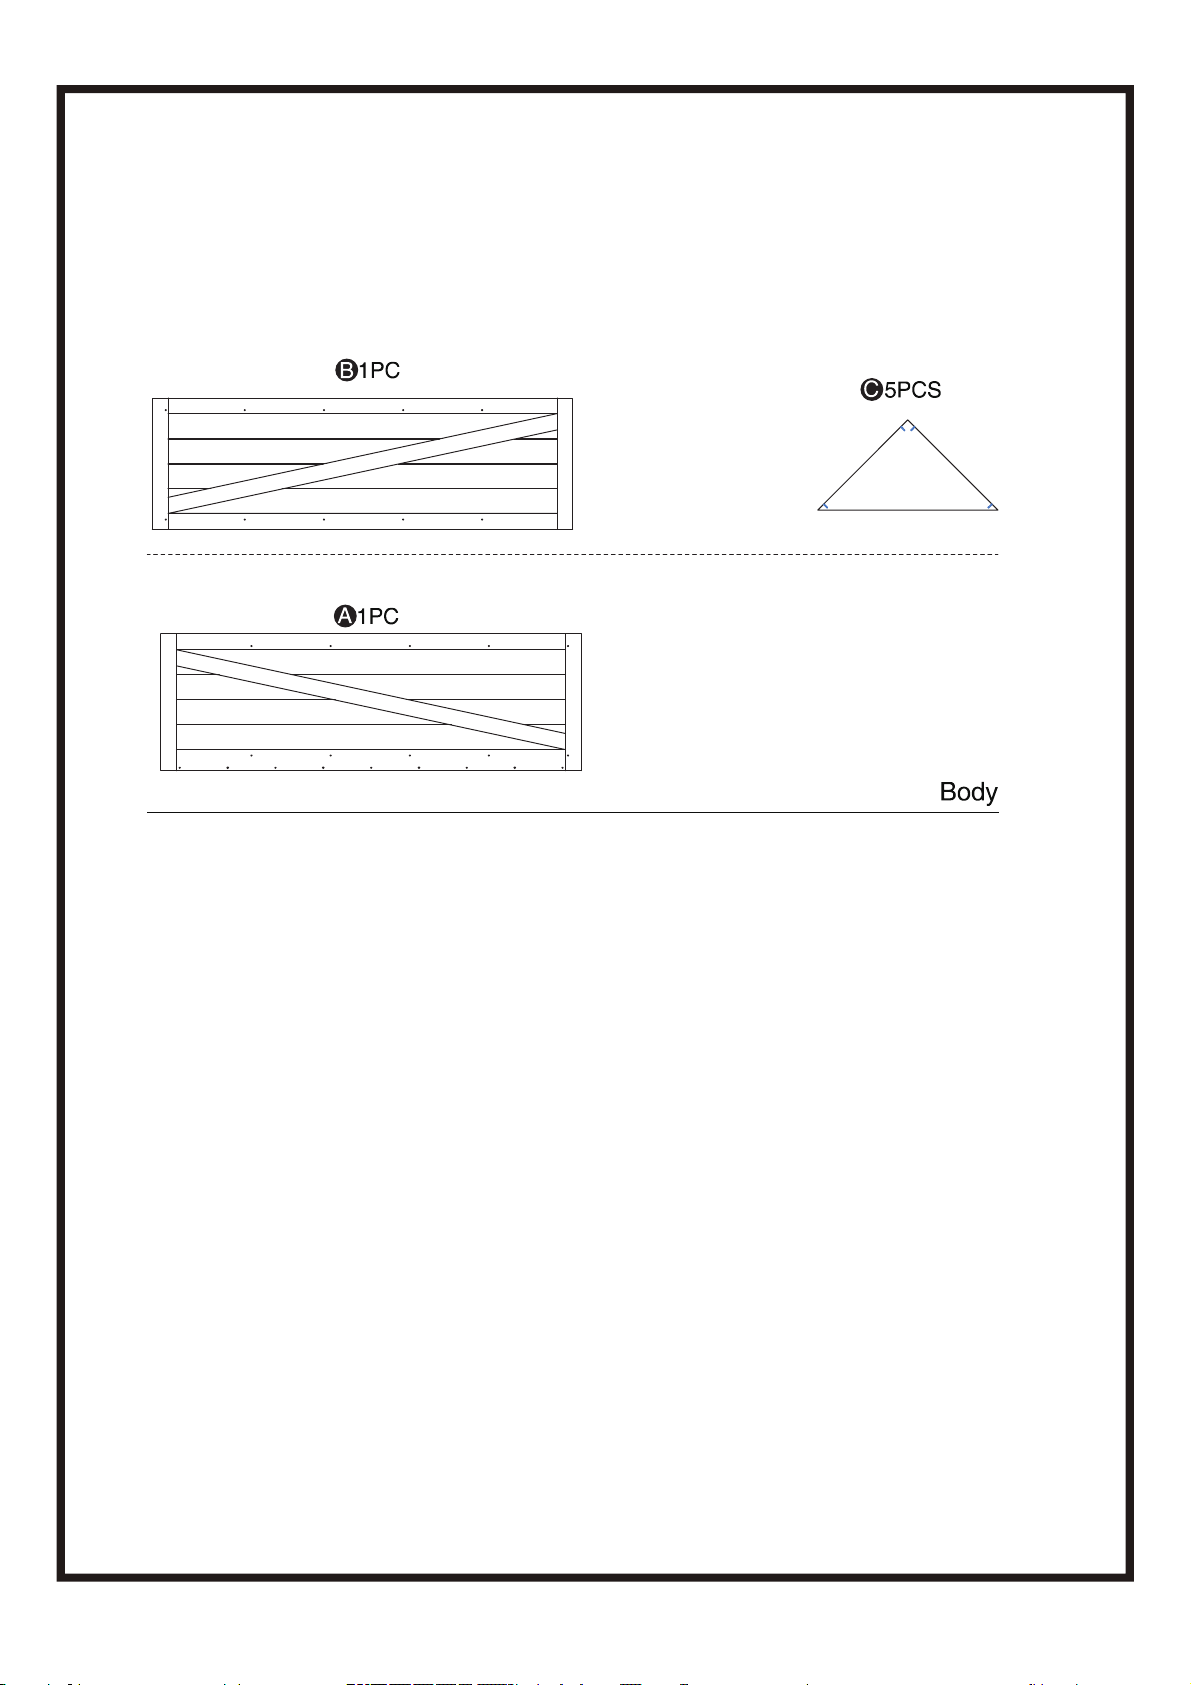
GET READY
Please group boards as below.
7 / 10
Page 8
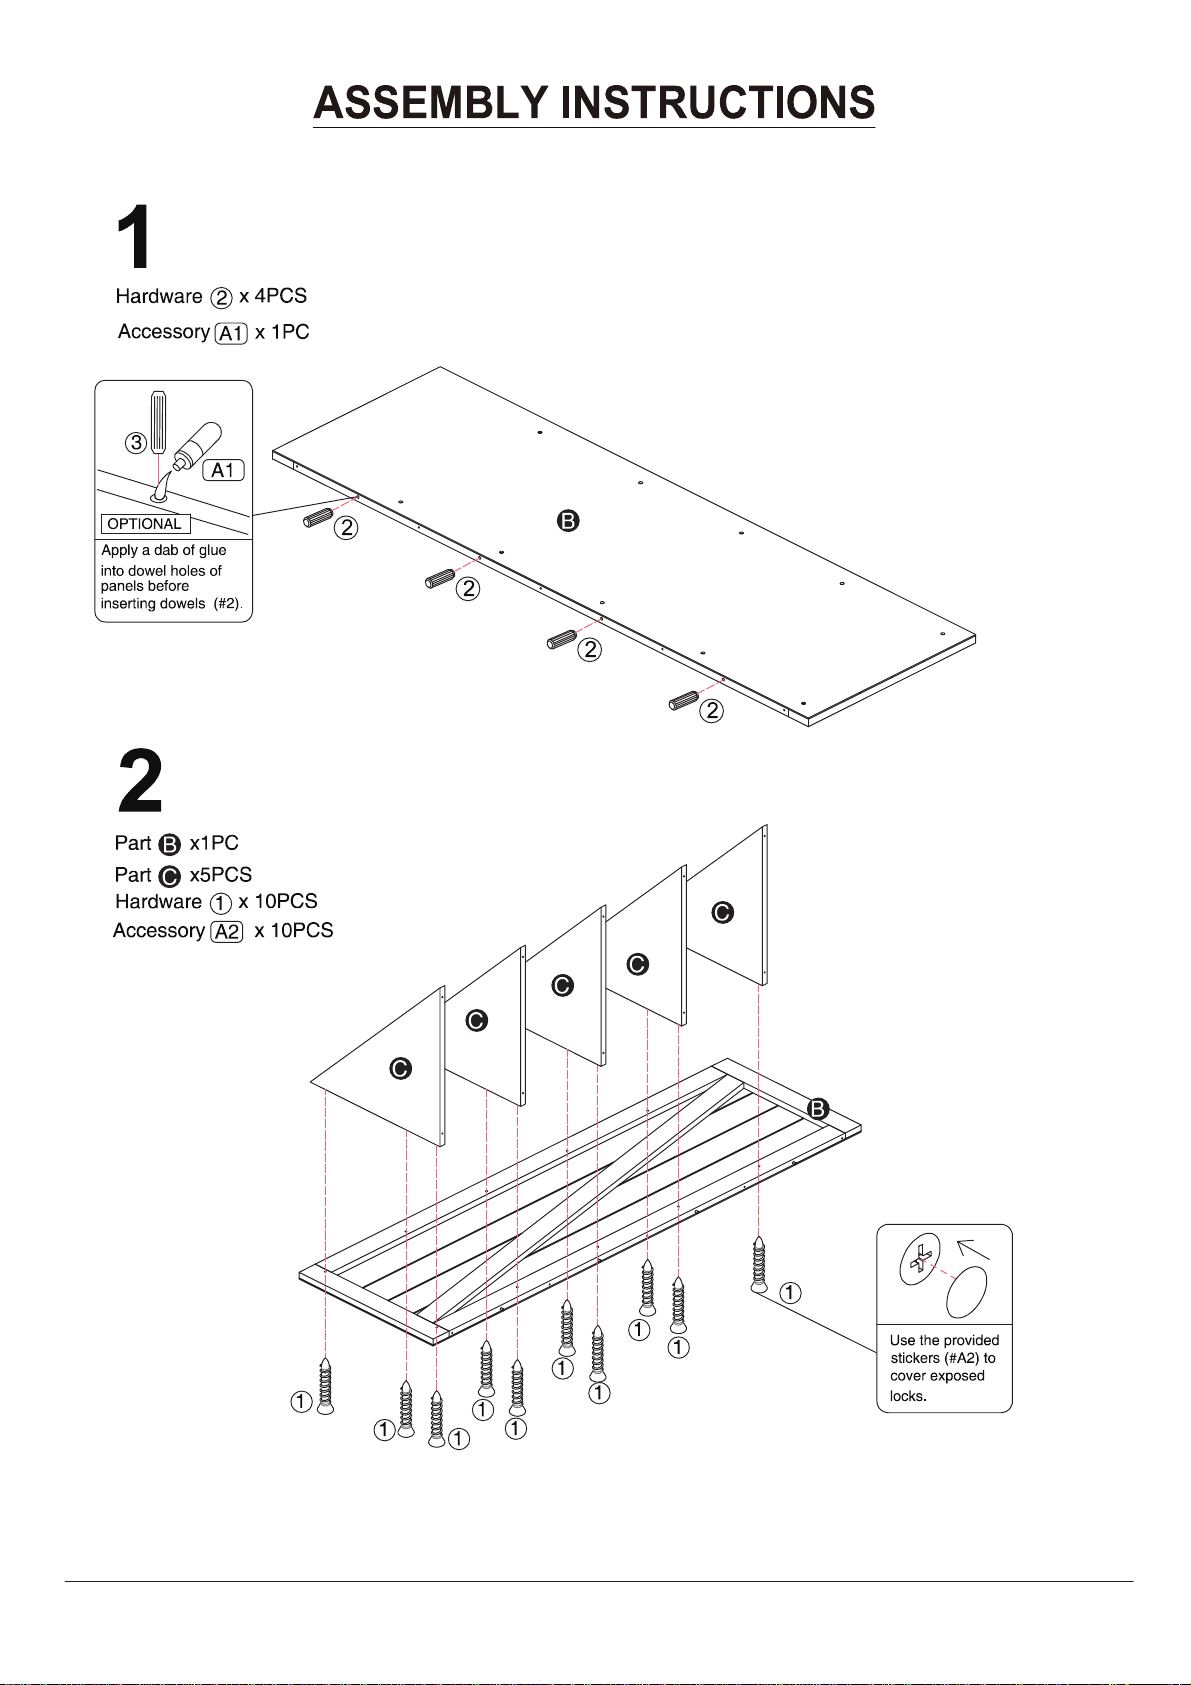
screws.
8 / 10
Page 9
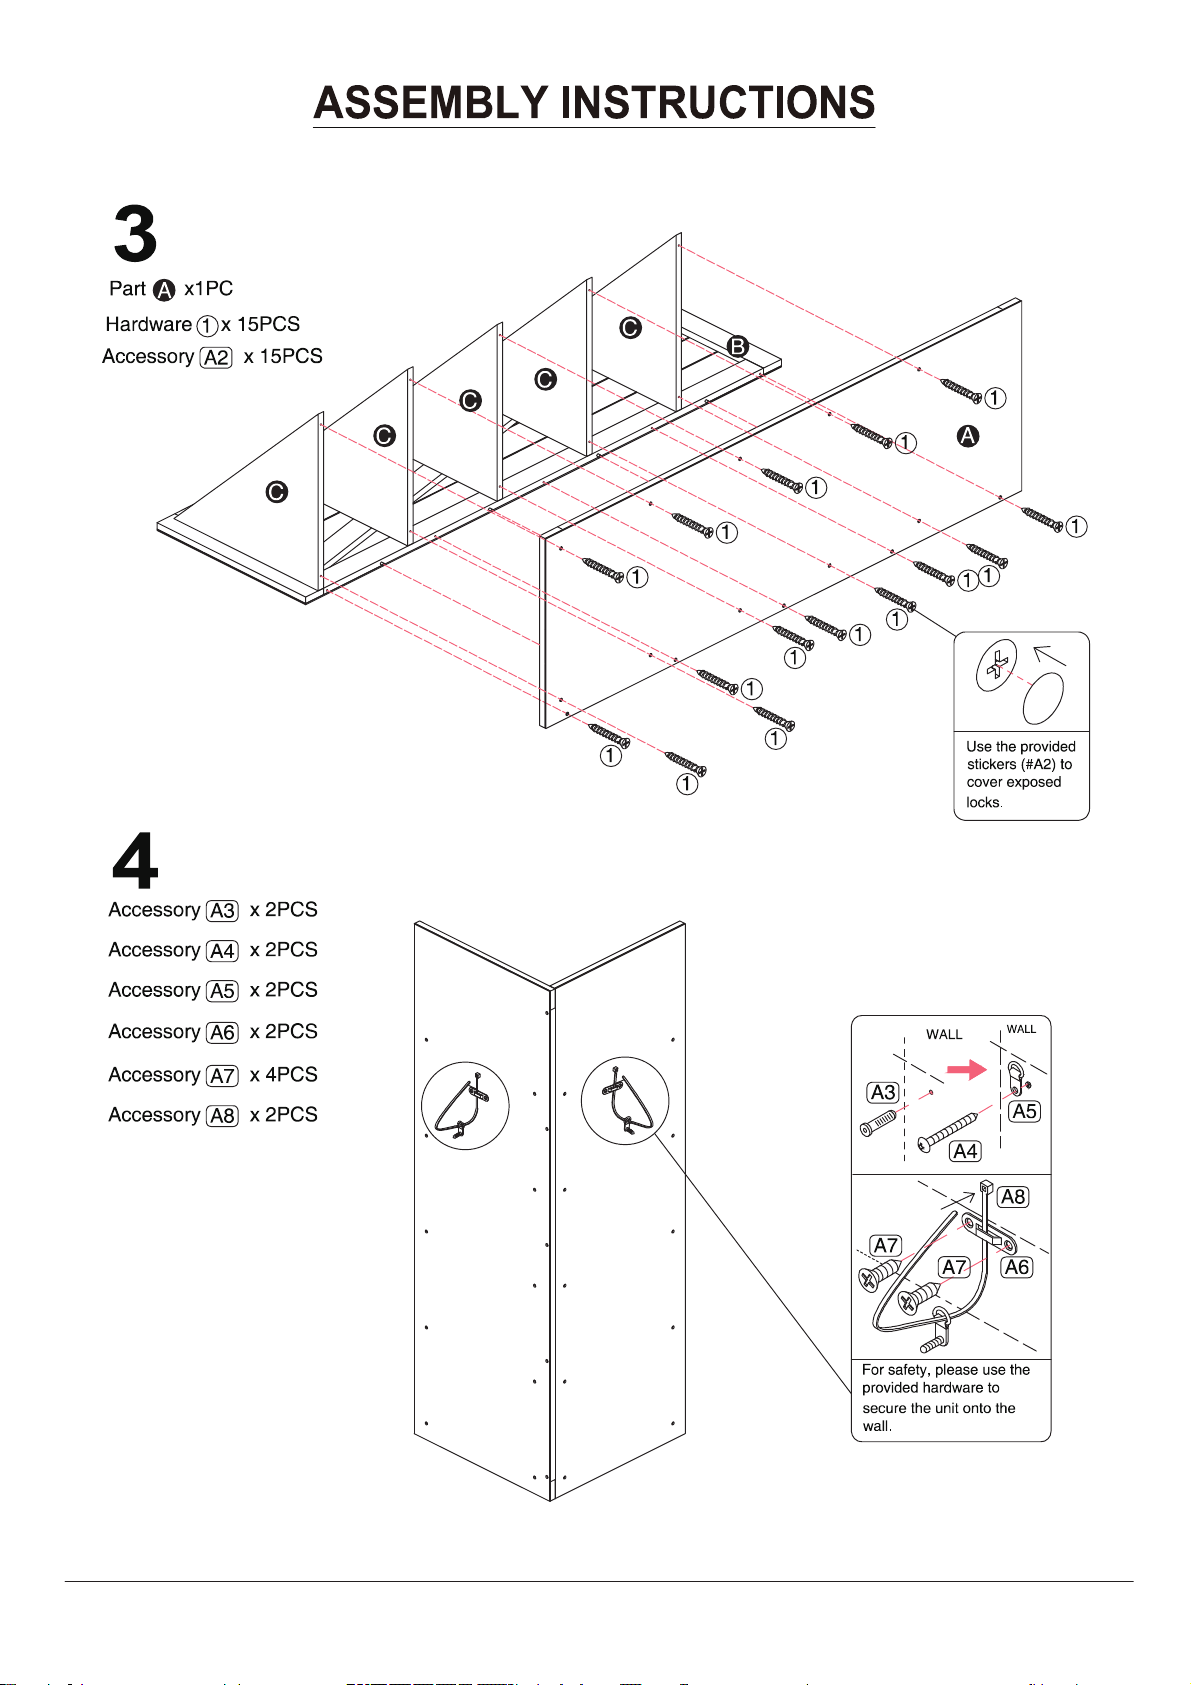
screws.
9 / 10
Page 10
10 / 10
 Loading...