

Page 1
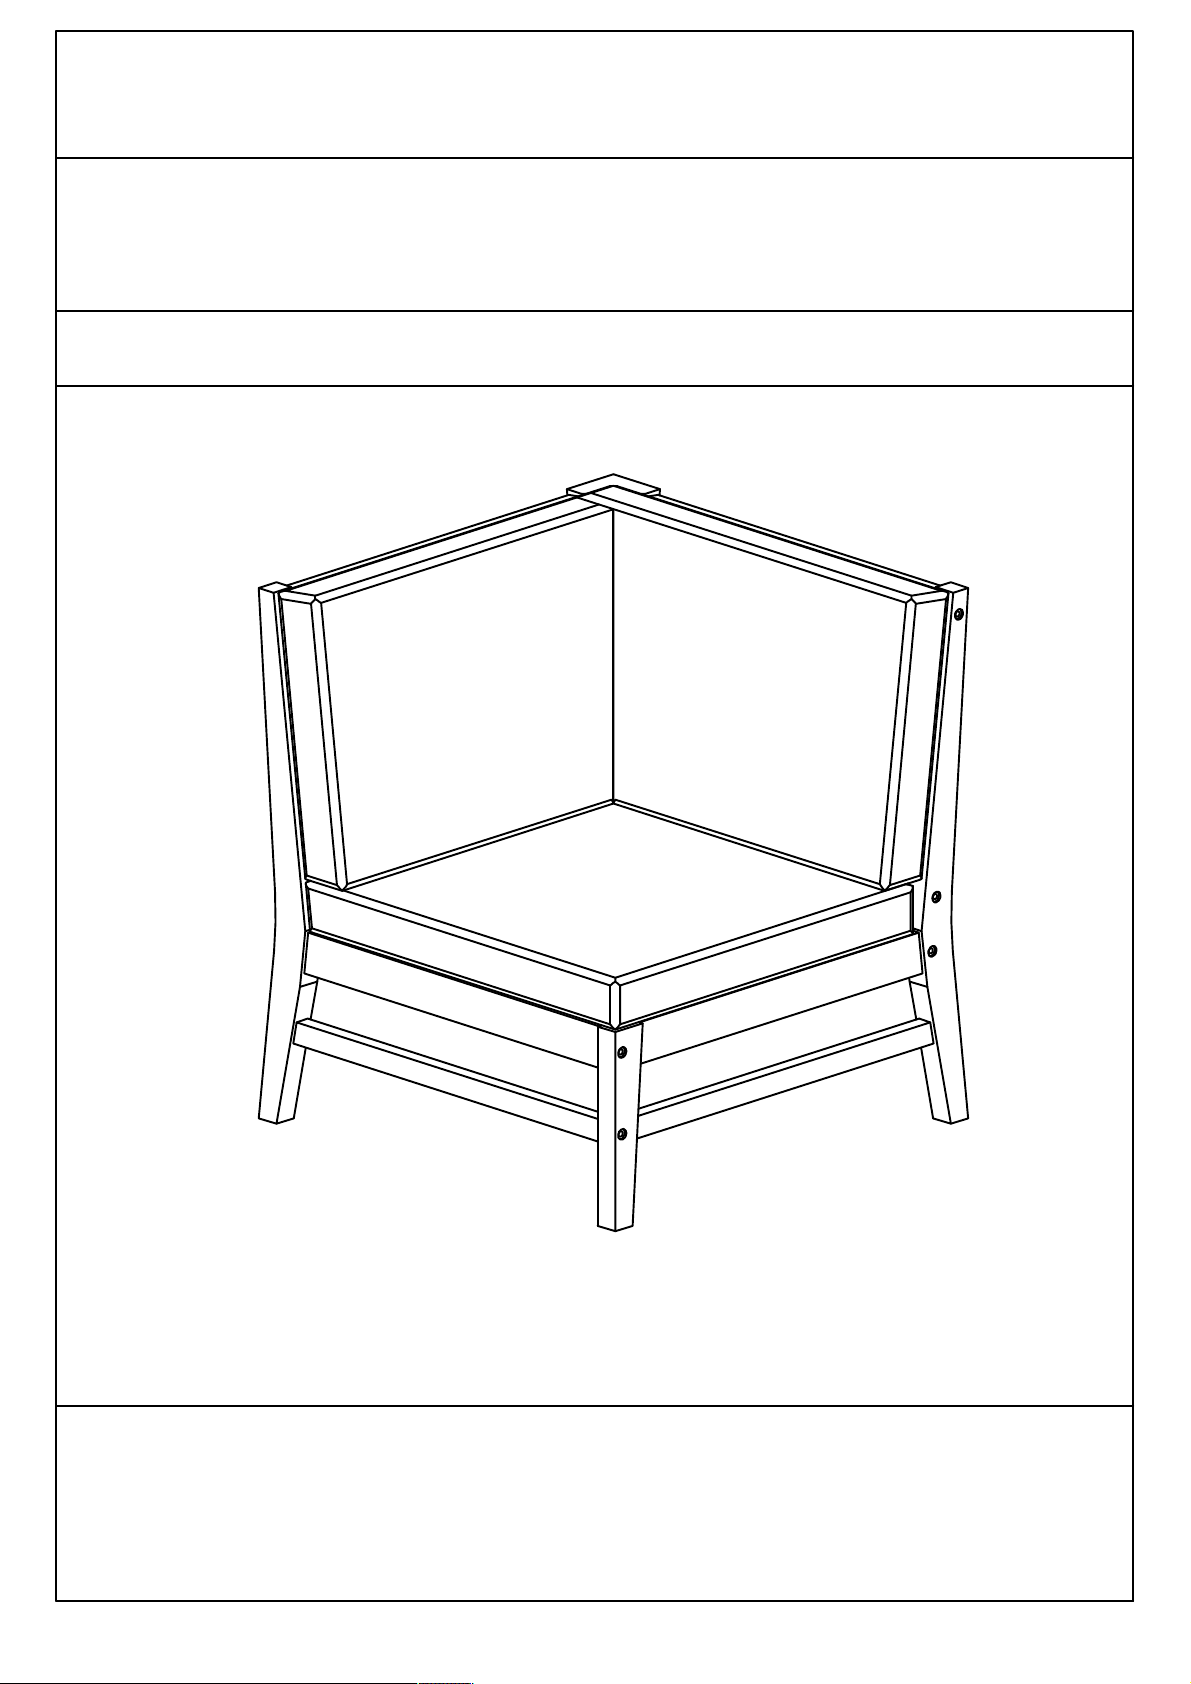
CHAIR
Assembly Instructions
Assembly Instructions
CAUTION: You must read this before you proceed
.
CAUTION : This Chair is NOT a TOY.
Keep your child / children at bay in the process of assembly.
For turning the Chair and to prevent damage to the Chair, 02 persons may be needed
to execute this action.
1 of 10
Page 2
Label
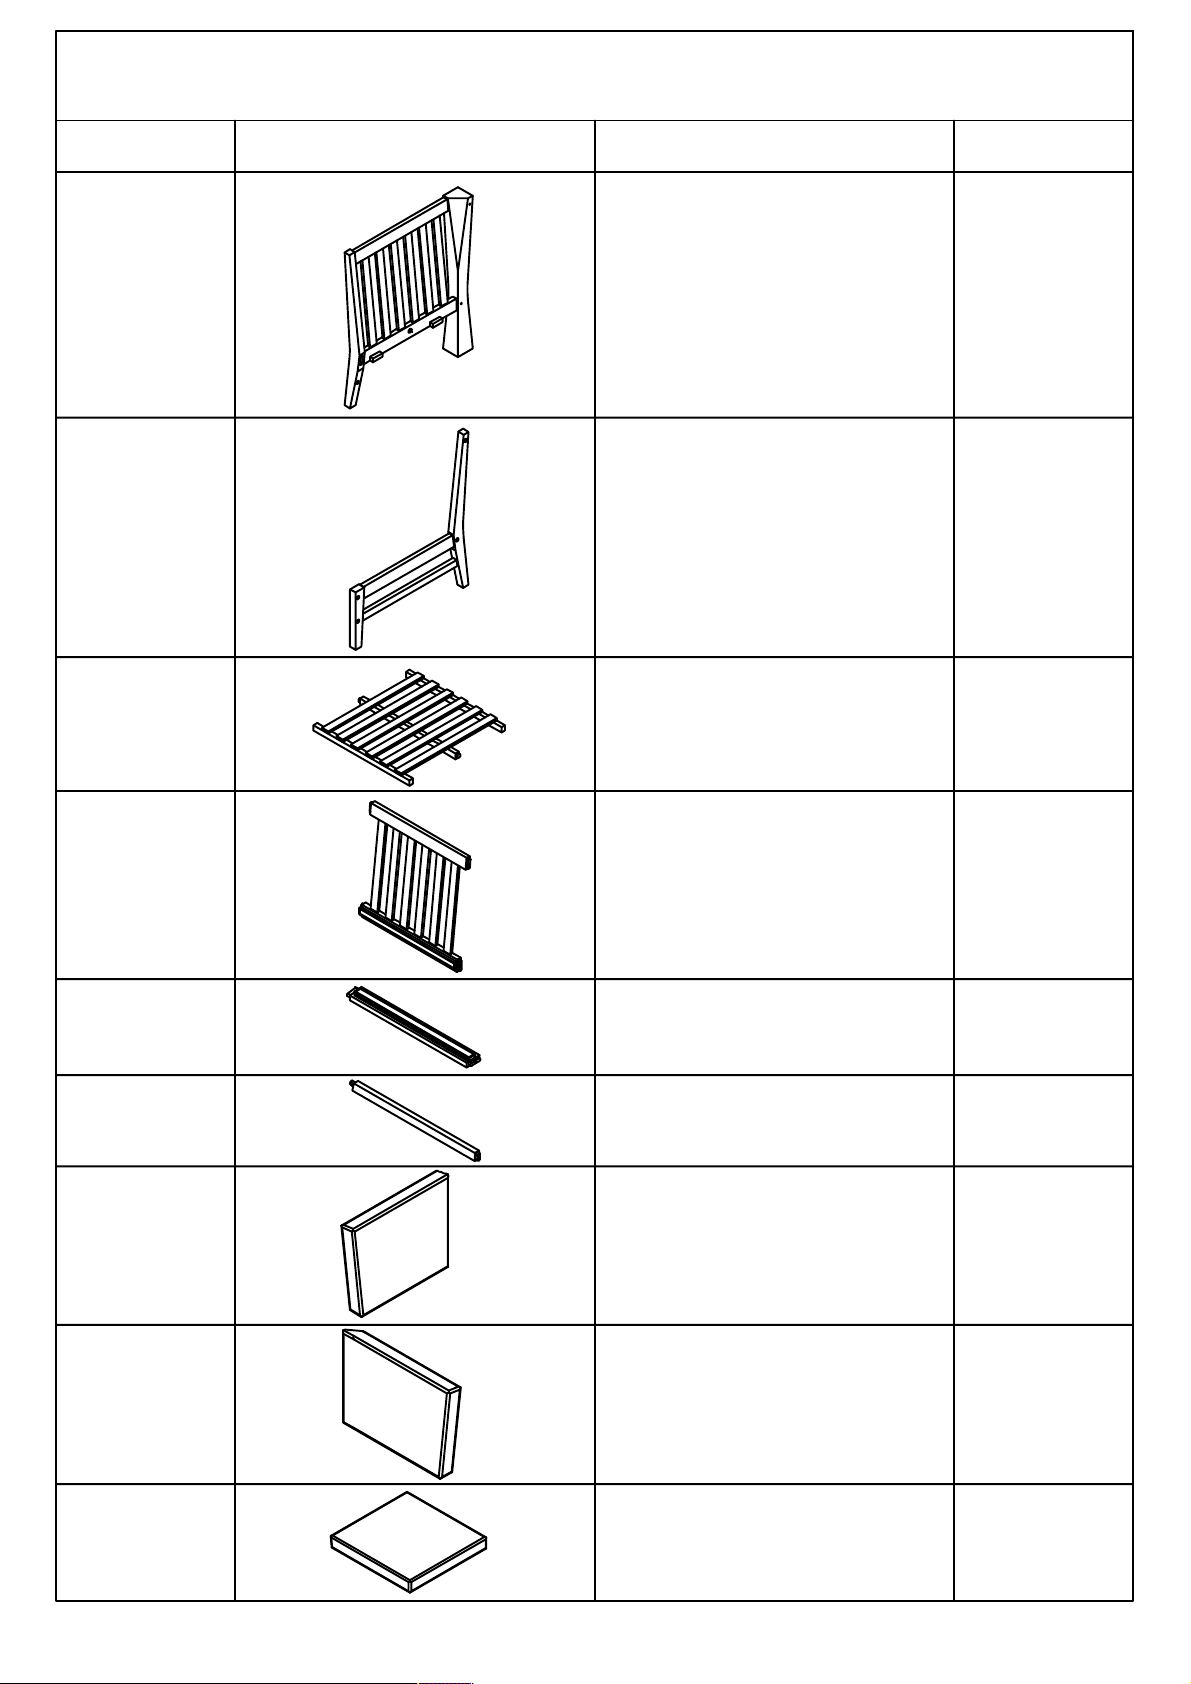
Parts List
Picture
Description Qty
Left Leg Panel
A
B
C
D
With Pre-installed
Leveller
Rigth Leg Panel
With Pre-installed
Leveller
Seat Panel
Backrest Panel
1
1
1
1
E
F
G
H
I
Seat Support Bar
Leg Support Bar
Small Backrest
Cushion
Big Backrest
Cushion
Seat Cushion
1
1
1
1
1
2 of 10
Page 3
Lapel
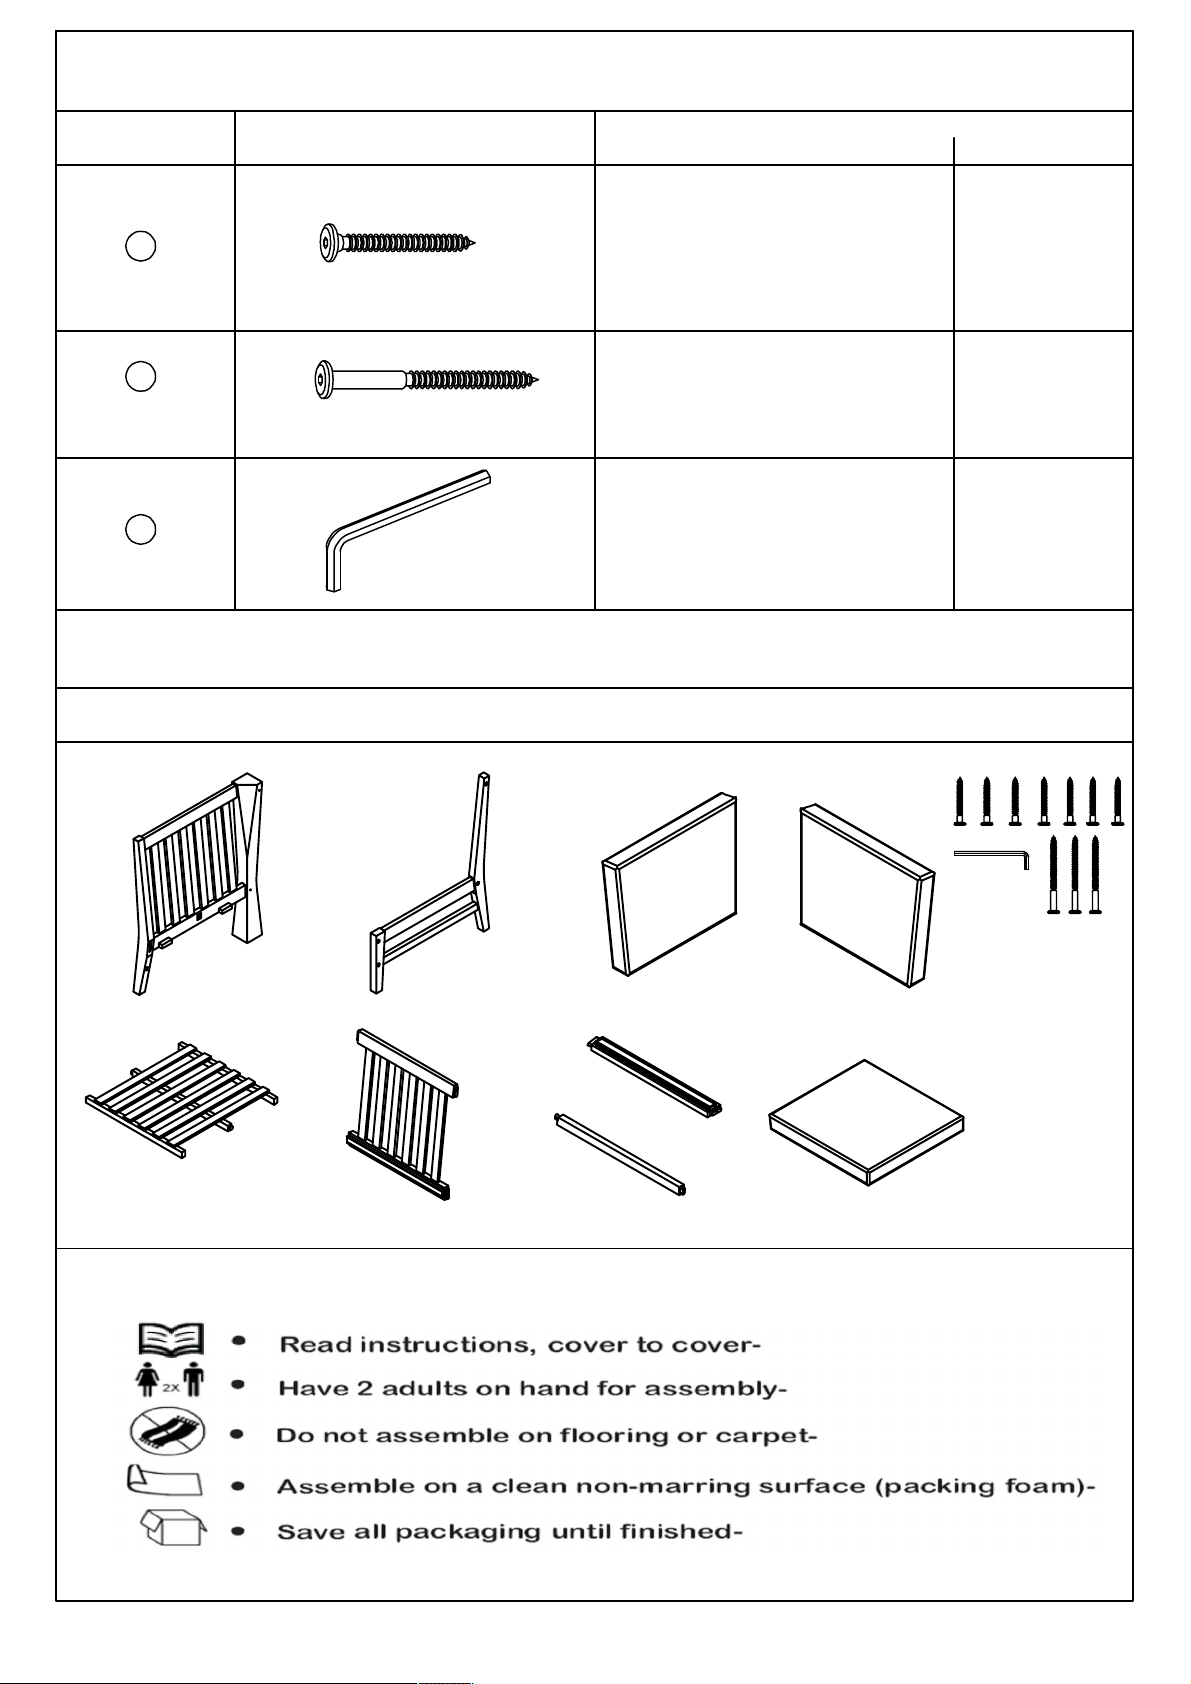
Hardware
Picture
Description Qty
1
2
3
Before Beginning Assembly:
Short Screw
Long Screw
Allen Key
(M7*70mm)
(M7*120mm)
7
3
1
3 of 10
Page 4
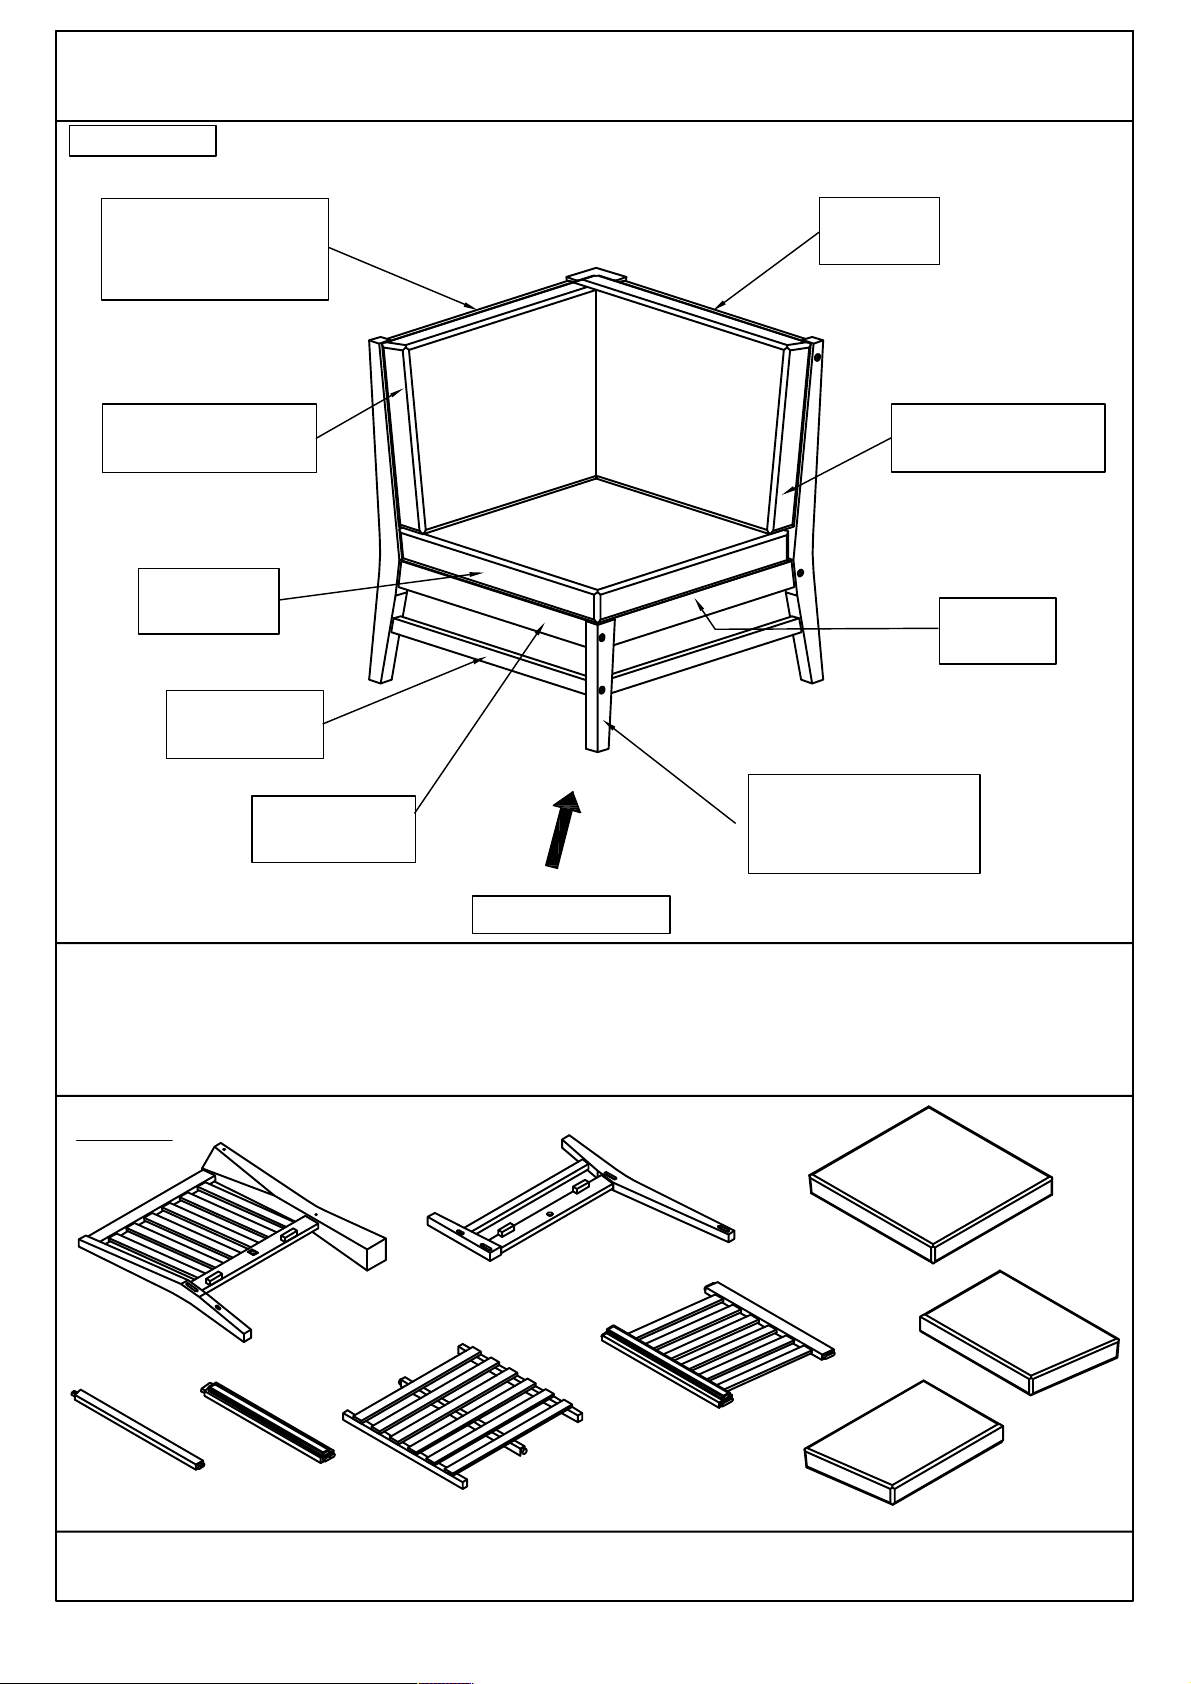
OVERVIEW
Assembly Steps
Left Leg Panel
With Pre-installed
Leveller(A)
Small Backrest
Cushion (G)
Seat
Cushion(I)
Leg Support
Bar(F)
Seat Support
Bar(E)
Backrest
Panel (D)
Big Backrest
Cushion (H)
Seat
Panel(C)
Right Leg Panel
With Pre-installed
Leveller(B)
FRONT FACING
This Chair has multiple parts and may require up to 30 minutes to assemble.To give
you an overview of the Chair parts, the above picture is to help you put the various
parts into perspective. Please read through the instructions below to familiarise
yourself with the parts and steps before assembly.
Step 1
Unpack and place all parts on a clean, non-marring surface.
4 of 10
Page 5
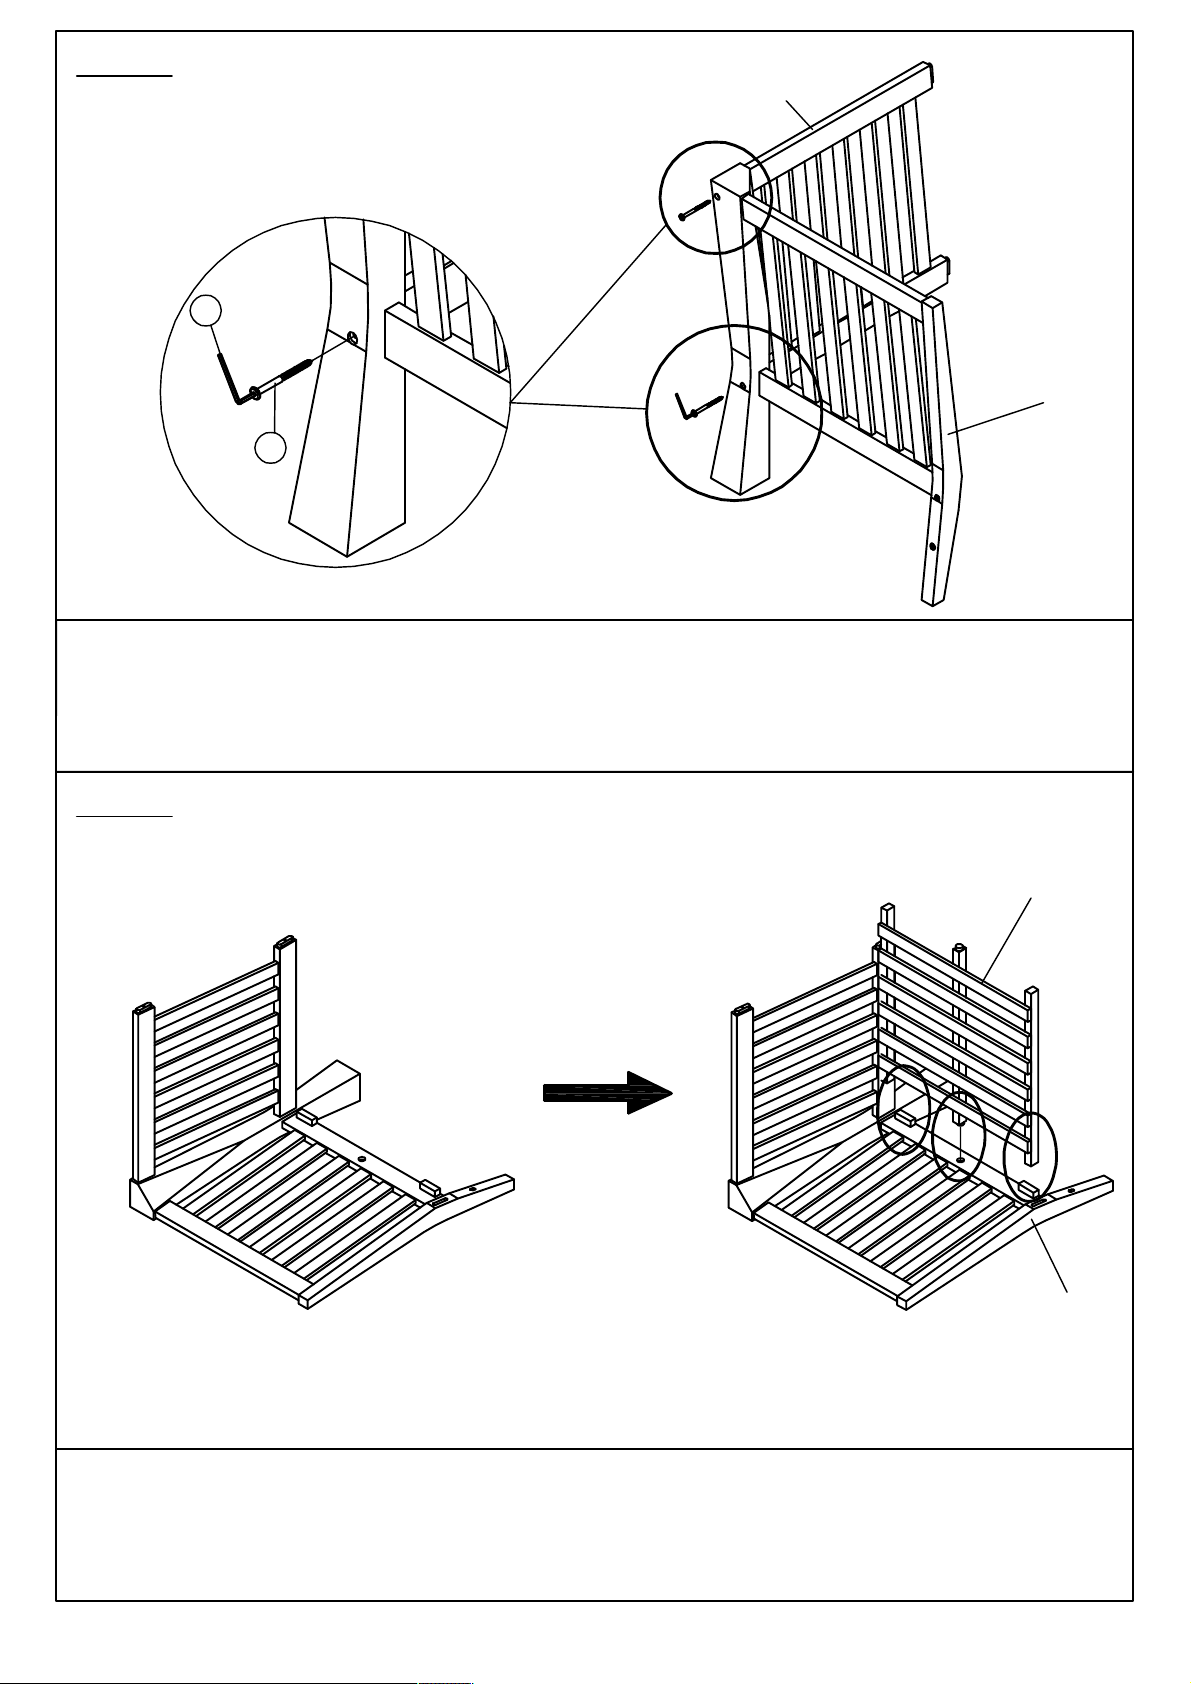
Step 2
D
3
A
2
Attach Backrest Panel (D) to Left Leg Panel With Pre-installed Leveller (A), secure by
using Screw(②) with Allen Key(③).
Do not fully tighten the Screws.
Step 3
C
With assistance from your adult partners, lay down the Chair
Attach mortise of Seat Panel (C) to tenon of the Left Leg Panel With Pre-installed
Leveller (A).
A
5 of 10
Page 6
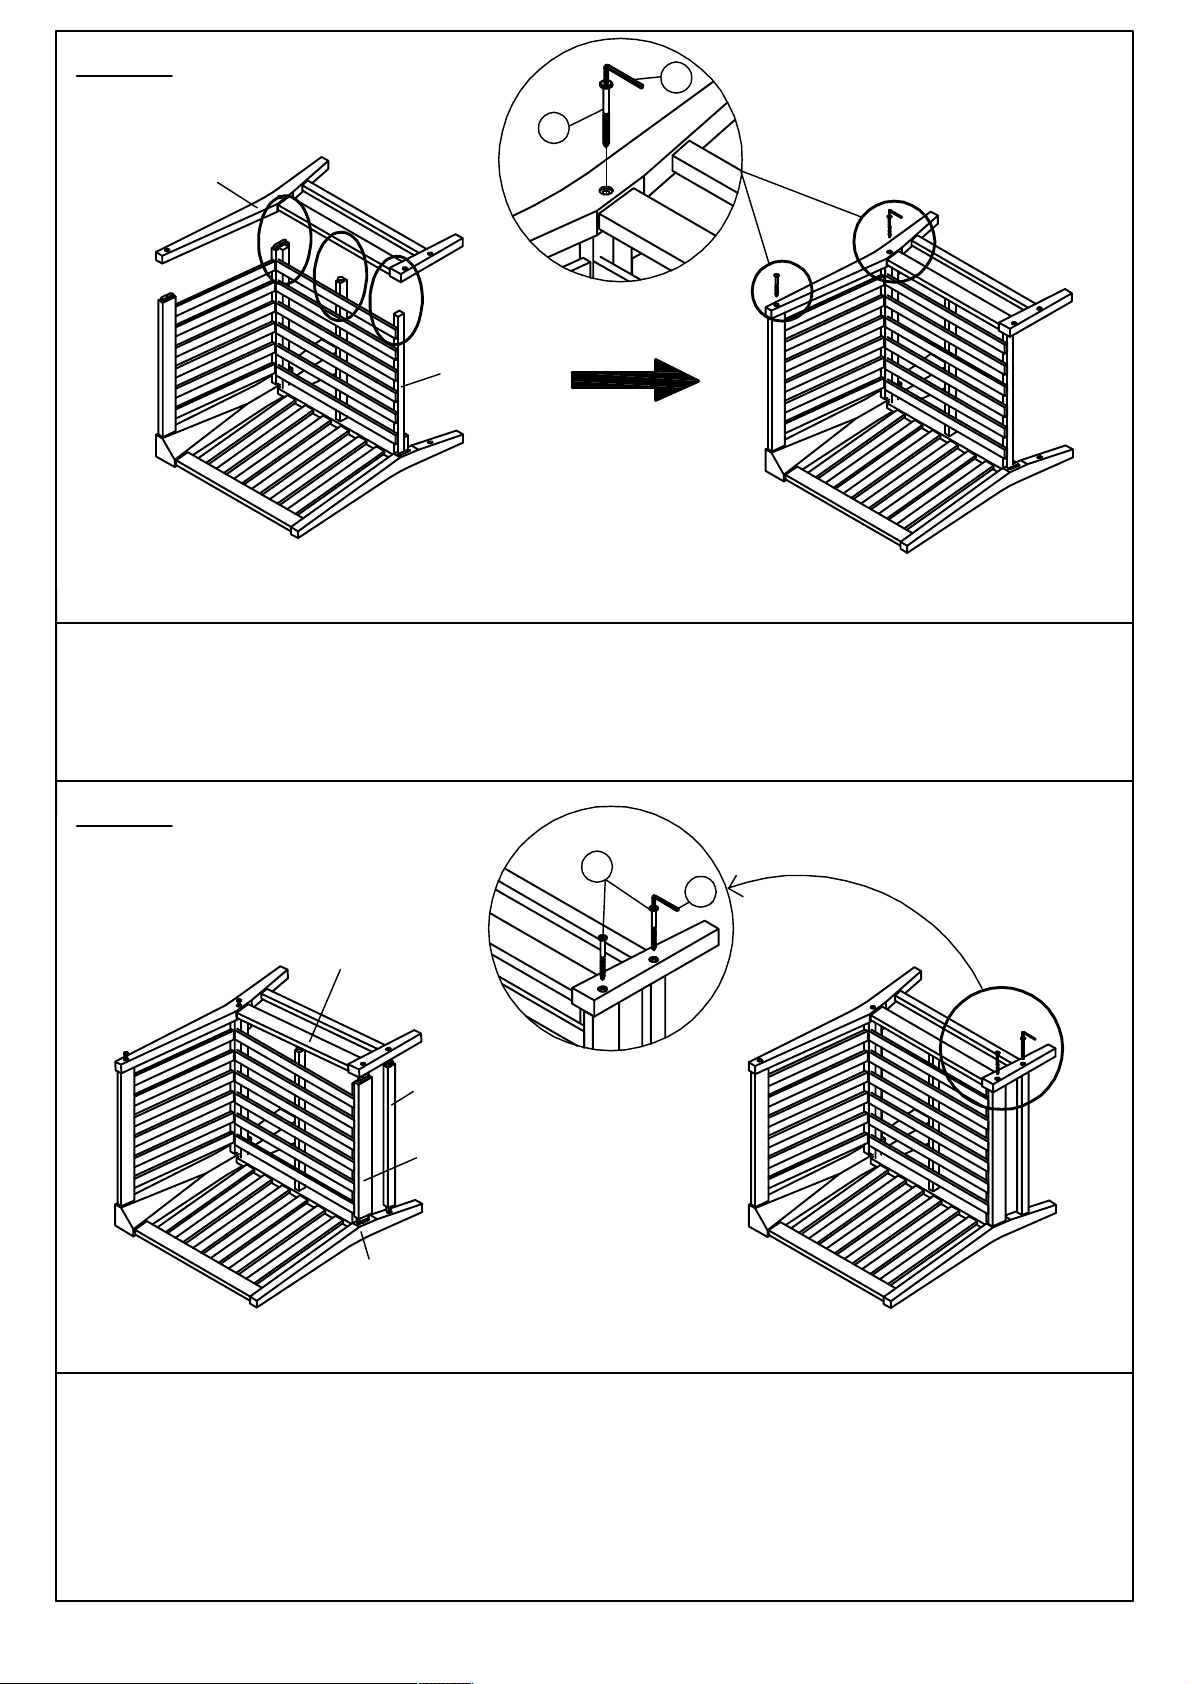
Step 4
3
1
B
C
Attach mortise of Right Leg Panel With Pre-installed Leveller (B) to tenon of the
Seat Panel (C) Secure by using Screw(①) with Allen Key(③).
Loosely tighten the Screws.
Step 5
1
3
B
F
E
A
Insert Seat Support Bar (E) and Leg Support Bar (F) to Left Leg Panel With PreInstalled Leveller (A) and Right Leg Panel With Pre-installed Levelller (B)
Secure Right Leg Panel With Pre-installed Leveller (B) to Seat Support Bar (E) and
Leg Support Bar (F) by using Screws(
Do not fully tighten the Screws.
①)
and Allen Key (
③).
6 of 10
Page 7
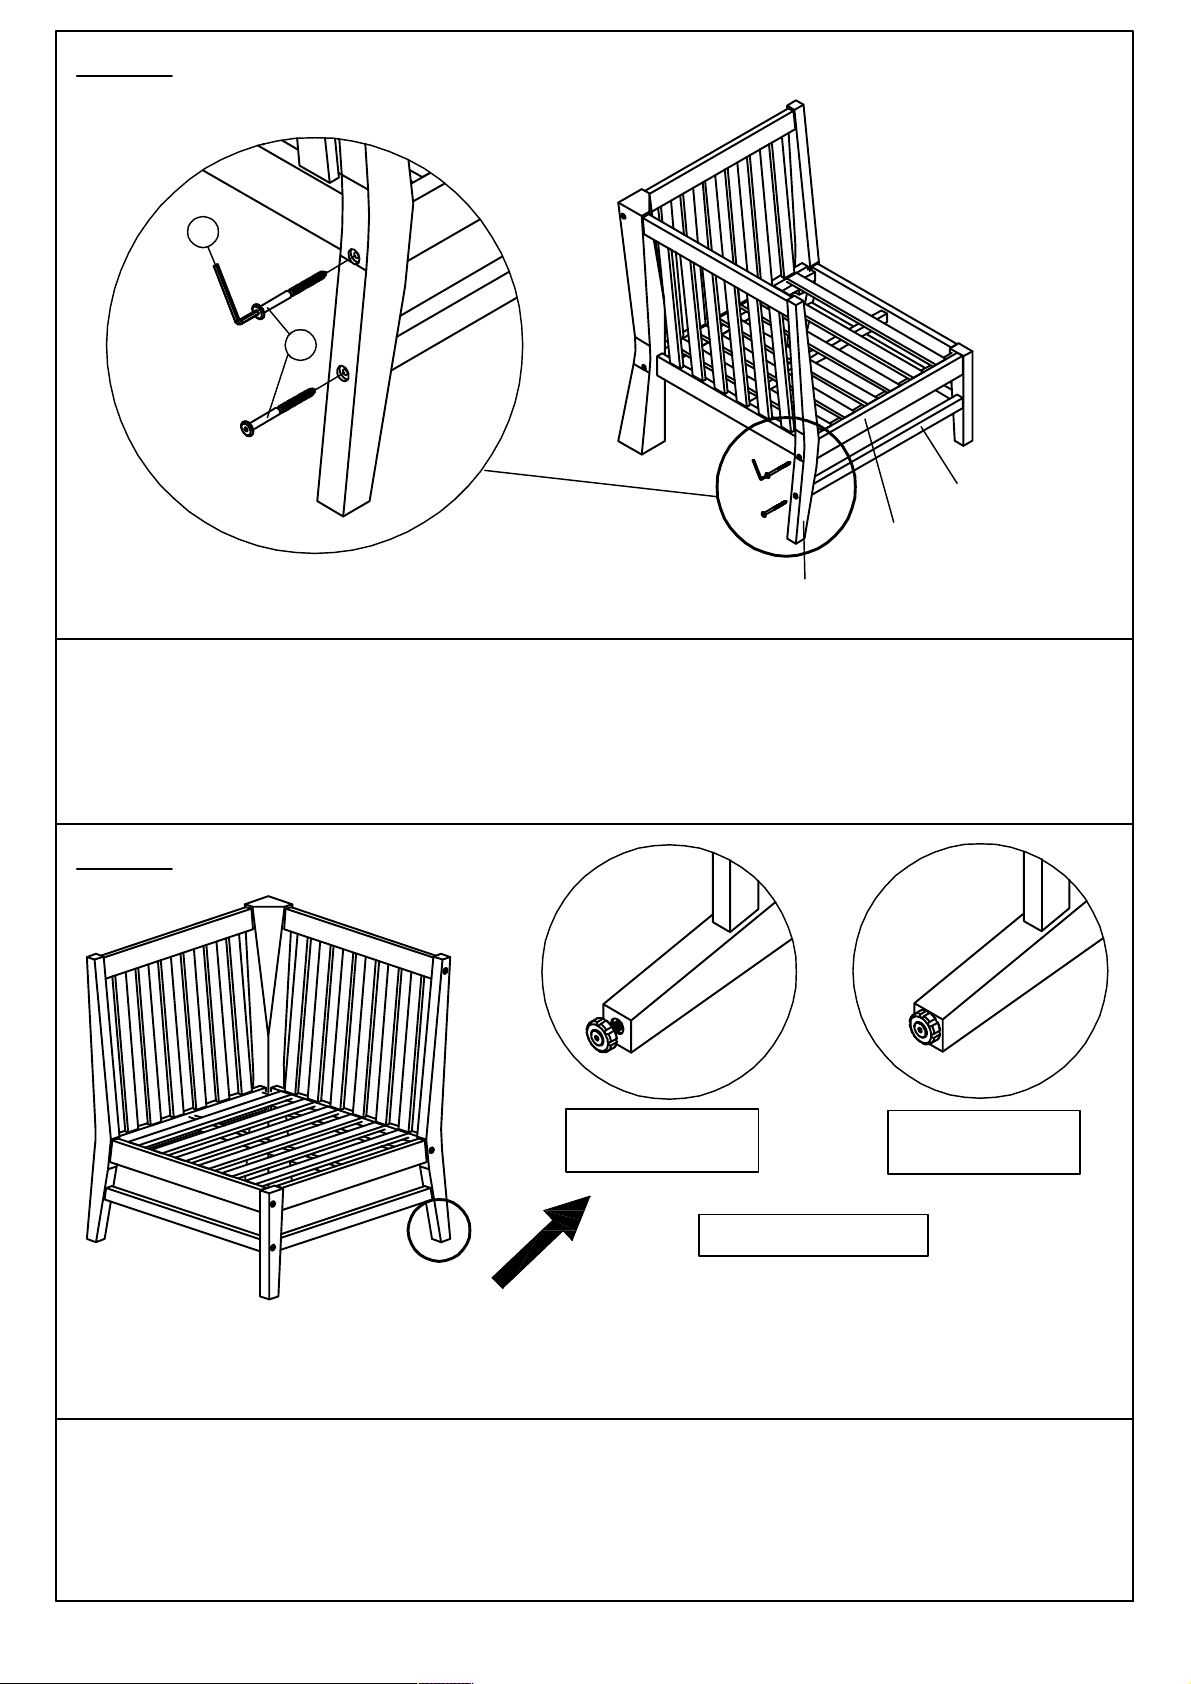
Step 6
3
1
F
E
A
With assistance from your adult partners, turn the Chair right side up
Secure Seat Support Bar (E) and Leg Support Bar (F) to Left Leg Panel With Preinstalled Leveller (A) by using Screws( ①) and Allen Key(③).
Do not fully tighten the Screws.
Step 7
Adjust height
for balance
Adjust Pre-installed
Adjust low for
balance
Inspect the Chair and make sure all parts are adequately connected.
In a sequential manner, tighten all Bolts and Screws at all joints.
With assistance from your adult partners, adjust the Levellers to desiredheight to avoid
wobbles.
7 of 10
Page 8
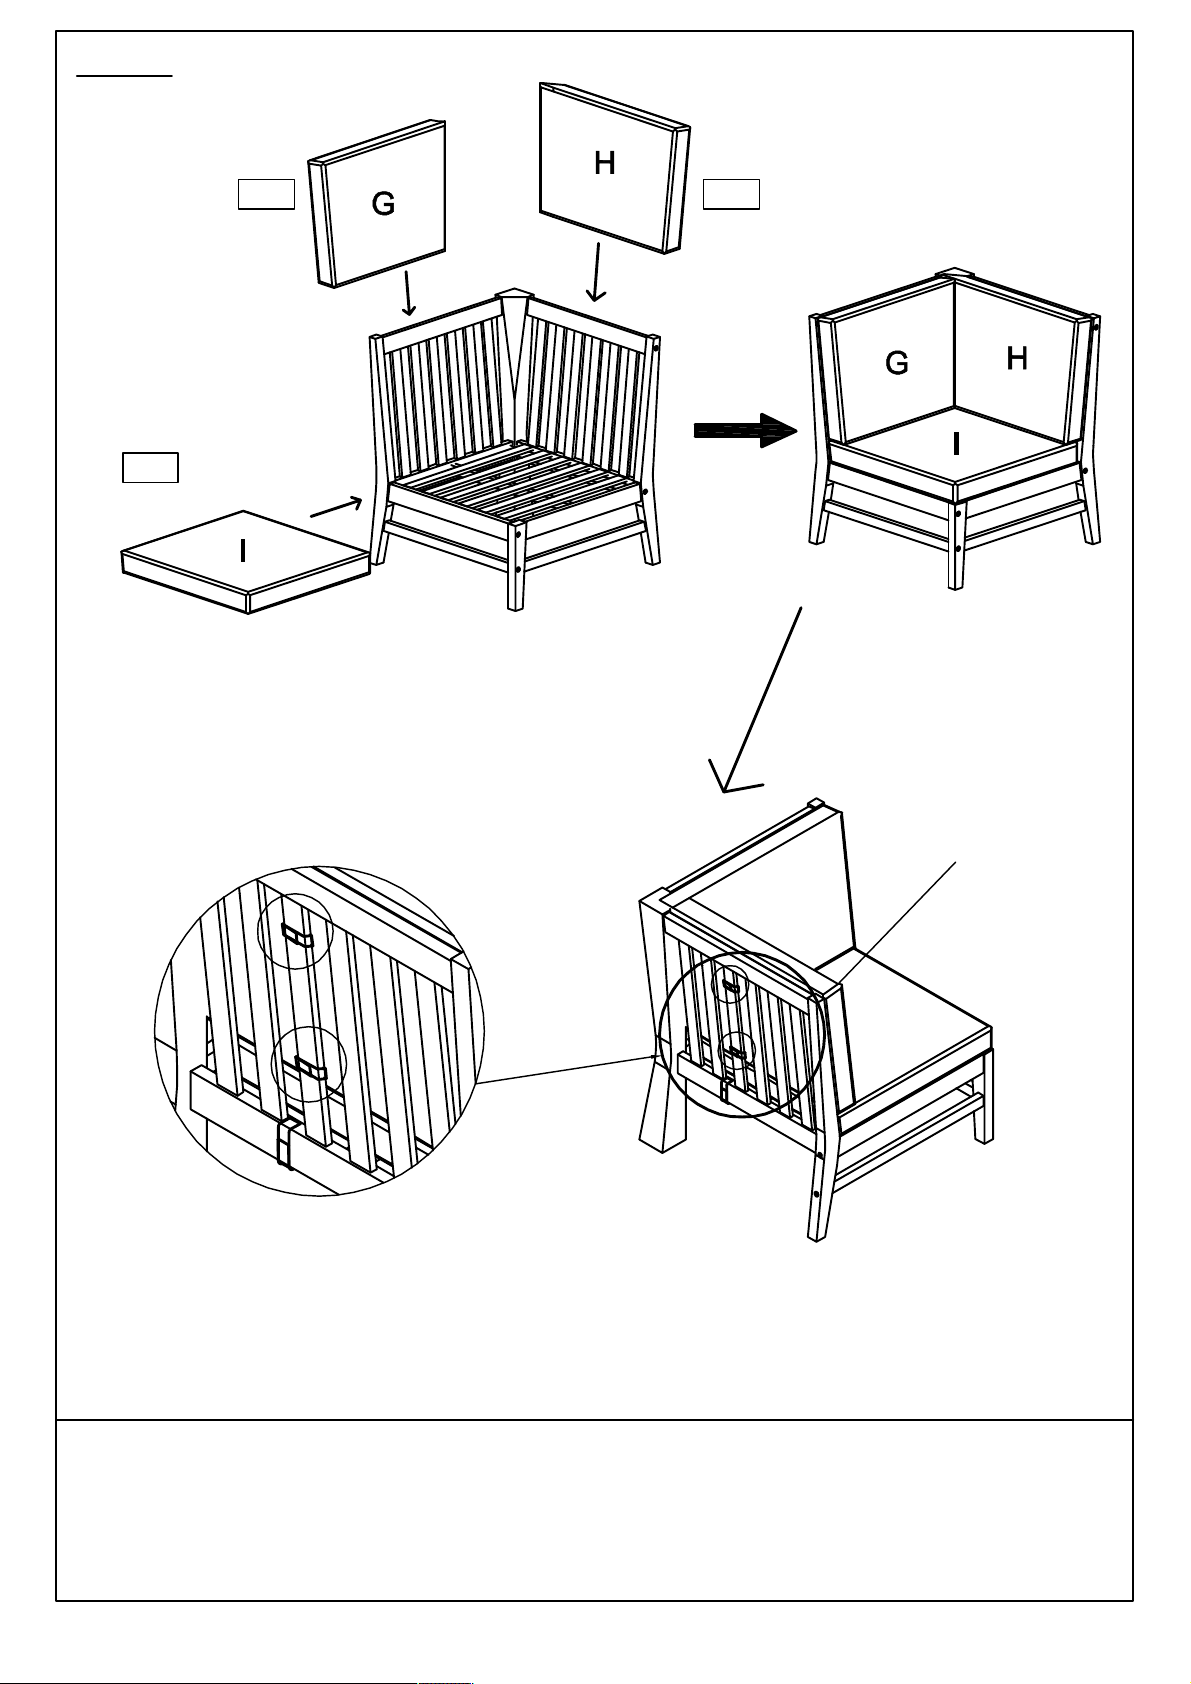
Step 8
8.1
8.3
8.2
H
G
I
Place Seat Cushion(G) and Backrest Cushions (H) on to the Chair using the velcro
straps as shown above.
Your Chair is ready for use.
This Chair can only be used on a flat, level surface.
8 of 10
Page 9
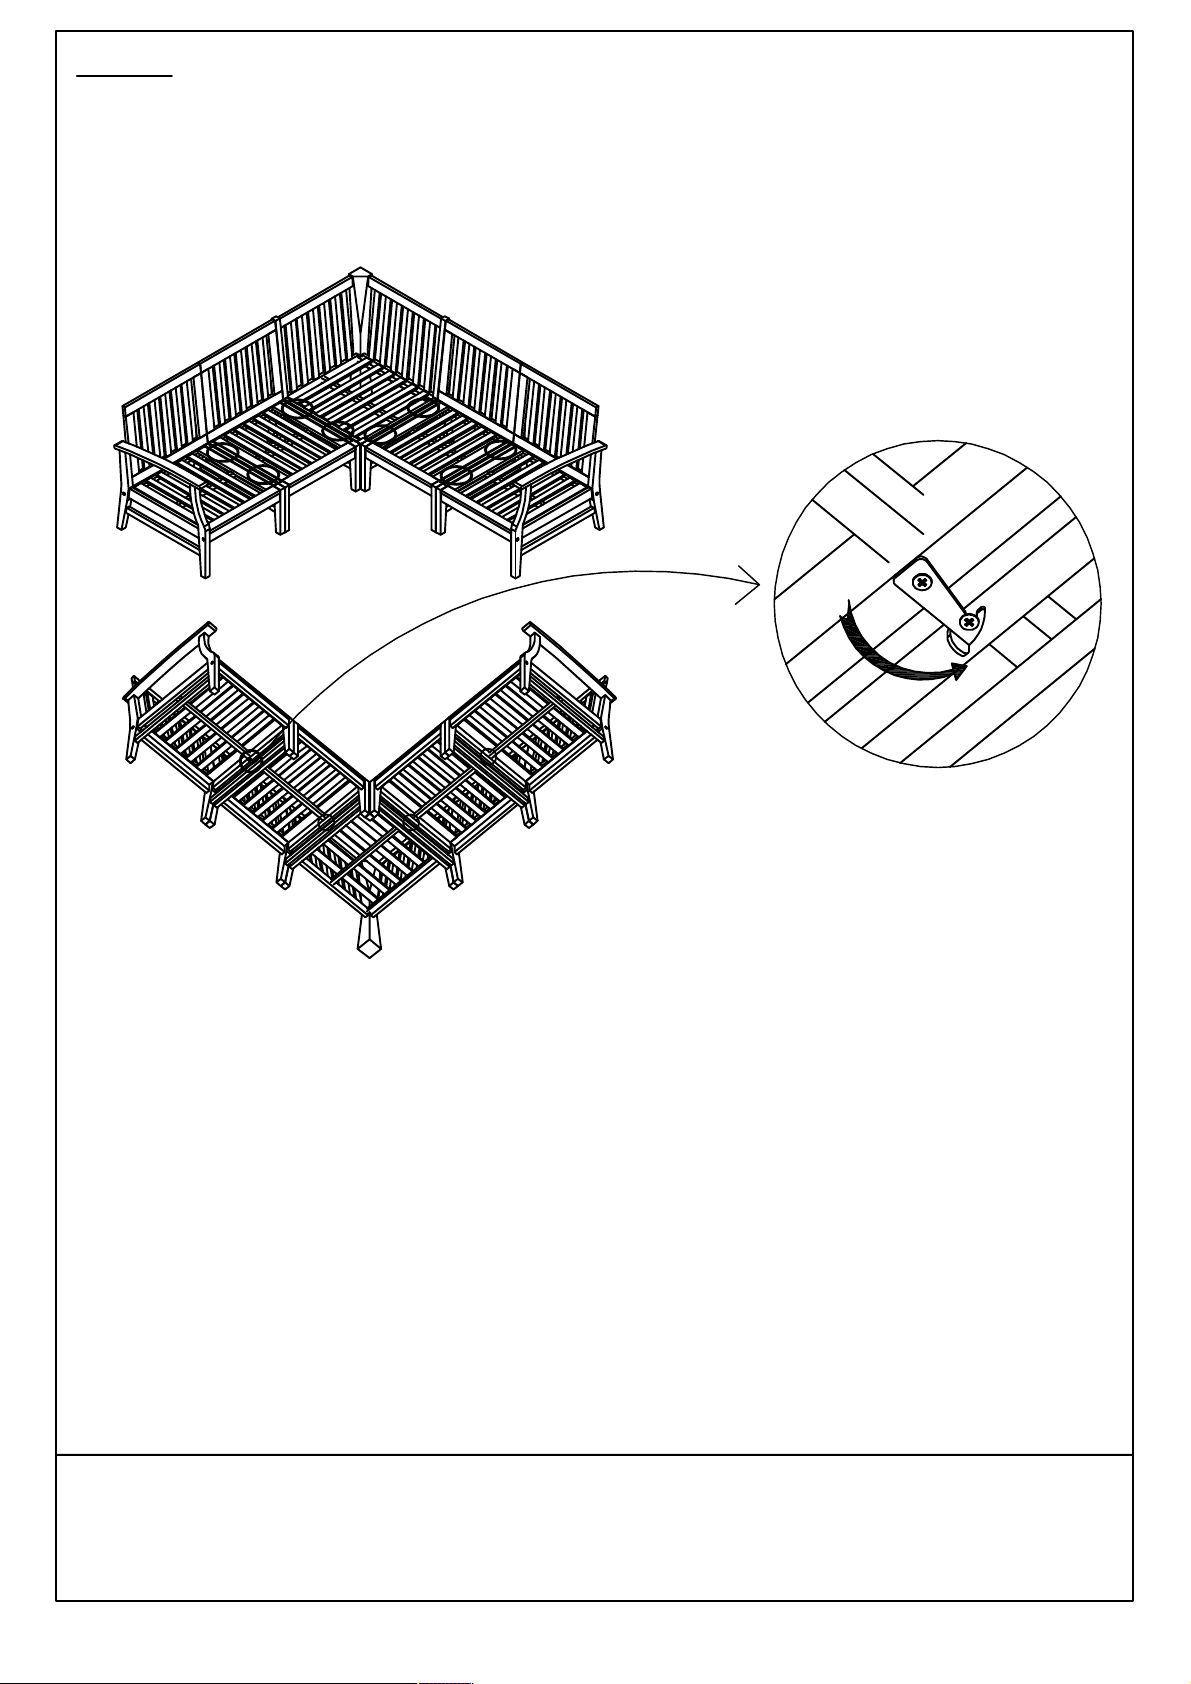
Step 9
Note: This is optional step in case we want to connect all chairs in a settogether and
should be done before placing cushion.
With assistance from your adult partners, adjust the Levellers to desired clip to connect the
chairs together.
9 of 10
Page 10
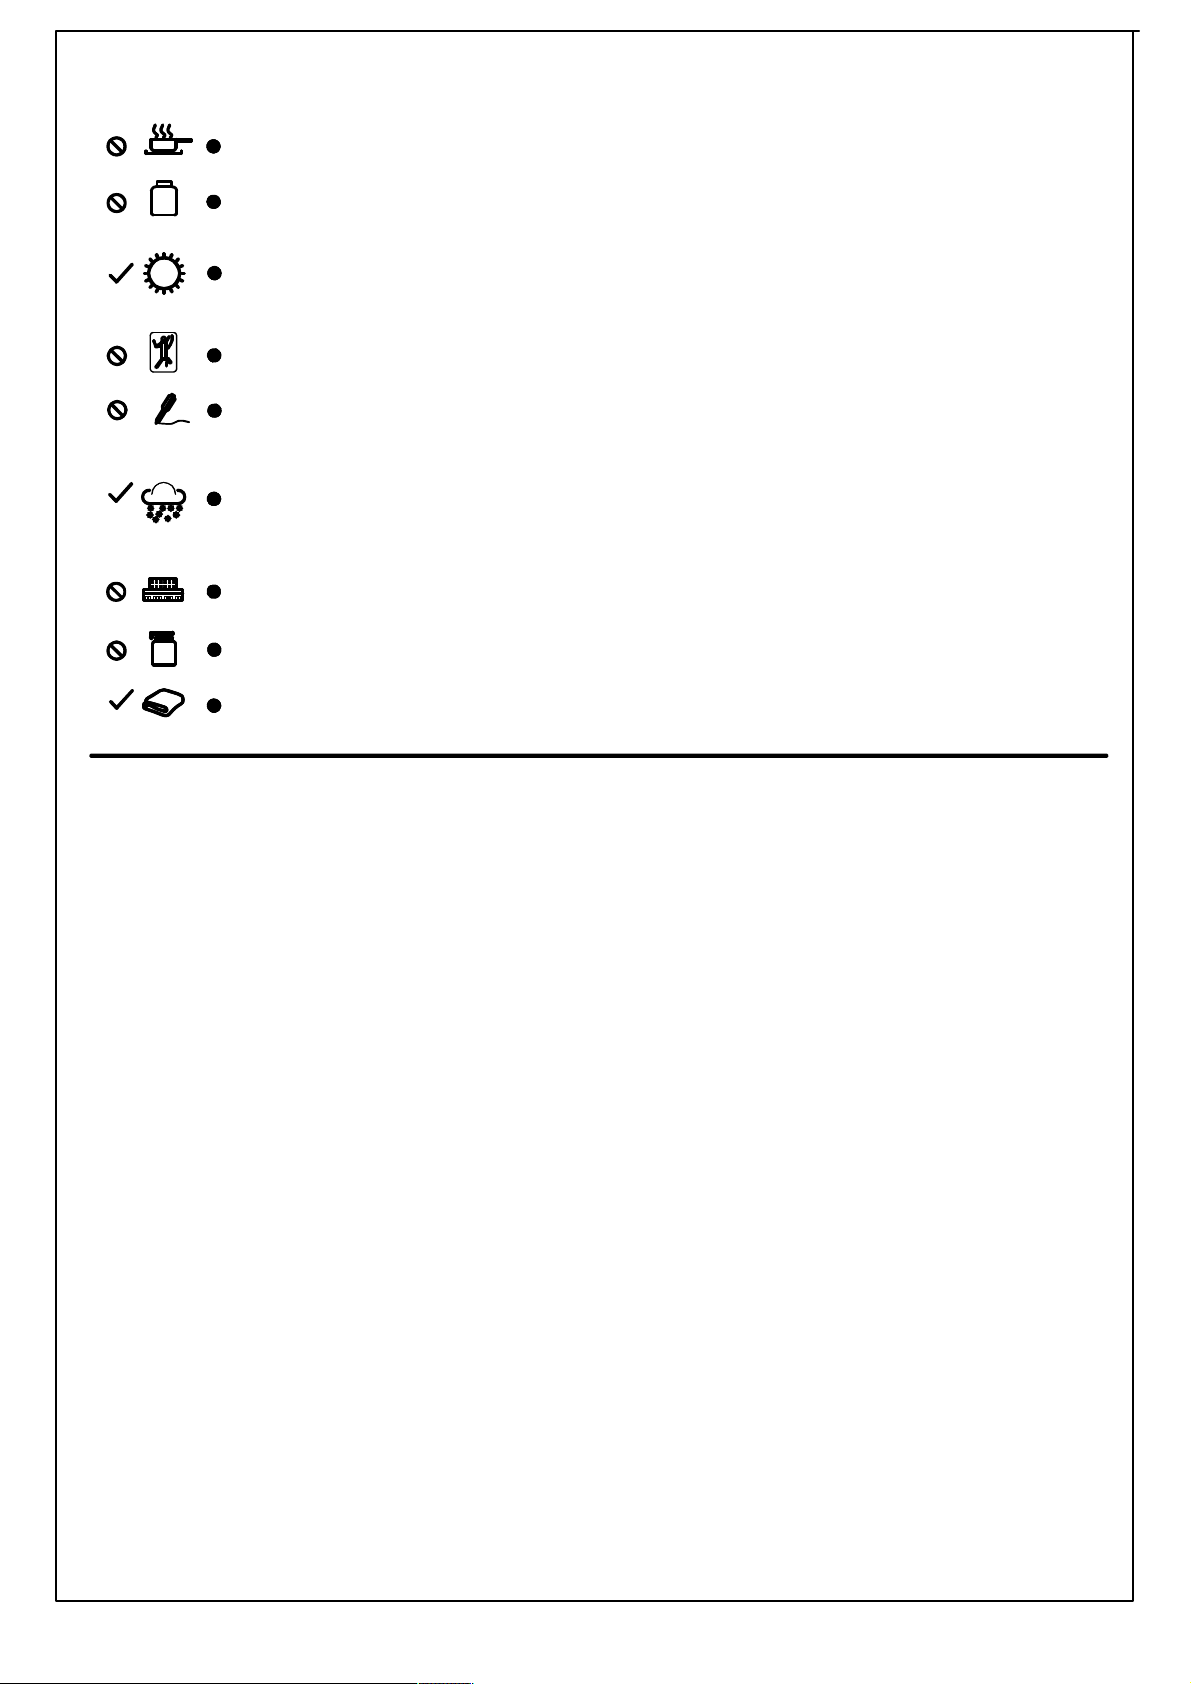
Do not put hot items directly on furniture surface
Care & Maintenance
Do not clean
M D ABCDEG
Do not clean furniture with harsh cleansers or polish.
To obtain the longest lifespan of your outdoor products, minimizing
exposure to direct sunlight is recommended.
Children should not climb or jump on the furniture.
Do not write on furniture without a padded barrier to protect the surface.
To obtain the longest lifespan of your outdoor products,avoid extended
and lengthy exposure to rain, snow, and direct sunshine. Whenerer
possible cover the product and / or place under patio or awnings.
Not for commercial use. For residential use only .
Stains may be removed with mild soap solution and damp cloth.
Dust and pick-up spills using a clean, non colored lint-free cloth.
10 of 10
 Loading...