

Page 1
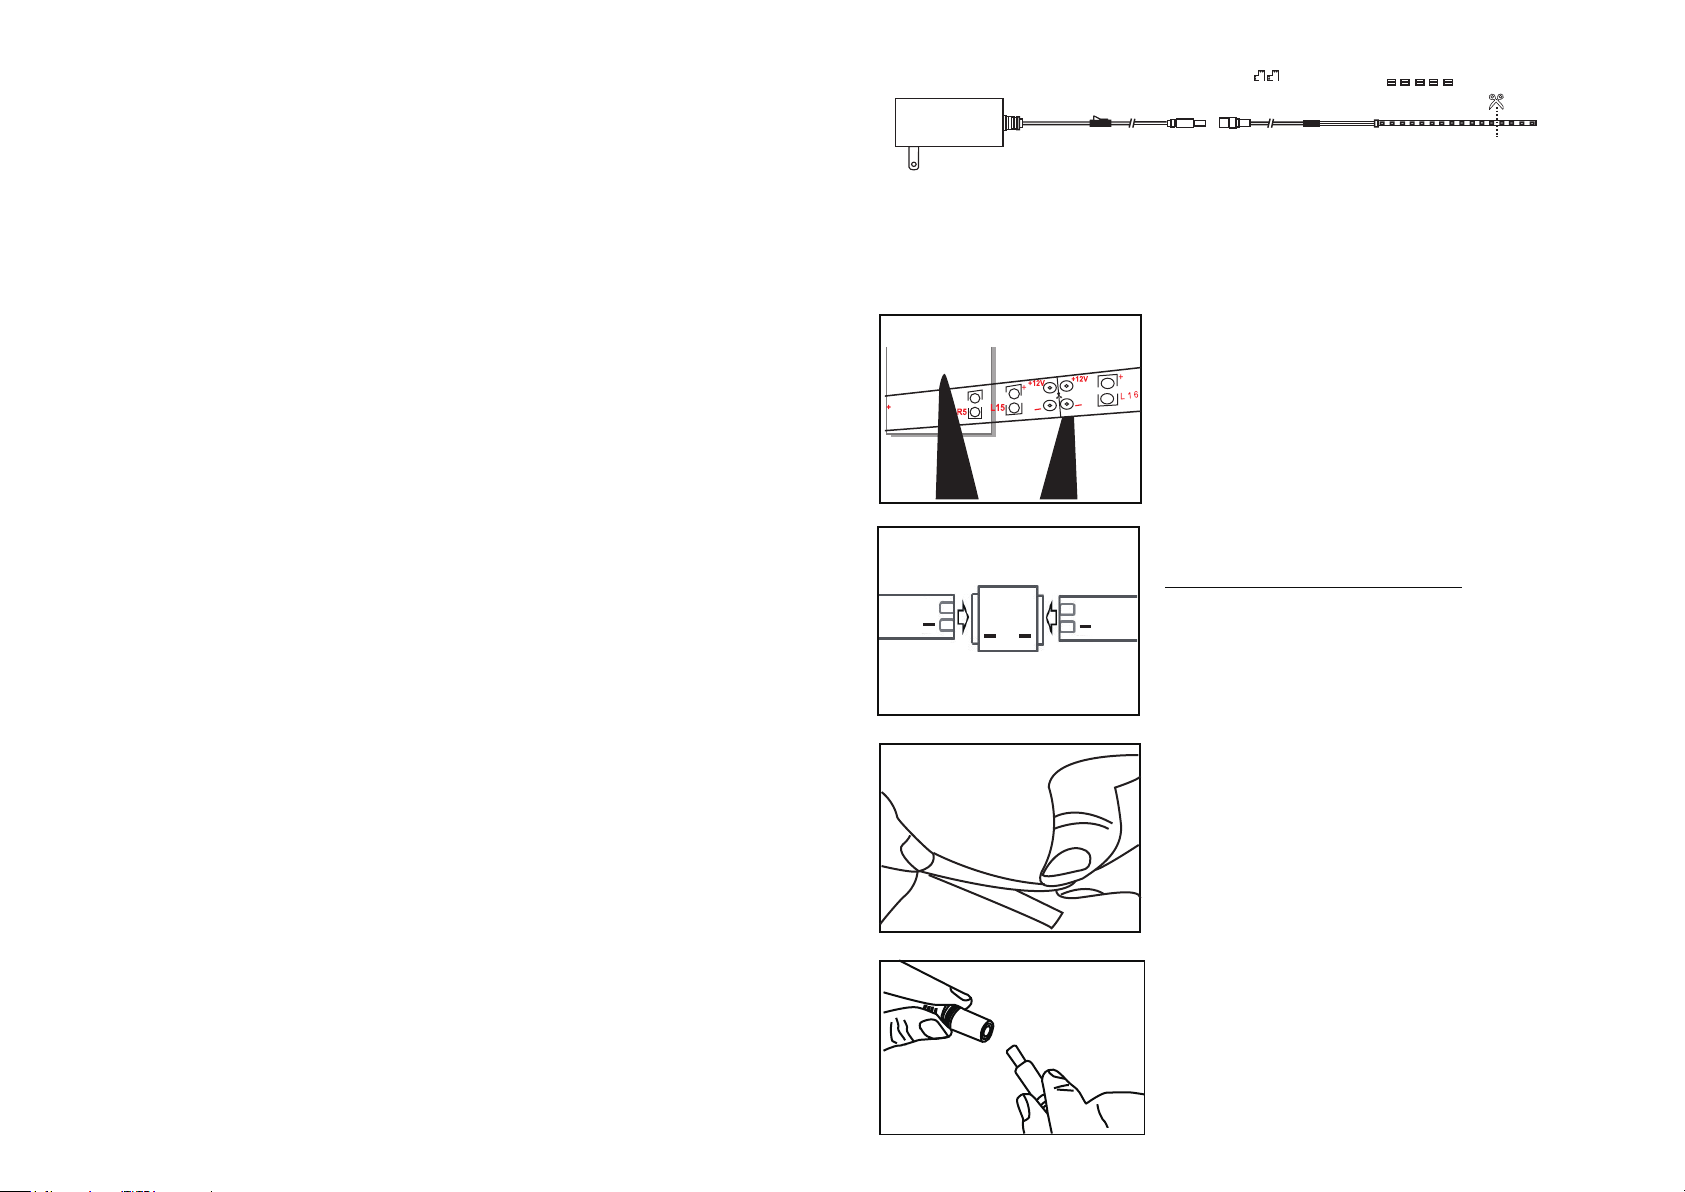
60”cord with on/off switch
2 connectors
5 cover joiners
LED FLEXIBLE TAPE LIGHTING KIT
WARNING:
1. Risk of electric shock: turn power off before servicing - see instructions.
2. This luminaire must be installed in dry location only and in open fixtures only.
3.
CAUTION - To reduce the risk of fire, do not install more than 2 luminaires in
compartment smaller than 12 inches by 12 inches by 12 inches.
4. Use only insulated staples or plastics ties to secure cord;
5. Route and secure cords so that they will not be pinched or damaged when the
cabinet is pushed to the wall;
6. Position the portable cabinet light with respect to the cabinet so the lamp
replacement markings are able to be read during relamping.
7. Not intended for recessed installation in ceilings, or recessed installation in soffits.
8. The National Electrical Code (NEC) does not permit cords to be concealed
where damage to insulation may go unnoticed. To prevent fire danger, do not
run cord behind walls, ceilings, soffits, or cabinets where it may be inaccessible
for examination. Cords should be visually examined periodically and immediately
replaced when any damage is noted.
9. This product is not a toy. Do not store or leave this luminaire in a location
accessible to young children.
10. Do not install this luminaire in a heat-producing appliances.
11. Risk of fire hazard, only connect a maximum of a TOTAL length to the
following Adapter.
12. Ensure NOT to exceed the above maximum (loading) total length before
adding any accesories.
LED tape
transformer
12”power feed cable
assembled on the tape
ASSEMBLEY AND INSTALLATION INSTRUCTIONS
1. MEASURE – and lay-out the installation prior to removing the backing exposing the adhesive.
Ensure mounting surface is clean and free of any debris or residue.
2. IF CUTTING –Use a pair of sharp scissors to cut the
tape at the flat welding plate along the line, as indicated
(avoid the bulge tin welding plate). Every 3 LED’s in
group is cuttable.
L13
3. CONNECT– use the joiner to connect the strip.
Insert the end of the strip and make sure the flat welding
plate is well inserted into the joiner.
Accessories sold separately
12V
+
+ +
+
12V
Flexible Tape Connector -
L,T and + shaped connectors allow you to change directions.
Flexible Tape Extension For areas where no-light is required
Important Note: When connecting the tapes, ensure the anode
and cathode are in the right position as shown.
4. MOUNT – Remove the backing to expose
adhesive and stick the strip to the desired
location.
• If necessary, use mounting clips (included)
to further secure tape to location.
CAUTION: This luminaire includes an adapter that is only designed for use
with this luminaire. Do not use for any other application.
5. WIRING – connect the power feed cable
assembled on the tape to the power supply
cord and plug in.
 Loading...